


Prima 
Reverse transfer
ID card printer
Printer Driver Manual
P R O F E S S I O N A L S E R I E S
Secure ID card printers
Prima 3 Driver Manual
Welcome to the high performance printer driver for the Prima 3 series printer. This manual will help you to install, set-up and configure the driver to get the best results for your prints.
The driver runs on 32-bit Windows platforms and was successfully tested under Windows 2000, Windows XP Professional as well as under new Windows Vista operating system.
This driver was designed for the best performance and stability. Additionally, all the necessary features referring to different card materials, color ribbons etc., are included.
All document setting parameters can be controlled from the PC via the new Administration Center.
Technical Support
For technical assistance, please contact your dealer from who you purchased the printer from.
2
Prima 3 Driver Manual
Table of contents
1. |
Legal and Copyright Information ......................................................................................................... |
6 |
|
2. |
Installation.............................................................................................................................................. |
7 |
|
|
2.1. |
Printer Driver Installation................................................................................................................... |
7 |
|
2.2. |
Advanced Printer Configuration ...................................................................................................... |
15 |
3. |
Printing Preferences............................................................................................................................ |
18 |
|
|
3.1. |
Introduction into driver and print technology ................................................................................... |
18 |
|
3.2. |
Layout / Setup ................................................................................................................................. |
19 |
|
3.2.1. |
Page Orientation......................................................................................................................... |
19 |
|
3.2.2. Set-up for Control of Printing / Encoding .................................................................................... |
19 |
|
|
3.2.3. Set-up for Layout Orientation...................................................................................................... |
20 |
|
|
3.3. |
K/PO Panel ..................................................................................................................................... |
21 |
|
3.3.1. |
Introduction ................................................................................................................................. |
21 |
|
3.3.2. |
Default Settings .......................................................................................................................... |
21 |
|
3.3.3. Selection of text objects to be printed on K-plane ...................................................................... |
22 |
|
|
3.3.4. Selection of black & white images to print on K-plane ............................................................... |
23 |
|
|
3.3.5. |
K Plane options........................................................................................................................... |
23 |
|
3.3.6. PO Panel Area Definition (Peel Off) ........................................................................................... |
29 |
|
|
3.4. |
UV Panel ......................................................................................................................................... |
33 |
|
3.4.1. |
Introduction ................................................................................................................................. |
33 |
|
3.4.2. |
Settings ....................................................................................................................................... |
33 |
|
3.4.3. |
Security Area .............................................................................................................................. |
36 |
|
3.5. |
Advanced ........................................................................................................................................ |
37 |
|
3.5.1. Global Print Offset and K Plane Offset ....................................................................................... |
37 |
|
|
3.5.2. |
K Dithering .................................................................................................................................. |
37 |
|
3.5.3. |
Synchronization .......................................................................................................................... |
38 |
|
3.5.4. |
Track Formats............................................................................................................................. |
38 |
|
3.5.5. |
Card Output ................................................................................................................................ |
39 |
|
3.5.6. |
Material Usage............................................................................................................................ |
39 |
|
3.5.7. Sample of magnetic stripe Encoding .......................................................................................... |
40 |
|
4. |
Advanced Intelligent Printer Management (AIPM) ........................................................................... |
41 |
|
|
4.1. |
Introduction ..................................................................................................................................... |
41 |
|
4.2. |
Dispatcher ....................................................................................................................................... |
41 |
|
4.2.1. |
Printers........................................................................................................................................ |
42 |
|
4.2.2. |
Material Capacity List ................................................................................................................. |
42 |
|
4.2.3. |
Print Jobs .................................................................................................................................... |
42 |
|
4.2.4. |
Tools ........................................................................................................................................... |
43 |
5. |
Administration Center......................................................................................................................... |
45 |
|
|
5.1. |
Printer Settings................................................................................................................................ |
45 |
|
5.1.1. |
Re-transfer settings .................................................................................................................... |
46 |
|
5.1.2. |
Bend remedy............................................................................................................................... |
46 |
|
5.1.3. |
Ink settings.................................................................................................................................. |
46 |
|
5.1.4. |
Other settings.............................................................................................................................. |
46 |
|
5.1.5. |
Print setting transfers.................................................................................................................. |
47 |
|
5.2. |
Options ............................................................................................................................................ |
48 |
|
5.2.1. |
General Options.......................................................................................................................... |
48 |
|
5.2.2. Printer Driver Profiles and Printer Grouping Definition............................................................... |
49 |
|
|
5.2.3. Setting up Printing Preferences and Managing of Printer Driver Profiles .................................. |
53 |
|
|
5.3. |
LUT / Password............................................................................................................................... |
56 |
|
5.3.1. |
Lookup Table Configuration........................................................................................................ |
56 |
|
5.3.2. |
Password .................................................................................................................................... |
56 |
|
5.4. |
Driver Config ................................................................................................................................... |
57 |
6. |
Advanced Chip Encoding Framework (ACEF) ................................................................................. |
58 |
|
|
6.1. |
Plugin architecture .......................................................................................................................... |
59 |
|
6.2. |
Software and Hardware Setup........................................................................................................ |
60 |
|
6.2.1. |
Plugin Info ................................................................................................................................... |
60 |
|
6.2.2. |
Port Assignment ......................................................................................................................... |
61 |
|
6.2.3. |
Format Templates....................................................................................................................... |
63 |
|
6.2.4. Configuration (Global Settings and Test) ................................................................................... |
65 |
|
3
|
Prima 3 Driver Manual |
|
6.3. |
Application Setup ............................................................................................................................ |
66 |
6.4. |
Multi-printer encoding...................................................................................................................... |
67 |
6.5. |
Printing and encoding over network................................................................................................ |
68 |
6.6. |
Multiple encodings on one card ...................................................................................................... |
68 |
6.7. |
Precoding ........................................................................................................................................ |
69 |
6.8. |
Encoding String............................................................................................................................... |
70 |
6.8.1. Encoding string examples........................................................................................................... |
73 |
|
7. |
Troubleshooting and known limitations ........................................................................................... |
75 |
8. |
Appendix A........................................................................................................................................... |
76 |
4
Prima 3 Driver Manual
1.Legal and Copyright Information
This product is provided on an "as is" basis, without any other warranties, or conditions, expressed or implied, including but not limited to warranties of merchantable quality, merchantability or fitness for a particular purpose, or those arising by law, statute, usage of trade or course of dealing. You assume the entire risk as to the results and performance of the Software. Neither we, our dealers nor our suppliers shall have any liability to you or any other person or entity for any indirect, incidental, special or consequential damages whatsoever, including but not limited to loss of revenue or profit, lost or damaged data or other commercial or economic loss, even if we have been advised of the possibility of such damages or they are foreseeable; or for claims by a third party. Our maximum aggregate liability to you, and that of our dealers and suppliers, shall not exceed the amount paid by you for the product. Some jurisdictions do not allow the exclusion or limitation of liability for consequential or incidental damages so the above limitation may not apply to you.
2.Installation
Important Note:
Only the Prima 3 High Output (XID590ie) model allows multiple printers (7) to be connected to a single PC.
A single Prima 3 model from the following list can be connected to a single PC
-Prima 3 Uno (XID560ie)
-Prima 3 Duo (XID570ie)
-Prima 3 Duo Plus (XID580ie)
5
Prima 3 Driver Manual
2.Installation Cont.
2.1. Printer Driver Installation
Note 1: It is recommended to install the driver before you connect the printer to the PC! Note 2: System administrator privileges are required for driver installation!
Log on to Windows as system administrator.
Start the installer program "Setup XID5xx 5.5.exe" from your driver CD ROM. Follow the instructions (See the following screen shots).
The installation itself contains two separate steps in one installation procedure: First the printer device driver and second the printer driver itself.
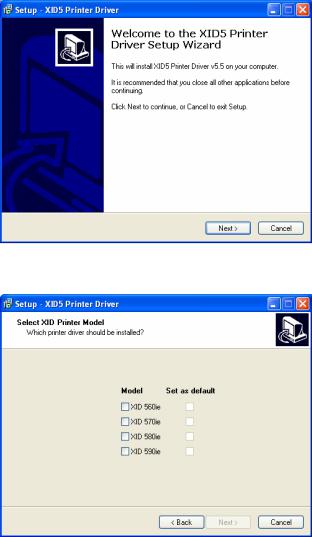
Click "Next" to continue.
Please select your "DIGID XID5xx" model from the model list. In addition, you can decide to specify the printer as the default printer on your system.
Then click "Next" to continue.
6
Prima 3 Driver Manual
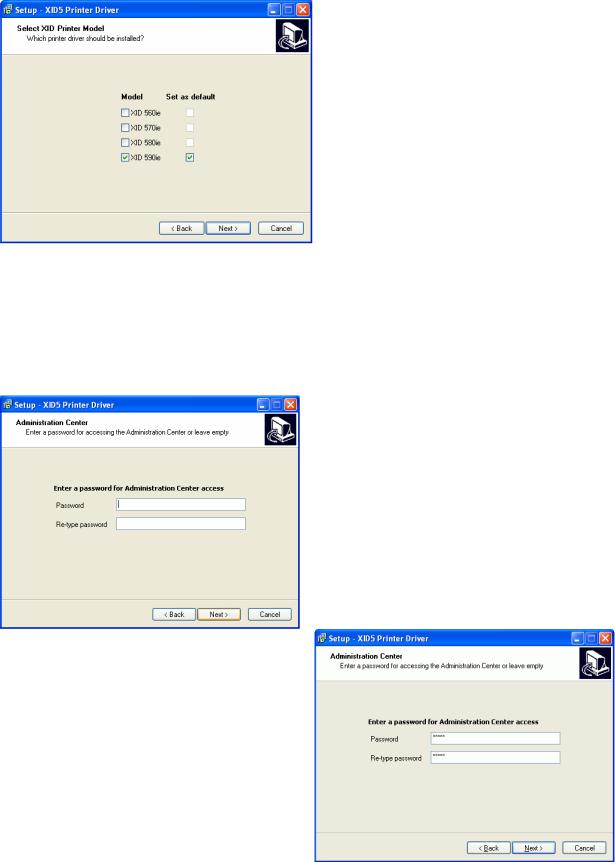
Note: Please note that you have to choose the exact name of the delivered member of our XID Printer Family. The wrong choice will result in a non-working printer!!!
An administrator password can be set during initial installation. This password grants access to the Administration Center.
Note: It is possible to leave this field empty, but it is recommended to enter a password.
If both entries match, click "Next" to continue.
7
Prima 3 Driver Manual
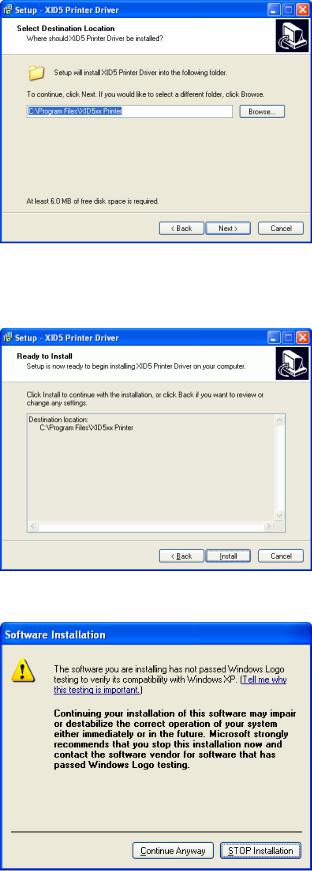
Note: It is recommended to use the proposed default path. Please verify the path shown and click "Next".
Click "Install" to continue.
Click "Continue Anyway" to continue the installation.
8

Prima 3 Driver Manual
Click "Continue Anyway" to continue the installation.
Click "Continue Anyway" to continue the installation.
Now the files will be installed.
9
Prima 3 Driver Manual
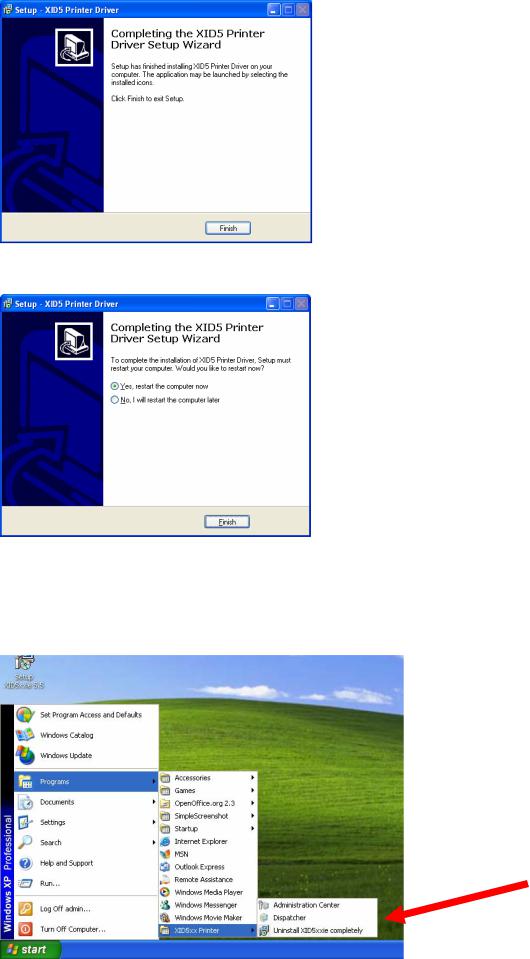
Click on "Finish" to complete the installation.A reboot may be necessary, as shown below.
Please wait until the driver installation is completed, then click "Finish". The selected printer should appear here (see arrow):
Under Start -> Programs -> XID5xx Printer, you should see the related modules
10
Prima 3 Driver Manual
By calling the printer properties, from the "General" tab, you can print a test page as follows:
After your test page has been printed successfully, click "OK".
After the installation has been completed, connect the printer to the PC and power on. The Hardware Wizard appears and shows a signature warning:
Click "Continue" to proceed.
11
Prima 3 Driver Manual
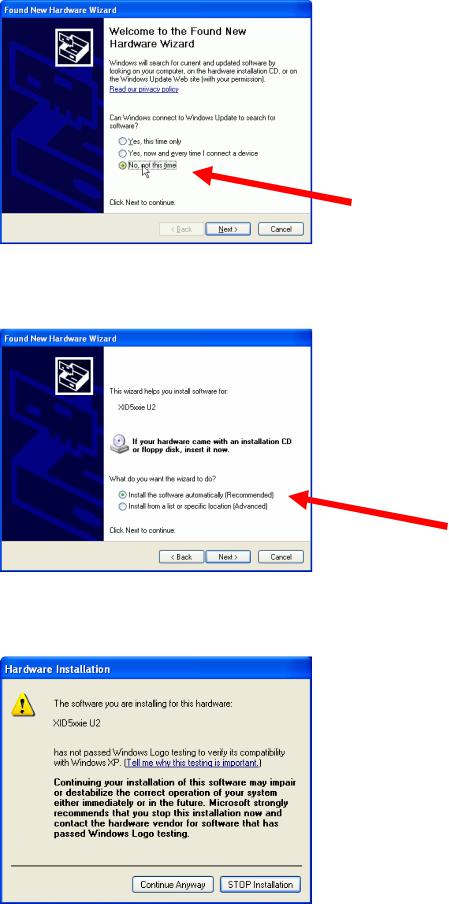
The Wizard will ask you to connect to Windows Update:
Choose "No, not this time" and click "Next".
Choose "Install the software automatically" and click "Next".
Note: The hardware name ("XID 5xxie U2") may differ depending on the firmware and the ID of the printer.
The Hardware Wizard appears and shows a signature warning.
Click "Continue Anyway".
12

Prima 3 Driver Manual
The Hardware wizard will install the needed files automatically.
Click "Finish" to close the Hardware Wizard.
Congratulations! You have successfully finished the printer driver installation.
13
Prima 3 Driver Manual
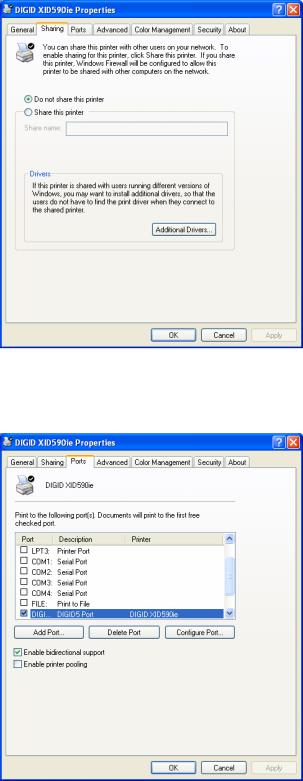
2.2. Advanced Printer Configuration
If the printer is used in a network environment and will be shared with other users, then click "Shared as:" and name the printer. Afterwards other users can select this printer within the network environment.
Note: The screenshot may differ depending on system configurations:
The required printer port will be linked automatically to DIGID5 port.
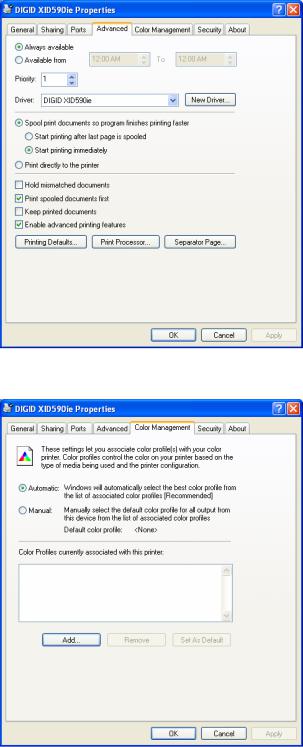
Do not change the following default settings unless you are an advanced user:
14
Prima 3 Driver Manual
The Color Management settings should only be used by experienced users.
15
Prima 3 Driver Manual
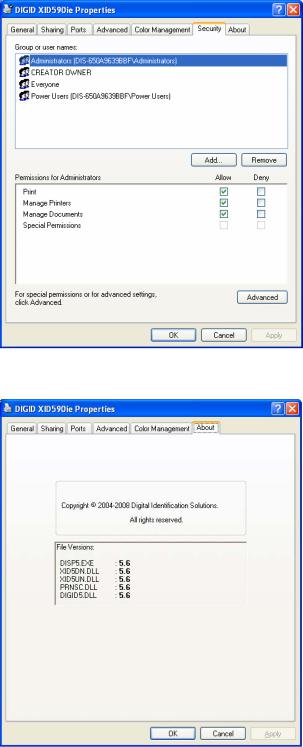
Note: The screenshot may differ depending on system configuration:
On the "About" tab you will find the version of the installed printer driver:
16

Prima 3 Driver Manual
3.Printing Preferences
3.1. Introduction into driver and print technology
In graphic user interfaces all options are shown dynamically as there are card feeding, loading card in magazine, card leaving the printer etc.
The printing technology contains printing of the colors as a mixture from Yellow, Magenta and Cyan ("Y", "M", "C"). Black ("K"), also known as Carbon black or process black, is often available on color ribbons. The reason for the use of Carbon ("K") black is that a full mixture of Yellow, Magenta and Cyan results in a dark, but not pure black. As a consequence it is common to print strings, barcodes etc. with Carbon ("K") black for achieving a better and sharper impression.
The print order per full color site with an YMCK ribbon appears as following:
Yellow Magenta Cyan Carbon (K)
P r i n t d i r e c t i o n
For special needs, we are also offering color ribbons with an additional K field. This is a useful option if e.g. a customer needs to print the front of a card in YMCK while on the back of the card has to be printed only some text information in K. The CMYKK ribbon enables this process without the use of a double patch of YMCK and is very cost saving.
The print order per full color site with an YMCKK ribbon appears as following:
Yellow Magenta Cyan Carbon (K) Carbon (K)
P r i n t d i r e c t i o n
17
Prima 3 Driver Manual
3.2. Layout / Setup
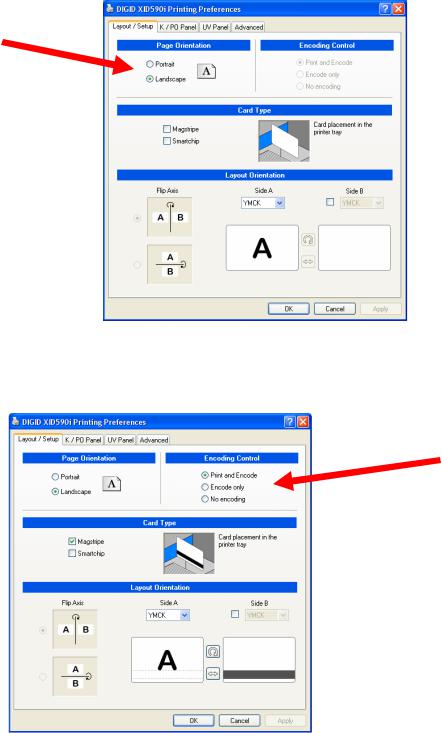
3.2.1.Page Orientation
This option will be used to setup the page orientation between Portrait and Landscape.
3.2.2.Set-up for Control of Printing / Encoding
This option sets up the control of "Print and Encode", "Encode only" or "No Encoding".
18
Prima 3 Driver Manual
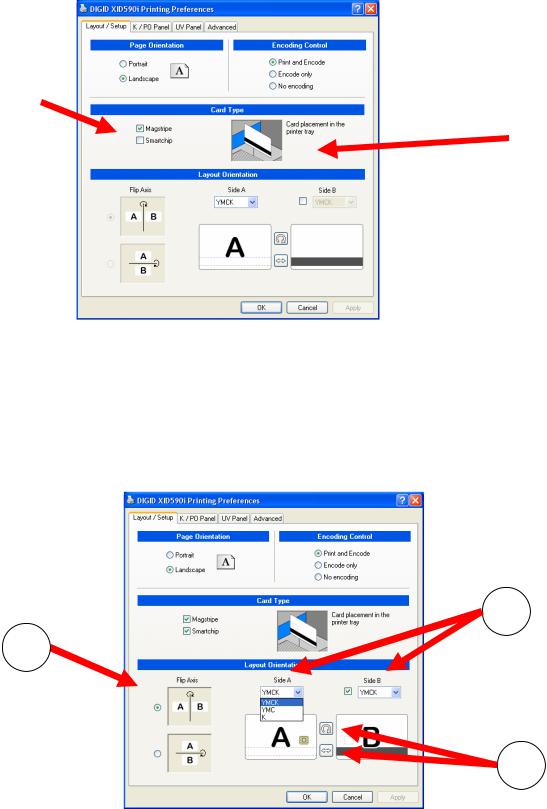
Set-up for use of cards with magnetic stripe or smartchip (Card Type)
If the "Magstripe" or "Smartchip" checkbox is enabled, all options regarding encoding and positioning of card will be enabled. In addition, the "Card placement in the printer tray" shows dynamically the correct images to the operator.
Please note that the magstripe function is for visualization AND activation.
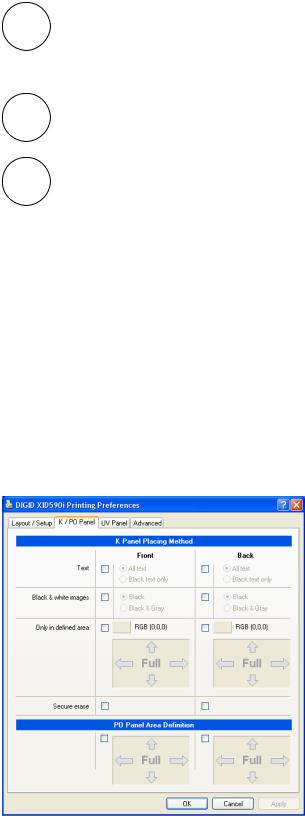
3.2.3.Set-up for Layout Orientation
The Setup for Layout Orientation is the "central point" of orientation definition of cards and usage of ribbons. With a minimum of mouse clicks you can define every combination you need. By default, the intelligent printer driver’s matrix calculates the fastest possible print out speed. However, the operator can always decide between material usage vs. print speed.
B
A
C
19
Prima 3 Driver Manual
Flip Axis: Here you can setup the orientation of the 'card body', which is the same as
Athe function as former 'Image Orientation'. The advantage is that you do not need to imagine how the card will rotate. Just pick up a card and you will understand the idea behind flipping the card horizontally or vertically.
Side A or B: Use the pull down menu to set up the patch usage of the color ribbon for
Bside A (Front side) and side B (Back side).
Rotation / Swap: The rotation button will rotate the full card 180°, while the swap button
Cwill exchange the front and back of the layout.
For more details, please refer to Appendix A at the end of this document!
3.3. K/PO Panel
3.3.1.Introduction
This tab allows you to both define the kind of extraction methods for placing different objects to the K-plane (Carbon black) and to define inclusion areas for PO (peal-off) separately for front and back.
3.3.2.Default Settings
20
Prima 3 Driver Manual
3.3.3.Selection of text objects to be printed on K-plane
By enabling "Text", you are able to specify if all text or only black text should be printed on the K-plane.
Sample: The upper text box was printed with K and the lower box with YMC:
21
Prima 3 Driver Manual
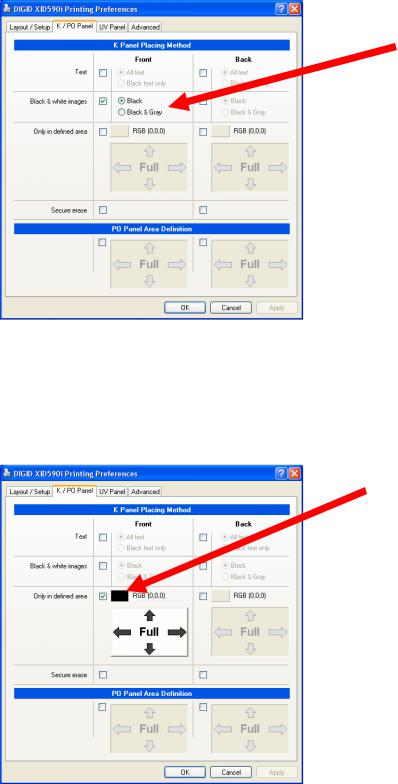
3.3.4.Selection of black & white images to print on K-plane
By enabling "Black and White Images" you can specify if black or black & grey images should be printed on the K plane.
3.3.5.K Plane options
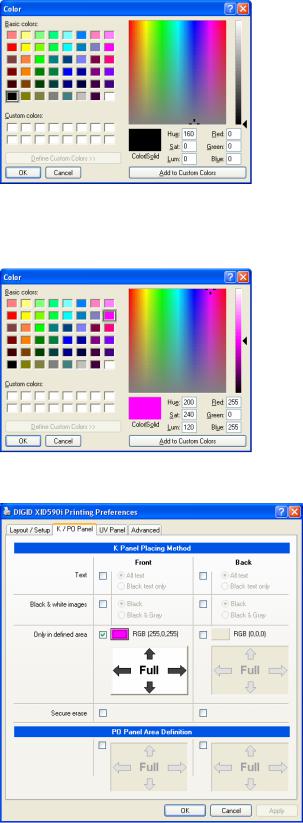
3.3.5.1.Definition of "special colors" for printing on K-plane
If you use special colors to match existing ones on your layout they will be printed on K-plane.
After clicking on the color button, pick up or define a new color as you need. Also, you can add this color to the "Custom colors" as shown:
22
Prima 3 Driver Manual
It is recommended to choose either black or an extreme color, which will not be used in the rest of the layout. Pure colors (like Magenta) will never appear in digital photos, so it is safe to use them without introducing side-effects.
By clicking "OK" the color will be shown on the button.
23
Prima 3 Driver Manual
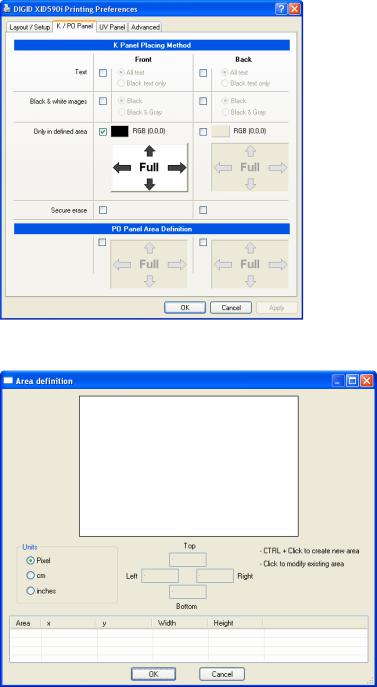
3.3.5.2.Definition of areas for printing on K-plane
In combination with the special colors (see chapter 3.3.5), you can define inclusion areas:
After clicking on the area button the following dialog window appears:
24
Prima 3 Driver Manual
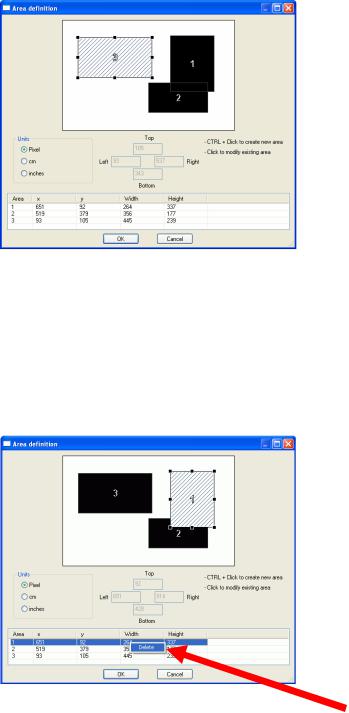
To create a new area: Click and draw a rectangle area while pressing and holding down the CTRL-key on the keyboard.
To edit an area: Select an area you want to move or resize by clicking on the area itself or choose it from the list.
You can move the area pixel by pixel using the cursor-keys.
To Delete an existing area: Select the area you want to delete or choose the corresponding area from the list, then either right-click on mouse button and click "Delete" or hit del Del-key on the keyboard.
25
 Loading...