


5 GHz airMAX® ac Radio BaseStation with airPrism®
Active RF Filtering Technology
Model: RP-5AC-Gen2
Introduction
Thank you for purchasing the Ubiquiti Networks® Rocket® Prism RP-5AC-Gen2. This Quick Start Guide is designed to guide you through installation and also includes warranty terms.
Package Contents
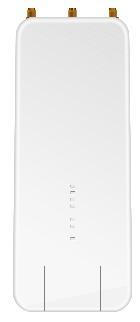
Rocket Prism 5AC |
GPS Antenna |
|
|
|
|
|
|
|
Gigabit PoE (24V, 1A) |
Power Cord |
Quick Start Guide |
with Mounting Bracket |
|
|
Installation Requirements
•The GPS Antenna needs to have clear line of sight to the sky for proper GPS operation.
•Shielded Category 5 (or above) cabling should be used for all wired Ethernet connections and should be grounded through the AC ground of the PoE.
We recommend that you protect your networks from harmful outdoor environments and destructive ESD events with industrial grade, shielded Ethernet cable from Ubiquiti Networks. For more details, visit www.ubnt.com/toughcable
TERMS OF USE: Ubiquiti radio devices must be professionally installed. Shielded Ethernet cable and earth grounding must be used as conditions of product warranty. TOUGHCable™ is designed for outdoor installations. It is the customer’s responsibility to follow local country regulations, including operation within legal frequency channels, output power, and Dynamic Frequency Selection (DFS) requirements.
Hardware Overview
|
|
GPS |
|
|
|
|
|
Antenna |
|
|
|
RP-SMA |
Connector |
|
RP-SMA |
||
Antenna |
|
|
|
|
Antenna |
Connector: |
|
|
|
Connector: |
|
Chain 1 |
|
|
|
Chain 0 |
|
LED Panel
Port Cover

LED Panel
Signal In airOS®, you can modify the wireless signal strength threshold values for each LED on the Wireless tab under Signal LED Thresholds. The default values are shown below:
LED will light blue when the wireless signal strength is above -65 dBm.
LED will light blue when the wireless signal strength is above -73 dBm.
LED will light blue when the wireless signal strength is above -80 dBm.
LED will light blue when the wireless signal strength is above -94 dBm.
GPS GPS The GPS LED will light steady blue when the GPS signal strength is sufficient. This requires a minimum of three satellite connections.
LAN LAN The LAN LED will light steady blue when an active Ethernet connection is made to the LAN port and flash when there is activity.
Power The Power LED will light blue when the device is connected to a power source.
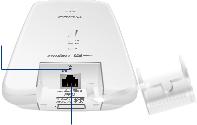
Ports
Reset
Button
LAN Port
Reset Button To reset to factory defaults, press and hold the Reset button for more than 10 seconds while the Rocket
Prism is powered on. Alternatively, the Rocket Prism may be reset remotely via a Reset button located on the bottom of the
Gigabit PoE adapter.
LAN The Gigabit Ethernet port is used to connect the power and should be connected to the LAN.

Hardware Installation
The Rocket Prism is designed to mount directly onto a Ubiquiti airMAX RocketDish™ antenna for Point-to-Point use or an airMAX Sector antenna for Point-to-MultiPoint use.
1.Lift the release latch on the bottom of the Rocket Prism and slide the Port Cover off.
2. Connect an Ethernet cable to the LAN port.
3. Replace the Port Cover.
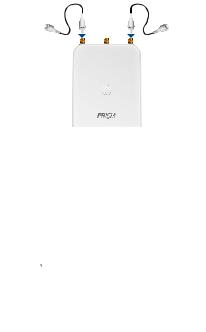
4.Connect the RF cables to the RP-SMA Antenna Connectors located on top of the Rocket Prism.
5.Attach the Rocket Prism to the antenna.
a.Align the mounting tabs on the back of the Rocket Prism with the mounting slots on the antenna.
b.Slide the Rocket Prism down until it locks into place.
H
V
Mounting on a RocketDish |
Mounting on a Sector Antenna |

6.Attach the other end of the RF cables to the RF connectors on the antenna.
H
V
Connecting to a RocketDish |
Connecting to a Sector Antenna |
7.Connect the GPS Antenna to the GPS Antenna Connector on the Rocket Prism.

 H
H 

 V
V
Connecting the GPS Antenna |
Connecting the GPS Antenna |
8. Attach the protective shroud.
H |
V |
Align the hash mark on the top of the shroud with the notch on the RocketDish. Rotate the shroud clockwise until it locks into place.
Slide the protective shroud down over the Rocket Prism until it locks into place on the Sector antenna.
9. Place the GPS Antenna on the mounting hardware.
Placement on a Dish Antenna |
Placement on a Sector Antenna |
 Loading...