


R605
CONTINUOUS ROWING MACHINE R 605
GB OWNER'S MANUAL P. 2-5
D BETRIEBSANLEITUNG S. 6-9
F MODE D'EMPLOI P. 10-13
INCTRUCIQ PO |KSPLUATACII S. 14-17
R
I MANUALE D'USO P. 18-21
NL HANDLEIDING P. 22-25
S BRUKSANVISNING S. 26-29
FIN KÄYTTÖOHJE S. 30-33
SERIAL NUMBER
SERIENNUMMER
NUMERO DE SERIE
SERIJNYJ NOMER
NUMERO DI SERIE
SERIENUMMER
SERIENNUMMER
SARJANUMERO
583 2006 B
GB
INFORMATION AND WARNINGS
PLEASE READ THIS OWNER’S MANUAL THROUGH CAREFULLY BEFORE ASSEMBLING, USING
AND SERVICING THE ROWING MACHINE! FOLLOW THE INSTRUCTIONS DESCRIBED IN THIS
MANUAL CAREFULLY.
THE EQUIPMENT HAS BEEN DESIGNED FOR HOME USE. THE TUNTURI WARRANTY APPLIES ONLY FOR
FAULTS AND MALFUNCTIONS IN HOME USE.
NOTE ABOUT YOUR HEALTH
* Before you start any training, consult a physician to check your state of health.
* If you experience nausea, dizziness or other abnormal symptoms while exercising, stop your workout at once and
consult a physician.
* To avoid muscular pain and strain, begin each workout by warming up and end it by cooling down. Don’t forget to
stretch at the end of the workout.
NOTE ABOUT THE EXERCISING ENVIRONMENT
* Place the rowing machine on a firm, level surface.
* Make sure that the exercising environment has adequate ventilation. To avoid catching cold, do not exercise in a
draughty place.
NOTE ABOUT USING THE EQUIPMENT
* Parents or others responsible for children should note that children’s natural playfulness and curiosity may lead to
situations and behaviour for which the rowing machine is not designed. If children are allowed to use the device, they
should be supervised and taught to use the rowing machine properly, keeping in mind the child’s physical and mental
development and their personality. The rowing machine is not a toy.
* Before you start using the rowing machine, make sure that it functions correctly in every way. Do not use a faulty
device.
* In heavy or long-term use, the machine may shed dust or oil. It is therefore advised to place the machine on a
protective base.
* Only one person may use the cycle at a time.
* Wear appropriate clothing and shoes when exercising.
* Do not attempt any servicing or adjustment other than those described in this manual. The given service instructions
must be followed carefully.
* The equipment is not recommended for persons weighing over 110 kg.
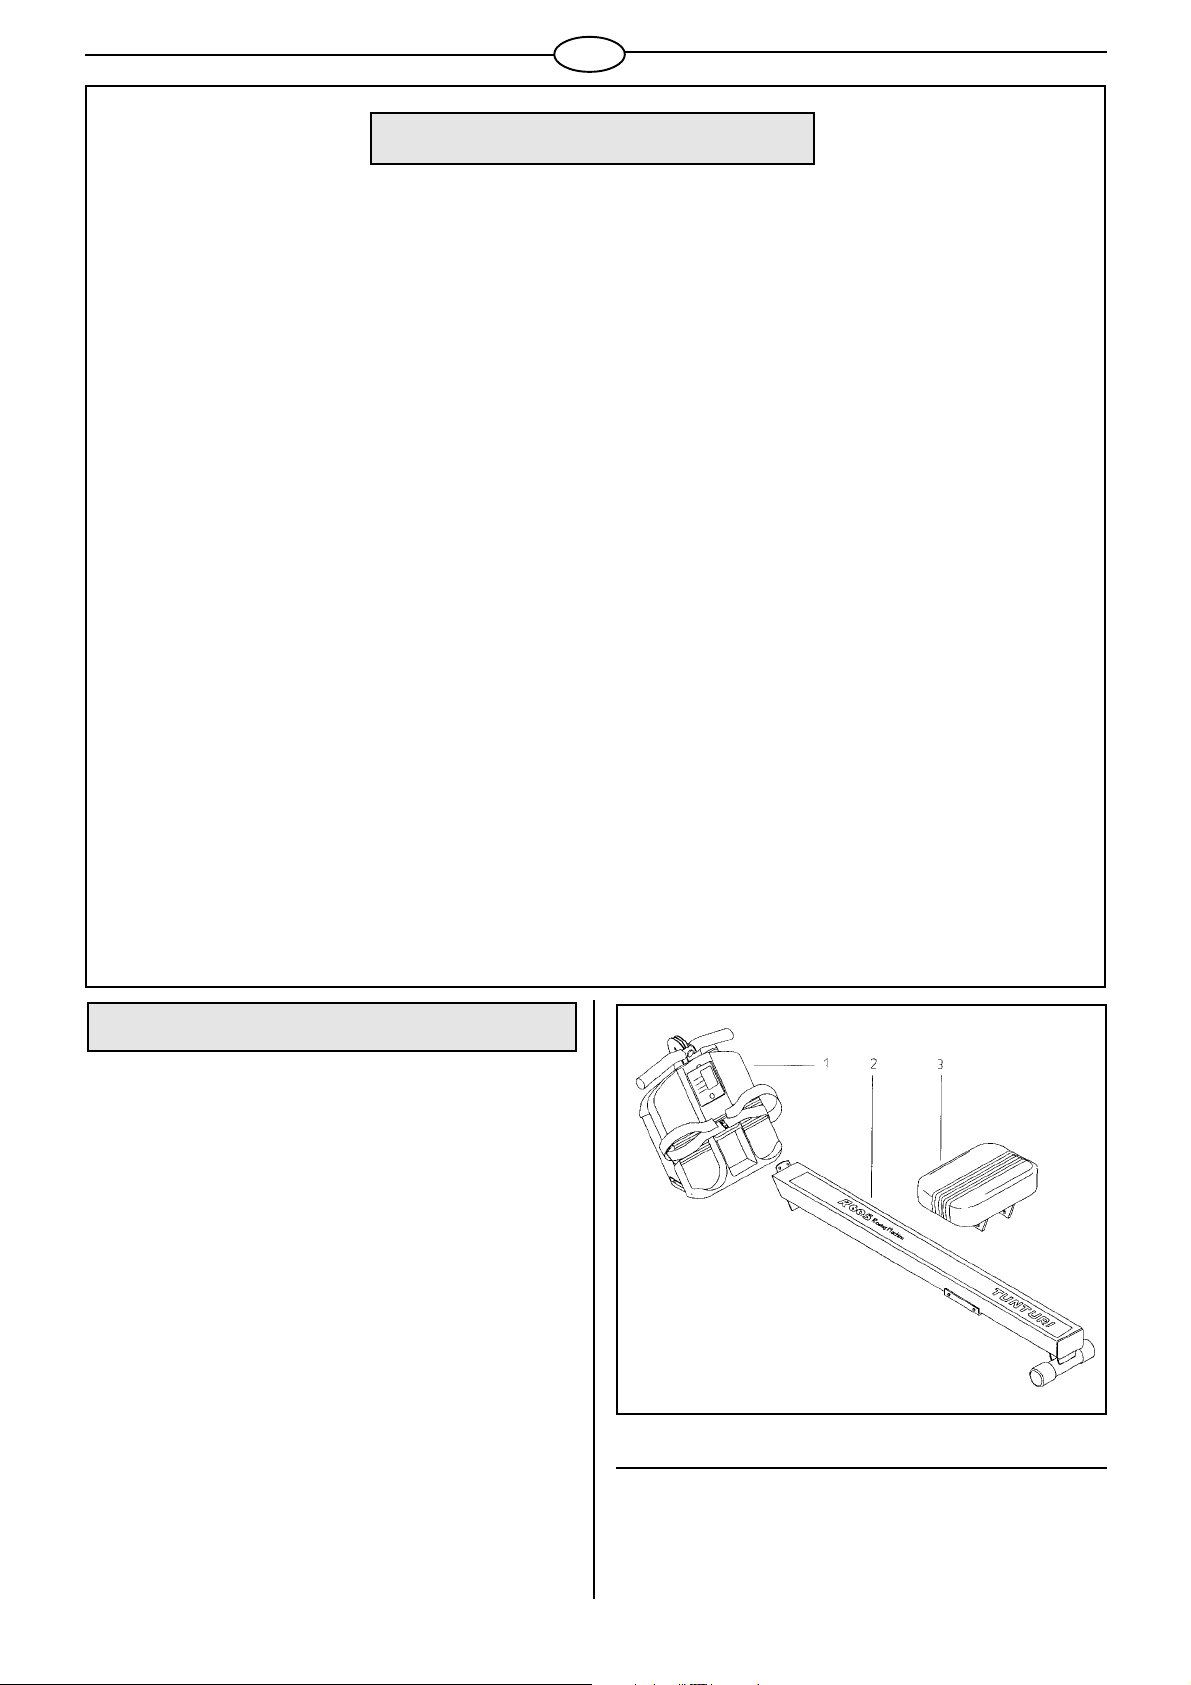
ASSEMBLY
Before assembling the device, make sure the following
parts are present:
1. frame
2. rail
3. seat
Hardware kit including the following:
screwdriver, allen key wrench, fastening screws and
sleeves for the rail (4 pcs), fastening screws for the seat
(4 pcs), batteries (2 pcs)
If you notice that a part is missing, contact the dealer and
give the model (R 605), serial number and spare part
number from the spare part list at the back of the manual.
Remove the parts of the machine from the package and
assemble as follows:
INSERTING BATTERIES
Remove the meter from the frame between the footrests.
N.B. Be careful not to damage the wire. Insert two 1,5
V batteries by opening the bottom of the meter cover.
Note the - and + signs marked in the case. Replace the
cover and fasten the meter to the frame.
2
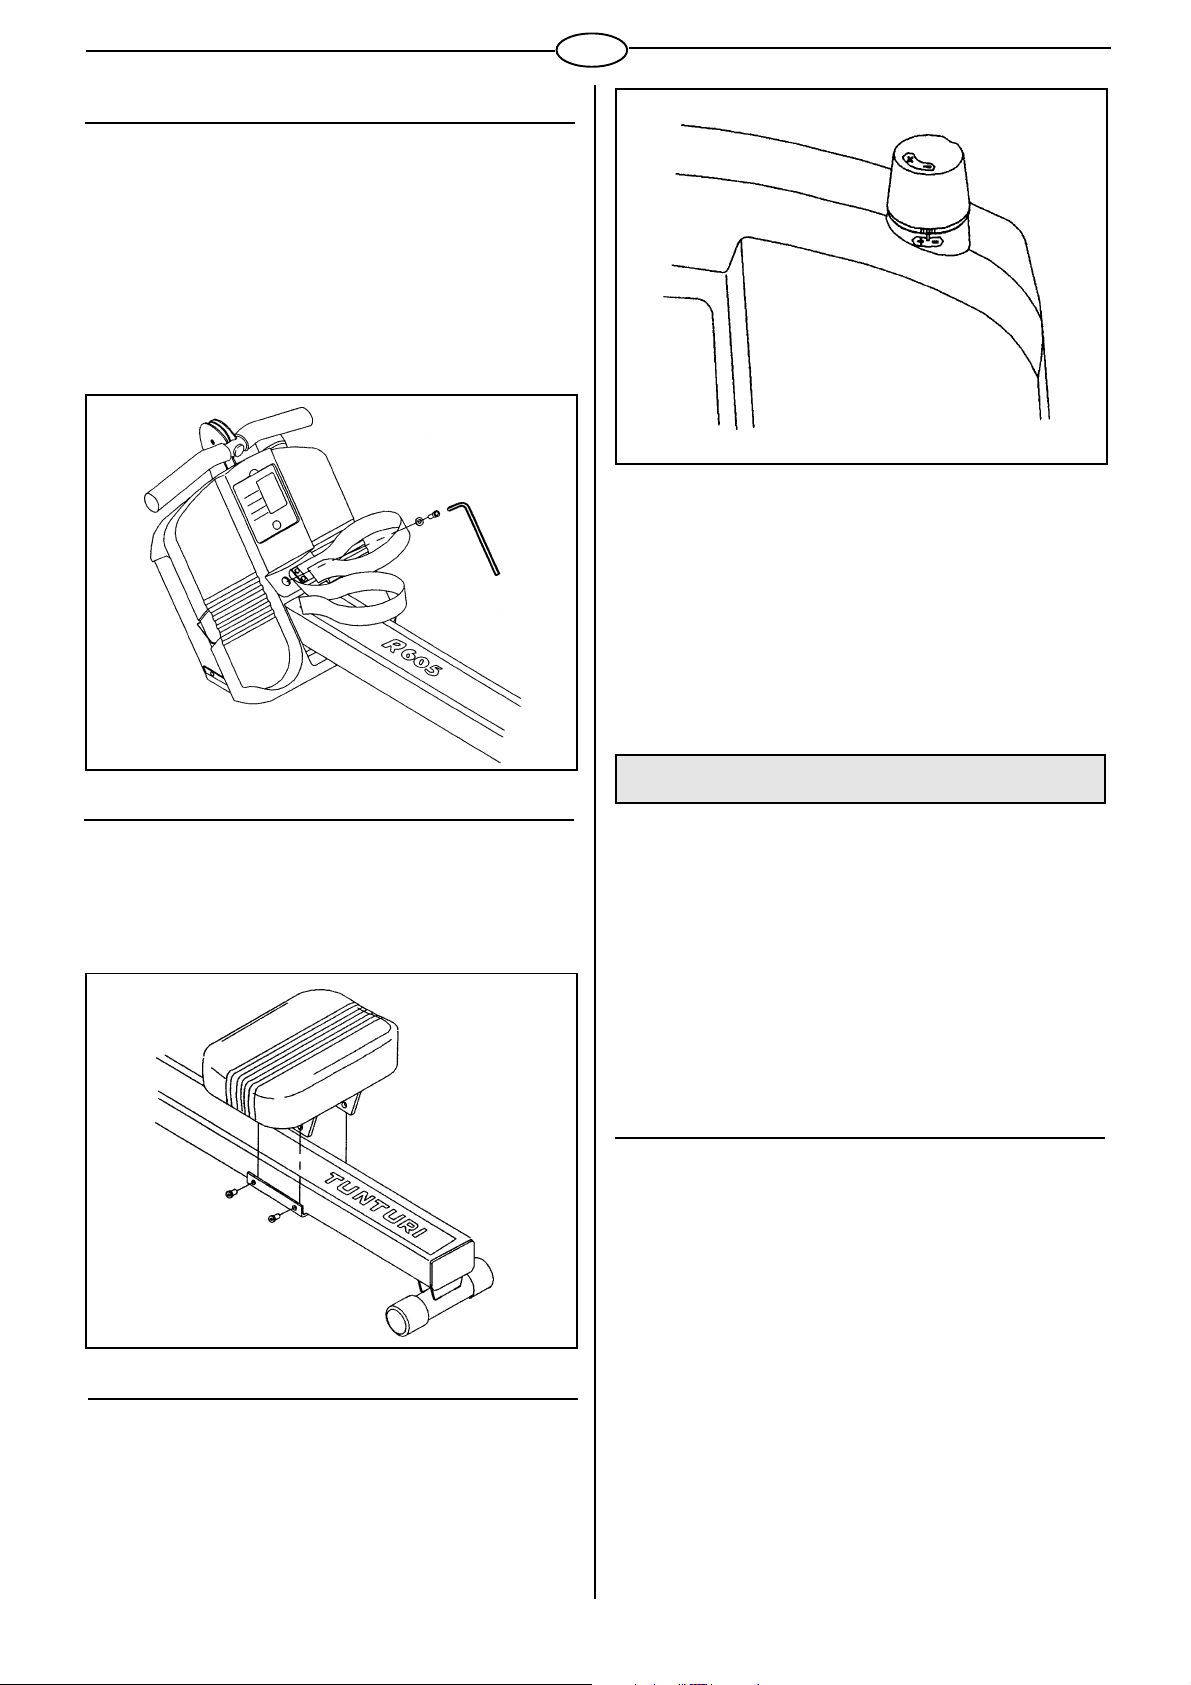
FRAME ASSEMBLY
Place the frame on the floor so that it faces upward and
fit the head of the rail carefully in its place. Support the
frame with one hand, set the fastening screws below the
rail on their places and tighten them with fingers. Tilt the
device in a horizontal position, open the footstraps and
pull them aside, revieling the two holes for fastening
screws. Place a screw and a sleeve on top of the allen key
wrench and set them carefully in place. Tighten all screws
with the allen key wrench and slip the footstraps back
under the metal hooks on the sides of the frame.
GB
In rowing machines with flywheel construction, stroke
speed is at highest at the end of the rowing stroke with the
body leaning slightly backwards and the arms flexed
against the chest. The flywheel speed is also at its highest
at this point. Stroke speed is at its lowest at the start of the
rowing stroke. If you row at a very low resistance at a fast
tempo, the flywheel will continue to rotate fast at the
beginning of the rowing motion, and there may be an idle
stroke. It is therefore recommended to use a higher
resistance when the rowing tempo is very fast.
SEAT ASSEMBLY
To mount the seat, use the four screws in the hardware kit
to fix the seat to the carriage on the rail. The edges of the
base plate should be inside the edges of the carriage.
N.B. The sticker on the bottom of the seat shows the
correct seat position.
METER
The meter switches on automatically when you start
rowing or press the RESET-key on the meter, and switches
off when you have not exercised or pressed the key for
about 4 minutes. You can reset the readings by pressing
the RESET key.
N.B. Protect the meter from direct sunlight, as it may
damage the liquid crystal display. Protect the meter
from water and avoid severe impacts, as these may
also damage the meter.
DISPLAYS
STROKES:
Counts rowed strokes upwards (0-9999).
TIME:
Shows time counted upwards (0:00-59:59).
STROKES/MIN:
Number of strokes per minute (0-999).
ADJUSTING RESISTANCE
The rowing load can be stepplessly adjusted by the knob
(fig.). The lightest, or the base load, is in use when the
groove in the knob points to the mark on the frame. There
are four other load levels marked on the knob, the
heaviest, maximum load, being indicated by four grooves.
The load is freely adjustable between the base and
maximum load; the settings serve only as a guide.
CALORIES:
Estimated total calorie consumption (0.0-999 kcal).
Because different people’s capacity to produce energy
(efficiency) varies, the energy consumption display shows
only a rough approximation of the real consumption. This
meter calculates the energy consumption on the basis of
fixed and measured values.
3
 Loading...