


Garden Cultivator
Operator’s Manual
®
GC720
TABLE OF CONTENTS
Service Information . . . . . . . . . . . . . . . . . . . . . . . . . . . . . . . . . . . . .1 Rules for Safe Operation . . . . . . . . . . . . . . . . . . . . . . . . . . . . . . . . .2 Know Your Unit . . . . . . . . . . . . . . . . . . . . . . . . . . . . . . . . . . . . . . . .3 Operating Instructions . . . . . . . . . . . . . . . . . . . . . . . . . . . . . . . . . . .3 Maintenance & Repair Instructions . . . . . . . . . . . . . . . . . . . . . . . . .4 Cleaning and Storage . . . . . . . . . . . . . . . . . . . . . . . . . . . . . . . . . . .4 Specifications . . . . . . . . . . . . . . . . . . . . . . . . . . . . . . . . . . . . . . . . .4 Warranty Information . . . . . . . . . . . . . . . . . . . . . . . . . . . . . . . . . . .16
SAVE THESE INSTRUCTIONS
For service call 1-800-345-8746, or 1-800-668-1238 in Canada to obtain a list of authorized service dealers near you. For more details about your unit, visit our website at www.trimmerplus.com.
If you have difficulty assembling this product or have any questions regarding the controls, operation or maintenance of this unit, please call the Customer Support Department.
PROOF OF PURCHASE WILL BE REQUIRED FOR WARRANTY SERVICE.
Service on this unit both within and after the warranty period should be performed only by an authorized and approved service dealer.
All information, illustrations, and specifications in this manual are based on the latest product information available at the time of printing. We reserve the right to make changes at any time without notice.
Copyright© 2011 MTD SOUTHWEST INC, All Rights Reserved.
769-07296 P00 |
11/11 |

RULES FOR SAFE OPERATION
The purpose of safety symbols is to attract your attention to possible dangers. The safety symbols, and their explanations, deserve your careful attention and understanding. The safety warnings do not by themselves eliminate any danger. The instructions or warnings they give are not substitutes for proper accident prevention measures.
SYMBOL MEANING
SAFETY ALERT: Indicates danger, warning or caution. Attention is required in order to avoid serious personal injury. May be used in conjunction with other symbols or pictographs.
NOTE: Advises you of information or instructions vital to the operation or maintenance of the equipment.
DANGER: Failure to obey a safety warning will result in serious injury to yourself or to others. Always follow the safety precautions to reduce the risk of fire, electric shock and personal injury.
WARNING: Failure to obey a safety warning can result in injury to yourself and others. Always follow the safety precautions to reduce the risk of fire, electric shock and personal injury.
CAUTION: Failure to obey a safety warning may result in property damage or personal injury to yourself or to others. Always follow the safety precautions to reduce the risk of fire, electric shock and personal injury.
Read the Operator’s Manual and follow all warnings and safety instructions. Failure to do so can result in serious injury to the operator and/or bystanders.
FOR QUESTIONS, CALL 1-800-345-8746 IN U.S. OR 1-800-668-1238 in CANADA
• IMPORTANT SAFETY INSTRUCTIONS • READ ALL INSTRUCTIONS BEFORE OPERATING
WARNING: When using the unit, you must follow the safety rules. Please read these instructions before operating the unit in order to ensure the safety of the operator and any bystanders.
Please keep these instructions for later use.
•Carefully read and understand the operator's manual of the unit that powers this add-on.
•Read this operating instruction manual carefully. Be thoroughly familiar with the controls and the proper use of the equipment. Know how to stop the unit and disengage the controls quickly.
•Do not operate this unit when tired, ill, or under the influence of alcohol, drugs, or medication.
•Never allow children to operate the equipment. Never allow adults unfamiliar with the instructions to use the unit. Never allow adults to operate the equipment without proper instruction.
•All guards and safety attachments must be installed properly before operating the unit.
•Inspect the unit before use. Ensure the tines are installed correctly and secure.
•Clear the area to be cultivated before each use. Remove all objects such as rocks, broken glass, nails, wire, or string which can be thrown or become entangled in the cultivator add-on.
SAFETY WARNINGS FOR GAS UNITS
•Never operate the unit without the fuel cap securely in place.
•Avoid creating a source of ignition for spilled fuel. Wipe up any spilled fuel from the unit immediately before starting the unit. Move the unit at least 30 feet (9.1 m) from the fueling source and site before starting the engine. Do not smoke.
•Never start or run the unit inside a closed room or building. Breathing exhaust fumes can kill. Operate this unit only in a well-ventilated outdoor area.
SPECIAL SAFETY WARNINGS FOR ELECTRIC POWERHEADS AND CULTIVATORS
WARNING: To reduce the risk of electrical shock, use only extension cords approved for outdoor use, such as an extension cord of cord type SW-A, SOW-A, STW-A, STOW-A, SJW-A, SJOW-A, SJTW-W or SJTOW-A. Extension cords are available from your local retailer. Use only round-jacketed extension cords approved for outdoor use.
•CORD SETS: Make sure your cord set is in good condition. When using a cord set, be sure to use a cord that is heavy enough to carry the current that your unit will draw. An undersized cord set will cause a drop in line voltage resulting in loss of power and overheating. See the operator’s manual for the unit that will power this add-on for the recommended cord size.
•Inspect all extension cords and the unit power connection periodically. Look closely for deterioration, cuts or cracks in the insulation. Also inspect the connections for damage. Replace the cords if any defects or damage appear.
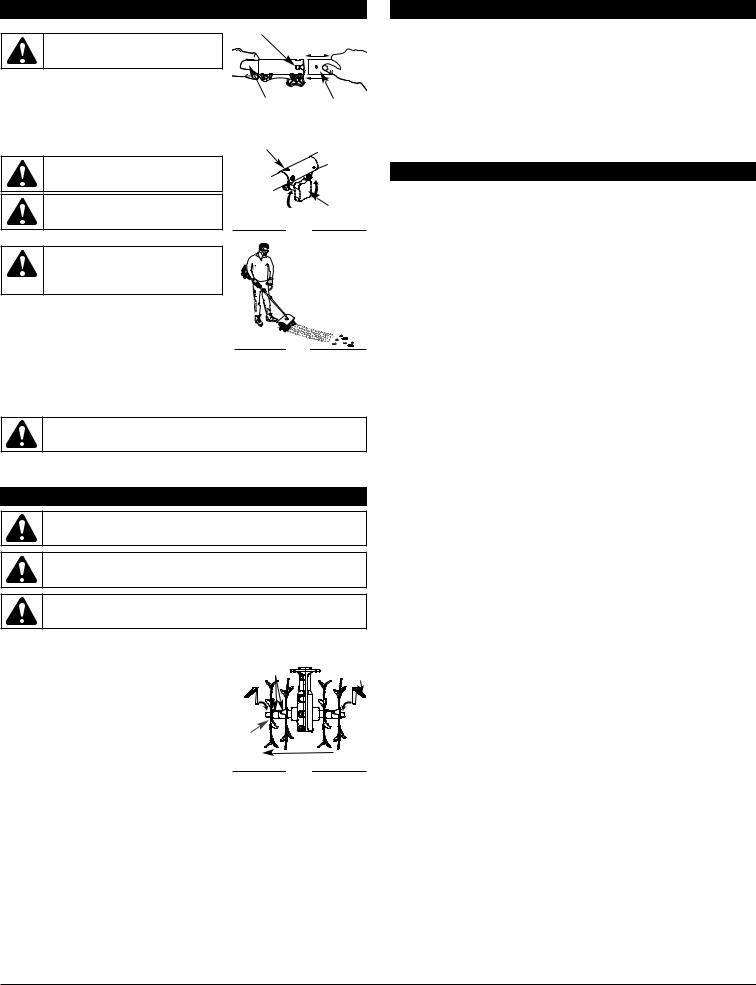
• Prevent disconnection of the cultivator Extension Cord |
Unit Cord |
powerhead from extension cord |
|
during operation by using a plug- |
|
receptacle retaining strap, connector, |
|
or by making a knot as shown below: |
|
•Avoid dangerous environments. Never operate your unit in damp or wet conditions. Moisture is a shock hazard.
•Do not use the unit in the rain. Do not use in or around water.
•Do not handle the plug or unit with wet hands or standing on any wet surfaces.
•Do not leave the unit plugged in when not in use, changing attachments or add-ons, or while being serviced.
WHILE OPERATING
•Keep bystanders, especially children and pets, at least 50 ft (15 m) away.
•Wear safety glasses or goggles that are marked as meeting ANSI Z87.1-1989 standards, and use ear/hearing protection when operating this unit. Wear a face or dust mask if the operation is dusty.
•Wear heavy, long pants, boots, gloves and a long sleeve shirt. Do not wear loose clothing, jewelry, short pants, sandals or go barefoot. Secure hair above shoulder level.
•Use the unit only in daylight or good artificial light.
•Use the right tool. Only use this tool for the purpose intended.
•Do not force unit. It will do the job better and with less likelihood of injury at a rate for which it was designed.
•Use extreme caution when reversing or pulling the unit towards you.
•Do not overreach, take extra care when working on steep slopes or inclines. Always keep proper footing and balance.
•Always hold the unit with both hands when operating. Keep a firm grip on both the front and rear handle or grips.
WARNING: Gasoline is highly flammable, and its vapors can explode if ignited. Take the following precautions:
•Keep hands, face, and feet at a distance from all moving parts. Do not touch or try to stop the tines when they are rotating. Do not operate without guards in place.
•Store fuel only in containers specifically designed and approved for the storage of such materials.
•Always stop the engine and allow it to cool before filling the fuel tank. Never remove the fuel tank cap or add fuel when the engine is hot. Always loosen the fuel tank cap slowly to relieve any pressure in the tank before fueling. Do not smoke.
•Always mix and add fuel in a clean, well-ventilated outdoor area where there are no sparks or flames. Do not smoke.
•Do not operate the unit faster than the speed needed to do the job. Do not run the unit at high speed when not in use.
•Always stop the engine/motor when operation is delayed or when walking from one location to another.
•Stop the engine/motor for maintenance, repair, to install or remove the tines. The unit must be stopped and the tines no longer turning to avoid injury.
2

RULES FOR SAFE OPERATION
•The tines become very sharp from use. Always wear heavy gloves when handling, removing, installing or cleaning the tines.
•If you strike or become entangled with a foreign object, stop the engine/motor immediately and check for damage. Have any damage repaired before attempting further operations.
•Stop the unit IMMEDIATELY if you feel excessive vibration. Vibration is a sign of trouble. Inspect thoroughly for loose nuts, bolts or damage before continuing. Repair or replace affected parts as necessary.
•Stop and either unplug or switch the unit off prior to any maintenance, repair or changing out of any add-ons.
•Keep unit clean of vegetation and other materials. They may become lodged between the tines and gearbox or guard.
•Use only genuine MTD replacement parts and accessories for this unit. These are available from your authorized service dealer. Use of any non MTD parts or accessories could lead to serious injury to the user or damage to the unit, and void your warranty.
MAINTENANCE AND STORAGE
•Allow the unit to cool before storing or transporting. Be sure to secure the unit while transporting.
•Store the unit in a locked up and dry or high and dry place to prevent unauthorized use or damage, out of the reach of children.
•Clean the tines with a hose and water. Wipe the tines with a light machine oil to prevent rust.
•Never douse or squirt the unit with water or any other liquid. Keep handles dry, clean and free from debris. Clean after each use.
•Keep these instructions. Refer to them often and use them to instruct other users. If you loan someone this unit, also loan them these instructions.
•Only qualified personnel should perform any repairs or maintenance procedures that are not described in this manual.
•Check shear bolts, engine mounting bolts and other bolts at frequent intervals for proper tightness to be sure the equipment is in safe working condition.
•Inside a building store the machine away from ignition sources. Allow the engine to cool before storing in any enclosure.
•Always refer to the Operator’s Manual instructions for important details if the cultivator is to be stored for an extended period.
•Do not attempt to repair the machine unless you have the proper tools, and instructions for disassembly and repair of the machine.
SAVE THESE INSTRUCTIONS
• SAFETY AND INTERNATIONAL SYMBOLS •
This operator's manual describes safety and international symbols and pictographs that may appear on this product. Read the operator's manual for complete safety, assembly, operating and maintenance and repair information.
SYMBOL MEANING
•SAFETY ALERT SYMBOL
Indicates danger, warning or caution. May be used in conjunction with other symbols or pictographs.
•WARNING - READ OPERATOR'S MANUAL
Read the operator’s manual(s) and follow all warnings and safety instructions. Failure to do so can result in serious injury to the operator and/or bystanders.
•WEAR EYE AND HEARING PROTECTION
WARNING: Thrown objects and loud noise can cause severe eye injury and hearing loss. Wear eye protection meeting ANSI Z87.1-1989 standards and ear protection when operating this unit. Use a full face shield when needed.
• THROWN OBJECTS AND ROTATING CUTTER CAN CAUSE SEVERE INJURY
WARNING: Small objects can be propelled at high speed, causing injury. Keep away from the rotating rotor.
RULES FOR SAFE OPERATION
SYMBOL MEANING
• KEEP BYSTANDERS AWAY
WARNING: Keep all bystanders, especially children and pets, at least 50 feet (15 m.) from the operating area.
• GARDEN CULTIVATORS – ROTATING TINES CAN CAUSE SEVERE INJURY
WARNING: Stop the engine/motor and allow the tines to stop before installing or removing tines, or before cleaning or performing any maintenance. Keep hands and feet away from rotating tines.
APPLICATIONS
With Cultivator Add-On:
•Cultivating sod and light soil. Also for cultivating in garden areas, around trees, etc.
NO ASSEMBLY TOOLS REQUIRED
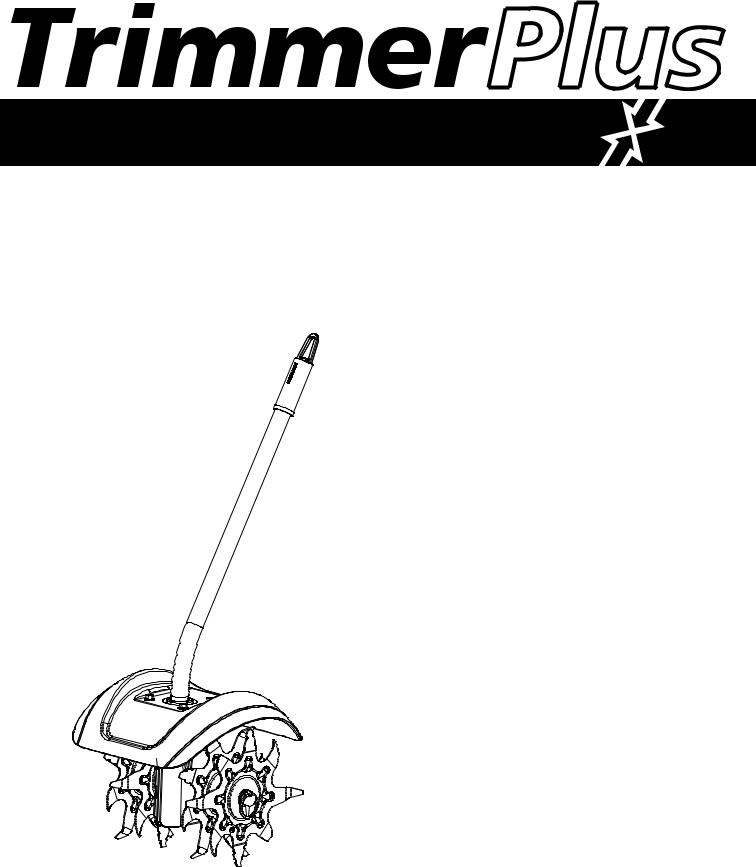
KNOW YOUR UNIT
 Hanger
 Shaft Housing
Tine Guard
Tines 
Gearbox
Click Pin
OPERATING INSTRUCTIONS
OPERATING THE EZ-LINK™ SYSTEM
The EZ-Link™ system enables the use of these optional Add-Ons.
AERO-FLEX® Trimmer . . . . . . . . . . . . . . . . . . . . . . . . . . . . . . . . . . . . . . . . . . . . . . . . . . . . . . . . . . . . . AF720 Hedge Trimmer . . . . . . . . . . . . . . . . . . . . . . . . . . . . . . . . . . . . . . . . . . . . . . . . . . . . . . . . . . . . . . . . . AH721* Brushcutter . . . . . . . . . . . . . . . . . . . . . . . . . . . . . . . . . . . . . . . . . . . . . . . . . . . . . . . . . . . . . . . . . . . . BC720* Cultivator . . . . . . . . . . . . . . . . . . . . . . . . . . . . . . . . . . . . . . . . . . . . . . . . . . . . . . . . . . . . . . . . . . . . . . GC720 Edger . . . . . . . . . . . . . . . . . . . . . . . . . . . . . . . . . . . . . . . . . . . . . . . . . . . . . . . . . . . . . . . . . . . . . . . . . . LE720 Pole Saw . . . . . . . . . . . . . . . . . . . . . . . . . . . . . . . . . . . . . . . . . . . . . . . . . . . . . . . . . . . . . . . . . . . . . . PS720 Straight Shaft Trimmer . . . . . . . . . . . . . . . . . . . . . . . . . . . . . . . . . . . . . . . . . . . . . . . . . . . . . . . . . . . . SS725 Turbo Blower . . . . . . . . . . . . . . . . . . . . . . . . . . . . . . . . . . . . . . . . . . . . . . . . . . . . . . . . . . . . . . . . . . . TB720 *DO NOT use this add-on with an electric powered unit.
WARNING: Read and understand operator’s manual for add-on prior to operation.
REMOVING THE ADD-ON:
1.Turn the knob counterclockwise to loosen (Fig. 3).
2.Press and hold the release button (Fig. 1).
3.While firmly holding the upper shaft housing, pull the add-on straight out of the EZ-Link™ coupler (Fig. 2).
EZ-Link™ Coupler |
|
Release |
||||||||||||||
|
|
|
|
|
|
|
|
|
|
|
|
|
|
Button |
||
|
|
|
|
|
|
|
|
|
|
|
|
|
|
|
|
|
|
|
|
|
|
|
|
|
|
|
|
|
|
|
|
|
|
Guide Recess
Fig. 1
3
OPERATING INSTRUCTIONS
INSTALLING THE ADD-ON:
WARNING: To avoid serious personal injury and damage to the unit, shut unit off before removing or installing add-ons.
NOTE: To make installing or removing the add-on easier, place the unit on the ground or on a work bench.
1.Turn knob counterclockwise to loosen (Fig. 3).
2.While firmly holding the add-on, push it straight into the EZ-Link™ coupler (Fig. 2).
NOTE: Aligning the release button with the guide recess will help installation (Fig. 1).
3.Turn the knob clockwise to tighten (Fig. 3).
CAUTION: Lock the release button in the primary hole (Fig. 2) and securely tighten the knob before operating this unit.
CAUTION: This add-on is to be used in the primary hole only. Using the wrong hole could lead to personal injury or damage to the unit.
OPERATING TIPS
Primary Hole
Upper Shaft |
|
Lower Shaft |
Housing |
|
Housing |
|
|
|
|
Fig. 2 |
|
90˚ Edging Hole |
|
|
|
|
|
|
|
|
(Trimmer Only) |
|
|
Knob
Fig. 3
WARNING: Dress properly to reduce the risk of injury when operating this unit. Do not wear loose clothing or jewelry. Wear eye and ear/hearing protection. Wear heavy long pants, boots and gloves. Do not wear short pants, sandals or operate barefoot.
1. Move the cultivator to the work area prior to starting the engine/motor.
2. Start the unit.
3. With the engine running and the tines off the ground, depress the throttle control to increase the engine speed.
4. Holding both of the shaft and handle grips firmly, slowly Fig. 4 lower the cultivator until the tines make
contact with the ground (Figs. 4).
5.As cultivating action begins, pull back on the cultivator so that the tines can penetrate the ground.
6.Once the ground has been broken, continue at a moderate pace until you are familiar with the controls and the handling of the cultivator.
WARNING: To prevent serious personal injury, use extreme caution when reversing or pulling the unit towards you.
MAINTENANCE AND REPAIR INSTRUCTIONS
STORAGE
•Check unit before storage to be sure the equipment is in safe working condition.
•Stop the engine or motor.
•Store the unit indoors, in a dry and locked place, out of the reach of children.
For gas powerhead units
•Allow the unit to cool before storing in any enclosure.
•Drain fuel from unit. Never store the unit with fuel in the fuel tank inside a building where ignition sources are present such as hot water and space heaters, clothes dryers, etc.
SPECIFICATIONS *
Operating Weight of Attachment:. . . . . . . . . . . . . . . . . . . . . . . . . . . . . . . . . . . . . . . . . . . . . 10 lbs. (4.65 kg) Adjustable Tine Width. . . . . . . . . . . . . . . . . . . . . . . . . . . . . . . . . . . . . . . . . . . . . . 6 to 9 in. (15 to 22.86 cm) Steel Tines. . . . . . . . . . . . . . . . . . . . . . . . . . . . . . . . . . . . . . . . . . . . . . . . . . . . . . . . . . . . . . . . 8 in. (20.3 cm)
* All specifications are based on the latest product information available at the time of printing. We reserve the right to make changes at any time without notice.
MAINTENANCE AND REPAIR INSTRUCTIONS
WARNING: To prevent serious personal injury, never perform maintenance or repairs with unit running. Always service and repair a cool unit.
WARNING: Avoid accidental starting. Stop motor and disconnect extension cord prior to performing any maintenance or repairs.
WARNING: Cultivator tines are sharp. Always wear leather gloves to protect your hands when handling tines.
REMOVING AND REPLACING TINES
Cultivator tines are subject to wear and should be replaced if any signs of damage are present. Tines should also be removed and cleaned after each use.
Tine Removal and Replacement
1. Make sure the unit is off.
NOTE: It may be necessary to lay the cultivator back in a horizontal position on a flat level surface with the upper handle touching the ground. It may also be necessary to wash any dirt off the tines and shaft for ease of removal.
2.Remove the click pin from each end of the tine shaft. Slide the tines off of the shaft (Fig. 5).
3.Clean and oil the shaft.
4.Slide on the new tines with the hubs facing each other (Fig. 5).
Hubs |
Click |
|
Pin |
||
|
Convex
Side
Direction of Convex Tines
Fig. 5
NOTE: Each tine has a convex side. Make sure that all of the convex sides are facing as shown in Figure 5.
5.Secure the new tines to the shaft with click pins. It may be necessary to wash the dirt off the tines and shaft for ease of removal.
4
Garden Cultivator
Manuel de L'utilisateur
®
GC720
TABLE DES MATIÈRES
Service technique . . . . . . . . . . . . . . . . . . . . . . . . . . . . . . . . . . . . . .5 Consignes de sécurité . . . . . . . . . . . . . . . . . . . . . . . . . . . . . . . . . . .6 Familiarisez-vous avec votre appareil . . . . . . . . . . . . . . . . . . . . . . .7 Mode d'emploi . . . . . . . . . . . . . . . . . . . . . . . . . . . . . . . . . . . . . . . .8 Entretien et réparations . . . . . . . . . . . . . . . . . . . . . . . . . . . . . . . . . .8 Nettoyage et entreposage . . . . . . . . . . . . . . . . . . . . . . . . . . . . . . . .8 Caractéristiques . . . . . . . . . . . . . . . . . . . . . . . . . . . . . . . . . . . . . . .8 Garantie . . . . . . . . . . . . . . . . . . . . . . . . . . . . . . . . . . . . . . . . . . . . .16
CONSERVEZ CES INSTRUCTIONS
Obtenez la liste des concessionnaires agréés appelez le 1-800-345-8746 aux États-Unis ou le 1-800-668-1238 au Canada. Pour de plus amples informations à propos de votre appareil, visitez www.trimmerplus.com.
Si vous éprouvez des difficultés à assembler ce produit ou si vous avez des questions sur les commandes, l'utilisation ou l'entretien de cet appareil, veuillez contacter le service à la clientèle.
TOUT SERVICE SOUS GARANTIE NÉCESSITE UNE PREUVE D'ACHAT.
Tout entretien effectué sur cet appareil pendant et après la période de garantie doit être fait par un concessionnaire agréé uniquement.
Toutes les informations, illustrations et spécifications contenues dans ce manuel tiennent compte des dernières informations techniques disponibles au moment de mettre sous presse. Nous nous réservons le droit d'y apporter des modifications à tout moment, sans préavis.
Copyright© 2011 MTD SOUTHWEST INC., Tous droits réservés.
769-07296 P00 |
11/11 |
 Loading...