


OWNERS MANUAL
MANUEL DU PROPRIETAIRE
BETRIEBSANLEITUNG
MANUALE DEL PROPRIETARIO
MANUAL DEL PROPIETARIO
MANUAL DO UTILIZADOR
AIR CONDITIONER (SPLIT TYPE)
GEBRUIKSAANWIJZING
ПДЗГЙЕУ ЧСЗУЗУ
CLIMATISEUR (TYPE SPLIT)
KLIMA GERÄT (SPLIT-TYP)
CONDIZIONATORE D'ARIA (TIPO SPLIT)
AIRE ACONDICIONADO (TIPO SPLIT)
AR CONDICIONADO (TIPO SPLIT)
AIRCONDITIONER (GESPLITST TYPE)
КЛЙМБФЙУФЙКП (ДЙБЙСПХМЕНПХ ФХРПХ)
<Under Ceiling Type> / <Type sous le plafond>
<Zwischendeckentyp> / <Tipo sotto il soffitto>
<Modelo de techo> / <Tipo Sob o Tecto>
<Type voor montage boven verlaagd plafond> / <Фэрпт кЬфщ брь фзн пспцЮ>
Heat Pump Model/Modèle à thermopompe
Geräte mit Heizung/Modello con pompa di riscaldamento
Modelo con bomba de calor/Modelo de bomba térmica
Model met warmtepomp/МпнфЭлп ме БнфлЯб Иесмьфзфбт
Indoor Unit/Unité intérieure Outdoor Unit/Unité extérieure
Raumeinheit/Unità interna Außengerät/Unità esterna
Unidad interior/Unidade interior Unidad exterior/Unidade exterior
Binnenunit/ЕущфесйкЮ МпнЬдб Buitenunit/ЕощфесйкЮ МпнЬдб
RAV-SM562CT-E RAV-SM562AT-E SP562AT- E
RAV-SM802CT-E RAV-SM802AT-E SP802AT- E
RAV-SM1102CT-E RAV-SM1102AT-E SP1102AT-E
RAV-SM1402CT-E RAV-SM1402AT-E SP1402AT-E
Thank you very much for purchasing TOSHIBA Air Conditioner.
Please read this owner's manual carefully before using your Air Conditioner.
• Be sure to obtain the “Owner’s manual” and “Installation manual” from constr uctor (or dealer).
Request to constructor or dealer
• Please clearly explain the contents of the Owner’s manual and hand over it.
Nous vous remercions pour avoir choisi un climatiseur TOSHIBA.
Veuillez lire attentivement ce Manuel du propriétaire avant d’utiliser votre climatiseur.
• Assurez-vous que le constructeur (ou le revendeur) vous remette le “Manuel du propriétaire” et le “Manuel d’installation”.
Demande au constructeur ou au revendeur
• Veuillez expliquer clairement le contenu du Manuel du propriétaire et le remettre au client.
Wir danken Ihnen, dass Sie sich für ein TOSHIBA Klimagerät entschieden haben.
Bitte lesen Sie diese Betriebsanleitung, bevor Sie Ihr Klimagerät benutzen, sorgfältig.
• Lassen Sie sich die “Betriebsanleitung” und das “Installations-Handbuch” unbedingt vom Installateur oder vom Lieferanten
aushändigen.
Eine Bitte an den Installateur oder Lieferanten:
• Bitte erklären Sie dem Käufer den Inhalt der Betriebsanleitung und händigen sie ihm aus.
Grazie di aver acquistato un condizionatore d'aria TOSHIBA.
Prima di usare il condizionatore d'aria, leggere con attenzione questo manuale del proprietario.
• Si raccomanda di tenere a portata di mano il “Manuale del proprietario” e il “Manuale di installazione” ricevuti dal produttore (o dal
rivenditore).
Richiesta al produttore o al rivenditore
• Spiegare chiaramente il contenuto del Manuale del proprietario e consegnarne una copia all'utente.
Muchas gracias por haber adquirido el aparato de aire acondicionado TOSHIBA.
Lea atentamente este manual del propietario antes de utilizar el aparato de aire acondicionado.
• Asegúrese de que el fabricante (o distribuidor) le proporcione el “Manual del propietario” y el “Manual de instalación”.
Solicitud al fabricante o distribuidor
• Explique con claridad el contenido del Manual del propietario y entréguelo al cliente.
Muito obrigada por adquirir o Ar Condicionado TOSHIBA.
Leia atentamente este manual do utilizador antes de utilizar o seu ar condicionado.
• Não se esqueça de receber o “Manual do utilizador” e o “Manual de inslatação” do fabricante (ou agente).
Pedido ao fabricante ou agente
• Explique por favor o conteúdo do Manual do utilizador e entregue-o.
Hartelijk dank voor uw keuze voor een airconditioner van TOSHIBA.
Lees deze gebruiksaanwijzing zorgvuldig door voordat u de airconditioner gaat gebruiken.
• Zorg ervoor dat u zowel de ‘gebruiksaanwijzing’ als de ‘installatiehandleiding’ van de installateur (of leverancier) krijgt.
Verzoek aan de installateur of de leverancier
• Leg de inhoud van de gebruiksaanwijzing duidelijk uit en overhandig de gebruiksaanwijzing nadien aan de klant.
Убт ехчбсйуфпэме рплэ рпх рспфймЮубфе гйб фзн бгпсЬ убт Энб Клймбфйуфйкь TOSHIBA.
Рбсбкблпэме дйбвЬуфе рспуечфйкЬ фйт пдзгЯет чсЮузт рсйн брь фз чсЮуз фпх Клймбфйуфйкпэ.
ВевбйщиеЯфе ьфй п кбфбукехбуфЮт (Ю п рщлзфЮт) убт рбсЭдщуе кбй фйт ПдзгЯет ЧсЮузт кбй фп ЕгчейсЯдйп ЕгкбфЬуфбузт.
РбсЬклзуз гйб фпн кбфбукехбуфЮ Ю фпн рщлзфЮ
Рбсбкблю еозгЮуфе ме убцЮнейб фб ресйечьменб фщн Пдзгйюн ЧсЮузт кбй рбсбдюуфе фп.

ADOPTION OF NEW REFRIGERANT
This Air Conditioner is a new type which adopts a new refrigerant HFC (R410A) instead of the con ventional refrigerant R22 in order to prevent destruction of the ozone layer.
UTILISATION DU NOUVEAU REFRIGERANT
Ce climatiseur est d’un type inédit qui utilise le nouveau réfrigérant HFC (R410A) au lieu du réfrigérant traditionnel
R22, afin d’éviter la destruction de la couche d’ozone.
EINFÜHRUNG EINES NEUEN KÜHLMITTELS
Dies ist ein neuartiges Klimagerät. Anstatt des herkömmlichen Kühlmittels R22 verwendet es das neue oz onschichtschonende HFC Kühlmittel R410A.
ADOZIONE DI UN NUOVO REFRIGERANTE
Questo condizionatore d'aria è di un tipo nuovo che adotta un nuo vo refrigerate HFC (R410A) al posto del
refrigerante convenzionale R22, per prevenire la distruzione dello strato di ozono dell'atmosfera terrestre.
ADOPCIÓN DE NUEVO REFRIGERANTE
Este aparato de aire acondicionado es un modelo reciente que incorpora el nuevo refrigerante HFC (R410A) en
lugar del refrigerante convencional R22 par a así evitar daños en la capa de ozono.
ADOPÇÃO DO NOVO REFRIGERANTE
Este ar condicionado é um modelo novo que adopta um novo refrigerante HFC (R410A) em vez do refrigerante
convencional R22 par a evitar a destruição da cama de ozono.
TOEPASSING VAN EEN NIEUW KOELMIDDEL
Deze airconditioner is een nieuwe type dat werkt met een nieuw koelmiddel HFC (R410A) in plaats van met het
conventionele k oelmiddel R22, als bijdrage om de aantasting van de ozonlaag te reduceren.
ХЙПИЕФЗУЗ НЕПХ ШХКФЙКПХ
Фп рбсьн Клймбфйуфйкь еЯнбй нЭпт фэрпт рпх хйпиефеЯ нЭп шхкфйкь HFC (R410A) уфз иЭуз фпх ухмвбфйкпэ шхкфйкпэ
R22 рспкеймЭнпх нб впзиЮуей уфзн рспуфбуЯб фпх ьжпнфпт.
CONTENTS
ACCESSORIES (SOLD SEPARATELY)......................................... 1
PRECAUTIONS FOR SAFETY....................................................... 1
PARTS NAME ................................................................................. 3
PARTS NAME OF REMOTE CONTROLLER................................. 4
CORRECT USAGE ......................................................................... 6
AUTOMATIC OPERATION (Auto Changeover) ............................ 7
ADJUSTMENT OF WIND DIRECTION........................................... 8
TIMER OPERATION ....................................................................... 9
MAINTENANCE ............................................................................ 11
AIR CONDITIONER OPERATIONS AND PERFORMANCE ....... 12
RE-INSTALLATION....................................................................... 13
TROUBLES AND CAUSES .......................................................... 13
ENGLISH
ACCESSOIRES (VENDUS SEPAREMENT) ................................ 15
MESURES DE SECURITE ........................................................... 15
NOM DES PIECES ....................................................................... 17
NOM DES PIECES DE LA TELECOMMANDE ............................ 18
UTILISATION CORRECTE ........................................................... 20
FONCTIONNEMENT AUTOMATIQUE
(Commutation Automatique) ...................................................... 21
INHALT
SOMMAIRE
ZUBEHÖR (GESONDERT ERHÄLTLICH) ................................... 29
SICHERHEITSVORKEHRUNGEN ............................................... 29
TEILEBEZEICHNUNGEN ............................................................. 31
TEILEBEZEICHNUNG DER FERNBEDIENUNG ........................ 32
RICHTIGE HANDHABUNG .......................................................... 34
AUTOMATISCHER BETRIEB (Automatischer Wechsel)........... 35
INDICE
ACCESSORI (DA ACQUISTARE A PARTE) ................................ 43
PRECAUZIONI PER LA SICUREZZA.......................................... 43
NOME DELLE PARTI .................................................................... 45
NOME DELLE PARTI DEL TELECOMANDO .............................. 46
USO CORRETTO.......................................................................... 48
FUNZIONAMENTO AUTOMATICO
(Commutazione Automatica)...................................................... 49
CONTENIDO
ACCESORIOS (VENDIDOS POR SEPARADO) .......................... 57
PRECAUCIONES PARA SU SEGURIDAD .................................. 57
NOMBRE DE LOS COMPONENTES........................................... 59
DESCRIPCIÓN DE LOS BOTONES DEL CONTROL REMOTO 60
UTILIZACIÓN CORRECTA ........................................................... 62
FUNCIONAMIENTO AUTOMÁTICO (Cambio Automático)....... 63
REGLAGE DU SENS DE SOUFFLAGE ...................................... 22
FONCTIONNEMENT PAR MINUTERIE ....................................... 23
ENTRETIEN .................................................................................. 25
FONCTIONNEMENT ET PERFORMANCES DU CLIMATISEUR 26
REINSTALLATION ........................................................................ 27
PROBLEMES ET CAUSES .......................................................... 27
EINSTELLUNG DER ZULUFTRICHTUNG .................................. 36
ZEITBETRIEB ............................................................................... 37
WAR TUNG .................................................................................... 39
FUNKTIONEN UND LEISTUNG DES KLIMAGERÄTS............... 40
NEU-INSTALLATION .................................................................... 41
STÖRUNGEN UND IHRE URSACHEN........................................ 41
REGOLAZIONE DELLA DIREZIONE DEL FLUSSO D'ARIA..... 50
FUNZIONAMENTO CON TIMER .................................................. 51
MANUTENZIONE.......................................................................... 53
OPERAZIONI E PRESTAZIONI DEL
CONDIZIONATORE D'ARIA ......................................................... 54
RE-INSTALLAZIONE .................................................................... 55
PROBLEMI E CAUSE................................................................... 55
AJUSTE DE LA DIRECCIÓN DEL AIRE ..................................... 64
FUNCIONAMIENTO DEL TEMPORIZADOR ............................... 65
MANTENIMIENTO ........................................................................ 67
FUNCIONES Y RENDIMIENTO DEL APARATO
DE AIRE ACONDICIONADO........................................................ 68
REINSTALACIÓN.......................................................................... 69
PROBLEMAS Y CAUSAS............................................................. 69
FRANCAIS
DEUTSCHNEDERLANDS
ITALIANOESPAÑOLPORTUGUÊSЕЛЛЗНЙКБ
ÍNDICE
ACESSÓRIOS (VENDIDO SEPARADAMENTE) ......................... 71
PRECAUÇÕES DE SEGURANÇA............................................... 71
NOME DAS PEÇAS ...................................................................... 73
NOME DAS PEÇAS DO CONTROLADOR REMOTO ................. 74
[UTILIZAÇÃO CORRECTA] ......................................................... 76
FUNCIONAMENTO AUTOMÁTICO (Mudança Automática)...... 77
INHOUD
ACCESSOIRES (NIET MEEGELEVERD).................................... 85
VOORZORGSMAATREGELEN VOOR UW VEILIGHEID ............ 85
BENAMING VAN DE ONDERDELEN .......................................... 87
BENAMING VAN DE ONDERDELEN VAN DE
AFSTANDSBEDIENING ............................................................... 88
CORRECT GEBRUIK ................................................................... 90
AUTOMATISCHE BEDIENING (Automatisch Omschakelen) ... 91
РЕСЙЕЧПМЕНБ
РБСЕЛКПМЕНБ (РЩЛПХНФБЙ ОЕЧЩСЙУФБ) ........................... 99
РСПЦХЛБОЕЙУ БУЦБЛЕЙБУ ....................................................... 99
ПНПМБ ФМЗМБФЩН ................................................................. 101
ПНПМБУЙБ ФМЗМБФЩН ФПХ ФЗЛЕЧЕЙСЙУФЗСЙПХ ............... 102
ПСИЗ ЧСЗУЗ ............................................................................. 104
БХФПМБФЗ ЛЕЙФПХСГЙБ (Бхфьмбфз МефбвплЮ) ................... 105
AJUSTE DA DIRECÇÃO DO AR ................................................. 78
OPERAÇÃO DO TEMPORIZADOR ............................................. 79
MANUTENÇÃO ............................................................................. 81
OPERAÇÃO E FUNCIONAMENTO DO AR CONDICIONADO... 82
REINSTALAÇÃO .......................................................................... 83
PROBLEMAS E CAUSAS ............................................................ 83
INSTELLEN VAN DE LUCHTSTROOMRICHTING...................... 92
DE TIMER GEBRUIKEN ............................................................... 93
ONDERHOUD ............................................................................... 95
BEDIENING EN WERKING VAN DE AIRCONDITIONER ........... 96
OPNIEUW INSTALLEREN ........................................................... 97
PROBLEMEN EN OORZAKEN .................................................... 97
РСПУБСМПГЗ ФЗУ ДЙЕХИХНУЗУ ФПХ БЕСБ ....................... 106
ЛЕЙФПХСГЙБ ЧСПНПДЙБКПРФЗ .............................................. 107
УХНФЗСЗУЗ ............................................................................... 109
ЛЕЙФПХСГЙЕУ КЛЙМБФЙУФЙКПХ КБЙ БРПДПУЗ ...................... 110
ЕГКБФБУФБУЗ ЕК НЕПХ ......................................................... 111
РСПВЛЗМБФБ КБЙ БЙФЙЕУ ....................................................... 111
ACCESSORIES (SOLD SEPARATELY)
Remote controller
CODE No.
ON / OFF
FAN
MODE
SWING/FIXTIME
VENT
UNITSET CL
FILTER
RESET
SET
H
TEMP.
TEST
DATA
TEST
SETTING
UNIT No.
R.C. No.
TIMER SET
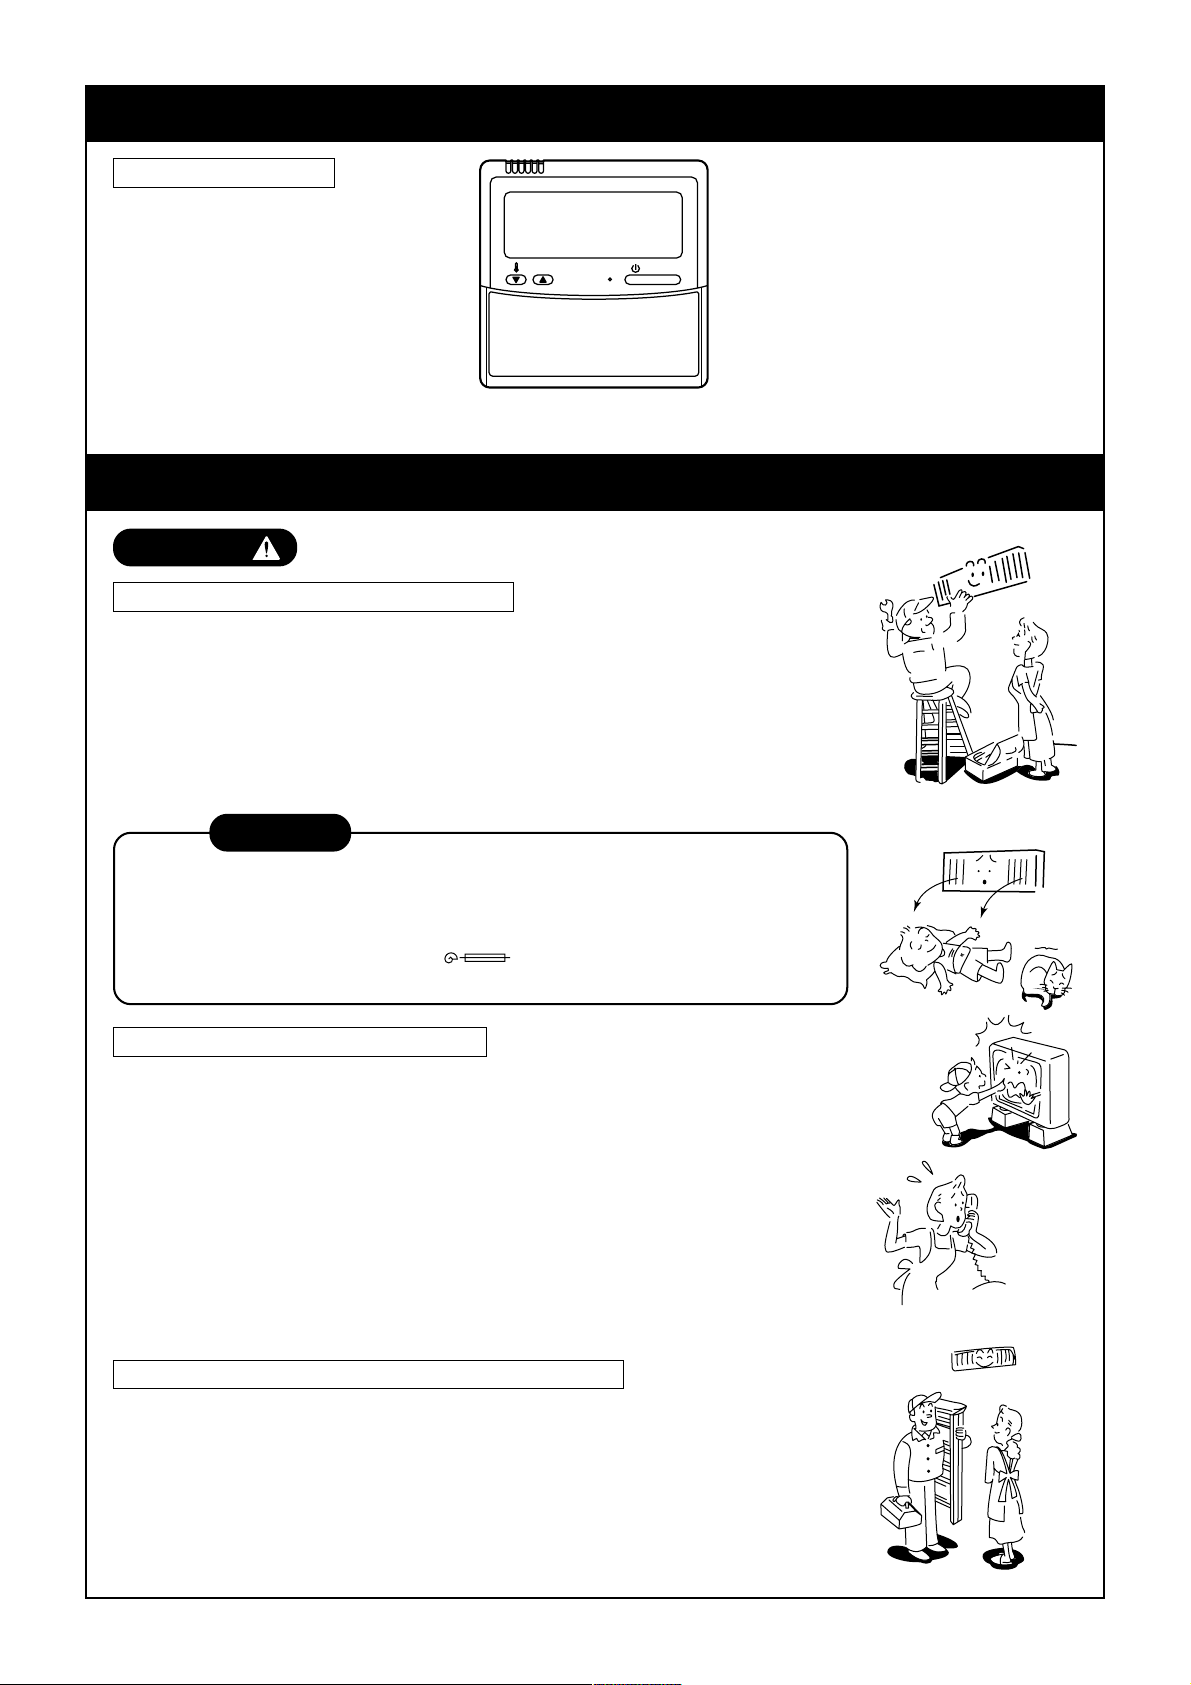
PRECAUTIONS FOR SAFETY
WARNING
WARNINGS ABOUT INSTALLATION
• Make sure to ask the qualified installation professional in electric work to install
the air conditioner.
If the air conditioner is inappropriate installed by yourself, it may cause water leak,
electric shock, fire, and so on.
• Be sure to provide grounding.
Do not connect ground wires to gas pipes, water pipes, lightning rods or ground
wires for telephone cables .
CAUTION
TO DISCONNECT THE APPLIANCE FROM THE MAINS SUPPLY
This appliance must be connected to the mains by means of a s witch with a
contact separation of at least 3 mm.
The installation fuse (25A D type ) must be used for the po wer
supply line of this conditioner.
WARNINGS ABOUT OPERATION
• Cleaning of the air filter and other parts of the air filter involves dangerous w ork in
high places, so be sure to hav e a service person do it. Do not attempt it yourself.
The cleaning diagram for the air filter is there for the service person, and not for
the customer.
• Avoid cooling the room too strong or exposing the human body to cool breeze for
a long time as it is bad for the health.
• When you notice something abnormal with the air conditioner (smells like something scorching, poor cooling, etc.), immediately turn off the main switch, the
circuit breaker, from the mains to stop the air conditioner, and contact the dealer .
If the air conditioner is continuously operated with something abnormal, it may
cause machine failure, electric shock, fire, and so on.
WARNINGS ABOUT MOVEMENT AND REPAIR
• Do not move or repair any unit by yourself.
Since there is high voltage inside the unit, you may get electric shock when
removing the cover and main unit.
• Whenever the air conditioner needs repair , make sure to ask the dealer to do it.
If it is repaired imperfectly, it may cause electric shock or fire .
• When moving the air conditioner for re-installing at another place, ask the dealer
to do it. If it is imperfectly installed, it may cause electric shock or fire.
1
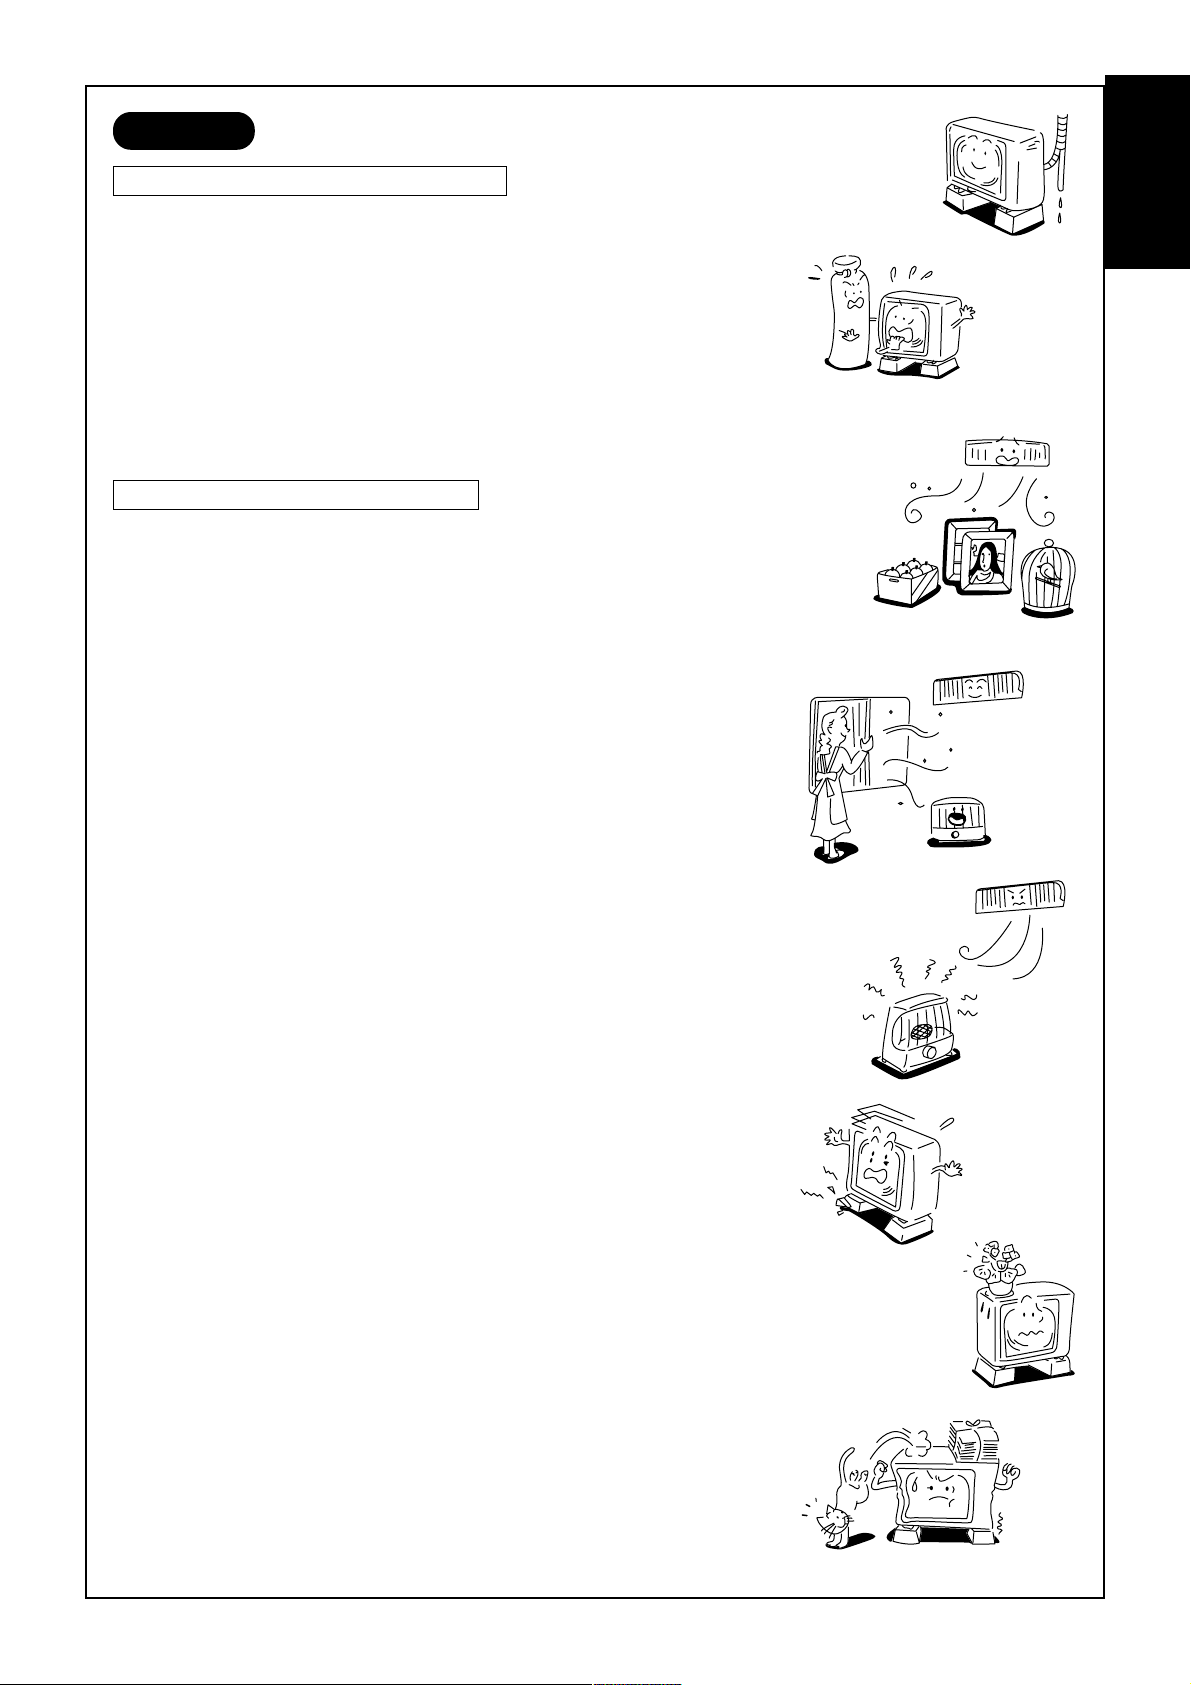
CAUTION
CAUTIONS ABOUT INSTALLATION
• Be sure to confirm the following cautions.
• Certainly lay the drain hose for perfect draining.
Bad drainage may cause flooding in the house and getting furniture
wet.
• Make sure to connect the air conditioner to an exclusive power
supply of the rated voltage, otherwise the unit may break down or
cause a fire.
• Do not install the unit in a place where inflammable gas may leak.
If inflammable gas accumulates around the unit, it ma y cause a fire .
CAUTIONS ABOUT OPERATION
• Carefully read this manual before starting the air conditioner. There
are many important things to keep in mind for daily operation.
• Do not use this air conditioner for special purposes such as preserving food, precision instruments, art objects, breeding animals,
growing potted plants, etc.
• Avoid exposing potted plants and animals to the wind of the air
conditioner, since it badly affects the health and growth of them.
• When the air conditioner is operated with a combustion appliance in
the same place, be careful of ventilation to let fresh air enter the
room.
Poor ventilation causes oxygen shortage.
• Do not place any combustion appliance in a place where it is directly
exposed to the wind of air conditioner, otherwise it may cause
imperfect combustion.
• When the air conditioner is used in a closed room, be careful of
sufficient ventilation of the room. Poor ventilation causes o xygen
shortage.
• Do not touch any switches with wet finger, otherwise you may get an
electric shock.
• If the air conditioner won’t be used for a considerably long time, turn
off the main switch or the circuit breaker, for safety.
• Check the concrete blocks, etc. of the base of the outdoor unit
occasionally.
If the base is left damaged or deteriorated, the unit may topple ov er
and inflict an injury to a person as the worst case.
• Do not put anything on the outdoor unit nor step onto it. If you do so,
it may not only topple ov er the unit but also injure yourself.
• To make the air conditioner operate in its original performance,
operate it within the range of the operating temperature specified in
the instructions.
Otherwise it may cause a malfunction, or water leak from the unit.
• Prevent any liquid from falling into the remote controller. Do not spill
juice, water or any kind of liquid.
ENGLISH
2
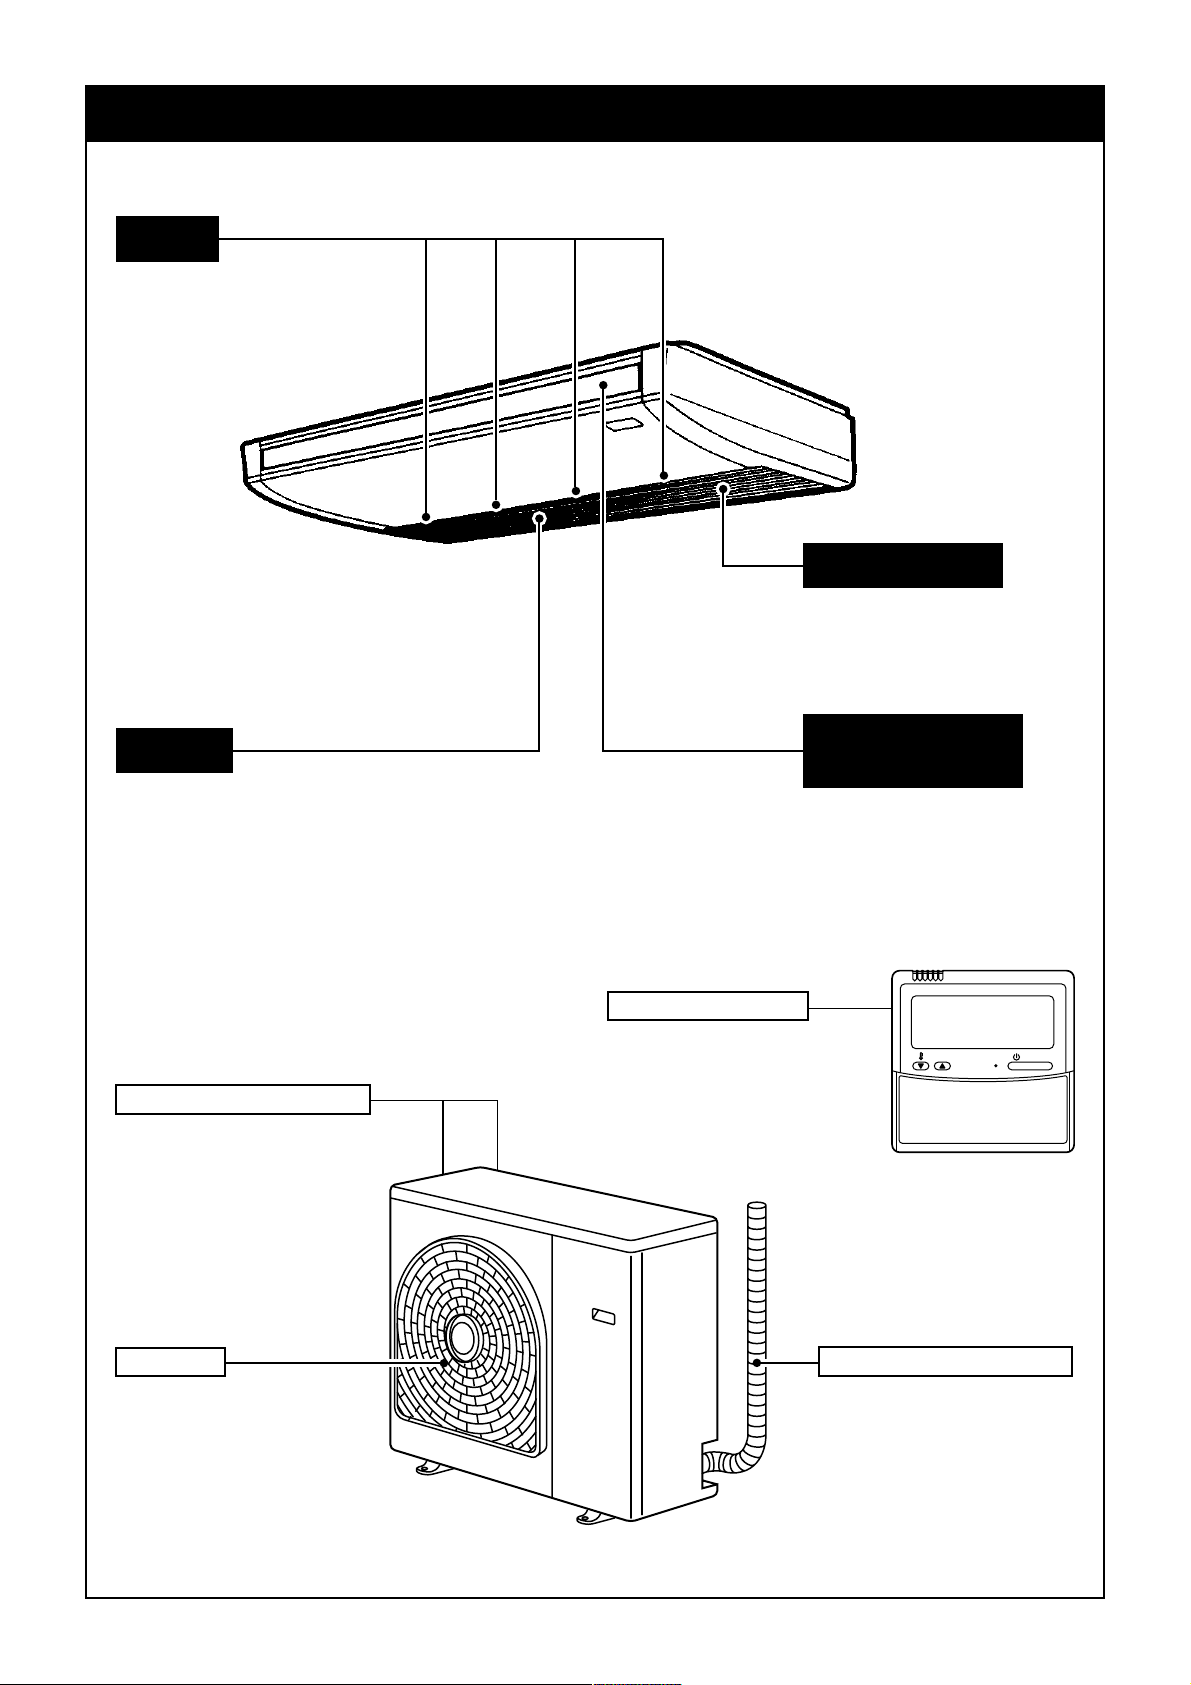
PARTS NAME
Indoor unit
Button
Button to open/close the
suction port
Suction air port
The air in the room is sucked
in from this port.
Air filter
Removes dust or trash.
(Provided on the suction port.)
Outdoor unit
Air inlet (Side and rear)
Remote controller
Discharge flap of
discharge port
Change the direction of the air
to be discharged according to
cool/heat mode.
UNIT No.
R.C. No.
CODE No.
ON / OFF
FAN
MODE
SWING/FIXTIME
VENT
UNITSET CL
FILTER
RESET
DATA
SET
TEST
SETTING
H
TEMP.
TIMER SET
TEST
Air outlet
∗ The image of outdoor unit in the figure is in case Model RAV-SM802AT-E.
3
Pipes and electric wires

PARTS NAME OF REMOTE CONTROLLER
Display section
In the display e xample , all indicators are displayed for the explanation.
In reality only, the selected contents are indicated.
• When turning on the leak breaker at the first time, [SET
DAT A] flashes on the display part of the remote controller.
While this display is flashing, the model is being automatically
confirmed. Accordingly, wait for a while after [SET DATA]
display has disappeared, and then use the remote controller.
78
FILTER
RESET
SET
TEMP.
DATA
TEST
SETTING
UNIT No.
H
TEST
R.C. No.
TIMER SET
CODE No.
Display
section
ON / OFF
FAN
MODE
SWING/FIXTIME
VENT
UNITSET CL
Operation
section
2
1
DATA
3
SET
4
5
H
6
14
1
SET DATA display
Displayed during setup of the timer.
2
Operation mode select display
The selected operation mode is displayed.
3
CHECK display
Displayed while the protective device works or a
trouble occurs.
4
Timer time display
Time of the timer is displayed.
(When a trouble occurs, the check code is displayed.)
5
Timer SETIN setup display
When pushing the Timer SETIN b utton, the
display of the timer is selected in order of [OFF]
→ [OFF] repeat OFF timer → [ON]
→ No display.
6
Filter display
If “FILTER ” is displayed, clean the air filter.
7
TEST run display
Displayed during a test run.
8
Flap position display
Displays flap position.
SETTING
TEST
UNIT No.
R.C. No.
9
CODE No.
11
13
9
SWING display
Displayed during up/down mo v ement of
the flap.
10
Set up temperature display
The selected set up temp. is displayed.
11
Remote controller sensor display
Displayed while the sensor of the remote
controller is used.
12
PRE-HEAT display
Displayed when the heating oper ation
starts or defrost operation is carried out.
While this indication is displayed, the
indoor fan stops or the mode enters in
LOW.
13
No function display
Displayed if there is no function even if
the button is pushed.
14
Air volume select display
The selected air volume mode is displayed.
(AUTO)
(HIGH)
(MED.)
(LOW)
10
12
4

Operation section
ON / OFF
Push each button to select a desired operation.
• The details of the operation needs to be set up once, afterward, the air conditioner can be used by pushing
ON / OFF
button only.
1
7
TEMP.
10
2
FIL TER
TEST
RESET
5
3
1
Air volume select button
Selects the desired air volume mode.
2
Timer set button
TIMER SET button is used when the timer is
set up.
3
Check button
The CHECK button is used for the check
operation. During normal operation, do not
use this button.
4
Fan button
FAN button is used when a fan which is sold on
the market or etc. is connected.
• If “No function ” is displayed on the
remote controller when pushing the FAN
button, a fan is not connected.
TIMER SET
ON / OFF
8
FAN
SWING/FIXTIME
MODE
VENT
9
4
UNITSET CL
6
8
When the button is pushed, the operation
starts, and it stops by pushing the button
again.
When the operation has stopped, the operation
lamp and all the displays disappear.
9
Operation select button
Selects desired operation mode.
10
Set up temperature button
Adjusts the room temperature.
Set the desired set temperature by pushing
button
or .
5
Filter reset button
Resets (Erases) “FILTER ” display.
6
UNIT and AUTO flap button
UNIT
(No function)
SWING/FIX
7
Operation lamp
Lamp is lit during the operation. Lamp is off
when stopped.
Although it flashes when operating the protection device or abnormal time.
OPTION :
Remote controller sensor
Usually the TEMP. sensor of the indoor unit senses
the temperature. The temperature on the surrounding of the remote controller can also be sensed.
For details, contact the dealer from which you have
purchased the air conditioner.
5

CORRECT USAGE
When you use the air conditioner for the first time or when you change the SET DATA value, f ollow the procedure below. From the next time, the operation displayed on the remote controller will start by pushing the
ON / OFF
Preparation
Turn on the main power switch and/or the leakage breaker.
• When the power supply is turned on, a partition line is displayed on the display part of the remote controller.
After the power supply is turned on, the remote controller does not accept an operation for approx. 1 minute,
*
but it is not a failure.
• While using the air conditioner, operate it only with
button only.
REQUIREMENT
switch and the leak breaker.
ON / OFF
button without turning off the main power
TEMP.
ON / OFF
1
4
TIMER SET
FIL TER
TEST
RESET
1
Push
The operation lamp goes on, and the operation starts.
2
Select an operation mode with the
“MODE
One push of the button, and the display
changes in the order shown on the right.
• In HEA T mode, if the room temper ature reaches to the set temperature , the outdoor unit stops and
the air flow becomes LOW and the air v olume decreases .
• In the defrost mode, the fan stops so that cool air is not discharged and PRE-DEF is displayed.
ON / OFF
MODE
button.
” button.
FAN
SWING/FIXTIME
UNITSET CL
MODE
VENT
AUTO HEAT DRY COOL FAN
3
2
3
Select air volume with “
One push of the button, and the display
changes in the order shown on the right.
• When air volume is “AUTO ”, air volume diff ers according to the room temper ature .
• In DRY mode, “AUTO ” is displayed and the air volume is LOW.
• In heating operation, if the room temperature is not heated sufficiently with VOLUME “LOW ” operation, select “MED. ” or “HIGH ” operation.
4
Determine the set up temperature by pushing the “TEMP. ” or “TEMP. ” button.
FAN
” button.
AUTO
Stop
Push
The operation lamp goes off, and the operation stops.
ON / OFF
button.
6
LOW MED. HIGH

AUTOMATIC OPERATION (Auto Changeover)
When you set the air conditioner in mode or switch over from AUTO operation because of some settings
change, it will automatically select either cooling, heating, or fan only operation depending on the indoor
temperature.
TEMP.
ON / OFF
1
3
FIL TER
RESET
TIMER SET
TEST
FAN
SWING/FIXTIME
UNITSET CL
Start
1
2
3
• In case of cooling, start the operation after approx. 1 min ute.
• In case of heating, the operation mode is selected in accordance with the room temperature and operation
• When you select the Auto mode, it is unnecessary to set the fan speed. The FAN speed display will show
• After the heating operation has stopped, FAN operation ma y continue for approx. 30 seconds .
• When the room temperature reaches the set temperature and the outdoor unit stops, the supper low wind is
• If the Auto mode is uncomfortable, you can select the desired conditions manually.
ON / OFF
Push this button to start the air conditioner.
Mode select button (MODE)
Select Auto .
T emperature button
Set the desired temperature.
starts after approximately 3 to 5 minutes.
AUTO and the fan speed will be automatically controlled.
discharged and the air volume decreases e xcessively . During defrost operation, the fan stops so that cool
air is not discharged and “HEAT READY ” is displayed.
button
MODE
VENT
2
NOTE
When restarting the operation after stop
• When restarting the operation immediately after stop, the air conditioner does not operate for approx. 3
minutes to protect the machine.
Stop
Push
Push this button again to stop the air conditioner.
ON / OFF
button.
7

ADJUSTMENT OF WIND DIRECTION
• When the air conditioner stops, the flap (adjustment plate of up/down wind direction) directs downward
automatically.
• When the heating operation is in READY states, the flap (adjustment plate of up/down wind direction) directs
upward. The swinging starts after HEAT READY status cleared, SWING is displayed on the remote
controller even if the heating oper ation is in READY status.
How to set up the wind direction
Push
SWING/FIX
during operation.
1
The wind direction changes for e very push of the button.
In HEAT operation
Direct the flap (adjustment plate of up/down wind direction) downward. If directing
at upward, hot air may not come to the foot.
In COOL/DRY operation
Direct the flap (adjustment plate of up/down wind direction) upward. If directing it
downward, the dew may from on the surface of the air discharge port and may
drop down.
FIL TER
RESET
TEMP.
TIMER SET
TEST
How to start swinging
1
SWING/FIX
Push
, set the flap (adjustment plate of
up/down wind direction) direction to the
lowest position, and then push
SWING/FIX
SWING is displayed and the up/do wn wind
direction is automatically selected.
again.
Initial setup
Initial setup
ON / OFF
FAN
SWING/FIXTIME
UNITSET CL
MODE
VENT
How to stop swinging
1
Push SWING/WIND again while the flap is
swinging.
• The flap stops at a position when you push.
After then, if pushing
tion descends from the highest position.
• In COOL/DRY operation, the flap does not
stop as it directs downward.
If stopping the flap as it directs downward
during swing operation, it stops after moving
to the 3rd position from the highest position.
SWING/FIX
, the wind direc-
In FAN operation
Initial setup
In all modes
Series of
operation
Display when stopping the swing
Fan/Heat
operation
Cool/Dry
operation
8

TIMER OPERATION
A type of timer operation can be selected from the following three types .
OFF timer : The operation stops when the time of timer has reached the set time.
Repeat OFF timer : Every time, the operation stops after the set time has passed.
ON timer : The operation starts when the time of timer has reached the set time.
Timer operation
1
FIL TER
RESET
1
Push TIMER SET button.
• The timer display (type) changes for eve ry
push of the button.
• SET DATA and timer time displays flash.
2
Push
TIME
to select “SET TIME”.
TEMP.
TEST
TIMER SET
3
4
ON / OFF
FAN
SWING/FIXTIME
UNITSET CL
MODE
VENT
2
OFF
(OFF timer) (Repeat OFF timer)
OFF ON
No display
(ON timer)
For every push of button, the set time increases in the unit of 0.5 hr (30 minutes).
The maximum set time is 72.0 hr.
For e very push of button, the set time decreases in the unit of 0.5 hr (30 minutes).
The minimum set time is 0.5 hr.
3
Push SET button.
SETTING
•
display disappears and timer time displa y goes on.
(When ON timer is activated, timer time, ON timer are displayed and other displays disappear.)
Cancel of timer operation
4
Push CL button.
• TIMER display disappears.
NOTICE
• When the operation stops after the timer reached the preset time, the Repeat OFF timer resumes the
operation by pushing
the set time.
ON / OFF
button and stops the operation after the time of the timer has reached
9

HINTS FOR ECONOMICAL OPERATION
Maintain room temperature at comfortable level
Clean air filters
The clogged air filter impairs the performance of the air conditioner.
Never open doors and windows more often than necessary
To keep cool or warm air in the room, nev er open doors and windows more often than necessary.
Window curtains
In cooling, close the curtains to avoid direct sunlight.
In heating, close the curtains to keep the heat in.
Get uniform circulation of room air
Adjust the air flow direction for the even
circulation of room air.
Clean, please.
Gee, chilly
Control
Blows upward
Cool and
dry air
Please close
Air flow adjustment
Warm
air
Blows downward
10

MAINTENANCE
Cleaning of remote controller
CAUTION
• Use a dry cloth to wipe the remote controller.
• A cloth dampened with cold water may be used on the indoor unit if
it is very dirty .
• Never use a damp cloth on the remote controller.
• Do not use a chemically-treated duster for wiping or leave such
materials on the unit for long. It may damage or fade the surface of
the unit.
• Do not use benzine, thinner, polishing powder, or similar solvents for
cleaning. These may cause the plastic surface to crack or deform.
If you do not plan to use the unit for more than 1 month
(1) Operate the fan for 3 to 4 hours to dry inside the unit
• Operate “FAN ONLY” mode with set temperature 30°C.
(2) Stop the air conditioner and turn off the main power switch or the circuit breaker.
Checks before operation
(1) Check that the air filters are installed.
(2) Check that the air outlet or inlet is not blocked.
(3) Turn on the main power switch or the circuit breaker for the main power supply to the air conditioner.
WARNING
Cleaning of the air filter and other parts of the air filter involves dangerous work in high places, so be sure
to have a service person do it.
Do not attempt it yourself.
NOTE
For Air conditioning system which is operated regularly, cleaning and maintenance of the indoor/outdoor
units are strongly recommended.
As a general rule, if an indoor unit is operated for about 8 hours daily, the indoor/outdoor units will need to
be cleaned at least once every 3-MONTH. This cleaning and maintenance shall be carried out by a
qualified person.
Failure to clean the indoor/outdoor units regularly will result in poor performance, icing, water leaking and
ev en compressor failure.
11

AIR CONDITIONER OPERATIONS AND PERFORMANCE
3 minutes protection function
3-minutes protection function prev ents the air conditioner from starting for initial 3 minutes after the main
power switch/circuit breaker is turned on for re-starting the air conditioner.
Power failure
Po w er failure during operation will stop the unit completely .
• To restart the operation, push the START/STOP button on the remote controller.
• Lightning or a wireless car telephone operating nearby may cause the unit to malfunction. Turn off the main
power switch or circuit breaker and then turn them on again. Push the START/STOP b utton on the remote
controller to restart.
Heating characteristics
Preheating operation
The air conditioner will not deliver warm air immediately after it is turned on. Warm air will start to flow out
after approximately 5 minutes when the indoor heat exchanger w armed up .
Warm air control (In heating operation)
When the room temperature reaches the set temperature, the fan speed is automatically reduced to prevent
to blow cold draft. At this time, the outdoor unit will stop.
Defrosting operation
If the outdoor unit is frosted during the heating operation, defrosting starts automatically (for approximately
2 to 10 minutes) to maintain the heating capacity.
• The fans in both indoor and outdoor units will stop during the defrosting operation.
• During the defrosting operation, the defrosted water will be drained from the bottom plate of the outdoor
unit.
Heating capacity
In the heating operation, the heat is absorbed from the outside and brought into the room. This w ay of heating
is called heat pump system. When the outside temperature is too low, it is recommended to use another
heating apparatus in combination with the air conditioner .
Attention to snowfall and freeze on the outdoor unit
• In snowy areas, the air inlet and air outlet of the outdoor unit are often covered with snow or frozen up .
If snow or freeze on the outdoor unit is left as it is, it may cause machine failure or poor warming.
• In cold areas, pay attention to the drain hose so that it perfectly drains water without water remaining inside
for freeze prevention. If water freezes in the dr ain hose or inside the outdoor unit, it may cause machine
failure or poor warming.
Air conditioner operating conditions
For proper perf ormance, operate the air conditioner under the f ollo wing temperature conditions:
Cooling Outdoor temperature : –5°C to 43°C (RAV-SM
operation –15 to 43°C (RAV-SP
Room temperature : 21°C to 32°C (Dry valve temp.), 15°C to 24°C (Wet valve temp.)
CAUTION
Heating Outdoor temperature : –15°C to 15°C (Wet valve temp.)
operation
Room temperature : 15°C to 28°C (Dry valve temp.)
If air conditioner is used outside of the above conditions, safety protection may work.
Room relative humidity – less than 80 %. If the air conditioner operates
in excess of this figure, the surface of the air conditioner may cause dewing.
∗∗∗
∗∗∗
2AT-E)
2AT-E)
12

RE-INSTALLATION
DANGER
Ask the dealer or an installation professional to re-install the air conditioner to a new place or
move it to another place and to observe the following items.
If the air conditioner is inappropriate installed by yourself, it may cause electric shoc k or fire.
Do not install the air conditioner in the following places
• Do not install the air conditioner in any place within 1 m from a TV, stereo, or radio set. If the unit is installed
in such place, noise transmitted from the air conditioner affects the operation of these appliances .
• Do not install the air conditioner near a high frequency appliance (sewing machine or massager for business
use, etc.), otherwise the air conditioner may malfunction.
• Do not install the air conditioner in a humid or oily place, or in a place where steam, soot, or corrosive gas is
generated.
• Do not install the air conditioner in a salty place such as seaside area.
• Do not install the air conditioner in a place where a great deal of machine oil is used.
• Do not install the air conditioner in a place where it is usually exposed to strong wind such as in seaside
area or on the roof or upper floor of a building.
• Do not install the air conditioner in a place where sulfureous gas generated such as in a spa.
• Do not install the air conditioner in a vessel or mobile crane.
Be careful with noise or vibrations
• Do not install the air conditioner in a place where noise by outdoor unit or hot air from its air outlet annoys
your neighbors.
• Install the air conditioner on a solid and stable foundation so that it prev ents tr ansmission of resonating,
operation noise and vibration.
• If one indoor unit is operating, some sound may be audible
from other indoor units that are not operating.
TROUBLES AND CAUSES
CAUTION
If any of the following conditions occur, turn off the main power supply switch and immediately contact the
dealer :
• The operation lamps flash at short intervals (5 Hz) even though you have tried turning off the power
supply and turning on again after 2 or 3 minutes.
• Switch operation does not work properly.
• The main power fuse often blows out, or the circuit breaker is often activated.
• A foreign matter or water fall inside the air conditioner.
• Any other unusual conditions are observed.
13

Before you ask f or servicing or repair s, check the following points.
Inoperative
• The main power switch is turned off.
• The circuit breaker is activated to cut off power supply.
• The main power fuse has blown out.
• Stoppage of electric current.
Does not cool well or heat well
• The air inlet and/or outlet of the outdoor unit is blocked.
• Doors or windows are opened.
• The fan speed is set to low.
• The air conditioner is set in the DRY mode.
• The set temperature is too high. (In cooling operation)
• The set temperature is too low. (In heating operation)
Indoor unit or outdoor unit makes a strange noise.
• When the temperature suddenly changes, the indoor or outdoor unit
occasionally makes a strange noise because of expansion/
contraction of parts or change of refrigerant flow.
The room air is smelly or a bad odor comes from the air conditioner.
• Smells impregnated in the walls‚ carpets, furniture, clothing, or furs, come out.
Outdoor unit is frosted in heating operation.
Water drains from outdoor unit.
• The outdoor unit is sometimes frosted in heating operation.
In that case, the unit automatically performs defrosting
(for 2 to 10 minutes) for increasing the heating efficiency.
• In defrosting operation, both the indoor and outdoor units stop air flow.
• Hiss sound is heard when flow of the refrigerant is changed for defrosting.
• Resultant water of automatic defrosting in heating operation drains from
outdoor unit.
Air flow changes though the FAN button is not set to the AUTO mode .
These are not failures. Recheck
• When the temperature of blown air drops in heating operation,
the air conditioner automatically changes or stops air flow from the
indoor unit not to make persons in the room feel chilly.
• Air flow from the indoor unit is occasionally changed in the cooling operation.
A white mist of chilled air or water is generated from the outdoor unit.
• The indoor unit in cooling operation or the outdoor unit in defrosting
operation occasionally steams.
Calm
14

This product is compliant with Directive 2002/95/EC , and cannot be disposed as unsorted municipal waste.
Ce produit est conforme à la Directive 2002/95/CE et il ne peut pas être jeté avec les ordures ménagères non triées.
Dieses Produkt entspricht der Richtlinie 2002/95/EWG und darf nicht als normaler, unsortierter Hausabfall entsorgt
werden.
Questo prodotto è conforme alla direttiva 2002/95/CE, e per disfarsene non deve essere gettato con la spazzatura della
casa.
Este producto cumple con la Directiva 2002/95/EC, y no se puede desechar como la basur a m unicipal.
Este produto respeita a Directiva 2002/95/EC e não pode ser deitado fora como lixo municipal.
Dit product is in overeenstemming met richtlijn 2002/95/EC en mag niet als huishoudelijk afval worden afgevoerd.
Фп рспъьн бхфь ухµµпсцюнефбй µе фзн ПдзгЯб 2002/95/ЕЕ кбй ден µрпсеЯ нб брпссйцфеЯ щт µз фбойнпµзµЭнп дзµпфйкь
брьвлзфп.
TOSHIBA CARRIER CORPORATION
2 CHOME 12-32, KONAN, MINATOKU, TOKYO, 108-0075, JAPAN
EH99923701
 Loading...