


RAV-SM2242DT-E
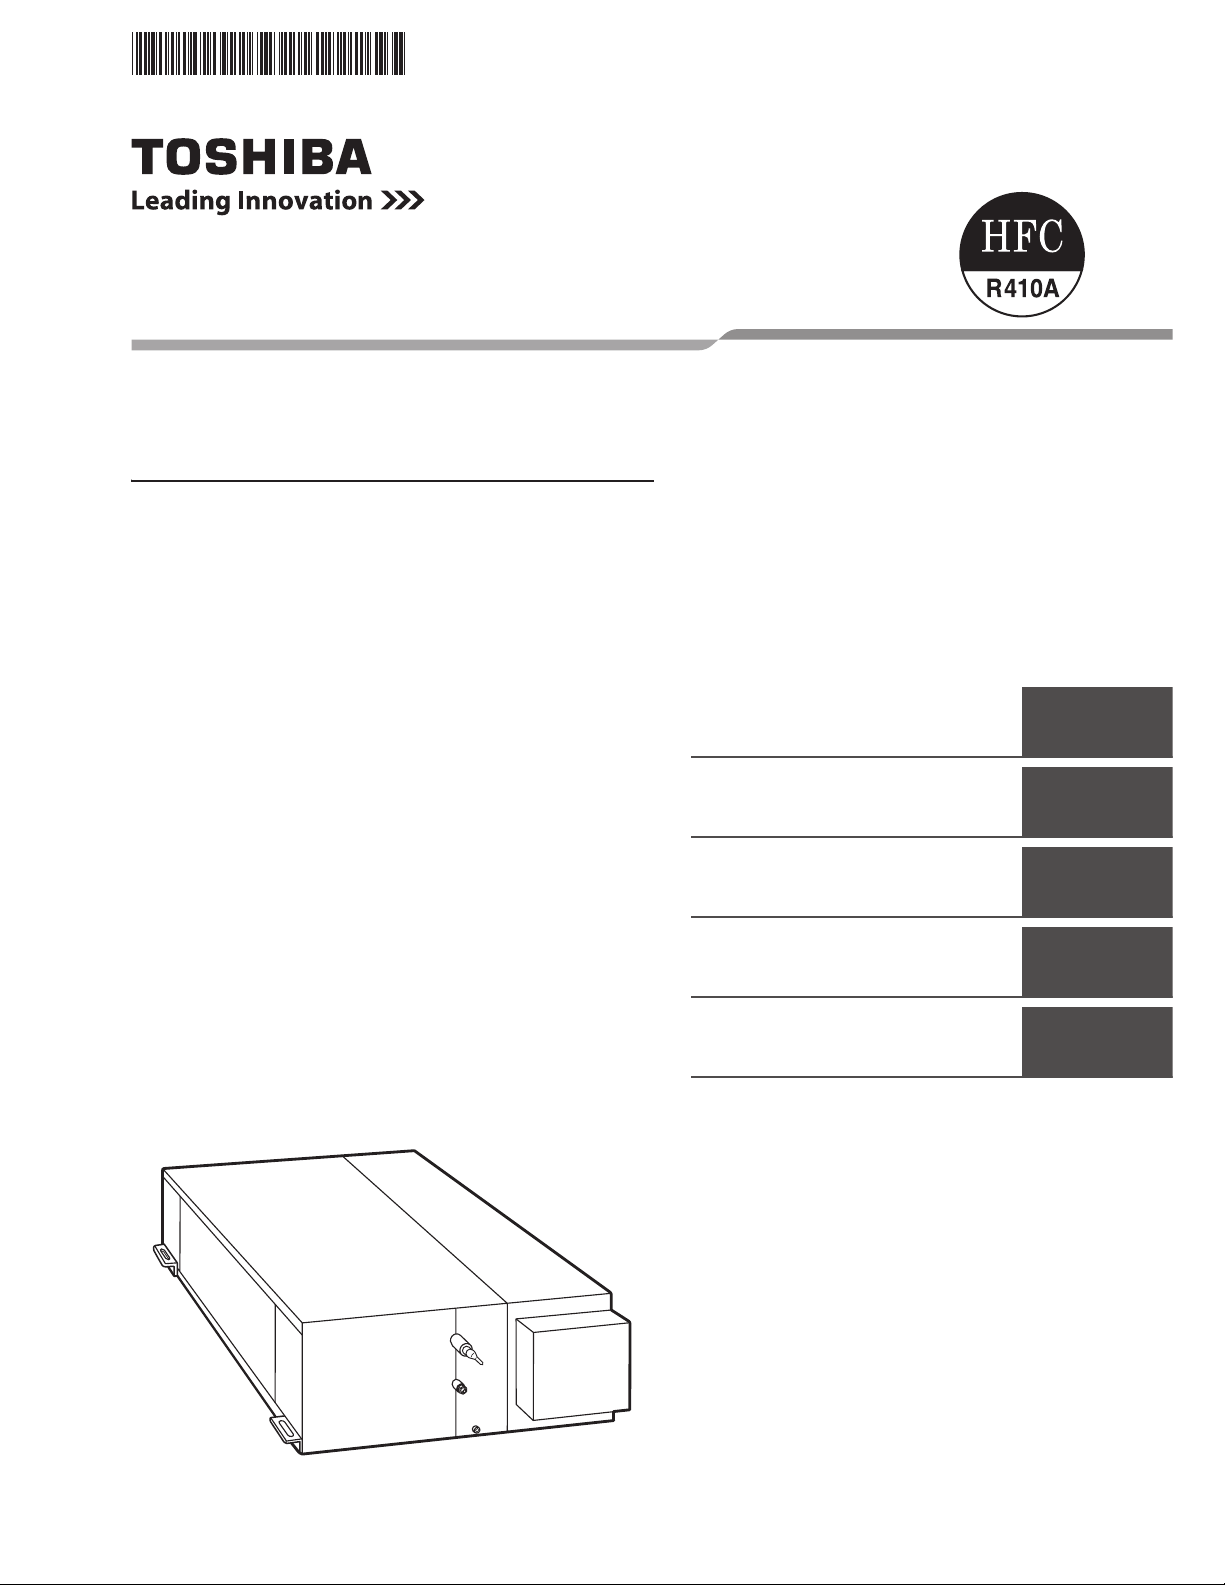
AIR CONDITIONER (SPLIT TYPE)
Indoor Unit
Model name:
Concealed Duct High Static Pressure Type
RAV-SM2242DT-E
RAV-SM2802DT-E
Installation Manual
Installation Manual
Air conditioner (Split type) 1
English
Manuel d’installation
Climatiseur (Type split) 41
Français
Installationsanleitung
Klimagerät (Split-typ) 81
Deutsch
Manuale di installazione
Condizionatore d’aria (Tipo split)121
Italiano
Manual de instalación
Aire acondicionado (Tipo split) 161
Español

– 1 –
Concealed Duct High Static Pressure
Installation Manual
Original instruction
Contents
1 PRECAUTIONS FOR SAFETY. . . . . . . . . . . . . . . . . . . . . . . . . . . . . . . . . . . . . . . . . . . . 5
2 ACCESSORY PARTS. . . . . . . . . . . . . . . . . . . . . . . . . . . . . . . . . . . . . . . . . . . . . . . . . . . 8
3 SELECTION OF INSTALLATION PLACE . . . . . . . . . . . . . . . . . . . . . . . . . . . . . . . . . . . 9
4 INSTALLATION . . . . . . . . . . . . . . . . . . . . . . . . . . . . . . . . . . . . . . . . . . . . . . . . . . . . . . 11
5 FAN CHARACTERISTICS . . . . . . . . . . . . . . . . . . . . . . . . . . . . . . . . . . . . . . . . . . . . . . 15
6 DRAIN PIPING WORK . . . . . . . . . . . . . . . . . . . . . . . . . . . . . . . . . . . . . . . . . . . . . . . . . 18
7 REFRIGERANT PIPING AND EVACUATING . . . . . . . . . . . . . . . . . . . . . . . . . . . . . . . 22
8 ELECTRICAL CONNECTION. . . . . . . . . . . . . . . . . . . . . . . . . . . . . . . . . . . . . . . . . . . . 25
9 APPLICABLE CONTROLS. . . . . . . . . . . . . . . . . . . . . . . . . . . . . . . . . . . . . . . . . . . . . . 28
10 TEST RUN. . . . . . . . . . . . . . . . . . . . . . . . . . . . . . . . . . . . . . . . . . . . . . . . . . . . . . . . . . . 35
11 MAINTENANCE . . . . . . . . . . . . . . . . . . . . . . . . . . . . . . . . . . . . . . . . . . . . . . . . . . . . . . 36
12 TROUBLESHOOTING . . . . . . . . . . . . . . . . . . . . . . . . . . . . . . . . . . . . . . . . . . . . . . . . . 38
ADOPTION OF NEW REFRIGERANT
This Air Conditioner uses R410A an environmentally friendly refrigerant.
1-EN
– 2 –
Concealed Duct High Static Pressure
Installation Manual
EN
Thank you for purchasing this Toshiba air conditioner.
Please read carefully through these instructions that contain important information which complies with the “Machinery”
Directive (Directive 2006/42/EC), and ensure that you understand them.
Some of the details provided in these instructions differ from the Installation Manual supplied with your product, and the
instructions provided here take precedence.
After reading these instructions, be sure to keep them in a safe place together with the Owner’s Manual and Installation Manual
supplied with your product.
Generic Denomination: Air Conditioner
Definition of Qualified Installer or Qualified Service Person
The air conditioner must be installed, maintained, repaired and removed by a qualified installer or qualified service person.
When any of these jobs is to be done, ask a qualified installer or qualified service person to do them for you.
A qualified installer or qualified service person is an agent who has the qualifications and knowledge described in the table
below.
Agent Qualifications and knowledge which the agent must have
Qualified installer
• The qualified installer is a person who installs, maintains, relocates and removes the air conditioners made
by Toshiba Carrier Corporation. He or she has been trained to install, maintain, relocate and remove the air
conditioners made by Toshiba Carrier Corporation or, alternatively, he or she has been instructed in such
operations by an individual or individuals who have been trained and is thus thoroughly acquainted with the
knowledge related to these operations.
• The qualified installer who is allowed to do the electrical work involved in installation, relocation and removal
has the qualifications pertaining to this electrical work as stipulated by the local laws and regulations, and
he or she is a person who has been trained in matters relating to electrical work on the air conditioners made
by Toshiba Carrier Corporation or, alternatively, he or she has been instructed in such matters by an
individual or individuals who have been trained and is thus thoroughly acquainted with the knowledge
related to this work.
• The qualified installer who is allowed to do the refrigerant handling and piping work involved in installation,
relocation and removal has the qualifications pertaining to this refrigerant handling and piping work as
stipulated by the local laws and regulations, and he or she is a person who has been trained in matters
relating to refrigerant handling and piping work on the air conditioners made by Toshiba Carrier Corporation
or, alternatively, he or she has been instructed in such matters by an individual or individuals who have been
trained and is thus thoroughly acquainted with the knowledge related to this work.
• The qualified installer who is allowed to work at heights has been trained in matters relating to working at
heights with the air conditioners made by Toshiba Carrier Corporation or, alternatively, he or she has been
instructed in such matters by an individual or individuals who have been trained and is thus thoroughly
acquainted with the knowledge related to this work.
Qualified service
person
• The qualified service person is a person who installs, repairs, maintains, relocates and removes the air
conditioners made by Toshiba Carrier Corporation. He or she has been trained to install, repair, maintain,
relocate and remove the air conditioners made by Toshiba Carrier Corporation or, alternatively, he or she
has been instructed in such operations by an individual or individuals who have been trained and is thus
thoroughly acquainted with the knowledge related to these operations.
• The qualified service person who is allowed to do the electrical work involved in installation, repair,
relocation and removal has the qualifications pertaining to this electrical work as stipulated by the local laws
and regulations, and he or she is a person who has been trained in matters relating to electrical work on the
air conditioners made by Toshiba Carrier Corporation or, alternatively, he or she has been instructed in such
matters by an individual or individuals who have been trained and is thus thoroughly acquainted with the
knowledge related to this work.
• The qualified service person who is allowed to do the refrigerant handling and piping work involved in
installation, repair, relocation and removal has the qualifications pertaining to this refrigerant handling and
piping work as stipulated by the local laws and regulations, and he or she is a person who has been trained
in matters relating to refrigerant handling and piping work on the air conditioners made by Toshiba Carrier
Corporation or, alternatively, he or she has been instructed in such matters by an individual or individuals
who have been trained and is thus thoroughly acquainted with the knowledge related to this work.
• The qualified service person who is allowed to work at heights has been trained in matters relating to
working at heights with the air conditioners made by Toshiba Carrier Corporation or, alternatively, he or she
has been instructed in such matters by an individual or individuals who have been trained and is thus
thoroughly acquainted with the knowledge related to this work.
2-EN
– 3 –
Concealed Duct High Static Pressure
Installation Manual
Definition of Protective Gear
When the air conditioner is to be transported, installed, maintained, repaired or removed, wear protective gloves and ‘safety’
work clothing.
In addition to such normal protective gear, wear the protective gear described below when undertaking the special work detailed
in the table below.
Failure to wear the proper protective gear is dangerous because you will be more susceptible to injury, burns, electric shocks
and other injuries.
Work undertaken Protective gear worn
All types of work
Protective gloves
‘Safety’ working clothing
Electrical-related
work
Gloves to provide protection for electricians and from heat
Insulating shoes
Clothing to provide protection from electric shock
Work done at heights
(50 cm or more)
Helmets for use in industry
Transportation of
heavy objects
Shoes with additional protective toe cap
Repair of outdoor unit Gloves to provide protection for electricians and from heat
3-EN
– 4 –
Concealed Duct High Static Pressure
Installation Manual
EN
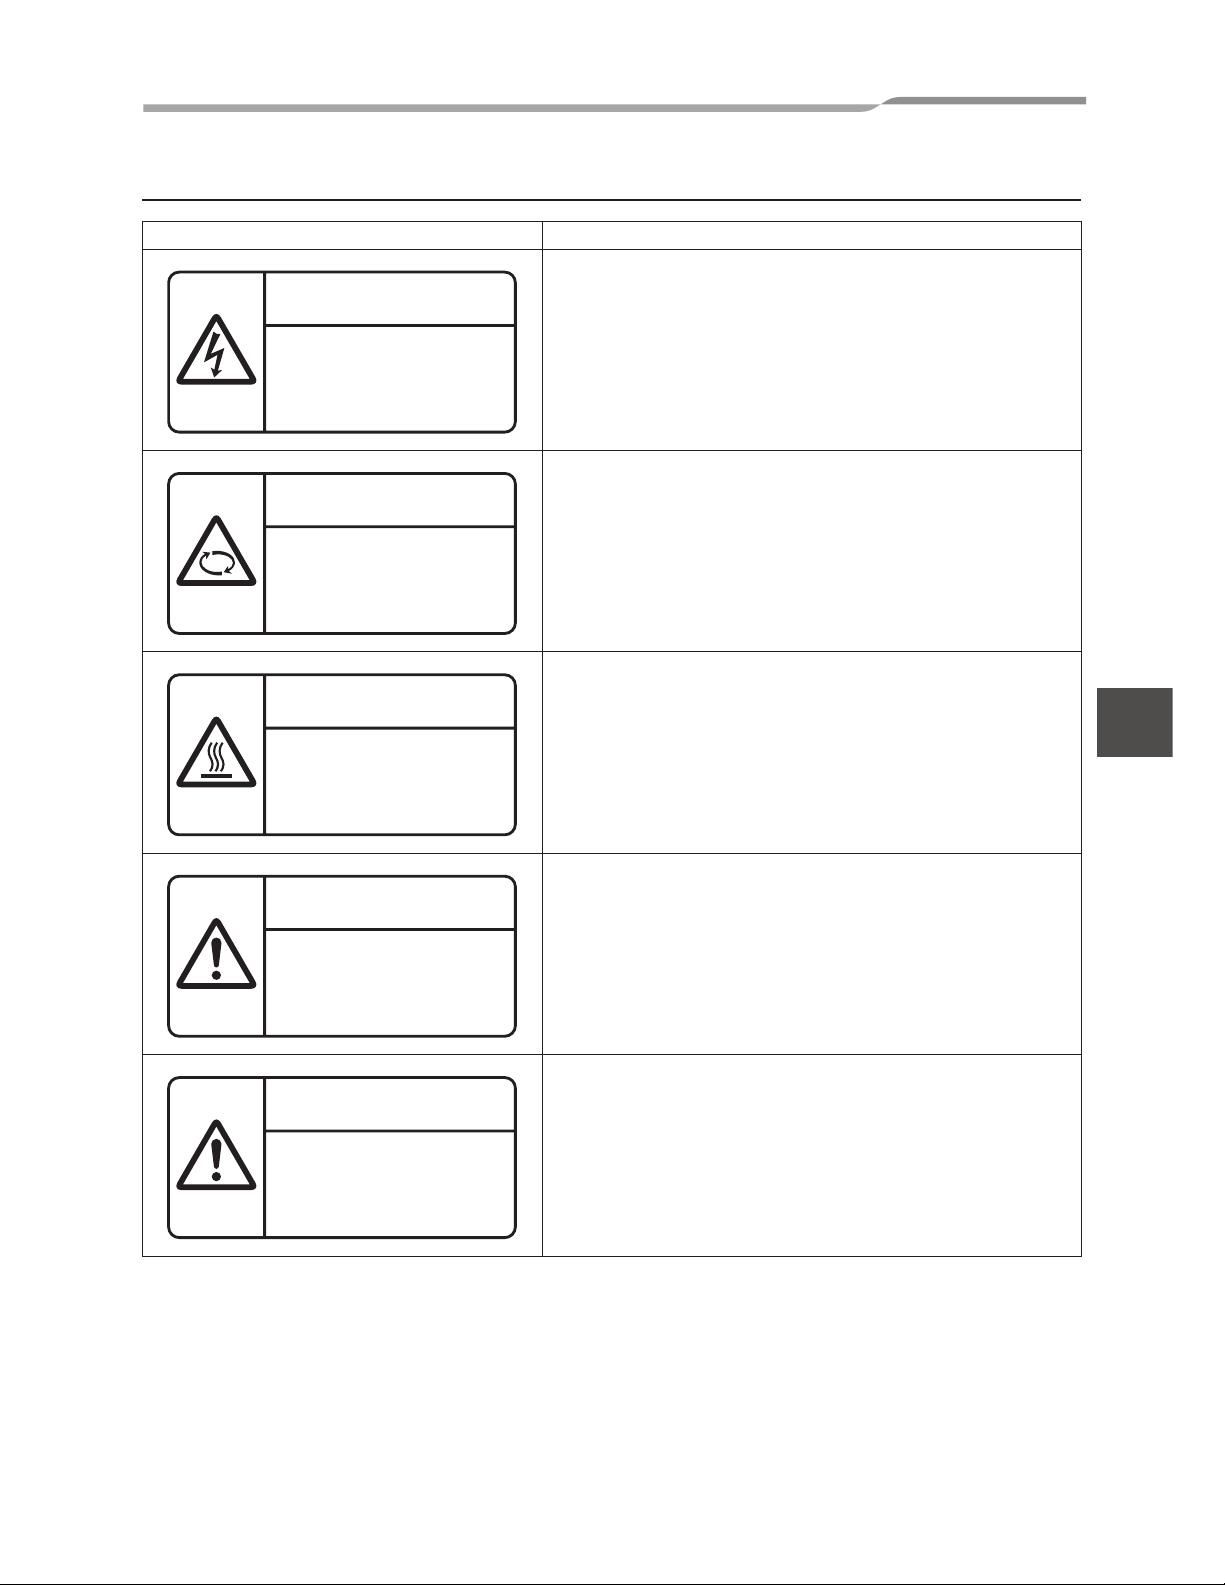
! Warning Indications on the Air Conditioner Unit
Warning indication Description
WARNING
ELECTRICAL SHOCK HAZARD
Disconnect all remote electric power supplies before servicing.
WARNING
Moving parts.
Do not operate unit with grille removed.
Stop the unit before the servicing.
CAUTION
High temperature parts.
You might get burned when removing this panel.
CAUTION
Do not touch the aluminium fins of the unit.
Doing so may result in injury.
CAUTION
BURST HAZARD
Open the service valves before the operation, otherwise there might be the
burst.
WARNING
ELECTRICAL SHOCK HAZARD
Disconnect all remote
electric power supplies
before servicing.
WARNING
Moving parts.
Do not operate unit with grille
removed.
Stop the unit before the servicing.
CAUTION
High temperature parts.
You might get burned
when removing this panel.
CAUTION
Do not touch the aluminum
fins of the unit.
Doing so may result in injury.
CAUTION
BURST HAZARD
Open the service valves before
the operation, otherwise there
might be the burst.
4-EN
– 5 –
Concealed Duct High Static Pressure
Installation Manual
1 PRECAUTIONS FOR SAFETY
WARNING
General
• Before starting to install the air conditioner, read carefully through the Installation Manual, and follow its instructions to install
the air conditioner.
• Only a qualified installer(*1) or qualified service person(*1) is allowed to install the air conditioner. If the air conditioner is
installed by an unqualified individual, a fire, electric shocks, injury, water leakage, noise and/or vibration may result.
• Before opening the intake grille of the indoor unit or service panel of the outdoor unit, set the circuit breaker to the OFF
position. Failure to set the circuit breaker to the OFF position may result in electric shocks through contact with the interior
parts. Only a qualified installer(*1) or qualified service person(*1) is allowed to remove the intake grille of the indoor unit or
service panel of the outdoor unit and do the work required.
• Before carrying out the installation, maintenance, repair or removal work, be sure to set the circuit breaker to the OFF
position. Otherwise, electric shocks may result.
• Place a “Work in progress” sign near the circuit breaker while the installation, maintenance, repair or removal work is being
carried out. There is a danger of electric shocks if the circuit breaker is set to ON by mistake.
• Only a qualified installer(*1) or qualified service person(*1) is allowed to undertake work at heights using a stand of 50 cm
or more or to remove the intake grille of the indoor unit to undertake work.
• Wear protective gloves and safety work clothing during installation, servicing and removal.
• Do not touch the aluminium fin of the outdoor unit. You may injure yourself if you do so. If the fin must be touched for some
reason, first put on protective gloves and safety work clothing, and then proceed.
• Do not climb onto or place objects on top of the outdoor unit. You may fall or the objects may fall off of the outdoor unit and
result in injury.
• When working at heights, use a ladder which complies with the ISO 14122 standard, and follow the procedure in the ladder’s
instructions. Also wear a helmet for use in industry as protective gear to undertake the work.
• When cleaning the filter or other parts of the outdoor unit, set the circuit breaker to OFF without fail, and place a “Work in
progress” sign near the circuit breaker before proceeding with the work.
• When working at heights, put a sign in place so that no-one will approach the work location, before proceeding with the
work. Parts and other objects may fall from above, possibly injuring a person below.
• The refrigerant used by this air conditioner is the R410A.
• You shall ensure that the air conditioner is transported in stable condition.
• Do not move or repair any unit by yourself. There is high voltage inside the unit. You may get electric shock when removing
the cover and main unit.
Selection of installation location
• If you install the unit in a small room, take appropriate measures to prevent the refrigerant from exceeding the limit
concentration even if it leaks. Consult the dealer from whom you purchased the air conditioner when you implement the
measures. Accumulation of highly concentrated refrigerant may cause an oxygen deficiency accident.
• Do not install the air conditioner in a location that may be subject to a risk of exposure to a combustible gas. If a combustible
gas leaks and becomes concentrated around the unit, a fire may occur.
• When transporting the air conditioner, wear shoes with additional protective toe caps.
• When transporting the air conditioner, do not take hold of the bands around the packing carton. You may injure yourself if
the bands should break.
• Install the indoor unit at least 2.5 m above the floor level since otherwise the users may injure themselves or receive electric
shocks if they poke their fingers or other objects into the indoor unit while the air conditioner is running.
• Do not place any combustion appliance in a place where it is directly exposed to the wind of air conditioner, otherwise it may
cause imperfect combustion.
Installation
• When the indoor unit is to be suspended, the designated hanging bolts (M10 or W3/8) and nuts (M10 or W3/8) must be used.
• Install the air conditioner at enough strong places to withstand the weight of the unit. If the strength is not enough, the unit
may fall down resulting in injury.
• Follow the instructions in the Installation Manual to install the air conditioner. Failure to follow these instructions may cause
the product to fall down or topple over or give rise to noise, vibration, water leakage, etc.
• The designated bolts (M10, M12) and nuts (M10, M12) for securing the outdoor unit must be used when installing the unit.
• Install the outdoor unit property in a location that is durable enough to support the weight of the outdoor unit. Insufficient
durability may cause the outdoor unit to fall, which may result in injury.
5-EN

– 6 –
Concealed Duct High Static Pressure
Installation Manual
EN
Refrigerant piping
• Install the refrigerant pipe securely during the installation work before operating the air conditioner. If the compressor is
operated with the valve open and without refrigerant pipe, the compressor sucks air and the refrigeration cycles is over
pressurized, which may cause a injury.
• Tighten the flare nut with a torque wrench in the specified manner. Excessive tighten of the flare nut may cause a crack in
the flare nut after a long period, which may result in refrigerant leakage.
• After the installation work, confirm that refrigerant gas does not leak. If refrigerant gas leaks into the room and flows near a
fire source, such as a cooking range, noxious gas may be generated.
• When the air conditioner has been installed or relocated, follow the instructions in the Installation Manual and purge the air
completely so that no gases other than the refrigerant will be mixed in the refrigerating cycle. Failure to purge the air
completely may cause the air conditioner to malfunction.
• Nitrogen gas must be used for the airtight test.
• The charge hose must be connected in such a way that it is not slack.
• If refrigerant gas has leaked during the installation work, ventilate the room immediately. If the leaked refrigerant gas comes
in contact with fire, noxious gas may be generated.
Electrical wiring
• Only a qualified installer(*1) or qualified service person(*1) is allowed to carry out the electrical work of the air conditioner.
Under no circumstances must this work be done by an unqualified individual since failure to carry out the work properly may
result in electric shocks and/or electrical leaks.
• When connecting the electrical wires, repairing the electrical parts or undertaking other electrical jobs, wear gloves to
provide protection for electricians and from heat, insulating shoes and clothing to provide protection from electric shocks.
Failure to wear this protective gear may result in electric shocks.
• Use wiring that meets the specifications in the Installation Manual and the stipulations in the local regulations and laws. Use
of wiring which does not meet the specifications may give rise to electric shocks, electrical leakage, smoking and/or a fire.
• Be sure to connect earth wire. (Grounding work)
Incomplete grounding causes an electric shock.
• Do not connect ground wires to gas pipes, water pipes, and lightning rods or ground wires for telephone wires.
• After completing the repair or relocation work, check that the ground wires are connected properly.
• Install a circuit breaker that meets the specifications in the installation manual and the stipulations in the local regulations
and laws.
• Install the circuit breaker where it can be easily accessed by the agent.
• When installing the circuit breaker outdoors, install one which is designed to be used outdoors.
• Under no circumstances must the power cable be extended. Connection trouble in the places where the cable is extended
may give rise to smoking and/or a fire.
• Electrical wiring work shall be conducted according to law and regulation in the community and installation manual.
Failure to do so may result in electrocution or short circuit.
Test run
• Before operating the air conditioner after having completed the work, check that the electrical parts box cover of the indoor
unit and service panel of the outdoor unit are closed, and set the circuit breaker to the ON position. You may receive an
electric shock if the power is turned on without first conducting these checks.
• When you have noticed that some kind of trouble (such as when an error display has appeared, there is a smell of burning,
abnormal sounds are heard, the air conditioner fails to cool or heat or water is leaking) has occurred in the air conditioner,
do not touch the air conditioner yourself but set the circuit breaker to the OFF position, and contact a qualified service
person. Take steps to ensure that the power will not be turned on (by marking “out of service” near the circuit breaker, for
instance) until qualified service person arrives. Continuing to use the air conditioner in the trouble status may cause
mechanical problems to escalate or result in electric shocks, etc.
• After the work has finished, be sure to use an insulation tester set (500V Megger) to check the resistance is 2 M! or more
between the charge section and the non-charge metal section (Earth section). If the resistance value is low, a disaster such
as a leak or electric shock is caused at user’s side.
• Upon completion of the installation work, check for refrigerant leaks and check the insulation resistance and water drainage.
Then conduct a test run to check that the air conditioner is operating properly.
Explanations given to user
• Upon completion of the installation work, tell the user where the circuit breaker is located. If the user does not know where
the circuit breaker is, he or she will not be able to turn it off in the event that trouble has occurred in the air conditioner.
• If you have discovered that the fan grille is damaged, do not approach the outdoor unit but set the circuit breaker to the OFF
position, and contact a qualified service person(*1) to have the repairs done. Do not set the circuit breaker to the ON position
until the repairs are completed.
• After the installation work, follow the Owner’s Manual to explain to the customer how to use and maintain the unit.
Relocation
• Only a qualified installer(*1) or qualified service person(*1) is allowed to relocate the air conditioner. It is dangerous for the
air conditioner to be relocated by an unqualified individual since a fire, electric shocks, injury, water leakage, noise and/or
vibration may result.
• When carrying out the pump-down work shut down the compressor before disconnecting the refrigerant pipe. Disconnecting
the refrigerant pipe with the service valve left open and the compressor still operating will cause air, etc. to be sucked in,
raising the pressure inside the refrigeration cycle to an abnormally high level, and possibly resulting in rupture, injury or other
trouble.
(*1) Refer to the “Definition of Qualified Installer or Qualified Service Person.”
6-EN
– 7 –
Concealed Duct High Static Pressure
Installation Manual
CAUTION
New Refrigerant Air Conditioner Installation
• THIS AIR CONDITIONER ADOPTS THE NEW HFC REFRIGERANT (R410A) WHICH DOES NOT DESTROY OZONE
LAYER.
• The characteristics of R410A refrigerant are; easy to absorb water, oxidizing membrane or oil, and its pressure is approx.
1.6 times higher than that of refrigerant R22. Accompanied with the new refrigerant, refrigerating oil has also been changed.
Therefore, during installation work, be sure that water, dust, former refrigerant, or refrigerating oil does not enter the
refrigerating cycle.
• To prevent charging an incorrect refrigerant and refrigerating oil, the sizes of connecting sections of charging port of the
main unit and installation tools are changed from those for the conventional refrigerant.
• Accordingly the exclusive tools are required for the new refrigerant (R410A).
• For connecting pipes, use new and clean piping designed for R410A, and please care so that water or dust does not enter.
To Disconnect the Appliance from Main Power Supply.
• This appliance must be connected to the main power supply by means of a switch with a contact separation of at least 3 mm.
• The installation fuse must be used for the power supply line of this conditioner.
7-EN
– 8 –
Concealed Duct High Static Pressure
Installation Manual
EN
2 ACCESSORY PARTS
Part name Q’ty Shape Usage
Installation Manual
2 This manual
(Be sure to hand over to customers)
(For other languages that do not appear in this Installation Manual,
please refer to the enclosed CD-R.)
Owner’s Manual
1
(Be sure to hand over to customers)
Heat insulator
1
For heat insulation of Gas pipe connecting section
1
For heat insulation of Liquid pipe connecting section
Joint (Ø22.2 – Ø28.6 mm)
1
For connecting the gas side pipe
8-EN

– 9 –
Concealed Duct High Static Pressure
Installation Manual
3 SELECTION OF INSTALLATION PLACE
Upon approval of the customer, install the air conditioner in a place that satisfies the following
conditions.
• Place where the unit can be installed horizontally.
• Place where a sufficient servicing space can be ensured for safety maintenance and check.
• Place where drained water will not cause any problem.
Avoid installing in the following places.
• Place exposed to air with high salt content (seaside area), or place exposed to large quantities of sulfide gas (hot spring).
(Should the unit be used in these places, special protective measures are needed.)
• A restaurant kitchen where a lot of oil is used or place near machines in a factory (Oil adhering to the heat exchanger and
resin part (fan) in the indoor unit may reduce the performance, generate mist or dew drop, or deform or damage resin parts.)
• Place where organic solvent is used nearby.
• Place close to a machine generating high frequency.
• Place where the discharged air blows directly into the window of the neighbour house. (Outdoor unit)
• Place where noise of the outdoor unit is easily transmitted.
(When install the outdoor unit on the boundary with the neighbour, pay due attention to the level of noise.)
• Place with poor ventilation. (Before air duct installation, check whether value of air volume, static pressure and duct
resistance are correct.)
• Do not use the air conditioner for special purposes such as preserving food, precision instruments, or art objects, or where
breeding animals or growing plants are kept. (This may degrade the quality of preserved materials.)
• Place where any of high-frequency appliances (including inverter devices, private power generators, medical equipment, and
communication equipment) and inverter-type fluorescent light is installed.
(A malfunction of the air conditioner, abnormal control, or problems due to noise to such appliances/equipment may occur.)
• When the wireless remote controller is used in a room equipped with an inverter-type fluorescent light or at a place exposed
to direct sunlight, signals from the remote controller may not be received correctly.
• Place where organic solvent is used.
• Place where special spray is used frequently.
! Installation under high-humidity atmosphere
In some cases including the rainy season, especially inside of the ceiling may become high-humidity atmosphere (dew-point
temperature: 23°C or higher).
1. Installation to inside of the ceiling with tiles on the roof
2. Installation to inside of the ceiling with slated roof
3. Installation to a place where inside of the ceiling is used for pathway to intake the fresh air
• In the above cases, additionally attach the heat insulator to all positions of the air conditioner, which come to contact with the
high-humidity atmosphere. In this case, arrange the side plate (Check port) so that it is easily removed.
• Apply also a sufficient heat insulation to the duct and connecting part of the duct.
[Reference]
Condensation test conditions
Indoor side:
27°C dry bulb temperature
24°C wet bulb temperature
Air volume: Low air volume, operation time 4 hours
9-EN

– 10 –
Concealed Duct High Static Pressure
Installation Manual
EN
! Installation space (Unit: mm)
Reserve space required for maintenance the indoor unit and service work.
REQUIREMENT
1. Attach the optional accessories (drain-up kit etc.) on the unit before installing the unit. Also, set the check port with carrying
in port to the side surface of the unit except air inlet panel.
2. Prepare the check port with carrying in port hole with the size of 600x600mm.
! Filter cleaning sign term setting
The lighting term setup of the filter sign (Notification of filter cleaning) of the remote controller can be changed according to the
condition of installation.
For setup method, refer to “Filter sign setting” and “To secure better effect of heating” in the Applicable controls of this Manual.
200 or more Servicing space
Air flow direction
1000 or more
Concealed duct high
static pressure
Check port with carrying
in port 600x600
Air flow direction
Concealed
duct high static
pressure
Air outlet chamber
Filter chamber
Air inlet chamber
Duct hose
Duct hose
Duct hose
<Installation example>
10-EN
– 11 –
Concealed Duct High Static Pressure
Installation Manual
4 INSTALLATION
WARNING
• Install the air conditioner certainly to sufficiently withstand the weight.
• If the strength is insufficient, the unit may fall down resulting in human injury.
• Perform a specified installation work to guard against strong wind or earthquake.
• An incomplete installation can cause accidents by the units falling and dropping.
REQUIREMENT
Strictly comply with the following rules to prevent damage of the indoor units and human injury.
• Do not put a heavy article on the indoor unit. (Even units are packaged)
• Carry in the indoor unit as it is packaged if possible. If carrying in the indoor unit unpacked by necessity, be sure to use
buffering cloth, etc. to not damage the unit.
• To move the indoor unit, hold the hooking metals (4 positions) only.
Do not apply force to the other parts (refrigerant pipe, drain pan, foamed parts, or resin parts, etc.).
• Hanging bolt pitch of air inlet chamber side is different (centre position), make sure not to make mistake to install the setting
direction.
• Carry the package by two or more persons, and do not bundle it with plastic band at positions other than specified.
! External Dimensions (Unit: mm)
1328
1380
100
200 150
31
45
470
624
1250
698
22
46
65
1288 (Hanging bolt pitch)
4-M10 hanging bolt
(Local procure)
Electrical control box
1260 (Hanging bolt pitch)
Refrigerant pipe connecting port
(Liquid side Ø12.7 Flared)
Drain pipe
connecting port
Refrigerant pipe connecting port
(Gas side Ø22.2 Brazed)
11-EN
– 12 –
Concealed Duct High Static Pressure
Installation Manual
EN
! Installation of hanging bolt
• Consider the piping/wiring after the unit is hung when
determining the location of the indoor unit installation and
orientation.
• After the location of the indoor unit installation has been
determined, install hanging bolts.
• For the dimensions of the hanging bolt pitches, refer to the
external view.
• When a ceiling already exists, lay the drain pipe,
refrigerant pipe, system interconnection wires, and remote
controller wires to their connection locations before
hanging the indoor unit.
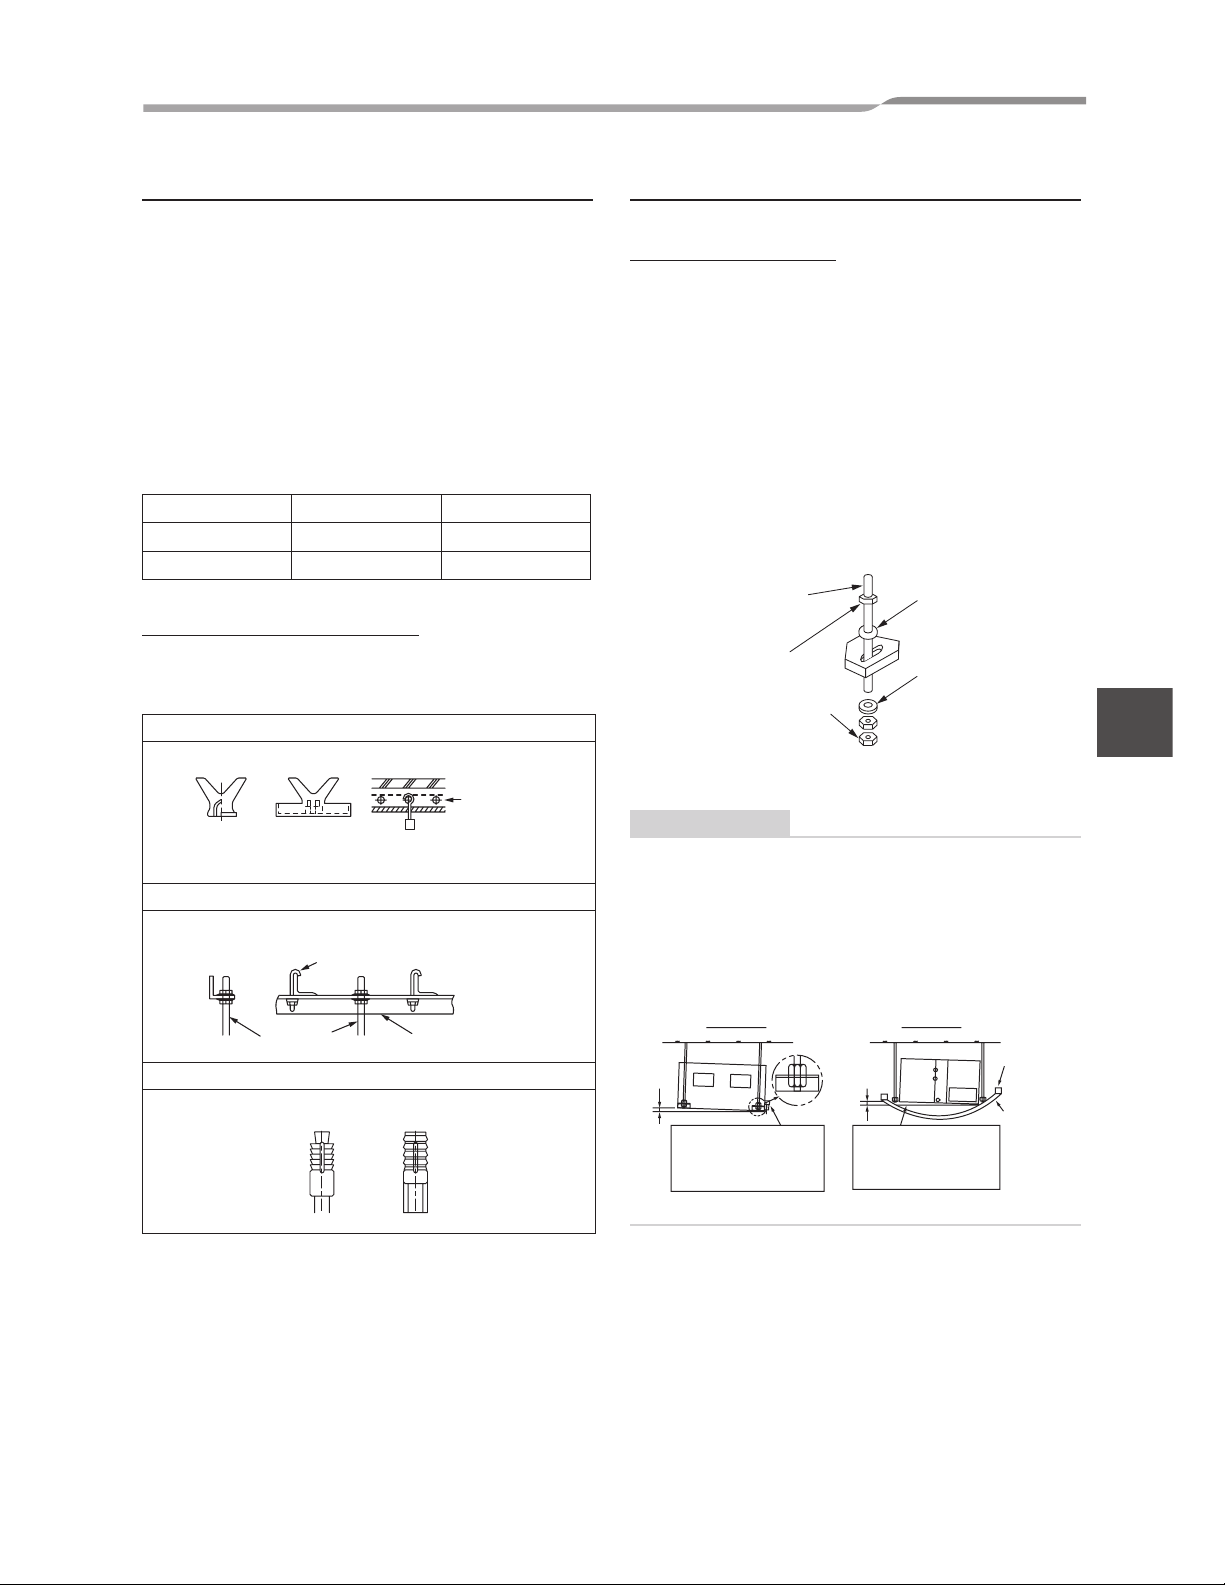
Procure hanging bolts washer and nuts for installing the
indoor unit (these are not supplied).
Installation of hanging bolt
Use M10 hanging bolts (4 pcs, to be local procure).
Matching to the existing structure, set pitch according to size
in the unit external view as shown below.
! Installation of indoor unit
Treatment of ceiling
The ceiling differs according to structure of building.
For details, consult your constructor or interior finish
contractor.
In the process after the ceiling board has been removed, it is
important to reinforce ceiling foundation (frame) and to keep
horizontal level of installed ceiling correctly in order to
prevent vibration of ceiling board.
• Attach the nuts and the M10 flat washers to the hanging
bolt.
• Put washers at up and down of the hanging bracket of the
indoor unit to hang down the indoor unit.
• Using a level vial, check that four sides are horizontal.
(Horizontal degree: Within 5mm)
• Check that four sides are horizontal using a level vial.
(Horizontal degree: Within 5mm)
REQUIREMENT
• Hang the unit in a horizontal position.
When unit is hanged to slant, it may cause overflow of
drainage.
• Install the unit within the dimension according to the figure
below.
• Using level vial or vinyl hose to confirm whether the unit
is hang horizontally.
Hanging bolt M10 or W3/8 4 pieces
Nut M10 or W3/8 12 pieces
Washer M10 8 pieces
New concrete slab
Install the bolts with insert brackets or anchor bolts.
Steel flame structure
Use existing angles or install new support angles.
Existing concrete slab
Use a hole-in anchors, hole-in plugs, or a hole-in bolts.
Rubber
Anchor bolt
(Blade type
bracket)
(Slide type
bracket)
(Pipe hanging
anchor bolt)
Hanging bolt
Hanging bolt
Support angle
Nut
(W3/8 or M10)
M10 flat washer
M10 flat washer
Hanging bolt
(W3/8 or M10)
Nut
(W3/8 or M10)
0 to 5mm
±5mm
Set the air inlet and air
outlet sides are within
5mm with each other.
Water pouring
Set the drain pipe
connecting port side within
5mm lower than opposite
side.
Front view
Side view
Vinyl hose
12-EN
 Loading...