


Toshiba 19DV713B, 19DV714B, 22DV713B, 22DV714B, 26DV713B Owner Manual
...LCD TV/DVD COMBINATION
19DV713B
19DV714B
22DV713B
22DV714B
26DV713B
32DV713B
OWNER’S MANUAL
©2010 Toshiba Corporation
Before operating the unit, please read this manual thoroughly.
Owner’s Record
The model number and serial number are on the back of your TV/DVD. Record these numbers in the spaces below. Refer to these numbers whenever you communicate with your Toshiba dealer about this TV/DVD.
Model number: _________________
Serial number: _________________

Precautions
CAUTION:
THIS UNIT IS A CLASS 1 LASER PRODUCT. HOWEVER THIS UNIT USES A VISIBLE LASER BEAM WHICH COULD CAUSE HAZARDOUS RADIATION EXPOSURE IF DIRECTED. BE SURE TO OPERATE THE PLAYER CORRECTLY AS INSTRUCTED.
THE FOLLOWING CAUTION LABEL IS LOCATED ON THE REAR PANEL OF THE UNIT.
CLASS 1
LASER PRODUCT
WHEN THIS UNIT IS PLUGGED INTO THE WALL OUTLET, DO NOT PLACE YOUR EYES CLOSE TO THE OPENINGS TO LOOK INTO THE INSIDE OF THIS UNIT.
USE OF CONTROLS OR ADJUSTMENTS OR PERFORMANCE OF PROCEDURES OTHER THAN THOSE SPECIFIED HEREIN MAY RESULT IN HAZARDOUS RADIATION EXPOSURE.
DO NOT OPEN COVERS AND DO NOT REPAIR YOURSELF. REFER SERVICING TO QUALIFIED PERSONNEL.
Headphone Warning
Loud music can damage your hearing irreversibly. Do not set the volume to a high level when listening through headphones, particularly for extended listening periods.
Information for the DVB-T function
•Any function relative to the digital television (with the DVB logo) is available only within the country or area where such signals are transmitted. Verify with the salesperson if it is possible to receive a DVB-T signal in the zone where you live.
•Even if the television conforms to the DVB-T specifications, the compatibility to future digital DVB-T transmissions is not guaranteed.
•Some digital television functions may not be available in some countries.
•The DVB-T system present in this device is FTA (Free to air).
•The “HD ready” logo is a trademark of EICTA.
•DVB is a registered trademark of the DVB Project. This logo indicates that the product is compliant with European Digital Broadcasting.
Possible Adverse Effects on LCD Screen
If a fixed (non-moving) pattern remains on the LCD screen for long periods of time, the image can become permanently retained on the LCD TV panel and cause subtle but permanent ghost images. This type of damage is NOT COVERED BY YOUR WARRANTY. Never leave your TV on for long periods of time while it is displaying the following formats or images:
•Fixed Images, such as stock tickers, video game patterns, TV station logos, and websites.
•Special Formats that do not use the entire screen. For example, viewing letterbox style (16:9) media on a normal (4:3) display (Black bars at top and bottom of screen); or viewing normal style (4:3) media on a widescreen (16:9) display (Black bars on left and right sides of screen).
IMPORTANT INFORMATION
If a television is not positioned in a sufficiently stable location, it can be potentially hazardous due to falling. Many injuries, particularly to children, can be avoided by taking simple precautions such as:
•Using stands recommended by the manufacturer of the television.
•Only using furniture that can safely support the television.
•Ensuring the television is not overhanging the edge of the supporting furniture.
•Not placing the television on tall furniture (for example, cupboards or bookcases) without anchoring both the furniture and the television to a suitable support.
•Not standing the televisions on cloth or other materials placed between the television and supporting furniture.
•Educating children about the dangers of climbing on furniture to reach the television or its controls.
Place the TV on a stable, level surface that can support the weight of the TV. In order to maintain stability and prevent it from falling over, secure the TV to a wall using a sturdy tie to the clip on the back of the table top stand.
Note: Unless otherwise indicated, the examples used throughout this manual are based on the 32DV713B model.
2

|
Contents |
Precautions ................................................................................................................................................................................ |
2 |
Important safety information ........................................................................................................................................................ |
5 |
Digital TV switchover ................................................................................................................................................................... |
8 |
Location of controls ..................................................................................................................................................................... |
9 |
Remote control .......................................................................................................................................................................... |
10 |
I/O connections........................................................................................................................................................................... |
12 |
Using the Auto Brightness Sensor.............................................................................................................................................. |
13 |
Auto setup ................................................................................................................................................................................. |
14 |
Quick guide for menu operation ................................................................................................................................................. |
16 |
Selecting the video input source ................................................................................................................................................ |
17 |
Automatic station presetting with the built-in tuner .................................................................................................................... |
18 |
Changing the order of stored channels ..................................................................................................................................... |
19 |
Manual TV station presetting ..................................................................................................................................................... |
20 |
Basic operation .......................................................................................................................................................................... |
21 |
Teletext ...................................................................................................................................................................................... |
23 |
Stereo reception with the built-in analogue tuner ...................................................................................................................... |
24 |
Picture format ............................................................................................................................................................................ |
25 |
AV colour adjustment ................................................................................................................................................................ |
26 |
Other convenience functions ..................................................................................................................................................... |
27 |
Using REGZA-LINK® ................................................................................................................................................................ |
29 |
Using the Media Player .............................................................................................................................................................. |
33 |
Display setup/Timer setting (DTV mode only) ........................................................................................................................... |
40 |
Password setup (Parental lock) (DTV mode only) ..................................................................................................................... |
41 |
Version ...................................................................................................................................................................................... |
42 |
Software upgrade (DTV mode only) .......................................................................................................................................... |
43 |
Common interface (DTV mode only) ......................................................................................................................................... |
44 |
Multi audio (DTV mode only) ..................................................................................................................................................... |
45 |
DVB-Subtitle/Using the Digital Service (DTV mode only) .......................................................................................................... |
46 |
EPG (Electronic Program Guide) (DTV mode only) .................................................................................................................. |
47 |
EPG Timer (DTV mode only) ..................................................................................................................................................... |
48 |
Disc ............................................................................................................................................................................................ |
49 |
Basic playback ........................................................................................................................................................................... |
50 |
Advanced playback ................................................................................................................................................................... |
52 |
Zoom function/Scene navigation ............................................................................................................................................... |
53 |
Scene bookmark ........................................................................................................................................................................ |
54 |
Repeat playback/A-B repeat playback ...................................................................................................................................... |
55 |
Scene angle/Title selection/DVD menu ..................................................................................................................................... |
56 |
Soundtrack language/Audio channel/Subtitle ............................................................................................................................ |
57 |
Playback information/VCD playback control (PBC) ................................................................................................................... |
58 |
MP3/JPEG/DivX® and Audio CD operation ............................................................................................................................... |
59 |
About the file browser/Audio file playback ................................................................................................................................. |
60 |
Playing an audio file .................................................................................................................................................................. |
61 |
JPEG file operation ................................................................................................................................................................... |
62 |
DivX® and DivX® VOD operation .............................................................................................................................................. |
63 |
MP3/JPEG/DivX® and Audio CD playback modes .................................................................................................................... |
64 |
Programme playback/Random playback ................................................................................................................................... |
66 |
Customising disc playback ........................................................................................................................................................ |
67 |
Temporary cancel the rating level by DVD disc ......................................................................................................................... |
73 |
PC connection ........................................................................................................................................................................... |
74 |
Connecting an HDMI or DVI device to the HDMI input .............................................................................................................. |
75 |
REGZA-LINK® connection ........................................................................................................................................................ |
76 |
Connecting TV to other equipment ............................................................................................................................................ |
77 |
3

Contents |
|
Status message ......................................................................................................................................................................... |
79 |
Troubleshooting table ................................................................................................................................................................ |
80 |
Specifications ............................................................................................................................................................................. |
82 |
The GNU General Public License (GPL) ................................................................................................................................... |
83 |
The Libpng License Notices ...................................................................................................................................................... |
86 |
The zlib License ......................................................................................................................................................................... |
87 |
4

Important safety information
This unit has been produced according to all current safety regulations. The following safety tips should safeguard users against careless use and the dangers related to such use.
•Although this unit has been carefully manufactured and rigorously checked prior to leaving the factory as with all electrical appliances, it is possible for problems to develop. If you notice smoke, an excessive build-up of heat or any other unexpected phenomena, you should disconnect the plug from the mains power socket immediately.
•Ensure that the unit is sufficiently ventilated! Never place it next to or underneath curtains!
•This set should only be connected to an AC 110-240V/50-60Hz mains power supply. Do not attempt to connect it to any other type of supply.
•The socket outlet must be installed near the equipment and is easily accessible.
•Do not open this unit. An attempt to repair the unit by a non-expert could be dangerous and potentially cause a fire hazard. All repairs must be carried out by qualified service personnel only.
•Keep away from rodents. Rodents (and also cockatiels) enjoy biting electric flexes. They can cause a short circuit (fire hazard!) and receive a fatal electric shock.
•Always hold the plug when disconnecting the unit from the socket outlet. Do not pull on flex. The flex can become overloaded and cause a short circuit.
•Use a damp---not wet---cloth to clean the unit.
•Set up unit so that no one will trip over the flex.
•This unit is recommended to be installed on shock-free benches in order to avoid any danger from falling.
•Take note that toddlers can pull the unit down from a table or cupboard by means of its flex. Children can hurt themselves when doing this.
•Do not use the unit near heat sources. The casing and flex could be damaged by the intensity of the heat.
•The screen is made of glass and can break if damage is done to it. Be careful when collecting sharp edged glass splitters.
•If you intend to wall mount the unit, contact the shop where you purchased the unit for advice, and leave the installation work to professionals. Improper installation can cause damage and/or injuries.
•When installing the set on a wall, allow at least 10 cm clearance between the rear of the set and the wall. Clearance of less than 10 cm will obstruct the vents and cause overheating to the interior of the set, resulting in faults or damage to the set.
•Taking fall-prevention measures
-If these measures are not taken, the unit can fall and cause damage and/or injuries.
-Contact the shop where you purchased the unit to obtain full details of the measures.
•When a TV stand is used,
-Ensure the unit is fully on the stand and placed in the centre.
-Do not leave the stand doors open. You could be hurt as a result of the unit falling or breaking, or your fingers being caught or jammed. Take extra precautions if you have children.
•Avoid placing the unit on any surfaces that may be subject to vibrations or shocks.
•To protect the unit during a thunder storm, unplug the AC power cord and disconnect the aerial. Caution: Do not touch the aerial connector.
•When you leave your home for a long period of time, unplug the AC power cord for safety.
•The unit becomes warm when in operation. Do not place any covers or blankets on the unit in order to prevent overheating. The ventilation holes should not be blocked. Do not set up near radiators. Do not place in direct sunshine.
•When placing on a shelf, allow at least 10 cm clearance space around the whole unit.
•The unit shall not be exposed to dripping or splashing, and no objects filled with liquids, such as vases, shall be placed on the apparatus.
•Liquids spilled into the unit can cause serious damage. Switch the set off and disconnect the mains power supply, then consult a qualified service person before attempting to use the unit again.
•Moisture condensation occurs, for example, when you pour a cold drink into a glass on a warm day and drops of water form on the outside of the glass. In the same way, moisture may condense on this unit’s internal optical pick-up lens, one of the most crucial internal parts of the unit.
•Moisture condensation occurs in the following situations:
-When you move the unit from a cold place to a warm place.
-When you use the unit in a room where the heater was just turned on.
-When you use the unit in an area where cold air from an air conditioner directly hits the unit.
-When you use the unit in a humid place.
•Never use the unit when moisture condensation may occur.
•Using the unit when moisture condensation exists may damage its own internal parts and discs. Connect the power cord of the unit to the wall outlet, turn on the unit, remove the disc, and leave it for two or three hours. After two or three hours, the unit will warm up and moisture will be evaporated. Leaving the TV connected to the wall outlet will help prevent moisture condensation in the unit.
•Never place hot objects or open flame sources, such as lighted candles or night lights, on or close to the TV. High temperatures can melt plastic and lead to fires.
5
Important safety information (continued)
Where to install
Locate the television away from direct sunlight and strong lights; soft and indirect lighting is recommended for comfortable viewing. Use curtains or blinds to prevent direct sunlight from falling on the screen.
Always place the TV on a sturdy, level, stable surface that can support the weight of the TV. In order to maintain stability and prevent the TV from falling over, secure the TV with a sturdy strap from the hook on the rear of the TV to a wall stud, pillar, or other immovable structure. Make sure the strap is tight, secure, and parallel to the floor.
The LCD display panels are manufactured with extremely high-precision technology techniques. However some non-active pixels may appear on the screen or luminous spots may occur occasionally - this is not a sign of a malfunction.
Note: The hook is only applicable to 26DV713B and 32DV713B.
Sturdy strap (as short as possible)
|
|
Clip |
|
Hook |
|
|
Screw |
|
|
hole |
Screw |
|
|
|
Side View |
|
Top View |
Make sure that the television is located in a position where it cannot be pushed or hit by objects, as pressure will break or damage the screen, and that small items cannot be inserted into slots or openings of the case.
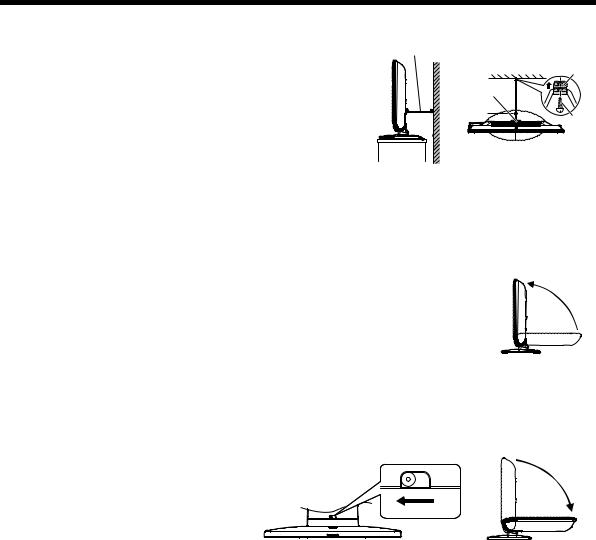
To display your LCD TV on the included pedestal stand
Observe the following safety precautions:
(1) Read and follow the pedestal assembly instructions included with the pedestal.
Caution: Before beginning pedestal assembly, carefully lay the front of the LCD Panel face down on a flat, cushioned surfaces such as a quilt or blanket. Leave the bottom of the TV protruding over the edge of the surface and assemble the pedestal as indicated below.
Note: Extreme care should always be taken when attaching the pedestal stand to avoid damage to the LCD panel.
(2)Grab the pedestal stand and lift the display up. Confirm the pivot is locked.
(3)Place the TV on a sturdy, level surface that can support the weight of the TV.
(4)Be sure to secure the TV to a wall stud, pillar, surface, or other immovable structure. To secure the TV in this manner: (1) attach a clip to an immovable structure, and then (2) pass a sturdy strap through the clip and attach each end to the hooks located at the back of the TV. Be sure to leave at least 10 cm between the TV and the wall or similar structure for ventilation.
To fold the pedestal stand
(1)Slide the lever on the back side of the pedestal stand to the left.
(2)Lay the display down.
Applicable to the following models:
19DV713B, 19DV714B, 22DV713B, and 22DV714B.
Slide the lever to the left
Back side of the pedestal stand
Note: Do not operate the LCD TV when the pedestal stand is folded. The pedestal stand should not be folded at any time except for packing purposes.
To display your LCD TV using a wall bracket
If you decide to wall mount your LCD TV, always use a wall bracket appropriate for the size and weight of the LCD TV:
(1)Caution: Two people are required for installation.
(2)Unplug and remove any cables and/or other component connectors from the rear of the TV.
(3)Follow the instructions provided with your wall bracket. Before proceeding, make sure the appropriate bracket(s) are attached to the wall and the back of the TV as described in the instructions provided with the wall bracket.
(4)IMPORTANT: Always use the screws supplied or recommended by the wall mount manufacturer.
(5)After attaching the appropriate bracket(s) to the wall and the back of the TV, remove the pedestal stand from the TV as described below.
6
Important safety information (continued)
Removing the pedestal stand
(1)Carefully lay the front of the TV face down on a flat, cushioned surface such as a quilt or blanket. Leave the stand protruding
over the edge of the surface.
Note: Extreme care should always be taken when removing the pedestal stand to avoid damage to the LCD panel.
(2)Remove the screws shown in the diagram below. This will allow removal of the pedestal stand.
(3)Once you have removed all screws holding the pedestal stand in place, remove the pedestal stand from the TV by sliding the pedestal stand away from the TV.
19DV713B/19DV714B/22DV713B/22DV714B |
|
|
|
|
26DV713B/32DV713B |
|
|
|
|
|||||||||||||||||||||||||||||||||||||||||||||||
|
|
|
|
|
|
|
|
|
|
|
|
|
|
|
|
|
|
|
|
|
|
|
|
|
|
|
|
|
|
|
|
|
|
|
|
|
|
|
|
|
|
|
|
|
|
|
|
|
|
|
|
|
|
|
|
|
|
|
|
|
|
|
|
|
|
|
|
|
|
|
|
|
|
|
|
|
|
|
|
|
|
|
|
|
|
|
|
|
|
|
|
|
|
|
|
|
|
|
|
|
|
|
|
|
|
|
|
|
|
|
|
|
|
|
|
|
|
|
|
|
|
|
|
|
|
|
|
|
|
|
|
|
|
|
|
|
|
|
|
|
|
|
|
|
|
|
|
|
|
|
|
|
|
|
|
|
|
|
|
|
|
|
|
|
|
|
|
|
|
|
|
|
|
|
|
|
|
|
|
|
|
|
|
|
|
|
|
|
|
|
|
|
|
|
|
|
|
|
|
|
|
|
|
|
|
|
|
|
|
|
|
|
|
|
|
|
|
|
|
|
|
|
|
|
|
|
|
|
|
|
|
|
|
|
|
|
|
|
|
|
|
|
|
|
|
|
|
|
|
|
|
|
|
|
|
|
|
|
|
|
|
|
|
|
|
|
|
|
|
|
|
|
|
|
|
|
|
|
|
|
|
|
|
|
|
|
|
|
|
|
|
|
|
|
|
|
|
|
|
|
|
|
|
|
|
|
|
|
|
|
|
|
|
|
|
|
|
|
|
|
|
|
|
|
|
|
|
|
|
|
|
|
|
|
|
|
|
|
|
|
|
|
|
|
|
|
|
|
|
|
|
|
|
|
|
|
|
|
|
|
|
|
|
|
|
|
|
|
|
|
|
|
|
|
|
|
|
|
|
|
|
|
|
|
|
|
|
|
|
|
|
|
|
|
|
|
|
|
|
|
|
|
|
|
|
|
|
|
|
|
|
|
|
|
|
|
|
|
|
|
|
|
|
|
|
|
|
|
|
|
|
|
|
|
|
|
|
|
|
|
|
|
|
|
|
|
|
|
|
|
|
|
|
|
|
|
|
|
|
|
|
|
|
|
|
|
|
|
|
|
|
|
|
|
|
|
|
|
|
|
|
|
|
|
|
|
|
|
|
|
|
|
|
|
|
|
|
|
|
|
|
|
|
|
|
|
|
|
|
|
|
|
|
|
|
|
|
|
|
|
|
|
|
|
|
|
|
|
|
|
|
|
|
|
|
|
|
|
|
|
|
|
|
|
|
|
|
|
|
|
|
|
|
|
|
|
|
|
|
|
|
|
|
|
|
|
|
|
|
|
|
|
|
|
|
|
|
|
|
|
|
|
|
|
|
|
|
|
|
|
|
|
|
|
|
|
|
|
|
|
|
|
|
|
|
|
|
|
|
|
|
|
|
|
|
|
|
|
|
|
|
|
|
|
|
|
|
|
|
|
|
|
|
|
|
|
|
|
|
|
|
|
|
|
|
|
|
|
|
|
|
|
|
|
|
|
|
|
|
|
|
|
|
|
|
|
|
|
|
|
|
|
|
|
|
|
|
|
|
|
|
|
|
|
|
|
|
|
|
|
|
|
|
|
|
|
|
|
|
|
|
|
|
|
|
|
|
|
|
|
|
|
|
|
|
|
|
|
|
|
|
|
|
|
|
|
|
|
|
|
|
|
|
|
|
|
|
|
|
|
|
|
|
|
|
|
|
|
|
|
|
|
|
|
|
|
|
|
|
|
|
|
|
|
|
|
|
|
|
|
|
|
|
|
|
|
|
|
|
|
|
|
|
|
|
|
|
|
|
|
|
|
|
|
|
|
|
|
|
|
|
|
|
|
|
|
|
|
|
|
|
|
|
|
|
|
|
|
|
|
|
|
|
|
|
|
|
|
|
|
|
|
|
|
|
|
|
|
|
|
|
|
|
|
|
|
|
|
|
|
|
|
|
|
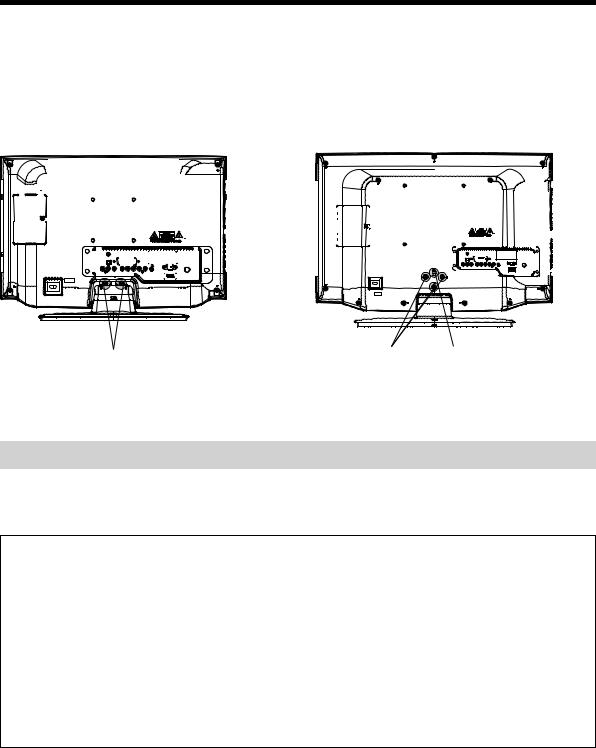
AC INPUT
AC INPUT
Two screws
Three screws Hook
(Sturdy strap should be as short as possible.)
Note:
•22DV713B, 22DV714B, and 32DV713B are used for illustration purposes.
•The hook is only applicable to 26DV713B and 32DV713B.
Please take note
If stationary images generated by text services, channel identification logos, computer displays, video games, on-screen menus, etc. are left on the television screen for any length of time, they could leave an afterimage. It is always advisable to reduce both the brightness and contrast settings.
EXCLUSION CLAUSE
Toshiba shall under no circumstances be liable for loss and/or damage to this product caused by:
i)fire;
ii)earthquake;
iii)accidental damage;
iv)intentional misuse of the product;
v)use of the product in improper conditions;
vi)loss and/or damage caused to the product whilst in the possession of a third party;
vii)any damage or loss caused as a result of the owner’s failure and/or neglect to follow the instructions set out in the owner’s manual;
viii)any loss or damage caused directly as a result of misuse or malfunction of the product when used simultaneously with associated equipment;
Furthermore, under no circumstances shall Toshiba be liable for any consequential loss and/or damage including but not limited to the following: loss of profit, interruption of business, and/or loss of recorded data whether caused during normal operation or misuse of the product.
7
When does switchover happen?
*Copeland switches on October 17, 2007
The exact date you switch depends on the transmitter you are served by. To check when you switch,
go to Digital UK’s postcode checker on www.digitaluk.co.uk
DIGITAL SWITCHOVER
Keep this important leaflet about how to re-tune your TV during the digital TV switchover
Television in the UK is going digital, bringing us all more choice and new services. Starting in late 2007 and ending in 2012, television services in the UK will go completely digital, TV region by TV region.
Please see above to find out when your area switches to digital.
Digital UK is the independent, non-profit organisation leading the process of digital TV switchover in the UK. Digital UK provides impartial information on what people need to do to prepare for the move to digital, and when they need to do it.
How the switchover affects your TV equipment:
Your new TV has a digital tuner built in, which means it is ready to receive the Freeview signal by simply plugging it into your aerial socket (check if you can get digital TV through your aerial now, or whether you’ll have to wait until switchover, at www.digitaluk.co.uk).
When the TV switchover happens in your area, there are at least two occasions when you will need to re-tune your TV in order to continue receiving your existing TV channels, and also to pick up new ones, Digital UK, the body leading the digital TV switchover, will advise you when you need to re-tune during the switchover.
If you choose to connect your TV to satellite or cable with a digital box then it will not be affected by switchover, and you won’t need to re-tune.
How to re-tune:
As new services are broadcast it will be necessary to re-tune the television in order to view them. Auto Tuning will completely retune the television and can be used to update the channel list.
1 Press MENU button on the remote control unit to display the Channel menu, and then select Auto Tuning.
2 A screen will appear warning that all previously stored channels will be deleted.
You must allow the television to complete the search......
When the search is complete the Auto Tuning screen will display the total number of service found.
NOTE: For further detailed instructions on Auto Tuning, please refer to pages 16 and 18.
If you are missing channels, it may be that they are not available in your area, or that your aerial needs upgrading.
If you have any further questions, please contact your equipment supplier or call Digital UK on 08456 50 50 50 or visit www.digitaluk.co.uk
8

Location of controls
1 2 3
19DV713B/19DV714B/22DV713B/22DV714B
5
6 
4 |
7 |
12 |
8
9
10
13
11
14
Note:
Adjusting the screen angle
You can adjust the angle of the TV screen 3° forward or 12°backward from a vertical angle. Hold the base of the TV while adjusting the angle.
Applicable to the following models:
19DV713B, 19DV714B, 22DV713B, 22DV714B.
26DV713B/32DV713B
4 |
12 |
|
13
14

 3
3
5
 6
6
7
8
9
10
11
•The position of indicator labels on the keypad may be different depending on the model. 22DV713B, 22DV714B, and 32DV713B are used for illustration purposes.
Description of indicators and controls
1. POWER indicator: The Power indicator lights red in standby mode, orange in standby mode when the timer is activated, and green when TV is powered on.
2.Remote sensor
3.Auto Brightness Sensor: This sensor will detect the ambient light conditions to optimise the backlighting level (see page 13).
4.Disc slot: Load the disc into the disc slot to view or listen.
5. EJECT: Press to eject a disc.
6. VOLUME + / -: Press to adjust the volume level. In Menu: Setting.
7. PLAY/
PLAY/  CHANNEL
  : Press
  to change to a higher numbered channel set into memory.
In DVD mode: Playback. In Menu: Functions as up menu navigation button. In Standby mode: Turn the TV on.
8. |
STOP/ |
CHANNEL |
: Press |
to change to a lower numbered channel set into memory. |
|
|
In DVD mode: Stop. In Menu: Functions as down menu navigation button. In Standby mode: Turn the TV on. |
|
|||
9. |
MENU: Press to access the menu system. |
|
|
||
10. |
INPUT/ENTER: Select video input source. In Menu: Use as an ENTER button to confirm selection. |
|
|||
11. |
POWER button: Connect the supplied AC power cord to 110-240V/50-60Hz AC outlet, and then press the button to |
||||
|
turn the TV on and off. |
|
|
|
|
12. |
C.I. slot: The Common Interface allows you to insert CAM (Conditional Access Module) and a suitable Smart Card to give |
||||
|
you access to additional Pay-TV services (see page 44). Before inserting the module, make sure to turn off the mains |
|
|||
|
power and then insert the module all the way into the slot until it is flushed with the side panel buttons. |
|
|||
13. |
HDMI 2 input: High-Definition Multimedia Interface (HDMI 2) input receives digital audio and uncompressed digital video |
|
|||
|
from an HDMI device or uncompressed digital video from a DVI device. HDMI connection is necessary to receive 1080p |
|
|||
|
signals (see pages 74-76). |
|
|
|
|
14. |
USB terminal: For use when inserting a USB device. |
9 |
|||
|
|
|
|
|
|
Remote control
|
|
|
|
|
|
|
|
|
|
|
|
|
|
|
|
|
|
|
|
|
|
|
|
|
|
|
Function |
Page |
|
|
|
|
|
|
|
|
|
|
|
|
|
|
|
|
|
|
|
|
|
|
|
|
|
|
|
|
|
|
|
|
|
|
|
|
|
|
|
|
|
|
|
|
|
|
|
|
|
|
|
|
|
|
|
|
Eject a disc from the disc slot |
51 |
|
|
|
|
|
|
|
|
|
|
|
|
|
|
|
|
|
|
|
|
|
|
|
|
|
|
|
|
|
|
|
|
|
|
|
|
|
|
|
|
|
|
|
|
|
|
|
|
|
|
|
|
|
|
|
|
|
|
|
|
|
|
|
|
|
|
|
|
|
|
|
|
|
|
|
|
|
|
|
|
|
|
|
|
|
|
|
|
|
|
|
|
|
|
|
|
|
|
|
|
|
|
|
|
|
|
|
|
|
|
|
|
|
|
Toggle between TV and DVD mode |
16, 50 |
|
|
|
|
|
|
|
|
|
|
|
|
|
|
|
|
|
|
|
|
|
|
|
|
|
|
|
|
|
|
|
|
|
|
|
|
|
|
|
|
|
|
|
|
|
|
|
|
|
|
|
|
|
|
|
|
|
|
|
|
|
|
|
|
|
|
|
|
|
|
|
|
|
|
|
|
|
|
|
|
|
|
|
|
|
Toggle between analogue TV and digital TV |
16 |
|
|
|
|
|
|
|
|
|
|
|
|
|
|
|
|
|
|
|
|
|
|
|
|
|
|
|
|
|
|
|
|
|
|
|
|
|
|
|
|
|
|
|
|
|
|
|
|
|
|
|
|
|
|
|
|
Toggle between power on and standby mode |
16 |
|
|
|
|
|
|
|
|
|
|
|
|
|
|
|
|
|
|
|
|
|
|
|
|
|
|
|
|
|
|
|
|
|
|
|
|
|
|
|
|
|
|
|
|
|
|
|
|
|
|
|
|
|
|
|
|
- Select a channel |
21 |
|
|
|
|
|
|
|
|
|
|
|
|
|
|
|
|
|
|
|
|
|
|
|
|
|
|
|
- Select a teletext page |
23 |
|
|
|
|
|
|
|
|
|
|
|
|
|
|
|
|
|
|
|
|
|
|
|
|
|
|
|
- Enter the password |
41, 73 |
|
|
|
|
|
|
|
|
|
|
|
|
|
|
|
|
|
|
|
|
|
|
|
|
|
|
|
|
|
|
|
|
|
|
|
|
|
|
|
|
|
|
|
|
|
|
|
|
|
|
|
|
|
|
|
|
Display source information |
22, 47, 58 |
|
|
|
|
|
|
|
|
|
|
|
|
|
|
|
|
|
|
|
|
|
|
|
|
|
|
|
|
|
|
|
|
|
|
|
|
|
|
|
|
|
|
|
|
|
|
|
|
|
|
|
|
|
|
|
|
Turn the sound on/off |
21 |
|
|
|
|
|
|
|
|
|
|
|
|
|
|
|
|
|
|
|
|
|
|
|
|
|
|
|
|
|
|
|
|
|
|
|
|
|
|
|
|
|
|
|
|
|
|
|
|
|
|
|
|
|
|
|
|
Toggle between TV, Radio, and Data modes |
21 |
|
|
|
|
|
|
|
|
|
|
|
|
|
|
|
|
|
|
|
|
|
|
|
|
|
|
|
|
|
|
|
|
|
|
|
|
|
|
|
|
|
|
|
|
|
|
|
|
|
|
|
|
|
|
|
|
Select an input source |
17 |
|
|
|
|
|
|
|
|
|
|
|
|
|
|
|
|
|
|
|
|
|
|
|
|
|
|
|
|
|
|
|
|
|
|
|
|
|
|
|
|
|
|
|
|
|
|
|
|
|
|
|
|
|
|
|
|
- Change the TV channel or teletext page up or down |
21, 23 |
|
|
|
|
|
|
|
|
|
|
|
|
|
|
|
|
|
|
|
|
|
|
|
|
|
|
|
- In standby mode: turn on the power |
16 |
|
|
|
|
|
|
|
|
|
|
|
|
|
|
|
|
|
|
|
|
|
|
|
|
|
|
|
|
|
|
|
|
|
|
|
|
|
|
|
|
|
|
|
|
|
|
|
|
|
|
|
|
|
|
|
|
Increase or decrease the volume |
21 |
|
|
|
|
|
|
|
|
|
|
|
|
|
|
|
|
|
|
|
|
|
|
|
|
|
|
|
|
|
|
|
|
|
|
|
|
|
|
|
|
|
|
|
|
|
|
|
|
|
|
|
|
|
|
|
|
|
|
|
|
|
|
|
|
|
|
|
|
|
|
|
|
|
|
|
|
|
|
|
|
|
|
|
|
|
- In DVD mode, view the DVD menu screen |
56 |
|
|
|
|
|
|
|
|
|
|
|
|
|
|
|
|
|
|
|
|
|
|
|
|
|
|
|
||
|
|
|
|
|
|
|
|
|
|
|
|
|
|
|
|
|
|
|
|
|
|
|
|
|
|
|
- In JPEG CD mode, display image thumbnails |
60 |
|
|
|
|
|
|
|
|
|
|
|
|
|
|
|
|
|
|
|
|
|
|
|
|
|
|
|
||
|
|
|
|
|
|
|
|
|
|
|
|
|
|
|
|
|
|
|
|
|
|
|
|
|
|
|
|
|
|
|
|
|
|
|
|
|
|
|
|
|
|
|
|
|
|
|
|
|
|
|
|
|
|
|
|
- In DVD mode, select a DVD title |
56 |
|
|
|
|
|
|
|
|
|
|
|
|
|
|
|
|
|
|
|
|
|
|
|
|
|
|
|
- In JPEG CD mode, view the image file browser |
60 |
|
|
|
|
|
|
|
|
|
|
|
|
|
|
|
|
|
|
|
|
|
|
|
|
|
|
|
|
|
|
|
|
|
|
|
|
|
|
|
|
|
|
|
|
|
|
|
|
|
|
|
|
|
|
|
|
In DTV mode, display the Digital Main Menu |
16 |
|
|
|
|
|
|
|
|
|
|
|
|
|
|
|
|
|
|
|
|
|
|
|
|
|
|
|
|
|
|
|
|
|
|
|
|
|
|
|
|
|
|
|
|
|
|
|
|
|
|
|
|
|
|
|
|
Display the EPG (Electronic Program Guide) |
47 |
|
|
|
|
|
|
|
|
|
|
|
|
|
|
|
|
|
|
|
|
|
|
|
|
|
|
|
|
|
|
|
|
|
|
|
|
|
|
|
|
|
|
|
|
|
|
|
|
|
|
|
|
|
|
|
|
|
|
|
|
|
|
|
|
|
|
|
|
|
|
|
|
|
|
|
|
|
|
|
|
|
|
|
|
|
Cursor buttons to select or adjust programming menus when a menu is on-screen |
14, 15 |
|
|
|
|
|
|
|
|
|
|
|
|
|
|
|
|
|
|
|
|
|
|
|
|
|
|
|
|
|
|
|
|
|
|
|
|
|
|
|
|
|
|
|
|
|
|
|
|
|
|
|
|
|
|
|
|
|
|
|
|
|
|
|
|
|
|
|
|
|
|
|
|
|
|
|
|
|
|
|
|
|
|
|
|
|
|
|
|
|
|
|
|
|
|
|
|
|
|
|
|
|
|
|
|
|
|
|
|
|
|
|
|
|
|
- When using the TV menu, enable a menu option or view a sub-menu screen |
16 |
|
|
|
|
|
|
|
|
|
|
|
|
|
|
|
|
|
|
|
|
|
|
|
|
|
|
|
- In teletext mode, display teletext page 100 |
23 |
|
|
|
|
|
|
|
|
|
|
|
|
|
|
|
|
|
|
|
|
|
|
|
|
|
|
|
- When in TV mode, display the channel list |
21 |
|
|
|
|
|
|
|
|
|
|
|
|
|
|
|
|
|
|
|
|
|
|
|
|
|
|
|
- In ATV mode, display the Analogue Main Menu |
16 |
|
|
|
|
|
|
|
|
|
|
|
|
|
|
|
|
|
|
|
|
|
|
|
|
|
|
|
- In DVD mode, display the DVD Setup menu |
67 |
|
|
|
|
|
|
|
|
|
|
|
|
|
|
|
|
|
|
|
|
|
|
|
|
|
|
|
|
|
|
|
|
|
|
|
|
|
|
|
|
|
|
|
|
|
|
|
|
|
|
|
|
|
|
|
|
- Exit the Analogue or Digital Main Menu screen |
16 |
|
|
|
|
|
|
|
|
|
|
|
|
|
|
|
|
|
|
|
|
|
|
|
|
|
|
|
||
|
|
|
|
|
|
|
|
|
|
|
|
|
|
|
|
|
|
|
|
|
|
|
|
|
|
|
- Cancel marking |
54 |
|
|
|
|
|
|
|
|
|
|
|
|
|
|
|
|
|
|
|
|
|
|
|
|
|
|
|
|
|
|
|
|
|
|
|
|
|
|
|
|
|
|
|
|
|
|
|
|
|
|
|
|
|
|
|
|
- Exit the DVD Setup Menu screen |
67 |
|
|
|
|
|
|
|
|
|
|
|
|
|
|
|
|
|
|
|
|
|
|
|
|
|
|
|
- Return to previous directory from Media Player sub-folder or sub-menu |
35-37, 39 |
|
|
|
|
|
|
|
|
|
|
|
|
|
|
|
|
|
|
|
|
|
|
|
|
|
|
|
Start or resume disc playback |
50 |
|
|
|
|
|
|
|
|
|
|
|
|
|
|
|
|
|
|
|
|
|
|
|
|
|
|
|
||
|
|
|
|
|
|
|
|
|
|
|
|
|
|
|
|
|
|
|
|
|
|
|
|
|
|
|
|
|
|
|
|
|
|
|
|
|
|
|
|
|
|
|
|
|
|
|
|
|
|
|
|
|
|
|
|
Cancel disc playback |
50 |
|
|
|
|
|
|
|
|
|
|
|
|
|
|
|
|
|
|
|
|
|
|
|
|
|
|
|
|
|
|
|
|
|
|
|
|
|
|
|
|
|
|
|
|
|
|
|
|
|
|
|
|
|
|
|
|
|
|
|
|
|
|
|
|
|
|
|
|
|
|
|
|
|
|
|
|
|
|
|
|
|
|
|
|
|
- Pause the teletext display to “hold” the current page in place |
23 |
|
|
|
|
|
|
|
|
|
|
|
|
|
|
|
|
|
|
|
|
|
|
|
|
|
|
|
- Jump to the previous chapter/track |
52 |
|
|
|
|
|
|
|
|
|
|
|
|
|
|
|
|
|
|
|
|
|
|
|
|
|
|
|
|
|
|
|
|
|
|
|
|
|
|
|
|
|
|
|
|
|
|
|
|
|
|
|
|
|
|
|
|
- In teletext mode, reveal the answers to quiz questions |
23 |
|
|
|
|
|
|
|
|
|
|
|
|
|
|
|
|
|
|
|
|
|
|
|
|
|
|
|
||
|
|
|
|
|
|
|
|
|
|
|
|
|
|
|
|
|
|
|
|
|
|
|
|
|
|
|
- During playback, play in fast reverse direction |
52 |
|
|
|
|
|
|
|
|
|
|
|
|
|
|
|
|
|
|
|
|
|
|
|
|
|
|
|
|
|
|
|
|
|
|
|
|
|
|
|
|
|
|
|
|
|
|
|
|
|
|
|
|
|
|
|
|
- In teletext mode, view a sub-page |
23 |
|
|
|
|
|
|
|
|
|
|
|
|
|
|
|
|
|
|
|
|
|
|
|
|
|
|
|
- During playback, play in fast forward direction |
52 |
|
|
|
|
|
|
|
|
|
|
|
|
|
|
|
|
|
|
|
|
|
|
|
|
|
|
|
||
|
|
|
|
|
|
|
|
|
|
|
|
|
|
|
|
|
|
|
|
|
|
|
|
|
|
|
|
|
|
|
|
|
|
|
|
|
|
|
|
|
|
|
|
|
|
|
|
|
|
|
|
|
|
|
|
- In teletext mode, toggle the display size |
23 |
|
|
|
|
|
|
|
|
|
|
|
|
|
|
|
|
|
|
|
|
|
|
|
|
|
|
|
- During playback, jump to the next chapter/track |
52 |
|
|
|
|
|
|
|
|
|
|
|
|
|
|
|
|
|
|
|
|
|
|
|
|
|
|
|
|
|
|
|
|
|
|
|
|
|
|
|
|
|
|
|
|
|
|
|
|
|
|
|
|
|
|
|
|
- Fastext/TOP text buttons |
23 |
|
|
|
|
|
|
|
|
|
|
|
|
|
|
|
|
|
|
|
|
|
|
|
|
|
|
|
- DVD control buttons |
52, 55 |
|
|
|
|
|
|
|
|
|
|
|
|
|
|
|
|
|
|
|
|
|
|
|
|
|
|
|
Mark specific playback points in a DVD, VCD, or audio CD |
54 |
|
|
|
|
|
|
|
|
|
|
|
|
|
|
|
|
|
|
|
|
|
|
|
|
|
|
|
||
|
|
|
|
|
|
|
|
|
|
|
|
|
|
|
|
|
|
|
|
|
|
|
|
|
|
|
|
|
|
|
|
|
|
|
|
|
|
|
|
|
|
|
|
|
|
|
|
|
|
|
|
|
|
|
|
- In DVD mode, change the scene angle |
56 |
|
|
|
|
|
|
|
|
|
|
|
|
|
|
|
|
|
|
|
|
|
|
|
|
|
|
|
- In JPEG CD mode, rotate the image display |
62 |
|
|
|
|
|
|
|
|
|
|
|
|
|
|
|
|
|
|
|
|
|
|
|
|
|
|
|
|
|
|
|
|
|
|
|
|
|
|
|
|
|
|
|
|
|
|
|
|
|
|
|
|
|
|
|
|
Repeat playback of a specific section between two set points (A-B) |
55 |
|
|
|
|
|
|
|
|
|
|
|
|
|
|
|
|
|
|
|
|
|
|
|
|
|
|
|
|
|
|
|
|
|
|
|
|
|
|
|
|
|
|
|
|
|
|
|
|
|
|
|
|
|
|
|
|
Toggle the teletext display on or off |
23 |
|
|
|
|
|
|
|
|
|
|
|
|
|
|
|
|
|
|
|
|
|
|
|
|
|
|
|
|
|
|
|
|
|
|
|
|
|
|
|
|
|
|
|
|
|
|
|
|
|
|
|
|
|
|
|
|
Set the subtitle of a multi-language DVD |
46, 57 |
|
|
|
|
|
|
|
|
|
|
|
|
|
|
|
|
|
|
|
|
|
|
|
|
|
|
|
|
|
|
|
|
|
|
|
|
|
|
|
|
|
|
|
|
|
|
|
|
|
|
|
|
|
|
|
|
- In ATV mode, select between the available broadcast audio channels |
24 |
|
|
|
|
|
|
|
|
|
|
|
|
|
|
|
|
|
|
|
|
|
|
|
|
|
|
|
- In DTV mode, display the Multi audio menu |
45 |
|
|
|
|
|
|
|
|
|
|
|
|
|
|
|
|
|
|
|
|
|
|
|
|
|
|
|
- Change the soundtrack language of a multi-language DVD or VCD |
57 |
|
|
|
|
|
|
|
|
|
|
|
|
|
|
|
|
|
|
|
|
|
|
|
|
|
|
|
|
|
|
|
|
|
|
|
|
|
|
|
|
|
|
|
|
|
|
|
|
|
|
|
|
|
|
|
|
- In TV mode, switch to the last channel selected prior to the current one |
21 |
|
|
|
|
|
|
|
|
|
|
|
|
|
|
|
|
|
|
|
|
|
|
|
|
|
|
|
- In DVD mode, change the image viewing scale of a video or image file |
53 |
|
|
|
|
|
|
|
|
|
|
|
|
|
|
|
|
|
|
|
|
|
|
|
|
|
|
|
|
|
|
|
|
|
|
|
|
|
|
|
|
|
|
|
|
|
|
|
|
|
|
|
|
|
|
|
|
Select the specific point where to start disc playback |
53 |
|
|
|
|
|
|
|
|
|
|
|
|
|
|
|
|
|
|
|
|
|
|
|
|
|
|
|
|
|
|
|
|
|
|
|
|
|
|
|
|
|
|
|
|
|
|
|
|
|
|
|
|
|
|
|
|
In TV/DVD mode, change the display’s aspect ratio |
25 |
|
|
|
|
|
|
|
|
|
|
|
|
|
|
|
|
|
|
|
|
|
|
|
|
|
|
|
|
|
|
|
|
|
|
|
|
|
|
|
|
|
|
|
|
|
|
|
|
|
|
|
|
|
|
|
|
Configure the Sleep Timer |
22 |
|
|
|
|
|
|
|
|
|
|
|
|
|
|
|
|
|
|
|
|
|
|
|
|
|
|
|
|
|
10
Remote control (continued)
Install the batteries
Use R03/AAA/UM4 batteries.
Note:
•Weak batteries can leak and severely damage the remote control transmitter. Always remove batteries if they become weak or if the remote control is not to be used for an extended period of time.
•Do not use old or weak batteries. The remote control may not work properly with a weak voltage from such batteries. Replace exhausted batteries with new ones. Never try to recharge normal batteries - this could cause an explosion.
•Dispose of batteries in a designated disposal area.
Warnings:
•Never throw batteries into a fire.
•Never expose batteries to excessive heat such as sunshine, fire or the like.
1 Open the battery compartment cover in the direction of the arrow.
2 Install the batteries as shown |
3 Close the battery compartment. |
below, ensuring the correct polarity. |
|
Distance of remote control operation
The remote control will not work properly in the following cases:
If bright sunlight directly beams on the front of the TV. If an obstacle is placed between the TV and the remote.
If the batteries are not installed according to their polarities. |
If the batteries are weak. |
11

I/O connections
Note:
Before you connect other appliances:
•To avoid potentially damaging your TV, make sure all items are switched off and disconnected from the mains power when you make the connections.
•Arrange the desired connection.
•When you have finished making the connections, reconnect the mains power to the TV and switch it back on.
Connect your aerial as shown below. Connections to other equipments is explained further on pages 74-78. If you have problems with reception, consult a TV antenna installer.
Illustration of 26DV713B/32DV713B |
Illustration of 19DV713B/19DV714B/ 22DV713B/ |
||||||||||||||||||||||||||||||||||||||||||||||||||||||||||||||||||||||||||||||||||||||||||||||||||||||||||||||||||||||||||||
|
|
|
|
|
|
|
|
|
|
|
|
|
|
|
|
|
|
|
|
|
|
|
|
|
|
|
|
|
|
|
|
|
|
|
|
|
|
|
|
|
|
|
|
|
|
|
|
|
|
|
|
|
|
|
|
|
|
|
|
|
|
|
|
|
|
|
|
|
|
|
|
22DV714B |
|||||||||||||||||||||||||||||||||||||||||||||||||||||
|
|
|
|
|
|
|
|
|
|
|
|
|
|
|
|
|
|
|
|
|
|
|
|
|
|
|
|
|
|
|
|
|
|
|
|
|
|
|
|
|
|
|
|
|
|
|
|
|
|
|
|
|
|
|
|
|
|
|
|
|
|
|
|
|
|
|
|
|
|
|
|
|
|
|
|
|
|
|
|
|
|
|
|
|
|
|
|
|
|
|
|
|
|
|
|
|
|
|
|
|
|
|
|
|
|
|
|
|
|
|
|
|
|
|
|
|
|
|
|
|
|
|
|
|
|
(K) |
AC INPUT
(K)
AC INPUT |
|
|
|
|
|
|
|
|
|
|
|
|
|
|
|
|
|
|
|
|
|
|
|
|
|
|
|
|
|
|
|
|
|
|
|
|
|
|
|
|
|
|
|
|
|
|
|
|
|
|
|
|
|
|
|
|
|
|
|
|
|
|
|
|
|
|
|
|
|
|
|
|
|
|
|
|
|
|
|
|
|
|
|
|
|
|
|
|
|
|
|
|
|
|
|
|
|
|
|
|
|
|
|
|
|
|
|
|
|
|
|
|
|
|
|
|
|
|
|
|
|
|
|
|
|
|
|
|
|
|
|
|
|
|
|
|
|
|
|
|
|
|
|
|
|
|
|
|
|
|
|
|
|
|
|
|
|
|
|
|
|
|
|
|
|
|
|
|
|
|
|
|
|
|
|
|
|
|
|
|
|
|
|
|
|
|
|
|
|
|
|
|
|
|
|
|
|
|
|
|
|
|
|
|
|
|
|
|
|
|
|
|
|
|
|
|
|
|
|
|
|
|
|
|
|
|
|
|
|
|
|
|
|
|
|
|
|
|
|
|
|
|
|
|
|
|
|
|
|
|
|
|
|
|
|
|
|
|
|
|
|
|
|
|
|
|
|
|
|
|
|
|
|
|
|
|
|
|
|
|
|
|
|
|
|
|
|
|
|
|
|
|
|
|
|
|
|
|
|
|
|
|
|
|
|
|
|
|
|
|
|
|
|
|
|
|
|
|
|
|
|
|
|
|
|
|
|
|
|
|
|
|
|
|
|
|
|
|
|
|
|
|
|
|
|
|
|
|
|
|
|
|
|
|
|
|
|
|
|
|
|
|
|
|
|
|
|
|
|
|
|
|
|
|
|
|
|
|
|
|
|
|
|
|
|
|
|
|
|
|
|
|
|
|
|
|
|
|
|
|
|
|
|
|
|
|
|
|
|
|
|
|
|
|
|
|
|
|
|
|
|
|
|
|
|
|
|
|
|
|
|
|
|
|
|
|
|
|
|
|
|
|
|
|
|
|
|
|
|
|
|
|
|
|
|
|
|
|
|
|
|
|
|
|
|
|
|
|
|
|
|
|
|
|
|
|
|
|
|
|
|
|
|
|
|
|
|
|
|
|
|
|
|
|
|
|
|
|
|
|
|
|
|
|
|
|
|
|
|
|
|
|
|
|
|
|
|
|
|
|
|
|
|
|
|
|
|
|
|
|
|
|
|
|
|
|
|
|
|
|
|
|
|
|
|
|
|
|
|
|
|
|
|
|
|
|
|
|
|
|
|
|
|
|
|
|
|
|
|
|
|
|
|
|
|
|
|
|
|
|
|
|
|
|
|
|
|
|
|
|
|
|
|
|
|
|
|
|
|
|
|
|
|
|
|
|
|
|
|
|
|
|
|
|
|
|
|
|
|
|
|
|
|
|
|
|
|
|
|
|
|
|
|
|
|
|
|
|
|
|
|
|
|
|
|
|
|
|
|
|
|
|
|
|
|
|
|
|
|
|
|
|
|
|
|
|
|
|
|
|
|
|
|
|
|
|
|
|
|
|
|
|
|
|
|
|
|
|
|
|
|
|
|
|
|
|
|
|
|
|
|
|
|
|
|
|
|
|
|
|
|
|
|
|
|
|
|
|
|
|
|
|
|
|
|
|
|
|
|
|
|
|
|
|
|
|
|
|
|
|
|
|
|
|
|
|
|
|
|
|
|
|
|
|
|
|
|
|
|
|
|
|
|
|
|
|
|
|
|
|
|
|
|
|
|
|
|
|
|
|
|
|
|
|
|
|
|
|
|
|
|
|
|
|
|
|
|
|
|
|
|
|
|
|
|
|
|
|
|
|
|
|
|
|
|
|
|
|
|
|
|
|
|
|
|
|
|
|
|
|
|
|
|
|
|
|
|
|
|
|
|
|
|
|
|
|
|
|
|
|
|
|
|
|
|
|
|
|
|
|
|
|
|
|
|
|
|
|
|
|
|
|
|
|
|
|
|
|
|
|
|
|
|
|
|
|
|
|
|
|
|
|
|
|
|
|
|
|
|
|
|
|
|
|
|
|
|
|
|
|
|
|
|
|
|
|
|
|
|
|
|
|
|
|
|
|
|
|
|
|
|
|
|
|
|
|
|
|
|
|
|
|
|
|
|
|
|
|
|
|
|
|
|
|
|
|
|
|
|
|
|
|
|
|
|
|
|
|
|
|
|
|
|
|
|
|
|
|
|
|
|
|
|
|
|
|
|
|
|
|
|
|
|
|
|
|
|
|
|
|
|
|
|
|
|
|
|
|
|
|
|
|
|
|
|
|
|
|
|
|
|
|
|
|
|
|
|
|
|
|
|
|
|
|
|
|
|
|
|
|
|
|
|
|
|
|
|
|
|
|
|
|
|
|
|
|
|
|
|
|
|
|
|
|
|
|
|
|
|
|
|
|
|
|
|
|
|
|
|
|
|
|
|
|
|
|
|
|
|
|
|
|
|
|
|
|
|
|
|
|
|
|
|
|
|
|
|
|
|
|
|
|
|
|
|
|
|
|
|
|
|
|
|
|
|
|
|
|
|
|
|
|
|
|
|
|
|
|
|
|
|
|
|
|
|
|
|
|
|
|
|
|
|
|
|
|
|
|
|
|
|
|
|
|
|
|
|
|
|
|
|
|
|
|
|
|
|
|
|
|
|
|
|
|
|
|
|
|
|
|
|
|
|
|
|
|
|
|
|
|
|
(A) |
|
|
|
|
|
|
|
|
|
|
|
|
|
|
|
|
|
|
|
|
|
|
|
|
|
|
|
|
|
|
|
|
|
(A) |
|
|
|
|
|
|
|
|
|
|
||||||||||||||||||||||||||||||||||
Note:
• 22DV713B, 22DV714B, and 32DV713B are used for illustration purposes.
(A)AC input: Connect one end of the supplied AC power cord into the TV’s AC input jack, and the other end to an AC 110- 240V/50-60Hz power outlet to turn on and operate the TV.
(B)AV1 (SCART) socket: For the connection of SCART cable, see pages 77-78.
(C)HEADPHONE jack: For use when inserting a headphone with a mini plug (3.5 mm).
(D)OPTICAL DIGITAL AUDIO output: Optical audio output in Dolby Digital format for connecting an external Dolby Digital decoder, amplifier, or home theatre system with optical audio input (see page 77).
(E)AV2 (VIDEO, Audio L/R) input: Standard (composite) video and standard audio inputs plus for connecting devices with
composite video (see pages 77-78).
Note: Standard (composite) video cables carry only video information; separate audio cables are required for a complete connection.
(F)COMPONENT input: For use when connecting devices with component video output (see page 78).
Note: Component video cables carry only video information; separate audio cables are required for complete connection.
(G)PC/HDMI 1 AUDIO input: PC audio input terminal is shared with HDMI 1 analogue audio input terminal (see pages 74-75).
(H)HDMI 1 input: High-Definition Multimedia Interface (HDMI 1) input receives digital audio and uncompressed digital video from an HDMI device or uncompressed digital video from a DVI device. Also see (G). HDMI connection is necessary to receive 1080p signals (see pages 74-76).
(I)PC MONITOR input (PC): For use when connecting a personal computer (see page 74).
(J)Tuner: Connect the outdoor aerial to the aerial input socket (see page 77).
(K)Bracket holes: Fix a wall mounting bracket (not supplied) here.
12
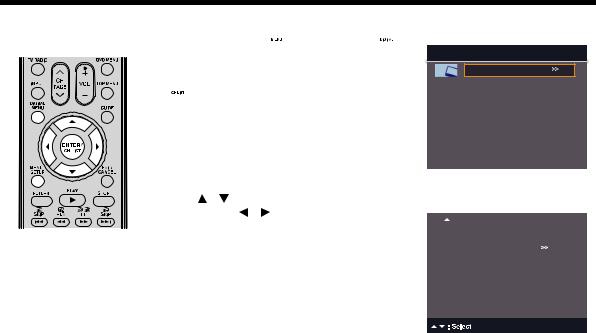
Using the Auto Brightness Sensor
When the Auto Brightness Sensor feature is set to On, the TV will automatically optimise the backlighting levels to suit ambient light conditions.
1 Press MENU SETUP  or DIGITAL MENU
  to display the Main Menu screen.
Select Picture, and then press ENTER/CH LIST
 .
.
Main Menu
Picture
Sound
Channel
Setup
|
2 Press / to select Auto Brightness Sensor, |
|
|
|
|
|
|
|
|
|
|
|
|
Picture |
|
|
|
|
|
|
|||
|
and then press / to select On or Off to confirm |
|
|
|
|
|
|
|
|
|
|
|
your choice. |
|
|
|
|
|
|
Auto Brightness Sensor |
Off |
|
|
|
|
|
|
||
|
|
|
|
|
|
Reset
 : Adjust
13
Auto setup
Your TV has an automatic installation routine which makes installation easy. When you turn on the TV for the first time, the automatic installation routine is activated. This routine helps you select the on-screen language, country, energy saving mode, and automatically search for and store all available analogue and digital (DVB) channels.
The automatic station presetting feature is for the TV’s built-in tuner only. If you have a device such as a digital decoder (e.g. Satellite or Digital Terrestrial) connected (see page 77), you need to tune it in separately according to its own instructions.
1 Press  on the TV control panel or
  on the remote control.
The Auto Installation menu will appear.
2 Press |
/ |
to select Menu Language, and then |
press |
/ |
to select your preferred language. |
3 |
Press |
/ |
to select Country, and then press |
|
/ |
to select your country. |
|
Auto Installation
Menu Language |
English |
Country |
UK |
Energy Saving Mode |
Home |
Auto Tuning |
|
|
: Adjust |
||
|
|
|
|
|
Auto Installation |
|
|
|
Menu Language |
English |
|
|
Country |
UK |
|
|
Energy Saving Mode |
Home |
|
|
Auto Tuning |
|
|
|
|
|
|
: Adjust
4 Press / to select Energy Saving Mode. |
|
Auto Installation |
|
|
For normal home use, press / to select Home. |
|
Menu Language |
English |
|
|
|
Country |
UK |
|
|
|
Energy Saving Mode |
Home |
|
|
|
Auto Tuning |
|
|
|
|
|
|
|
: Adjust
Note:
•The factory default settings of this TV meet the Energy Saving requirements. Enabling or changing certain features and functionality (e.g. Picture Setting) may increase energy consumption, possibly beyond the limits required for Energy Saving qualification.
To ensure your TV is operating at optimal energy efficiency, select [Home] mode during initial activation.
•The corresponding default setting of Picture Preference to [Home] mode is “Standard”, and the corresponding default setting of Picture Preference to [Retail] mode is “Sports”. The Energy Saving Mode will remain the same regardless of the changes made to the setting of Picture Preference.
•If you want to change the current energy saving mode setting, perform the Reset procedure (see page 28) and run the auto installation routine to select a different mode.
14
Auto setup (continued)
5
6
Note:
•The Auto Tuning process will only start by itself the
first time you turn on the TV/DVD. To enable Auto Tuning in a later time, see page 18.
Press / to select Auto Tuning, and then press
ENTER/CH LIST 

 .
.
A message prompt will appear with option to connect aerial to TV.
Press ENTER/CH LIST  to start Auto Tuning.
Your TV will now automatically detect all available channels in your area and store them in the TV’s memory. Analogue channels will be scanned first, and then digital channels.
When the Programming Now progress bar is completely highlighted, the Auto Tuning process is finished.
To cancel the Auto Tuning process: Press EXIT/CANCEL 

 .
.
Note:
•Please be patient. The Auto Tuning process can take several minutes to complete.
Connect aerial to TV then press ENTER to start auto tuning
|
|
|
|
|
|
|
|
|
|
|
EXIT : End |
||
|
|
|
|
|
|
|
|
|
Auto Installation |
|
|
|
|
|
|
Menu Language |
English |
|
||
|
|
Country |
UK |
|
||
|
|
Energy Saving Mode |
Home |
|
||
|
|
Auto Tuning |
|
|
|
|
|
|
Analogue Channel Found |
16 |
|
|
|
|
|
|
|
|
|
|
|
|
|
|
|
|
|
|
|
|
|
|
|
|
|
|
|
|
|
|
|
|
|
|
|
|
|
|
EXIT : Cancel
(Analogue)
Auto Installation
|
|
|
|
|
|
|
|
|
Menu Language |
English |
|||
|
|
Country |
UK |
|||
|
|
Energy Saving Mode |
Home |
|||
|
|
Auto Tuning |
|
|
|
|
|
|
DTV Channel Found |
5 |
|
|
|
|
|
Radio Channel Found |
3 |
|
|
|
|
|
|
|
|
|
|
|
|
|
|
|
|
|
|
|
|
|
|
|
|
|
|
|
|
|
|
|
|
|
|
|
|
|
|
EXIT : Cancel
(Digital)
15
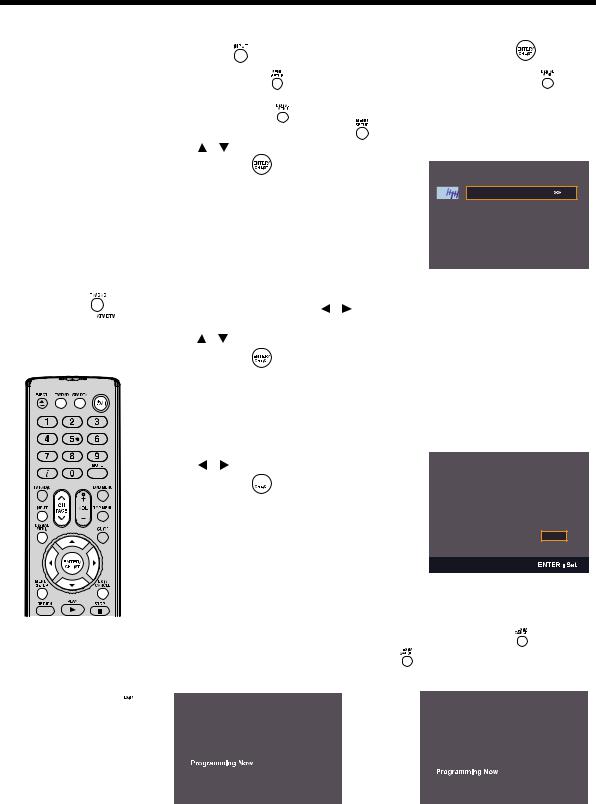
Quick guide for menu operation
Preparations:
•Turn on the TV with the
 button on its left side.The
  power indicator will light green.
To place the TV in standby mode, press  on the remote control. Power indicator will change from green to red. To turn on
the TV from standby mode, press  on the remote control again.
In standby mode, you can
also turn the TV on with

 /
/  on the TV or CH
  /
/  on the remote control.
To turn off the TV, press
 button on it; to completely switch it off, disconnect the mains power supply.
• Press TV/DVD |
to |
select TV mode. |
|
•Press ATV/DTV  to toggle between analogue TV and digital TV mode.
Note:
•If no button is pressed after approximately 60 seconds, the Main Menu screen will disappear.
•Press EXIT/CANCEL 

 to exit the Main Menu screen.
Quick guide for menu operation
Launch the Main Menu screen. For example: Select Auto Tuning.
1 |
Press INPUT |
to select ATV or DTV, and then press ENTER/CH LIST |
. |
|
|
||||
2 |
Press MENU SETUP |
in ATV (analogue TV) mode or press DIGITAL MENU |
in DTV |
||||||
|
(digital TV) mode to display the Main Menu screen. |
|
|
|
|
||||
|
When DIGITAL MENU is pressed in ATV mode, it will automatically switch to DTV mode. |
||||||||
|
And it is possible to use MENU SETUP |
in DTV mode. |
|
|
|
|
|||
3 |
Press / |
to select Channel, and then press |
|
|
|
|
|
||
|
Main Menu |
|
|
|
|||||
|
ENTER/CH LIST |
. |
|
|
|
|
|
|
|
Picture
Sound
Channel
Setup
|
|
|
|
|
|
|
|
|
|
|
4 On the Channel menu, the Country option is |
|
|
|
|
||||||
|
|
|
|
|||||||
|
automatically highlighted. Press |
/ to select |
|
|
|
|
||||
|
your country. |
|
|
|
|
|
Country |
UK |
|
|
|
Press |
/ |
to select Auto Tuning, and then press |
|
|
>> |
|
|||
|
|
|
|
|
|
|
|
|
|
|
|
ENTER/CH LIST |
. |
|
|
|
|
>> |
|
||
|
|
|
|
|
>> |
|
||||
|
|
|
|
|
|
|
|
|
|
|
|
|
|
|
|
|
|
|
|
: Adjust |
|
5 |
A message prompt will appear with option to delete |
|
|
|
||||||
|
|
|
||||||||
|
previously stored channels. |
|
|
|
|
|
|
|||
|
|
|
|
|
|
|
||||
|
Press |
/ |
to select Yes or No, and then press |
|
|
|||||
Auto Tuning will delete all previously
ENTER/CH LIST 

 .
.
stored channels -
Do you want to proceed?
Yes No
 : Adjust
6 The auto scan process will now begin. A progress bar appears to indicate scanning progress.
Note:
• |
All the channels will be deleted before the scanning process begins. |
|||
• |
You can cancel the scan process at any time by pressing EXIT/CANCEL . The carriers |
|||
|
and the services stored before EXIT/CANCEL |
is pressed will be stored. |
||
|
|
|
|
|
|
|
|
|
|
|
|
|
|
|
|
|
|
|
|
|
|
|
|
|
|
DTV Channel Found |
0 |
|
|
Analogue Channel Found |
0 |
|
|
Radio Channel Found |
0 |
||
|
|
|
|
|
|
Frequency(kHz) |
642000 |
|
|
|
|
|
|||||
|
|
|
|
|
|
|
|
|
|
|
|
|
|
|
|
|
|
|
|
|
|
|
|
|
|
|
|
|
|
|
|
|
|
|
|
|
|
|
|
|
|
|
|
|
EXIT : Cancel |
|
EXIT : Cancel |
(Analogue) |
|
(Digital) |
16
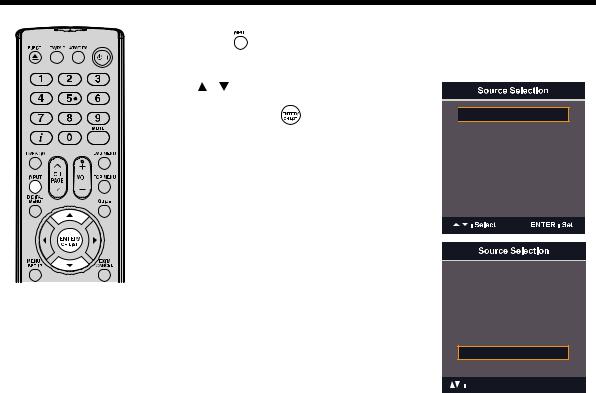
Selecting the video input source
Note:
•If no button is pressed after approximately 5 seconds, the Source Selection menu screen disappears.
Selecting the video input source
1 |
Press INPUT |
to view a signal from the device connected to your TV, such as a VCR or |
|
DVD player. |
|
You can select each input source according to the devices you have connected to your TV.
2 |
Press / or the corresponding number on the |
|
|
screen to select a video input source, and then |
|
|
press ENTER/CH LIST |
within 5 seconds. |

 ATV
ATV
 DTV
DTV
 AV1
AV1
 AV2
AV2
 Component
 HDM1
HDM1  HDM2
HDM2
 AV1
AV1
 AV2
AV2
 Component
 HDM1
HDM1  HDM2
HDM2
7.PC
8.DVD
Select ENTER : Set
17
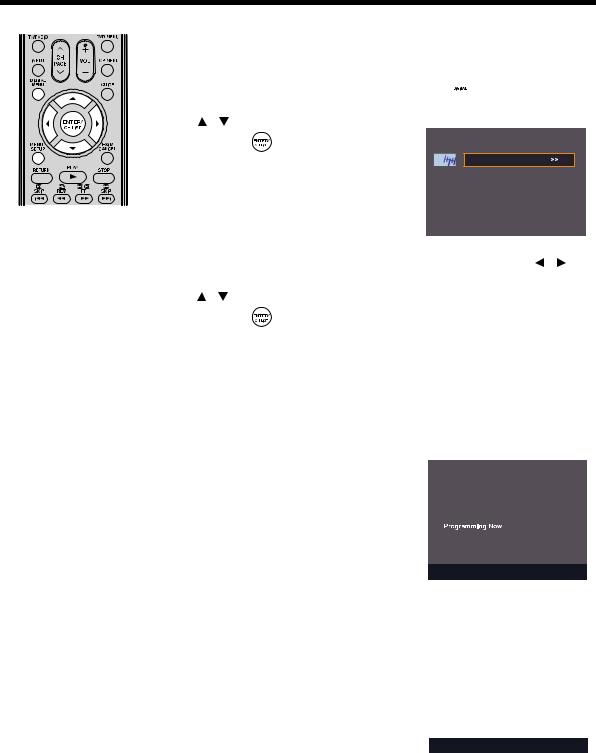
Automatic station presetting with the built-in tuner
Automatic station presetting with the built-in tuner
Perform this feature to search for and store new analogue and digital TV programmes after the Automatic Installation (see page 14).
Preparation:
Make sure your antenna is connected to the aerial input (see page 12). Select ATV or DTV (see page 16), and then press MENU SETUP  or DIGITAL MENU
  .
.
1 Press / to select Channel, and then press |
Main Menu |
|
|
|
|
ENTER/CH LIST |
. |
Picture |
Sound |
||
Channel
Setup
|
|
|
|
|
|
|
|
|
|
|
|
|
|
|
|
|
|
|
2 On the Channel menu, the Country option is automatically highlighted. Press |
/ to |
||||||
|
select your country. |
|
|
|
|
|
|
|
|
3 Press / to select Auto Tuning, and then press |
|
|
|
|
|
|
|
|
|
|
|
|
|
|
||
|
ENTER/CH LIST |
. |
|
|
Country |
UK |
||
|
The automatic tuning will search for available |
|
|
|
>> |
|
|
|
|
|
|
|
>> |
|
|
||
|
channels and store them in a correct order. During |
|
|
|
|
|
||
|
|
|
|
>> |
|
|
||
|
the search the sound is muted. When all channels |
|
|
|
|
|
||
|
|
|
|
|
|
|
||
|
have been stored, the normal TV screen will appear. |
|
|
|
|
|
|
|
|
|
|
|
|
|
|
|
|
|
|
|
|
|
|
|
ENTER : Set |
|
|
|
|
|
|
|
|
|
|
|
|
|
|
|
|
|
|
|
|
|
|
|
|
|
|
|
|
|
Analogue Channel Found |
0 |
|
|
|
|
|
|
|
|
|
|
|
|
|
|
|
|
|
EXIT : Cancel
(Analogue)
|
|
|
|
|
|
|
|
|
DTV Channel Found |
0 |
|
|
|
|
|
Radio Channel Found |
0 |
|
|
|
|
|
Frequency(kHz) |
642000 |
|
|
|
|
|
|
|
|
|
|
|
|
|
|
|
|
|
|
|
|
|
|
|
|
|
|
|
|
|
|
|
|
|
|
|
|
|
|
EXIT : Cancel
(Digital)
18
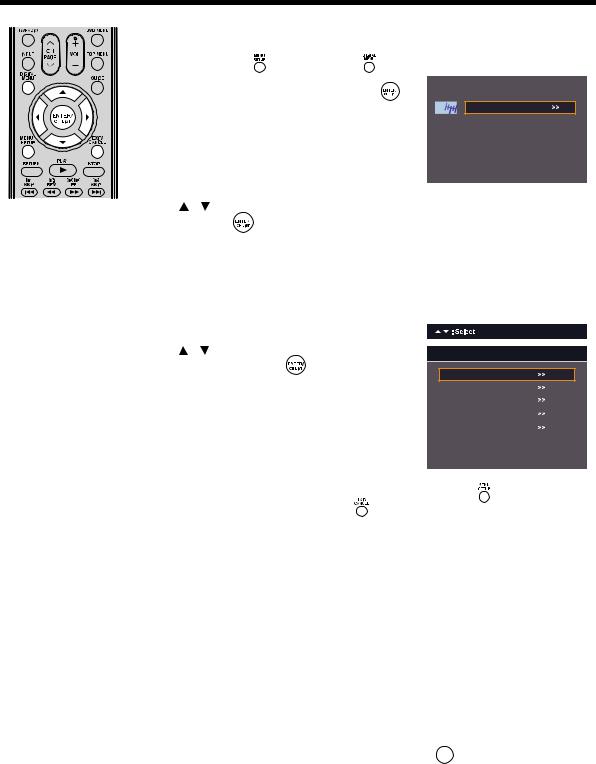
Changing the order of stored channels
Changing the order of stored channels
The Automatic station presetting stores channels in a specific order. However, this order can be changed if you wish.
1 |
Press MENU SETUP |
or DIGITAL MENU |
to |
|
Main Menu |
||||
|
display the Main Menu screen. |
|
Picture |
|
|
Select Channel, and then press ENTER/CH LIST . |
|||
|
Sound |
|||
Channel
Setup
Note: |
|
|
2 |
Press / to select Ch Allocation, and then press |
|
• When changing the |
|
ENTER/CH LIST |
. |
||
|
|
|
|||
order of channels, it is best to start with Ch1.
3 |
Press / to select a channel allocation option, and |
|
|
then press ENTER/CH LIST |
. |
|
|
|
|
|
|
|
|
|
|
|
|
|
Country |
UK |
|
|
|
>> |
|
|
|
>> |
|
|
|
|
|
|
|
|
|
ENTER : Set
Ch Allocation
Sort
Erase Programme
Lock
Skip
Ch Label
4 |
|
|
|
|
After configuring the channel allocation options, press MENU SETUP |
to return to Ch |
|||
|
Allocation menu, or press EXIT/CANCEL |
to return to the normal screen. |
||
There are several options to customise your channel allocation settings:
•Sort: Press  /
/  to select the channel that you want to move, and then press
  to move the channel label to the left side of the list. Press
  /
/  to select the position that you want to move the channel to, and then press
  to confirm the move.
•Erase Programme: Press  /
/  to select the channel that you want to erase, and then press
ENTER/CH LIST  .
.
•Lock: This feature enables you to lock any channel you choose by pressing ENTER/CH LIST
 , and then enter the parental lock password. If you have not set the parental lock password, you can use the initial password “0000”.
•Skip: Press  /
/  to select the channel that you want to skip, and then press ENTER/CH LIST
 . A
. A  mark will appear.
•Ch Label: Press  /
/  to select a channel that you want to rename, and then press
  /
/  to select Ch Label. Press
  /
/  repeatedly until the character you want appears in the first place.
When the character you want appears, press ENTER/CH LIST 

 . Repeat this step to enter the
rest of the characters. If you want to remove the channel label, press  /
/  to select Label Clear, and then press ENTER/CH LIST
  .
.
19
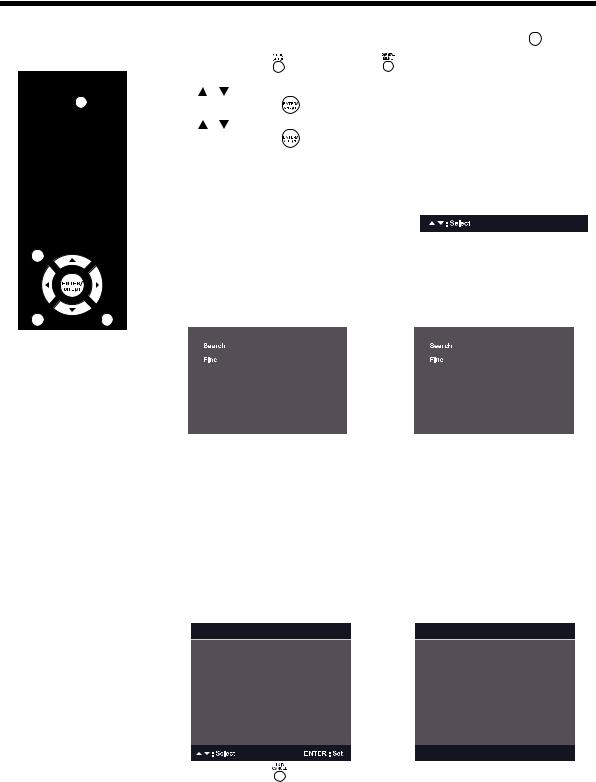
Manual TV station presetting
The Auto Tuning process stores all available stations in the reception area. However, some stations with weak or poor reception may not be detected. If this is the case and you still want to store these stations in your TV, press the ATV/DTV 

 button to
enter ATV or DTV mode, and then follow the steps below.
1 |
Press MENU SETUP |
or DIGITAL MENU |
to display the Main Menu screen. |
||||||
2 |
Press |
/ |
to select the Channel menu, and then |
|
|
|
|
||
|
|
|
|
||||||
|
press ENTER/CH LIST |
. |
|
|
|
|
|
||
3 |
|
|
Country |
|
|
||||
Press |
/ |
to select Manual Tuning, and then |
|
|
>> |
|
|||
|
|
|
|
|
|
|
UK |
||
|
press ENTER/CH LIST |
. |
|
|
|
|
|
||
|
|
|
|
>> |
|
||||
|
|
|
|
|
|
|
|
|
|
|
|
|
|
|
|
|
|
>> |
|
|
|
|
|
|
|
|
|
|
|
ENTER : Set
4 In ATV mode:
(1)Press  /
/  to select Search, and then press
  /
/  each station that has good reception.
(2)If you like to use fine-tuning, select Fine. Press  /
/ 
to start tuning. It will stop at
to fine tune until the station is
adjusted to the best position (see the note on the left of this page).
Manual Tuning |
|
Manual Tuning |
Note:
•Under a normal receiving condition, the station search will stop automatically at the best receiving position. That picture will appear without disturbance. This receiving position will be automatically saved. You do not need to fine tune it.
In the rare case of bad reception, the station search might not stop at the best receiving position. The picture display in that station will appear disturbed (e.g. wavy lines). Only in this case will you need to manually fine tune the station’s position.
|
|
48.25 MHz |
|
|
|
48.25 MHz |
|
|
Colour System |
Auto |
|
|
Sound System |
Auto |
|
|
|
|
|
|
|
: Adjust |
|
|
|
|
|
|
|
48.25 MHz |
|
|
|
48.25 MHz |
|
|
Colour System |
PAL |
|
|
Sound System |
D/K |
|
|
|
|
|
|
|
: Adjust |
|
|
|
|
|
(3)To select a colour system for your TV, select Colour System. Press  /
/  to select the TV system applicable to your area: Auto, PAL or SECAM. PAL should be selected for use in the UK.
(4)To select a sound system, select Sound System. Press  /
/  to select the sound system applicable to your area: Auto, B/G, I, D/K or L/L’.
In DTV mode:
You can select a channel number for Channel List by pressing  /
/  . The corresponding tuning frequency for the channel will be set. Or you can enter a frequency value to start tuning.
After setting the channel, press ENTER/CH LIST  to start scanning for channels.
A progress bar will appear to indicate scanning progress, and a list of services collected
from the channel will be listed.
Manual Tuning
Channel List |
Ch-21 |
|
|
Frequency(kHz) 474000
 : Adjust
Manual Tuning
Channel List |
Ch-21 |
Frequency(kHz) 474000
|
DTV Channel Found |
5 |
|
|
Radio Channel Found |
3 |
|
|
|
|
|
|
|
|
|
|
|
|
|
|
|
|
|
Completed
EXIT : Cancel
5 Press EXIT/CANCEL |
to return to the normal screen. |
20
Basic operation
Note: |
•If the built-in tuner does not receive anything (e.g. if no antenna is connected) during TV operation, the TV will change to standby mode after approx. 15 minutes.
•Press TV/RADIO  to switch between the three service categories: TV, Radio, and Data.
Channel selection
Use the number buttons 0-9. For example:
•CH 2: Press 0 and within 2 seconds, press 2. The TV will switch to CH 2.
•CH 29: Press 2 and within 2 seconds, press 9. The TV will switch to CH 29.
(1)Press CH  /
/  to select a channel. This takes approx. 2 seconds to switch from one channel to another. Only channels saved in the TV and are active can be displayed. Skipped channels will not appear (see page 19).
The Channel List shows a list of all receivable programmes. They are located in channels 1 to 99 for ATV mode and 1 to 999 for DTV mode.
(2)Press ENTER/CH LIST  to display the Channel List.
Channel List - ATV
01. Channel
02. Channel
03. Channel
04. Channel
05.
06.
07.
08.
09.
10.
11.
|
Channel List |
Radio |
|
|
S.No |
Service |
|
007. |
SBS 6 |
||
008. |
SBS 7 |
||
|
|
|
|
|
009. |
SBS 8 |
|
010. |
SBS 9 |
||
011. |
SBS 10 |
||
012. |
SBS 11 |
||
|
|
|
|
|
|
|
ENTER |
TV/RADIO |
|
|
|
||
Analogue Channel List |
DTV Channel List |
|||
(3)Press  /
/  to select a desired channel, and then press ENTER/CH LIST
  to display the selected channel.
(4)Press EXIT/CANCEL 

 to exit.
Toggle between the list of TV, Radio, and Data services (DTV mode only)
(1)Press TV/RADIO 

 to switch between the TV, Radio, and Data mode.
(2)If you press ENTER/CH LIST  when you are in Radio mode, the Channel List menu will display the list of Radio services.
If you wish to view the list of Data services without exiting the current menu, press
TV/RADIO 

 once.
once.
If you wish to view the list of TV services without exiting the current menu, press
TV/RADIO 

 again.
QuickView
Press CH RTN ZOOM 
 to go back to the last selected channel.
Volume adjustment
Press VOL +/– to adjust the volume. The volume level indicator shows the current volume, and will disappear after 4 seconds of inactivity.
Mute
Press MUTE  to turn off the sound. The TV/DVD’s sound will be turned off and Mute will appear on-screen. Press MUTE
  again or VOL +/– to turn the sound on.
21
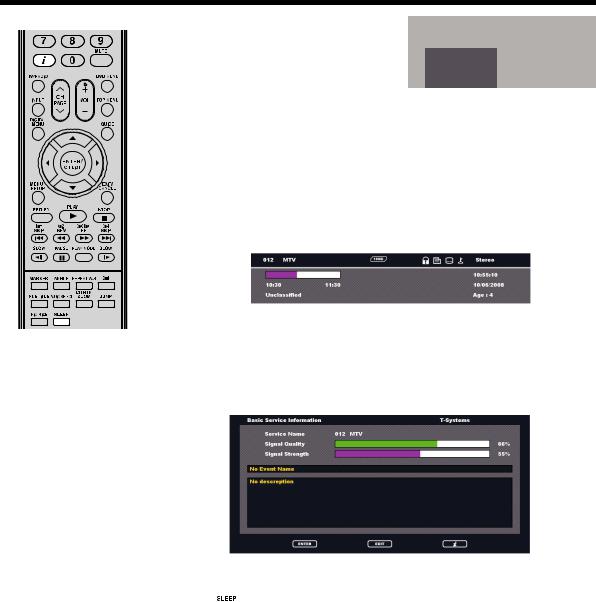
Basic operation (continued)
Note: |
•In the Basic Service Information, the name of channels and services appears in full not in abbreviation.
•Subtitles are displayed on the channel banner, but some broadcasts may not provide this service.
Information display
In ATV mode:
Press  to display the channel number and sleep timer settings information on the screen. Current settings for the sound mode, picture size, and resolution (if in use) are also displayed. The information will appear for approx. 5 seconds.
In DTV mode:
11 |
|
Sleep Timer |
BBC1 |
|
1h 40m |
|
|
|
NICAM ST
Auto 576i
When you switch channels, a channel banner is displayed for a few seconds. The channel banner shows information such as current date and time, DTV channel number, station, and messages from the DTV service providers, etc.
(1)While watching a programme, press  to display the channel banner. The channel banner will disappear after a set time. You can change how long the channel banner is displayed (see page 40 for details).
|
|
|
|
|
|
|
|
|
DVB Teletext available |
|||||||||||
|
|
|
Service |
name |
|
|
|
DVB Subtitle available |
|
|
||||||||||
|
|
|
|
|
|
|
|
Pay TV |
|
|
|
|||||||||
Service no. |
|
Lock status |
|
|
|
|
|
Audio mode |
|
|||||||||||
|
|
|
|
|
|
|
|
|
|
|
|
|
|
|||||||
Duration bar |
|
|
|
|
|
|
|
|
|
|
|
|
|
|
|
|
|
|
|
Time and |
|
|
|
|
|
|
|
|
|
|
|
|
|
|
|
|
|
||||
|
|
|
|
|
|
|
|
|
|
|
|
|
|
|||||||
Starting/ |
|
|
|
|
|
|
|
|
|
|
|
|
|
|
|
|
|
|
||
Ending time of |
|
|
|
|
|
|
|
|
|
|
|
|
Date |
|||||||
|
|
|
|
|
|
|
|
|
|
|
|
|
||||||||
current |
|
|
|
|
|
|
|
|
|
|
|
|
|
|
||||||
|
|
|
|
|
|
|
|
|
|
|
|
|
|
|
||||||
|
|
|
|
|
|
|
|
|
|
|
|
|
|
|
|
|
|
|
|
|
|
|
|
|
|
Genre |
|
|
|
|
|
|
Parental rating |
||||||||
|
|
|
|
|
|
|
|
|
|
|
|
|
|
|||||||
(2)Press  again to display the Basic Service Information screen.
You can verify the signal strength and quality of the selected service here. If necessary, adjust the direction of antenna to obtain the maximum signal strength.
A short event description of an event can also be viewed here. For an extended description of an event, you can view it in the EPG menu (see page 47).
(3) Press  to remove the diaplay of the Basic Service Information.
Sleep timer
Press SLEEP  to set the sleep timer to turn off your TV/DVD after a set length of time. Each time you press the SLEEP button, the timer setting increases in 10 increments (Off, 0h 10m, 0h 20m, ..., 2h 0m). After the setting is programmed, the display will begin 30 seconds in advance to remind you that the sleep timer is enabled.


To confirm the sleep timer setting, press SLEEP  and the time remaining will appear for a few seconds. To cancel the sleep timer, press the SLEEP button repeatedly until Off appears.
22
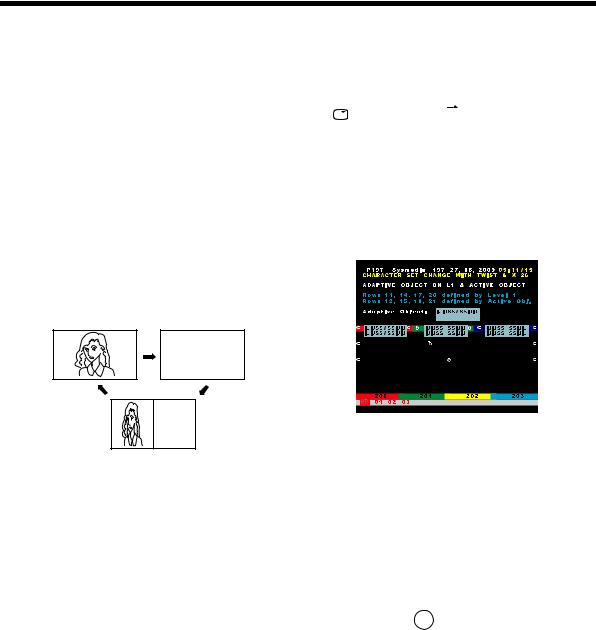
Teletext
A teletext service offers a range of text-based information, typically including news stories, sport articles, weather forecasts, and TV schedules. Information is sent page by page. The TV can store up to 256 pages, but they can only be accessed once they have been stored.
Fastext/TOPtext
The Fastext/TOPtext is teletext with a special directory.
On the lower part of the screen there are four different coloured fields (red, green, yellow, and blue). These fields lead directly to the pages shown within. The coloured buttons on the remote control correspond to the coloured fields. Press the appropriate coloured button in order to activate the desired coloured field.
Switch Teletext on/off
Teletext is not available for all channels.
(1)Select a channel that shows teletext.
(2)Press  . You will now see a teletext page.
(If “100” is shown without any text information, it may mean that the current channel does not support teletext.)
(3)Press  again to switch to split TV-teletext display mode. You will now see both the teletext page and the TV programme.
(4)Press  once more to close the teletext screen.
(5)Press  again in order to switch teletext on. The last page which was stored is now shown.
TELETEXT
TELETEXT
Note:
•You cannot change channels when there is a teletext display. Turn off the teletext if you want to switch to another channel.
Select page
Press CH  /
/  until the page you want appears. Or use the number buttons 0-9 to enter the page number.
If you input the wrong page number, enter 3 random numbers first, and then enter the number you want. Or press one of the coloured teletext buttons, so the page from Fastext/TOPtext will be shown.
Hold page
Some pages are divided into sub-pages by channel. Subpages are automatically displayed when they are transmitted. In order to hold a page, press  .
.
Press  again to display the next sub-page.
Directly select a sub-page
Sub-page numbers are displayed below the coloured bar. Press  /
/  to select a sub-page, or highlight
  to display a sub-page when it is transmitted. You can directly select a sub-page if required.
Example:
On the screen below, page 197 offers the sub-page service. At the bottom of the screen, sub-pages (01/02/03) available for page 197 are displayed.
To select a sub-page:
(1)Press 
 in order to select 01 sub-page.
(2)Press 
 again in order to switch to 02 sub-page.
(3)Press 
 once more to switch to 03 sub-page.
Enlargement
Press  to increase the size of teletext display - either the upper or lower half of the screen is enlarged. Each time you press
  , the display toggles between half-screen and fullscreen display mode.
Answering quiz questions
Some teletext pages contain quiz questions. Answers to these questions are hidden within the page. Press  to reveal the answers.
Page 100
Press ENTER/CH LIST 

 to show page 100 of a multi-page teletext.
23
Stereo reception with the built-in analogue tuner
The TV’s built-in tuner can detect and receive NICAM stereo broadcasts automatically.
NICAM stereo sound reception
Note: |
Bad reception can cause disturbance to stereo sound. In some cases, NICAM stereo sound may not be received correctly. In the case of two-channel sound
reception, press AUDIO SELECT 


 to switch to a
sound channel with better audio quality.
1 |
Press MENU SETUP |
to display the Main Menu |
|
screen. |
|
|
Press / to select Sound, and then press |
|
|
ENTER/CH LIST |
. |
2 |
Select NICAM, and then press / to select |
|
Auto or Off.
Select Off if you do not want to receive NICAM sound.
Sound
|
|
|
|
|
NICAM |
Auto |
|
|
Bass |
15 |
|
|
Treble |
15 |
|
|
Balance |
|
|
|
HDMI1 Audio |
HDMI |
|
|
Digital Audio Output |
Bitstream |
|
|
Reset |
|
|
|
|
|
|

 : Adjust
3 Press EXIT/CANCEL |
to return to the normal screen. |
The following types of broadcast are possible with NICAM transmissions:
•NICAM ST: Illuminates for approx. 4 seconds when a NICAM STEREO broadcast signal is received.
NICAM ST
•NICAM M1: Illuminates for approx. 4 seconds when a NICAM MONO A broadcast signal is received.
N I C A M M 1
• NICAM M1/ M2: Illuminates for approx. 4 seconds |
|
|
|
|
|
|
|
|
|
|
|
when a NICAM MONO A and MONO B broadcast |
|
|
|
|
|
|
NICAM |
M1 |
/ M2 |
|
|
signals are received. |
|
|
|||
|
|
|
|
|
|
|
|
|
|
|
|
•NICAM OFF: Appears for approx. 4 seconds when a NICAM signal is received and the NICAM Off option is selected.
NICAM Off
Stereo reception in Germany
STEREO illuminates for approx. 4 seconds when a STEREO broadcast signal is received.
S t e r e o
Two-channel sound reception
When two-channel sound reception is available, press AUDIO SELECT 


 to select your preferred audio channel.
Each time you press AUDIO SELECT 


 , the sound channel will switch between the two alternative channels available.
NICAM two-channel sound reception (not available in Germany)
Two-channel sound reception in Germany
|
|
|
|
|
|
|
|
|
|
|
|
S o u n d |
|
|
|
|
|
S o u n d |
|
|
|
|
|
|
|
|
|
|
|
|
|
|
24
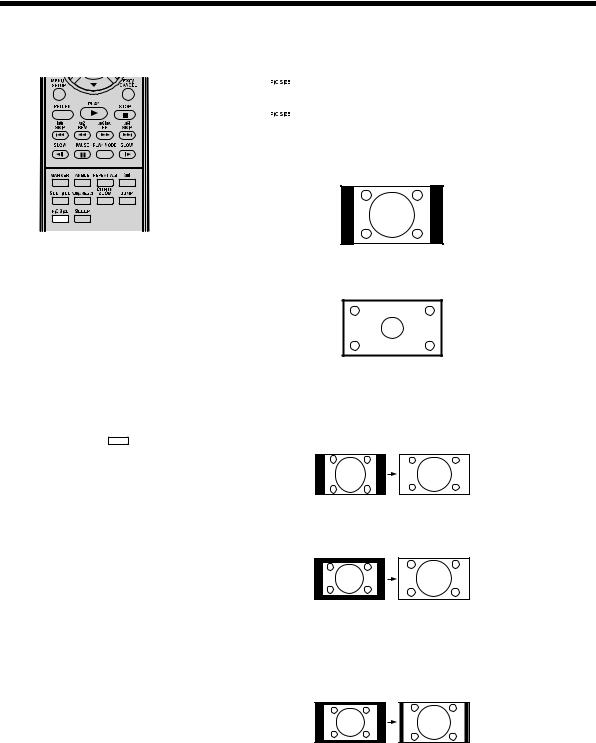
Picture format
The broadcaster may transmit a widescreen signaling (WSS) signal which can determine the correct height/width of pictures and have it set automatically when the setting Auto is selected. If you want to change this setting, you can select from the formats listed below.
Note:
•When the picture size is set to Auto mode, the aspect ratio will automatically change according to the WSS signal, if it is available. This may either be transmitted by a broadcasting TV channel, or via a recording from a VCR, etc. Any WSS signal received will only be effective in Auto mode. However, some DVD players/digital decoders etc. will automatically switch the
aspect ratio via a SCART input (Pin 8 switching), even if Auto is not selected.
In any case, if you want to change an aspect ratio to the one selected
automatically, you can change it by pressing PIC SIZE 

 .
.
•In PC mode, the picture size settings is available only for 16:9 or 4:3 format.
•In HDMI or Component mode, the scanning rates are 720p and 1080i, and the picture size settings is available only for 16:9 or Real (HDMI mode only) format.
•Using the PIC SIZE function to change the format of the displayed image (i.e. changing the height/ width ratio) for the purposes of public display or commercial gain may infringe on copyright laws.
Auto picture size
Press PIC SIZE  repeatedly until Auto appears on the screen.
Picture format setting
Press PIC SIZE  repeatedly to scroll through the following options.
4:3
This mode shows a picture in the standard 4:3 format with vertical black bands on the left and right sides.
Real (HDMI mode only)
The picture is displayed in its original size.
16:9
This mode is used with 16:9 signals from a Digital decoder, DVD player or other external source. This uniformly stretches a 4:3 picture horizontally to fill the screen. (For example, DVDs often store a 16:9 image ‘‘anamorphically’’, which means that the 16:9 image is stored as a horizontally compressed 4:3 image. Select the 16:9 format to restore the image to its proper 16:9 proportions.)
Cinema
This mode is used to zoom in, or expand pictures with a 4:3 ‘‘letterbox’’ format (with black bars on the top and bottom of the picture) so that they fill more of the screen.
Note:
•Using this format will slightly cut off part of the picture due to the image expansion.
However, it is possible to scroll the picture up or down to view the cutoff section on the top or bottom part of the picture (see Vertical Position on page 28).
14:9
This mode enlarges a standard 4:3 picture to the 14:9 format.
25
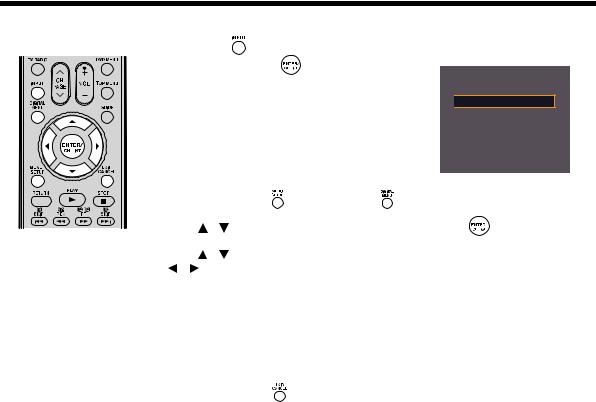
AV colour adjustment
Use the AV Colour menu option to adjust the picture colour settings in AV mode. These settings do not apply when the TV is in any other mode.
Note:
•DVD players that play NTSC DVDs (i.e. multiregion/region code-free) can produce different signals based on the player model. Possible signals include PAL, SECAM, NTSC3.58, NTSC4.43 and PAL60. If you are using an external DVD player, connect it to the TV through the component video jack.
1 Press INPUT |
to select AV1 or AV2, and then |
|
|
|
|||
press ENTER/CH LIST |
. |
|
|
 ATV
ATV
 DTV
DTV

 AV1
AV1
 AV2
AV2
 Component
 HDM1
HDM1
 HDM2
HDM2
2 |
Press MENU SETUP |
or DIGITAL MENU |
|
|
|
|
|
|
|
||
to display the Main Menu screen. |
|
||||||||||
3 |
Press |
/ |
to select Setup, and then press ENTER/CH LIST |
. |
|
|
|||||
4 |
Press |
/ |
to select AV Colour, and then press |
|
|
|
|
|
|||
|
|
|
|
|
|||||||
|
/ |
to select the preferred colour system. |
|
|
|
|
|
|
|
||
|
Options include PAL, SECAM, NTSC4.43, |
|
|
Auto 4:3 Default |
|
4:3 |
|
||||
|
NTSC3.58, and PAL60. |
|
|
|
Display Setup |
|
>> |
|
|||
|
If you are not certain of the system used in your |
|
|
Auto Shut Off |
|
>> |
|
||||
|
|
|
|
|
|
|
|
||||
|
area or if the setting you have selected causes |
|
|
AV Colour |
|
Auto |
|
||||
|
|
|
Rec Screen Status |
On |
|
||||||
|
horizontal stripes to the picture display, select |
|
|
|
|||||||
|
|
|
Reset |
|
>> |
|
|||||
|
Auto. |
|
|
|
|
|
|
|
|||
|
|
|
|
|
|
|
|
|
|
|
|
|
|
|
|
|
|
|
|
|
: Adjust |
|
|
5 |
Press EXIT/CANCEL |
to return to the normal screen. |
|
|
|
||||||
26

|
|
|
Other convenience functions |
|
|
|
|||
|
|
|||
The TV Main Menu has several menu options you can configure to suit your viewing preferences. |
|
|||
|
|
|
|
|
Main |
Selected items |
Setup hint |
|
|
menu |
|
|||
|
|
|
|
|
|
|
|
|
|
Picture |
Picture Setting |
Brightness |
Adjust the black level. This aspect determines the point where grays become pure |
|
|
|
|
black. |
|
|
|
|
|
|
|
|
Contrast |
Adjust the white level. This aspect determines how bright the brightest whites |
|
|
|
|
should appear. |
|
|
|
|
|
|
|
|
Sharpness |
Adjust the sharpness or softness of the display. |
|
|
|
|
|
|
|
|
Colour |
Adjust the colour intensity. |
|
|
|
|
|
|
|
|
Tint*1 |
Adjust the balance of the red, green, and blue colours in the display. |
|
|
|
Colour Temperature |
Adjust the level of white balance in the display. Available settings include: |
|
|
|
|
• Cool - Picture appears with a bluish tint. |
|
|
|
|
• Standard - Picture appears more white. |
|
|
|
|
• Warm - Picture appears with a reddish tint. |
|
|
|
|
|
|
|
|
Backlight |
Adjust the backlight level. |
|
|
|
|
|
|
|
|
DynaLight |
This function automatically strengthens the black colouring of dark areas in the |
|
|
|
|
video according to the level of darkness. |
|
|
|
|
|
|
|
Picture Preference |
|
Select one of the four preset picture modes. |
|
|
|
|
• Sports - High contrast display for clear-cut images. |
|
|
|
|
• Standard - Picture is viewed in its original display mode. |
|
|
|
|
• Movie - Picture quality is suited for viewing under dim lighting conditions to deliver |
|
|
|
|
a “cinema” experience. |
|
|
|
|
• Memory - When you adjust any of the items in the Picture Setting menu, this |
|
|
|
|
mode is automatically applied. |
|
|
|
|
|
|
|
Picture Size |
|
You can choose from six picture formats to adjust the height/width ratio of the |
|
|
|
|
display. See page 25. |
|
|
|
|
|
|
|
Blue Back |
On/Off |
You can set the TV to automatically switch the display to a blue screen and mute |
|
|
|
|
the sound if the signal is weak or absent. |
|
|
|
|
|
|
|
PC Setting*2 |
Hor Position |
Adjust the image position horizontally. |
|
|
|
Ver Position |
Adjust the image position vertically. |
|
|
|
|
|
|
|
|
Clock |
Minimise any vertical bars or stripes visible on the screen background. |
|
|
|
|
|
|
|
|
Phase |
Adjust this option if the computer’s display frequency has been set to 60 Hz. This |
|
|
|
|
will optimise picture quality by eliminating flickering in the display. |
|
|
|
|
|
|
|
|
Auto Adjust |
When individual adjustment of PC settings results in rough edges or flickering in the |
|
|
|
|
picture display, select Auto Adjust to automatically adjust all settings to their ideal |
|
|
|
|
position based on the current VGA signal. |
|
|
|
|
|
|
|
DNR*3 |
On/Off |
DNR (digital noise reduction) improves picture quality by filtering out unusable data |
|
|
|
|
(noise) from a faulty input signal (e.g. a video film in letterbox format or a noisy |
|
|
|
|
analogue cable TV signal). |
|
|
|
|
|
|
|
Auto Brightness |
On/Off |
This sensor will detect the ambient light conditions to optimise the backlighting |
|
|
Sensor |
|
levels. See page 13. |
|
|
|
|
|
|
|
Reset |
|
Reset all Picture menu settings to their factory preset values. |
|
|
|
|
|
|
Sound |
NICAM |
Auto/Off |
Enable or disable the reception of NICAM stereo broadcasts. See page 24. |
|
|
|
|
|
|
|
Bass |
|
Adjust the low-pitched sounds. |
|
|
|
|
|
|
|
Treble |
|
Adjust the high-pitched sounds. |
|
|
|
|
|
|
|
Balance |
|
Adjust the sound balance between the left and right speakers. |
|
|
|
|
|
|
|
HDMI1 Audio |
HDMI/DVI |
See pages 74-76. |
|
|
|
|
|
|
|
Digital Audio Output |
Bitstream/PCM |
You can select “Bitstream” when AC3 format is available or select “PCM” for other |
|
|
|
|
audio format. |
|
|
|
|
|
|
|
Reset |
|
Reset all Sound menu settings to their factory preset values. |
|
|
|
|
|
|
*1 Adjust Tint if you use an NTSC3.58 MHz or NTSC4.43 MHz signal through one of the AV inputs, and NTSC or Auto has been selected for the AV Colour option.
*2 The PC Setting option can be configured only when the TV tuner input is set to PC mode. *3 In PC mode, the DNR option cannot be selected.
27
 Loading...