


544
Skyr@cer Access Point 544
QUICK INSTALLATION GUIDE
GIDS VOOR SNELLE INSTALLATIE
GUIDE D’INSTALLATION RAPIDE
SCHNELLE INSTALLATIONSANLEITUNG
SNABBINSTALLATIONSGUIDE
HURTIG INSTALLATIONSGUIDE
HURTIGINSTALLASJON
NOPEA ASENNUSOHJE
HL_Skyr@cerAP544.book Page 1 Wednesday, February 12, 2003 3:19 PM

Skyr@cer Access Point 544
HL_Skyr@cerAP544.book Page 2 Wednesday, February 12, 2003 3:19 PM
Skyr@cer Access Point 544
HL_Skyr@cerAP544.book Page 3 Wednesday, February 12, 2003 3:19 PM

4 Skyr@cer Access Point 544
ENGLISH
1. INTRODUCTION 5
1.1. Product Features 5
1.2. System Requirements 5
2. LED INDICATORS 5
3. CONFIGURATION 6
3.1. Configuration menu 6
3.1.1. Status Page 8
3.1.2. Basic Setting 8
3.1.3. IP Setting 10
3.1.4. Advanced Setting 12
3.1.5. Security 14
3.1.6. Tools 16
4. USING AP 22M UTILITY FOR MANAGEMENT 17
4.1. Installing AP 22M Utility 17
4.2. Manage and Configure AP with AP 22M Utility 21
4.2.1. Link Information 21
4.2.2. AP Setting 22
4.2.3. IP Setting 24
4.2.4. WEP Setting 24
5. TECHNICAL SPECIFICATION 26
6. WARRANTY 27
HL_Skyr@cerAP544.book Page 4 Wednesday, February 12, 2003 3:19 PM

Skyr@cer Access Point 544 5
ENGLISH
1. INTRODUCTION
The Wireless Access Point delivers enhanced IEEE 802.1b high performance for up to 22Mbps,
which is double of that offered by most of the Access Points in the current market.
1.1. PRODUCT FEATURES
• Fully compatible with IEEE 802.11b standard for wireless and 802.3 for LAN connection.
•Interoperatable with existing IEEE 802.11b standard devices.
• Supports new data modulation PBCC technology from Texas Instruments, which allows high
data with double speed of right up to 22Mbps.
• 20% more transmitting and receiving coverage supported by PBCC modulation.
• Supports auto data rate fallback under noisy environment or longer distance.
• Enhanced security on WEP encryption from 64, 128 to a maximum of 256 bits.
• Built-in DHCP server
•4 AP operating modes available to fulfill your needs:
1. AP
2. AP Client
3. AP Bridge (Point-to-Point and Multi-Point)
4. Multiple Bridge
• Easy setup and installation with web-based configuration utility.
• AP management utility running on PC to make it easy to manage and configure all the AP in
the same network.
1.2. SYSTEM REQUIREMENTS
•Windows 95, 98, 98SE, Millennium, NT, 2000 and XP operating system
•Internet Explorer 5.5 or higher
• One CD-ROM drive
•At least one RJ-45 Ethernet network adapter installed
2. LED INDICATORS
•Power LED
ON when the unit is powered up
• LAN LED
ON indicates LAN connection; blink indicates LAN activity
•WLAN LED
ON indicates WLAN connection; blink indicates wireless activity
HL_Skyr@cerAP544.book Page 5 Wednesday, February 12, 2003 3:19 PM

6 Skyr@cer Access Point 544
ENGLISH
3. CONFIGURATION
The web-based configuration menu provides user friendly graphic design for easy configuration.
Please go through the following check list before you consider using the configuration menu.
1. You will need Internet Explorer v5.5 or higher and Netscape v4.0 or higher.
2. The Ethernet network adapter must be working properly.
3. If you are connecting the Access Point through a router or a local area network, which has
DHCP server enabled, you will not need to assign a static IP address to the computer that
you are using to configure the Access Point.
4. If you are not connecting the Access Point through a router or a local area network, which
has DHCP server enabled, you will need to assign a static IP address to the computer that
you are using to configure the Access Point.
5. The IP address assigned to the computer that you are using to configure the Access Point
must be in the same IP address range as Access Point’s
6. The power jack must be properly inserted to make sure that the Access Point is powered.
The Default Settings of the 22Mbps Access Point:
3.1. CONFIGURATION MENU
Enter the default Access Point IP address : 192.168.1.1
!Note: The default username is “admin” and the default password is also “admin”.
I
P Address 192.168.1.1
User Name admin
Password admin
ESSID wireless
Channel 6
WEP disabled
Open web browser
window.
Type in IP address.
Press “Enter” or “Go”.
Type in “User Name”.
Type in “Password”
Click
“OK”
.
HL_Skyr@cerAP544.book Page 6 Wednesday, February 12, 2003 3:19 PM
Skyr@cer Access Point 544 7
ENGLISH
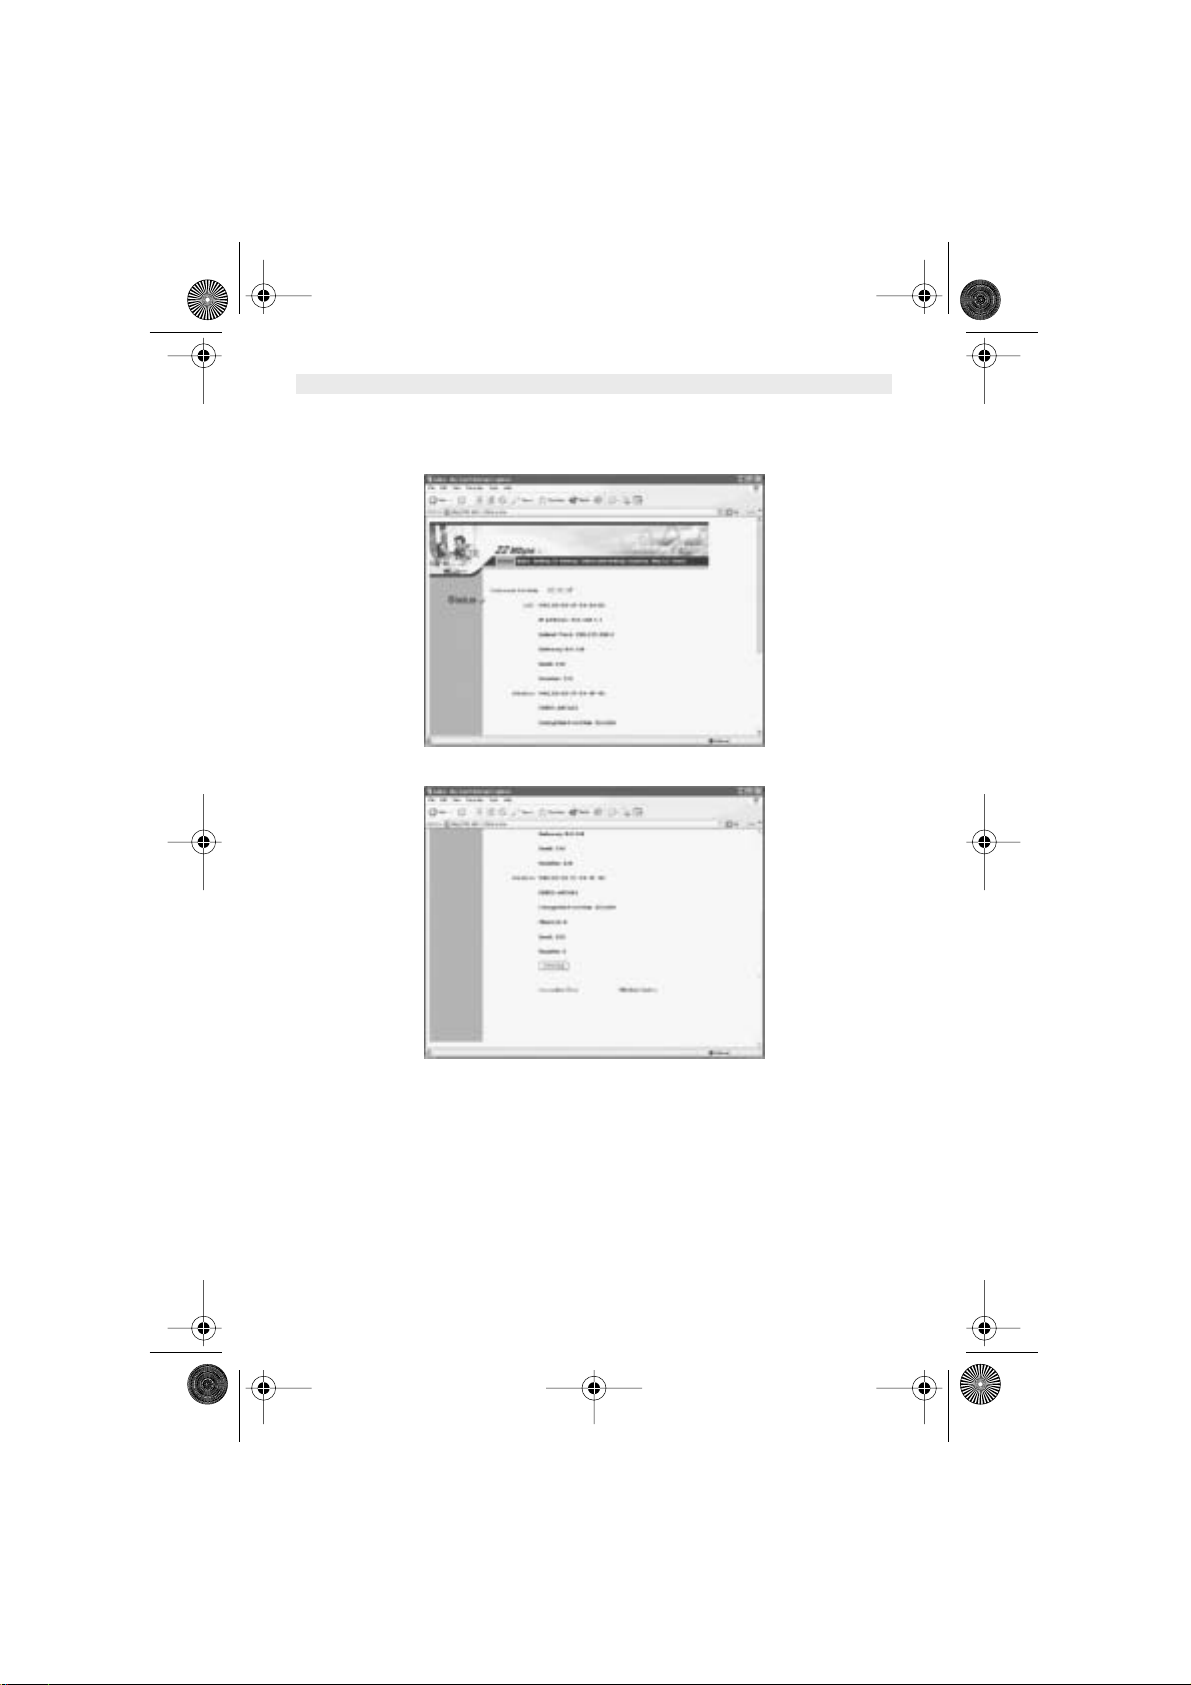
The configuration menu will appear. You can configure and get information about the Access
Point by going through each tab. Here Status page is displayed.
HL_Skyr@cerAP544.book Page 7 Wednesday, February 12, 2003 3:19 PM
8 Skyr@cer Access Point 544
ENGLISH
3.1.1.
STATUS PAGE
This page displays the following information.
Firmware Version
: Shows the current firmware version
LAN
: Shows the Mac address, IP address (default: 192.168.1.1), Subnet Mask,
Gateway Address. The current LAN traffic calculated in terms of number of
packets sent and received by AP through wired connection is also displayed.
Wireless
: Shows the Mac address, current ESSID, the status of Encryption Function
(Enable or Disable). the current using channel. The current wireless traffic
calculated in terms of number of packets sent and received by AP through
wireless communication is also displayed.
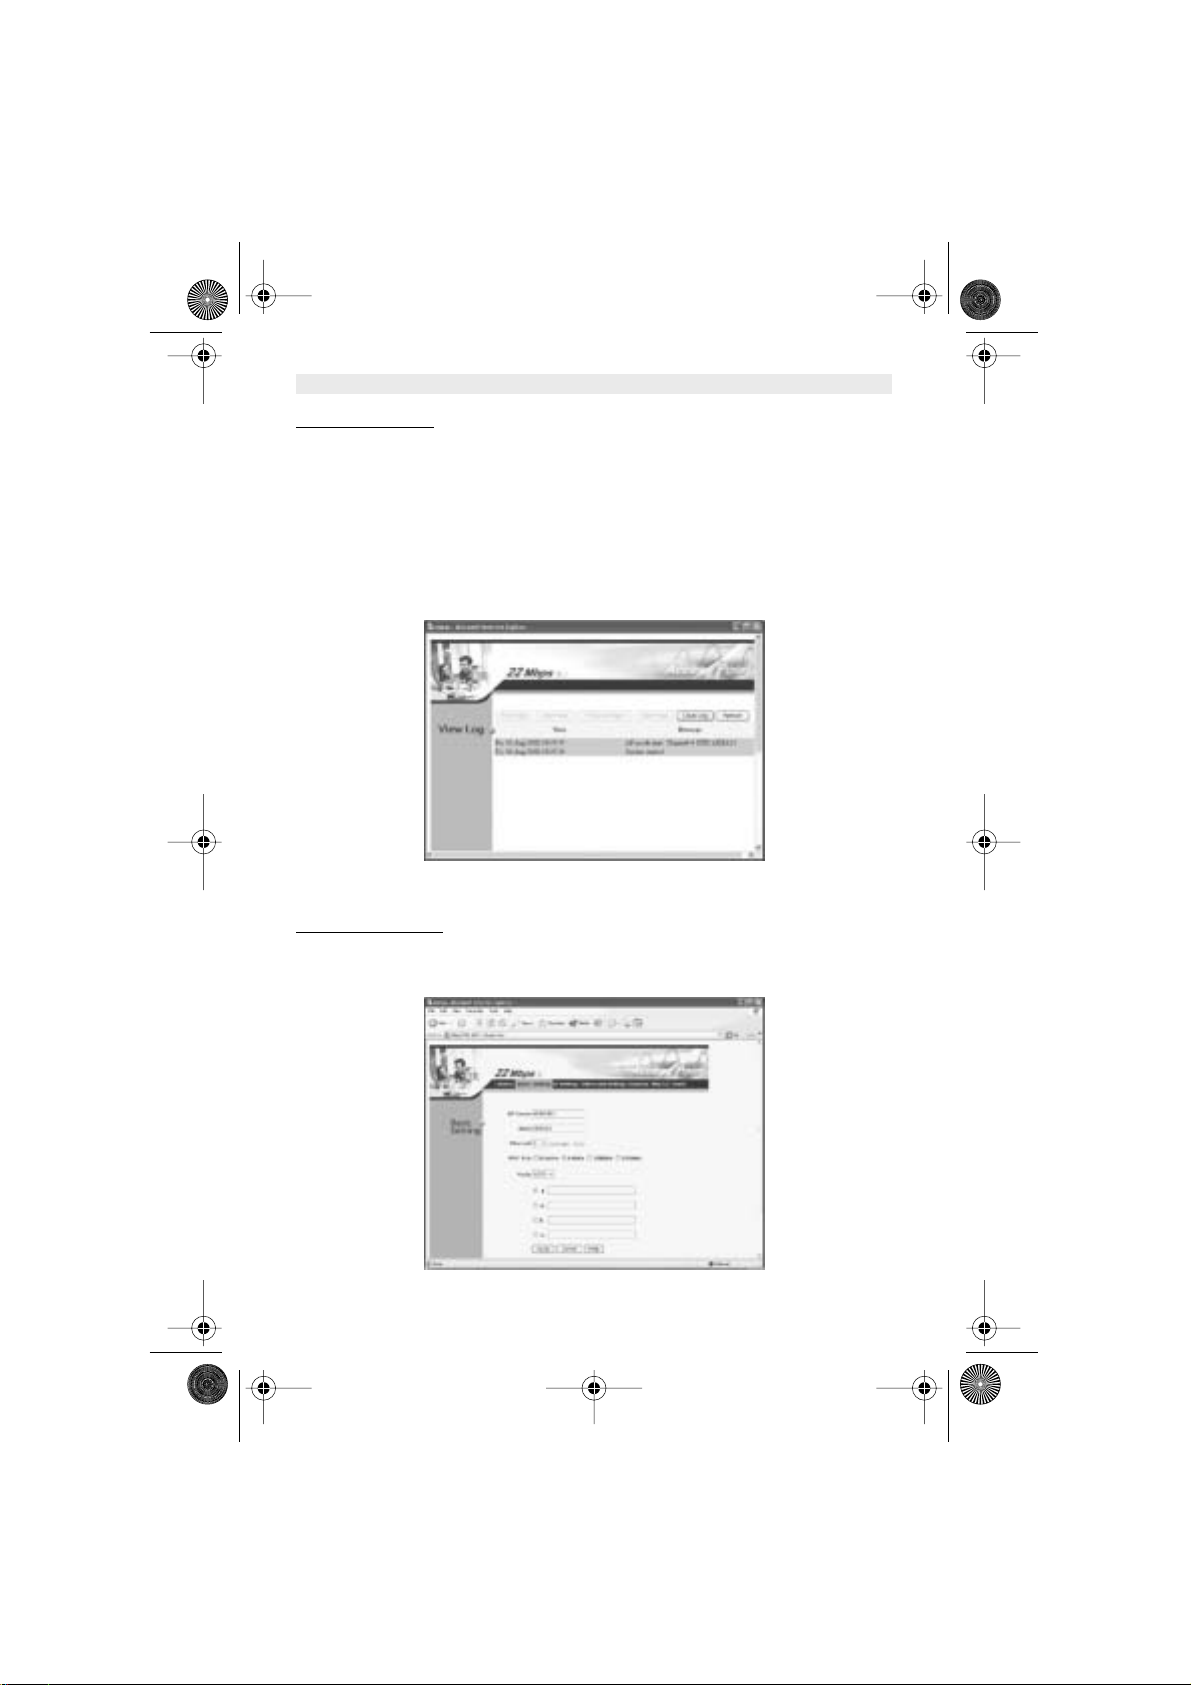
View Log
: Upon clicked, the page will change to log page. The log page records every
event and the time that it happens.
You may clear the entries recorded in the log by clicking the “
Clear Log
” button, and refresh the
screen to show the latest log entries by clicking the “
Refresh
” button.
3.1.2.
BASIC SETTING
This is the page where you can change the basic settings of the Access Point with the minimum
amount of effort to adjust a secure wireless network.
HL_Skyr@cerAP544.book Page 8 Wednesday, February 12, 2003 3:19 PM

Skyr@cer Access Point 544 9
ENGLISH
AP Name
: Name of the AP, which can be used to identify the Access Point among the all the
Access Points in the wireless network.
SSID
: Service Set Identifier, which is a unique name shared among all clients and nodes in
a wireless network. The SSID must be identical for each clients and nodes in the
wireless network.
Channel
: The value of channel that AP will operate in. You can select the channel range of
1 to 13.
WEP Key
: To disable WEP security, click on the “Disable” option. To enable WEP security, there
are 3 type of WEP keys to choose from, 64bits, 128bits and 256bits. When one of the
3 WEP key options is selected, you must enter the value of one of the four Keys in
ASCII or HEX format. You can also enter the values for all four WEP keys, and select
one to use.
Note! When AP’s WEP security is enabled, all the wireless clients that wish to
connect to the Access Point must also have WEP enabled with the identical WEP Key
value entered.
For the changes made to any of the items above to be effective, click “Apply”.
The new settings are now been saved to Access Point and will be effective once the Access Point
restarts.
Click “
Back
” to go back to Basic Setting page.
HL_Skyr@cerAP544.book Page 9 Wednesday, February 12, 2003 3:19 PM

10 Skyr@cer Access Point 544
ENGLISH
3.1.3.
IP SETTING
This is the page where you configure the IP and DHCP settings of the Access Point.
The default IP address of the Access Point is 192.168.1.1 with the Subnet Mask of 255.255.255.0.
You can type in other values for IP Address, Subnet Mask and Gateway and click “
Apply
” button
for the changes to be effective.
You can also set the Access Point to obtain the IP from a DHCP server, but it is not recommended.
Once set, it will be difficult to determine the dynamic IP assigned to the Access Point. Select the
option “Obtain IP Automatically” and click “
Apply
” button for the changes to be effective.
HL_Skyr@cerAP544.book Page 10 Wednesday, February 12, 2003 3:19 PM
Skyr@cer Access Point 544 11
ENGLISH
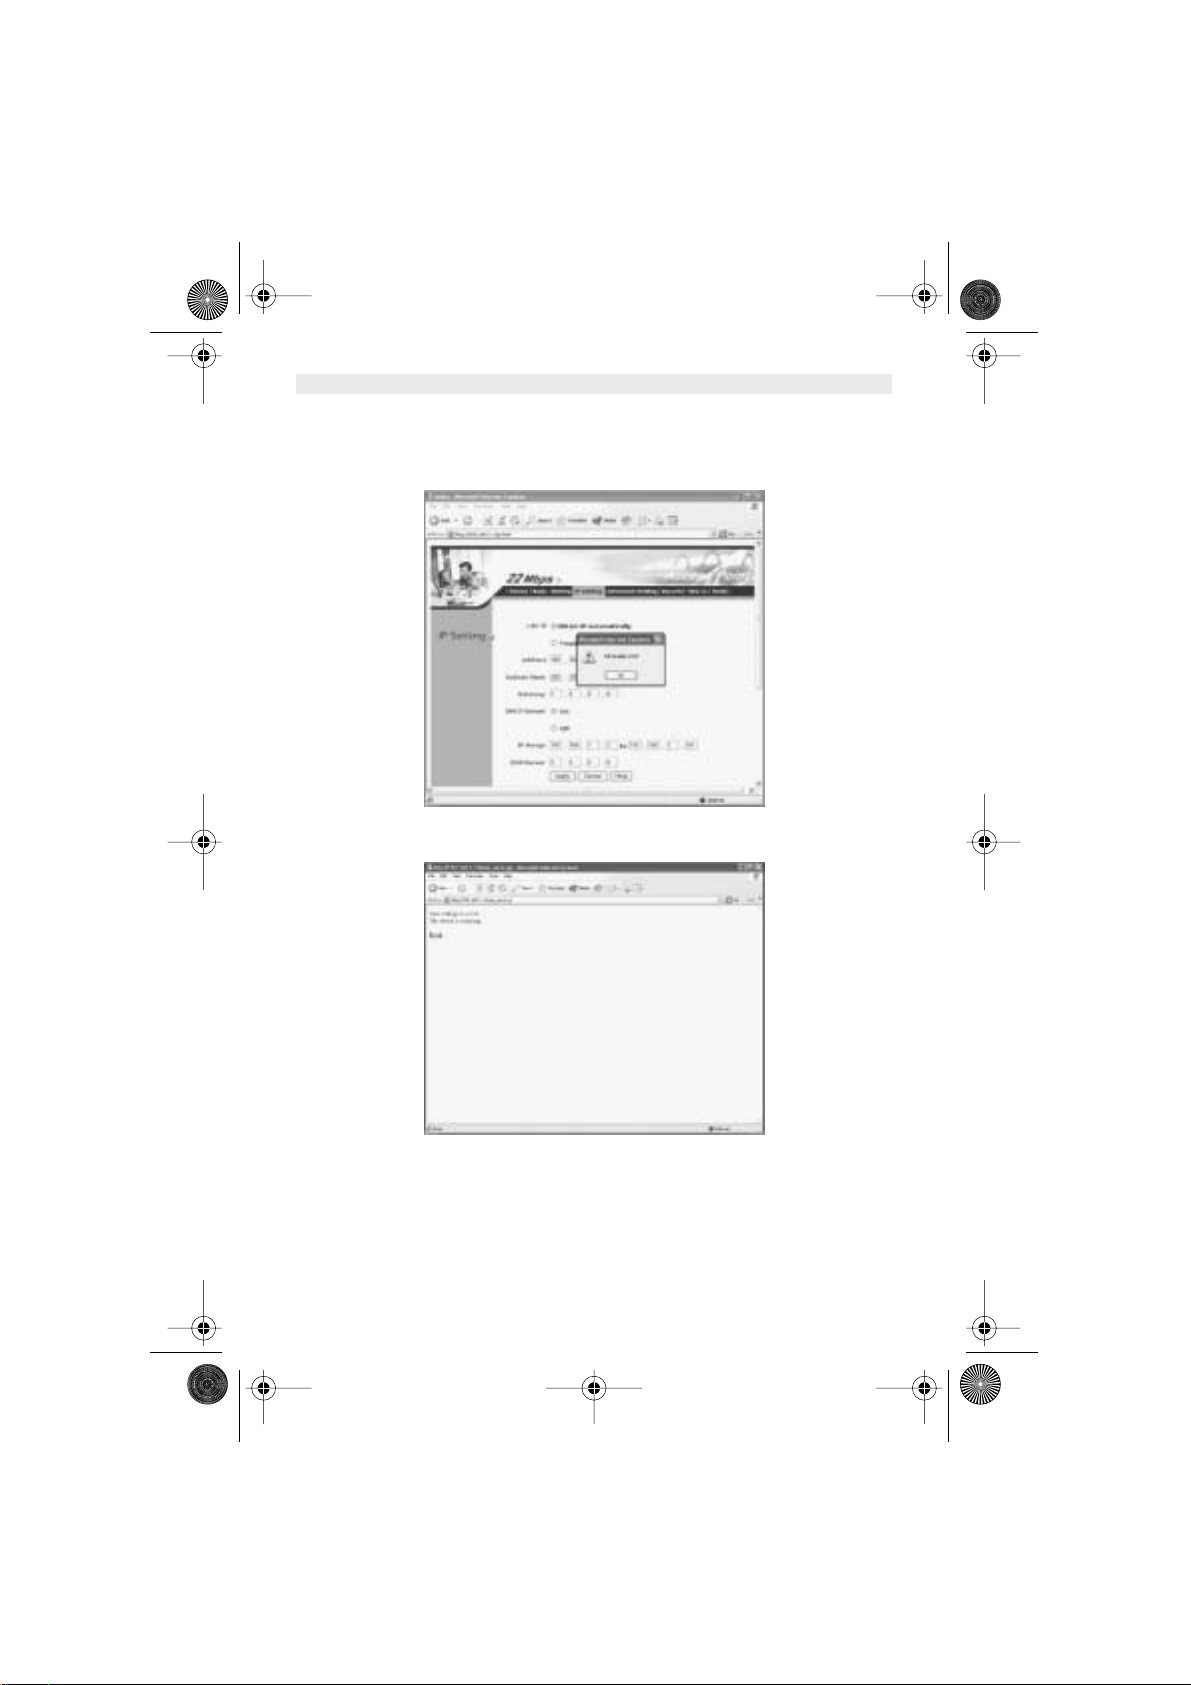
DHCP Server
:
It’s not recommended to enable the DHCP server if you have a DHCP server running in your LAN
network, for it will cause possible IP assignment conflict.
Enable the DHCP server function by selecting the option “On”, and enter the IP range.
Click “
OK
” to close pop-up box. Click “
Apply
” for the changes to be effective.
The new settings are now been saved to Access Point and will be effective once the Access Point
restarts. Click “
Back
” to go back to Basic Setting page.
HL_Skyr@cerAP544.book Page 11 Wednesday, February 12, 2003 3:19 PM

12 Skyr@cer Access Point 544
ENGLISH
3.1.4.
ADVANCED SETTING
This page contains configurations for advanced users, which the change will reflect the wireless
performance and operating modes.
AP Mode
:
Select one of the AP operating modes for different application of Access Point.
1.
AP
– The normal Access Point operating mode which forms a wireless ESS network with its
wireless clients.
2.
AP Client
– Acts as an Ethernet-to-Wireless Bridge, which allows a LAN or a single computer
station to join a wireless ESS network through it.
3.
Wireless Bridge
– A pair of APs operating under Bridge mode to act as the bridge that
connects two Ethernet networks or Ethernet enabled clients together. The “Remote Bridge
MAC” is where you enter the MAC address of the other AP that you connect to setup the
wireless bridge.
4.
Multiple Bridge
– A group of APs which consists of two or more APs operating under Multiple
Bridge mode, that can connect two or more Ethernet networks or Ethernet enabled clients
together. The way that multiple bridge setup is based on the topology of Ad-Hoc mode.
Beacon Interval
: To set the period of time in milliseconds that AP sends out a beacon. Default is
100 milliseconds.
RTS Threashold
: To set the size of RTS/CTS packet size. Default is 2432 bytes.
Fragmentation Threashold
: To set the the number of bytes used for the fragmentation boundary
for directed messages. Default is 2436 bytes.
DTIM Interval
: This value indicates the interval of the Delivery Traffic Indication Message (DTIM).
A DTIM field is a countdown field informing clients of the next window for listening to broadcast
and multicast messages. When the Access Point has buffered broadcast or multicast messages
for associated clients, it sends the next DTIM with a DTIM Interval value. Access Point Clients
hear the beacons and awaken to receive the broadcast and multicast messages.
HL_Skyr@cerAP544.book Page 12 Wednesday, February 12, 2003 3:19 PM

Skyr@cer Access Point 544 13
ENGLISH
Authentication Type
: The Authentication Type default is set to Open System, and you may want
to set to Shared Key when the clients and AP in the same wireless network enable the WEP
encryption. All the nodes and hosts on the network must use the same authentication type. It’s
recommend that you use the default setting.
Preamble Type
: Preamble is a sequence of bits transmitted at 1Mbps that allows the PHY
circuitry to reach steady-state demodulation and synchronization of bit clock and frame start. Two
different preambles and headers are defined: the mandatory supported Long Preamble and
header, which interoperates with the 1 Mbit/s and 2 Mbit/s DSSS specification (as described in
IEEE Std 802.11), and an optional Short Preamble and header (as described in IEEE Std
802.11b). At the receiver, the Preamble and header are processed to aid in demodulation and
delivery of the PSDU. The Short Preamble and header may be used to minimize overhead and,
thus, maximize the network data throughput. However, the Short Preamble is supported only from
the IEEE 802.11b (High-Rate) standard and not from the original IEEE 802.11. That means that
stations using Short-Preamble cannot communicate with stations implementing the original
version of the protocol.
Basic Rate
: The basic transfer rate is set depending on the speed of your wireless network. For
example, you set 1-2 (Mbps) if you have older 802.11 compliant device in your network, which
supports 1 ~ 2 Mbps data rate. This setting does not limit the basic transfer rates of the faster
802.11 compliant network devices.
Antenna Selection
: To set the antenna for transmitting data. The default setting is Diversity
Antenna, which is better for reception.
SSID Broadcast
: While SSID Broadcast is enabled, all wireless clients will be able to
communicate with the Access Point. For security purpose, you may want to disable SSID
Broadcast to allow only those wireless clients with the AP’s SSID to communicate with the Access
Point.
HL_Skyr@cerAP544.book Page 13 Wednesday, February 12, 2003 3:19 PM
14 Skyr@cer Access Point 544
ENGLISH
3.1.5.
SECURITY
This page is where you configure the security features supported by this Access Point.
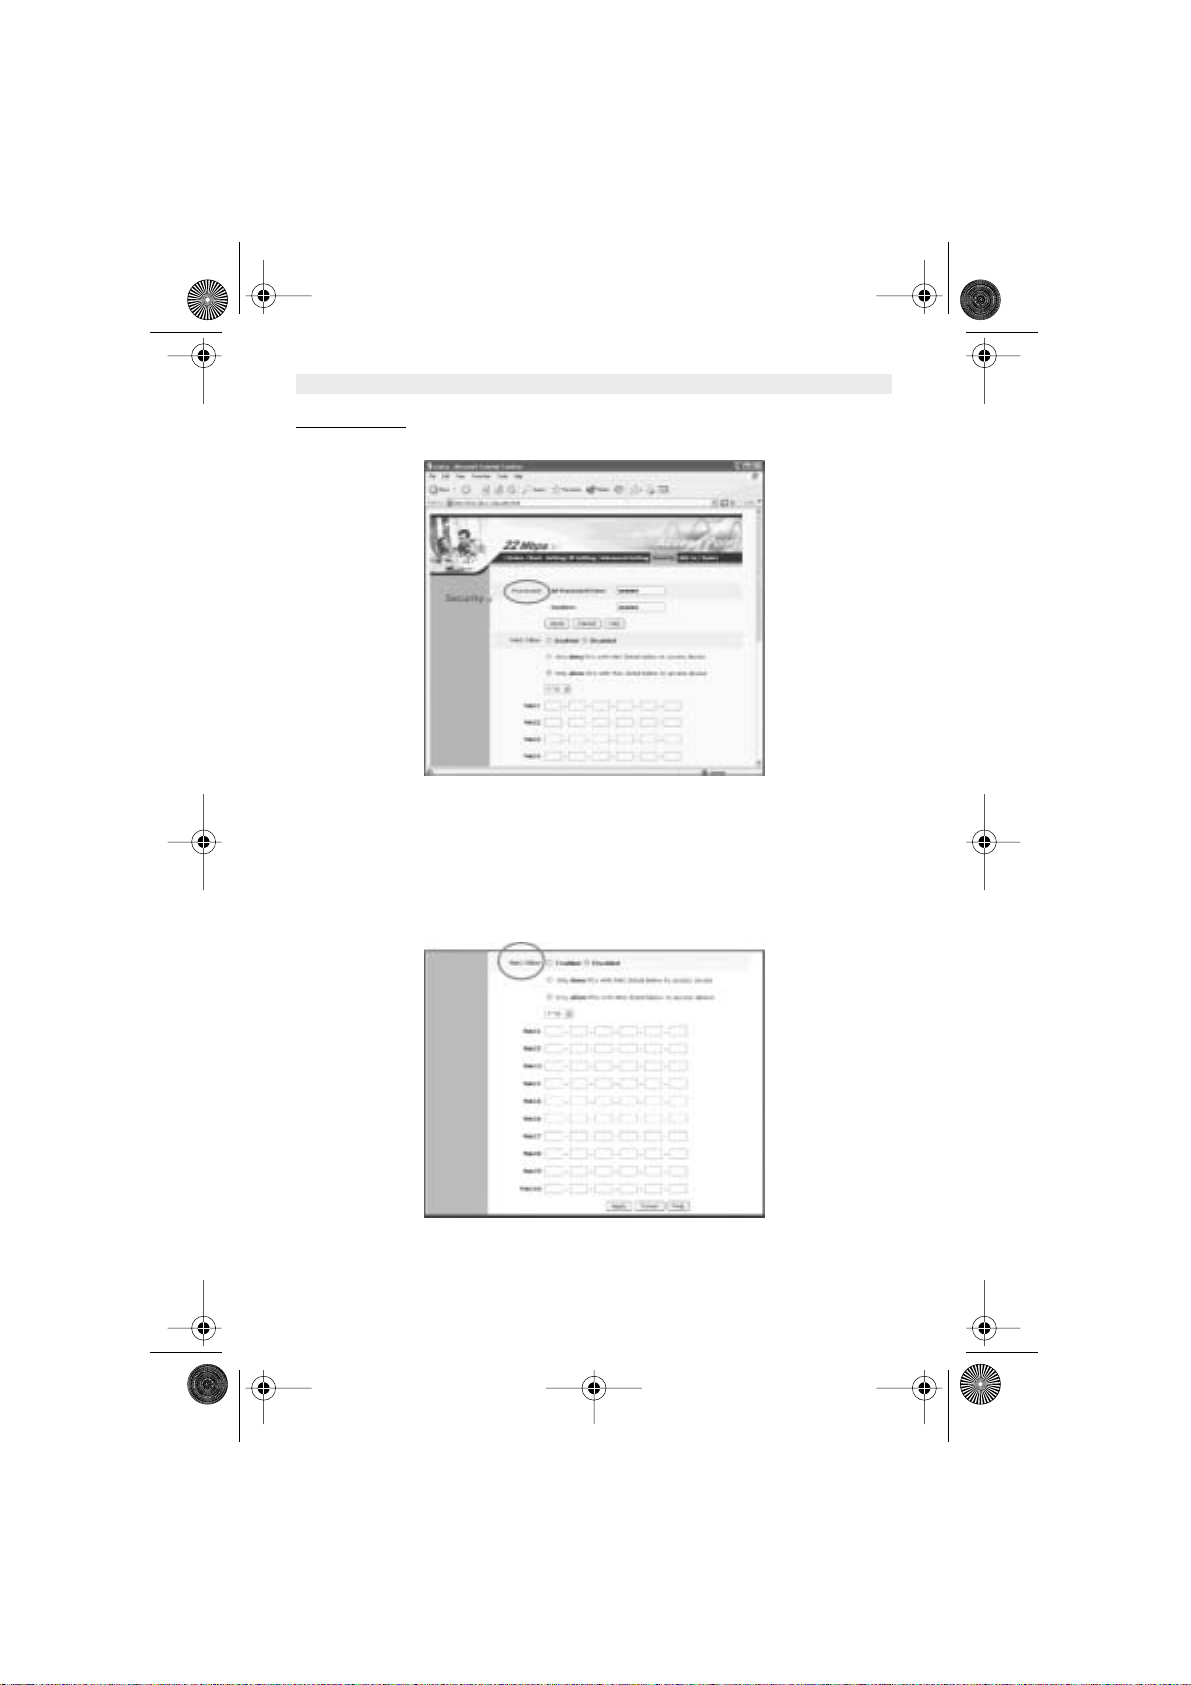
Password:
Allows you to change the new login password. Here are the necessary steps:
1. Enter the new password in the “
AP Password New:
” field.
2. Enter the new password again in the “
Confirm
” field.
3. Click “
Apply
”
!Note: The wireless clients will not be able to recognize the Access Point using Site
Survey utilities, such as zero configuration utility provided in Windows XP.
MAC Filter
HL_Skyr@cerAP544.book Page 14 Wednesday, February 12, 2003 3:19 PM

Skyr@cer Access Point 544 15
ENGLISH
MAC Filter function controls the MAC of the network devices that are listed in this table for access
authorization or denial. When MAC Filter is enabled, by selecting the “
Enabled
” radio box, select
one of two choices:
• Only deny PCs with MAC listed below to access device, or
• Only allow PCs with MAC listed below to access device
The maximum number of MAC addresses that can be stored in Access Pint is 50. You can browse
through the MAC address saved by selecting the drop-down box.
For any changes made in the security page, click “
Apply
” for the changes to be effective. When
the above page will appear. Click “
Back
” to go back to the previous page.
HL_Skyr@cerAP544.book Page 15 Wednesday, February 12, 2003 3:19 PM

16 Skyr@cer Access Point 544
ENGLISH
3.1.6.
TOOLS
Three functions are provided in this page, Backup/Restore Settings, Restore default settings and
Firmware Upgrade.
Backup Settings:
Click on “
Backup
” button, which will open a FileSave Dialog box, where you get to save all the
current settings and configurations to a file.
Restore Settings:
Click on the “
Browse
” button to open a FileOpen Dialog box, where you get to select the file,
which you save previous settings and configurations, to be opened.
Upon selecting the saved file, click “
Restore
” and complete the restore process when the Access
Point re-operates after it restarts.
Restore to default settings:
Click on “
Default
” button to restore the Access Point back to it’s manufacture default settings.
Firmware Upgrade:
Click on the “
Browse
” button to open a FileOpen Dialog box, where you get to select the firmware
file, which you download from the web for the latest version.
Upon selecting the firmware file, click “
Upgrade
” and complete the firmware upgrade process
when the Access Point re-operates after it restarts.
HL_Skyr@cerAP544.book Page 16 Wednesday, February 12, 2003 3:19 PM

Skyr@cer Access Point 544 17
ENGLISH
4. USING AP 22M UTILITY FOR MANAGEMENT
4.1. INSTALLING AP 22M UTILITY
The AP 22M Utility is a program that runs on your PC, which offers easy management for all
existing 22Mbps Access Points in the same network domain. Please follow the steps below for
installation and refer to “Manage and Configure AP with AP 22M Utility” session Access point
configuration.
!Note: The installation demonstrated is based on Windows XP operating system. The
other Windows operation system will have very similar installation.
1. Turn on your PC
2. After Windows starts up, insert the 22Mbps Access Point Product CD into the CD tray of the
CD-ROM
3. The following screen would appear.
4. Select menu option, “
Access Point
”, on the left side of screen.
HL_Skyr@cerAP544.book Page 17 Wednesday, February 12, 2003 3:19 PM

18 Skyr@cer Access Point 544
ENGLISH
5. Click “
Install
” on the menu bar to proceed with 22M AP installation.
6. The 22M AP Utility loads the Install wizard for installation.
Click
“Next”
to start
installation.
HL_Skyr@cerAP544.book Page 18 Wednesday, February 12, 2003 3:19 PM
Skyr@cer Access Point 544 19
ENGLISH
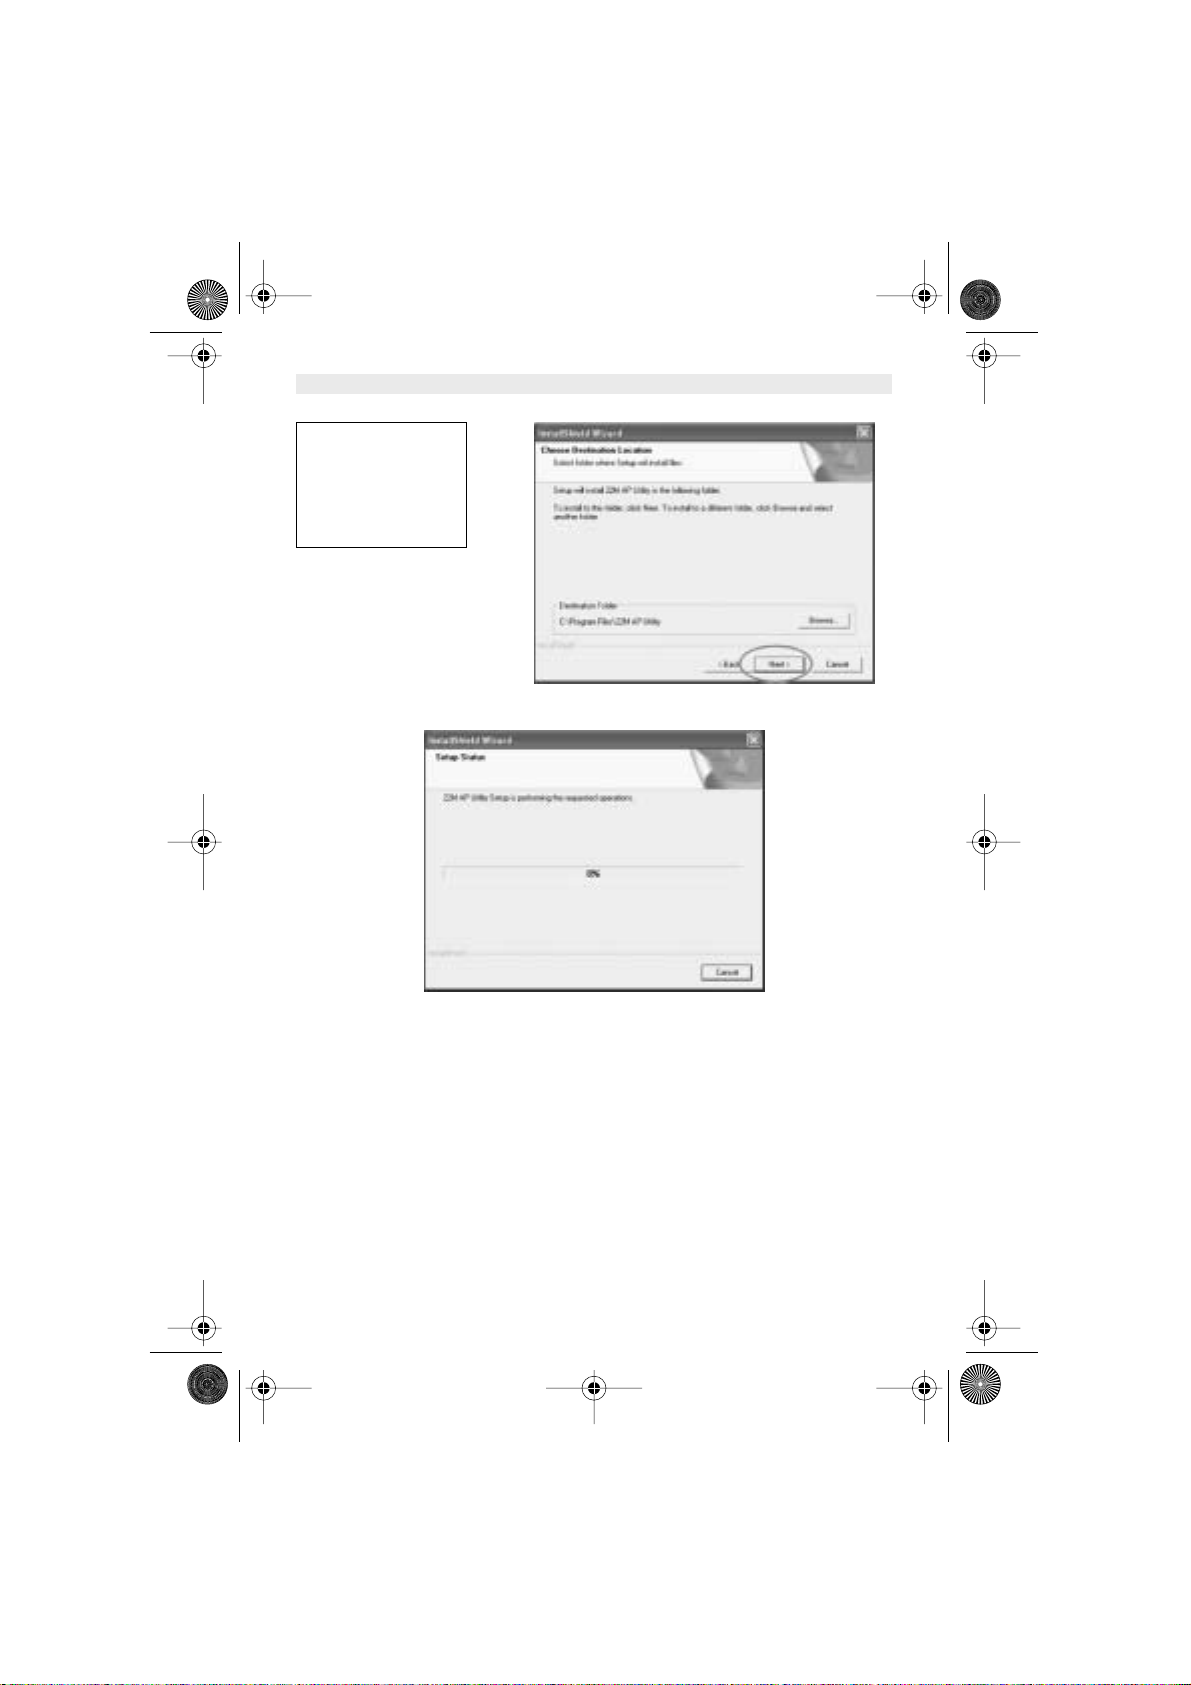
Installation wizard copies the utility program files in your PC.
Click
“Next”
to install in
default folder or Click
“Browse”
to install in a
different folder.
HL_Skyr@cerAP544.book Page 19 Wednesday, February 12, 2003 3:19 PM

20 Skyr@cer Access Point 544
ENGLISH
7. Click
“Finish”
to complete the installation.
8. The 22M AP Utility icon would then appear on your desktop for easy access.
HL_Skyr@cerAP544.book Page 20 Wednesday, February 12, 2003 3:19 PM
Skyr@cer Access Point 544 21
ENGLISH
4.2. MANAGE AND CONFIGURE AP WITH AP 22M UTILITY
The AP 22M Utility can be useful in a way that allows you to configure one AP to another to save
the trouble of logging into the web configuration utility of each AP. However, all the Access Points
that you wish to configure using AP 22M Utility must be in the same network domain as your PC’s.
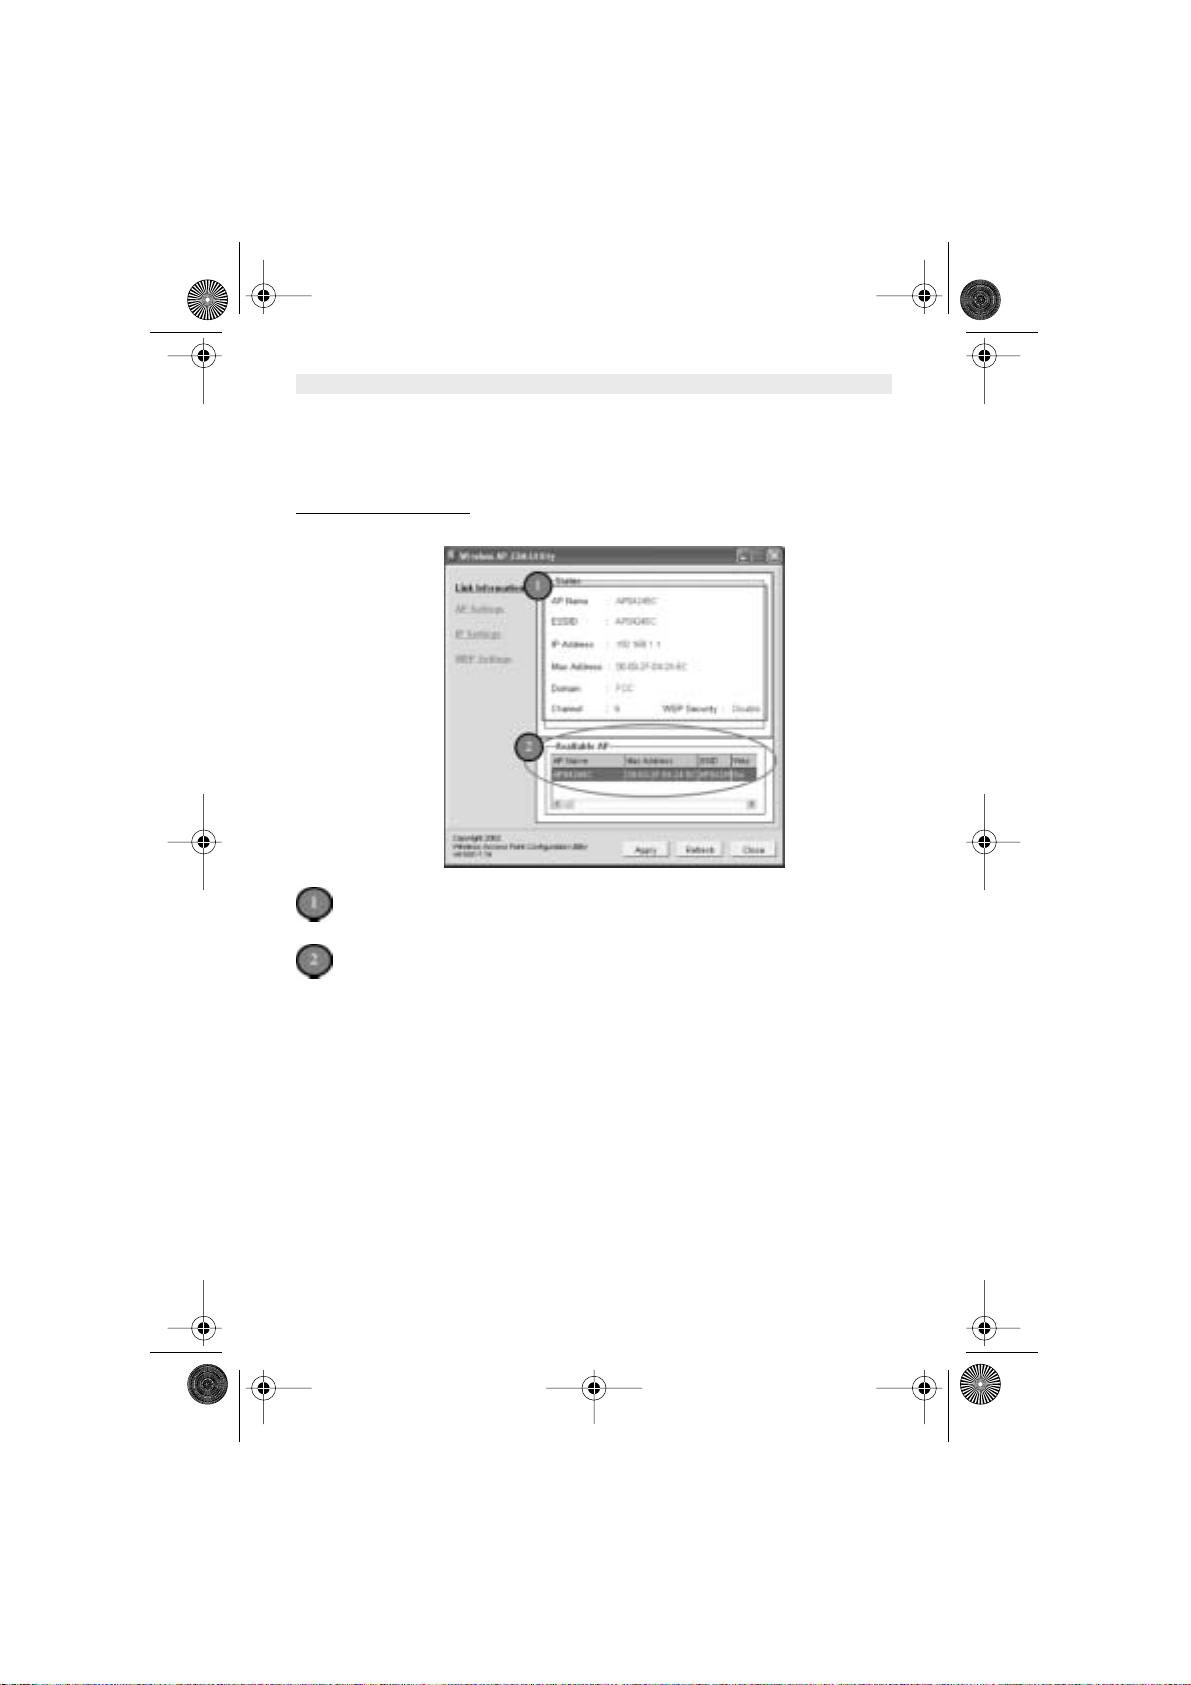
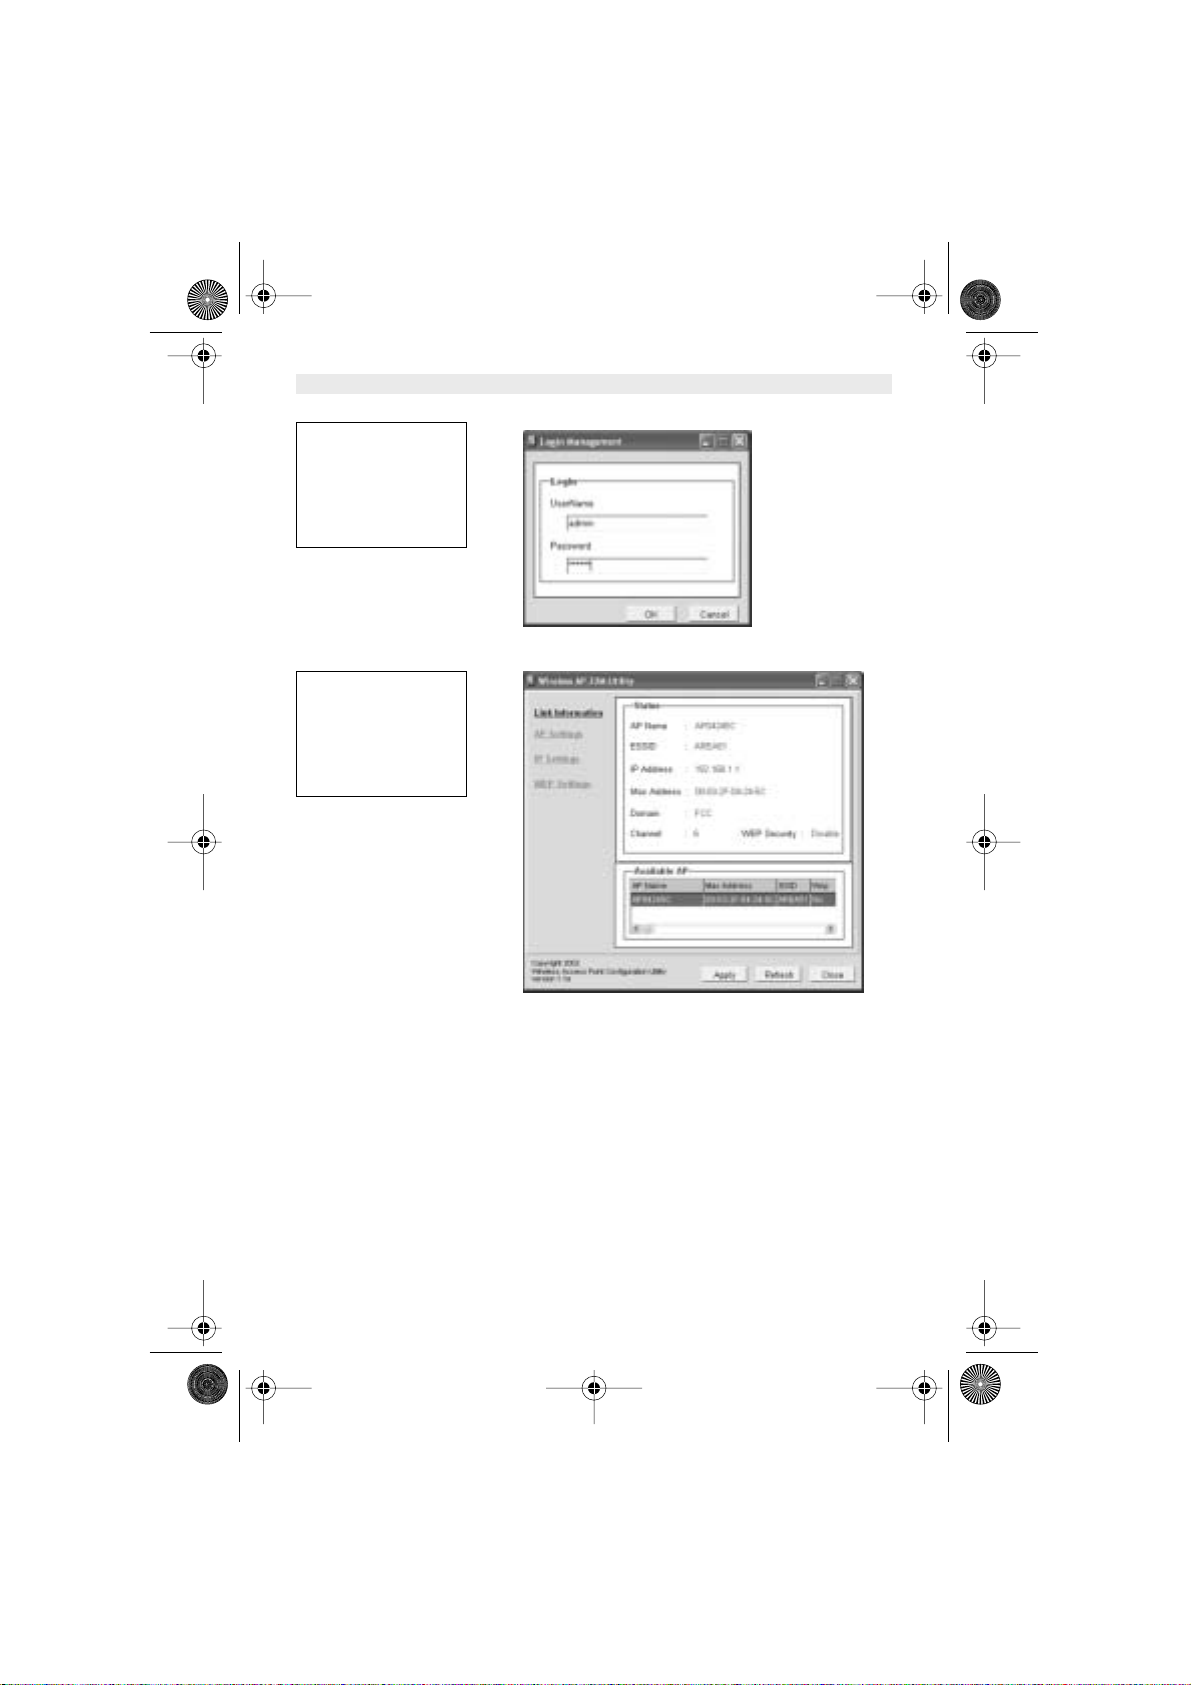
4.2.1.
LINK INFORMATION
This is the default page when AP 22M Utility starts up.
Status
– displays the basic settings of the selected Access Point.
Available AP
– lists all the 22mpbs Access Point of the same network domain detected
on the network. You can select a particular Access Point from the list to view and change
its configuration.
HL_Skyr@cerAP544.book Page 21 Wednesday, February 12, 2003 3:19 PM
22 Skyr@cer Access Point 544
ENGLISH
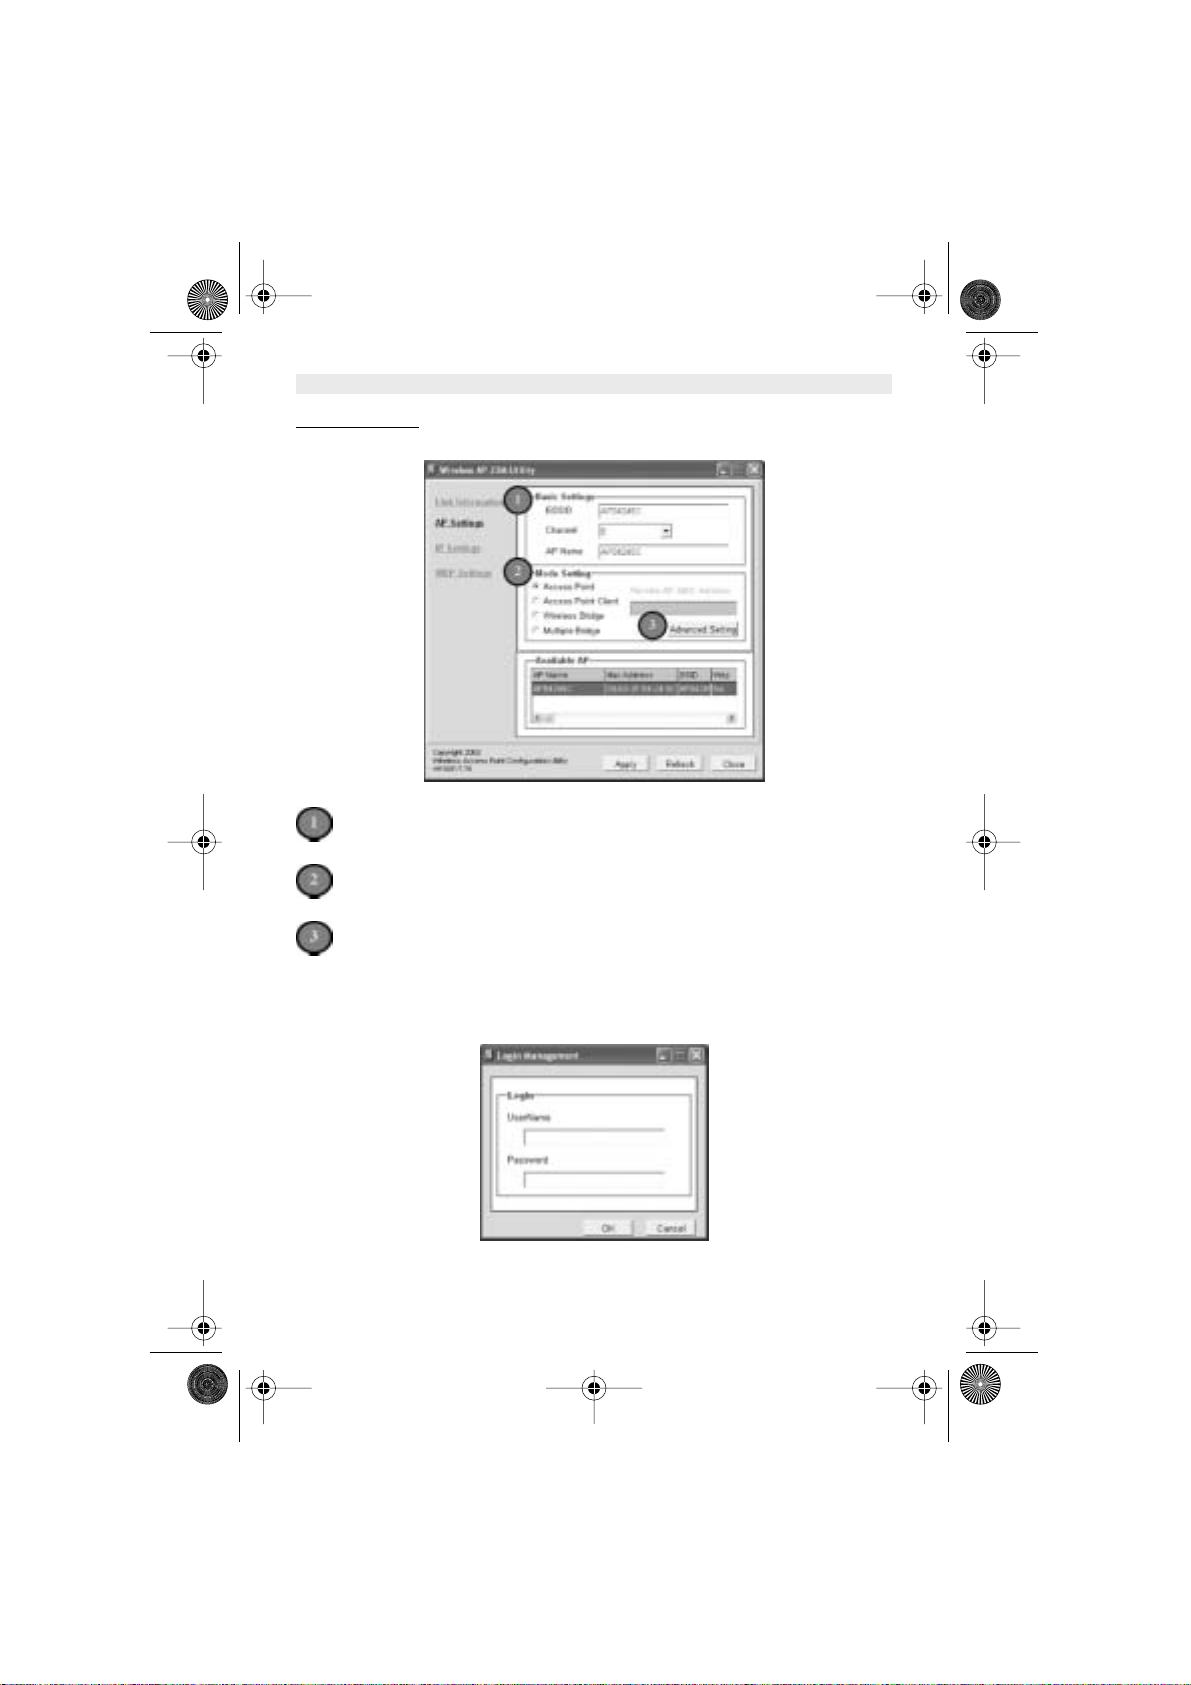
4.2.2.
AP SETTING
This is the page that allows you to change the settings of the Access Point.
Basic Settings
– allows you to enter the new values for ESSID, Channel and AP Name
of the Access Point.
Mode Settings
– allows you to change the operating mode of the Access Point. There
are 4 modes that you can choose: (1) Access Point, (2) Access Point Client, (3) Wireless
Bridge and (4) Multiple Bridge.
Advanced Settings
– recommended for advanced users who are familiar with wireless
networks, and it’s where you set additional parameters and settings of the Access Point.
For any changes made to be effective, click
“Apply”
button
The utility program will now prompt you for user name and password as part of the login and
security protection to make sure you have the right authorization.
HL_Skyr@cerAP544.book Page 22 Wednesday, February 12, 2003 3:19 PM
Skyr@cer Access Point 544 23
ENGLISH
!Note: The default username is “admin” and the default password is also “admin”.
Enter “UserName” and
“Password” for the
Access Point.
Click
“OK”
button.
The Access Point
restarts itself, and the
screen will switch back
to startup page - Link
Information.
HL_Skyr@cerAP544.book Page 23 Wednesday, February 12, 2003 3:19 PM
24 Skyr@cer Access Point 544
ENGLISH
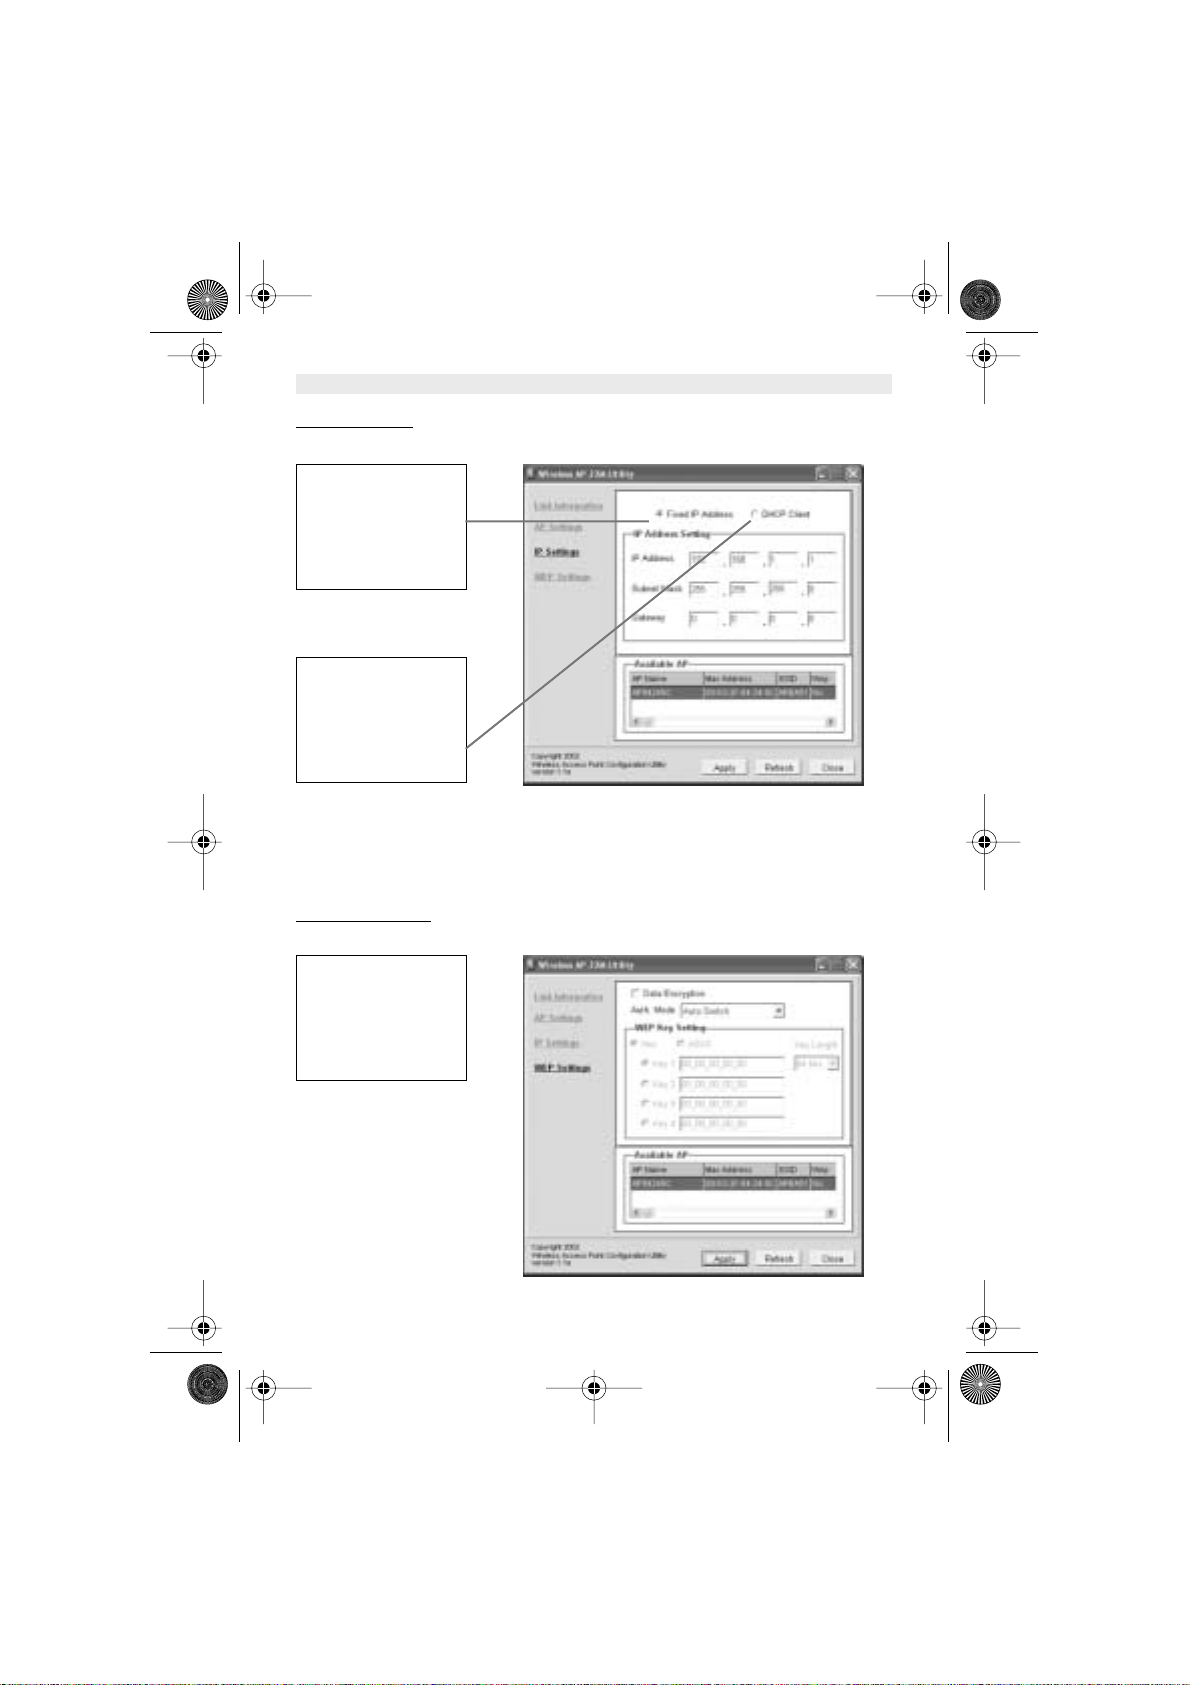
4.2.3.
IP SETTING
This is the page where you configure the IP settings for the Access Point.
Please also refer to Appendix B to learn more about Network and IP address.
Click “
Apply
” button for any changes made to be effective. The utility program will prompt you for
user name and password for security protection.
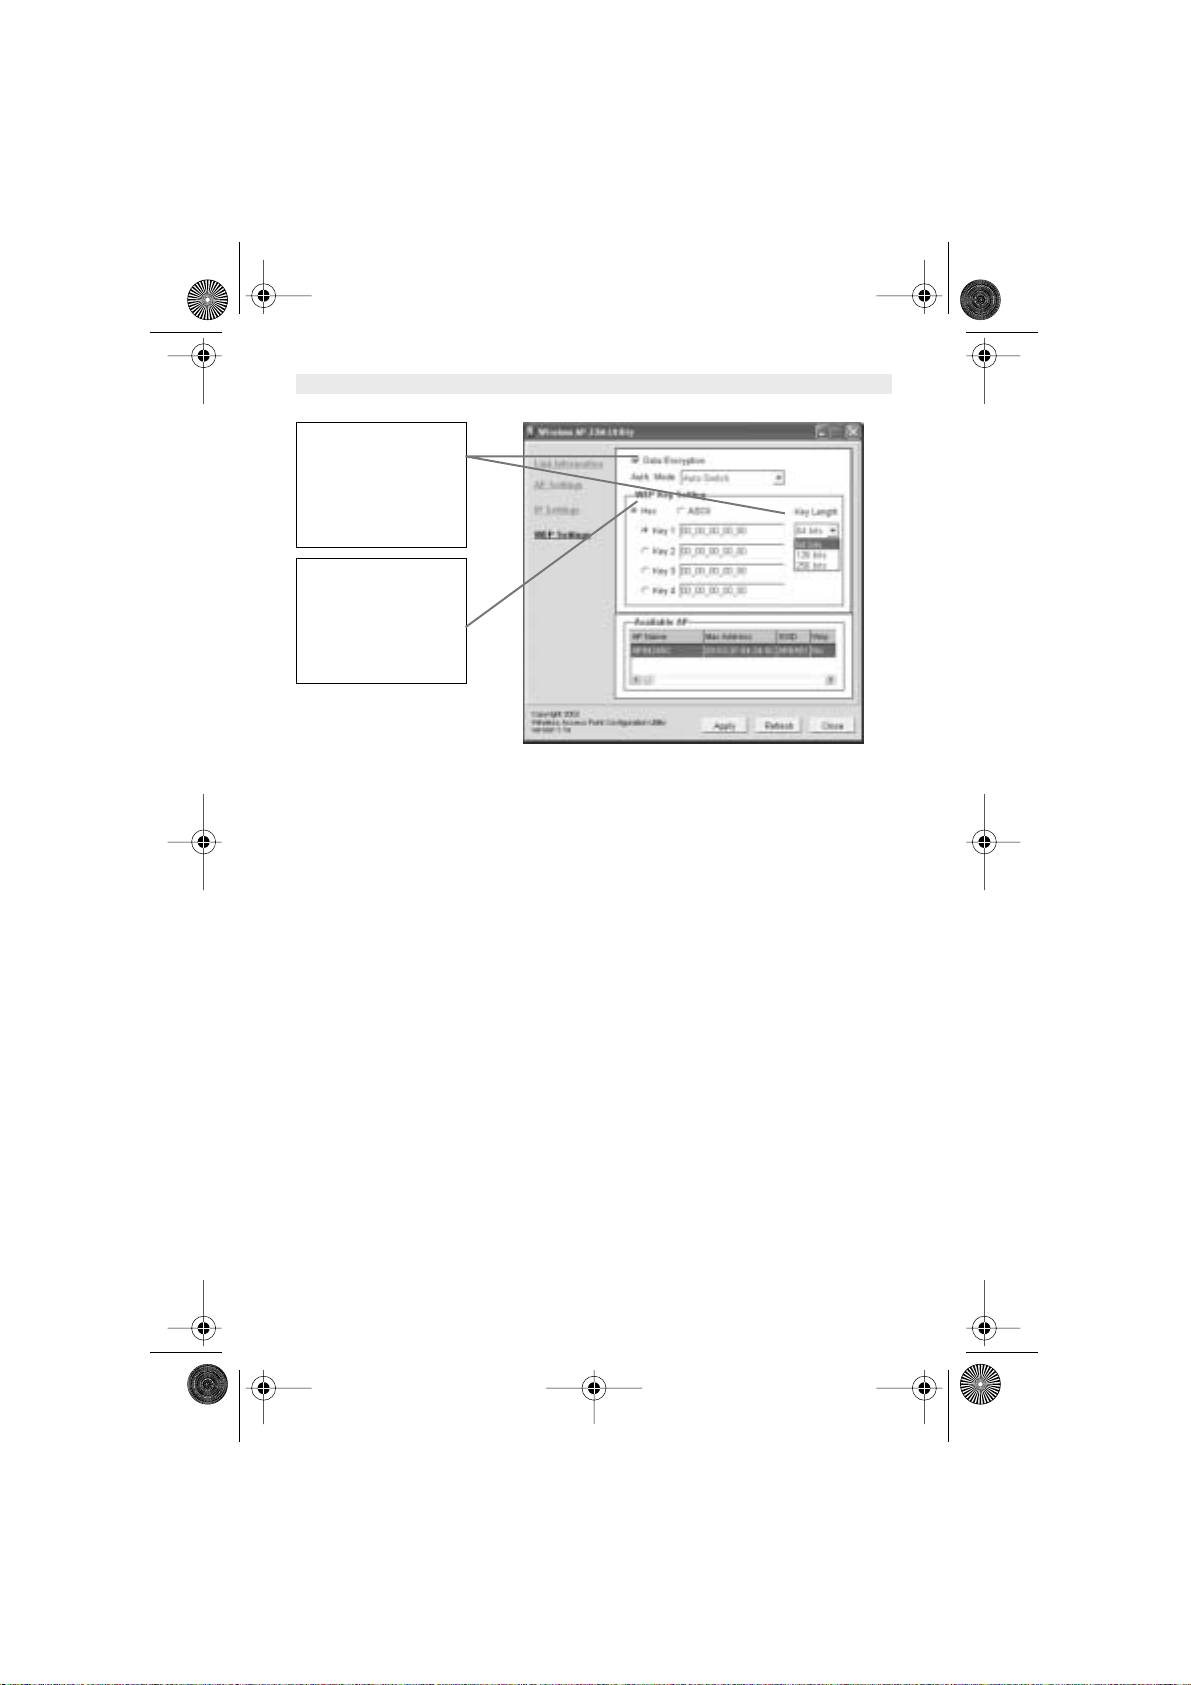
4.2.4.
WEP SETTING
This is the page that allows you to configure the WEP settings for the Access Point.
Enable WEP Key
security by clicking
“Data Encryption”
.
Select “Fixed IP
Address” and enter the
IP address of the
Access Point and
Gateway.
Select
“DHCP Client”
if
there is a DHCP server
assigning IP addresses
on the network.
HL_Skyr@cerAP544.book Page 24 Wednesday, February 12, 2003 3:19 PM
Skyr@cer Access Point 544 25
ENGLISH
Select the “
Auth.
Mode
” and the “
Key
Length
”.
Fill at least on of the 4
the Web Key fields with
Hex or ASCII values.
HL_Skyr@cerAP544.book Page 25 Wednesday, February 12, 2003 3:19 PM

26 Skyr@cer Access Point 544
ENGLISH
5. TECHNICAL SPECIFICATION
Standard
802.11b compliant (wireless)
802.3, 802.3u for LAN
Data Rate
1 / 2 / 5.5 / 11 / 22 Mbps
Emission Type
Direct Sequence Spread Spectrum (DSSS)
Data Modulation
1 Mbps – BPSK
2 Mbps – QPSK
5.5 / 11 Mbps – CCK
5.5 / 11 / 22 Mbps - PBCC
RF Frequency
2400 MHz – 2483.5 MHz (Europe)
Operating Channel 13 Channels (Europe)
RF Output Power 16 ~ 18 dBm (typical)
Sensitivity 22MHz PBCC - 80 dBm (Typically @25°C+5°C)
11MHz PBCC - 85 dBm (Typically @25°C+5°C)
11MHz CCK - 82 dBm (Typically @25°C+5°C)
Security Wired Equivalent Privacy (WEP) 64 / 128 / 256 bit
Antenna Type Dipole Antenna with Diversity, 2dBi Antenna Gain
Memory SDRAM8 Mbyte
FLASH1 Mbyte
Dimension 198 x 150 x 61.5 mm
Power Consumption Operation max. 1.2 A
600mA + 50mA
Power Supply DC 5 Volt + 5%, AC Adapter AC 100V-240V
HL_Skyr@cerAP544.book Page 26 Wednesday, February 12, 2003 3:19 PM

Skyr@cer Access Point 544 27
ENGLISH
6. W ARRANTY
• This equipment comes with a 24-month warranty. The warranty will be honoured on
presentation of the original bill or receipt, provided the date of purchase and the unit type are
indicated.
• During the time of the warranty Topcom will repair free of charge any defects caused by
material or manufacturing faults. Topcom will at its own discretion fulfil its warranty
obligations by either repairing or exchanging the faulty equipment.
• Any warranty claims will be invalidated as a result of intervention by the buyer or unqualified
third parties.
• Damage caused by inexpert treatment or operation, and damage resulting from the use of
non-original parts or accessories not recommended by Topcom is not covered by the
warranty.
• The warranty does not cover damage caused by outside factors, such as lightning, water and
fire, nor does it apply if the unit numbers on the equipment have been changed, removed or
rendered illegible.
Note: Please do not forget to enclose your receipt if you return the equipment.
HL_Skyr@cerAP544.book Page 27 Wednesday, February 12, 2003 3:19 PM

28 Skyr@cer Access Point 544
NEDERLANDS
1. INLEIDING 29
1.1. Producteigenschappen 29
1.2. Systeemvereisten 29
2. LED-INDICATOREN 29
3. CONFIGURATIE 30
3.1. Configuratiemenu 30
3.1.1. Status-Pagina 32
3.1.2. Basic Setting (Basisinstelling) 33
3.1.3. IP Setting (IP-Instelling) 34
3.1.4. Advanced Setting 36
3.1.5. Beveliging 38
3.1.6. Tools 40
4. HET AP 22M-HULPPROGRAMMA GEBRUIKEN VOOR BEHEERDOELEINDEN 41
4.1. Het AP 22M-Hulpprogramma installeren 41
4.2. AP beheren en configureren met het AP 22M-hulpprogramma 45
4.1.1. Link Information 45
4.2.2. AP Setting 46
4.2.3. IP Setting (IP-Instelling) 48
4.2.4. WEP Setting 48
5. TECHNISCHE SPECIFICATIE 50
6. GARANTIE 51
HL_Skyr@cerAP544.book Page 28 Wednesday, February 12, 2003 3:19 PM

Skyr@cer Access Point 544 29
NEDERLANDS
1. INLEIDING
Het Draadloze Access Point levert een verbeterde hoge IEEE 802.1b performance voor max.
22Mbps, wat dubbel zoveel is als wat de meeste Access Points die nu op de markt verkrijgbaar
zijn, bieden.
1.1. PRODUCTEIGENSCHAPPEN
•Volledig compatibel met de IEEE 802.11b standaard voor draadloze netwerken en 802.3
voor LAN-verbinding.
• Onderling koppelbaar met bestaande IEEE 802.11b-compatibele toestellen.
• Ondersteunt nieuwe PBCC-datamodulatietechnologie van Texas Instruments, die een
dubbele datasnelheid van tot 22Mbps mogelijk maakt.
• 20% meer zend- en ontvangstbereik dankzij PBCC-modulatie.
• Ondersteunt automatische terugval van datasnelheid bij slechte lijnkwaliteit of langere
afstanden.
• Betere beveiliging op WEP-codering van 64, 128 tot het maximum van 256 bits.
•Ingebouwde DHCP-server
•4 AP-bedrijfsmodi beschikbaar om aan uw behoeften te voldoen:
1. AP
2. AP Client
3. AP Bridge (Point-to-Point en Multi-Point)
4. Multiple Bridge
• Makkelijke instelling en installatie met webgebaseerd configuratiehulpprogramma.
• Met hulpprogramma voor AP-beheer dat draait op PC om beheer en configuratie van alle
AP’s in hetzelfde netwerk te vergemakkelijken.
1.2. SYSTEEMVEREISTEN
•Windows 95, 98, 98SE,Millennium, NT, 2000 en XP-besturingssysteem.
•Internet Explorer 5.5 of hoger
• Één CD-ROM-station
•Minstens één RJ-45 Ethernet-netwerkadapter geïnstalleerd
2. LED-INDICATOREN
•Power LED
AAN wanneer de eenheid wordt opgestart
• LAN LED
AAN duidt op LAN-verbinding; Knipperen duidt op LAN-activiteit
•WLAN LED
AAN duidt op WLAN-verbinding; knipperen duidt op draadloze activiteit
HL_Skyr@cerAP544.book Page 29 Wednesday, February 12, 2003 3:19 PM

30 Skyr@cer Access Point 544
NEDERLANDS
3. CONFIGURATIE
Het webgebaseerde configuratiemenu biedt een gebruikersvriendelijk interface voor een
makkelijke configuratie. Neem eerst de onderstaande controlelijst door voor u het
configuratiemenu gebruikt.
1. U heeft Internet Explorer v5.5 of hoger en Netscape v4.0 of hoger nodig.
2. De Ethernet-netwerkadapter moet correct werken.
3. Als u het Access Point via een router of een LAN-netwerk met ingeschakelde DHCP-server
aansluit, hoeft u geen statisch IP-adres toe te kennen aan de computer die u gebruikt om het
Access Point te configureren.
4. Als u het Access Point niet via een router of een LAN-netwerk met ingeschakelde DHCP-
server aansluit, moet u een statisch IP-adres toekennen aan de computer die u gebruikt om
het Access Point te configureren.
5. Het IP-adres dat is toegekend aan de computer die u gebruikt om het Access Point te
configureren, moet in hetzelfde IP-adresbereik liggen als dat van het Access Point.
6. De stekkerbus moet correct zijn ingestoken om te garanderen dat het Access Point stroom
krijgt.
De Standaardinstellingen van het 22Mbps Access Point:
3.1. CONFIGURATIEMENU
Voer het standaard Access Point IP-adres in: 192.168.1.1
!Opmerking: De standaard gebruikersnaam is "admin" en het standaard wac htwoor d
is ook "admin".
IP-Adres 192.168.1.1
User Name
(Gebruikersnaam)
admin
Password
(Wachtwoord)
admin
ESSID wireless
Channel (Kanaal) 6
WEP Uitgeschakeld
Open het venster van de
webbrowser
Voer het IP-adres in
Druk op “Enter” of “Go”
Tik uw “user name” in
Tik uw “password” in
Klik op “OK”
HL_Skyr@cerAP544.book Page 30 Wednesday, February 12, 2003 3:19 PM
 Loading...