


Toastmaster TA710, TA710S, 7224, 7236, 7324 User Manual
...
GRIDDLES
FREE STANDING MODELS:
TA710/TA710S, 7224, 7236, 7324, 7336,7348 INSTALLATION - OPERATION - MAINTENANCE
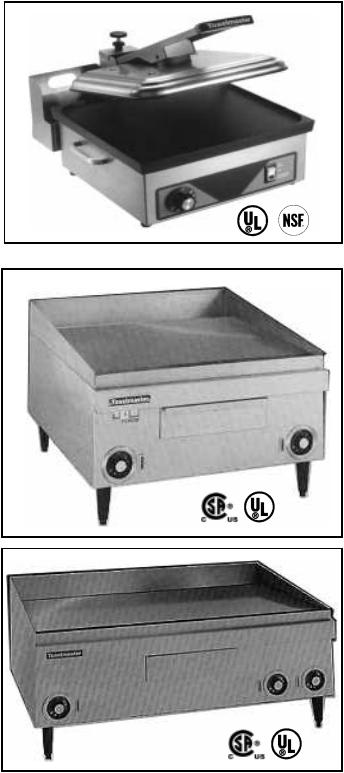
Model - 7336 Counter Top Griddle
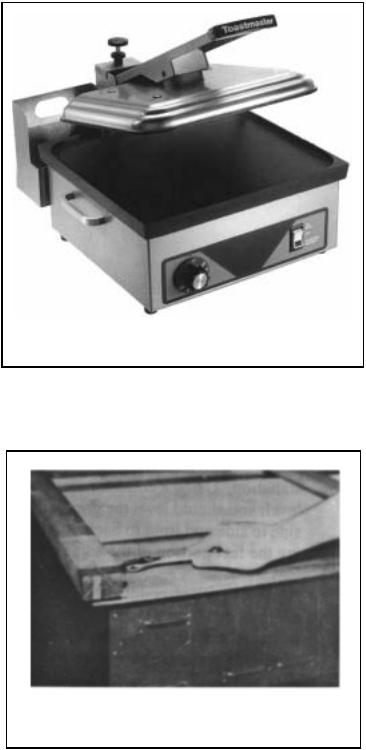
Model - TA710 Sandwich Grill
Middleby Philippines Corporation
~
113 Technology Ave., Laguna Technopark Inc., Binan, Laguna, Philippines 4024 Phone (632) 5208170 - Fax (632) 5208191 - www.middleby.com
MANUAL GRDL0804A710-7348
GRIDDLES
SECTION I GENERAL INFORMATION
Toastmaster manufactures a variety of heavy duty electric griddles for use in the commercial kitchen. Free standing models are available. Free standing models are available. Toasmaster’s many years of experience in manufacturing commercial cooking equipment has provide the expertise necessary to furnish the best electric griddle on the market. Toastmaster provides quality products through precise engineering and production methods as well as the use of the best materials available. The extra features provided on Toastmaster griddles helps to create what is often referred to as “The Toastmaster Difference.”
Toastmaster counter top or free standing griddles are furnished with stainless steel front and sides for easy cleaning and care as well as a gleaming appearance. All thermostat controls are recessed in a stainless steel mounting cup for protection. Thermostats have a range of 150°to 450°F. This low range temperature setting will allow the griddle to be used for holding of foods. This feature is especially helpful on larger griddles where part of the griddle can be used for cooking while another part is used for holding. The larger griddles also have the heating elements spaced so that one element and its control covers only 9” of griddle area for greater versatility, and for more even heat distribution.
All Toastmaster griddles are furnished with 1/2” thick, one piece hot rolled steel plate cooking surface. The free standing models are supplied with splash guards on both sides and rear. All grease troughs are made of stainless steel, again for ease in cleaning and for durability. Even the bottom of the cabinet is enclosed.
The models A710 and A710S are referred to as sandwich grills. These models have both top and bottom grill surfaces that may be ordered as cast aluminum with an aluminum oxide vapor blast finish (A710) or with a “Silverstone”* finish (A710S). This top and bottom grill feature allows for the grilling of food products, such as grilled cheese sandwiches, without turning the sandwich over.
*”Silverstone” is a trademark of the Dupont Company.
Following the information in this manual will assist you in making a proper installation. Suggestions for the proper use and care of your Toastmaster griddle are also provided.
Following is a description of the various models of Toastmaster griddles:
Toastmaster ® |
PAGE 1 |
GRIDDLES
A.Description of Models
1.A710 and A710S Sandwich grill
a.120 volt, 208 volt or 240 volt
b.Grills both sides of sandwich without turning
c.Grills 9 cheese sandwiches at one time
d.Factory installed 36” cord and plug
e.Operate top and bottom grills at the same time or use bottom grill only
2.7224 Counter top griddle
a.Combination voltage 208/240V
b.23 13/16” wide x 18” deep griddle surface
c.Preheats to 400°F in 12 minutes
d.Stainless steel splash guards
e.Accessory stand available
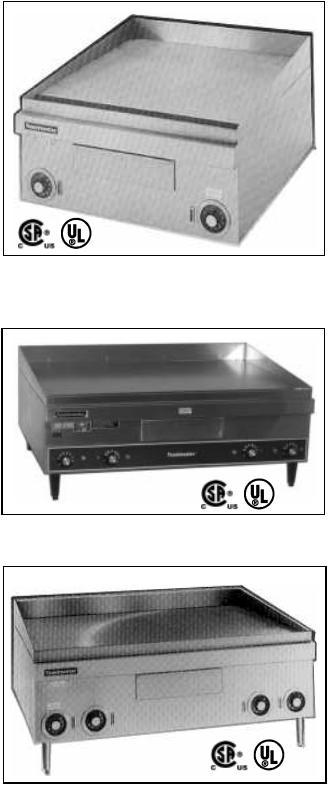
3.7236 Counter top griddle
a.208 volt or 240 volt
b.35 13/16” wide x 18” deep griddle surface
c.Preheats to 400° F in 12 minutes
d.Stainless steel splash guards
e.Accessory stand available
PAGE 2 |
Toastmaster ® |
GRIDDLES
4.7324 Counter Top available
a.208, 240, or 480VAC, 3 or 1-phase
b.Total kw 10.4
c.Griddle surface 24” wide x 24” deep
d.Preheats to 400° F within 12 minutes
e.Stainless steel splasher on sides and back
f.Grease trough & chute at front
g.(2) thermostatically controlled heat zones
5.7336 Counter top griddle
a.208 volt or 240 volt
b.35 7/8” wide x 24” deep griddle surface
c.Preheats to 400° F in 12 minutes
d.Stainless steel splash guards
e.Accessory stand available
6.7348 Counter top griddle
a.208 volt or 240 volt
b.47 3/4” wide x 24” deep griddle surface
c.Preheats to 400 F in 12 minutes
d.Stainless steel splash guards
e.Accessory stand available
Toastmaster ® |
PAGE 3 |
GRIDDLES
SECTION II INSTALLATION AND TESTING
A. Unpacking
Models A710 and A710S are packed in foam-in-place material. All other griddles (both drop-in models and counter top models) are mounted on a wood pallet, or shipping platform.
1. Models A710 and A710S : remove staples from top of carton and discard.
2. Remove top portion of foam packing and discard.
3. Lift unit out of carton.
Model A710S with 1 1/2” legs.
4.A710/A710S are shipped with legs already installed.
5.All other models are uncrated by cutting the banding straps that hold the carton in place with the shipping pallet.
6.Lift the carton up and off the griddle and shipping pallet.
7.Carefully turn the griddle upside down and remove the bolts that secure the pallet to the griddle.
8.Remove the shipping pallet and discard.
Remove the shipping pallet.
9.Your griddle is now ready for installation. Refer to paragraph B.
PAGE 4 |
Toastmaster ® |
GRIDDLES
B.Installation and Electrical Connections
1. Free standing or counter top models
a.CAUTION: Be sure to follow all state and local electrical codes when installing the Toastmaster griddle.
b.Pull out the grease drawer and locate the bag containing the 4” NSF approved, adjustable legs. Models 7224, 7236 and 7324 are all furnished with 6 steel legs. Model A710/A710S has 1 1/4” legs already attached at factory.
c.Turn griddle on its back.
d.Thread each of the legs into the weldnuts or leg mounting plates provided on the bottom of the griddle. Tighten securely.
e.Place the griddle in position on the counter where you have chosen for installation. Using a common carpenters
level, you should level the griddle from side to side and front to back by adjusting the feet portion of the adjustable legs. f. All Toastmaster counter top griddles are provided with a terminal block in a compartment at rear for electrical connection. Knockouts are also provided in case bottom. See dimensional drawings on pages 15-20 for knockout positions. No internal wiring is necessary.
g.No internal fusing is provided on Toastmaster counter top griddles. Therefore, the installing contractor must provide the proper disconnect as may be required by state and local codes.
h.The Model A710 and A710S sandwich grill comes standard with 36” cord and plug.
i.Be sure the main power disconnect switch is in the “OFF” position before attempting to make any electrical connections.
Install legs with griddle on its back.
Adjust the leveling legs.
Toastmaster ® |
PAGE 5 |
j.Be sure your electrician provides the proper wire capable of carrying the volt age required as shown on the serial number plate of the Toastmaster griddle. Failure to do so may void your warranty.
NOTE: See electrical data chart on page 17 for KW rating and amperage drawer.
k.Be sure all electrical connections are tight and are positioned so that they will not short out when the electrical power is applied by turning the main power disconnect switch “ON.”
l.After all electrical connections have been made refer to the section on “Testing the Installation.”
NOTE: 1. All Toastmaster counter top griddles and the A710/A710S sandwich grills meet the standards of the National Sanitation Foundation and are listed by Underwriters’ Laboratories Inc.
NOTE: 2. All Toastmaster counter top griddles, except 7336 and 7348, can be ordered to be furnished with a cord and plug. See accessories listed on page 16.
2.Model 7324:
a.For supply connections use copper wire, sized LAW the National Electrical Code be suitable for 90 C (min).
b.Spacing from a wall:
•Sides - 1” (min)
•Back - 1/2” (min)
3.Use of Accessory Stand
a.Models 7336 and 7348 may be ordered with accessory stand.
b.When mounting any of the above models on the accessory stand do not install the 4” legs as indicated in 2.c, 2.d. and 2.e above.
GRIDDLES
c.Stands may be supplied with 6” legs or with a set of casters as indicated in the accessories listed on page 16.
d.Install the legs or casters in the weld nuts or mounting plates of the stand prior to installation of the griddle.
e.After the legs casters have been installed on the stand, place the griddle on the stand. Secure the griddle to the stand with the bolts provided. (CAUTION: Do not use the bolts that were used to secure the stand to the shipping crate as they may be too long.)
NOTE: Because of available counter space it is common to use an accessory stand (usually furnished with 6” legs) for a permanent griddle installation. However, the use of a griddle stand, especially one supplied with casters, is commonly considered not to be a permanent installation and it is advised that a griddle installed in this manner should be supplied with an accessory cord and plug.
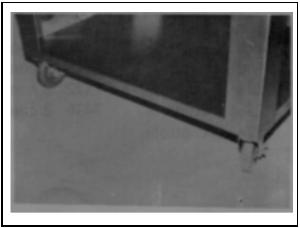
Caster shown on griddle stand.
PAGE 6 |
Toastmaster ® |
GRIDDLES
C. TESTING THE INSTALLATION
Now that the griddle has been installed and the proper electrical connectors have been made, clean the rust preventive material from the griddle surface with a nonflammable grease solvent. Then wash with warm water and a mild detergent. Rinse with a clean damp cloth and wipe dry. It is now time to test the installation.
1.Turn all control knobs to the “OFF” position
2.Turn the main power disconnect switch “ON”
3.Starting on the left, (for griddles with more than one control) turn one control knob at a time to 200° F. Wait a few minutes and check to see if that section of the griddle has started.
to heat. Turn that control knob “OFF” and move to the next control and repeat. Continue until the entire griddle has been tested.
The A710/A710S is controlled by a rocker switch that operates bottom grill only or both top and bottom. To test turn the thermostat dial to 200° F and set the rocker switch to heat both top and bottom grills. Again wait a few minutes and check to see if both grills are beginning to heat. Return the rocker switch to the “OFF” position.
SECTION III OPERATION
A. Controls
1.All Toastmaster counter top griddle are controlled by a thermostat control knob adjustable from 150° to 450° F with positive “OFF” position. The following list shows how many thermostat control knobs are on each of the various models:
7224 |
- |
2 controls |
7236 |
- |
3 controls |
7324 |
- |
2 controls |
7336 |
- |
4 controls |
7348 |
- |
5 controls |
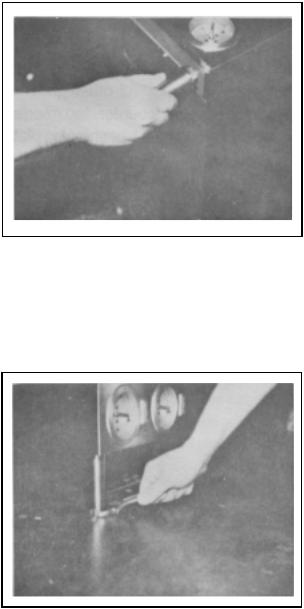
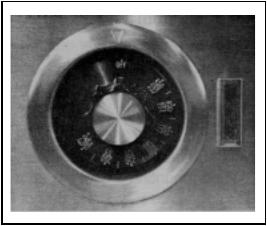
2.Each thermostat control knob is furnished with adjacent signal light that cycles on and off as the thermostat calls for heat to maintain the temperature setting you have selected.
Thermostat control knob and signal light.
Toastmaster ® |
PAGE 7 |
 Loading...