


READ AND SAVE THESE INSTRUCTIONS
WARNING: A risk of fire and electrical shock exists in all electrical appliances and may cause personal injury or death. Please follow all safety instructions.
Bread Box™ Plus Bread Maker
Use and Care Guide Recipe Book
Model 1148X
•FAST BAKE PROGRAM FOR FRESH BREAD IN UNDER 1 HOUR
•8 BREAD PROGRAMS INCLUDING WHOLE WHEAT AND DOUGH
•3-HOUR KEEP WARM CYCLE
•WAKE UP TO FRESH BREAD - 13 HOUR DELAY TIMER
•HORIZONTAL NON-STICK LOAF PAN
?? QUESTIONS ??
Before Contacting Your Retailer Call
TOLL-FREE 1-800-947-3744
and talk to one of Toastmaster’s Experts.

TABLE OF CONTENTS
IMPORTANT SAFEGUARDS . . . . . . . . . . . . . . . . . . . . . . . . . . . . . . . . . . . . . . . . . . . . . . . . 3 BEFORE YOUR FIRST USE . . . . . . . . . . . . . . . . . . . . . . . . . . . . . . . . . . . . . . . . . . . . . . . . . 4 ■ POWER OUTAGE . . . . . . . . . . . . . . . . . . . . . . . . . . . . . . . . . . . . . . . . . . . . . . . . . . . . 4 BREAD MAKER INTRODUCTION . . . . . . . . . . . . . . . . . . . . . . . . . . . . . . . . . . . . . . . . . . . . 5 ■ PARTS . . . . . . . . . . . . . . . . . . . . . . . . . . . . . . . . . . . . . . . . . . . . . . . . . . . . . . . . . . . . 5 ■ CONTROL PANEL . . . . . . . . . . . . . . . . . . . . . . . . . . . . . . . . . . . . . . . . . . . . . . . . . . . . . 6 ■ FEATURES . . . . . . . . . . . . . . . . . . . . . . . . . . . . . . . . . . . . . . . . . . . . . . . . . . . . . . . . . . 7 ■ PROGRAM SPECIFICATIONS . . . . . . . . . . . . . . . . . . . . . . . . . . . . . . . . . . . . . . . . . . . . 8 HELPFUL HINTS FOR BREAD AND DOUGH . . . . . . . . . . . . . . . . . . . . . . . . . . . . . . . . . . . . . 9 ■ MEASURING . . . . . . . . . . . . . . . . . . . . . . . . . . . . . . . . . . . . . . . . . . . . . . . . . . . . . . . 9 ■ DOUGH BALL . . . . . . . . . . . . . . . . . . . . . . . . . . . . . . . . . . . . . . . . . . . . . . . . . . . . . . . 9 ■ INGREDIENTS . . . . . . . . . . . . . . . . . . . . . . . . . . . . . . . . . . . . . . . . . . . . . . . . . . . . . . 10 ■ SUBSTITUTES . . . . . . . . . . . . . . . . . . . . . . . . . . . . . . . . . . . . . . . . . . . . . . . . . . . . . . . 11 ■ BREAD MIXES AND OTHER COOK BOOKS . . . . . . . . . . . . . . . . . . . . . . . . . . . . . . . . . 12 ■ HIGH ALTITUDE . . . . . . . . . . . . . . . . . . . . . . . . . . . . . . . . . . . . . . . . . . . . . . . . . . . . . 12 ■ FREEZING BAKED BREAD . . . . . . . . . . . . . . . . . . . . . . . . . . . . . . . . . . . . . . . . . . . . . . 12 ■ FREEZING DOUGH. . . . . . . . . . . . . . . . . . . . . . . . . . . . . . . . . . . . . . . . . . . . . . . . . . . 12 PROGRAMMING . . . . . . . . . . . . . . . . . . . . . . . . . . . . . . . . . . . . . . . . . . . . . . . . . . . . . . 13 ■ PROGRAMMING BREAD MAKER PROGRAMS. . . . . . . . . . . . . . . . . . . . . . . . . . . . . . . . 13 ■ PROGRAMMING DELAY TIMER . . . . . . . . . . . . . . . . . . . . . . . . . . . . . . . . . . . . . . . . . . 15 RECIPES . . . . . . . . . . . . . . . . . . . . . . . . . . . . . . . . . . . . . . . . . . . . . . . . . . . . . . . . . . . . 16 ■ BREAD . . . . . . . . . . . . . . . . . . . . . . . . . . . . . . . . . . . . . . . . . . . . . . . . . . . . . . . . . . . 16 ■ FAST BAKE™ BREADS AND INSTRUCTIONS . . . . . . . . . . . . . . . . . . . . . . . . . . . . . . . . . 29 ■ GLUTEN-FREE BREADS AND INSTRUCTIONS . . . . . . . . . . . . . . . . . . . . . . . . . . . . . . . . 34 ■ DAY OLD BREAD RECIPES . . . . . . . . . . . . . . . . . . . . . . . . . . . . . . . . . . . . . . . . . . . . . . 41 ■ DOUGHS . . . . . . . . . . . . . . . . . . . . . . . . . . . . . . . . . . . . . . . . . . . . . . . . . . . . . . . . . 42 CLEANING AND STORING . . . . . . . . . . . . . . . . . . . . . . . . . . . . . . . . . . . . . . . . . . . . . . . 58 BEFORE CALLING FOR SERVICE . . . . . . . . . . . . . . . . . . . . . . . . . . . . . . . . . . . . . . . . . . . . 59 ■ QUESTIONS AND ANSWERS . . . . . . . . . . . . . . . . . . . . . . . . . . . . . . . . . . . . . . . . . . . 59 ■ CHECK LIST . . . . . . . . . . . . . . . . . . . . . . . . . . . . . . . . . . . . . . . . . . . . . . . . . . . . . . . . 60 ■ SERVICE INFORMATION . . . . . . . . . . . . . . . . . . . . . . . . . . . . . . . . . . . . . . . . . . . . . . . 62 SPECIFICATIONS . . . . . . . . . . . . . . . . . . . . . . . . . . . . . . . . . . . . . . . . . . . . . . . . . . . . . . 62 RECIPE INDEX . . . . . . . . . . . . . . . . . . . . . . . . . . . . . . . . . . . . . . . . . . . . . . . . . . . . . . . . 63
2

IMPORTANT SAFEGUARDS
When using electrical appliances, basic safety precautions should always be followed to reduce the risk of fire, electric shock and injury to persons, including the following:
•Read all instructions before using this appliance.
•Do not immerse cord, plug, or appliance in water or other liquid (see instructions for cleaning).
•Do not touch hot surfaces. Always use oven mitts when handling the hot bread pan or bread.
•Close supervision is necessary when this appliance is used near children.
•This appliance is not for use by children. Keep out of reach of children.
•Unplug from outlet when not in use and before cleaning. Allow to cool before attaching or removing parts.
•Avoid touching moving parts. Do not remove the bread pan during operation. Stop pad must be pressed if bread pan is to be removed before completion.
•Do not operate the appliance with a damaged cord or plug, or after the appliance malfunctions, or has been dropped or damaged in any manner. Return appliance to the nearest authorized service facility for examination, repair, electrical or mechanical adjustment.
•Do not use outdoors or while standing in damp area.
•Do not let cord hang over edge of table or counter or touch hot surfaces.
•Do not place on or near a hot gas or electric burner or in a heated oven.
•To unplug, grip the plug and pull out from the wall outlet. Never pull on the cord.
•Do not unplug while unit is in operation.
•Do not use appliance except as indicated in these instructions.
•Use accessory attachments only if recommended by Toastmaster Inc.
•Do not clean with metal scouring pads. Pieces can break off the pad and touch electrical parts.
•Bread maker must be placed at least 4 inches (10,2 cm) from walls and edge of counter.
•Do not cover bread maker with anything which would prevent the steam from escaping. This may cause warpage, discoloration, malfunction or even fire.
SAVE THESE INSTRUCTIONS
CAUTION: A short power supply cord is provided to reduce the risk of personal injury resulting from becoming entangled in or tripping over a longer cord. Extension cords are available from local hardware stores and may be used if care is exercised in their use. If an extension cord is required, special care and caution is necessary. Also the cord must be: (1) marked with an electrical rating of 125 V, and at least 13 A., 1625 W., and (2) the cord must be arranged so that it will not drape over the countertop or tabletop where it can be pulled on by children or tripped over accidentally.
ELECTRIC POWER: If electric circuit is overloaded with other appliances, your bread maker may not operate properly. The bread maker should be operated on a separate electrical circuit from other operating appliances.
POLARIZED PLUG: This appliance has a polarized plug (one blade is wider than the other). As a safety feature to reduce the risk of electrical shock, this plug is intended to fit in a polarized outlet only one way. If the plug does not fit fully in the outlet, reverse the plug. If it still does not fit, contact a qualified electrician. Do not attempt to defeat this safety feature.
THIS PRODUCT IS FOR HOUSEHOLD USE ONLY
3

BEFORE YOUR FIRST USE
Please fill out information that follows warranty.
Unpack and clean bread maker; see CLEANING AND STORING.
Place bread maker on a dry, stable surface away from burners and away from areas where cooking grease or water may splatter onto it. Avoid placing it where it may tip over during use. Place on back of counter top.
The bread maker will bake up to a 2 pound loaf of bread. Do not put a larger quantity of ingredients into the bread pan than recommended. If you do so, the bread may not mix or bake correctly and the bread maker may be damaged. The maximum amount of ingredients to be used is as follows.
Bread programs — approximately 4 cups Dough program — 4 2/3 cups
During first use, this product may smoke and/or emit an odor from mineral oils used in manufacturing. This is normal for a newly manufactured appliance. Before first use, operate empty on the fast bake program to burn off the manufacturing oils.
■ POWER OUTAGE
During the bread programs, if the bread maker loses power before the baking process begins, you may try starting it at the beginning of the program again for all programs except fast bake. You may also try starting the dough program at the beginning of the program again. This may not always produce an acceptable loaf. If you are not sure when the outage occurred, remove the dough ball from the bread pan and place in an oven-safe baking container. Allow to double in size and place in a preheated 350°F/177°C oven for 30-45 minutes or until done. The bread should sound hollow when tapped on top of the loaf if it is done.
If you are using the fast bake program or if the bread has already begun to bake when the outage occurs, you must begin with new ingredients.
4

BREAD MAKER INTRODUCTION
■ PARTS
 Bread Pan Clip
5

■ CONTROL PANEL
|
|
|
|
|
|
|
|
|
|
|
|
|
|
|
|
|
|
|
|
|
|
|
|
Display |
Loaf Size |
Select |
Timer |
Stop |
Start |
||
Window |
Choose 1 |
Press to select |
Press to |
Press for |
After selecting |
||
Indicates the |
lb., 1.5 lb. |
the program. |
delay pro- |
more than |
the program |
||
program or |
or 2 lb. loaf |
|
|
gram. The |
2 seconds |
and timer (if |
|
amount of time |
size. |
|
|
time will |
during the |
needed), press |
|
left for |
|
|
|
advance by |
cycle to |
to start the |
|
completion and |
|
|
|
10 minute |
cancel a |
program or |
|
display signals. |
|
|
|
intervals. |
program. |
timer count |
|
|
|
|
|
|
|
|
down. |
When a bread maker is packaged for shipment, a clear plastic film is placed over the control panel; carefully peel it off.
PROGRAM |
|
If you want to cancel the selected program, press the Stop pad and hold it |
CANCEL |
|
down for more than 2 seconds at any time during the program. |
|
PROGRAM SELECT RECALL
If you have started your bread maker and are not sure which program you have selected, you may recall this information. Press the Select pad at anytime. The indicator under the program chosen will appear in the display window. The bread maker will automatically return to amount of time left for completion of program.
6

■ FEATURES
PROGRAM SELECT
The control panel will let you choose different programs and loaf sizes.
All programs except Whole Wheat and French contain a beep to check the dough ball, to add additional ingredients (i.e., raisins, nuts, and spices) or to stir ingredients.
Basic (Med, Dark, or Light) . . . . . . . . . . . . . . . .
Whole Wheat . . . . . . . . . . . . . . . . . . . . . . . . .
Use these programs for basic bread recipes and most prepackaged bread mixes. You may choose light, medium or dark crust color.
If a recipe contains more than 50% whole wheat flour or when instructed in the recipe, use this program.
Sweet . . . . . . . . . . . . . . . . . . . . . . . . . . . . . . |
This program works best if a recipe is high in |
|
fat, sugar, eggs or cheese. |
Fast Bake™ . . . . . . . . . . . . . . . . . . . . . . . . . . . |
Make bread in less than one hour by using |
|
this program. Simply use the special instruc- |
|
tions and recipes found in the fast bake bread |
|
and gluten-free bread sections of this recipe |
|
book. |
French . . . . . . . . . . . . . . . . . . . . . . . . . . . . . .
Dough . . . . . . . . . . . . . . . . . . . . . . . . . . . . . .
This program is best suited for breads low in fat and sugar, which results in a crisp crust and coarse, chewy interior.
This program is used to prepare dough for making bread or rolls which are shaped before baking in a conventional oven.
7

■ PROGRAM SPECIFICATIONS (approximate times)
Process |
crust |
loaf |
total |
delay |
1st |
rest |
2nd |
|
size |
knead |
min./ |
knead |
|||
Program |
color |
lb. |
time |
timer |
min. |
sec.* |
min. |
|
|
|
|
|
|
|
|
|
|
1.0 |
3:00 |
|
10 |
28 |
12 |
|
Light |
1.5 |
3:20 |
|
15 |
30 |
20 |
|
|
2.0 |
3:30 |
|
15 |
32 |
20 |
|
|
1.0 |
3:00 |
|
10 |
28 |
12 |
Basic |
Med |
1.5 |
3:20 |
4:00 to |
15 |
30 |
20 |
|
|
2.0 |
3:30 |
13:00 |
15 |
32 |
20 |
|
|
1.0 |
3:00 |
Hours |
10 |
28 |
12 |
|
Dark |
1.5 |
3:20 |
|
15 |
30 |
20 |
|
|
2.0 |
3:30 |
|
15 |
32 |
20 |
Whole |
|
1.0 |
3:20 |
|
12 |
23 |
15 |
Wheat |
Med |
1.5 |
3:30 |
|
15 |
30 |
15 |
|
|
2.0 |
3:40 |
|
15 |
30 |
20 |
|
|
1.0 |
3:20 |
|
10 |
35 |
15 |
Sweet |
Med |
1.5 |
3:30 |
|
15 |
33 |
22 |
|
|
2.0 |
3:40 |
|
15 |
32 |
25 |
Fast |
|
1.0 |
:59 |
TIMER |
7 |
30* |
7 |
Bake |
Med |
1.5 |
1:00 |
NOT |
7 |
30* |
7 |
|
|
2.0 |
1:01 |
AVAILABLE |
7 |
30* |
7 |
|
|
1.0 |
3:40 |
4:00 to |
12 |
33 |
15 |
French |
Med |
1.5 |
3:50 |
13:00 |
15 |
33 |
22 |
|
|
2.0 |
4:00 |
Hours |
15 |
32 |
20 |
|
|
1.0 |
1:10 |
TIMER |
10 |
30 |
10 |
Dough |
|
1.5 |
1:20 |
NOT |
15 |
30 |
15 |
|
|
2.0 |
1:25 |
AVAILABLE |
17 |
30 |
18 |
|
|
|
|
|
|
|
|
display |
1st |
|
2nd |
|
|
|
time |
punch |
bake |
keep |
|||
for |
rise |
sec. |
rise |
min. |
warm |
|
beep** |
min. |
min. |
||||
|
|
|
||||
2:15 |
20 |
3 |
60 |
50 |
|
|
2:20 |
20 |
3 |
60 |
55 |
|
|
2:28 |
23 |
3 |
60 |
1:00 |
|
|
2:15 |
20 |
3 |
60 |
50 |
|
|
2:20 |
20 |
3 |
60 |
55 |
|
|
2:28 |
23 |
3 |
60 |
1:00 |
|
|
2:15 |
20 |
3 |
60 |
50 |
|
|
2:20 |
20 |
3 |
60 |
55 |
3 |
|
2:28 |
23 |
3 |
60 |
60 |
Hours |
|
— |
30 |
3 |
70 |
50 |
|
|
— |
25 |
3 |
70 |
55 |
|
|
— |
25 |
3 |
70 |
60 |
|
|
2:25 |
25 |
3 |
60 |
55 |
|
|
2:25 |
20 |
3 |
60 |
60 |
|
|
2:33 |
23 |
3 |
60 |
65 |
|
|
:49 |
16 |
|
|
29 |
NOT |
|
:50 |
16 |
|
|
30 |
AVAIL- |
|
:51 |
16 |
|
|
31 |
ABLE |
|
— |
35 |
3 |
70 |
55 |
|
|
— |
25 |
3 |
70 |
65 |
3 |
|
— |
28 |
3 |
70 |
75 |
Hours |
|
25 |
20 |
3 |
|
|
NOT |
|
25 |
20 |
3 |
— |
— |
AVAIL- |
|
25 |
20 |
3 |
|
|
ABLE |
|
|
|
|
|
|
|
* Rest is only seconds for Fast Bake™ program.
**Display time for beep tells you when to add additional ingredients, i.e. raisins or nuts, during all programs except Whole Wheat and French. Use this time to check dough ball and scrape ingredients from sides of pan.
The beeper sounds when baking is complete. If you want to serve bread that has just been baked, press Stop pad and remove. You may remove the bread or leave it in the bread maker. If left, it will automatically be kept warm for up to 3 hours during the keep warm process on all bake cycles except fast bake. The display window will show 0:00, and the colon will flash. At the end of keep warm, the display window will indicate last program selected.
8

HELPFUL HINTS FOR BREAD AND DOUGH
We recommend that you read the following information before you shop for your ingredients. Your bread maker will bake up to a 2 pound loaf of fresh bread containing approximately 4 cups of flour. All ingredients except liquids must be at room temperature and liquids should be approximately 80°F/27°C (baby bottle temperature). When preparing bread for the Fast Bake program, all liquid temperatures must be 110°-115°F/43°-46°C. Always place the ingredients in the bread pan in the order listed in the recipe: liquids, dry ingredients and then yeast. Some ingredient amounts are the same for different size loaves.
■ MEASURING: THE CORRECT WAY
Be sure to measure accurately for success. Mis-measuring, even slightly, can make a big difference in your results.
When you are measuring liquids, use a clear glass or plastic liquid measuring cup. To ensure accuracy, set the measuring cup on the counter top and read the measurement at eye level.
To measure your flour, spoon it lightly into a standard dry ingredient measuring cup and level it with a straight edge. Also, do not shake the cup or tap it on the counter top. Do not scoop the flour with the measuring cup as this tends to pack more flour than the recipes call for.
Use standard measuring spoons and level with a straight edge.
Measurement/Conversion Chart
1 1/2 tsp = |
1/2 TBL |
8 |
TBL |
= |
1/2 cup |
|
3 tsp = |
1 |
TBL |
12 |
TBL |
= |
3/4 cup |
1/2 TBL = |
1 |
1/2 tsp |
16 |
TBL |
= |
1 cup |
2 TBL = |
1/8 cup |
3/8 cup = |
1/4 cup + 2 TBL |
|||
4 TBL = |
1/4 cup |
5/8 cup = |
1/2 cup + 2 TBL |
|||
5 TBL + 1 tsp = |
1/3 cup |
7/8 cup |
= |
3/4 cup + 2 TBL |
||
■ DOUGH BALL: NECESSARY FOR A SUCCESSFUL LOAF OF BREAD
We have found that liquid amounts called for in a recipe may need to be adjusted slightly because different climates and seasons result in a wide variety of humidity levels. You should check the dough ball at the beep during the kneading process, see program specifications. At this point, the ball should be round, smooth-textured, soft and slightly tacky to the touch. When touched it will leave a little dough on your finger. Push down any dough or flour that may be on the sides of the pan. If it does not form a ball and is more like a batter, add 1 tablespoon of flour at a time until it reaches the appropriate consistency. On the other hand, if the mixture is too dry to form a ball, forms more than one ball, or is a ball but not soft and slightly tacky, add 1 teaspoon of water and allow it to absorb. Add more water if necessary. Provided you have used all of the ingredients specified in the recipe, measured the ingredients properly, and have a "good” dough ball, you should achieve a successful loaf of bread.
When preparing bread in the Fast Bake™ program, the dough ball will be a very soft, loose ball with a smooth texture and will be sticky to the touch. When touched it will leave dough on your finger.
9
■ INGREDIENTS: READ BEFORE SHOPPING
Yeast: The Number One Ingredient
For all programs except fast bake we used RED STAR® Active Dry Yeast when we developed the bread recipes. However, RED STAR® QUICK•RISE™ Yeast may also be used. We found that we did not have to vary the amount used when we substituted one for the other. When using bread machine yeast, follow the package instructions.
When developing the fast bake program, we found that QUICK•RISE™, Bread Machine or Instant Active Dry Yeast must be used. They may be substituted in equal amounts. You will find that this program requires more yeast than other programs.
RED STAR® QUICK•RISE™ yeast must be used for all gluten-free recipes.
A 1/4 ounce package of RED STAR® yeast contains approximately 2 1/4 level teaspoons of yeast. When the yeast is exposed to oxygen, moisture or warmth, the activity of it deteriorates. Therefore, we recommend storing yeast in an airtight container and refrigerating for up to 6 weeks or freezing it for up
to 6 months. Measure out the amount you need and allow it to come to room temperature before using it — this takes about 15 minutes.
If you have any doubt regarding the activity of the yeast, you may use one of the following tests to determine its strength. Each test calls for a different amount of yeast as a base ingredient. This gives you more bread choices once the test is complete. The yeast mixture should not be used for the fast bake program.
To test for one package (2 1/4 teaspoons) of RED STAR® Active Dry or QUICK•RISE™ Yeast, use a liquid measuring cup and fill to the 1/2 cup level with 110°-115°F/43°-46°C water. Stir in 1 teaspoon granulated sugar and 1 package (2 1/4 teaspoons) RED STAR® Active Dry or QUICK•RISE™ Yeast. Leave your stirring spoon in the cup. Set a timer for 10 minutes. As the yeast absorbs liquid, it will begin to activate and rise to the surface. If at the end of the 10 minutes the yeast has multiplied to the 1 cup mark, it is very active. The yeast mixture may be used in your ToastmasterBread Maker in a recipe that calls for 2 1/4 teaspoons of yeast. Remember to adjust your recipe for the 1/2 cup of water and 2 1/4 teaspoons of yeast used in the test. The sugar does not need to be adjusted. To test for 1 1/2 teaspoons of RED STAR® Active Dry or QUICK•RISE™ Yeast, use a liquid measuring cup and fill to the 1/4 cup level with 110°- 115°F/43°-46°C water. Stir in 1 teaspoon granulated sugar and 1 1/2 teaspoons RED STAR® Active Dry or QUICK•RISE™ Yeast. Leave your stirring spoon in the cup. Set a timer for 10 minutes. As the yeast absorbs liquid, it will begin to activate and rise to the surface. If at the end of the 10 minutes the yeast has multiplied to the 1/2 cup mark, it is very active. The yeast mixture may be used in your Toastmaster Bread Maker in a recipe that calls for 1 1/2 teaspoons or more of yeast. Remember to adjust your recipe for the 1/4 cup of water and 1 1/2 teaspoons of yeast used in the test. The sugar does not need to be adjusted.
Flour: Bread Flour is Essential for Bread
All types of flour are affected by many factors, such as milling grades, moisture content, length of storage and manufacturing processes. Adjustments to the recipes may need to be made to compensate for climactic changes in different regions to ensure an excellent loaf.
Bread flour is a definite necessity. Milled from hard winter or spring wheat, it has a higher protein content that makes it more durable than all-purpose flour. The protein, when mixed with liquid, becomes gluten. When kneaded, gluten becomes elastic and gives the bread better structure. In contrast, all-purpose flour, milled from a combination of soft and hard wheat, becomes elastic too easily for use in a bread maker and quickly loses its ability to stretch well. As a result, bread made from all-purpose flour will be smaller and more dense. Several well-known mills now market bread flour. It is labeled bread flour on the package and is available at grocery stores.
Wheat is the only grain that contains the type of protein that becomes elastic when kneaded. Other flours, such as rye, barley, oats, soy, rice and buckwheat, add flavor and fiber to breads but do not add structure to the dough. Therefore, wheat flour is essential as a base when making bread.
Vital Wheat Gluten is produced by processing white flour one more step. White flour contains both protein and starch, and mills now can remove most of the starch leaving only the protein (gluten). When gluten is added to recipes containing whole grain flours, it improves the volume and shape of the loaf significantly.
10
Many grocery stores stock gluten in the flour section. Health food and nutrition centers also carry this item.
Flour is best kept in an airtight container. If you are storing the flour for a long period of time, you may want to keep it in the freezer as the refrigerator tends to dry it out. Whole grain wheat flours, which have a higher oil content, will become rancid much more quickly than white flour and should always be kept in the freezer. Be sure, however, to allow all flours to return to room temperature before placing in the bread maker.
Fat: Dough Enhancer and Conditioner
Our recipes were developed using vegetable oil. You may use any type of oil or substitute in equal proportions solid shortening or real butter (divide them into small pieces). We have found no noticeable difference in flavor but the crust may be more crisp with real butter. We do not recommend the use of margarine as it tends to make the crust tough.
Liquids: Activate the Yeast and Bind the Dough
When we use the term liquid, we are referring to all wet ingredients used in the recipe. For all programs except fast bake, it is very important that the liquid temperature is 80°F/27°C. With this water temperature, the yeast activates gradually to accommodate these programs.
When preparing bread using the fast bake program, all liquid temperatures must be 110°- 115°F/43°-46°C. The warmer temperature is necessary for the yeast to activate quickly to accommodate this specially designed program.
Eggs are also considered part of the total liquid amount. Eggs should be at room temperature. When removing them from the refrigerator, place whole uncracked eggs in a bowl of warm water for 15 minutes to take off the chill before use.
Cinnamon and Garlic: Not True Friends of Yeast
Previously, cinnamon and sugar were sprinkled on dough before it was rolled up jelly-roll fashion. Adding cinnamon and garlic to the dough in a bread maker, however, presents a problem. Cinnamon reacts with bread dough just as a meat tenderizer reacts with meat. It breaks down the structure. Although it smells wonderful as it is baking, the flavor is dissipated in the baking process. DO NOT ADD MORE THAN LISTED IN THE RECIPE. For more flavor, use them as a spread for the bread rather than adding to the dough.
Fruits and Vegetables: Add Flavor and Nutrition
When adding fruits or vegetables to recipes, do not exceed the amount listed. These products, if used in excessive amounts, may inhibit the rising of the bread.
Salt: Regulates Yeast Activity
Salt is necessary to control the activity of yeast, disciplining it to work slowly and steadily. Without salt, yeast acts too rapidly. Salt also strengthens the structure of the dough. If too little or no salt is used, the bread will rise rapidly and then fall. The texture will also be more coarse and/or uneven.
Sugar: Food for Yeast
Sugar is the favorite food of yeast, but too much sugar will cause the yeast to over-react. The loaf of bread will be small and dense. Dried fruits also contribute sugar to the bread dough. We do not recommend adding any more than is specified in each recipe. In addition, we do not recommend the use of artificial sweeteners because the yeast cannot react with them.
■ SUBSTITUTES
In our test kitchen, we experimented with these ingredient substitutions. We do caution you that your results may vary significantly from ours. If you would like to try other substitutions, there are several helpful hint books available from retail stores to assist you. However, we cannot guarantee their results.
Eggs
Liquid egg substitutes may be used as directed on the carton. Two egg whites may be substituted for one whole egg. REMEMBER, all egg products must be at room temperature.
11

Milk
Coffee creamer, non-dairy creamer or dry buttermilk may be substituted for dry milk in equal proportions. Liquid milk 80°F/27°C may be substituted for water in equal proportions for all bread programs except fast bake. The dry milk may then be eliminated all together. The loaf will be slightly smaller.
Salt
Salt-free recipes are not successful. Dietetically sodium free (less than 5 mg sodium per serving) or low salt (less than 1/2 the sodium of table salt) may be used in equal amounts. The bread will be more coarse.
Sugar
Honey may be substituted for sugar in equal proportions; reduce the liquid by the same amount. Brown sugar may be substituted for white sugar in equal proportions. Yeast needs sugar — no artificial sweetener should be used.
Wheat Flour
For gluten-free bread recipes refer to gluten-free bread section.
Yeast
We used RED STAR® Yeast to develop our recipes. However, any brand may be used. Refer to yeast ingredient section for other yeast substitutes.
■ BREAD MIXES AND OTHER COOK BOOKS
Use mixes labeled for up to 2 pound loaves. For best results, use the basic courses. Even though we offer a wide variety of recipes for bread and dough, you may be looking for one that we have not included in our recipe book. Bread maker helpful hints and recipe books are available at book and retail stores. They offer a wide variety of recipes. Refer to features section of this book for the best bread program to use for other recipes. Minor adjustments may be necessary for best results.
■ HIGH ALTITUDE
High elevations may make dough rise faster. We recommend that you try the recipe as it is printed first. The dough ball should be round, smooth-textured, soft and slightly tacky to the touch. If you find the results are unsuccessful, decrease your yeast 1/4 teaspoon at a time. You may also have to increase the liquid because of the drier air; start with 1 tablespoon and increase it if necessary. The addition of gluten will help the structure of the bread. The recommended amount is 1 teaspoon per cup of flour unless specified otherwise in the recipe.
■ FREEZING BAKED BREAD
When freezing bread and rolls, cool them before wrapping in plastic wrap. Place them in a plastic bag and seal it. Bread may be frozen for up to six weeks. When you thaw, partially open the wrapping to allow the moisture to escape gradually for best results.
■ FREEZING DOUGH
At the end of the dough program, you may remove the dough and freeze it for baking at a later time. Form the dough into the desired shape and immediately freeze for one hour to harden. Remove from the freezer and wrap in plastic wrap. Next, place it in a plastic bag and seal. Dough can be kept in the freezer for up to four weeks. Thaw the dough in plastic bag in the refrigerator overnight or for several hours. Unwrap and place on baking container. Cover and let stand in warm, draft free place until double the original size. Because the dough is not room temperature, you will find it takes longer than usual to rise. Bake according to recipe instructions.
If additional assistance is needed, expert help is available from Toastmaster® (1-800-947-3744) or from RED STAR® YEAST & PRODUCTS (1-800-445-4746).
12

PROGRAMMING
■ PROGRAMMING BREAD MAKER PROGRAMS
The following are the general steps for using the bread maker. Depending on the program or recipe that you choose, some steps may not apply or there may be additional steps. Refer to the Breads, Fast Bake Breads, Gluten-Free Breads and Doughs sections.
Add all ingredients to the pan in the order listed in the recipe.
The illustrations in this use and care guide are for information purposes only. You may find your bread maker looks different, however, the steps for operation are the same.
1 Open the lid and remove the bread pan by pulling straight up, using the handle.
2 |
Mount the kneading blade on |
||
the shaft, flat side down. |
|||
|
|
|
|
|
|
|
|
3 Place all ingredients, except yeast, in bread pan in the order listed. Use a rubber spatula to smooth the dry ingredients in the bread pan; be sure to spread into all corners. Lightly tap the pan 3 times on the counter top to settle the ingredients. Add yeast on top.
4 Insert bread pan and push down on rim until it snaps securely into place. Fold handle down.
If the pan does not snap securely into place, remove bread pan. Wearing oven mitts, place fingers behind bread pan clips and gently pull away from oven wall. Insert bread pan again.
13

5 Close the lid. Plug into 120 V ~
60 Hz outlet. The bread maker display indicator will default to Basic Med and 1.15 lb.
6 |
Press the Select button to |
choose the desired program. |
Press the Loaf Size button to select 1.0 lb., 1.5 lb. or 2.0 lb. size recipe. Although the bread maker is capable of making 1 lb., 1.5 lb. and 2 lb. loaves, we recommend baking 1.5 and 2 lb. recipes for more uniform loaves of bread. The smaller size recipes and mixes will not fill the bread pan when finished.
8 The beeper will sound when bread is done. Press Stop and remove the bread pan using oven mitts. If you
do not stop the unit and remove the bread, it will automatically go into the keep warm process on all programs except Fast Bake and Dough. Your bread will be kept warm for three hours and then the bread
maker will shut off. For best results, remove bread immediately after the bake process is complete.
7 Press Start. The time left for the program to be finished is displayed. The timer will
count down. All programs except Whole Wheat and French will beep to add additional ingredients during the second knead. Opening lid will not stop kneading.
Add ingredients quickly and evenly over dough. Quickly close lid to prevent heat loss. At this time also check dough ball and use a rubber spatula to scrape any ingredients from the sides of the pan.
If using the fast bake program or delay timer, add all of the ingredients at the beginning. The ingredients will be chopped into smaller pieces.
9 Turn the bread pan upside down and shake to release the bread.
Place the bread upright on a wire rack to cool 2030 minutes before cutting. This allows the steam to escape. Be sure to remove the kneading blade from the bread.
CAUTION:
•The bread pan, kneading blade and bread will be very hot.
•Always unplug after use.
14

■ PROGRAMMING DELAY TIMER
The delayed timer can be set to delay bread making up to 13 hours. At the selected time, delicious bread will be ready. The delay works for all programs except fast bake and dough.
Add all ingredients to the bread pan in the order listed. It is critical to add the yeast last on top of the flour, and away from the liquid. This will keep the yeast from activating until the bread maker starts to mix.
Select the program and Loaf Size. Before pressing Start, set the Timer for the amount of time you want to wait before the bread is done.
EXAMPLE: It is 9:00 p.m. now. The bread is to be ready at 6:30 a.m. the next morning. Set the timer for 9:30, because there are 9 hours and 30 minutes between 9:00 p.m. and 6:30 a.m.
1. When pressed, the time will |
NOTE: The bread maker will start when |
advance in 10 minute increments. |
the timer has counted down to the start |
|
time for the program selected to begin. |
2.When constant pressure is applied to the pad, the time will advance quickly. Once you count up to 13:00 hours, the timer starts over again at 4:00 hours.
3.Press the Start pad. The timer is set, and the colon blinks. After one minute, 9:29 is displayed,
and the timer continues to count |
Colon will blink |
|
down in 1 minute increments. |
||
|
15
RECIPES
■ BREAD . . . AS EASY AS 1 - 2 - 3
1.Add ingredients to the bread pan in the order listed. Refer to the Helpful Hints for Bread and Dough for measuring information. Place the bread pan in the bread maker.
2.Close the lid. Select the bread program, choose the Loaf Size and press Start.
3.When finished baking, remove bread pan from the bread maker. Invert and shake to remove the loaf. Allow loaf to cool standing upright on a wire rack before slicing.
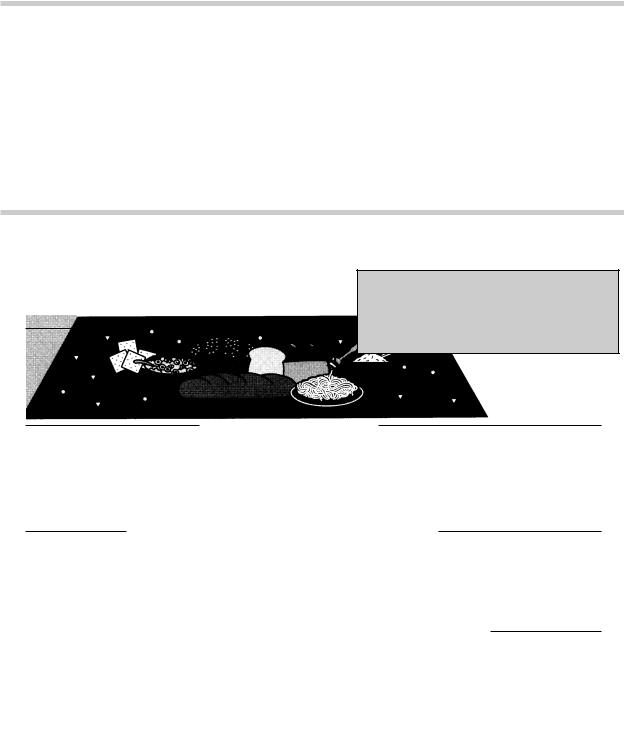
FOOD GUIDE PYRAMID
A Guide To Daily Food Choices
Fats, Oils & Sweets
Group
USE SPARINGLY
Milk, Yogurt, &
Cheese Group
2-3 SERVINGS
Vegetable Group
3-5 SERVINGS
KEY
● Fat (naturally occurring and added) ▼ Sugars (added)
Meat, Poultry, Fish, Dry
Beans, Eggs, & Nuts
Group
2-3 SERVINGS
Fruit Group
2-4 SERVINGS
Bread, Cereal,
Rice & Pasta
Group
6-11
SERVINGS
Bread, cereal, pasta, crackers and other grain foods are low in fat and full of energy. The Food Guide Pyramid says we should eat 6-11 servings daily — more than any other food group. One half-inch slice of bread is approximately two servings.
16

BREADS
We suggest starting your bread baking with this White Bread recipe. Follow each step carefully. These steps have been written to eliminate the most common errors in bread maker baking and may be helpful for any recipe.
|
|
WHITE BREAD |
|
|
|
|
|
||
|
1 lb. |
2 lb. |
||
water 80°F/27°C |
1/2 cup + 3 TBL |
1 cup + 5 TBL |
||
oil |
4 tsp |
2 |
TBL |
|
sugar |
1 |
1/2 TBL |
2 |
TBL |
salt |
1 |
tsp |
2 |
tsp |
dry milk |
1 |
TBL |
2 |
TBL |
bread flour |
2 |
1/4 cups |
4 cups |
|
active dry yeast |
1 tsp |
1 |
1/4 tsp |
|
Program |
Basic |
Basic |
||
1.Remove the bread pan from the bread maker. Attach the kneading blade onto the shaft. Make sure all ingredients, except water, are at room temperature.
2.Use a liquid measuring cup to measure the water (80°F/27°C/baby bottle temperature) and pour into the bread pan.
3.Use a measuring spoon to measure the oil and add to the bread pan.
4.Use a measuring spoon to measure the sugar, salt and dry milk; level off with the straight edge of a knife and add to the bread pan.
5.Lightly spoon bread flour into a dry measuring cup; level off with the straight edge of a knife and add to the bread pan. Smooth into all corners. Lightly tap pan on counter 3 times to settle all dry ingredients.
6.Carefully measure yeast with a measuring spoon; level off with the straight edge of a knife and add to the bread pan. If using delay timer, make sure yeast is on top of bread flour, away from liquids.
7.Place the bread pan into the bread maker. Push down on rim until it snaps into place. Close the lid.
8.Select Basic Medium, Basic Dark, or Basic Light program, Loaf Size and set Timer to delay, or press Start for immediate start.
9.At the beep during the kneading process, check the dough ball. It should be slightly tacky to the touch. Add more water or flour if necessary; see Dough Ball. At this time, push down any dough or flour that may be on the sides of the pan.
10.When the beeper sounds, the bread has finished baking and the keep warm cycle will start. The display window will show 0:00, and the colon will flash.
11.Press Stop and use oven mitts to carefully remove the bread pan at any time during the keep warm process.
CAUTION: THE OVEN CAVITY, BREAD PAN, KNEADING BLADE AND BREAD WILL BE VERY HOT.
USE OVEN MITTS.
12.Turn bread pan upside down and shake several times to release the bread. Do not use metal utensils inside the bread pan or machine. Remove the kneading blade and allow loaf to cool standing upright on wire rack approximately 20 minutes before cutting.
13. If bread loaf does not easily release from pan, allow it to sit on a heat resistant surface 5 minutes, then remove. When the bread has completely cooled, approximately 1 hour, store in an air tight container.
14.UNPLUG UNIT BEFORE CLEANING. DO NOT IMMERSE THE BREAD PAN IN WATER, see CLEANING AND STORING.
17

FRENCH BREAD
|
1 lb. |
2 lb. |
||
water 80°F/27°C |
3/4 cup + 2 TBL |
1 cup + 7 TBL |
||
oil |
1 |
TBL |
2 |
TBL |
sugar |
1 tsp |
2 tsp |
||
salt |
3/4 tsp |
1 |
1/2 tsp |
|
bread flour |
2 |
1/4 cups |
4 |
1/3 cups |
active dry yeast |
1 |
1/2 tsp |
2 tsp |
|
Program |
French |
French |
||
|
|
|
|
|
FAT FREE WHITE BREAD
|
1 lb. |
2 lb. |
||
water 80°F/27°C |
1/2 cup + 3 TBL |
1 cup + 5 TBL |
||
applesauce* |
4 tsp |
2 |
TBL |
|
sugar |
1 |
1/2 TBL |
2 |
TBL |
salt |
1 |
tsp |
2 |
tsp |
dry milk |
1 |
TBL |
2 |
TBL |
bread flour |
2 |
1/4 cups |
4 cups |
|
active dry yeast |
1 tsp |
1 |
1/4 tsp |
|
Program |
Basic |
Basic |
||
*any variety
Note: Substituting applesauce for oil in other recipes may not produce good results.
|
|
MAPLE BREAD |
|
|
|
|
|
|
|
|
|
|
|
|
|
|
1 lb. |
2 lb. |
|
|
water 80°F/27°C |
3/4 cup |
1 cup |
|
|
oil |
2 1/2 TBL |
1/4 cup |
|
|
maple syrup |
1/4 cup |
1/3 cup |
|
|
maple flavoring |
1/4 tsp |
1/2 tsp |
|
|
salt |
1 tsp |
2 tsp |
|
|
bread flour |
2 cups |
3 cups |
|
|
dry oatmeal, quick or regular |
1/2 cup |
1 cup |
|
|
walnuts |
1/2 cup |
3/4 cup |
|
|
active dry yeast |
1 1/2 tsp |
1 3/4 tsp |
|
|
Program |
Basic |
Basic |
|
|
|
|
|
|
18

|
EGG BREAD |
|
|
|
|
|
|
||
|
1 lb. |
2 lb. |
||
egg(s) room temperature plus |
1 |
|
2 |
|
enough water 80°F/27°C to equal |
3/4 cup |
1 |
1/4 cups |
|
oil |
2 |
TBL |
1/4 cup |
|
sugar |
4 tsp |
3 |
TBL |
|
salt |
1 |
1/2 tsp |
1 |
TBL |
dry milk |
2 |
TBL |
1/4 cup |
|
bread flour |
2 cups |
4 cups |
||
active dry yeast |
1 |
1/2 tsp |
2 |
3/4 tsp |
Program |
Basic |
Basic |
||
BUTTERMILK BREAD
|
1 lb. |
2 lb. |
||
cultured buttermilk, liquid 80°F/27°C |
3/4 cup |
1 |
1/2 cups |
|
oil |
2 |
TBL |
1/4 cup |
|
honey |
2 |
TBL |
1/4 cup |
|
salt |
1 |
tsp |
2 |
tsp |
baking soda |
1/4 tsp |
1/2 tsp |
||
bread flour |
2 |
1/2 cups |
4 |
1/4 cups |
active dry yeast* |
1 |
1/4 tsp |
1 |
1/4 tsp |
Program |
Basic |
Basic |
*yeast amounts are correct |
|
|
|
|
MILK BREAD |
|
|
|
|
|
|
|
|
|
||
|
|
|
|
|
||
|
|
1 lb. |
2 lb. |
|
||
|
milk, liquid 80°F/27°C |
3/4 cup |
1 |
1/4 cups + 2 TBL |
|
|
|
oil |
1 |
TBL |
3 |
TBL |
|
|
sugar |
1 |
1/4 tsp |
2 tsp |
|
|
|
salt |
1 |
1/4 tsp |
2 tsp |
|
|
|
bread flour |
2 cups |
4 cups |
|
||
|
active dry yeast |
1 |
1/4 tsp |
1 |
3/4 tsp |
|
|
Program |
Basic |
Basic |
|
||
|
|
|
|
|
|
|
19

CINNAMON RAISIN BREAD
|
1 lb. |
1.5 lb. |
||
water 80°F/27°C |
3/4 cup + 2 TBL |
1 cup + 2 TBL |
||
oil |
1 |
TBL |
4 tsp |
|
brown sugar |
1 |
1/2 TBL |
2 |
1/2 TBL |
salt |
1 tsp |
1 |
1/2 tsp |
|
dry milk |
1 |
TBL |
1 |
1/2 TBL |
bread flour |
2 |
1/4 cups |
3 cups |
|
active dry yeast |
1 |
1/2 tsp |
2 |
1/2 tsp |
Program |
Sweet |
Sweet |
||
Add at the beep: |
|
|
|
|
cinnamon |
1/2 tsp |
3/4 tsp |
||
raisins |
1/3 cup |
1/2 cup |
||
walnuts |
1/3 cup |
1/2 cup |
||
BANANA GRANOLA BREAD
|
1 lb. |
2 lb. |
||
water 80°F/27°C |
3/4 cup |
1 |
1/4 cups + 3 TBL |
|
oil |
2 |
TBL |
5 |
TBL |
honey |
2 |
TBL |
3 |
TBL |
banana flavoring |
1/2 tsp |
1 tsp |
||
salt |
1/2 tsp |
2 tsp |
||
dry milk |
2 |
TBL |
3 |
TBL |
bread flour |
2 |
1/4 cups |
4 |
1/4 cups |
banana chips, dried |
1/3 cup |
1/2 cup |
||
granola cereal |
2/3 cup |
1 cup |
||
active dry yeast* |
1 |
1/2 tsp |
1 |
1/2 tsp |
Program |
Sweet |
Sweet |
||
*yeast amounts are correct |
|
|
|
|
|
|
|
|
|
20
 Loading...