


|
'D. |
· . . .. .. |
. |
DVDAudio/Video player |
& IQ!i |
||
Operating InstructionsJ0
Model No. DVD-A
DVD |
lWJo§@DIGITALVIDEOI |
|
AUDIO/VIDE |
O |
|
|
|
|
·
· |
Before. connect. . •jng, operating or. adjustil'lg this |
||
:a tkpleas r a these instructions completely. |
|||
. |
. |
. d |
d |
|
|
|
eep thiSmanual for future reference. |
VQT83$9

Dear customer
Thank you for purchasing this product.
For optimum performance and safety, please read these instructions carefully.
I Table of contents
Caution for AC Mains Lead |
.............................................. |
........................................... ..................... |
.3 |
|||||||||||||||||||||||||||||||||||||||
Safety information |
|
|
|
. |
|
|
||||||||||||||||||||||||||||||||||||
|
|
|
|
|
|
|
|
|
|
|
|
|
|
|
|
|
|
|
|
|
|
|
|
|
|
|
|
|
|
|
|
|
|
.. |
|
|
|
|
|
|
|
4 |
Safety precautions......... |
|
|
....................................... |
|
|
|
|
|
|
|
|
................................................ |
|
|
|
|
|
|
. |
|
|
|
................... |
....... |
||||||||||||||||||
Features |
|
|
|
|
|
|
|
|
|
|
|
|
|
|
|
|
|
|
|
|
|
|
|
|
|
|
|
|
|
|
|
|
|
|
|
|
|
|
5 |
|||
|
|
|
|
|
......................................................... |
|
|
|
|
|
|
|
|
|
|
|
|
..................... |
|
|
|
|
|
....................... |
|
|
|
|
|
. .................. |
|
|
|
|
|
|
|
4 |
||||
|
selection |
|
|
|
|
|
|
|
|
|
|
|
|
|
|
|
|
|
|
|
|
|
|
|
|
|
|
|
|
|
|
|
|
|
|
|
5 |
|||||
Disc |
|
|
....................... |
|
|
|
|
|
|
. . . |
. |
... |
............ |
|
|
. . ..................................................................................................... . . . ................................................ |
........................ . . . .................... |
|||||||||||||||||||||||||
Control |
reference.............guide. . . . . . |
. . .............. |
|
. |
||||||||||||||||||||||||||||||||||||||
|
|
|
|
|
|
|
|
|
|
|
|
|
|
|
|
|
|
|
|
|
|
|
|
|
|
|
|
|
|
|
|
6 |
||||||||||
The remote control |
|
|
|
......... |
|
|
. . ..................... |
|
|
|
|
........................................................ |
|
|
|
|
|
|
|
|
|
|
|
....................... |
|
|
|
|
|
|
|
|
||||||||||
Using headphones |
|
|
|
|
|
|
|
|
|
|
|
|
|
|
|
|
|
|
|
|
|
|
|
|
|
|
|
|
|
|
|
|
7 |
|||||||||
|
|
|
|
|
|
|
|
|
|
|
.. |
|
|
|
|
|
|
|
|
|
|
|
|
|
|
|
|
|
|
|
|
7 |
||||||||||
Simple setup· |
Connection to a television |
....................................................................................... |
|
|
|
|
|
|
|
|
|
|
|
|
|
|
|
|
|
|
|
|
|
8 |
||||||||||||||||||
|
|
................................................ |
|
|
|
|
|
|
|
|
|
.......................................................................... |
|
|
|
|
|
|
|
|
|
|
|
|
|
|
|
|
|
|
|
11 |
||||||||||
Basic play |
.......................................................................................................................................... |
|
|
|
|
|
|
|
|
|
|
|
|
|
|
|
|
|
|
|
|
|
. |
|
|
|
|
|
|
|
|
|
. |
|
|
|||||||
Other methods of play |
|
|
|
Sound (V.S.S.) |
|
|
|
|
|
|
|
|
|
|
|
|
|
|
|
|
12 |
|||||||||||||||||||||
Enjoying Virtual Surround |
|
|
|
|
|
|
|
|
|
|
|
|
|
|
|
. ..... |
|
|
|
|||||||||||||||||||||||
|
|
. . . . . . |
. |
. |
. . .................. . . . . . .. ....... ............. . . . ................................. |
|
|
|
|
|
|
|
|
|
|
|
|
|
|
|
|
|
|
|
||||||||||||||||||
Using menus |
|
|
|
|
|
. |
|
|
|
|
|
|
|
.................................... ............................. .... ....... |
|
|
|
|
|
|
|
|
|
|
|
|
|
|
|
|
|
|
|
16 |
||||||||
DVD |
menus . |
|
|
|
|
|
|
|
|
|
|
|
. |
|
|
|
................................................................. |
1 7 |
||||||||||||||||||||||||
|
|
................... |
|
|
|
|
|
|
.................................................. |
|
|
|
|
|
|
|
|
|
|
|||||||||||||||||||||||
Top menu |
|
|
|
|
|
|
|
|
|
|
|
|
|
|
|
|
|
|
|
|
|
. |
|
|
. |
|
. |
|
. |
|
|
|
|
|
|
1 7 |
||||||
Changing |
soundtracks |
|
|
|
|
|
|
|
|
|
|
|
|
|
|
|
|
|
|
|
|
|
|
|
|
17 |
||||||||||||||||
|
|
|
|
|
language |
|
|
.......................................... |
............................................... |
|
|
|
|
|
|
|
|
|
|
|
|
|
|
|
|
|
|
|
|
|
|
|||||||||||
Changing subtitle |
|
|
.......................................................................... |
|
|
|
|
|
|
|
..... ........ ....... ................ |
|
|
|
|
|
|
|
|
|
...................................18 |
|||||||||||||||||||||
Switching angles |
|
|
|
|
|
|
........................ |
|
|
|
................................................ |
|
|
|
|
|
|
|
|
|
||||||||||||||||||||||
Program play |
|
................................................... |
|
|
|
|
|
|
|
|
|
|
......................................................................... . |
|
|
|
|
|
|
|
|
|
|
|
|
. |
....................... |
18 |
||||||||||||||
Random play |
......................................................... |
|
|
|
|
|
|
|
|
|
|
|
|
......................... ... |
|
|
|
|
|
|
|
........................ |
19 |
|||||||||||||||||||
Repeat play |
|
................................................................................... |
|
|
|
|
|
|
|
|
|
|
|
|
........................ ...................... |
|
|
|
|
|
|
|
|
|
|
|
|
|
|
|
|
. |
|
|
20 |
|||||||
Repeat play ........................................................................................................................................ |
|
|
|
|
|
|
|
|
|
|
|
|
|
|
|
|
|
|
|
|
|
|
|
|
|
|
|
|
|
|
|
|
|
|
|
21 |
||||||
A-B repeat |
position you want to play again: MARKER |
|
|
|
|
|
|
|
|
|
|
|
|
|
|
|
|
21 |
||||||||||||||||||||||||
Marking a |
............... |
|
|
|
|
. . . |
. . . . .. |
|
. ............. |
|
|
|
. . . . . . ................... |
|
|
. . . . . . . . . . ................. . . . . . . . . .. .................... . . . . . . ........... |
|
|
|
|
|
|
|
|
. |
|
|
|
|
|
|
|
|
|
|
|
|
|
|
|||
Marking a position |
|
|
|
|
|
|
|
|
|
|
|
|
|
|
|
|
|
|
|
|
|
|
|
|
|
|
|
|
|
|
21 |
|||||||||||
Playing from a |
marked position |
|
|
|
|
|
|
|
|
|
|
|
|
|
|
|
|
|
|
|
|
|
|
|
|
21 |
||||||||||||||||
|
|
.................... |
|
|
|
|
|
|
.......................................................................................................... |
|
. |
|
|
|
|
|
|
|
|
|
|
.................................... |
|
|
||||||||||||||||||
|
|
|
|
|
|
|
|
|
|
|
|
|
|
|
............... ..................................................... |
|
|
|||||||||||||||||||||||||
Graphic User Interface |
• |
GUI |
|
|
|
|
|
|
|
|
|
|
|
|
|
|
|
|
|
|
|
|
|
|
|
|
|
22 |
||||||||||||||
Basic GUI operation |
|
|
|
|
|
|
|
|
|
|
|
|
|
|
|
|
|
|
|
|
|
|
|
|
|
|
|
|
||||||||||||||
|
|
|
|
|
|
|
|
|
........................ .... .................... . . . . ....................................................................... |
|
|
|||||||||||||||||||||||||||||||
Language, display, and ratings settings |
. |
|
|
|
|
|
|
|
|
|
|
. |
|
|
|
|
|
|
26 |
|||||||||||||||||||||||
Adding an amplifier and speakers to |
your system |
|
|
|
|
|
|
|
|
|
|
|
|
|
|
|
|
33 |
||||||||||||||||||||||||
......... ................................................. ...................... |
|
|
|
|
|
|
|
|
|
|
|
|
|
|
|
|
|
|
|
|||||||||||||||||||||||
Connection and settings |
|
|
|
|
|
|
|
|
|
|
|
|
|
|
. |
|
|
|
|
|
|
|
|
|
|
|||||||||||||||||
-Advanced connections |
|
........... |
|
|
........ |
|
........................................ |
........... ..................................... |
|
|
|
|
|
. |
|
|
|
|
. |
|
|
. |
................. |
. |
||||||||||||||||||
Playing through the front speakers |
|
|
|
|
|
|
|
|
|
|
|
|
|
|
...34 |
|||||||||||||||||||||||||||
Connecting 5.1 -channel surround |
system............................................. |
|
. |
|
|
|
|
|
|
...................... |
........... |
|
||||||||||||||||||||||||||||||
Connecting a surround system through a |
|
digital sound decoder |
|
|
|
|
|
|
|
|
|
|
|
|
|
|
|
|
35 |
|||||||||||||||||||||||
. |
.............. |
................................................................. ......... |
|
|
|
|
|
|
...... . . . . ........ ...................................... . . |
34 |
||||||||||||||||||||||||||||||||
Other connections |
|
|
|
|
|
|
|
|
|
|
|
|
|
|
|
|
36 |
|||||||||||||||||||||||||
Audio settings |
|
................................... |
|
|
|
|
|
|
|
. |
|
........................................................ . . |
............. |
................. .... |
|
|
||||||||||||||||||||||||||
Summary of |
|
|
|
|
|
|
|
|
|
|
|
|
|
|
|
|
|
|
|
|
|
|
|
|
|
|
|
|
|
|
|
|
|
|
37 |
|||||||
|
................. |
|
|
|
|
|
.................. |
|
|
|
............................ |
|
|
.. .......... |
|
. |
|
|
|
|
................... . ............................... |
|
|
|
||||||||||||||||||
|
|
|
|
|
initial settings |
|
|
|
|
|
|
|
|
|
|
|
|
|
|
|
|
. |
|
|
|
.. |
|
..41 |
||||||||||||||
|
|
|
|
|
|
|
|
|
|
|
|
|
|
|
|
|
|
|
|
|
. |
... .................. |
.. |
|
|
|
||||||||||||||||
How different kinds of |
software...........................appear ................... .................. ........... .on your television |
|
|
|
|
|
|
|
|
|||||||||||||||||||||||||||||||||
Language code list |
|
|
|
. |
|
|
|
|
|
|
. |
|
|
|
|
|
|
................ .......... .................... |
42 |
|||||||||||||||||||||||
|
|
|
|
|
|
|
|
|
|
|
|
|
|
|
|
|
|
|
|
|
|
|
|
|
|
|
. |
|
|
|
|
|
|
. |
|
|
|
42 |
||||
Operating your |
television or amplifier |
|
|
|
|
|
|
|
|
|
|
|
|
|
|
|
|
|
|
|
|
|
|
|
||||||||||||||||||
|
............ |
|
|
. |
........................ |
|
|
|
|
|
....................................... ............................. .... ........ |
|
|
|
|
|
|
|
|
|
|
|
|
|
|
|
|
|
|
|
|
|
|
|
||||||||
Television operation |
|
|
|
|
|
|
|
|
|
|
|
|
|
|
|
|
|
|
|
|
|
|
|
|
|
|
|
|
|
|
43 |
|||||||||||
|
|
|
|
|
|
volume of a Technics amplifier.......... ................................ . .................. . . ................ . |
. |
|
|
|
|
|
|
|
|
|
|
|
|
. |
|
|
|
|
|
|||||||||||||||||
To control the |
|
|
|
|
......... |
. |
|
................................................................................................................ |
|
. . |
|
|
. . |
. |
|
|
|
|
|
|
|
|
|
|
|
|
|
|
|
|
|
|
.43 |
|||||||||
Glossary |
|
|
|
|
|
|
|
|
|
|
|
|
|
|
. |
........................................................... . . |
44 |
|||||||||||||||||||||||||
Troubleshooting.....................guide........... |
|
|
..... |
|
.................. |
|
|
|
........................ |
|
|
|
||||||||||||||||||||||||||||||
. |
|
|
|
|
|
|
|
|
|
. |
|
|
|
|
|
. |
...................... ... ........45 |
|||||||||||||||||||||||||
Maintenance |
|
|
|
|
|
|
.................... |
|
|
|
............... |
|
|
........................................... |
|
|
|
|
|
|
|
|||||||||||||||||||||
|
|
|
|
|
|
|
|
|
|
|
|
............................................ |
|
|
|
|
|
....................... |
. |
............. |
46 |
|||||||||||||||||||||
Specifications.................... |
|
|
|
. |
|
|
.................. ............. |
|
47 |
|||||||||||||||||||||||||||||||||
|
|
|
.................................. |
|
|
|
|
|
|
|
|
........................................... ............ ......................... |
|
|
|
|
|
|
|
|
|
|
|
|
|
|
|
|
|
|
|
|
||||||||||
|
|
|
|
|
|
|
|
|
|
|
|
|
|
|
|
|
|
|
|
|
|
|
|
|
|
|
|
|
|
|
|
|
|
|
|
|||||||
VQT8399

I Ca ution far AC Mains Lea d
For your safety please read the following text carefully
This appliance is supplied with a moulded three pin mains plug for your safety and convenience.
A 5 amp fuse is fitted in this plug.
Should the fuse need to be replaced please ensure that the replacement fuse has a rating of 5 amps and that it is approved by ASTA or BSI to BS 1 362.
Check for the ASTA mark 4iY or the BSI mark W on the body of the fuse.
If the plug contains a removable fuse cover you must ensure that it is refitted when the fuse is replaced.
If you lose the fuse cover the plug must not be used until a replacement cover is obtained.
A replacement fuse cover can be purchased from your local Panasonic Dealer.
IF THE FITTED MOULDED PLUG IS UNSUITABLE FOR THE SOCKET OUTLET IN YOUR HOME THEN THE FUSE SHOULD BE REMOVED AND THE PLUG CUT OFF AND DISPOSED OF SAFELY.
THERE IS A DANGER OF SEVERE ELECTRICAL SHOCK IF THE CUT OFF PLUG IS INSERTED INTO ANY 13 AMP SOCKET.
If a new plug is to be fitted please observe the wiring code as shown below.
If in any doubt please consult a qualified electrician.
IMPORTANT
The wires in this mains lead are coloured in accordance with the following code:
Blue: Neutral
Brown: Live
As the colours of the wires in the mains lead of this appliance may not correspond with the coloured markings identifying the terminals in your plug, proceed as follows:
The wire which is coloured BLUE must be connected to the terminal in the plug which is marked with the letter N or coloured BLACK.
The wire which is coloured BROWN must be connected to the terminal in the plug which is marked with the letter L or coloured RED.
Under no circumstances should either of these wires be connected to the earth terminal of the three pin plug, marked with the letter E or Earth Symbol + .
How to replace the Fuse
•There are two types of the AC Mains Lead: ® or® supplied with the player as shown below.
1 . Open the fuse compartment with a screwdriver.
2. Replace the fuse and fuse cover.
TYPE @
1 2
TYPE@
1
VOT8399
I Safety information
CAUTION!
THIS PRODUCT UTILIZES A LASER.
USE OF CONTROLS OR ADJUSTMENTS OR PERFORMANCE OF PROCEDURES OTHER THAN THOSE SPECIFIED HEREIN MAY RESULT IN HAZARDOUS RADIATION EXPOSURE.
DO NOT OPEN COVERS AND DO NOT REPAIR YOURSELF. REFER SERVICING TO QUALIFIED PERSONNEL.
CAUTION!
DO NOT INSTALL OR PLACETHIS UNIT IN A BOOKCASE, BUlLT IN CABINET OR IN ANOTHER CONFINED SPACE. ENSURE THE UNIT IS WELL VENTILATED. ENSURE THAT CURTAINS AND ANY OTHER MATERIALS DO NOT OBSTRUCT THE VENTILATION TO PREVENT RISK OF ELECTRIC SHOCK OR FIRE HAZARD DUE TO OVERHEATING.
CAUTION ·LASER RADIATION WHEN OPEN.
DO NOT STARE INTO BEAM.
ATTENTION·RAYONNEMENT LASER EN CAS D'OUVERTURE.
NE PAS REGARDER DANS LE FAISCEAU.
VORSICHT ·LASERSTRAHLUNG, WENN ABDECKUNG GEOFFNET.
NIGHT IN DEN STRAHL BLICKEN.
ADVARSEL ·LASERSTRALING VED ABNING.
SE IKKE IND I STRALEN.
ADVARSEL ·LASERSTRALING NAR DEKSEL APNES.
STIRR IKKE INN I STRALEN.
VARNING |
·LASERSTRALNING NAR DENNA DEL AR OPPNAD. |
|
STIRRA EJ IN I STRALEN. |
VAROI |
·AVATIAESSA OLET ALTIIINA LASERSATEILYLLE. |
|
ALA TUIJOTA SATEESEEN. |
li - :fT7fli!m l:lH!i!i H.:. if=1-;t;li*!i!i B'to
).i · L:L: <cLJ-1f-7Cb'ilii3;9,
LJ-1f-7C O).z' l6*1Jlrc<lett\,
(Inside of player)
(Back of player)
I Safetypreca utions
Set the unit up on an even surface away from direct sunlight, high temperatures, high humidity, and excessive vibration. These conditions can damage the cabinet and other components, thereby shortening the unit's service life.
Place it at least 15 em away from wall surfaces to avoid distortion and unwanted acoustical effects.
Do not place heavy items on the unit.
Do not use high voltage power sources. This can overload the unit and cause a fire.
Do not use a DC power source. Check the source carefully when setting the unit up on a ship or other place where DC is used.
Ensure the AC mains lead is connected correctly and not damaged. Poor connection and lead damage can cause fire or electric shock. Do not pull, bend, or place heavy items on the lead.
Grasp the plug firmly when unplugging the lead. Pulling the AC mains lead can cause electric shock.
Do not handle the plug with wet hands. This can cause electric shock.
Do not let metal objects fall inside the unit. This can cause electric shock or malfunction.
Do not let liquids get into the unit. This can cause electric shock or malfunction. If this occurs, immediately disconnect the unit from the power supply and contact your dealer.
Do not spray insecticides onto or into the unit. They contain flammable gases which can ignite if sprayed into the unit.
Do not attempt to repair this unit by yourself. If sound is interrupted, indicators fail to light, smoke appears, or any other problem that is not covered in these instructions occurs, disconnect the AC mains lead and contact your dealer or an authorized service center. Electric shock or damage to the unit can occur if the unit is repaired, disassembled or reconstructed by unqualified persons.
Extend operating life by disconnecting the unit from the power source if it is not to be used for a long time.
VQT8399

I features
• High sound quality
This unit includes a 192 kHz/24-bit audio digital analogue convertor to get the best from the high quality sound recorded on DVDs. The system incorporates a variety of technologies for delivering high-quality sound, including a virtual battery operation mains-supply circuit providing high resistance to noise generated from the mains supply.
• High picture quality
The unit is equipped with a 1 O-bit video digital analog convertor and 21-pin SCART terminals, enabling you to connect to professional class video monitors and to enjoy video with high clarity. By changing the picture mode, you can easily adjust the picture to the optimum settings for the kind of video software you are watching.
• A variety of convenient features
This unit is equipped to deal with the variety of convenient features recorded on DVDs, such as multiple soundtrack and subtitle languages and multiple angles.
• Surround systems
The unit is equipped with both Dolby Digital and DTS decoders to allow you to experience a full fledged home theater system.
• Compatible with PAL DVD
AUDIONIDEO (Video CD) and NTSC DVD
AUDIONIDEO (Video CD)
This player can play discs recorded in either PAL or NTSC format.
However, the player must be connected to a PAL TV which is capable of receiving PAL 525/60 system or to a Multi-system TV to play both PAL DVD AUDIONIDEO (Video CD) and NTSC DVD AUDJONIDEO (Video CD).
I Disc selection
Use this chart when selecting discs. You can use both 8 em and 12 em discs. Do not use a disc adaptor for 8 em discs.
DVD- |
|
|
|
(I) |
+ |
|
|
|
|
|
|||
|
|
|
|
NTSC |
|
|
Audio |
|
|
|
PAL |
|
|
DVD- |
DVD |
Example' |
NTSC |
|
||
VI |
|
+ |
|
|||
Video |
PAL |
&f@•» |
||||
Video CD |
|
PAL |
||||
|
DEO•• |
|
|
|
|
|
|
|
|
|
|
NTSC |
|
|
|
|
|
|
|
|
|
|
|
|
|
+ |
|
|
|
|
|
|
|
|
CD |
rnloDIGITAL AUDIDm |
|
|
|
|
|
|
|
|
|
|
|
|
Operations not indicated with these marks apply to all four disc types.
Discs that cannot be played
DVD-ROM, DVD-R/DVD-RAM, CD-ROM, VSD, CDV, CD-G, CD-RW, DVD+RW, CVD, SVCD, Divx Video Discs, Photo CD, and CD-R.
The data on photo CDs and CD-R can be damaged if you attempt to play them.
Region Management Information (DVD-Video only)
This unit responds to the Region Management Information recorded on DVDs. This unit's region number is "2". You cannot play the disc if the region number on the DVD does not correspond to the region number on the unit.
You can play discs marked "ALL".
You can play discs with labels containing the region number "2" and "ALL".
Accessories |
|
Please check and identify the supplied |
|
accessories. |
|
D AC mains lead (VJA0940) .......................................... |
1 |
0 AudioNideo cable (VJA0788-D)................................. |
1 |
11m
0The included AC mains lead is for use with this unit only. Do not use it with other equipment.
Use numbers indicated in parentheses when asking for replacement parts.
D
VQT8399

I Control reference g ui de
No. |
|
Name |
|
|
|
Ref. page |
||||||||||
IM@iii!.iil |
|
|
|
|
|
|
|
|
|
|
|
|
|
|
||
0 |
Standby/on switch ( |
|
tl) |
|
|
. |
|
|
|
|
|
10 |
||||
Press to switch the unitcbfrom on to standby mode or vice versa. |
|
|||||||||||||||
|
|
|
|
|
|
..................... ................................. |
|
|
||||||||
|
In standby mode, the unit is still consuming a small amount of |
|||||||||||||||
|
power. |
|
6 |
|
|
|
|
|
|
|
|
|
|
|
|
|
® Standby indicator |
|
|
|
|
|
|
|
|
|
|
|
|
||||
|
When the unit is connected( ) |
to the AC mains supply, this |
||||||||||||||
|
indicator lights up in standby mode and goes out when the unit |
|||||||||||||||
|
is turned on. |
|
|
|
|
|
|
|
|
|
. |
|
|
|
|
|
@ V.S.S. (Virtual Surround Sound) indicator . |
|
|
|
|
16 |
|||||||||||
@ RE-MASTER indicator |
............................................................ |
|
|
|
|
|
|
|
|
3 |
1 |
|||||
|
|
|
|
.... .............. |
|
|
|
|
|
|
|
....... |
|
|
||
|
Lights when the re-master circuit, which improves sound quality, |
|||||||||||||||
|
is operating. (The re-master circuit works on 44.1/48 kHz |
16 bit |
||||||||||||||
0 |
audio signals of 2-channels or less.) |
|
. . . ..... |
13 |
||||||||||||
AUDIO ONLY |
|
............ |
|
|
|
|
||||||||||
|
|
output while playing DVD-Audio. |
|
|
|
|
|
|
||||||||
|
Disables videobutton and ...... ... ...... ....indicator |
|
|
|
|
|
|
|
||||||||
®Disc tray |
|
|
|
|
|
|
|
|
|
|
|
|
|
|
|
|
0 OPEN/CLOSE button ( .. |
|
) |
|
|
. . .. |
|
|
|
|
|
||||||
0 |
GROUP select button ... .. . . . .. ... |
|
. 14 |
|||||||||||||
|
Press to select the |
groups on DVD-Audio. |
|
|
|
|
|
|
|
|
||||||
|
|
.. . ... ...... ... ...... .. ..... ..... .... ... ... |
|
|
||||||||||||
@ SKIP and SEARCH buttons ...............( <111/<111<111, I ) |
|
|
|
12 |
||||||||||||
® Headphone jack and headphone level control |
|
|
|
. .......7 |
||||||||||||
|
(PHONES) .. |
............ |
|
. . . . |
|
.... .. . . |
. |
|
|
|||||||
@ Soundtrack |
channel indicators |
|
|
|
|
|
|
|
|
|
||||||
|
... .. .... ... ......... . .. .... ...... .......... . |
|
|
|
|
|||||||||||
|
MULTl CH: Lights when a signal of 3 or more channels is |
|||||||||||||||
|
detected. |
|
|
|
|
|
|
|
|
|
|
|
|
|
||
|
2 CH STEREO: Lights when a 2-channel signal is detected. |
|
|
|
||||||||||||
@Display |
|
|
|
|
|
|
|
|
|
|
|
|
|
|
|
|
STOP button <•)..................................................................... |
|
|
|
|
|
|
|
|
|
|
|
11 |
||||
CD |
PAUSE button (II )................................................................. |
|
|
|
|
|
|
|
|
|
|
11 |
||||
4Jij |
PLAY button ( )..... |
........ |
........................................................ |
|
|
|
|
|
|
|
|
|
11 |
|||
Buttons 0, 0, 0, 0 and to G; function in the same way as the controls on the main unit.
® Top menu display button . . . |
|
|
|
. |
|
|
|
|
|
|
|
. |
|
|
|
|
|
. .. . |
|
|
|
|
. |
17 |
|||||||||||||||||||||
@ Joystick |
|
|
|
|
|
|
. ..... |
|
|
|
.... |
....... |
|
|
|
|
.......... |
|
|
|
|
|
|
........ |
|
|
|
|
|
|
. |
|
|
... |
|
|
|
...... |
|
|
|
|
|||
® |
|
button .. |
|
|
|
|
|
|
|
. . . |
|
|
|
|
|
|
|
|
. . . . . |
|
|
|
|
|
|
|
|
|
|
|
|
11 |
|||||||||||||
|
Marker |
................................................................................... |
|
|
|
|
|
|
|
|
|
|
|
|
|
|
|
|
.. |
|
|
|
|
|
|
|
|
|
|
|
|
|
|
|
|
|
|
|
|
|
|
|
18 |
||
®Subtitle language. ......................button |
. |
|
|
|
...... |
. |
........... |
|
|
|
|
|
|
.. |
.... |
..... |
|
|
.. |
|
............... |
|
|
|
|
. |
|
|
|
. |
|
. |
|
||||||||||||
® SKIP buttons ( <Ill, )... |
|
...... |
|
|
..... |
|
........ |
... ..... ............ ..... |
|
... |
.. |
|
|||||||||||||||||||||||||||||||||
|
Cancel button . |
|
. |
|
|
|
|
|
|
|
|
. |
|
|
|
|
|
|
|
|
|
|
|
|
|
|
|
|
|
. |
|
|
|
|
|
|
|
|
|
|
12 |
||||
@ |
|
. |
|
......... ........... ........... ... ... |
. .......... |
|
|||||||||||||||||||||||||||||||||||||||
@ |
V.S.S. (Virtual |
...Surround...... ... ..............Sound)...button....... |
|
|
............. |
...... |
... ..... |
||||||||||||||||||||||||||||||||||||||
|
|
|
|
|
|
|
|
|
|
|
|
|
|
|
|
|
|
|
. . |
.. |
.16 |
||||||||||||||||||||||||
@ |
|
|
|
|
|
|
|
. |
|
|
|
|
|
|
|
|
|
|
|
|
|
..................... ..... |
|
|
|||||||||||||||||||||
|
Initial settings button . |
|
. . |
|
|
. |
|
. |
|
|
|
|
|
. . .... . |
|
|
|
. . |
|
|
|
|
|
. 10, 26 |
|||||||||||||||||||||
® Index skip button |
|
... |
.. |
... . |
... |
. |
. |
...... |
|
.... |
.............. .... |
.... .......... |
. |
15 |
|||||||||||||||||||||||||||||||
|
Time search |
|
|
|
|
|
|
|
|
|
|
|
|
|
|
|
|
|
|
|
|
|
|
|
|
|
|
|
|
|
|
|
|
. |
|
|
|
|
|
||||||
|
|
|
..... ..... . ... ...... ........... . . .... .... .. .. ..... .. |
15 |
|||||||||||||||||||||||||||||||||||||||||
® |
|
button |
|
|
|
|
|
|
|
|
|
|
. |
|
|
. |
|
................................. . . |
|||||||||||||||||||||||||||
®Time mode button |
...... |
|
......................... |
. |
|
|
|
|
|
|
|
|
|
|
|||||||||||||||||||||||||||||||
@ |
|
|
|
|
......... |
|
|
. . |
.............. |
|
. |
|
|
.. .. |
....... ... .................. ....... |
|
|||||||||||||||||||||||||||||
@ |
Television operation section |
|
|
....... |
. |
|
|
. |
|
|
. |
.... |
. |
. |
. |
... |
. |
........ |
43 |
||||||||||||||||||||||||||
Display button . . |
. . |
|
. .. .. .... .. |
|
........... |
. |
. |
|
. |
|
|||||||||||||||||||||||||||||||||||
|
|
|
|
|
|
|
|
|
|
|
|
|
|
|
. .. |
.. |
.. |
.. ....... |
.... |
..... |
|
|
|
|
22 |
||||||||||||||||||||
|
|
|
|
. .... |
.. |
.. |
.... |
. |
|
... |
....... |
|
|
|
... .. |
|
|
|
|
|
|
....... |
|
||||||||||||||||||||||
® Menu display button |
|
|
. |
|
|
. |
. ........................................... |
. |
.. |
17 |
|||||||||||||||||||||||||||||||||||
® Return button |
|
|
.......... |
. |
|
|
... |
|
|
||||||||||||||||||||||||||||||||||||
|
|
|
|
|
|
|
|
|
|
|
|
|
|
|
|
|
|
|
|
|
|
|
|
|
|
|
|
|
|
|
|
|
|
|
|
|
|
|
|
|
. |
|
|
10 |
|
® |
|
|
|
............ ................................................ ...... ..... |
|
||||||||||||||||||||||||||||||||||||||||
Soundtrack button... |
|
. |
|
|
. . |
|
. .. |
|
|
|
|
|
|
. . . . . ... |
.. |
.17 |
|||||||||||||||||||||||||||||
@ Angle button |
|
. . . |
.... |
....... |
.. |
|
..... |
...... |
|
|
|
..... |
|
...... |
. |
. . |
|
...... |
....... |
|
....... |
.. |
|
... |
|
|
|
. . |
.18 |
||||||||||||||||
|
|
|
..... .. . |
.. |
.... .... |
|
......... |
|
.... |
|
. . |
|
. |
|
... ... |
|
. ... |
|
...... . |
.. |
|
|
|||||||||||||||||||||||
@ SLOW/SEARCH buttons ( <111<111,)............................... |
|
. . . . . |
|
|
|
|
|
|
|
|
|
|
|
12, 13 |
|||||||||||||||||||||||||||||||
® Numbered buttons |
|
|
|
|
. |
|
|
|
|
|
|
|
|
. |
. . . |
........... |
11 |
||||||||||||||||||||||||||||
® Repeat mode |
button............... |
|
|
|
................ |
|
|
|
|
|
. |
|
|
. |
|
... |
|
|
.... |
|
.... |
. |
|
|
. .. |
|
|
||||||||||||||||||
|
|
|
|
|
|
|
|
|
|
|
|
|
|
|
|
|
|
|
|
|
|
|
.... |
. |
... |
. |
|
|
|
|
|
|
|
21 |
|||||||||||
® |
A-B REPEAT button ........................ |
|
|
|
|
. |
|
.. . .................. .. |
|
|
|
.......... |
|
||||||||||||||||||||||||||||||||
@ Play mode button |
.. |
............... |
|
. |
|
|
|
... . .. ... ............ . . .... ....... ............. |
|
||||||||||||||||||||||||||||||||||||
|
|
|
|
|
|
|
|
|
|
|
|
|
|
. |
|
|
|
|
|
|
|
|
|
|
|
|
|
|
|
|
|
|
|
15, 19, 20 |
|||||||||||
® Page skip button |
buttons.......... ....... |
|
|
.... |
. ... |
... |
|
|
...... |
|
. |
|
. |
|
.................. |
|
|
.. .. |
|
|
|
|
|
|
|
|
|
|
. |
|
|
|
|
|
. 15 |
||||||||||
®l |
Amplifier volume |
|
|
|
|
|
|
|
|
|
|
|
|
|
|
|
|
|
|
|
|
|
|
|
|
.. |
|
|
|
|
. 43 |
||||||||||||||
|
... |
............. |
|
|
..... .............. ........... ....................... .................... ............. .. |
|
|||||||||||||||||||||||||||||||||||||||
|
|
|
|
|
|
|
|
|
|
||||||||||||||||||||||||||||||||||||

•••••••••o•••••••••••ofioli•••••••••••••••• '•••••••••••••
Remote control signal sensor
D•
Transmission
window About 7 meters in front of the signal sensor
How to open the remote control cover
1:' :1-- Press gently on the arrow and slide down.
Headphone jack [PHONES]
I
ln Headphone plug type: 6.3 mm stereo
IThe remote control
IUse of batteries
•Align the poles (+ and -) properly when inserting the batteries.
•Do not mix old and new batteries or different types of batteries.
•Do not recharge ordinary dry cell batteries.
•Do not heat or disassemble the batteries. Do not allow them to contact flame or water.
•Remove the batteries if the unit is not to be used for a long time.
•Do not keep together with metallic objects such as necklaces.
•Do not use rechargeable type batteries.
•Do not use batteries if the covering has been peeled off.
Mishandling of batteries can cause electrolyte leakage which can damage items the fluid contacts and may cause a fire.
If electrolyte leaks from the batteries, consult your dealer.
Wash thoroughly with water if electrolyte comes in contact with any part of your body.
Operation notes
•Do not place obstacles between the remote control signal sensor and remote control unit.
•Do not expose the remote control signal sensor to direct sunlight or to the bright light of a fluorescent light.
•Take care to keep the remote control signal sensor and end of the remote control unit free from dust.
•If this system is installed in a rack with glass doors, the glass doors' thickness or colour might make it necessary to use the remote control a shorter distance from the system.
To prevent damage
•Never place heavy items on top of the unit.
•Do not disassemble or reconstruct the unit.
•Do not spill water or other liquids into the unit.
I Using headphones 1!1
1 . Set [PHONES] to "MIN" and connect the headphones (not included).
2. Adjust headphone volume with [PHONES].
Avoid listening for prolonged periods of time to prevent hearing damage.
VQT8399

Simple set up -Connection to a television
These pages explain how to connect the unit to a television and set it up so that you hear the audio through the television's speakers. Connections and procedures that enable you to enjoy the high-quality sound found on DVDs are described beginning on page 33.
Turn off the power to all units. Read the operating instructions of the other equipment carefully.
Do not connect the AC mains lead until all other connections are complete.
(For UNITED KINGDOM ONLY)
READ THE CAUTION FOR THE AC MAINS LEAD ON PAGE 3 BEFORE CONNECTION.
Connect Your DVD AudioNideo player Directly To Your TV Set
If the DVD-Audio/Video player is connected to the TV through a video cassette recorder, the picture may not be played back normally with some DVDs. So we strongly recommend you not to connect the DVD-Audio/Video player to your video cassette recorder when setting up your home entertainment system.
) ) )
Do not place the player on amplifiers or other equipment which may become hot.
• Connect the player to a television equipped with video and audio terminals
Audio/Video cable (included) |
|
|
|
Television |
||
Yellow {VIDEO) |
|
|
|
|
||
White |
(L) |
|
|
|
|
|
Red |
(R) |
|
|
|
|
|
|
|
|
|
|
|
|
Conserving power |
|
|
|
|
||
The unit consumes 3 W even when it is turned |
|
|
|
|
||
|
|
|
|
|||
off with |
[611]. To save power when the unit is |
Rear of television |
|
|
||
not to be used for a long time, unplug it from the |
|
|
|
|
||
household mains socket. All settings remain in |
Audio input |
Video input |
|
|||
memory. |
terminals |
terminal |
S video input |
|||
|
|
|
{white) (red) |
(yellow) |
terminal |
|
|
|
|
|
|||
|
|
|
|
|
|
|
|
|
|
|
|
|
|
Audio/Video cable (included) |
|
|
|
. |
|
|
|
|
S video cable (not included) |
or |
|
|
|
: |
.................... .................... |
|
|
.
Connect only if your television has an S video terminal.
Disconnect the yellow video cable in this case.
The S video terminals
Connections through these terminals provide higher quality pictures than through the video terminal.
VOT8399
mains socket (AC 220-240 VI 50 Hz)

• Connection to a television with 21-pin SCART terminal
|
|
|
|
|
Insertion of connector: |
|
Rear of television --- |
||||||
Audio input |
Video input |
|
|
|
Even when the connector is |
|
|
|
|
||||
S video input |
21-pin SCART |
pe ectly inserted, depending on the |
||||
terminals |
terminal |
|||||
terminal |
terminal |
type of inlet used, the front part of |
||||
|
|
|||||
(white) (red) |
(yellow) |
rf |
||||
|
|
|
the connector may jut out as shown |
|||
@0 |
@ |
|
|
|
in the drawing, |
|
|
|
|
However there is no problem using |
|||
|
|
|
the unit. |
|||
|
|
|
|
|
||
Note:,·
Audio and Vid.eo out through AUDIO OUT
coi:rneators (red and white)NIDE:O OUT
connector (yellow) are only from OVD
pJeiyt>aok, not from other sources connected to the SOARTterminals.
r---------------.
AUDIOL OUTL |
|
DIGITALAUDIOOUT |
|
|
L l |
|
|
|
OUT SVIDEO |
|
|
|
|
|
CENTER5.1chSUAJ!OUNDAUDIOQIJfFRONT |
|
|
VIDEO |
|
©© OPTICAL COAXIAL |
|
|
|
(Q) OUT"' |
|||||
|
|
©©© |
|
|
|||||
00R R |
0© |
|
|
SUB·©00R R |
©0 |
||||
|
|
|
|
|
WOOFER SURROUND FRONT |
||||
|
|
|
|
|
|
|
|
|
|
1 To 21 -pin SCART terminal of TV set
21-pin SCART cables (not included)
Satellite receiver |
|
|
21-pin SCART |
or |
|
terminals |
|
Decoder |
|
|
|
|
|
|
21 -pin SCART terminals |
|
|
|
|
Approx. 6 mm Appliance inlet
AC IN rv
Video cassette recorder
•If your television is monaural
Use a stereo-monaural audio cable instead of the supplied Audio/Video cable. The video part of the cable (yellow) can still be used if required.
Audio cable (not included)
.. To unit audio output terminal [white (L)]
To television audio input terminal |
)TI!u1[!][1 ----- |
; |
.. To unit audio output terminal [red (R)]
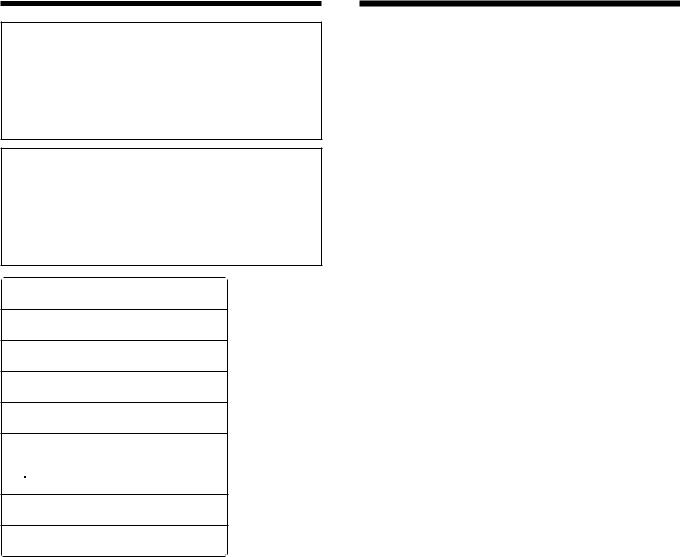
VQT8399

|
Menu Language |
English |
Gal 4 On-Screen Messages |
|
|
, ISII1lDisplay5 FL |
Bright |
|
I(!, a TV Aspect |
4:3 |
|
!i. 7 |
Digital Audio Output |
|
8 |
Speaker Setting |
Multi-channel |
9 |
Other Settings |
|
|
Press RETURN to exit |
|
....
Ill |
¢ENI |
11A |
ENTERIll |
..
....
|
Ill |
|
EN |
R |
|
ENTER |
|
||
|
Ill |
¢I |
11 |
|
|
.. |
|
Level 8 rR |
|
0 1 |
Disc Languages |
|||
Ratings |
|
|||
cmJ0 32 |
Menu Language |
English |
||
GR: 4 On-Screen Messages |
|
|
||
l!li!IQ 5 |
FL Display |
Bright |
||
I'lla.,TVAspect |
4:3 |
|||
flii. Digital7 Audio Output |
|
|
||
(i. 8 |
Speaker Setting |
Multi-channel |
||
9 |
Other Sailings |
|
|
|
|
Press RETURN to exit |
|||
|
.... |
|
|
|
|
Ill |
¢ENI |
11A |
|
|
ENTERIll |
|||
..
""
- Standard (OirectVIewTV} G!ICl
CRT Projector 3 LCD Projector
4Project!on TV
Press RETURN to exit
Simple setup - Connection to a television
Carry out the following operation to suit the type of television you are using. The factory setting is for a regular 4:3 television.
• Turn the television on.
• Switch the video input mode on the television to suit the type of connection you have made (e.g., VIDEO 1 ).
• The On-Screen menu language of your player has been factory preset to English.
If you would like to change the menu language to French, German, Italian or Spanish, please refer to "Menu Language" on page 29.
In the explanations given below it is assumed that English has IIbeen selected as the menu language.
D
11!1
IJ 1 . 4:3 (factory setting)
2. 1 6:9 (wide-screen television)
Press the joystick to proceed to the next screen.
Operate the joystick to highlight the type of television you have connected.
1 . Standard (Direct View TV) (factory setting)
2. CRT Projector IJI3. LCD Projector 4. Projection TV
Press the joystick to confirm your selection and return to the initial settings screen.
Press [RETURN] to exit the initial settings screen.
•[RETURN] button
Press to return to the previous screen. Settings are not entered.
•Numbered buttons
Press the number corresponding to the menu item to enter a setting.

SKIP --+o.,..;.;:;
[ ...] [ ]
Playing DVD and Video COs
The producer of the material can control how these discs are played. This means that you may not be able to ont ol play. with some of the operations described in these operating mstruct1ons. Read the disc's instructions carefully.
The symbol " " appears on the television when you perform an operation to indicate it is not allowed at that time.
Playing karaoke discs
After playing a track, you will normally be shown a menu. Some discs allow you to play all the tracks in succession. Others will play all the tracks in succession automatically.
DVD volume
Volume may be lower when playing DVDs than when playing other discs.
If you turn the volume up on the television or amplifier, ensure you reduce the volume again before playing other sources so that a sudden increase in output does not occur.
A menu screen is shown on your |
|
|
|
television shortly after starting some |
|
0 Thefirst |
The third() |
DVD-Video and Video CDs. To |
|
||
continue play you must make a |
|
movement |
movement |
selection. |
|
The second |
Thefourth |
|
|
f.jmovement |
movementC) |
|
|
|
|
Operate the joystick to highlight an item.
Press the joystick to confirm your selection.
OR
Press the numbered buttons corresponding to the menu item.
For items numbered 10 and over, press [ 1 0] then the two digits. e.g. 10: [ 1 0] -+ [1] -+ [0]
e.g. 25: [ 1 0] -+ [2] -+ [5]
Other buttons used to operate menus
The operation of these buttons differs with the disc so read the instructions that came with the disc for further details.
[SKIP): Shows the next menu. [RETURN]: Shows the previous menu.
[MENU]: Shows the menu screen (DVD).
[TOP MENU]: Shows the first menu screen (DVD).
VQT8399
[AUDIO ONLY] [ •1 [II][ ]
Joystick
|
|
,_ |
|
|
|
|
|
.. |
|
|
|
|
|
SLOW/ |
STOP |
|
|
SEARCH |
|
|
|
[<111<111][] |
||
[.] |
--t-i"'r |
|
PLAY |
|
PAUSE -- |
|
[ ] |
||
[II ] |
|
|
|
|
I Other metho ds of play
When [ •] is pressed.
" "flashes to indicate that the resume function is active.
Using the resume function to restart play
While" " is flashing, press[ ].
Play starts from where it was stopped.
This function does not work if the disc's play time is not displayed, [ •1 is pressed again, the disc tray is opened. This function is available when" " is flashing.
If you are playing DVD-Video, you can activate the CHAPTER REVIEW function while the message, "Press PLAY to Chapter Review" is shown on your television. This message appears for a few seconds before play is resumed.
Press [ ] while this message is shown on your television and the beginning portions of each chapter up to the current one are played. Full play resumes from the point play was stopped at.
CHAPTER REVIEW is not possible with some DVD-Video.
Press [ 1-4..,.. ](backward)or [ 111>1(forward)] . on the remote control.
OR
[..1-4 , ,..,....o,..r [] I 111>1on the] main unit
Each press increases the number of skips.
The first skip backwards takes you to the beginning of the current track or chapter.
If pressed while a DVD or Video CD menu is on the screen, you may return to the previous menu.
During play
Press [ ..,....,..(backward)] or [ ](forward) on the
remote control.
Each press increases the speed of the search. There are five speeds.
OR
Press and hold [ 1-4..,../..,....] or,..[ I 111>1onthe]
main unit.
The search speed increases in five steps if the button is held down.
..
Audio will be heard during search.
You can turn off audio output during search with DVD-Video and Video CDs (.. page 31 ).
If pressed while a DVD or Video CD menu is on the screen, you may return to the previous menu.

While stopped or playing
Press the numbered buttons.
To select a track or chapter numbered 10 and over, press [ 10] then the two digits.
e.g. 10:[;=; 10]---[1]+ ---[OJ+ e.g. 25: [ 10] ----[2]---[+5]
When playing-DVD-Audio and you want to start play from a track in a different group, select the group first (.. page 14).
hW•I.r11•W•Ifi•JiJ•»
While paused
Press [ <111111<111111](backward) or [ ](forward) on the
remote control.
Each press increases the speed of the slow motion. There are five speeds.
OR
Press and hold [ foill<llllll/<111111<111111or] [ I ] on the
main unit.
The slow motion speed increases in five steps if the button is held down.
Press[ ] to resume play.
Only the motion picture parts of DVD-Audio are affected.
1•1'4•1!11•1'4.,.,.!IIJ.•
While paused
Move the joystick left(backward) or right(forward)
on the remote control.
You can move backward only with DVDs.
The frame changes each time you move the joystick.
The frames change in succession if you hold the joystick in position. Press[ ] to resume play.
You also can move forward frame-by-frame by pressing[ II].
..
Only the motion picture parts of DVD-Audio are affected.
•fl•u•
Canceling playback control allows you to play the disc all the way through from the beginning.
1.Press[ .].
The "PBC" indicator on the unit's display goes out.
2.Press the numbered buttons to select the track where you want to start play.
See the disc's jacket for the track numbers.
To restore playback control
1. Press[ .] to stop play.
2. Press[MENU] on the remote control.
The "PBC" indicator on the unit's display comes on.
Press [AUDIO ONLY].
The lamp next to the button lights.
The video signal is cut off so only the audio signals are output. AUDIO ONLY is canceled if the button is pressed again or if the unit is turned off.
•Video signals are output while the disc is stopped and when operations such as skipping or searching are performed. The television can appear unusual while video signals are not being output.
•Turn the television off for a better effect if you have connected the VIDEO OUT on this unit through an amplifier.
VQT8399

Numbered buttons
INDEX SKIP 1;--- |
'""\-" |
[-][+] - |
|
PAGE [-][+]
IOlher melhods ofpi<Jy
Selecting a group
Groups
The tracks on DVD-Audio are divided into groups. e.g. Group 1: All tracks
Group 2: 60s pops
Group 3: 70s pops
How these groups are played differs with the disc so read the instructions that came with the disc for further details.
Bonus groups
Some discs contain bonus groups. To enjoy these groups you may have to enter a password.
Press [GROUP]. |
|
|
Press [ ] when the required |
|
|
group is selected to start play of |
The group changes |
|
that group. |
||
|
|
each time the button is pressed. |
To select by number (Remote control only) |
||
2.1 . |
Press[GROUP]. |
|
3. |
Press the numbered button corresponding to the required group. |
|
|
Press [ ]. |
|
ISelection may not be allowed in some situations (e.g., while a menu is being displayed).
Playing bonus groups
You can play the bonus groups contained on some DVD-Audio by |
|||||
entering a password. The password is written on the instructions |
|||||
that came with the disc. |
|
|
|
|
|
DPress [GROUP] to select the bonus group. |
|
||||
11 Press [ ]. |
|
|
e.g. 1234 |
|
|
Enter the 4-digit |
|
|
|
||
11 password with the |
|
"""" |
aomi QrqlJp |
""""· |
|
|
|||||
numbered buttons and |
|
||||
|
|
Entera 4-olgitpa!lswpraf" |
|||
press the joystick. |
|
" |
then press ENTiiSR.s, 3 |
||
If you enter the wrong |
|
Press |
1234 " |
;<j ; |
|
|
|
||||
password, the previous screen |
|
|
|
RETURNto""exil: I |
|
|
|
|
|||
will be displayed. Start again |
|
|
|
|
|
from the beginning. |
|
|
|
|
|
You can erase it by pressing[CANCEL]. |
|
|
|||
II Use the joystick to select a track and press to start play.
This operation must also be performed if the group is selected during program or random play.
Some discs will show a menu screen for you to enter your password. Follow the instructions on the screen.
The bonus group can be played as many times as you like after the password has been entered until the disc is removed from the player.

 Playing all the groups in succession
UseDthis operation if the disc does not give you the choice to play all the groups.
While stopped
f) Press [.-] to start play.
1•1'4•1!1
Some DVD-Audio include still pictures. You can select these pictures with the following operation.
During play
Press [PAGE(- or+)].
-:backward +:forward
..
There are some cases where the disc does not allow you to select pictures with this feature.
1•19•1!)
DVD-Audio tracks are divided by indexes. You can find a particular position by skipping these indexes.
While playing or paused
Press [INDEX SKIP(- or+)].
-:backward +:forward
If the disc was playing, it will continue to play from the position you skipped to. If the disc was paused, it will remain paused at the position you skipped to.
..
Sound is interrupted during this operation. Some tracks do not have indexes.
YouDcan specify times within groups on DVD-Audio, or within titles on VD-Video.
uring play
Specify the time |
e.g. 7 minutes 5 seconds |
f)with the numbered |
CD |
buttons. |
|
CD Enter the minutes (7). |
|
® Enter the seconds (05). |
|
Other examples
7 minutes and 30 seconds:[7] - [3] - [0]
1 hour, 2 minutes and 30 seconds: [1 )--> [0)-+ [2)-+ [3)-+ [OJ
If you enter the wrong time, you can start again by pressing [CANCEL].
IJPress the joystick to start play.
..
• You cannot specify a time beyond the current title or group. If the title or group finishes while you are still entering the time, the time search screen is canceled.
When playing DVD-Audio, the track's elapsed time is shown on the display after time search is complete.
• Press[TIME SEARCH] to cancel partway through.
• You cannot do time search during random or program play.
1•19•1!1•TliJ·••IJ.•
Press [TIME MODE].
The display changes each time the button is pressed. The displays shown depend on the condition of the player.
e.g. When playing DVD-Audio in group mode. Elapsed time of trackRemaining time of track
..L__ Remaining time of group _______j
You can use this feature with Video CD if you cancel playback control (-+ page
VOT8399
 Loading...