Tanaka THT-210, HTD-2530PF, THT-210s, THT-2000, THT-2100 User Manual
...
Owner’s Manual
Model Numbers: |
P/N 28334 |
|
|
THT-210/210S/2000/2100/2120 |
Date 04-06-05 |
|
THT-2510/2520/240/2530/2540
HTD-2520PF/2522PF/2526PF
HTD-2530PF,HTS-2530PF
HEDGETRIMMERS
THT-2120
HTD-2530PF
Supplier To The Outdoor Power Equipment Industry
ISM, Inc. • 1028 4th Street SW • Auburn, WA 98001 • Phone: (253) 333-1200 • Fax: (253) 333-1212
w w w . t a n a k a - u s a . c o m |
custsvc@tanaka-ism.com |

THT-210/210S/2000/2100/2120/2520, THT-240/2510/2530/2540/262 |
|
|
Owner’s Manual |
||
HTD-2520PF/2522PF/2526PF/2530PF, HTS-2530PF |
||
|
||
|
|
Before using this unit:
•Read the operator’s manual carefully.
•Check that the cutting equipment is correctly assembled and adjusted.
•Start the unit and check the carburetor adjustment. See “Maintenance”.
 WARNING
The engine exhaust from this product contains chemicals known to the State of California to cause cancer, birth defects and other reproductive harm.
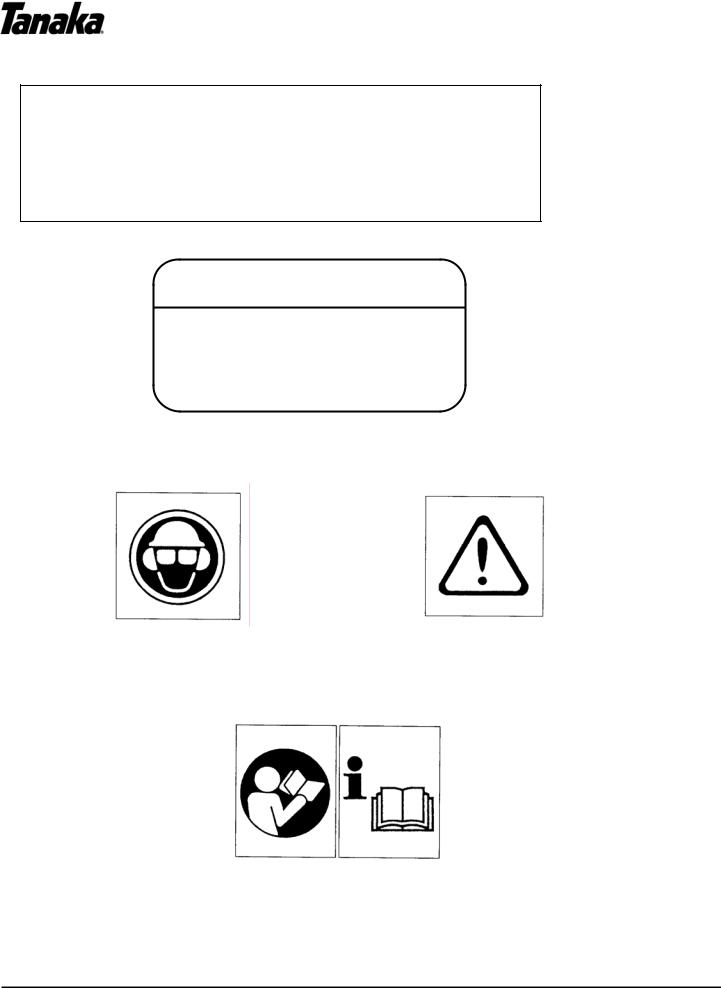
Always wear eye, head and ear protectors when using this unit.
Read, understand and follow all warnings and instructions in this manual and on the unit.
It is important that you read, fully understand and observe the following safety precautions and warnings. Careless or improper use of the unit may cause serious or fatal injury.
www.tanaka-usa.com |
1 |
custsvc@tanaka-ism.com |

THT-210/210S/2000/2100/2120/2520, THT-240/2510/2530/2540/262 |
|
|
Owner’s Manual |
||
HTD-2520PF/2522PF/2526PF/2530PF, HTS-2530PF |
||
|
|
1.Recoil Starter
2.Fuel Tank
3.Safety Trigger
4.Throttle Trigger
5.Front Handle
6.Rear Handle
7.Spark Plug
8.Hand Guard
9.Cutting Blade
10.Air Cleaner
11.Ignition Switch
12.Blunt Guard (optional)
13.Gear Case
14.Choke Lever
15.Lock Button
16.Blade Cover
17.Lock Button
18.Priming Pump
www.tanaka-usa.com |
2 |
custsvc@tanaka-ism.com |

THT-210/210S/2000/2100/2120/2520, THT-240/2510/2530/2540/262 |
|
|
Owner’s Manual |
||
HTD-2520PF/2522PF/2526PF/2530PF, HTS-2530PF |
||
|
||
|
|
2. Warnings and safety instructions.
Operator Safety
•Always wear a safety face shield or goggles.
•Always wear heavy, long pants, boots and gloves. Do not wear loose clothing, jewelry, short pants, sandals or go barefoot. Secure hair so it is above shoulder length.
•Do not operate tool when you are tired, ill or under the influence of alcohol, drugs or medication.
•Never let a child or inexperienced person operate the machine.
•Wear hearing protection.
•Never start or run the engine inside a closed room or building. Breathing exhaust fumes can kill.
•Keep handles free of oil and fuel.
•Keep hands away from cutting equipment.
•Do not grab or hold the unit by the cutting equipment.
•When the unit is turned off, make sure the engine has stopped before the unit is set down.
•When operation is prolonged, take a break from time to time so that you may avoid possible white finger disease, which is caused by vibration.
Tool Safety
•Inspect the entire tool before each use. Replace damaged parts. Check for fuel leaks and make sure all fasteners are in place and securely fastened.
•Replace parts that are cracked, chipped or damaged in any way before using the tool.
•Make sure the safety guard is properly attached.
•Keep others away when making carburetor adjustments.
•Use only accessories as recommended for this tools by the manufacturer.
 WARNING!
Never modify the tool in any way. Do not use the tool for any job except that for which it is intended.
Fuel Safety
•Mix and pour fuel outdoors and where there are no sparks or flames.
•Use a container approved for fuel.
•Do not smoke or allow smoking near fuel or the tool or while using the tool.
•Wipe up all fuel spills before starting engine.
•Move at least 3 m (10 ft) away from fueling site before starting engine.
•Stop engine before removing fuel cap.
•Empty the fuel tank before storing the tool. It is recommended that the fuel be emptied after each use. If fuel is left in the tank, store so fuel will not leak.
•Store tool and fuel in area where fuel vapors cannot reach sparks or open flames from water heaters, electric motors or switches, furnaces, etc.
 WARNING!
Anti-vibration systems do not guarantee that you will not sustain white finger disease or carpal tunnel syndrome. Therefore, continual and regular users should monitor closely the condition of their hands and fingers. If any of the above symptoms appear, seek medical advice immediately.
Cutting Safety
•Do not cut any material other than plant hedge.
•Inspect the area to be cut before each use. Remove objects which can be thrown or become entangled.
•Keep others including children, animals, bystanders and helpers outside the 15 m (50ft) hazard zone. Stop the engine immediately if you are approached.
•Hold the tool firmly with both hands.
•Keep firm footing and balance. Do not over-reach.
•Keep all parts of your body away from the muffler and cutting attachment when the engine is running.
•Keep the cutting tool below shoulder level. NEVER operate unit from a ladder, while in a tree or from any unstable support.
Maintenance Safety
•Maintain the tool according to recommended procedures.
•Disconnect the spark plug before performing maintenance except for carburetor adjustments.
•Keep others away when making carburetor adjustments.
•Use only genuine replacement parts as recommended by the manufacturer.
Transport and storage
•Carry the tool by hand with the engine stopped and the muffler away from your body.
•Allow the engine to cool, empty the fuel tank, and secure the tool before storing or transporting in a vehicle.
•Empty the fuel tank before storing the tool. It is recommended that the fuel be emptied after each use. If fuel is left in the tank, store so fuel will not leak.
•Store tool out of the reach of children.
•Clean the unit carefully and store it in a dry place.
•Make sure engine switch is off when transporting or storing.
•When transporting in a vehicle, cover blade with blade cover.
If situations occur which are not covered in this manual, take care and use good judgment. Contact your dealer if you need assistance.
Pay special attention to statements preceded by the following words:
 WARNING!
Indicates a strong possibility of severe personal injury or loss of life, if instructions are not followed.
CAUTION!
Indicates a possibility of personal injury or equipment damage, if instructions are not followed.
NOTE!
Helpful information for correct function and use.
www.tanaka-usa.com |
3 |
custsvc@tanaka-ism.com |

THT-210/210S/2000/2100/2120/2520, THT-240/2510/2530/2540/262 |
|
|
Owner’s Manual |
||
HTD-2520PF/2522PF/2526PF/2530PF, HTS-2530PF |
||
|
||
|
|
3. Assembly procedures
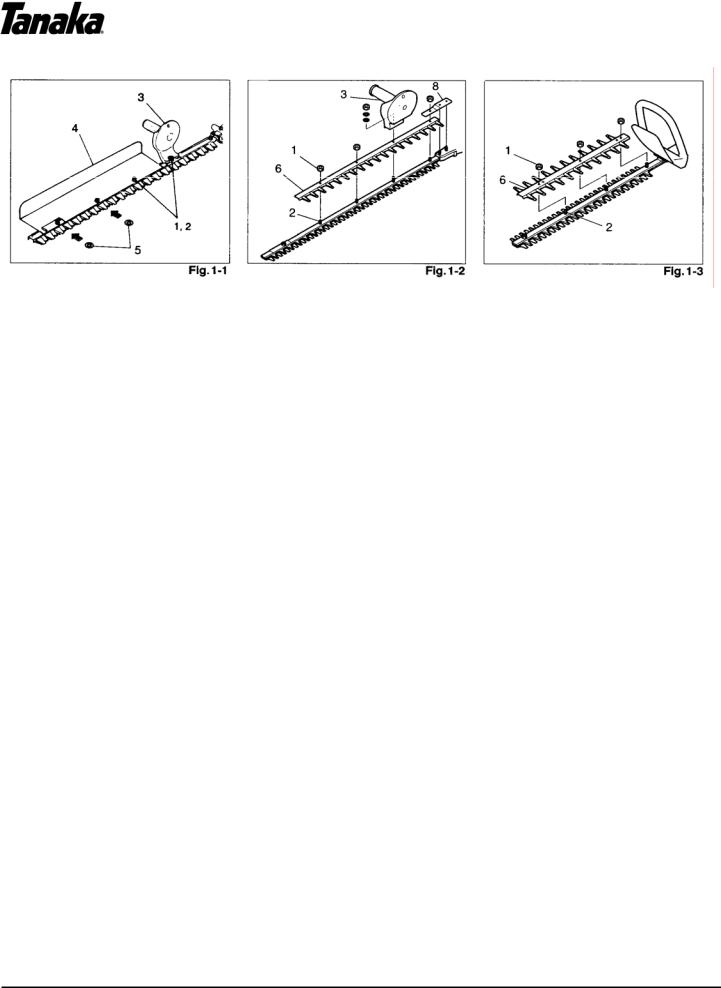
Handle B (3) and Gathering Plate (4) (Fig, 1-1)
1. Remove the four washers and nuts (1) from cutting blade end.
NOTE! In case of Handle B installation only, remove only the nut on the longest bolt.
2.Set the gathering plate on the guide bar, then finger tighten the three washers and nuts. *Use one each (5) of the two washers, which have been provided, under the gathering plate or on the two blade-fixing bolts from the cutting-blade end to install the gathering plate on THT-2540. (If so equipped)
3.Set the handle B on the longest bolt and finger tighten with the washer and nut.
4.Before securing the finger-tighten nuts, screw the blade fixing bolts (2) to be seated, then loosen the bolts approx. 1/2 turn.
5.With the bolts set at that position tighten the blade fixing nuts.
Handle B (3) and Blunt guard (6) for USA/CANADA (Fig. 1-2,3)
1. Remove the four nuts (1) (in case of double sided blade, three nuts (1)) from power head side.
NOTE! (For THT-2520,HTD-2530PF)
To set the blunt guard on the unit, loosen the blade fixing bolts so that the blunt guard can be slid into place. Do not use the washer originally used under support plate (8) together with blunt guard.
2.Set the blunt guard on the guide bar, then finger tighten the three nuts.
3.Set the handle B (3) on the longest bolt (Single sided blade) and finger tighten with the washer and nut.
4.Before securing the finger-tighten nuts, screw the blade fixing bolts (2) to be seated, then loosen the bolts approx. 1/2 turn.
5.With the bolts set at that position tighten the blade fixing nuts.
www.tanaka-usa.com |
4 |
custsvc@tanaka-ism.com |
 Loading...