


Solar Mounting Solutions
Array Skirt Installation Manual
Materials Included
SnapNrack Array Skirt
SnapNrack Array Skirt Frame Mount
SnapNrack Array Skirt Splice
SnapNrack Array Skirt End Cap Pair
Hardware Description Torque Specifi cation
Array Skirt Frame Mount 5 - 6 lb-ft (60 - 72 lb-in)
Dimensions 162” Skirt Length
Material Skirt and Splice: 6000 Series Aluminum
Compatibility All Module Frames
3 - 4 lb-ft (36 - 48 lb-in) Kyocera short side
Technical Specifi cations
Frame Mount: 6000 Series Aluminum, Stainless Steel Hardware
End Cap: Rubber
snapnrack.com
1
Solar Mounting Solutions
Required Tools
Socket Wrench
Torque Wrench
1/2” Socket
Circular Saw or Portable Band Saw
Tape Measure
Installation Instructions
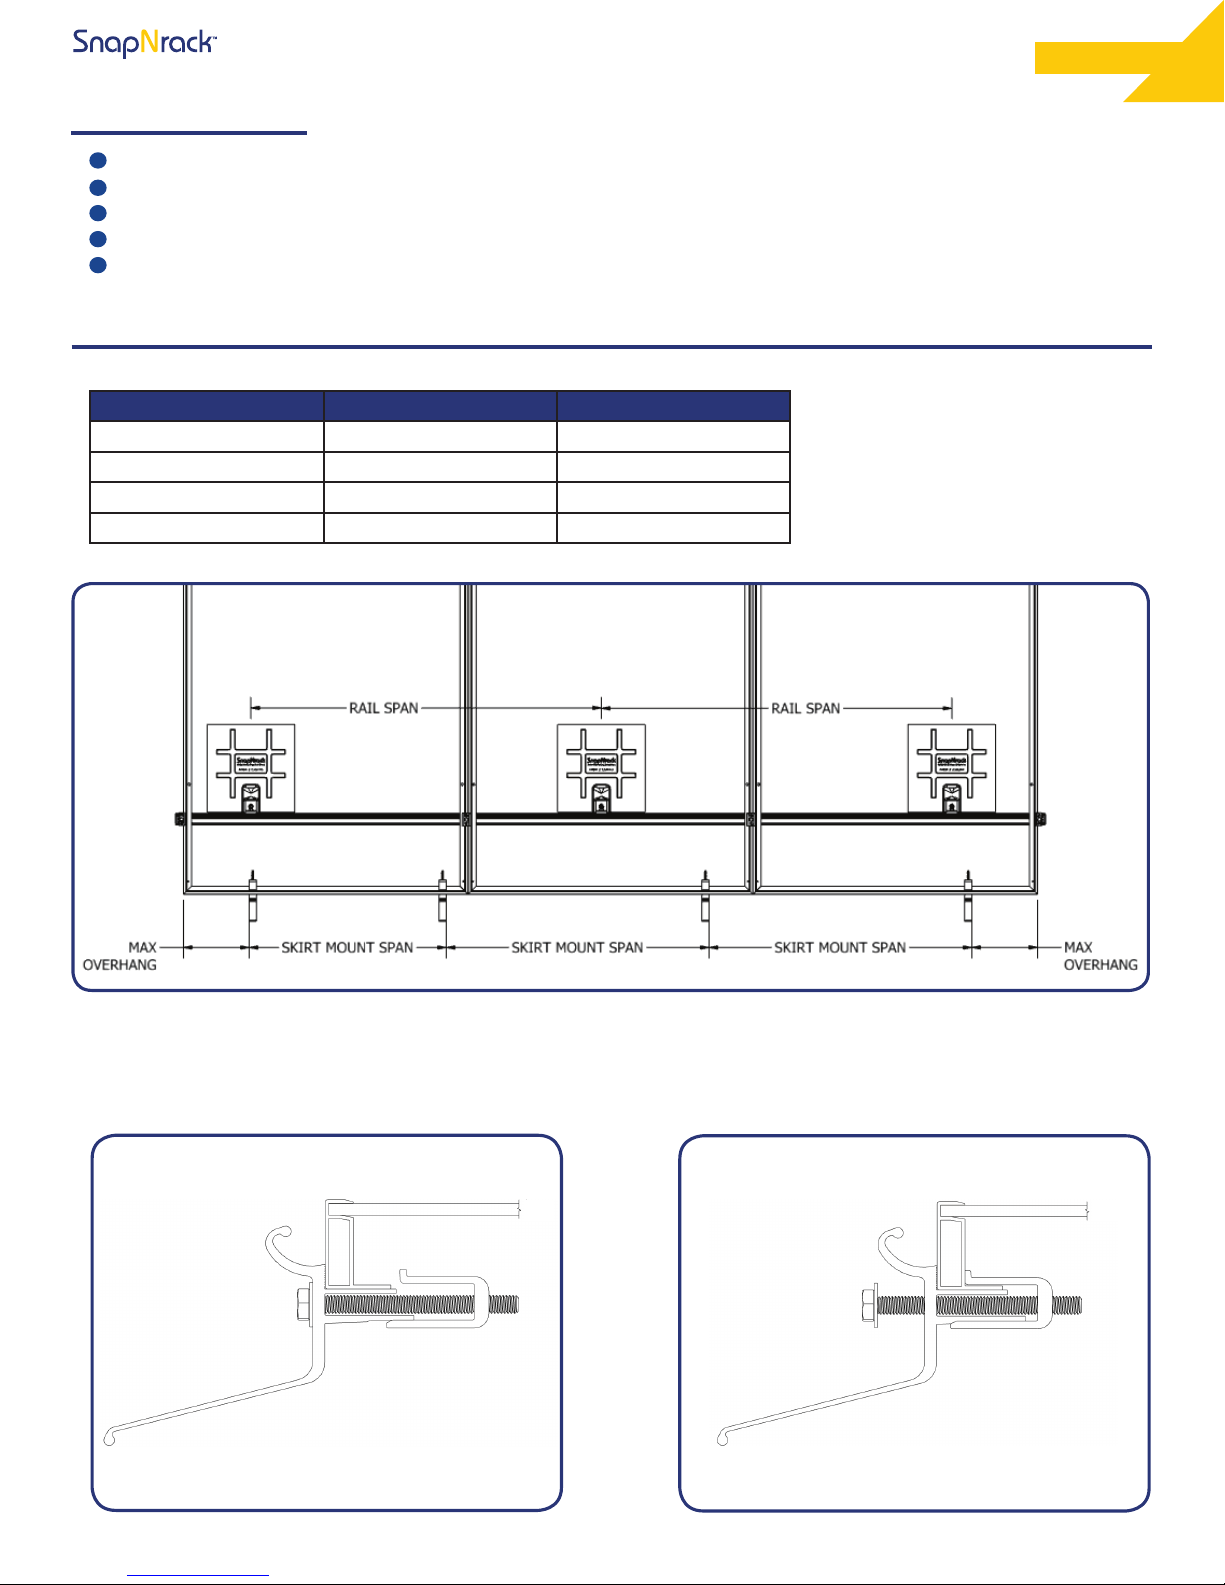
1. Locate array skirt mounts using the following span and cantilever rules:
Rail Span (ft) Skirt Mount Span (ft) Max Overhang (in)
8 6 12
6 4 9
4 3 6
2 2 3
snapnrack.com
2. With bolt backed out, rest fl at top side of skirt mount onto bottom edge of module frame.
3. Sandwich module frame with two halves of skirt mount, ensuring that shorter end of extrusion is facing
up.
2

Solar Mounting Solutions
Installation Instructions
4. Finalize placement of skirt mount and torque hardware to 5 - 6 lb - ft.
INSTALL NOTE: Torque to 3 - 4 lb - ft when installing on short side of Kyocera modules.
5. Determine length(s) of array skirt needed for array(s).
snapnrack.com
6. If array skirt needs to be cut, it can be done prior to installation at ground level or on the roof after
installation.
6A. If cutting skirts prior to installation, a circular saw with an appropriate metal-cutting blade is
recommended.
6B. If cutting skirts after installation, a portable band saw is recommended.
6A
6B
3
Solar Mounting Solutions
snapnrack.com
Installation Instructions
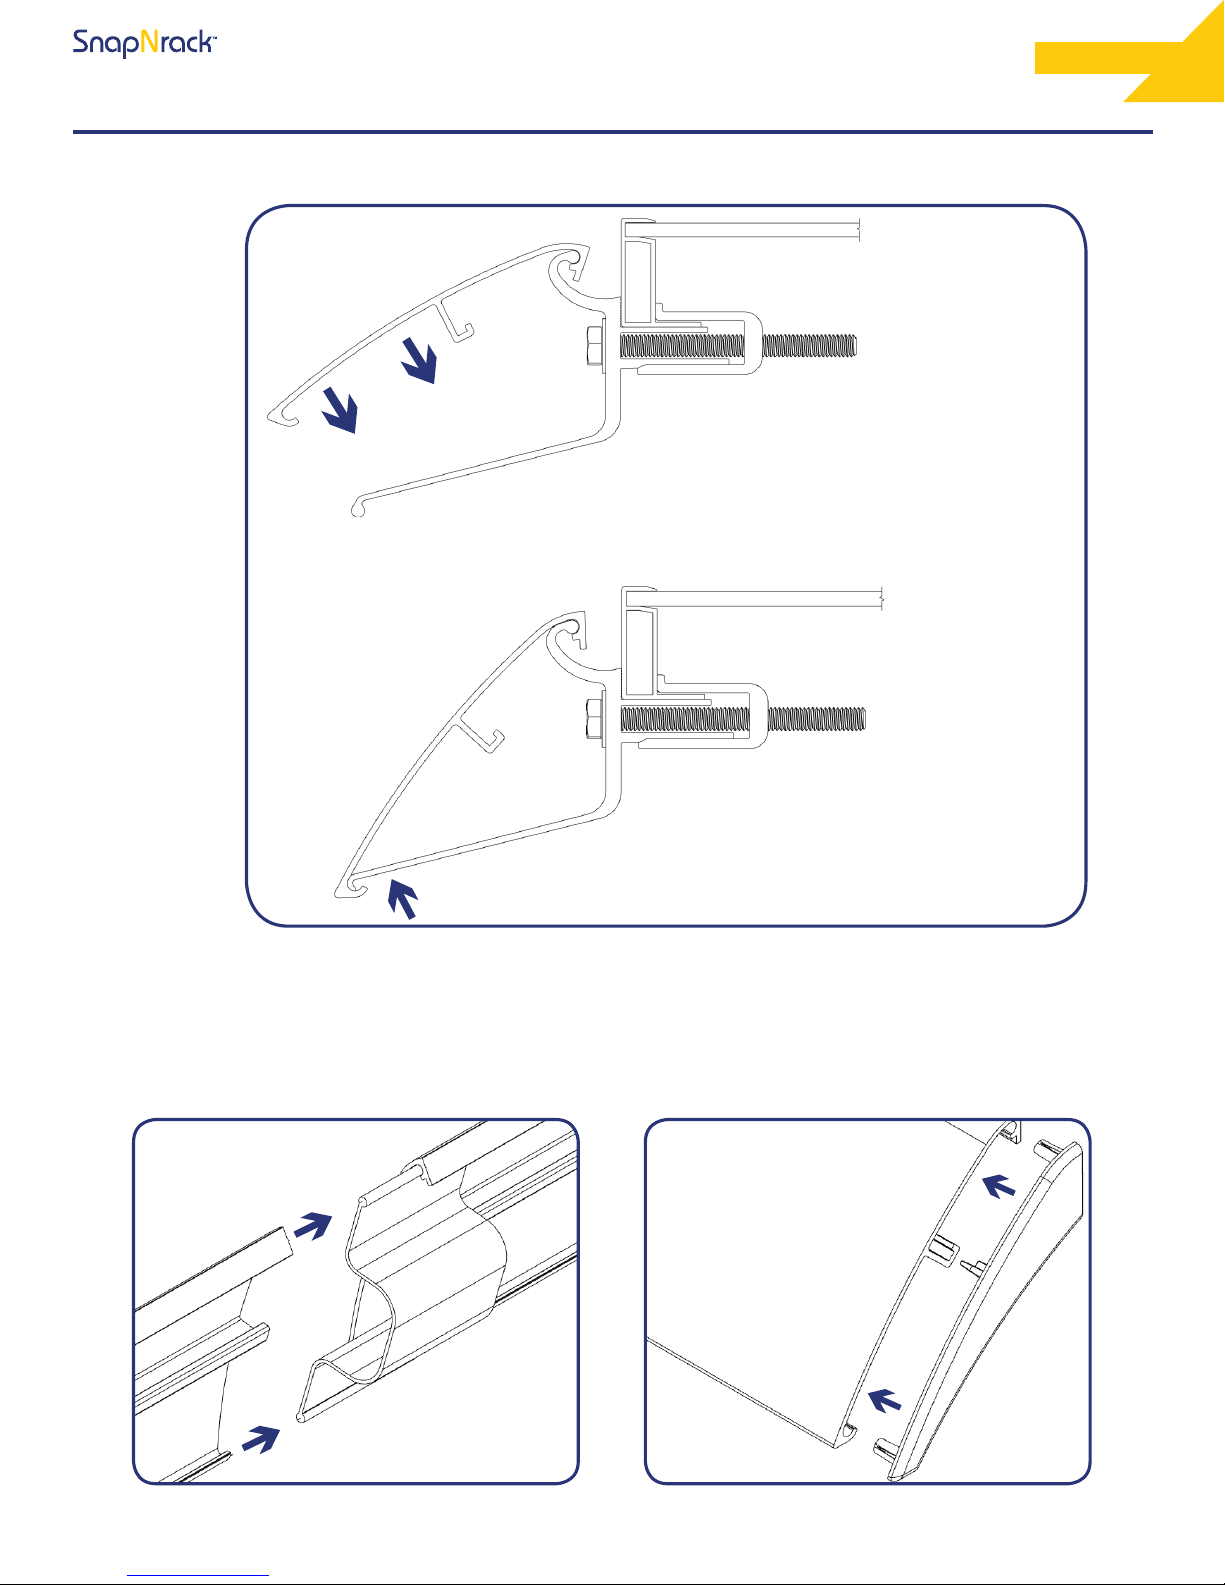
7. Rest array skirt on top hook of skirt mounts, then push lower hook up and lock into bottom of array
skirt.
8. If a splice is required, install by pushing it equally into lengths of array skirt and butting ends together.
INSTALL NOTE: All spliced sections must follow max overhang limits noted in Step 1.
9. Push end caps onto skirt edges to complete installation.
4
877-732-2860 www.snapnrack.com contact@snapnrack.com
© 2016 by SnapNrack Solar Mounting Solutions. All rights reserved
SnapNrack_Array Skirt_Install Manual_1.0
 Loading...