


SC110SG

32
Table of Contents
INSTRUCTIONS FOR THE USER: these provide recommendations for
use, a description of the controls and the correct procedures for cleaning
and maintaining the appliance
INSTRUCTIONS FOR THE INSTALLER: these are intended for the
qualified engineer who is to install, commission and test the appliance
1. PRECAUTIONS FOR USE ................................................................... 33
2. DISPOSAL INSTRUCTIONS - OUR ENVIRONMENT POLICY ........... 34
3. SAFETY PRECAUTIONS ..................................................................... 35
4. GET TO KNOW YOUR OVEN .............................................................. 36
5. BEFORE INSTALLATION..................................................................... 36
6. DESCRIPTION OF FRONT PANEL CONTROLS ................................ 37
7. USING THE OVEN ............................................................................... 39
8. USING THE PIZZA FUNCTION (ON SOME MODELS ONLY) ............ 46
9. ACCESSORIES AVAILABLE................................................................ 48
10. RECOMMENDED COOKING TABLES ................................................ 49
11. CLEANING AND MAINTENANCE ........................................................ 51
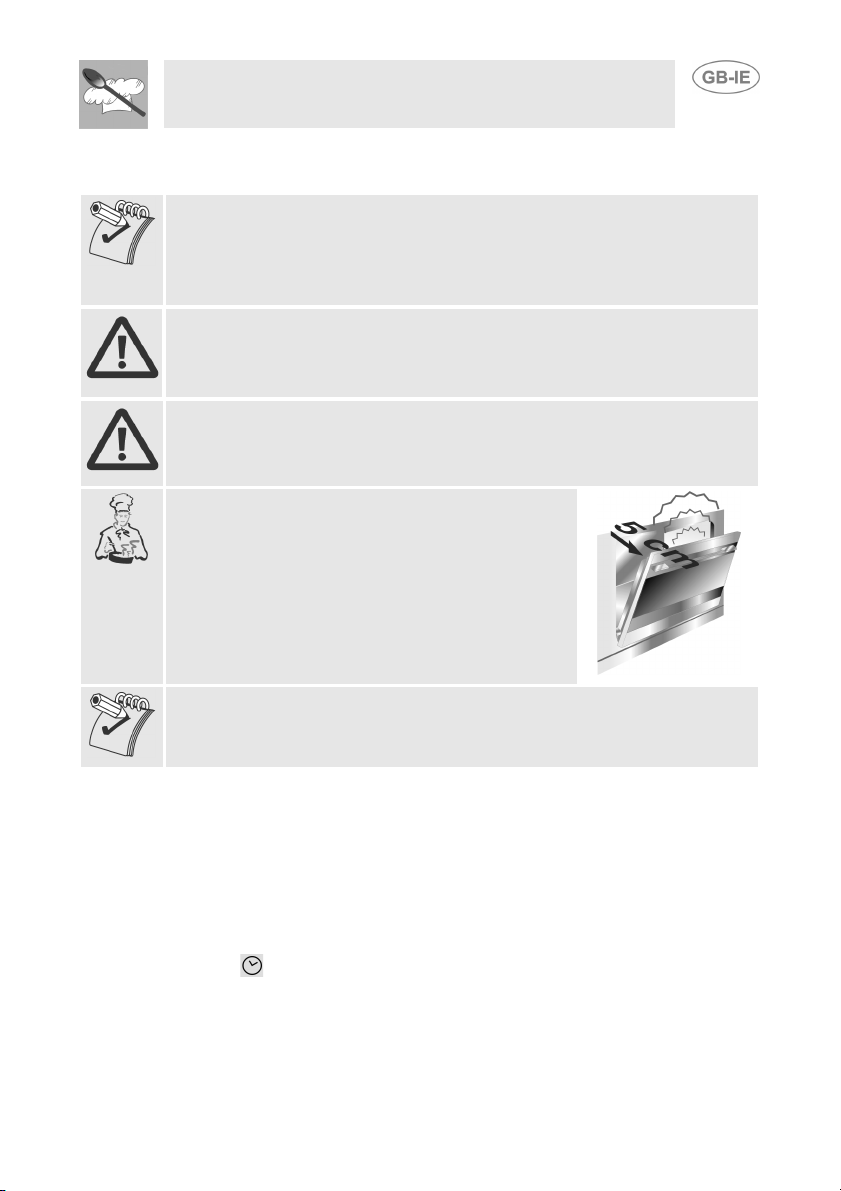
12. EXTRAORDINARY MAINTENANCE .................................................... 55
13. INSTALLING THE APPLIANCE............................................................ 58
33
Precautions for Use
1. PRECAUTIONS FOR USE
THIS MANUAL IS AN INTEGRAL PART OF THE APPLIANCE. TAKE GOOD CARE
OF IT AND KEEP IT TO HAND THROUGHOUT THE OVEN'S LIFE CYCLE.
WE URGE YOU TO READ THIS MANUAL AND ALL THE INFORMATION IT
CONTAINS CAREFULLY BEFORE USING THE APPLIANCE. INSTALLATION
MUST BE CARRIED OUT BY QUALIFIED STAFF IN COMPLIANCE WITH THE
RELEVANT REGULATIONS. THIS APPLIANCE IS INTENDED FOR HOUSEHOLD
USE AND COMPLIES WITH THE EEC DIRECTIVES CURRENTLY IN FORCE.
THE APPLIANCE IS BUILT TO PROVIDE THE FOLLOWING FUNCTION:
COOKING AND HEATING FOODS; ALL OTHER USES ARE TO BE
CONSIDERED IMPROPER.
THE MANUFACTURER DECLINES ALL LIABILITY FOR USES OTHER THAN
THOSE STATED ABOVE.
NEVER USE THIS APPLIANCE FOR HEATING ROOMS.
NEVER LEAVE PACKAGING RESIDUES UNATTENDED IN THE HOME.
SEPARATE THE VARIOUS PACKAGING MATERIALS BY TYPE AND CONSIGN
THEM TO THE NEAREST SEPARATE DISPOSAL CENTRE.
THIS APPLIANCE IS TAGGED UNDER EUROPEAN DIRECTIVE 2002/96/EC ON
WASTE ELECTRICAL AND ELECTRONIC EQUIPMENT (WEEE).
THIS DIRECTIVE CONTAINS THE REGULATIONS GOVERNING THE
COLLECTION AND RECYCLING OF DECOMMISSIONED APPLIANCES
THROUGHOUT THE EUROPEAN UNION.
NEVER OBSTRUCT THE OPENINGS AND SLITS PROVIDED FOR
VENTILATION AND HEAT DISPERSAL.
THE NAMEPLATE WITH THE TECHNICAL DATA, SERIAL NUMBER AND MARK
IS IN A VISIBLE POSITION ON THE OVEN DOOR FRAME.
THE NAMEPLATE MUST NEVER BE REMOVED.
NEVER USE METAL SCOURING PADS OR SHARP SCRAPERS;
THEY WILL DAMAGE SURFACES.
USE ORDINARY NON-ABRASIVE PRODUCTS WITH THE AID OF
WOODEN OR PLASTIC UTENSILS IF NECESSARY. RINSE
THOROUGHLY AND DRY WITH A SOFT CLOTH OR CHAMOIS
LEATHER.
DO NOT ALLOW SPILLS OF FOODS WITH HIGH SUGAR CONTENT
(E.G. JAM) TO DRY INSIDE THE OVEN. IF THEY DRY FOR TOO
LONG, THEY MIGHT DAMAGE THE ENAMEL COATING OF THE
INSIDE OF THE OVEN.

34
Disposal instructions
2. DISPOSAL INSTRUCTIONS - OUR
ENVIRONMENT POLICY
Our products are only packaged using non-pollutant, environment-friendly,
recyclable materials. We urge you to cooperate by disposing of the
packaging properly. Contact your local dealer or the competent local
organisations for the addresses of collection, recycling and disposal
facilities.
Never leave all or part of the packaging lying around. Packaging parts, and
especially plastic bags, may represent a suffocation hazard for children.
Your old appliance must also be disposed of properly.
Important: deliver the appliance to your local organisation authorised to
collect scrapped appliances. Proper disposal allows the intelligent
recovery of valuable materials.
Before scrapping your appliance it is important to remove doors and leave
shelves in position as for use, to ensure that children cannot accidentally
become trapped inside the oven during play. Also, cut the power supply
lead and remove it and the plug.
35
Safety precautions
3. SAFETY PRECAUTIONS
REFER TO THE INSTALLATION INSTRUCTIONS FOR THE SAFETY
REGULATIONS FOR ELECTRIC OR GAS APPLIANCES AND VENTILATION
FUNCTIONS.
IN YOUR INTEREST AND TO ENSURE YOUR SAFETY, BY LAW ALL ELECTRIC
APPLIANCES MUST ONLY BE INSTALLED AND SERVICED BY QUALIFIED
STAFF, IN ACCORDANCE WITH THE RELEVANT REGULATIONS.
OUR APPROVED INSTALLATION ENGINEERS GUARANTEE YOU A JOB WELL
DONE.
GAS OR ELECTRIC APPLIANCES MUST ALWAYS BE DISCONNECTED BY
SUITABLY SKILLED PEOPLE.
THE PLUG TO BE CONNECTED TO THE POWER SUPPLY LEAD AND THE
RELATIVE SOCKET MUST BE OF THE SAME TYPE AND COMPLY WITH THE
RELEVANT REGULATIONS.
THE POWER SUPPLY SOCKET MUST BE ACCESSIBLE EVEN AFTER THE
APPLIANCE HAS BEEN BUILT-IN.
NEVER DISCONNECT THE PLUG BY PULLING ON THE POWER SUPPLY
LEAD.
THE APPLIANCE MUST BE CONNECTED TO EARTH IN COMPLIANCE WITH
ELECTRICAL SYSTEM SAFETY REGULATIONS.
IMMEDIATELY AFTER INSTALLATION, CARRY OUT A QUICK TEST ON THE
APPLIANCE FOLLOWING THE INSTRUCTIONS PROVIDED LATER IN THIS
MANUAL. IF THE APPLIANCE FAILS TO OPERATE, DISCONNECT IT FROM
THE ELECTRICAL MAINS AND CONTACT YOUR NEAREST SERVICE CENTRE.
NEVER ATTEMPT TO REPAIR THE APPLIANCE.
NEVER PLACE INFLAMMABLE OBJECTS IN THE OVEN: IF IT SHOULD
ACCIDENTALLY BE SWITCHED ON, THIS MIGHT CAUSE A FIRE.
THE APPLIANCE BECOMES VERY HOT DURING USE. TAKE CARE NOT TO
TOUCH THE HEATING ELEMENTS INSIDE THE OVEN.
THE USE OF THIS APPLIANCE IS NOT PERMITTED TO PEOPLE (INCLUDING
CHILDREN) OF REDUCED PHYSICAL AND MENTAL ABILITY, OR LACKING IN
EXPERIENCE IN THE USE OF ELECTRICAL APPLIANCES, UNLESS THEY ARE
SUPERVISED OR INSTRUCTED BY ADULTS OR PEOPLE RESPONSIBLE FOR
THEIR SAFETY.
BEFORE THE APPLIANCE IS PUT INTO OPERATION, ALL THE PROTECTIVE
FILMS APPLIED ON THE OUTSIDE MUST BE REMOVED.
The manufacturer declines all responsibility for injury or damage caused by failure to
comply with the above regulations or deriving from tampering with even just one part
of the appliance and the use of non-original spare par ts.
36
Instructions for the User
4. GET TO KNOW YOUR OVEN
5. BEFORE INSTALLATION
CONTROL PANEL
OVEN LIGHT
OVEN FAN
SHELF AND TRAY RUNNERS
TEMPERATURE SENSOR
BOTTOM PLATE (ON SOME
MODELS ONLY)
PIZZA PLATE / COVER
RECESS (ON SOME
MODELS ONLY)
Never leave packaging residues unattended in the home. Separate waste
packaging materials by type and consign them to the nearest separate
disposal centre.
The inside of the appliance should be cleaned to remove all manufacturing
residues. For further information about cleaning, see point "11.
CLEANING AND MAINTENANCE".
37
Instructions for the User
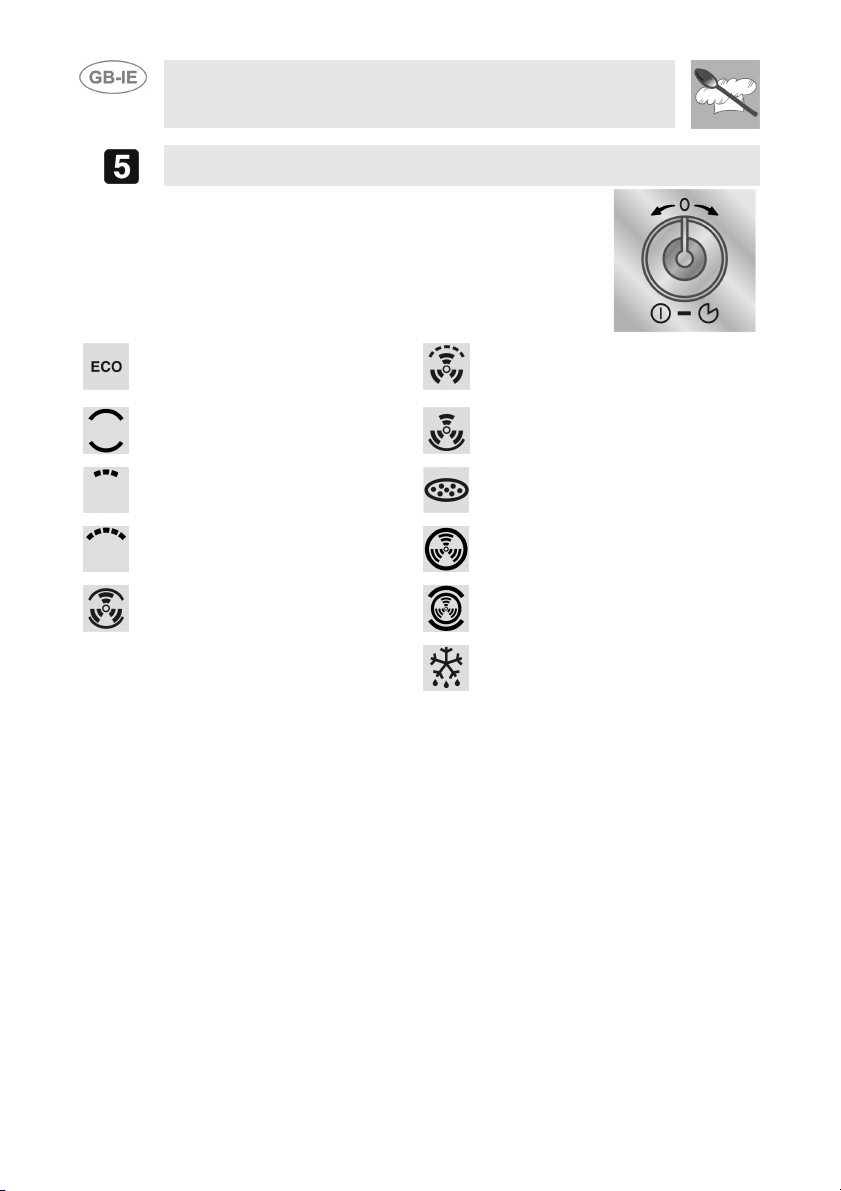
6. DESCRIPTION OF FRONT PANEL CONTROLS
All the appliance's control and monitoring devices are placed together on
the front panel. The table below provides the key to the symbols used.
THERMOSTAT-TIMER KNOB
PT1
This knob allows you to set the time, select the
cooking temperature and duration and program
the cooking start and end times. From now on,
for convenience it will be referred to as PT1.
For instructions on how to use it correctly, see
point “7.3 First use” and “7.5 Programmed
cooking procedures”.
CURRENT TIME/PROGRAMMED COOKING OPERATION DISPLAY
DSP1
This display shows the current time or the cooking duration.
From now on, for convenience it will be referred to as DSP1.
TEMPERATURE DISPLAY
DSP2
This display shows the temperature set for the function required, or the
temperature set by the user.
Also visible are the function cutout light (see point “7.6.1 Child safety
lock-out function”) and the preheating level (see point “7.4 Selecting the
function”).
From now on, for convenience it will be referred to as DSP2.
FUNCTION DISPLAY
DSP3
This display shows (illuminated) all the cooking functions available for
selection. For instructions on how to select a cooking function, see point
“7.2 Operating modes”.
From now on, for convenience it will be referred to as DSP3.
38
Instructions for the User
FUNCTION-SWITCH ON KNOB
PT2
This knob allows access to the oven's three operating
modes, and is also used to select a cooking function
(see point “7.2 Operating modes”).
From now on, for convenience it will be referred to
as PT2.
The table below provides a short description of the
functions available.
GRILL ELEMENT IN OPERATION
ALTERNATING WITH BOTTOM
HEATING ELEMENT + FAN
GRILL ELEMENT + FAN
TOP + BOTTOM HEATING
ELEMENTS
BOTTOM HEATING ELEMENT +
FAN
GRILL ELEMENT PIZZA FUNCTION (ON SOME
MODELS ONLY)
GRILL ELEMENT + TOP HEATING
ELEMENT
ROUND HEATING ELEMENT
TOP + BOTTOM HEATING
ELEMENTS+FAN
FAN HEATING ELEMENT + TOP +
BOTTOM HEATING ELEMENTS
DEFROSTING AND PROVING
39
Instructions for the User
7. USING THE OVEN
7.1 Precautions and General Advice
All cooking operations must be carried out with the door closed
When the oven and grill are used for the first time, they should be heated
to the maximum temperature for long enough to burn off any oily residues
left by the manufacturing process, which might contaminate foods with
unpleasant smells.
During cooking, do not cover the bottom of the oven with aluminium
or tin foil, and do not place pans or trays on it; this may damage the
enamel coating. If you wish to use greaseproof paper, position it so
that it does not interfere with the hot air circulation inside the oven.
Oven accessories which may come into contact with foods are made from
materials compliant with directive 89/109/EEC of 21/12/88 and national
relevant regulations.
To avoid unpleasant contact with any steam inside
the oven, open the door in two stages: hold it half-
open (about 5 cm) for 4-5 seconds, then open it
completely. If you have to carry out any procedures
on foods, leave the door open for as short a time as
possible to prevent a drop in the oven temperature
which will impair the cooking results.
To prevent excessive amounts of condensation from forming on the
internal glass, food should not be left inside the oven for too long after
cooking.
7.2 Operating modes
This product is programmed to provide 3 operating settings, which can be
modified by pressing PT2.
Standby setting: activated as soon as the current time has been
confirmed, with DSP1 on and showing the current time.
ON setting: from the standby setting, press PT2 once. All the displays and
knobs light up.
OFF setting:from the ON setting, press PT2 once.
Only the symbol on DSP1 remains on.
The heating system is not activated immediately in any of these
functions, in order to improve operator safety.
40
Instructions for the User
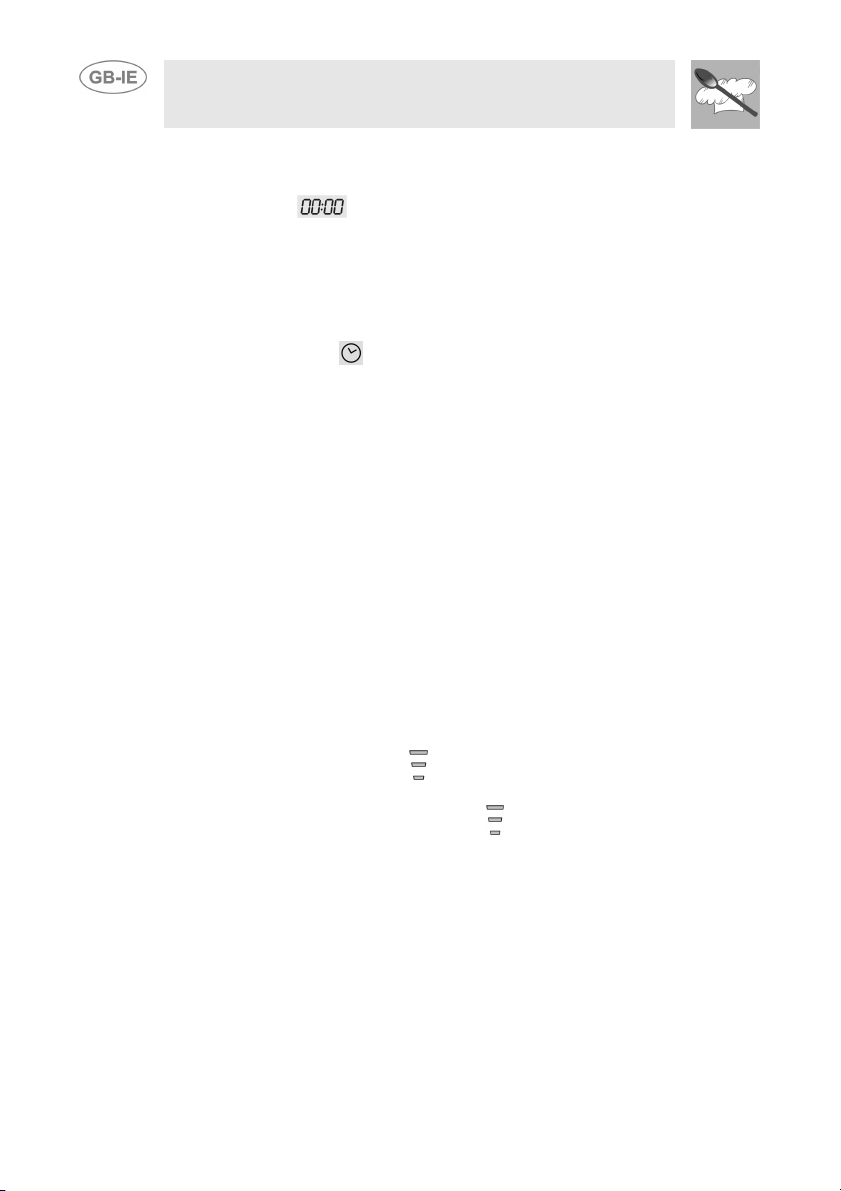
7.3 First use
At first use, or after a power failure, the oven's left hand-display, DSP1, will
show a flashing symbol. To start any cooking operation, the current
time must be set.
7.3.1 Setting the current time
To set the current time, turn PT1 to the right and left to increase or
decrease the hours. Press it once to move on to setting the minutes. Turn
it the right and left to increase or decrease the minutes and press it to set
the current time. The symbol will appear on the display, which will stop
flashing.
7.3.2 Changing the current time
It might become necessary to change the current time, for example at the
switch from summer to winter time. To do this, starting from the standby
setting (see point “7.2 Operating modes”) keep PT1 pressed until the
figures on DSP1 flash. Now repeat the operations described in point “7.3.1
Setting the current time”.
7.4 Selecting the function
In the ON state only, a cooking function can be selected by simply turning
PT2 to the right or left. The function selected will change colour to red on
DSP3. The preset cooking temperature will be displayed on DSP2.
7.4.1 Cooking with preset temperature
After selection of the function required, the oven will start the cooking
procedure at the preset temperature. Cooking itself is preceeded by a
preheating stage, which allows the oven to heat to the cooking
temperature more quickly. The ° symbol flashes on DSP2 to indicate that
this stage is in progress. The symbols will light up one at a time, from
the bottom up, indicating the rise in the temperature inside the oven. When
the preheating stage is over, the ° and symbols will remain constantly
on to indicate that the food can be placed inside the oven.
7.4.2 Changing the preset temperature
The temperature preset for each function can be changed to suit the user's
requirements.
At any time while cooking is in progress, turn PT1 in either direction to
increase or decrease the cooking temperature by 5 degrees at a time. PT1
can also be held in the left or right position to increase or decrease the
setting more quickly.
 Loading...