


 Loading...
HiPath 1100
HiPath 1120
HiPath 1150
HiPath 1190
System Telephones optiPoint 500 economy optiPoint 500 basic optiPoint 500 standard optiPoint 500 advance
User Manual

Introduction
Introduction
The HiPath 1100 family consists of the following systems: HiPath 1120, HiPath 1150 and HiPath 1190. The features and operation of these systems are very similar. Their differences stem from their capability regarding the number of extensions, external lines and optional modules available.
The following documentation package was developed to describe the characteristics for these systems:
•User Manual:
This manual describes step by step how to operate and use the features provided by each system.
•Programming Manual:
The Configuration Manual briefly describes the installation of HiPath 1120, HiPath 1150 and HiPath 1190 systems as well as the programming codes for the entire family of systems. It highlights the specific characteristics of each system.
•System Telephones Instruction Manual:
It is included with the telephone package and describes how to setup and use the telephone sets.
•Quick Reference Guide for Standard and System Telephones:
This guide provides summarized information on how to use the different codes for the features of each system:
•Attendant Console Quick Reference Guide:
This guide provides summarized information on how to use a system telephone as an Attendant Console.
•Service Manual.
This manual contains information regarding Siemens distributors and Service Centers where you can request maintenance service and programming assistance as well as purchase products and options for your Communications Systems.
•Warranty Certificate:
This Certificate defines the terms and conditions of the warranty provided by Siemens.
About This User Manual
This manual describes the operation and implementation of the HiPath 1100 system features with the system telephones optiPoint 500 economy, optiPoint 500 basic, optiPoint 500 standard and optiPoint 500 advance. It also describes all feature codes and functions provided by your system. Some functions may not be available with your system. The reasons for this are the following:
•The function is not configured for your type of line and/or system. Ask your System Administrator for further information.
•Your communications platform does not support the feature. Ask about upgrade capabilities for your system.
2
Introduction
Important Notes
Do not install the system or telephone sets where there may be a risk of explosion.
To ensure optimal performance and operation use only original accessories manufactured by Siemens.
Never open the system or dismantle any of the telephones. If you have any problems, ask for assistance from your System Administrator.
Care of the equipment
Avoid putting the system and telephones in contact with coloring liquids or other damaging fluids such as tea, coffee, fruit juices or soft drinks.
The information in this document provides only general descriptions of the features. The actual features may not correspond exactly to the descriptions herein and, furthermore, they are subject to changes to the extent that products continue to be developed.
The selection of features to be provided is not binding unless explicitly established in the terms of the contract.
Trademarks
This equipment conforms to the EU Directive 1999/5/EG, as attested by the CE mark.
This device has been manufactured in accordance with our certified environmental management system (ISO 14001). This process ensures the lowest consumption of raw materials and energy as well as the lowest production of industrial waste.
For compliance with EU directives, do not discard any batteries, electrical or electronic equipment marked with this symbol in common household garbage. Discard this type of waste at a local recycling or waste disposal facility.
3

Introduction
Introduction
Introduction. . . . . . . . . . . . . . . . . . . . . . . . . . . . . . . . . . .2
About This User Manual . . . . . . . . . . . . . . . . . . . . . . . . . . . . . . . . . . . . . 2
Important Notes . . . . . . . . . . . . . . . . . . . . . . . . . . . . . . . . . . . . . . . . . . . 3
Trademarks . . . . . . . . . . . . . . . . . . . . . . . . . . . . . . . . . . . . . . . . . . . . . . . 3
Telephone Reference Information . . . . . . . . . . . . . . .9
Front panel: optiPoint 500/basic/standard/economy . . . . . . . . . . . . . . . . 9 Front Panel: optiPoint 500 advance optiPoint key module . . . . . . . . . . 10 Back panel: optiPoint 500 . . . . . . . . . . . . . . . . . . . . . . . . . . . . . . . . . . . 11 How to use this manual. . . . . . . . . . . . . . . . . . . . . . . . . . . . . . . . . . . . . 12 Display Message/Prompts . . . . . . . . . . . . . . . . . . . . . . . . . . . . . . . . . . 13 Accessing a Feature . . . . . . . . . . . . . . . . . . . . . . . . . . . . . . . . . . . . . . . 13
... Directly. . . . . . . . . . . . . . . . . . . . . . . . . . . . . . . . . . . . . . . . . . . . . 13
... using the Service Menu . . . . . . . . . . . . . . . . . . . . . . . . . . . . . . . 13
... Using a programmable key . . . . . . . . . . . . . . . . . . . . . . . . . . . . . 14 System Support Technician. . . . . . . . . . . . . . . . . . . . . . . . . . . . . . . . . . 14
Using the HiPath 1100 Features. . . . . . . . . . . . . . . . .15
Considerations. . . . . . . . . . . . . . . . . . . . . . . . . . . . . . . . . . . . . . . . . . . . 15 Numbering Plan. . . . . . . . . . . . . . . . . . . . . . . . . . . . . . . . . . . . . . . . . . . 15 optiPoint 500 Properties and Connection Options . . . . . . . . . . . . . . . . 16 System signaling tones . . . . . . . . . . . . . . . . . . . . . . . . . . . . . . . . . . . . . 17
Functions used for making calls . . . . . . . . . . . . . . . .18
Making Calls . . . . . . . . . . . . . . . . . . . . . . . . . . . . . . . . . . . . . . . . . . . . . 18 Considerations . . . . . . . . . . . . . . . . . . . . . . . . . . . . . . . . . . . . . . . . . 18
... Using the Handset . . . . . . . . . . . . . . . . . . . . . . . . . . . . . . . . . . . . 18
... Using the Speakerphone . . . . . . . . . . . . . . . . . . . . . . . . . . . . . . . 19
... with the Headset . . . . . . . . . . . . . . . . . . . . . . . . . . . . . . . . . . . . . 19
... With the Handset on the Hook . . . . . . . . . . . . . . . . . . . . . . . . . . 19
... Using Automatic Seizure of
an Active External Line . . . . . . . . . . . . . . . . . . . . . . . . . . . . . . . . . . 20
... Using a Group of External Lines . . . . . . . . . . . . . . . . . . . . . . . . . 20 Switching to Speakerphone. . . . . . . . . . . . . . . . . . . . . . . . . . . . . . . . . . 21
4

Introduction
Switching to Handset . . . . . . . . . . . . . . . . . . . . . . . . . . . . . . . . . . . . . . 21 Switching to a Headset . . . . . . . . . . . . . . . . . . . . . . . . . . . . . . . . . . . . . 21 Speaker . . . . . . . . . . . . . . . . . . . . . . . . . . . . . . . . . . . . . . . . . . . . . . . . . 22 Ending a Call . . . . . . . . . . . . . . . . . . . . . . . . . . . . . . . . . . . . . . . . . . . . . 22 Seizure of a Specific Line . . . . . . . . . . . . . . . . . . . . . . . . . . . . . . . . . . . 23 Speed Dialing. . . . . . . . . . . . . . . . . . . . . . . . . . . . . . . . . . . . . . . . . . . . . 23
Programming Individual Speed Dialing . . . . . . . . . . . . . . . . . . . . . . 24 Phonebook Search. . . . . . . . . . . . . . . . . . . . . . . . . . . . . . . . . . . . . . . . . 27 Caller Lists . . . . . . . . . . . . . . . . . . . . . . . . . . . . . . . . . . . . . . . . . . . . . . . 29 External Line Reservation . . . . . . . . . . . . . . . . . . . . . . . . . . . . . . . . . . . 31 For Internet Access . . . . . . . . . . . . . . . . . . . . . . . . . . . . . . . . . . . . . 32 Recall . . . . . . . . . . . . . . . . . . . . . . . . . . . . . . . . . . . . . . . . . . . . . . . . . . . 32 Override. . . . . . . . . . . . . . . . . . . . . . . . . . . . . . . . . . . . . . . . . . . . . . . . . 34 Silent Monitoring . . . . . . . . . . . . . . . . . . . . . . . . . . . . . . . . . . . . . . . . . . 35 Hotline . . . . . . . . . . . . . . . . . . . . . . . . . . . . . . . . . . . . . . . . . . . . . . . . . . 36 Warmline . . . . . . . . . . . . . . . . . . . . . . . . . . . . . . . . . . . . . . . . . . . . . 36 Calling an Attendant Console (AC). . . . . . . . . . . . . . . . . . . . . . . . . . . . . 37 Direct Communication Call . . . . . . . . . . . . . . . . . . . . . . . . . . . . . . . . . . 37 Speakerphone Auto-Answering Mode . . . . . . . . . . . . . . . . . . . . . . . . . 38 LCR . . . . . . . . . . . . . . . . . . . . . . . . . . . . . . . . . . . . . . . . . . . . . . . . . . . . 38 ACS . . . . . . . . . . . . . . . . . . . . . . . . . . . . . . . . . . . . . . . . . . . . . . . . . . . . 39 Timer for Outgoing External Calls . . . . . . . . . . . . . . . . . . . . . . . . . . . . . 41 DISA . . . . . . . . . . . . . . . . . . . . . . . . . . . . . . . . . . . . . . . . . . . . . . . . . . . 41 Using a Temporary MSN to make a call . . . . . . . . . . . . . . . . . . . . . . . . 43
Features used during
Call . . . . . . . . . . . . . . . . . . . . . . . . . . . . . . . . . . . . . . . . . 44
Consultation. . . . . . . . . . . . . . . . . . . . . . . . . . . . . . . . . . . . . . . . . . . . . . 44 Transfer . . . . . . . . . . . . . . . . . . . . . . . . . . . . . . . . . . . . . . . . . . . . . . . . . 45 Toggle . . . . . . . . . . . . . . . . . . . . . . . . . . . . . . . . . . . . . . . . . . . . . . . . . . 47 Conference . . . . . . . . . . . . . . . . . . . . . . . . . . . . . . . . . . . . . . . . . . . . . . 47 Parking. . . . . . . . . . . . . . . . . . . . . . . . . . . . . . . . . . . . . . . . . . . . . . . . . . 48 Suffix Dialing . . . . . . . . . . . . . . . . . . . . . . . . . . . . . . . . . . . . . . . . . . . . . 49 Flash on External Analog Line . . . . . . . . . . . . . . . . . . . . . . . . . . . . . . . . 49 Recovering a Call on Hold . . . . . . . . . . . . . . . . . . . . . . . . . . . . . . . . . . . 50 Cost Code . . . . . . . . . . . . . . . . . . . . . . . . . . . . . . . . . . . . . . . . . . . . . . . 50
5

Introduction
Functions used for Receiving Calls . . . . . . . . . . . . .51
Answering Calls. . . . . . . . . . . . . . . . . . . . . . . . . . . . . . . . . . . . . . . . . . . 51 Answering a Call on Hold. . . . . . . . . . . . . . . . . . . . . . . . . . . . . . . . . 52 Pickup . . . . . . . . . . . . . . . . . . . . . . . . . . . . . . . . . . . . . . . . . . . . . . . . . . 53 Group . . . . . . . . . . . . . . . . . . . . . . . . . . . . . . . . . . . . . . . . . . . . . . . . 53 Individual . . . . . . . . . . . . . . . . . . . . . . . . . . . . . . . . . . . . . . . . . . . . . 54 Call Forwarding . . . . . . . . . . . . . . . . . . . . . . . . . . . . . . . . . . . . . . . . . . . 55 Internal. . . . . . . . . . . . . . . . . . . . . . . . . . . . . . . . . . . . . . . . . . . . . . . 55 External . . . . . . . . . . . . . . . . . . . . . . . . . . . . . . . . . . . . . . . . . . . . . . 55 When there is no answer . . . . . . . . . . . . . . . . . . . . . . . . . . . . . . . . 56 For Fax/DID . . . . . . . . . . . . . . . . . . . . . . . . . . . . . . . . . . . . . . . . . . . 57 Conditional . . . . . . . . . . . . . . . . . . . . . . . . . . . . . . . . . . . . . . . . . . . . 58 Deactivating Call Forwarding . . . . . . . . . . . . . . . . . . . . . . . . . . . . . . 59 Do Not Disturb . . . . . . . . . . . . . . . . . . . . . . . . . . . . . . . . . . . . . . . . . . . 60 Voice Mail . . . . . . . . . . . . . . . . . . . . . . . . . . . . . . . . . . . . . . . . . . . . . . . 61 Message Waiting Indicator (MWI). . . . . . . . . . . . . . . . . . . . . . . . . . . . . 62 MWI for System Telephones. . . . . . . . . . . . . . . . . . . . . . . . . . . . . . 62 Activating the Reception of an Internal MWI. . . . . . . . . . . . . . . . . . 64 Accessing your Mailbox. . . . . . . . . . . . . . . . . . . . . . . . . . . . . . . . . . 64 Voice Mail Forwarding . . . . . . . . . . . . . . . . . . . . . . . . . . . . . . . . . . . 65 Leaving a message . . . . . . . . . . . . . . . . . . . . . . . . . . . . . . . . . . . . . 65 Entry Voice Mail (EVM) . . . . . . . . . . . . . . . . . . . . . . . . . . . . . . . . . . . . . 66 Configuring a Personal Mailbox . . . . . . . . . . . . . . . . . . . . . . . . . . . . 67 Personal Mailbox Activation. . . . . . . . . . . . . . . . . . . . . . . . . . . . . . . 67 Checking your Personal Voice Mailbox . . . . . . . . . . . . . . . . . . . . . . 68 Second Attendant . . . . . . . . . . . . . . . . . . . . . . . . . . . . . . . . . . . . . . . . . 69 Groups. . . . . . . . . . . . . . . . . . . . . . . . . . . . . . . . . . . . . . . . . . . . . . . . . . 70 Call Groups (CG) . . . . . . . . . . . . . . . . . . . . . . . . . . . . . . . . . . . . . . . 70 Hunt Groups (HG) . . . . . . . . . . . . . . . . . . . . . . . . . . . . . . . . . . . . . . 70 Hunt Group (HG) and Call Group (CG) Login and Logout. . . . . . . . . 71 UCD Subscriber Groups. . . . . . . . . . . . . . . . . . . . . . . . . . . . . . . . . . 73 UCD Group Login/Logout . . . . . . . . . . . . . . . . . . . . . . . . . . . . . . . . 73 Available/Unavailable Agent for a UCD Group . . . . . . . . . . . . . . . . . 75 UCD Agent in Service/Out of Service . . . . . . . . . . . . . . . . . . . . . . . 75 Collect Call Barring . . . . . . . . . . . . . . . . . . . . . . . . . . . . . . . . . . . . . . . . 76 Overflow extension . . . . . . . . . . . . . . . . . . . . . . . . . . . . . . . . . . . . . . . . 76
6

Introduction
Miscellaneous Functions. . . . . . . . . . . . . . . . . . . . . . 77
Changing the Password for the Electronic Lock . . . . . . . . . . . . . . . . . . 77 Electronic Lock . . . . . . . . . . . . . . . . . . . . . . . . . . . . . . . . . . . . . . . . . . . 77 Music on Hold . . . . . . . . . . . . . . . . . . . . . . . . . . . . . . . . . . . . . . . . . . . . 78 Busy Signal when extension is busy . . . . . . . . . . . . . . . . . . . . . . . . . . . 79 Language/Country Settings . . . . . . . . . . . . . . . . . . . . . . . . . . . . . . . . . . 79 Relay . . . . . . . . . . . . . . . . . . . . . . . . . . . . . . . . . . . . . . . . . . . . . . . . . . . 81
Relay Status Check . . . . . . . . . . . . . . . . . . . . . . . . . . . . . . . . . . . . . 82 Acknowledging/deactivating a General Alarm . . . . . . . . . . . . . . . . . . . . 83 Deactivating a General Alarm. . . . . . . . . . . . . . . . . . . . . . . . . . . . . . 83 Alarm clock . . . . . . . . . . . . . . . . . . . . . . . . . . . . . . . . . . . . . . . . . . . . . . 83 Scheduling Time Reminders . . . . . . . . . . . . . . . . . . . . . . . . . . . . . . 84 Deleting/Checking a Scheduled Time Reminder . . . . . . . . . . . . . . . 85 Scheduled Time Reminder Call . . . . . . . . . . . . . . . . . . . . . . . . . . . . 85 COS (Class of Service) Changeover . . . . . . . . . . . . . . . . . . . . . . . . . . . 86 Data Protection . . . . . . . . . . . . . . . . . . . . . . . . . . . . . . . . . . . . . . . . . . . 86 Call Waiting Signaling Tone . . . . . . . . . . . . . . . . . . . . . . . . . . . . . . . . . . 87 Deactivating a Feature. . . . . . . . . . . . . . . . . . . . . . . . . . . . . . . . . . . . . . 87 Room Monitor . . . . . . . . . . . . . . . . . . . . . . . . . . . . . . . . . . . . . . . . . . . . 88 Room Monitor . . . . . . . . . . . . . . . . . . . . . . . . . . . . . . . . . . . . . . . . . 88 Night Service . . . . . . . . . . . . . . . . . . . . . . . . . . . . . . . . . . . . . . . . . . . . . 89 Call Forwarding when there is no answer on a for digital lines . . . . . . . 90 Door Opener . . . . . . . . . . . . . . . . . . . . . . . . . . . . . . . . . . . . . . . . . . . . . 91 Activating System Programming . . . . . . . . . . . . . . . . . . . . . . . . . . . . . . 91 Remote Configuration . . . . . . . . . . . . . . . . . . . . . . . . . . . . . . . . . . . 92 Fax Received . . . . . . . . . . . . . . . . . . . . . . . . . . . . . . . . . . . . . . . . . . . . . 93 Associated Group . . . . . . . . . . . . . . . . . . . . . . . . . . . . . . . . . . . . . . . . . 94 Redial. . . . . . . . . . . . . . . . . . . . . . . . . . . . . . . . . . . . . . . . . . . . . . . . . . . 94 Call Charge Consultation . . . . . . . . . . . . . . . . . . . . . . . . . . . . . . . . . . . . 95 Programming the Keys . . . . . . . . . . . . . . . . . . . . . . . . . . . . . . . . . . . . . 96 Procedure for programming the keys . . . . . . . . . . . . . . . . . . . . . . . 96 Features for Programmable Keys . . . . . . . . . . . . . . . . . . . . . . . . . . 97 Programming the Procedure Key. . . . . . . . . . . . . . . . . . . . . . . . . . . 99 Printing Key Labels . . . . . . . . . . . . . . . . . . . . . . . . . . . . . . . . . . . . 100 End key . . . . . . . . . . . . . . . . . . . . . . . . . . . . . . . . . . . . . . . . . . . . . 100
Features for Programmable Keys
only on the HiPath 1100 Manager . . . . . . . . . . . . . . . . . . . . . . . . . 101 Headset . . . . . . . . . . . . . . . . . . . . . . . . . . . . . . . . . . . . . . . . . . . . . . . . 102 Storing a phone number in a programmable key. . . . . . . . . . . . . . . . . 104 Date and Time Settings . . . . . . . . . . . . . . . . . . . . . . . . . . . . . . . . . . . . 105
7

Introduction
Special functions for ISDN lines. . . . . . . . . . . . . . .106
Call Forwarding on a Digital Line . . . . . . . . . . . . . . . . . . . . . . . . . . . . . 106 Deactivation of Call Forwarding . . . . . . . . . . . . . . . . . . . . . . . . . . . 107 Anonymous Caller ID (Call Trace) . . . . . . . . . . . . . . . . . . . . . . . . . . . . 108 Restriction for sending MSN . . . . . . . . . . . . . . . . . . . . . . . . . . . . . . . . 108
Practical Guide. . . . . . . . . . . . . . . . . . . . . . . . . . . . . .110
Care of the Telephone . . . . . . . . . . . . . . . . . . . . . . . . . . . . . . . . . . 110
Troubleshooting . . . . . . . . . . . . . . . . . . . . . . . . . . . . . . . . . . . . . . . 110
System Error Messages . . . . . . . . . . . . . . . . . . . . . . . . . . . . . . . . 111
Display Messages . . . . . . . . . . . . . . . . . . . . . . . . . . . . . . . . . . . . . 112
Index. . . . . . . . . . . . . . . . . . . . . . . . . . . . . . . . . . . . . . .113 Terminals, Adapters and Accessories. . . . . . . . . .117
Feature Codes . . . . . . . . . . . . . . . . . . . . . . . . . . . . . . .118
Symbols. . . . . . . . . . . . . . . . . . . . . . . . . . . . . . . . . . . . . . . . . . . . . . . . 118 Numbering Plan. . . . . . . . . . . . . . . . . . . . . . . . . . . . . . . . . . . . . . . . . . 118 Features . . . . . . . . . . . . . . . . . . . . . . . . . . . . . . . . . . . . . . . . . . . . . . . 119 System Telephone Features . . . . . . . . . . . . . . . . . . . . . . . . . . . . . 119 Seizure of an External Line . . . . . . . . . . . . . . . . . . . . . . . . . . . . . . 119 Functions Used for Making Calls . . . . . . . . . . . . . . . . . . . . . . . . . . 120 Functions used during Calls. . . . . . . . . . . . . . . . . . . . . . . . . . . . . . 121 Functions Used When Receiving Calls . . . . . . . . . . . . . . . . . . . . . 122 Miscellaneous functions . . . . . . . . . . . . . . . . . . . . . . . . . . . . . . . . 123 Alarm Clock . . . . . . . . . . . . . . . . . . . . . . . . . . . . . . . . . . . . . . . . . . 124 Satellite PABX . . . . . . . . . . . . . . . . . . . . . . . . . . . . . . . . . . . . . . . . 125 Functions for ISDN Lines. . . . . . . . . . . . . . . . . . . . . . . . . . . . . . . . 125
8
Telephone Reference Information
Telephone Reference Information
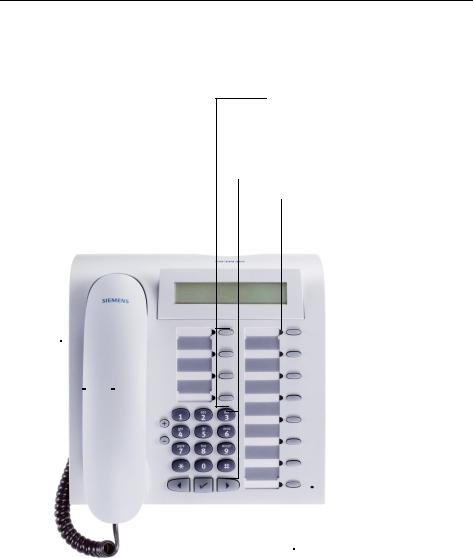
Front panel: optiPoint 500/basic/standard/economy
Speaker |
|
|
|
|
|
|
|
||
for Speaker- |
|
|
|
|
|
Display, |
|||
phone |
|
|
|
|
|
||||
|
|
|
|
|
2 lines, |
||||
and ring tones |
|
|
|
|
|
||||
|
|
|
|
|
24 characters |
||||
|
|
|
|
|
|
|
|
||
|
Handset |
|
|
|
|
|
per line |
||
|
|||||||||
|
|
|
|
|
|
|
|
||
|
|
|
|
|
|
|
|
|
|
|
|
|
|
|
|
|
|
|
|
|
|
|
|
|
|
|
|
|
|
Key labels– Preset Function keys: Service Menu
Redial
Microphone on/off or internal Speaker
Keypad
LEDs
Key label
Programmable keys
|
|
|
|
|
|
|
|
|
|
|
|
|
|
|
|
|
|
|
|
|
|
|
|
|
|
|
|
|
|
|
|
|
|
|
|
|
|
|
|
|
|
|
|
|
|
|
|
|
|
|
|
|
|
|
|
|
|
|
|
|
|
|
|
|
|
|
|
|
|
|
|
|
|
|
|
|
|
|
|
|
|
|
|
|
|
|
|
|
|
|
Preset |
|
|
|
|
|
|
|
|
|
|
|
|
|
|
||
|
|
|
|
|
|
|
|
|
|||
|
|
|
|
|
|
|
Function key: |
|
|
|
|
|
|
|
|
|
|
|
End |
|
|
|
|
|
|
|
|
|
|
|
|
|
|
|
|
Keys for |
Keys for selecting |
a |
|
Enter key |
Microphone for Speakerphone |
||||||
configuring |
function |
for selecting |
(optiPoint 500 standard only) |
||||||||
the telephone |
|
|
|
a function |
|
|
|
||||
9
Telephone Reference Information
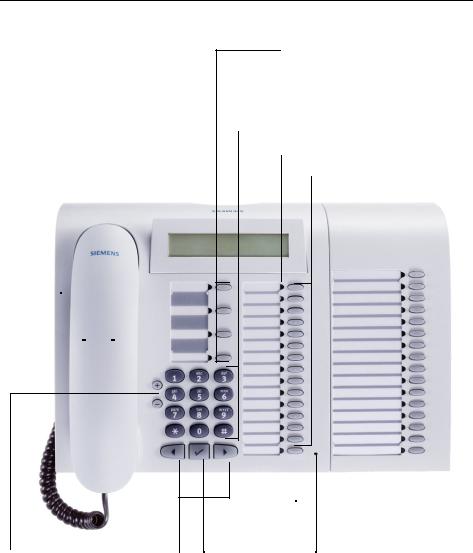
Front Panel: optiPoint 500 advance optiPoint key module
Speaker |
|
|
|
|
|
Lighted display, |
||||
for Speaker- |
|
|
|
|
|
2 lines, |
||||
phone |
|
|
|
|
|
24 characters per |
||||
and ring tones |
|
|
|
|
|
line |
||||
|
Handset |
|
|
|
|
|
|
|
|
|
|
|
|
|
|
|
|
|
|
|
|
|
|
|
|
|
|
|
|
|
|
|
|
|
|
|
|
|
|
|
|
|
|
Key labels– Preset Function keys: Service Menu
Redial
Microphone on/off or internal speaker
Keypad
LEDs
Key labels . Programmable keys
Preset |
|
|
optiPoint key module |
||
Function key: |
with additional keys |
|
End |
programmable keys |
|
Keys for |
Keys for selecting |
Enter key |
Microphone for speakerphone |
|
configuring |
||||
a function |
for selecting |
|
||
the telephone |
|
|||
|
a function |
|
||
|
|
|
10
Telephone Reference Information
Back panel: optiPoint 500
PC (USB) |
Headset |
|
|
|
|
|
HiPath 1100 |
|
|
|
|
Handset
optiPoint key module or optiPoint BLS
optiPoint adapter
For connections/accessories availability information for each optiPoint 500 model see Chapter ”optiPoint 500 Properties and Connection Options” Æ page 16 and Chapter ”Terminals, Adapters and Accessories” Æ page 117
11
Telephone Reference Information
Passo a passo |
|
|
* |
8 |
8 , ... |
|
|
uor v |
Service Menu |
|
|
Speaker |
|
|
CONSULTATION? |
|
: |
>Ring Tone? |
|
: |
|
|
<< >> |
12 |
|
|
How to use this manual
The steps for programming the system are presented sequentially in graphic format under the column "Step by Step" on the left side of each page.
Symbol Explanations: Lift the handset. Replace the handset. Initiate conversation.
Enter numbers, keys, passwords, internal or external phone numbers, etc.
Press keys to configure telephone settings. Press this key.
Press the key with the LED turned on. Press the blinking LED key.
The display shows the function available at the moment.
To activate the function indicated press .
To browse through available functions press <>,
until the function shows on the display. Then press :to confirm your selection.
Wait to hear an audible tone through the handset or speaker.
An extension is calling.
When activating certain functions and procedures, a long beeping tone means the activation was successful.
When activating certain functions and procedures, short beeping tones mean the activation failed.
Telephone Reference Information
Passo a passo |
|
|
06:30 |
MON OCT 03 05 |
|
27 |
HiPath 1100> |
|
>FORWARDING ON? |
: |
|
RECALL? |
|
: |
|
|
or |
>Directory? |
|
: |
Service Menu |
|
|
>#0=RESET SRVC.? |
: |
|
|
|
or |
|
rd |
|
Display Message/Prompts
Line 1 displays time, date, requests, error messages and confirmation messages, as appropriate.
Line 2 displays the internal number, the system’s name, and available options that can be selected by pressing :. If the ">" appears on the right, it means there are
more options available. Options can be accessed using
<>.
Accessing a Feature
... Directly
Certain features can be selected directly, for instance: Select using <>then confirm by pressing :.
Certain features may be selected directly during a call, under certain conditions. For example, a call to a busy extension:
Confirm your selection by pressing .
Select using <>then confirm by pressing :.
... using the Service Menu
To make these selections you must first press the Service Menu key and chose an option, for example: "#0=FEATURES OFF
Press this key.
Select using <>then confirm by pressing :.
Enter the code.
Additional options are available under "MORE FEATURES" in the Service Menu. For example, "*11 =FORWARDING ON ?" These options are also available when the phone is in Sleep Mode or during calls, but without the code.
13

Telephone Reference Information
Passo a passo
|
Press this key. |
Service Menu |
>MORE FEATURES? : Select using <>then confirm by pressing :.
>*11=FORWARDING ON? : Select using <>then confirm by pressing :.
... Using a programmable key
When a key has been programmed for a certain feature, simply press the key to activate the feature. For example:
Press the "CONFERENCE" key to activate this feature.
 ”Feature Codes” Æ page 118
System Support Technician
The Support Technician is the person responsible for programming your HiPath 1100. The Support Technician has all the necessary tools and information available in sorder to carry out his/her job.
Assistance with Troubleshooting
First contact your System Support Technician. If the problem is not solved, the Support Technician should call Technical Support.
14

Using the HiPath 1100 Features
Using the HiPath 1100 Features
Considerations
Feature descriptions and examples available for HiPath 1100are based on a standard optiPoint 500 system telephone model.
Check specific procedure to be followed for the different system telephone models. For information on how to configure each model, see the appropriate Instructions Manual.
All basic features are described in the Quick Reference Guide For System Telephones.
The information in this document provides only general descriptions of the features. The actual features may not correspond exactly to the descriptions herein and, furthermore, they are subject to changes to the extent that products continue to be developed.
The selection of features to be provided is not binding unless explicitly established in the terms of the contract.
Numbering Plan
A Numbering Plan assigns extensions, external lines, and groups - as well as other numbers that can be selected with features and programming codes - to execute specific functions.
Description |
HiPath 1120 |
HiPath 1150 |
HiPath 1190 |
|
|
|
|
External line |
801 to 808 |
801 to 832 |
801 to 845 |
|
|
|
|
Extension, including S0 |
11 to 30 |
11 to 60 |
101 to 240 |
|
|
610 to 645 |
|
|
|
|
|
Groups of external lines |
0 or 890 to 899 |
|
|
|
|
|
|
Call Groups (CG) |
770 to 779 |
|
|
|
|
|
|
Hunt Groups (HG) |
780 to 789 |
|
|
|
|
|
|
UCD Subscriber Groups |
790 to 799 |
|
|
|
|
|
|
Carrier |
9 |
|
|
|
|
|
|
EVM - Default internal number |
790 |
|
|
|
|
|
|
EVM - Message ports |
7491 and 7492 |
|
|
|
|
|
|
EVM - Virtual ports |
744 to 747 |
|
|
|
|
|
|
Fax/DID - Virtual ports for messages |
740 to 743 |
|
|
|
|
|
|
USB/CAPI line |
10 |
|
100 |
|
|
|
|
Substitution for * and # |
75 and 76 (accordingly) |
|
|
|
|
|
|
15

Using the HiPath 1100 Features
Note:
The number of external lines and extensions available depends on the system’s configuration.
optiPoint 500 Properties and Connection Options
optiPoint 5001 |
economy |
basic |
standard |
advance |
|
Function keys |
12 |
12 |
12 |
20 |
|
|
|
|
|
|
|
Full-Duplex Speakerphone |
- |
- |
Yes |
Yes |
|
Feature |
|
|
|
|
|
|
|
|
|
|
|
Display backlight |
- |
- |
- |
Yes |
|
|
|
|
|
|
|
Headset connection: |
|
|
|
|
|
• |
Built-in interface |
- |
- |
- |
Yes |
• |
Adapter |
- |
Yes |
Yes |
Yes |
• |
Handset Interface |
Yes |
Yes |
Yes |
Yes |
|
|
|
|
|
|
USB Interface |
- |
Yes |
Yes |
Yes |
|
|
|
|
|
|
|
Additional terminal interface |
- |
Yes |
Yes |
Yes |
|
(slave) |
|
|
|
|
|
|
|
|
|
|
|
Adapter slots |
0 |
1 |
1 |
2 |
|
|
|
|
|
|
|
[1] The name and type are printed on the bottom of the optiPoint 500 telephone set.
16

Using the HiPath 1100 Features
System signaling tones
During feature configuration the system uses the following signaling tones:
Tone |
Meaning |
|
|
Internal dialing tone |
The system is ready to receive and send call information. |
|
|
Signaling tone |
Connection established. Ring signal is being applied to |
|
phone number. |
|
|
Dial tone |
Network accepted information request and is sending a re- |
|
quest for more information. |
|
|
Busy signal |
It indicates to the caller that the number is busy. |
|
It is also used when the destination cannot be accessed |
|
(e.g., invalid number). |
|
|
External false signal |
The dial tone that is heard is not from the carrier |
|
|
Call Waiting Signaling Tone |
It indicates to the user having a conversation that there is |
|
another call ringing. |
|
|
Call Waiting tone for Door |
It indicates to the user having a conversation that someone |
Opener |
is requesting the Door Opener to open the door. |
|
|
Confirmation tone |
The procedure was successfully completed and accepted. |
|
|
Rejection tone |
The procedure is invalid and was not accepted. |
|
|
Override tone |
It alerts the user having a conversation that the call’s priva- |
|
cy was violated (override). |
|
|
Conference tone |
It indicates that a new participant joined the conversation. |
|
|
Recall confirmation tone |
It confirms a callback. |
|
|
Alert signal |
It alerts the called party when the Speakerphone Auto-An- |
|
swering and Paging features are enabled. |
|
|
Special Dial Tone |
Indicates that a service is activated (Night Service, Elec- |
|
tronic Lock, Do Not Disturb, etc.) |
|
|
Auto-Answering Tone |
After a Direct Communication Call is established. |
|
|
17

Functions used for making calls
Step by step
Functions used for making calls
Making Calls
Considerations
•When authorized, it allows you to call external numbers1 on a public network.
•The HiPath 1100 can also be programmed to require pressing the "Internal" key before an internal number can be dialed. When this is the case, there is no need to enter an external line access code to dial an
external number ("Automatic Seizure of an External Line2Check with the Support Technician for your system.
•Ask your Support Technician for the required internal numbers, public network access codes as well as information about enabled features and available extensions.
•Depending on how the HiPath 1100 is programmed (ask the system’s technical support team) it will automatically select the most economical route for making an external call (LCR - Least Cost Routing). When an LCR is not available, the non-default carrier name or "EXPENSIVE CONN" appears on the display, and a warning tone is emitted.
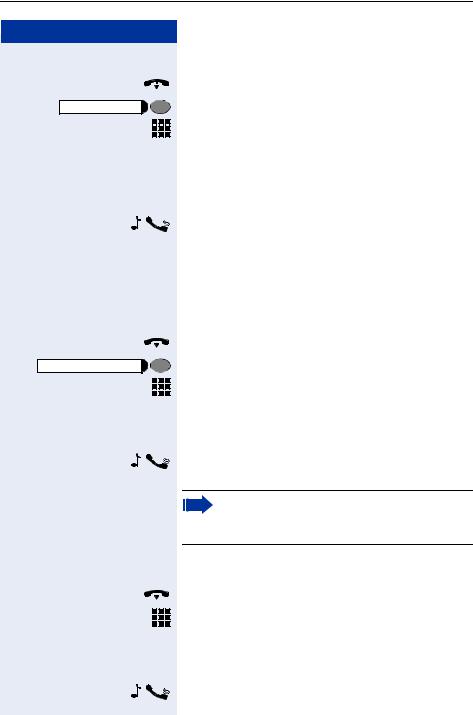
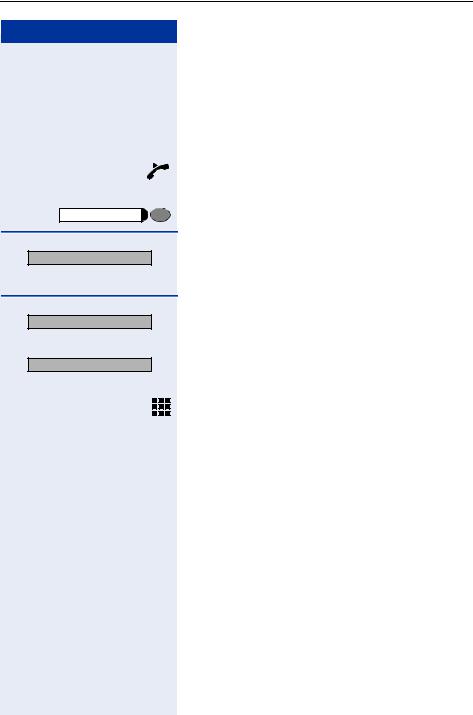
... Using the Handset
Lift the handset.
• For an internal call: Enter an extension number (e.g., 11/101).
•For an external calls: enter the code for accessing an external line (e.g., 0) and the external number you want to call.
Wait for the call to be answered. Initiate conversation.
[1]See the chapter Important Programming Data - Classes of Service in the Programming Manual.
[2]It allows the user to dial an external call directly, without having to dial an external access code (e.g., 0). If a continuous dialing tone is heard when the handset is lifted, it means that Automatic Seizure Mode is active (see Programming na External Line - Automatic Seizure of an External Line, in the Programming Manual).
18
Functions used for making calls
Step by step |
Speaker |
HEADSET ON |
... Using the Speakerphone
Handset on the hook.
Press this key.
•For an internal call: Enter an extension number (e.g., 11/101).
or
•For an external call: Enter the access code for an external line (e.g., 0) the external number you want to call.
Wait for the call to be answered. Initiate conversation.
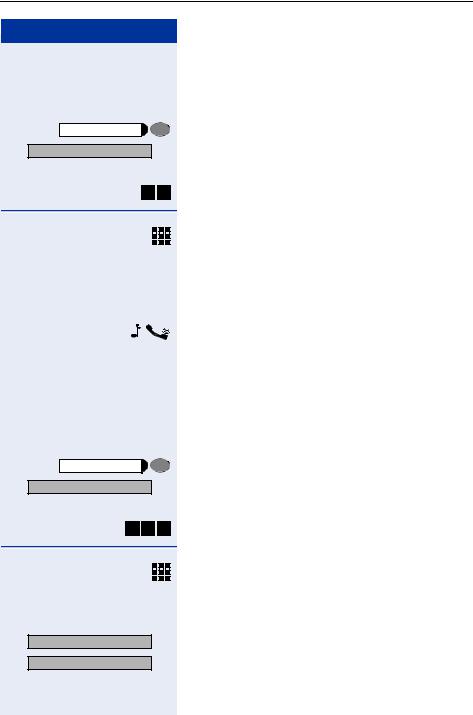
... with the Headset
Required: A headset must be connected. A key has been programmed for the "Headset" feature or the headset has an electronic control button that acts as the hook (see Headset feature).
Handset on the hook.
Press the HEADSET ON key.
•For an internal call: Enter an extension number (e.g., 11/101).
•For external calls: Enter the access code for accessing an external line (e.g., 0) and the external number you want to call.
Wait for the call to be answered. Initiate conversation.
Headsets do not send a call ending tone (busy signal) at the end of a call.
... With the Handset on the Hook
Handset on the hook.
•For an internal call: Enter an extension number (e.g., 11/101).
•For an external call: Enter the access code for accessing an external line (e.g., 0) and the external number you want to call.
Wait for the call to be answered. Initiate conversation.
19

Functions used for making calls
Step by step
... Using Automatic Seizure of an Active External Line
•Internal call
INTERNAL |
|
|
|
|
|
|
Press the "INTERNAL" key. |
|
|
|
|
|
|
|
Enter an extension number (e.g., 11/101). |
|
|
|
|
|
|
|
|
|
|
|
|
|
|
|
|
|
|
|
|
|
|
|
•External calls:
Enter the external number you want to call.
Wait for the call to be answered. Initiate conversation.
... Using a Group of External Lines1
An extension can originate external call or calls to a Master PABX through a group of external lines.
Enter the number of the appropriate group of external lines for accessing an external line.
• or
or 

 to
to 

 = Group of external lines
Wait for a dial tone.
Enter the external number you want to call.
Wait for the call to be answered. Initiate conversation.
... When a group is busy
If an overflow group was configured when the system was programmed, the call is carried out using a second group of external lines.
The second group of external lines takes into account the extension’s class of service.
[1]When operating as a Satellite PABX for external calls or for calling extensions of a Master PABX, select the group of external lines before selecting the second external access code (0...9 or 00...99).
Or, select the extension number, as appropriate (see Important Programming Data - Assigning Groups of External Lines to Extensions in the Programming Manual). When a group of external lines is configured as a Satellite PBX, a false dial tone is not generated.Overflow Group for External Lines (see Programming Manual. Programming an external Line - Overflow for a Group of External Lines
20
Functions used for making calls
Step by step |
|
Speaker |
and |
Speaker |
|
|
and |
HEADSET ON |
|
HEADSET ON |
|
Switching to Speakerphone
Conversation using the Handset
Press and hold this key while placing the handset on the hook. Then release the key and resume the conversation.
Conversation using a Headset
Press the key and resume the conversation.
Switching to Handset
Conversation using the Speakerphone or a Headset
Lift the handset and resume conversation.
Switching to a Headset
Required: A headset must be connected. A key has been programmed for the "Headset" feature or the headset has an electronic control button that acts as the hook (see Headset feature).
Conversation using the Speakerphone.
Press the HEADSET ON key or activate the electronic hook control and resume the conversation.
Conversation using the Handset
Press the HEADSET ON key or activate the electronic hook control.
Keep handset off the hook and resume conversation.
Headsets do not send a call ending tone (busy signal) at the end of a call.
21
Functions used for making calls
Step by step |
Speaker |
Speaker |
or |
Speaker |
or |
END |
or |
HEADSET ON |
22 |
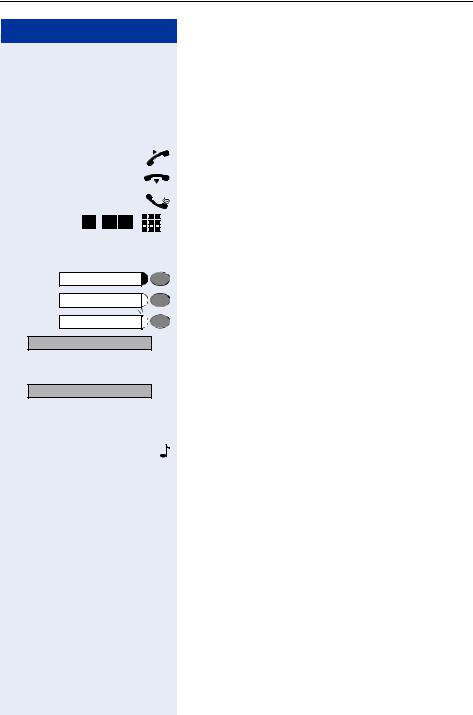
Speaker
This feature turns the speaker temporarily on to allow other people in the same room to participate in the conversation. Inform the person on the other end that the speaker is on.
Required: Conversation using the handset.
Activation
Press this key. The speaker LED turns on.
Deactivation
Press this key. The speaker LED turns off.
Ending a Call
Replace the handset
Press this key. The speaker LED turns off.
Press the "EXIT" key.
Press the HEADSET ON key or activate the electronic hook control (see Headset feature).
Functions used for making calls
Step by step
Seizure of a Specific Line
|
|
|
|
Seizing a specific line selects that line for generating an |
|
|
|
|
external call or a call to another PABX. |
|
|
|
|
Enter the number of an external line (e.g., 801). |
|
|
|
|
|
|
|
|
|
|
|
|
|
|
|
|
|
|
|
Seizing a specific line selects that line for generating an |
|
|
|
|
|
|
|
|
|
external call or a call to another PABX. |
|
|
|
|
Enter the number of the external line (e.g., 801). |
|
|
|
|
|
|
|
|
|
|
|
|
|
|
|
|
|
|
|
|
|
|
|
or |
|
|
|
|
Press the "LINE 801" key, for example, to use the exter- |
|
LINE 801 |
|
|
|
|
|
|
|
|
nal line 801. |
|
|
|
|
|
Wait for a dial tone.
Enter the external number you want to call.
Wait for the call to be answered. Initiate conversation.
Speed Dialing
Frequently used telephone numbers can be stored as abbreviated numbers in two types of phonebooks or speed dialing directories:
•System Speed Dialing1
The System Speed Dialing can store up to 250 numbers (000-249) most frequently dialed by HiPath 1100 users. Numbers are stored by the system’s support technician and can be used at any extension (if authorized, contact your support technician).
•Individual Speed Dialing
The Individual Speed Dialing stores up to 5 numbers chosen by the user. The numbers are configuredby the user and remain stored only at the extension.
[1]Numbers are stored during system configuration. They can be dialed from any telephone set. See the chapter Main Configurations - Speed Dialing in the Programming Manual. To assign names to number you must use the HiPath 1100 Manager.
23
Functions used for making calls
Step by step |
|
Service Menu |
|
>*7=SPEED DIAL? |
: |
|
or |
* 7 |
|
Service Menu |
|
>*92=CHANGE SPEED DIAL? |
: |
|
or |
* 9 |
2 |
|
or |
Next? |
: |
NEXT? |
: |
24 |
|
Using Speed Dialing
Required: Individual Speed Dialing numbers are stored by the user. System Speed Dialing numbers are stored by the Support Technician.
Press this key.
Select and press to confirm.
Enter the code for accessing Speed Dialing.
Enter the desired abbreviated number from the System Speed Dialing directory:
•

 to
to 

 = System Speed Dialing
•
 to
to 
 = Individual Speed Dialing
Wait for the call to be answered. Initiate conversation.
Programming Individual Speed Dialing
The speed dialing numbers stored in the Individual Speed Dialing directory are only available for the extension in which they were entered. These numbers can be updated, modified and deleted. Each extension can have up to 5 speed dialing numbers of 20 digits each.
Press this key.
Select and press to confirm.
Enter the code for programming a speed-dial number.
Enter the Individual Speed Dialing abbreviated number:
•
 to
to 
 = Individual Speed Dialing
Press to confirm.
Press until you see the abbreviated number you want.
Functions used for making calls
Step by step
> |
|
: |
|||
CHANGE? |
|||||
|
|
|
|
|
|
|
|
|
|
|
|
|
|
|
|
|
|
|
|
|
|
|
|
|
|
|
|
|
|
|
|
|
|
|
|
Optional
> |
|
: |
|||
ENTER NAME? |
|||||
|
|
|
|
|
|
|
|
|
|
|
|
|
|
|
|
|
|
|
|
|
|
|
|
|
|
|
|
|
|
1x ABC2
2x ABC2
3x ABC2
4x ABC2
1x DEF3
Optional
If a number has already been stored, the name (if entered) or the telephone number associated will be display.
Select and press to confirm.
Enter the external number to be stored in this position in the Individual Speed Dialing directory.
You can also enter a name associated to the number. The name will be stored in the Speed Dialing directory and displayed when the number is dialed.
Select and press to confirm.
Enter the name you want to associate to the number for Caller ID and phonebook searches.
The telephone keypad is now available for entering letters by repeatedly pressing the key for the letter you want.
Entering Letters
Letter A
Letter B
Letter C
Number 2
Letter D, and so on.
Example: Press the " 2" key three times to enter the letter "C" or press "3" twice to enter the letter "E."
•Key "0" = enters a space.
•Keys "1" and "#" = cancel the last character entered.
An Interdigit Pause ("P") can be added by pressing the Redial key.
25

Functions used for making calls
Step by step
SAVE?
>PREVIOUS?
>VIEW STATION NO.?
>VIEW NAME?
>DELETE?
>EXIT?
Each "P" character inserts a 2-second pause (default) in the connection. A longer pause can be inserted by entering more than one character (for example, for a 4-second pause enter "PP")
The first "P# or #" specifies that the next digits for A will only be forwarded if:
- Digital line or S0 extension:
P# - DTMF digits are sent after local carrier identification, when B is not answered.
# - DTMF digits are sent after B is answered. - External analog line or analog extension:
P# or # - DTMF digits are sent after B is answered.
Other characters ("#" and/or "*") may be added after "P#".
: Press to confirm.
or If you make a mistake:
: Select and press to confirm. All information is deleted.
or If a name is displayed, you can view the number associated to it.
: Select and press to confirm.
or If a number is displayed, you can view the name associated to it.
: Select and press to confirm.
or Delete all abbreviated number entries.
:Select and press to confirm.
or
:Select and press to confirm.
26
Functions used for making calls
Step by step |
|
|
or |
Speaker |
|
DIRECTORY ? |
: |
>NEXT? |
: |
|
or |
>PREVIOUS? |
: |
|
or |
Phonebook Search
A Phonebook Search or and alphanumeric search allows an extension to lookup a person’s number by the person’s name when making a call.
Required: Names were assigned to the speed dialing numbers recorded.
Lift the handset.
Press this key. The Speaker LED turns on.
Press to confirm.
The first record is displayed.
Select and press for viewing additional records.
Select and press for viewing additional records.
Using the keypad, enter the name you want to select or the first letters of the name. The name is searched.
The telephone keypad is now available for entering letters by repeatedly pressing the key for the letter you want.
27

Functions used for making calls
Step by step
1x ABC2
2x ABC2
3x ABC2
4x ABC2
1x DEF3
|
|
Optional |
|
> |
|
|
: |
DELETE CHAR? |
|
||
|
|
Optional |
|
> |
|
|
: |
DELETE LINE? |
|
||
|
|
Optional |
|
> |
|
|
: |
VIEW STATION NO.? |
|
||
|
|
Optional |
|
> |
|
|
: |
VIEW NAME? |
|
||
Entering Letters
Letter A
Letter B
Letter C
Number 2
Letter D, and so on.
•Key "0" = enters a space.
•Key "1" = displays the first record on the Speed Dialing directory.
•Keys "*" and "#"= do not mean anything
If no match is found for the letters entered or if it is not possible to enter letters at the moment, you will hear a short beeping sound.
Select and press to confirm. It deletes the last character that was entered If all characters are deleted, the first Speed Dialing entry will be displayed again.
Select and press to confirm. All characters that were entered will be deleted, and the first entry of the Speed Dialing directory will be displayed again.
Select and press to confirm.
Select and press to confirm.
The record selected is displayed:
28

Functions used for making calls
Step by step
> |
|
|
|
|
: |
|||||
CALLER LIST? |
|
|||||||||
|
|
|
|
|
|
|
|
or |
||
|
|
|
|
|
|
|
|
|
|
|
# |
8 |
|
2 |
|||||||
|
|
|
: |
|||||||
|
1=CALLS NOT ANSWERED |
|
||||||||
|
|
|
|
|
|
|
|
or |
||
> |
|
|
: |
|||||||
2=CALLS ANSWERED |
|
|||||||||
|
|
|
|
|
|
|
|
or |
||
> |
|
|
: |
|||||||
3=CALLS DIALED |
|
|||||||||
|
|
|
|
|
|
|
|
or |
||
|
|
|
|
|
|
|
|
|
|
|
|
|
|
|
|
|
|
|
|
|
|
|
|
|
|
|
|
|
|
|
|
|
|
|
|
|
|
|
|
|
|
|
|
|
|
|
|
|
|
|
|
|
|
|
NEXT? :
Caller Lists1
If so configured, the last calls not answered identified by the extension are stored in three caller lists. These caller lists can be programmed to save only external calls or both external and internal calls. Using a System Telephone with a display you can view and select lists:
•1 = CALLS NOT ANSWERED2
•2 = CALLS ANSWERED
•3 = CALLS MADE
Up to 10 calls can be stored for each caller list. They are stored in the order they were received or made. Each call is stored with a time stamp. The list starts with the most recent call that has not been recalled. If several calls were from the same caller, the list will show the time of the last call and the total number of times the call was received.
Looking Up a Caller List
Select and press to confirm.
Enter the dialing code for looking up Caller Lists.
Select and enter to select the type of Caller List wanted.
Enter the number of the list you want to look up:
= Calls not answered
= Calls answered = Calls dialed
Enter to display additional lists.
[1]Make sure that Caller ID is enabled by your carrier.
[2]When the Do Not Disturb facility for an extension is activated, unanswered calls are not stored in the memory.
29

Functions used for making calls
Step by step |
|
|
|||
|
|
|
|
|
End consultation. |
> |
|
|
|
: Select and press to confirm. |
|
EXIT? |
|||||
|
|
|
|
or |
|
|
|
|
|
|
Press this key. |
|
|
Service Menu |
|
|
|
|
|
|
|
or |
|
|
|
|
|
|
Replace the handset. |
|
|
|
|
or |
|
|
|
|
|
|
Press this key. The speaker LED turns off. |
|
|
Speaker |
|
|
|
|
|
|
|
|
Consultation about time of call and additional call- |
|
|
|
|
|
er information |
|
|
|
|
|
Required: The record wanted is shown in the caller list |
|
|
|
|
|
during the consultation. |
> |
|
|
: Select and press to confirm. |
||
DATE/TIME? |
|||||
|
|
|
|
or |
|
> |
|
|
: |
|
|
VIEW STATION NO.? |
|
||||
|
|
|
|
or |
|
> |
|
|
: |
|
|
VIEW NAME? |
|
||||
|
|
|
|
or |
|
> |
|
|
: |
|
|
WHO ? |
|
||||
|
|
|
|
|
Calling a Number from a Caller List1 |
|
|
|
|
|
Required: The record wanted is shown in the caller list |
|
|
|
|
|
during the consultation. |
> |
|
|
: Select and press to confirm. |
||
CALL? |
|||||
|
|
|
|
|
Wait for the call to be answered. Initiate conversation. |
|
|
|
|
|
|
|
|
|
|
|
Delete the record from the caller list. |
|
|
|
|
|
Required: The record wanted is shown in the caller list |
|
|
|
|
|
during the consultation. |
>DELETE? : Select and press to confirm.
[1]If a list is full and a call is made, the last number stored is automatically erased from the caller list.
30
Loading...