


 Loading...
LCD Monitor Management Software
OPERATION MANUAL
PN-SS21
Contents |
|
Introduction |
6 |
Points to note before using e-Signage S................................................................................................. |
6 |
Trademarks................................................................................................................................................. |
6 |
How to read this manual............................................................................................................................ |
7 |
Notation................................................................................................................................................................. |
7 |
Definitions................................................................................................................................................... |
8 |
Workflow through display of distribution data....................................................................................... |
9 |
Distribution using SDSS Launcher...................................................................................................................... |
10 |
System operation precautions................................................................................................................ |
11 |
Points to note when creating content and programs........................................................................................... |
11 |
e-Signage S Player A1 limitations........................................................................................................................ |
13 |
Installation |
14 |
System requirements............................................................................................................................... |
14 |
Installing e-Signage S.............................................................................................................................. |
16 |
Settings after installation...................................................................................................................................... |
17 |
Configuring player device settings....................................................................................................................... |
17 |
Uninstalling e-Signage S......................................................................................................................... |
22 |
Server Settings |
23 |
WEB Server Settings (Initial Setup Wizard)........................................................................................... |
23 |
WEB Server Settings............................................................................................................................... |
26 |
Setting the automatic logout time........................................................................................................................ |
27 |
Distribution Scheduler.......................................................................................................................................... |
27 |
Logging in |
|
Logging In |
29 |
Logging in to WEB Server....................................................................................................................... |
29 |
Description of the screen........................................................................................................................ |
30 |
Toolbar................................................................................................................................................................. |
30 |
Dashboard........................................................................................................................................................... |
30 |
E 2
|
Contents |
Content |
|
Content Folder Management |
32 |
Main window............................................................................................................................................. |
32 |
Managing content folder groups............................................................................................................ |
33 |
Content folder group management area.............................................................................................................. |
33 |
Creating a content folder group........................................................................................................................... |
34 |
Managing content folders....................................................................................................................... |
35 |
Content folder management area........................................................................................................................ |
35 |
Creating content folders |
36 |
Basic flow for creating a content folder................................................................................................. |
36 |
Creating a content folder......................................................................................................................... |
36 |
Editing a content file in a content folder................................................................................................ |
38 |
Edit Content File window..................................................................................................................................... |
38 |
Files that can be saved in content folders........................................................................................................... |
40 |
Uploading content files........................................................................................................................... |
41 |
Uploading files to the “Media” folder.................................................................................................................... |
41 |
Creating a scroll message....................................................................................................................... |
45 |
Uploading files to the “Scroll Message” folder or “Audio” folder.......................................................................... |
48 |
Downloading content files...................................................................................................................... |
49 |
Playback Condition Setting |
50 |
Setting playback conditions................................................................................................................... |
50 |
Program |
|
Program Management |
53 |
Main window............................................................................................................................................. |
53 |
Managing program groups...................................................................................................................... |
54 |
Program group management area....................................................................................................................... |
54 |
Creating a Program Group.................................................................................................................................. |
55 |
Managing programs................................................................................................................................. |
56 |
Program Management area................................................................................................................................. |
56 |
E 3

Contents |
|
Creating a Program |
57 |
Main window............................................................................................................................................. |
57 |
Creating programs................................................................................................................................... |
58 |
Setting the layout................................................................................................................................................. |
58 |
Assigning content folders..................................................................................................................................... |
60 |
Setting the PIP frame........................................................................................................................................... |
61 |
Setting the position of the screen........................................................................................................................ |
62 |
Setting the screen size........................................................................................................................................ |
62 |
Schedule |
|
Schedule Management |
64 |
Main window............................................................................................................................................. |
64 |
Managing schedule groups..................................................................................................................... |
65 |
Schedule group management area..................................................................................................................... |
65 |
Creating schedule groups.................................................................................................................................... |
66 |
Managing schedules................................................................................................................................ |
67 |
Schedule management area................................................................................................................................ |
67 |
Creating Schedules |
68 |
Main window............................................................................................................................................. |
68 |
Schedule creation area........................................................................................................................................ |
69 |
Creating a schedule................................................................................................................................. |
70 |
Adjusting an assigned content folder, program, or panel control command........................................................ |
71 |
Saving a timetable for synchronization................................................................................................................ |
71 |
Synchronize Timetable........................................................................................................................................ |
72 |
Panel control commands..................................................................................................................................... |
72 |
Distribution |
|
Distribution |
74 |
Main window............................................................................................................................................. |
74 |
Distribution data selection area........................................................................................................................... |
74 |
Panel area........................................................................................................................................................... |
75 |
Distributing / Scheduling distribution.................................................................................................... |
78 |
Distribution Status................................................................................................................................... |
80 |
USB Memory / SD Card Distribution |
81 |
E 4
|
Contents |
System Log |
|
Viewing the System Log |
83 |
Main window............................................................................................................................................. |
83 |
Viewing a system log............................................................................................................................... |
84 |
Outputting a system log (TXT format / CSV format)............................................................................................ |
85 |
Player |
|
Receiving Schedules and Displaying Programs |
87 |
Client Scheduler....................................................................................................................................... |
87 |
Launching Client Scheduler................................................................................................................................. |
87 |
Client Scheduler menu........................................................................................................................................ |
87 |
Program Viewer........................................................................................................................................ |
95 |
e-Signage S Player A1 settings............................................................................................................... |
95 |
e-Signage S Player A1 settings window.............................................................................................................. |
95 |
Key/Mouse Linkup |
98 |
Key/Mouse Linkup Tool window............................................................................................................. |
98 |
Launching Key/Mouse Linkup Tool...................................................................................................................... |
98 |
Key/Mouse Linkup Tool menu.............................................................................................................................. |
98 |
SDSS |
|
SDSS Launcher |
103 |
Appendix |
|
License information for this product |
105 |
Software components............................................................................................................................ |
105 |
E 5

Introduction
Thank you for purchasing LCD Monitor Management Software (e-Signage S).
Points to note before using e-Signage S
•This product has undergone exacting quality control processes prior to shipment. In the unlikely event that a failure or malfunction occurs, contact your retailer.
•Please understand that SHARP CORPORATION bears no responsibility for errors made during use by the customer or a third party, nor for any other malfunctions or damage to this product arising during use, except where indemnity liability is recognized under law.
•Under copyright law, the use of this product to duplicate, edit or otherwise alter copyrighted material is only permitted in cases where such duplicated or edited material is for individual or home use.
If material is duplicated and/or edited beyond this scope, and if such duplicated or edited material is used
(except in cases where the user themselves holds the copyright for the object of the duplicated material or where the user has received permission from the copyright holder), this will constitute a violation of copyright law and may lead to the copyright holder or other parties claiming compensation for damages. Such use should therefore be strictly avoided.
When using photo image data, DVD images, TV broadcasts or similar material with this product, the above uses that constitute copyright violation must be strictly avoided. Using, modifying, or otherwise altering images of other people without permission constitutes a violation of portrait rights, and must also be strictly avoided.
•To show TV, DVDs, or similar copyrighted programs and/or material, you must obtain the permission of the copyright holder or copyright holders.
•Transcribing or duplicating part or all of this manual and/or this software without permission from our company is not permitted.
•As a part of our policy of continuous improvement, SHARP reserves the right to make design and specification changes for product improvement without prior notice.
Trademarks
•Microsoft, Microsoft Edge, Windows, Windows Media, Windows Server, PowerPoint, and Internet Explorer are either registered trademarks or trademarks of Microsoft Corporation in the United States and/or other countries.
•Adobe and Flash are either registered trademarks or trademarks of Adobe Systems Incorporated in the
United States and/or other countries.
•Google, Android, and Google Chrome are trademarks of Google LLC.
Names of products and other proper nouns are the registered trademarks or trademarks of their respective copyright holders.
E 6

Introduction
How to read this manual
Notation
•Keyboard keys are indicated with square brackets.
Example: [Shift], [Ctrl]
•Menus, windows, dialog boxes, buttons, and tabs are indicated with square brackets.
Example: 4 Click [Save changes].
Return to the [Power Options] dialog box.
•Items, checkboxes, and option buttons are indicated with quotation marks.
Example: “Coordinate-X”, “Preset Screen Size” option button
•This manual assumes that e-Signage S has been installed in the following folder.
If you have installed the software in a different folder, substitute the other folder as necessary.
C:\Program Files (x86)\SHARP\e-Signage (default)
•The screens and procedures in this manual are examples.
These may vary depending on your monitor, screen settings, operating system, browser, and browser version.
The content files and fonts in this manual are examples. Not all of these are included with the software.
•This manual does not contain instructions for basic use of Windows or Android.
E 7

Introduction
Definitions
This chart provides definitions of terms used in this manual.
Term |
Definition |
|
Management PC |
This is used to set the overall screen layout and order of playback of content, and to |
|
create and distribute playback schedules. |
||
|
||
Player device |
This is a device that plays content according to the distributed schedule. |
|
Server software |
Software that is installed on the management PC. |
|
Player software |
Software that is installed on a player device. |
|
Content (files) |
Files such as videos, still images, and audio that are played. |
|
These are usually prepared by the user. |
||
|
||
Content folders |
Folders that contain content files. Panels, programs, and schedules can be assigned. |
|
|
|
|
Playlist |
A list of content files to be played. |
|
|
|
|
Frame |
The screen can be divided into multiple sub-screens, each of which is called a frame. |
|
|
|
|
Program |
Programs consists of a frame layout and the content folder information assigned to |
|
each frame. |
||
|
||
|
|
|
Timetable |
This assigns content folders and programs to the time period each is to be played |
|
during one day. |
||
|
||
|
|
|
Schedule |
This assigns content folders and programs to the date each is to be played. |
|
Panel |
Display (LCD monitor on which content data is displayed) |
|
Scroll message |
A message that scrolls on the screen. |
|
Up to two scrolling messages can be displayed with this software. |
||
|
||
Attached files |
A collective term for image and other files that are required when displaying files such |
|
as HTML files. |
||
|
||
Assigning |
Specifying which files (schedules, etc.) are to be distributed to each panel. |
|
|
Sending content data created on a management PC to player devices. In the SHARP |
|
Distribution |
e-Signage S Standalone Edition, the management PC and the player device are |
|
|
same. |
|
|
|
|
Distribution data |
Content data that is distributed to player devices. |
|
|
|
|
Tenant |
This is a group by which users, panels, schedules, and programs are managed. |
|
|
|
E 8

Introduction
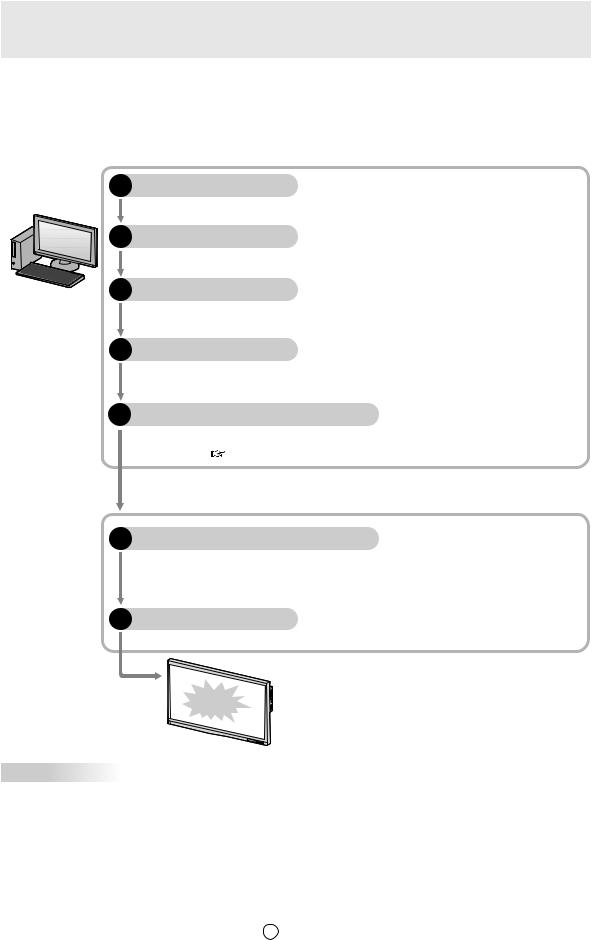
Workflow through display of distribution data
This chart indicates the workflow from selection of content to be displayed through display of the content on player devices.
1 Create content folders ( page 32)
Management PC*1
Create folders and save prepared content in the folders.
Create a layout for |
No (full-screen display) |
multiple content files and display the |
|
content in the layout |
|
Yes |
|
2 Create a program ( page 53)
Create a screen layout and assign content folders to each frame.
Display on a specified day at a No (display all day) specified time
Yes
3 Create a schedule ( page 64)
Set the date and time when each content folder or program will play.
4 Distribution (  page 74)
Distribute the data for distribution that you created to player devices.
5 Receive data (  page 87)
Player device*1
Deliver received distribution data to the e-Signage Client Scheduler.
Distribution data
displayed
6 Display the distribution data ( page 95)
Display the data that was distributed.
 TIPS
TIPS
Client Scheduler manages program viewers so that received distribution data are played at the scheduled time.
*1 In the SHARP e-Signage S Standalone Edition, the management PC and the player device are same.
E 9
Introduction
Distribution using SDSS Launcher
The sequence of steps from program creation to display of programs on a panel is indicated below. For information on SDSS Launcher, see page 103.
1 |
Create program |
|
Lay out content prepared in Program Editor and create a program. |
2 |
Create timetable |
|
Assign the hour of the day when a program created in Timetable Editor will be displayed. |
Management PC*1 3 |
Create schedule |
|
Assign the dates when daily timetables you have created in Schedule Editor will be displayed. |
4 |
Upload |
|
Upload schedules that you have created to e-Signage S on the management PC. |
5 |
Distribution Schedule |
|
Log in to the management PC using your browser, and schedule distribution of uploaded data to |
|
player devices. ( Page 74) |
6 Receive data
Deliver received schedules to the e-Signage Client Scheduler. (  Page 87)
7 Program displayed
Program Viewer displays programs when instructed to do so by Client Scheduler. ( Page 95)
Program displayed
Player device*1
 TIPS
TIPS
Client Scheduler manages program viewers so that received schedules are played at the scheduled time.
*1 In the SHARP e-Signage S Standalone Edition, the management PC and the player device are same.
E 10
Introduction
System operation precautions
Points to note when creating content and programs
Before operating the system, run a test using the actual content to be displayed on the panel. If the computer does not have sufficient processing power, content may not be play correctly.
•Playing videos
Playing multiple videos simultaneously is not recommended.
Windows Media Player generally places a heavier load on the CPU than Flash Player (although this depends on the content).
 TIPS
TIPS
•For some content, it may be necessary to install a codec or player software. For codecs and software that are not indicated as being operable on the installed operating system, test operation prior to introduction.
•Flash content
Take care when playing content that makes frequent use of image transparency processing (image fade-in/ fade-out), as this may place an extremely heavy load on the CPU.
•Enlarging/reducing still images and video
As image size and display size increase, so does the load placed on the CPU. CPU load also increases when images are displayed at an enlarged or reduced size. Keep the size of the content display area (frame size) as small as possible. Content should be created using the same image size as the display size.
•Still image slideshow
Using slideshow for still images will increase the load on the CPU. Effects depend on the performance of the video card.
•Scroll messages content
Displaying scroll messages requires significant CPU processing power. When using scroll messages, programs should be tested by actually displaying them before operation.
•Making the background color transparent will increase the load.
•Scroll messages with a larger display area place a larger load on the computer. Do not make the scroll message display area unnecessarily large.
•If there are many characters in a scroll message line, the display may become distorted. In this event, start a new line. (Up to 100 characters per line is recommended.)
•PowerPoint
To display PowerPoint content, e-Signage S requires PowerPoint Viewer. Even if Microsoft PowerPoint is installed on your computer, PowerPoint Viewer must be installed separately. If the 64-bit version of Office is installed on your computer, you will not be able to install PowerPoint Viewer.
Set the PowerPoint file to play repeatedly, and use automatic slideshow.
PowerPoint Viewer is not able to display multiple files at the same time. Do not assign PowerPoint files to multiple frames in the same program.
When PowerPoint content is displayed, you cannot use a mouse or other tool to click other display frames. It takes time for PowerPoint Viewer 2010 to start playback. Time is especially required to start the first playback after the computer is started. Be sure to allow time for startup in the overall playback time. Although it is possible to play files with a .pptx or .ppsx extension using PowerPoint Viewer 2007, it will take time to start playback. It is recommended that files with a .ppt or .pps extension be used for playback on
PowerPoint Viewer 2007.
E 11

Introduction
Operation in a browser
Do not use the [Back] key of your browser. This may cause the browser to stop operating normally.
Do not select the “Prevent this page from creating additional dialogs” checkbox that appears in the browser.
Confirmation screens may not appear, and some actions such as deleting may not be possible. If this is inadvertently selected and messages do not appear, restart your browser.
Continuous operation of player device
Player devices are not designed for continuous 24-hour-a-day operation. Be sure to shut down and restart player devices every day. (Refer to [Power Control] tab on page 90 )
Continuous operation of management PC
The management PC should be operated continuously no more than one week.
Computer internal clock
The software executes schedules based on the computer’s internal clock. You should ensure that your computer’s internal clock is always accurate by such means as synchronizing it with an internet time server.
Accuracy of program display time
Program display is controlled by a timer that starts at 0 seconds every minute. Programs can only be switched on the minute.
Note that there may be a delay before content is actually displayed. This depends on the time taken to launch applications that display content and the time taken to load content files.
Backup
e-Signage S does not have a data backup function. Regularly back up the tenant data folder (under C:\ ProgramData\SHARP\e-Signage\GroupData\) according to the data update frequency during operation.
Daisy chain configuration
e-Signage S cannot send different panel control commands (panel power ON/OFF and panel input source selection commands) to LCD Monitors (PN Series) connected in a daisy chain.
Still images
Displaying a still image in the background or in a frame in the same position for a long time may leave a residual image on the monitor. When creating programs, change still images and layouts at set intervals or take other measures to avoid this problem.
E 12

Introduction
e-Signage S Player A1 limitations
The following limitations apply to e-Signage S Player A1 (for Android player devices). Note these limitations before using this player.
Function |
|
|
e-Signage S Player A1 limitations |
|
Content |
File types that cannot be |
The following file types cannot be used on e-Signage S Player A1. |
||
|
used |
• |
PowerPoint |
|
|
|
• |
Flash |
|
|
|
• |
Executable file |
|
|
|
• |
Video files in unsupported formats ( |
page 40) |
|
|
• Signage widget content file |
|
|
|
|
• |
Conditional content file |
|
|
Screen size |
Maximum 1920 × 1080 or 1080 × 1920 |
|
|
|
|
|
|
|
|
Specification of player |
|
|
|
|
device path |
Cannot be used. |
|
|
|
Screen division by PIP |
|
|
|
|
Still image slideshow |
Usable slideshow effects are different on e-Signage S Player and |
||
|
(Transition Direction) |
e-Signage S Player A1. |
|
|
|
|
On e-Signage S Player A1, the following slideshow effects can be used. |
||
|
|
[Wipe / Expand / Slide / Fade / Round / Perspective / Pulse / Rotate / |
||
|
|
Transform / Random] |
|
|
|
Playing videos |
You cannot play multiple videos simultaneously. |
||
Distribution |
Storage required for |
(Size of distributed file) x 3 + 200 MB |
|
|
|
distribution (player device) |
|
||
|
|
|
|
|
|
Player device power ON/OFF |
Cannot be used. |
|
|
Player device |
Default FTP port number |
2121 |
|
|
settings |
|
If changed from the default setting, the port number must be set within |
||
|
|
the range 1024 to 32000. |
|
|
Key/Mouse Linkup Tool |
Not supported. |
|
||
|
|
|
||
Client Scheduler |
Not included. |
|
||
|
|
The Client Scheduler functions “View the Log”, “Pause to View |
||
|
|
Program”, “Delete Schedule Information”, and “Get data from |
||
|
|
management PC” cannot be used. |
|
|
•After mounting or unmounting a USB memory (USB flash drive) or SD memory card, restart e-Signage S Player A1 before distributing data. Data distribution may fail if attempted without restarting.
•Only one USB memory or SD memory card can be used at a time.
•If you uninstall e-Signage S Player A1 from the player device, all settings and distributed data will be lost.
•e-Signage S recognizes content types by the file extension. Even if a content type is indicated as being usable, it may not play correctly due to an unsupported codec or other reason. Verify that video and audio files play correctly in advance.
•Scrolling messages may not scroll smoothly in some instances. Check operation before placing signage in operation.
•The screen may flicker when changing programs or adjusting the clock on a player device.
•If a large amount of data has been distributed, it may take time to change programs.
•Changing of played data will occur when the time on the player device reaches 12:00 AM. Even if the same data will be played, playback will restart from the beginning of the data at 12:00 AM.
E 13

Installation
This chapter explains the system requirements and procedures for installing e-Signage S. Be sure to read this chapter before using the software.
System requirements*1
|
|
Name |
SHARP e-Signage S Standalone Edition |
|
|
|
PN-SS21 |
||
|
|
|
||
|
Installed computer |
Management PC / Player device |
||
|
CPU |
|
1.6 GHz or higher |
|
|
|
|
|
|
|
Operating |
Microsoft Windows 7/8.1/10*3 |
○ |
|
Computer |
system *2 |
Microsoft Windows Server 2008 / |
○ |
|
|
2008 R2 / 2012 / 2012 R2 / 2016 |
|||
|
|
|||
|
Memory |
|
2 GB or higher |
|
|
Hard disk |
|
500 MB or more of free space |
|
|
|
(additional space required to save data) |
||
|
|
|
||
Monitor |
|
Resolution |
1280 × 1024 dots or higher |
|
(for management)*4 |
Number of colors |
Full color |
||
Compatible browsers (operation window) |
Microsoft Internet Explorer 11 / Microsoft Edge / |
|||
Google Chrome |
||||
|
|
|
||
Panel (for player device) *5 |
LCD Monitor (PN Series) |
|||
Other software |
|
Microsoft Internet Explorer / Microsoft PowerPoint Viewer / |
||
|
Microsoft Windows Media Player*6 / Adobe Flash Player |
|||
Turn off user account control on the player device. *7
*1 The minimum requirements for the operating system to operate must also be met. Some content may require performance greater than that indicated to play correctly.
*2 Applicable versions are the 32-bit version and 64-bit version. *3 Use Windows 10 in desktop mode.
*4 The monitor of the computer used to create/edit programs and schedules.
*5 The player device can control the panel. To control the panel, the player device and the panel must be connected with an
RS-232 cable, or the panel must be connected to the LAN.
For the specifications of the panel and procedures for connection and settings, see the panel’s operation manual.
*6 Some content may require installation of a codec or player software. For codecs and software that are not indicated as being operable on the installed operating system, test operation prior to introduction.
*7 How to turn off user account control on the player device.
In Windows 7
(1)Select “User Accounts and Family Safety” in Control Panel.
(2)Select “User Accounts”.
(3)Select “Change User Account Control settings”.
(4)Move the slider to the bottom.
In Windows 8.1/10
(Caution)
Note that when this setting is selected, the Windows Store application will not run.
After you install e-Signage S Player, you can turn off user account control from Client Scheduler.
(1)Right-click the e-Signage Client Scheduler icon, and click [Setting] in the pop-up menu to display the [Setting of Client
Scheduler] dialog box.
(2)Click the [UAC Settings] tab and click [Turn off User Account Control].
(3)A confirmation message will appear. Click [OK].
(4)The [User Account Control] dialog box will appear. Click [Yes].
(5)A message indicating that the user account control has been disabled will appear. Click [OK] to restart the computer.
E 14

Installation
 TIPS
TIPS
•Flash Player, Windows Media Player and PowerPoint Viewer must be installed on player device.
•If a message prompting you to install a program appears because the program is not installed or the wrong version is installed, download and install the program from an appropriate website.
•For some content, it may be necessary to install a codec or player software. For codecs and software whose operation has not been demonstrated on the installed operating system, check operation prior to installation.
E 15

Installation
Installing e-Signage S
• You must log in as an administrator to install the software.
1
2
3
4
5
Start your computer.
Exit all applications.
Launch the e-Signage S setup program (Setup.exe).
•Double-click Setup.exe to launch the setup program.
•If a security warning (“The publisher could not be verified.”) appears during the installation, click [Run].
If the [User Account Control] window appears, click “Yes”.
In the [Welcome to the InstallShield wizard...] window, click [Next].
The software license agreement will appear.
Read the entire software license agreement.
6 If you agree to the terms of the agreement, select the “I accept the terms of the license agreement” option button, and click [Next].
7
8
Follow the instructions on the screen to complete the installation.
If a dialog box prompting you to restart appears after installation is finished, click [Yes].
E 16

Installation
Settings after installation
Double-click the e-Signage S shortcut icon on the desktop. The server settings window appears. ( Page 23)
Configuring player device settings
Once the installation is complete, change the settings of the player device before using e-Signage S.
Auto login settings
If the player device is to be used without an operator, enable Windows auto login.
1 From the Windows Taskbar, click [Start] - [All Programs] - [Accessories] - [Command Prompt]. In Windows 8.1 or 10, press the [Windows] key and [X] key at the same time, and click [Command Prompt] in the context menu.
The [Command Prompt] window will appear.
2
3
Type in “control userpasswords2” (without the quotation marks) and press the [Enter] key.
If the [User Account Control] window appears, click [Continue].
The [User Accounts] dialog box will appear.
4
5
6
7
Clear the “Users must enter a user name and password to use this computer.” checkbox.
Click [OK].
In the [Automatically Log On] window, enter the “User Name” and “Password”, and click [OK].
Type in “exit” and press the [Enter] key.
E 17

Installation
Screen saver settings
Disable the screen saver so that it does not appear on the panel when distributed content is played.
•In Windows 7 or 8.1
1Right-click on an empty area of the desktop, and select [Personalize] - [Screen Saver] from the menu that appears.
The [Screen Saver Settings] dialog box will appear.
2Select “(None)” from the “Screen saver” list.
3Click [OK].
•In Windows 10
1Right-click on an empty area of the desktop, and select [Personalize] - [Lock screen] - [Screen Saver] from the menu that appears.
The [Screen Saver Settings] dialog box will appear.
2Select “(None)” from the “Screen saver” list.
3Click [OK].
E 18

Installation
Power Management
Adjust settings so that the panel and hard disk do not turn off or enter system standby while distributed content is playing.
•In Windows 7
1From the Windows taskbar, select [Start] - [Control Panel] - [System and Security] - [Power Options].
The [Power Options] dialog box will appear.
2Click “Show additional plans”, select “High performance”, and click [Change plan settings].
3Select “Never” from the “Turn off the display” and “Put the computer to sleep” pull-down menus.
4Click [Save changes].
Return to the [Power Options] dialog box.
5Close the [Power Options] dialog box by clicking the  button in the upper right corner of the window.
•In Windows 8.1
1Press the [Windows] key and [C] key at the same time, and click [Settings] - [Control Panel] - [System and Security] - [Power Options].
The [Power Options] dialog box will appear.
2Select “High performance” and click [Change plan settings].
3Select “Never” from the “Turn off the display” and “Put the computer to sleep” pull-down menus.
4Click [Save changes].
Return to the [Power Options] dialog box.
5Close the [Power Options] dialog box by clicking the  button in the upper right corner of the window.
•In Windows 10
1Press the [Windows] key and [X] key at the same time, and then select [Control Panel] - [System and Security] - [Power Options] from the context menu.
The [Power Options] dialog box will appear.
2Click “Show additional plans”, select “High performance”, and click [Change plan settings].
3Select “Never” from the “Turn off the display” and “Put the computer to sleep” pull-down menus.
4Click [Save changes].
Return to the [Power Options] dialog box.
5Close the [Power Options] dialog box by clicking the  button in the upper right corner of the window.
E 19

Installation
IME toolbar settings
Move the IME toolbar into the taskbar so that it does not appear when distributed content is being played.
1 Right-click on the IME toolbar and click [Minimize] in the menu that appears.
Or click  .
.
Notification settings (Windows 10 only)
Adjust the settings so that notifications from applications are not displayed when distributed content is being played.
1 Press the [Windows] key and [A] key at the same time, and enable “Quiet hours” in ACTION
CENTER.
Windows Update settings
Set Windows Update so that it does not update automatically and display popup messages (dialog boxes, etc.) while distributed content is being played.
 TIPS
TIPS
If you have disabled automatic updates, be sure to check the Windows Update website (http://windowsupdate. microsoft.com/) regularly and download and install updates manually. Not installing the latest updates is a security risk and may also lead to performance related issues.
•In Windows 7 / 8.1
1Windows 7: From the Windows Taskbar, click [Start] - [Control Panel] - [System and Security] - [Turn automatic updating on or off].
Windows 8.1: Press the [Windows] key and [C] key at the same time, and click [Settings] - [Control Panel] - [System and Security] - [Turn automatic updating on or off].
The [Change settings] dialog box will appear.
2Select “Never check for updates (not recommended)” from the “Important updates” menu.
3Click [OK].
4If the [User Account Control] window appears, click “Yes”.
The [Change settings] dialog box will close.
E 20
Installation
•In Windows 10
1Press the [Windows] key and [X] key at the same time, and click [Command Prompt] in the context menu.
2Type in “gpedit.msc” and press [Enter].
3If the [User Account Control] window appears, click [Continue].
4In the tree on the left side of the [Local Group Policy Editor], click [Computer Configuration] - [Administrative Templates] - [Windows Components] - [Windows Update].
5Double-click [Configure Automatic Updates] on the right side of the [Local Group Policy
Editor].
The [Configure Automatic Updates] dialog box will appear.
6Select the “Disabled” option button and click [OK].
7Click the  button in the upper right corner to close the [Local Group Policy Editor] dialog box.
8Type “gpupdate” at the [Command Prompt] and press the [Enter] key.
9Make sure that the messages “User Policy update has completed successfully.” and “Computer Policy update has completed successfully.” appear, and then click the  button in the upper right corner to close the [Command Prompt] dialog box.
 TIPS
TIPS
In Windows 10 Home Edition, Windows Update cannot be disabled.
Resident application settings
Adjust the settings of resident applications so that they do not display popup messages (dialog boxes, etc.) while programs are playing.
E 21

Installation
Uninstalling e-Signage S
•Uninstalling the server software will not delete any tenants or users that have been created or data that was uploaded to the server. After you reinstall the server software, you will be able to use the data again.
1
2
3
Start your computer.
Exit all applications.
Launch the e-Signage S setup program (Setup.exe).
•Double-click Setup.exe to launch the setup program.
•If a security warning (“The publisher could not be verified.”) appears during the installation, click [Run].
If the [User Account Control] window appears, click “Yes”.
4
5
6
Select the “Remove” option button and click [Next].
Click [Yes].
Uninstallation will start.
 TIPS
TIPS
If Distribution Scheduler, Client Scheduler, or HTTP Server is already running, a message will appear. In this case, click [Yes]. Distribution Scheduler, Client Scheduler, or HTTP Server will be forcibly terminated and uninstallation will continue.
Click [Finish].
This completes uninstallation.
E 22
Server Settings
After installing e-Signage S, configure the server settings. The settings that must configured depend on the software you installed.
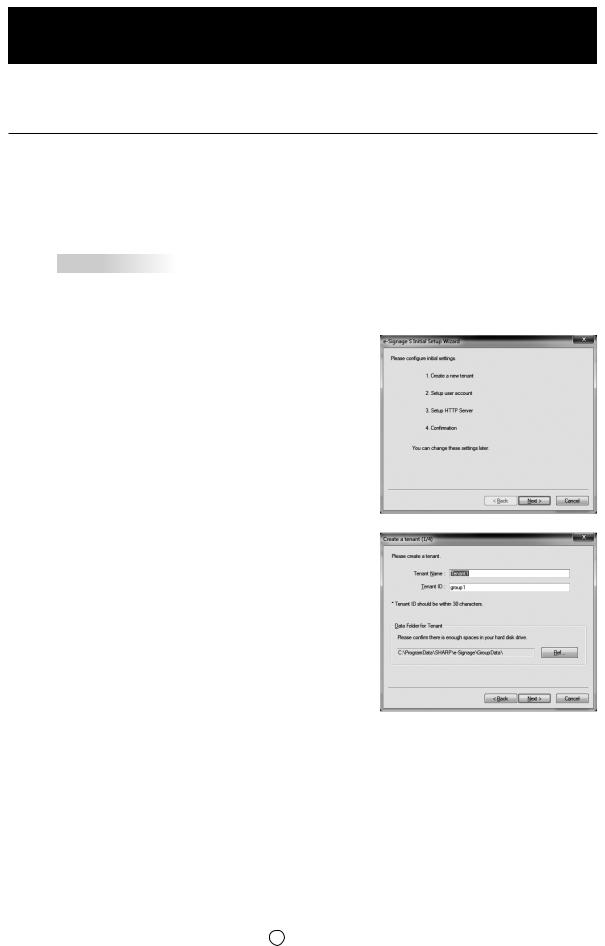
WEB Server Settings (Initial Setup Wizard)
1 Double-click the e-Signage S shortcut icon on Desktop.
Configuration Tool will launch. When launching the tool for the first time, follow the instructions in the setup wizard to configure the WEB server.
From the taskbar, click [Start] - [All Programs] - [SHARP e-Signage S] - [Server Management Tool].
 TIPS
TIPS
2
3
•After initial setup has been completed, the dashboard screen ( page 30) will appear when you click the e-Signage S shortcut icon.
Click [Next].
Create a tenant.
Create a tenant that will be used to manage users, panels and schedule data. Enter a tenant name and tenant ID (up to 30 alphanumeric characters).
“Data Folder for Tenant”
This folder contains the user, panel and schedule data.
To use a different folder, click [Ref] and specify the folder.
When you have finished entering, click [Next].
E 23
Server Settings
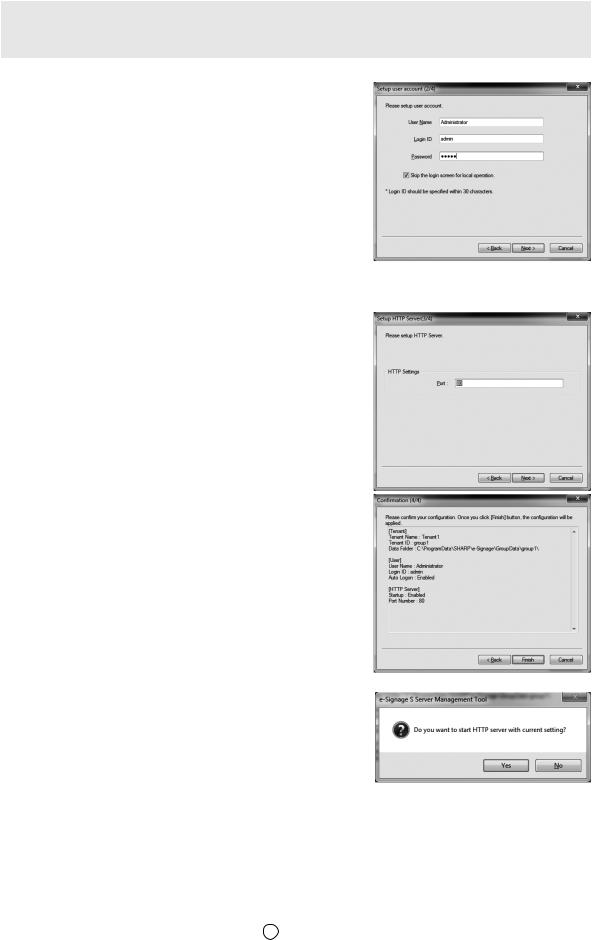
4 Register an initial user.
5
6
7
Register user information for server login.
Enter a user name, login ID (up to 30 alphanumeric characters) and password (up to 30 alphanumeric characters).
To skip the login screen when starting, select the “Skip the login screen for local operation” checkbox.
When you have finished entering, click [Next].
Configure HTTP Server setting.
Set the port number.
When you have completed the settings, click [Next].
Review the settings.
The settings are shown in the window. To finalize the settings, click [Finish]. To make changes, click [Back]. If you need to make changes after finalizing the settings, you can use Server Management Tool.
After checking the settings, click [Finish].
The e-Signage S Server Management Tool window will appear.
Click [Yes].
E 24
Server Settings
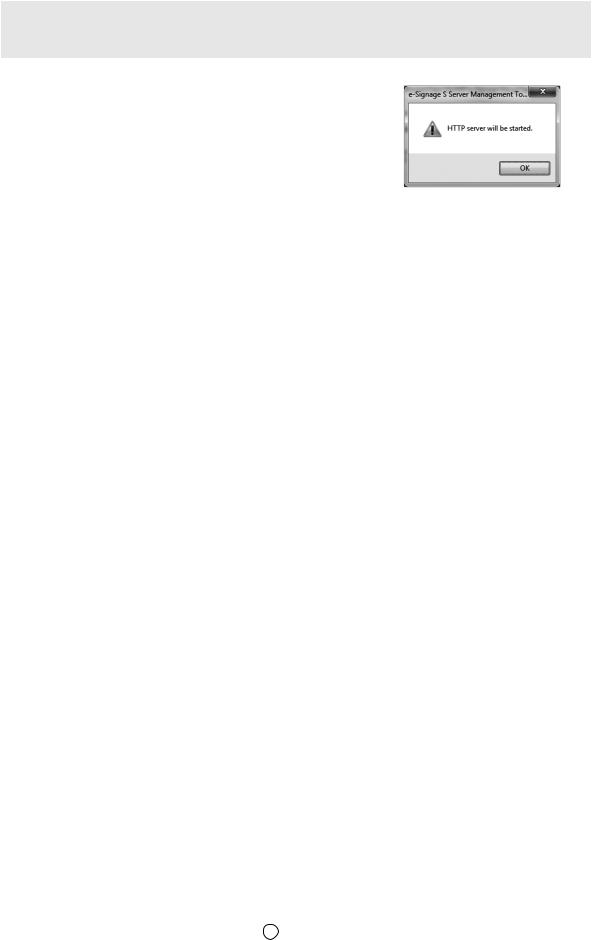
8 Click [OK].
HTTP Server will launch.
E 25
Server Settings
WEB Server Settings
1 From the Windows taskbar of the management PC, click [Start] - [All Programs] - [SHARP e Signage S] - [Server Management Tool].
Configuration Tool will launch and e Signage S Server Management Tool window will appear.
2
3
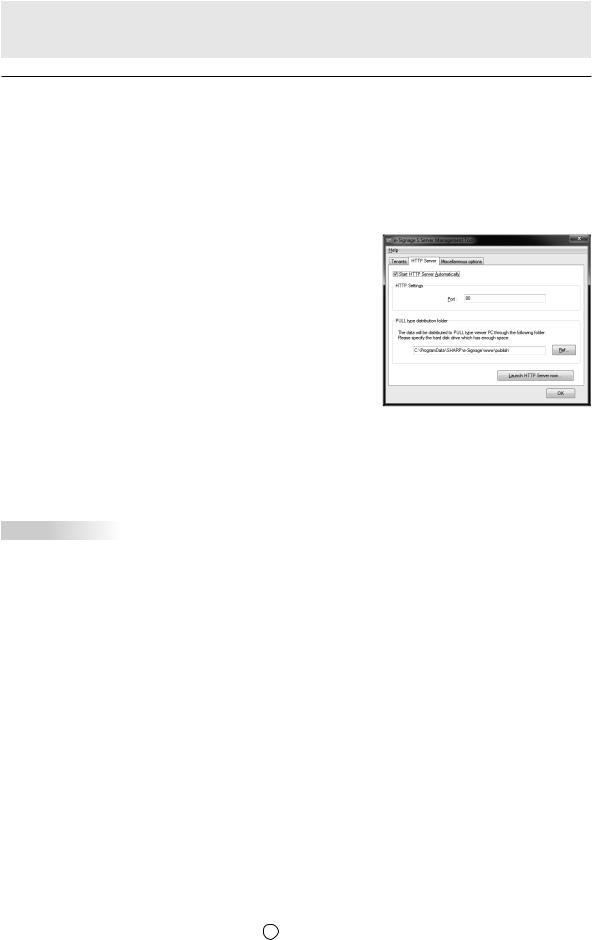
Click the “HTTP Server” tab of the Server Management Tool window.
Check the “Start HTTP Server Automatically”
checkbox.
HTTP Server will automatically launch when the management PC is started.
4 Enter a port number in “HTTP Settings”.
80 is set by default.
5 Click [Ref] in “PULL type distribution folder” and specify a folder.
Set the folder that will be used to store the distribution data for PULL type distribution.
6 Click [Launch HTTP Server now].
HTTP Server will launch.
 TIPS
TIPS
Server programs of the WEB Server will run as user processes and cannot be run as services. Log in to Windows using a user account with administrator privileges, and use WEB Server programs (HTTP Server and
Distribution Scheduler) that launch from startup.
E 26
Server Settings
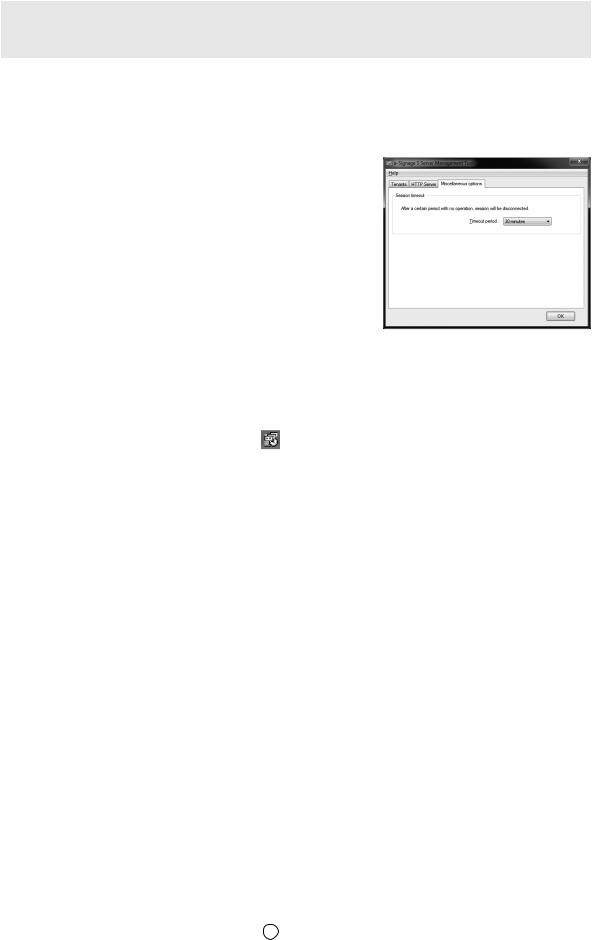
Setting the automatic logout time
Set the time after which automatic logout takes place if no actions are performed after logging in.
The default setting is 30 minutes.
1 Click the “Miscellaneous options” tab in the Server Management Tool window.
2
3
Select a timeout time from the pull-down menu.
If you do not want to be logged out automatically, select
“(none)”.
Click [OK].
Distribution Scheduler
Distribution Scheduler is a tool for managing e-Signage communication. Distribution Scheduler will launch automatically from “Startup” when you log in to Windows.
When Distribution Scheduler launches, an icon ( ) is displayed (and resides permanently) in the Task Tray.
Do not exit Distribution Scheduler unnecessarily.
E 27
Logging in

Logging In
Logging in to WEB Server
1 Double-click the e-Signage S shortcut icon on Desktop.
If a tenant has not been created, the server settings open. ( Page 23)
 TIPS
TIPS
•For Internet Explorer installed on Windows Server 2008 / 2008 R2 / 2012 / 2012 R2 / 2016, functions such as page redirection are restricted to increase security.
•If WEB Server does not operate, add the URL for WEB Server (http://(IP address of the server:Port number)/) to “Trusted Sites”. This can be accessed by clicking “Internet Options” - “Security” in Internet Explorer.
E 29
Logging In
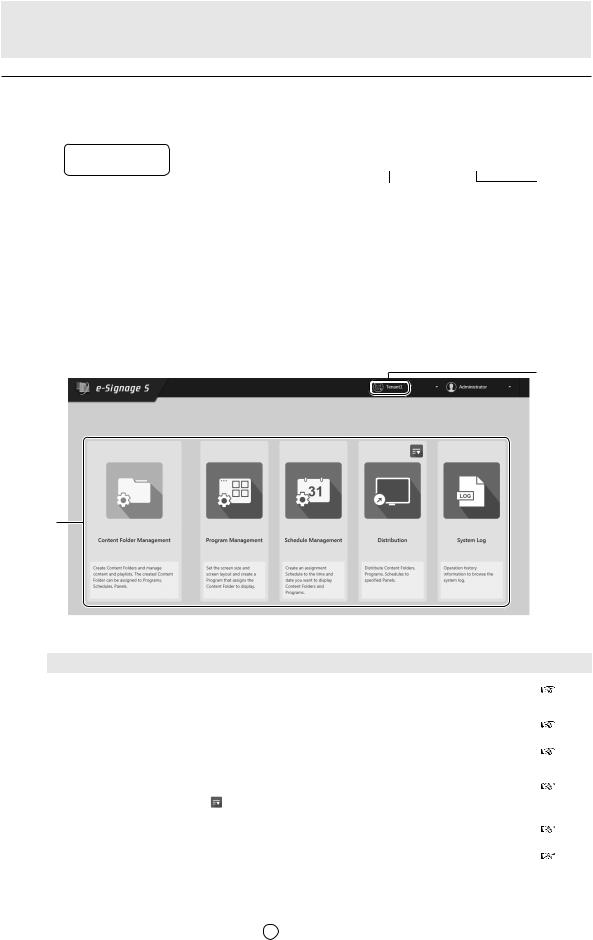
Description of the screen
Toolbar
(1) 

 (4)
(4)
(2) |
|
|
(3) |
|
|
||
(1) Home button |
(3) User |
||
Use this to return to Dashboard from other screens.
Shows the currently logged in user. You can change the password.
(2) Function selection button |
(4) Logout button |
You can select and display functions.
Click to log out from the server.
This will not appear if the login screen is skipped. ( Page 24)
Dashboard
 (6)
(6)
(5)
(5) Function buttons
Tab |
|
Description |
Page |
|
Content Folder |
Create and manage content folders and lists of content (video/ |
31 |
||
Management |
images, audio, scroll messages) stored in content folders. |
|||
|
||||
|
|
|
|
|
Program Management |
Create and manage programs that display content in an arranged |
52 |
||
|
layout. |
|
||
|
|
|
||
|
|
|
|
|
Schedule Management |
Create and manage content folders and program playback schedules. |
63 |
||
|
|
|
|
|
Distribution |
Distribute content folders, programs, and schedules. |
|
||
|
You can check distribution schedules and distribution statuses. |
73 |
||
|
Click to display the following menus. |
|
||
|
|
|
|
|
|
USB memory / SD |
You can use USB memory (USB flash drive) |
81 |
|
|
Card Distribution |
or an SD memory card for distribution. |
||
|
|
|||
System Log |
View logged operation and distribution information. |
82 |
||
(6)Show data usage button
Show e-Signage S data usage.
E 30
Loading...