


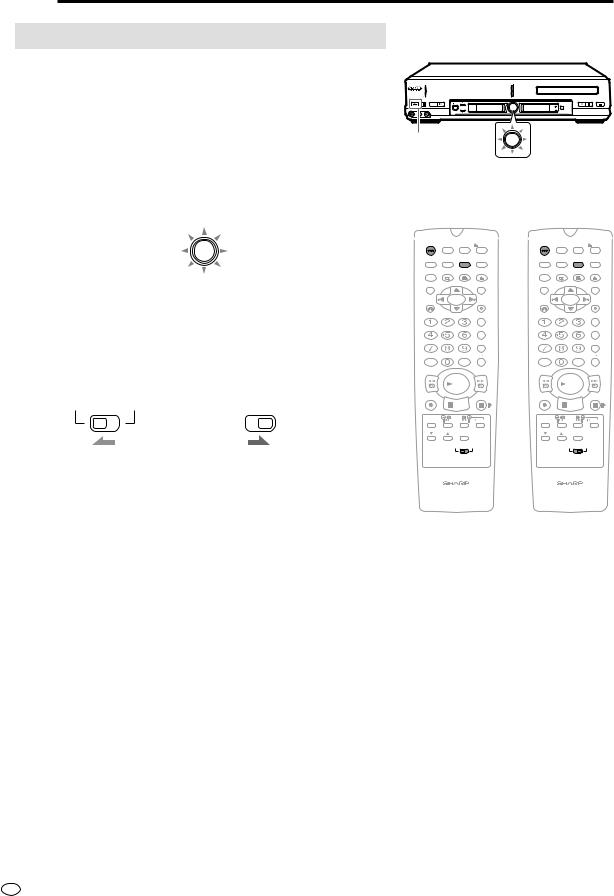
VCR/DVD COMBINATION
MODEL
DV-NC70
OPERATION MANUAL
OPERATE EJECT/STOP |
REW PLAY/×2 |
PLAY STOP |
OPEN/CLOSE |
/ |
REC |
TIMER |
|
|
|
||
|
CH |
VCR/DVD |
|
|
SELECTOR |
|
|
AV 2 IN VIDEO L(MONO)-AUDIO-R |
|
VCR DVD |
|
PAL NTSC
2 |
NTSC/PAL |

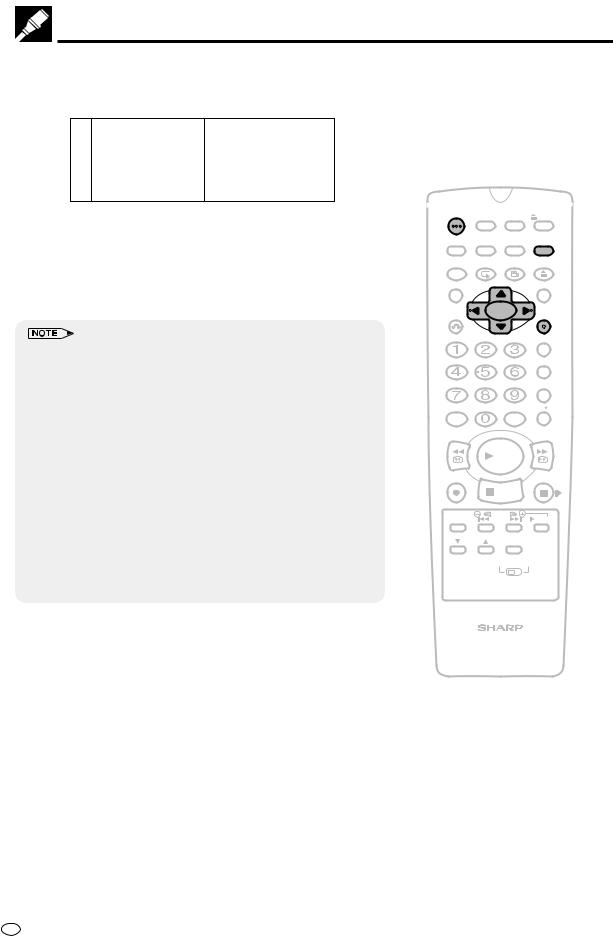
About This Manual
•All mentions of “the Remote” refer to the remote control unit.
•The following table describes the icons used in this Operation Manual.
Icon |
Meaning |
Tips and Hints for easier operation
Functions for DVD
DVD
VIDEO |
Functions for VIDEO CD |
C D |
|
|
|
C D |
Functions for Audio CD |
|
|
|
|
|
GENERAL INFORMATION |
CONNECTION AND INITIAL SETTING
VCR, DVD SETUP
WATCHING THE VCR, DVD
OTHER INFORMATION
Important!
Be sure to read this Operation Manual carefully before using the Product for the first time, and keep it on hand for future reference when you experience operational problems.
SAFETY INFORMATION
Note:
This Product can be used only where the power supply is AC 110V-240V, 50/60Hz. It cannot be used elsewhere.
CAUTION:
USE OF CONTROLS OR ADJUSTMENTS OR PERFORMANCE OF PROCEDURES OTHER THAN THOSE SPECIFIED HEREIN MAY RESULT IN HAZARDOUS RADIATION EXPOSURE.
AS THE LASER BEAM USED IN THIS PRODUCT IS HARMFUL TO THE EYES, DO NOT ATTEMPT TO DISASSEMBLE THE CABINET. REFER SERVICING TO QUALIFIED PERSONNEL ONLY.
WARNING:
TO REDUCE THE RISK OF FIRE OR ELECTRIC SHOCK, DO NOT EXPOSE THIS EQUIPMENT TO RAIN OR MOISTURE.
TO REDUCE THE RISK OF FIRE OR ELECTRIC SHOCK, AND ANNOYING INTERFERENCE, USE THE RECOMMENDED ACCESSORIES ONLY.
Laser Diode Properties
Material: AlGaInP
Wave length: 650 nm
Emission Duration: Continuous
Laser output: Max. 0.7 mW
Power Cord Protection
To avoid any malfunctions of the Product, and to protect against electric shock, fire or personal injury, please observe the following.
•Hold the plug firmly when connecting or disconnecting the AC power cord.
•Keep the AC power cord away from heating appliances.
•Never put any heavy object on the AC power cord.
•Do not attempt to repair or reconstruct the AC power cord in any way.
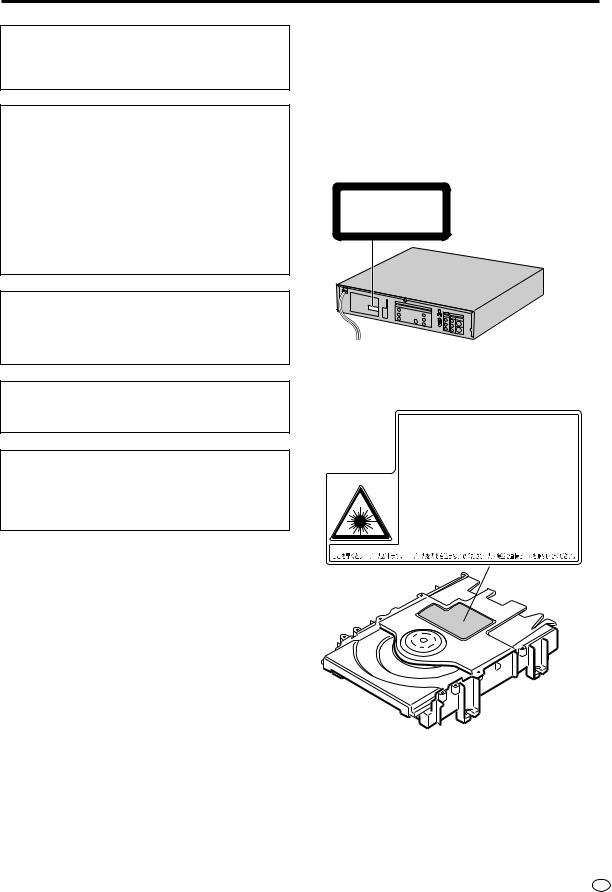
•This Product is classified as a CLASS 1 LASER product.
•The CLASS 1 LASER PRODUCT label is located on the rear cover.
•This product contains a low power laser device. To ensure continued safety do not remove any cover or attempt to gain access to the inside of the product. Refer all servicing to qualified personnel.
CLASS 1
LASER PRODUCT
(Rear of product)
|
CAUTION-LASER RADIATION WHEN OPEN. DO NOT STARE INTO BEAM |
|
OR VIEW DIRECTLY WITH OPTICAL INSTRUMENTS. |
|
VORSICHT-LASERSTRAHLUNG, WENN GEFFNET. BLICKEN SIE NICHT IN DEN STRAHL |
|
UND BETRACHTEN SIE DIESEN NICHT DIREKT MIT OPTISCHEN INSTRUMENTEN. |
|
ATTENTION-RADIATION LASER EN CAS D'OUVERTURE. NE PAS FIXER LE |
|
FAISCEAU NI REGARDER DIRECTEMENT DES INSTRUMENTS OPTIQUES. |
|
VARNING-LASERSTRÅLNING NÄR DENNA DEL ÄR ÖPPNAD. STIRRA EJ IN |
SA005WJ |
I STRÅLEN OCH BETRAKTA EJ STRÅLEN MED OPTISKA INSTRUMENT. |
|
VARO ! AVATTAESSA OLET ALTTIINA LASERSÄTEILYLLE. ÄLÄ TUIJOTA |
|
SÄTEESEEN ÄLÄKÄ KATSO SITÄ OPTISEN LAITTEEN LAPI. |
|
VARNING-LASERSTRÅLNING NÄR DENNA DEL ÄR ÖPPNAD. STIRRA EJ IN I |
|
STRÅLEN OCH BETRAKTA EJ STRÅLEN GEMON OPTISKT INSTRUMENT. |
|
ADVARSEL-LASERSTRÅLING NÅR DEKSEL ÅPNES. STIRR IKKE INN I |
|
STRÅLEN ELLER SE DIREKTE MED OPTISKE INSTRUMENTER. |
|
ADVARSEL-LASERSTRÅLING VED ÅBNING. SE IKKE IND I STRÅLEN- |
|
HELLER IKKE MED OPTISKE INSTRUMENTER. |
INFORMATION |
GENERAL |
|
|
1 GB

SAFETY INFORMATION
Location and Handling
•Do not place your Product in closed spaces or do not cover it to prevent excessive temperatures inside the Product.
•Do not place the Product in direct sunlight, or near heat sources.
•Keep the Product away from strong magnetic objects.
•Do not place any object containing water or other liquids on the Product. In the event that liquid should enter the cabinet, unplug the Product immediately and contact the retailer or service centre approved by SHARP immediately.
•Do not remove the Product cabinet. Touching parts inside the cabinet could result in electric shock and/ or damage to the Product. For service and adjustment inside the cabinet, call a qualified dealer or service centre approved by SHARP.
Nonuse Periods
When the Product is not being used, switch the Product to the standby mode.
When left unused for a long period of time, the Product should be unplugged from the household AC outlet.
No Fingers or Other Objects Inside
Do not put any foreign object on the disc tray.
Stacking
Place the Product in a horizontal position, and do not place anything heavy on it.
Condensation
Moisture may form on the pickup lens in the following conditions:
•immediately after a heater has been turned on.
•in a steamy or very humid room.
•when the Product is suddenly moved from a cold
environment to a warm one.
If moisture forms inside this Product, it may not operate properly.
In this case, turn on the power and wait about one hour for the moisture to evaporate.
Cleaning
Unplug your Product before cleaning. Use a damp cloth for cleaning. Do not use cleaning fluids or aerosols which could enter the Product and cause damage, fire, or electrical shock. These substances may also deteriorate the finish of your Product.
If There is Noise Interference on the TV While a Broadcast is being Received
Depending on the reception condition of the TV, interference may appear on the TV monitor when you watch a TV broadcast while the Product is turned on. This is not a malfunction of the Product or the TV. To watch a TV broadcast, turn off the Product.
Service
Do not attempt to service this Product yourself. Please refer any service to the nearest service centre approved by SHARP.
Copyright
Audio-visual material may consist of copyrighted works which must not be recorded without the authority of the owner of the copyright. Please refer to relevant laws in your country.
Copy Protection
This Product supports Macrovision copy protection. On DVDs that include a copy protection code, if the contents of the DVD are copied using a VCR, the copy protection code prevents the videotape copy from playing normally.
Apparatus Claims of U.S.Patent Nos. 4,631,603, 4,577,216, 4,819,098 and 4,907,093 licensed for limited viewing uses only.
This product incorporates copyright protection technology that is protected by method claims of certain U.S. patents and other intellectual property rights owned by Macrovision Corporation and other rights owners. Use of this copyright protection technology must be authorized by Macrovision Corporation, and is intended for home and other limited viewing uses only unless otherwise authorized by Macrovision Corporation. Reverse engineering or disassembly is prohibited.
Recommended Measures for Optimum Picture Excellence
The Product is a precision device that is constructed using extremely accurate technology.
Soiling or friction affecting the pickup lens or disc drive can impair the image quality. At the worst, neither video nor audio will be played back. To obtain optimum picture quality, the Product should be checked (cleaning and replacement of some parts) every 1,000 hours. Note that this period varies depending on the environment (temperature, humidity, dust, etc.) in which the Product is used. Contact your authorized Sharp supplier for details.
Do not attempt to clean the pickup lens yourself.
GB 2
 Types of Discs that Can Be Played on This Product
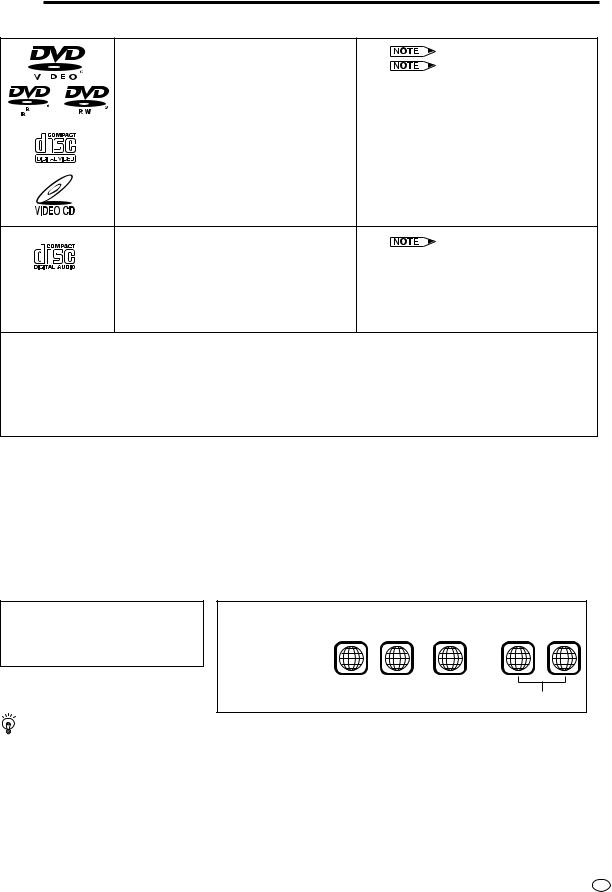
This Product can play back discs bearing any of the following marks:
|
|
|
DVD |
See |
1 |
|
|
|
DVD-R/DVD-RW* |
See |
2 on the next page |
|
|
|
[8cm(3") disc/12cm(5") disc] |
* Disks that have not been finalized cannot be played |
|
|
|||||
|
|
|
|
back. In addition, disks that have been recorded |
|
|
|
|
|
with the video recording format (VR Recording) also |
|
4.7 |
|
|
|
cannot be played back. |
|
|
|
|
|||
|
|
|
|
|
|
|
|
|
VIDEO CDs |
• Supports up to version 2.0. |
|
|
|
|
[8cm(3") disc/12cm(5") disc] |
|
|
Audio CDs |
See |
3 on the next page |
[8cm(3") disc/12cm(5") disc] |
|
|
|
|
|
CD-R/CD-RW |
• Discs recorded in MP3 file format or |
|
[8cm(3") disc/12cm(5") disc] |
Audio format. |
|
Other CDs
1)On CD-G and CD-EXTRA discs, only the sound can be played (no images).
2)Photo CD, DVD-ROM, DVD-RW (Video Recording Format), DVD-Audio, SACD, SVCD and CD-ROM discs cannot be used.
3)Discs with unusual shapes (heart-shaped or hexagonal discs) cannot be used. The use of such discs will
cause a fault.
• This Product will reject an incompatible disc, therefore the disc type should be checked.
This Product will output NTSC signals when playing “NTSC discs”. NTSC signals cannot be converted to modified PAL signals.
An NTSC TV or NTSC-compatible Multi-system TV must be used when playing NTSC discs.
DVD-R/DVD-RW Recording Modes
The video mode refers to a mode that allows playback with an ordinary DVD player. It is the mode that allows recording onto disks of DVD-R Ver. 2.0 or later or DVD-RW Ver. 1.1 or later. The video recording format (VR Recording) refers to the recording mode that allows various recording functions and editing in compliance with the standard specifications of the DVD Forum. (Cannot be played back with this Product)
 1
1
•DVD video players and discs are designed with region numbers which dictate the regions in which a disc can be played. If the region number on the disc you want to play does not match the region number in this Product, you will not be able to play the disc.
The region number for this Player is 2.
Samples of region number marks compatible with this Player:
2 |
12 |
.... 1 2 |
........ |
1 2 3 |
ALL |
|
|
6 |
|
4 5 6 |
|
Disc playable in all regions
As for the list of the region number 2 countries and the world map for all region numbers, refer to pages 98 and 99.
3 GB

Types of Discs that Can Be Played on This Product
Disc Function or Operation that is Not Available
In the cases listed below, the  or
or  indicator may appear on the TV screen, which indicates that the function or operation is not available.
•When you intend to perform the function or operation on which the manufacturer restriction is imposed: The specific functions on some DVDs and VIDEO CDs are determined by the disc manufacturer. As this Product plays disc data in accordance with the guidelines of the disc manufacturer, some functions may not be available on some discs. Be sure to read the documentation provided with the disc.
•When you intend to perform the functions or operations prohibited for the current disc:
The types of functions and operations that can be used for a particular disc vary depending on the features of that disc. Some disc functions and operations may differ from the descriptions given in this Operation Manual. In this event, follow the instructions given on the screen.
Icons Used on DVDs |
|
|
|
|
|
|
|
|
|
|
|
|
|
|
|
||||||||||||
Sample Icons |
|
|
|
|
|
|
|
|
|
|
|
|
|
|
|
|
|
|
|
|
|
|
|
|
|||
|
|
|
|
|
|
|
|
|
|
|
|
|
|
|
|
|
|
|
|
|
|
|
|
|
|
|
|
|
2 |
1. |
English |
|
|
|
2 |
|
|
|
1. English |
|
|
|
|
|
|
|
|
|
|
|
2 |
|
|||
|
2. |
Chinese |
|
|
|
|
|
|
2. Chinese |
|
|
16:9 |
LB |
|
|
2 |
|
|
|
||||||||
|
|
|
|
|
|
|
|
|
|
|
|
|
|
|
|
|
|
|
|||||||||
|
|
|
|
|
|
|
|
|
|
|
|
|
|
|
|
|
|
|
|||||||||
|
|
|
|
|
|
|
|
|
|
|
|
|
|
|
|
|
|
|
|
|
|||||||
|
|
|
|
|
|
|
|
|
|
|
|
|
|
|
|
|
|
|
|
|
|
|
|||||
|
|
|
|
|
|
|
|
|
|
||||||||||||||||||
Number of audio |
Type of subtitles |
Screen aspect |
Disc with |
Region code indicator |
|||||||||||||||||||||||
tracks |
|
|
recorded |
|
ratio recorded |
multiple |
|
|
|
||||||||||||||||||
|
|
|
|
|
|
|
|
|
|
|
|
|
|
|
|
|
|
|
|
camera angles |
|
|
|
||||
|
|
|
|
|
|
|
|
|
|
|
|
|
|
|
|
|
|
|
|
|
|
|
|
|
|
|
|
 2
2
• This Product supports 2-channel (L/R) audio and 5.1ch (Multi-channel) MPEG Audio 1/2 (only when the DIGITAL OUT coaxial jack is used for connection). It does not support 7.1 channel MPEG Audio Version 2.0.
3
•When playing back a CD-G (Graphics) or CD EXTRA disc, the audio portion will be played, but the graphic images will not be shown.
Title, Chapter and Tracks
•DVDs are divided into “titles” and “chapters”. If the disc has more than one movie on it, each movie would be a separate “title”. “Chapters”, on the other hand, are sections of titles.
Example: DVD
Title 1 |
Title 2 |
Chapter 1 Chapter 2 Chapter 3 |
Chapter 1 Chapter 2 |
• VIDEO CDs and Audio CDs are divided into “tracks”. You can think of a “track” as one tune on an Audio CD.
Example: VIDEO CD or Audio CD
Track 1 |
Track 2 |
Track 3 |
Track 4 |
Track 5 |
•Numbers identify each title, chapter, and track on a disc. Most discs have these numbers recorded on them, but some do not.
GB 4
 Disc Handling and Maintenance
Handling Precautions
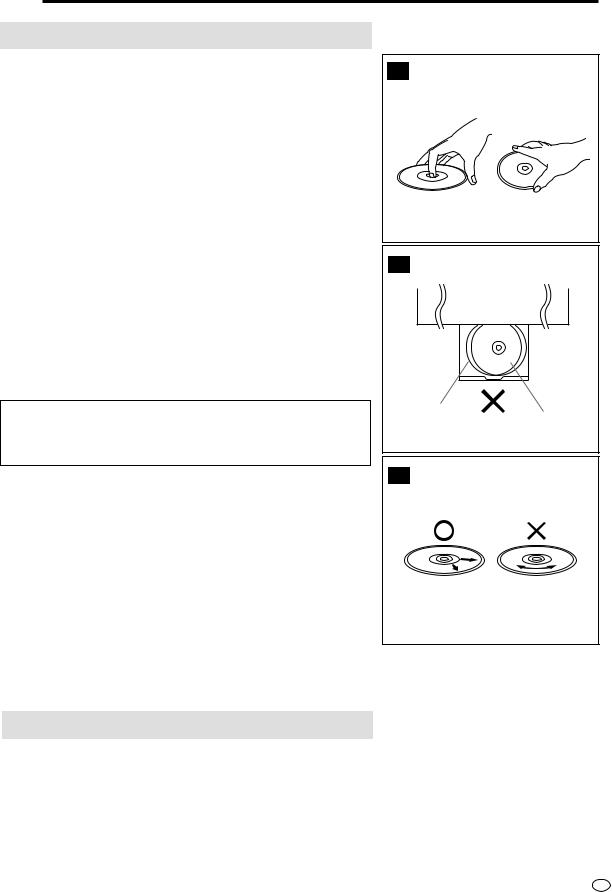
•Hold the disc by the edges so the surface will not be soiled with
fingerprints. ( )
)
Fingerprints, dirt and scratches can cause skipping and distortion.
•Do not write on the label side with a ball-point pen or other writing utensils.
•Do not use record cleaning sprays, benzine, thinner, static electricity prevention liquids or any other solvent.
•Be careful not to drop or bend the disc.
•Do not install more than 1 disc on the disc tray.
•Do not try to close the disc tray when the disc is not installed properly. ( )
)
•Be sure to store the disc in its exclusive case when not in use. Then store upright.
•Do not stick paper or adhesive labels to the disc.
If the Surface is Soiled ( )
)
Wipe gently with a soft, damp (water only) cloth.
When wiping discs, always move the cloth from the center hole towards the outer edge.
(If you wipe the discs using a circular motion, circular scratches are likely to occur, which will cause noise.)
If the playing surface of a disc is soiled or scratched, the Product may decide that the disc is incompatible and eject the disc tray, or it may fail to play the disc correctly. Wipe any soiling off the playing surface with a soft cloth.
If the Disc is Brought from a Cold to a Warm Environment, Dew May Form on the Disc
Wipe the dew off with a soft, dry, lint-free cloth before using the disc.
Improper Disc Storage
You can damage discs if you store them in the following places:
•Areas exposed to direct sunlight
•Humid or dusty areas
•Areas directly exposed to a heat outlet or heating appliance
A
B
Disc tray
Disc
C
Maintenance
•Be sure to turn the Product off and disconnect the AC power cord before maintaining the Product.
•Wipe this Product with a dry soft cloth.
If the surfaces are extremely dirty, wipe clean with a cloth which has been dipped in a weak soap-and-water solution and wrung out thoroughly and then wipe again with a dry cloth.
•Never use alcohol, benzine, thinner, cleaning fluid or other chemicals. And do not use compressed air to remove dust.
5 GB

 Contents
GENERAL INFORMATION |
|
SAFETY INFORMATION ................................ |
1 |
Types of Discs that Can Be Played on |
|
This Product .............................................. |
3 |
Disc Handling and Maintenance .................. |
5 |
Features ......................................................... |
8 |
Accessories ................................................... |
8 |
Major Components ........................................ |
9 |
CONNECTION AND INITIAL SETTINGS |
|
Basic Connection ........................................ |
14 |
Connecting to ANTENNA IN/RF OUT .............. |
14 |
Connecting a TV Equipped with |
|
VIDEO/AUDIO Input Jacks .......................... |
15 |
Using the Component Colour (Y, PB (CB), |
|
and PR (CR)) Output Jacks ........................... |
15 |
DVD Audio Connections ............................. |
16 |
Connecting a TV Equipped with S-VIDEO |
|
Input Jacks ................................................... |
16 |
Connecting to Audio Equipment ....................... |
16 |
Playing 2 channel audio ................................ |
16 |
Playing Dolby Digital (5.1 channel), DTS or |
|
MPEG audio ............................................... |
17 |
Preparations Before Using the Product .... |
18 |
Adjusting the Video Channel ..................... |
19 |
Auto Tuning System ................................... |
21 |
VCR SETUP |
|
VCR Setup .................................................... |
24 |
Menu Screen .................................................... |
24 |
Mode Selection ................................................. |
25 |
Setting the Channels ........................................ |
27 |
Auto Tuning ...................................................... |
28 |
Manual Tuning .................................................. |
30 |
Channel Skip/Cancelling Skip .......................... |
32 |
Channel Skip ................................................. |
32 |
Cancelling Skip ............................................. |
34 |
Setting the Clock .............................................. |
35 |
Initial Setting of Clock ................................... |
35 |
Changing the Clock Setting .......................... |
36 |
Setting the Language ....................................... |
37 |
VCR-RESET ................................................. |
37 |
Initial Setting of Language ............................ |
37 |
Changing Language ...................................... |
37 |
GB 6 |
|
VCR Display Information ............................ |
38 |
How to Display Indicators ................................. |
38 |
VCR Front Panel Display ................................. |
38 |
DVD SETUP |
|
DVD Setup .................................................... |
40 |
About the SETUP Screen ................................. |
40 |
TV MODE Setting ............................................. |
41 |
PARENTAL Level Setting ................................. |
42 |
AUDIO Setting .................................................. |
44 |
Setting the COMPRESSION |
|
(Dolby Digital output level) .......................... |
44 |
Setting the DOLBY DIGITAL ......................... |
45 |
Setting the MPEG ......................................... |
46 |
Setting the CINEMA VOICE .......................... |
46 |
DISC LANGUAGE Setting ................................ |
47 |
Setting SUBTITLE, |
|
AUDIO and MENU languages .................... |
47 |
Selecting languages from OTHER ................ |
48 |
DVD Display Information ............................ |
49 |
Operation Mode Indicators ............................... |
49 |
Language Code List for Disc Language ... 50
WATCHING THE VCR |
|
Playback ....................................................... |
52 |
Inserting a Video Cassette ............................... |
52 |
Playback ........................................................... |
52 |
Video Search (with the Remote) ....................... |
52 |
Fast Forwarding and Rewinding ....................... |
53 |
Slow Motion Playback (with the Remote) ......... |
53 |
Still Picture and Frame Advance ...................... |
53 |
Double Speed Playback ................................... |
53 |
NTSC Tape Play Back on PAL TV .................... |
54 |
Full Auto Playback ............................................ |
54 |
Auto Head Cleaning System ............................ |
54 |
Auto Tracking Control System .......................... |
54 |
Quick Start with Full Loading Mechanism ........ |
54 |
AUTO RENTAL ................................................. |
55 |
COLOUR .......................................................... |
55 |
BLUE BACK ..................................................... |
56 |
Playback of Hi-Fi Recorded Tapes ................... |
57 |
Audio Output Mode .......................................... |
57 |
Adjusting Hi-Fi Audio Tracking ......................... |
57 |
Sharp Super Picture .................................... |
58 |
Auto Repeat ................................................. |
59 |
Auto Zero Back ............................................ |
60 |

|
|
|
|
|
Contents |
|
DPSS (Digital Program Search System) |
|
About the Function Control Screen .......... |
81 |
|||
/Skip Search ............................................ |
61 |
Direct skip (title [track]/chapter/time) ................ |
82 |
|||
DPSS ................................................................ |
61 |
Subtitle language setting .................................. |
83 |
|||
Skip Search ...................................................... |
61 |
Angle setting ..................................................... |
84 |
|||
TV Programme Recording .......................... |
62 |
Audio setting ..................................................... |
85 |
|||
Cassette Erase Protection ................................ |
62 |
3D VIRTUAL SURROUND setting .................... |
86 |
|||
Recording a TV Programme ............................. |
62 |
DIGITAL GAMMA setting .................................. |
87 |
|||
To Watch Another TV Programme While |
|
Direct Selection of Scenes ......................... |
88 |
|||
Recording ..................................................... |
62 |
Selecting Scenes by Title Number ................... |
88 |
|||
Recording NICAM/IGR Multiplex Broadcasts ... |
63 |
Selecting Scenes from the Menu Screen |
......... 88 |
|||
Simple Recording Timer ............................. |
64 |
Programmed Playback ................................ |
89 |
|||
Immediate Recording ....................................... |
64 |
Chapter Programmed Playback ....................... |
89 |
|||
Recording with the Timer ........................... |
65 |
Track Programmed Playback ............................ |
90 |
|||
Confirming Timer Programmes ........................ |
68 |
MP3 Files Programmed Playback .................... |
91 |
|||
Cancelling Timer Programmes ......................... |
69 |
Repeat Playback .......................................... |
92 |
|||
Tape Dubbing .............................................. |
70 |
Repeat playback ............................................... |
92 |
|||
Recording a DVD Disc onto a Video |
|
A-B Repeat ....................................................... |
93 |
|||
Cassette ................................................... |
71 |
Resume Function ........................................ |
94 |
|||
Recording a DVD disc onto a Video cassette |
|
|
|
|
||
(Tape Editing mode) ..................................... |
71 |
|
|
|
||
|
OTHER INFORMATION |
|||||
|
|
|
|
|||
|
|
|
|
|
|
|
|
|
|
|
|
|
|
|
WATCHING THE DVD |
|
Troubleshooting .......................................... |
95 |
||
Preparing to Use DVD |
74 |
......................................Definition of Terms |
97 |
|||
Specifications |
100 |
|||||
When connecting a TV with the |
|
|||||
|
|
|
|
|||
DVD output jacks ......................................... |
74 |
|
|
|
||
When connecting a TV with the |
|
|
|
|
||
DVD/VCR shared output jacks ..................... |
74 |
|
|
|
||
Playback ....................................................... |
75 |
|
|
|
||
INFORMATION |
GENERAL |
|
|
|
|
INITIALSETTINGS |
CONNECTIONAND |
|
|
VCRSETUP |
|
|
|
|
|
DVDSETUP |
|
|
|
|
|
THEVCR |
WATCHING |
|
|
Basic Play ......................................................... |
75 |
Track Direct Playback ....................................... |
75 |
Fast Forward/Fast Reverse ............................... |
76 |
Slow-Motion Play .............................................. |
76 |
Still/Pause ......................................................... |
77 |
Frame Advance ................................................ |
77 |
Skip (Forward/Reverse) .................................... |
77 |
Angle Selection ........................................... |
78 |
Playing MP3 Discs ...................................... |
79 |
Regarding MP3 discs ....................................... |
79 |
Playing MP3 discs ............................................ |
79 |
To play MP3 discs ............................................. |
80 |
To play another file (music title) while playing ... |
80 |
To skip the file while playing ............................. |
80 |
THEDVD |
WATCHING |
|
|
|
|
INFORMATION |
OTHER |
|
|
7 GB
 Features
■ Common Features
•A DVD, AUDIO CD, VIDEO CD player and VCR all in one.
•Simultaneous VCR recording and DVD playback.
■ VCR
• Hi-Fi Stereo Sound, NICAM/IGR System
•380-times High Speed Rewind Function (in NTSC)
•S-VHS Simple Playback
•HQ (High Quality) Circuitry
•Simple Recording Timer
•Sharp Super Picture
■ DVD
•Plays DVD, VIDEO CD and Audio CD discs as well as CD-R/CD-RW discs recorded in MP3 file format
•3D Virtual Surround provides high-quality surround sound
•Digital Gamma correction
•Dolby Digital*1, DTS*2, MPEG Audio digital out capability
•High-quality digital images
•High-quality digital sound
*1 Manufactured under license from Dolby Laboratories. “Dolby” and the double-D symbol are trademarks of Dolby Laboratories.
*2 “DTS” and “DTS Digital Surround” are trademarks of Digital Theater Systems, Inc.
Disc Features and this Operation Manual
•The types of functions and operations that can be used for a particular disc vary depending on the features of that disc. In some cases, these functions and operations may differ from the descriptions given in this Operation Manual. In this event, follow the instructions given on the screen. This Operation Manual only covers basic disc operations.
•For some operations, the  or
or  indicator may appear on the TV screen. This indicates that the operation described in this Operation Manual is not permitted for the current disc.
 Accessories
OPERATE |
TIMER |
PROG |
EJECT |
|
ON/OFF |
||
DISPLAY |
ON |
VCR/DVD |
VCR MENU |
SCREEN |
SELECTOR DVD SETUP |
||
FUNCTION |
PROG/ |
ANGLE |
OPEN/ |
CONTROL |
REPEAT |
CLOSE |
|
TITLE |
|
|
DVD MENU |
CLEAR |
|
|
SET |
RETURN |
|
|
ENTER |
|
|
|
ZERO BACK |
|
|
|
SKIP SEARCH |
AM/PM |
|
INPUT SELECT VCR DVD |
|
/ |
|
|
|
REV |
|
|
FWD |
|
|
PLAY |
|
REC |
|
|
PAUSE/STILL |
|
STOP |
|
|
TAPE |
DPSS |
SLOW |
|
SPEED |
SKIP |
||
CH |
|
AUDIO |
|
|
OUTPUT |
|
|
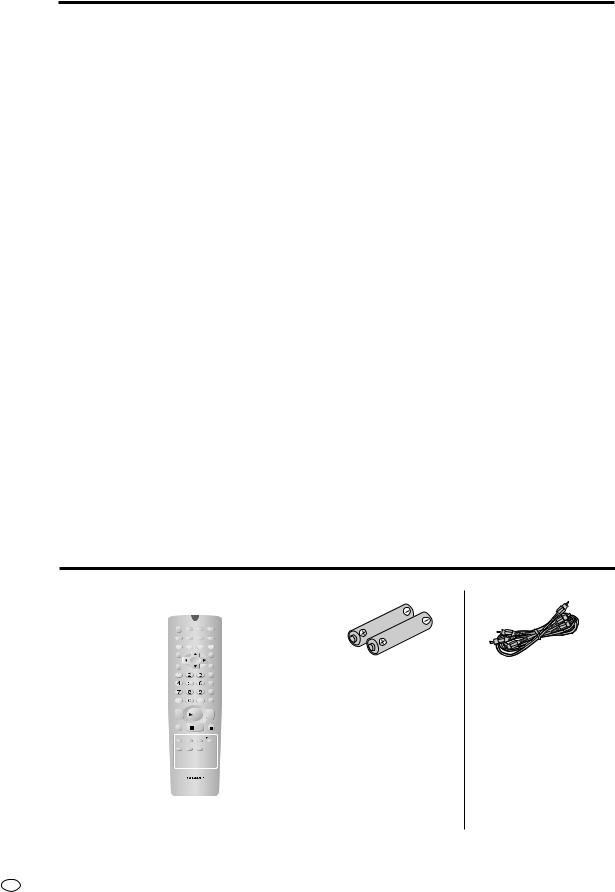
Two batteries
(AA, R6 or UM/SUM-3 ) VIDEO/AUDIO cable for the Remote
VCR DVD |
|
|
VCR/DVD COMBINATION |
|
|
Remote control unit |
RF cable |
Operation Manual |
GB 8
 Major Components
VCR Main Unit (Front)
Numbers in refer to the main pages
in this Operation Manual where the topic is explained.
|
|
|
|
|
52 |
Cassette compartment |
|
|
|
|
18 |
OPERATE |
18 |
VCR/DVD SELECTOR |
|
|
|
|
52 |
EJECT/STOP |
70 |
TIMER indicator |
|
|
|
|
|
|
|
||
Front AUDIO/ |
OPERATE EJECT/STOP |
REW PLAY/×2 |
|
|
PLAY STOP |
OPEN/CLOSE |
|
|
|
/ |
|
REC |
|
TIMER |
|
VIDEO input |
|
|
|
|
|||
|
|
CH |
VCR/DVD |
|
|
||
AV 2 IN VIDEO L(MONO)-AUDIO-R |
|
SELECTOR |
VCR DVD |
|
|||
|
|
|
|
|
|
||
jack |
70 |
|
|
|
|
|
|
REW 52
PLAY/×2 52
REC 62
CH 38
VCR Front Panel Display
Operation status |
38 |
|
|
Indicator |
|
|
|
Timer Recording |
67 |
VCR |
|
Indicator |
|
||
Audio Output |
|
L R |
|
57 |
SEPVP D |
|
|
Indicator |
|
||
Tape Speeds |
62 |
|
|
Indicator |
|
|
|
|
|
Clock Indicator |
38 |
|
|
Channel Indicator |
38 |
|
|
Tape Counter Indicator |
38 |
9 GB

Major Components
DVD Main Unit (Front)
OPERATE 74
Numbers in refer to the main pages
in this Operation Manual where the topic is explained.
75 Disc tray
75  OPEN/CLOSE
OPERATE EJECT/STOP |
REW PLAY/×2 |
PLAY STOP |
OPEN/CLOSE |
/ |
REC |
TIMER |
|
|
|
||
|
CH |
VCR/DVD |
|
|
SELECTOR |
|
|
AV 2 IN VIDEO L(MONO)-AUDIO-R |
|
VCR DVD |
|
VCR/DVD SELECTOR 74
75 Disc operation buttons (PLAY, STOP)
72 VCR DVD Indicator
DVD Front Panel Display
TITLE
Indicator
1 TRACK
Indicator
CHAPTER |
89 PROGRAM Indicator |
Indicator |
|
86 VIRTUAL surround Indicator
Operation status/Time Indicator 49 |
92 REPEAT Indicator |
2
78 ANGLE Indicator
You can toggle between 1 and 2by pressing the remote control unit’s DISPLAY button (page 49).
GB 10

Major Components
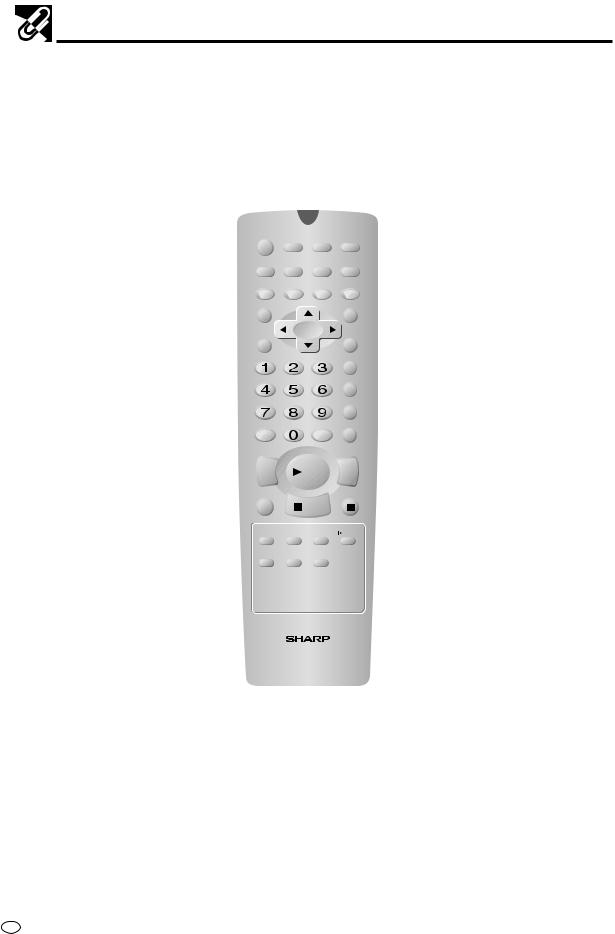
Remote (VCR Operation Buttons)
• The explanations on this page use the VCR/DVD CHANGE Switch in the VCR position.
Numbers in refer to the main pages
in this Operation Manual where the topic is explained.
TIMER ON/OFF 67
OPERATE 18
DISPLAY 38
ON SCREEN 38
CURSOR ( /
/ /
/ /
/  ) 20
) 20
CLEAR 60
Number buttons 32
OPERATE |
TIMER |
PROG |
EJECT |
ON/OFF |
|||
DISPLAY |
ON |
VCR/DVD |
VCR MENU |
SCREEN |
SELECTOR DVD SETUP |
||
FUNCTION |
PROG/ |
ANGLE |
OPEN/ |
CONTROL |
REPEAT |
CLOSE |
|
TITLE |
|
|
DVD MENU |
CLEAR |
|
|
SET |
RETURN |
|
|
ENTER |
|
|
|
ZERO BACK |
|
|
|
SKIP SEARCH |
AM/PM |
|
INPUT SELECT VCR DVD |
|
65 PROG
52 EJECT
19 VCR MENU
74 VCR/DVD SELECTOR
20 SET
60ZERO BACK
61SKIP SEARCH
AM/PM or |
/ |
36 |
/ |
|
|
71 |
VCR DVD |
REW 52 |
REV |
|
FWD |
62 |
INPUT SELECT |
||
|
|
|
|||||
|
|
|
|
PLAY |
|
52 |
FF |
PLAY |
52 |
|
|
|
|||
REC |
|
PAUSE/STILL |
|
|
|||
|
|
62 |
|
|
|
||
|
REC |
|
STOP |
|
53 |
PAUSE/ STILL |
|
STOP 52 |
TAPE |
DPSS |
SLOW |
53 |
SLOW —/±, 61 DPSS —/± |
||
TAPE SPEED 62 |
SPEED |
SKIP |
|||||
|
AUDIO |
|
53 |
SLOW |
|||
|
|
|
CH |
|
|||
CH |
/ |
38 |
OUTPUT |
||||
|
|
|
57 |
AUDIO OUTPUT |
|||
|
|
|
|
VCR |
DVD |
||
VCR/DVD CHANGE Switch 18
VCR/DVD COMBINATION
Loading the Batteries
1 Open the battery cover |
2 Load the batteries. |
3 Close the battery cover |
||
by pulling the lid in the |
Load the two batteries (AA, R6 or UM/SUM-3) |
by lowering the lid in the |
||
direction of the arrow. |
supplied with the Remote so that the battery |
direction of the arrow. |
||
|
poles |
and |
are positioned as indicated. |
|
|
|
|
|
|
11 GB
Major Components
Remote (DVD Operation Buttons)
• The explanations on this page use the VCR/DVD CHANGE Switch in the DVD position.
Numbers in refer to the main pages
in this Operation Manual where the topic is explained.
PROG 89 , REPEAT 92
OPERATE 75
ON SCREEN 49
DISPLAY 49
FUNCTION CONTROL 81
TITLE 88
RETURN 41
Number buttons 42
 REV 76
 STOP 75
OPERATE |
TIMER |
|
18 |
VCR/DVD SELECTOR |
PROG |
EJECT |
|
||
ON/OFF |
ANGLE |
|||
|
|
|
78 |
|
DISPLAY |
ON |
VCR/DVD VCR MENU |
|
|
SCREEN SELECTOR DVD SETUP |
DVD SETUP |
|||
|
|
|
41 |
|
FUNCTION |
PROG/ |
ANGLE |
OPEN/ |
|
CONTROL |
REPEAT |
CLOSE |
|
|
TITLE |
|
|
75 |
OPEN/CLOSE |
|
|
DVD MENU |
|
|
|
|
|
88 |
DVD MENU |
CLEAR |
|
|
SET |
|
RETURN |
|
|
ENTER |
|
|
|
|
41 |
ENTER |
|
|
|
ZERO BACK |
|
|
|
|
42 |
CURSOR ( / / / ) |
|
|
|
SKIP SEARCH |
|
AM/PM |
|
INPUT SELECT VCR DVD |
|
|
/ |
|
|
75 |
PLAY |
REV |
|
|
||
|
|
FWD |
|
|
|
|
PLAY |
76 |
FWD |
|
|
|
||
REC |
|
|
PAUSE/STILL |
|
|
STOP |
76 |
PAUSE/STILL |
|
TAPE |
DPSS |
SLOW |
|
|
SPEED |
SKIP |
SLOW |
||
|
|
AUDIO |
76 |
|
CH |
|
|
|
|
|
OUTPUT |
77 |
SKIP |
|
|
|
|
||
VCR DVD
18 VCR/DVD CHANGE Switch
VCR/DVD COMBINATION
•Do not subject the Remote to shock, water or excessive humidity.
•The Remote may not function if the Product sensor is in direct sunlight or any other strong light.
•Incorrect use of batteries may cause them to leak or burst. Read the battery warnings and use the batteries properly.
•Do not mix old and new batteries, or mix brands in use.
•Remove the batteries if you do not use the Remote for an extended period of time.
GB 12
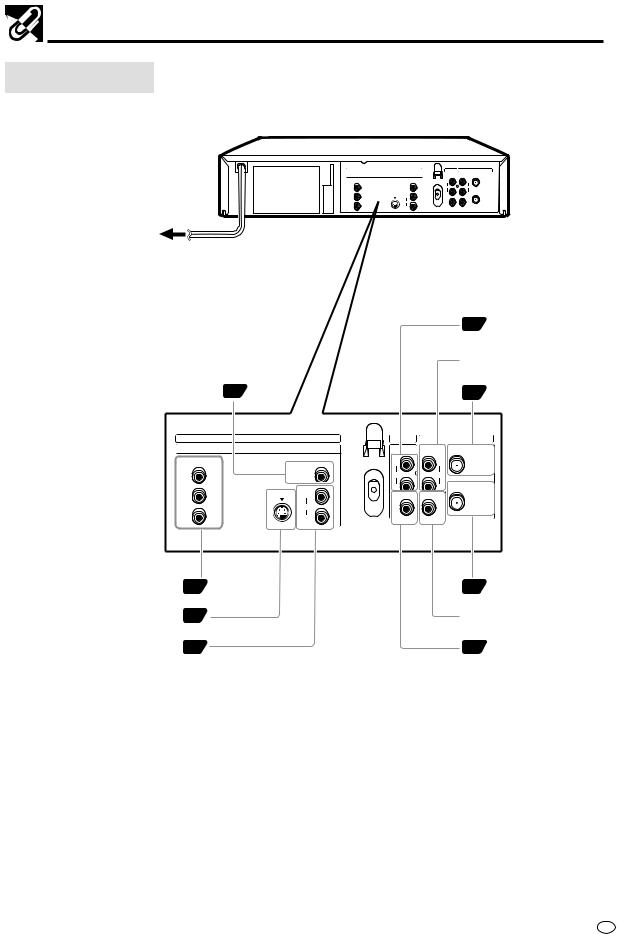
Major Components
Main Unit (Rear)
|
DVD OUT |
DVD/VCR |
|
VCR |
|
LINE OUT 2 |
LINE OUT 1 |
LINE IN 1 |
ANTENNA IN |
COMPONENT |
|
R |
R |
|
Y |
DIGITAL |
AUDIO |
AUDIO |
|
|
AUDIO |
|
|
|
|
|
L |
L |
RF OUT |
PB |
S-VIDEO R |
VIDEO |
VIDEO |
|
(CB) |
AUDIO |
|
|
|
|
|
|
|
|
PR |
L |
|
|
|
(CR) |
|
|
|
|
To an AC outlet
|
|
|
|
15 |
DVD/VCR shared |
|
|
|
|
|
AUDIO output jacks |
|
|
|
|
VCR AUDIO input |
|
|
|
|
|
jacks |
|
DVD Coaxial DIGITAL |
17 |
|
|
14 |
ANTENNA IN (antena |
output jack |
|
|
|
|
or cable input) |
|
DVD OUT |
DVD/VCR |
|
VCR |
|
|
LINE OUT 2 |
LINE OUT 1 |
LINE IN 1 |
ANTENNA IN |
|
COMPONENT |
|
R |
R |
|
|
Y |
DIGITAL |
AUDIO |
AUDIO |
|
|
AUDIO |
|
|
|||
|
|
|
RF OUT |
||
|
|
L |
L |
||
PB |
S-VIDEO R |
VIDEO |
VIDEO |
|
|
(CB) |
AUDIO |
|
|
|
|
|
|
|
|
|
|
PR |
L |
|
|
|
|
(CR) |
|
|
|
|
|
|
|
|
|
|
|
COMPONENT VIDEO output jacks |
15 |
14 |
ANTENNA OUT |
DVD S-VIDEO output jack |
16 |
VCR VIDEO input |
|
|
|
jack |
|
DVD AUDIO output jacks |
16 |
15 |
DVD/VCR shared |
|
|
|
VIDEO output jack |
13 GB

 Basic Connection
 Caution:
•Be sure to turn off the Product and equipment to be connected before connecting.
•Read through the operation manual for the equipment to be connected.
•Be sure that the colours of the jacks and plugs match up when using a VIDEO/AUDIO cable.
•Be sure to keep the Product connection cables separate from the TV antenna cable when you install the Product, because it may cause electrical interference when you are watching television programmes.
Connecting to ANTENNA IN/RF OUT
The connection method differs depending on the type of TV.
To ANTENNA |
Antenna cable |
IN jack |
|
DVD OUT |
DVD/VCR |
|
VCR |
|
LINE OUT 2 |
LINE OUT 1 |
LINE IN 1 |
ANTENNA IN |
COMPONENT |
|
R |
R |
|
Y |
DIGITAL |
AUDIO |
AUDIO |
|
AUDIO |
|
|||
|
|
|
RF OUT |
|
|
|
L |
L |
|
PB |
S-VIDEO R |
VIDEO |
VIDEO |
|
(CB) |
AUDIO |
|
|
|
|
|
|
|
|
PR |
L |
|
|
|
(CR) |
|
|
|
|
|
|
|
|
This Product To RF OUT jack
TV
To antenna input jack
RF cable (Supplied)
GB 14
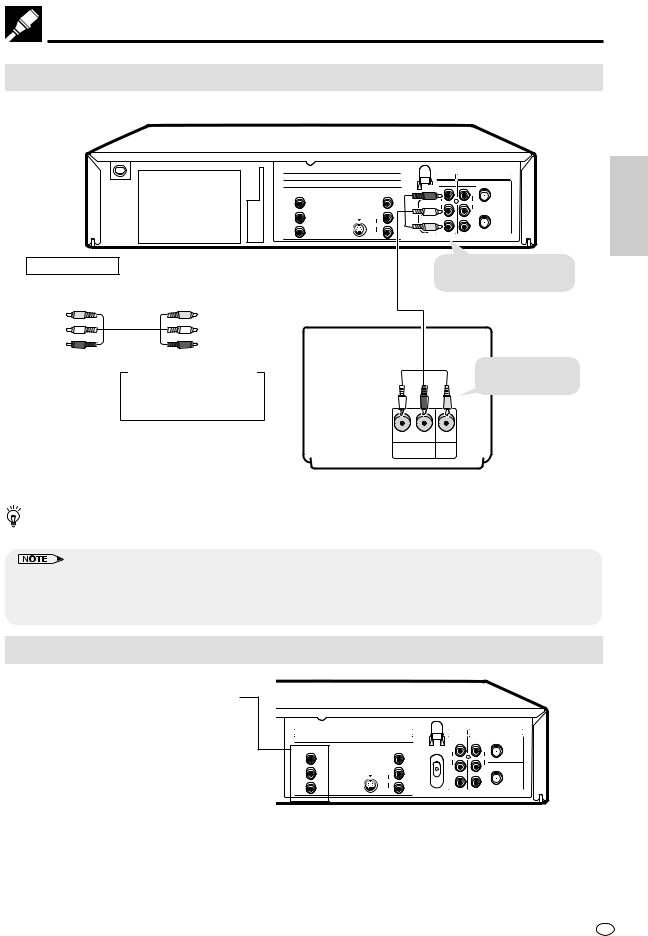
Basic Connection
Connecting a TV Equipped with VIDEO/AUDIO Input Jacks
This Product
|
DVD OUT |
DVD/VCR |
|
VCR |
|
LINE OUT 2 |
LINE OUT 1 |
LINE IN 1 |
ANTENNA IN |
COMPONENT |
|
(Red) |
|
|
|
R |
R |
|
|
Y |
DIGITAL |
(White)AUDIO |
AUDIO |
|
AUDIO |
RF OUT |
|||
|
|
L |
L |
|
PB |
S-VIDEO R |
VIDEO |
VIDEO |
|
(CB) |
AUDIO |
(Yellow) |
|
|
|
|
|
|
|
PR |
L |
|
|
|
(CR) |
|
|
|
|
|
|
|
|
Required cable |
VIDEO/AUDIO cable |
To DVD/VCR shared |
|
(supplied) |
VIDEO/AUDIO out jacks |
VIDEO/AUDIO cable (supplied) |
|
|
Yellow |
Yellow |
|
White (L) |
White (L) |
|
Red (R) |
Red (R) |
|
Jack and Plug Colours |
(White) |
(Red) (Yellow) To VIDEO/AUDIO |
Video: Yellow |
|
input jacks |
Audio Left: White |
|
|
Audio Right: Red |
|
|
|
L R |
|
|
AUDIO |
VIDEO |
|
IN |
IN |
AND CONNECTIONSETTINGS INITIAL
TV (with external input jacks)
You will not be able to hear all of the sound being output by the Product if you use the supplied VIDEO/AUDIO cable to a monaural TV that has only one AUDIO input jack.
•Make sure that colours of the jacks and plugs match up when connecting the cable.
•Connect the Product directly to the TV. If you attempt to view video on a TV connected via a VCR, the copy protection function will scramble the picture.
•If you want to listen to the audio through audio equipment, connect only the VIDEO cable to the TV.
Using the Component Colour (Y, PB (CB) and PR (CR)) Output Jacks
Colour Output Jacks (Y, PB (CB) and
PR (CR)):
Some TVs and monitors are equipped with input jacks for the component colour signals (Y, PB (CB) and PR (CR)). By connecting these input jacks to the corresponding output jacks on the Product, you can enjoy higher quality playback images.
If you are using a TV or monitor equipped with Y, PB (CB) and PR (CR) jacks, use these jacks rather than the S-VIDEO OUT jack.
|
DVD OUT |
DVD/VCR |
|
VCR |
|
LINE OUT 2 |
LINE OUT 1 |
LINE IN 1 |
ANTENNA IN |
COMPONENT |
|
R |
R |
|
Y |
DIGITAL |
AUDIO |
AUDIO |
|
|
AUDIO |
|
|
RF OUT |
|
|
L |
L |
|
PB |
S-VIDEO R |
VIDEO |
VIDEO |
|
(CB) |
AUDIO |
|
|
|
|
|
|
|
|
PR |
L |
|
|
|
(CR) |
|
|
|
|
|
|
|
|
15 GB
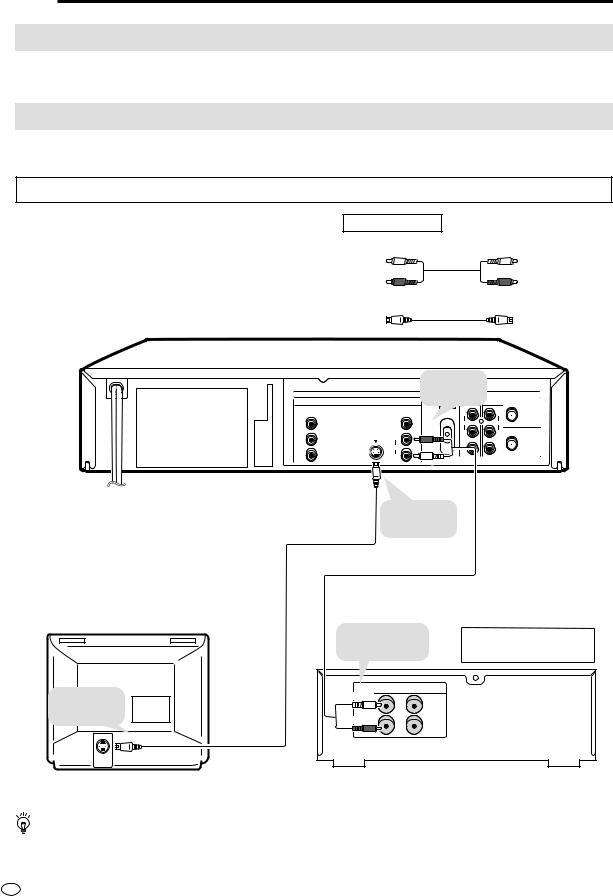
 DVD Audio Connections
Connecting a TV Equipped with S-VIDEO Input Jacks
When you want to achieve a better video image by connecting a TV equipped with an S-VIDEO input connector to the Product, you should use an S-VIDEO cable (commercially available) to connect the TV to the Product.
Connecting to Audio Equipment
Connecting the Product to audio equipment provides normal stereo sound plus powerful stereo sound enhanced by Dolby Digital (5.1 channel), DTS, and MPEG Audio.
Playing 2 channel audio
■ Analogue Connection
This Product
Required cables
AUDIO cable (commercially available)
White (L) |
White (L) |
Red (R) |
Red (R) |
S-VIDEO cable (commercially available)
|
|
To AUDIO |
|
|
|
|
DVD OUT |
OUT jacks |
|
VCR |
|
|
|
DVD/VCR |
|
||
|
LINE OUT 2 |
|
LINE OUT 1 |
LINE IN 1 |
ANTENNA IN |
COMPONENT |
|
|
R |
R |
|
Y |
DIGITAL |
|
AUDIO |
AUDIO |
|
AUDIO |
|
|
|||
|
(Red) |
|
|
RF OUT |
|
|
|
L |
L |
||
PB |
S-VIDEO R |
|
VIDEO |
VIDEO |
|
(CB) |
AUDIO |
|
|
|
|
|
|
|
|
|
|
PR |
L |
|
|
|
|
(CR) |
|
|
|
|
|
|
|
|
|
|
|
(White)
To S-VIDEO input jack
S-VIDEO
INPUT
TV (with external input jacks)
To S-VIDEO S-VIDEO cable OUT jack (commercially available)
AUDIO cable (commercially available)
To amplifier |
Jack and Plug Colours |
Audio Left: White |
|
audio input jacks |
Audio Right: Red |
ANALOG INPUT |
(White) |
L |
(Red) |
R |
Amplifier of stereo system, etc.
If the Product is set to OPERATE ON, the DVD signals will be output from the DVD OUT jacks at all times. (The DVD signals will be output from the DVD OUT jacks also when using the VCR.)
GB 16

DVD Audio Connections
Playing Dolby Digital (5.1 channel), DTS or MPEG audio
Connecting an amplifier with a Dolby Digital/DTS/MPEG Audio digital surround processor or a Dolby Digital/ DTS/MPEG Audio surround processor to your Product’s coaxial digital jack provides richer and more powerful audio play.
■ Connection to a processor or amplifier with a coaxial digital input jack
You can make this connection |
Required cable |
|
|
||
Coaxial digital cable (commercially available) |
|||||
using a coaxial digital cable. |
|||||
|
|
|
|
||
|
|
|
|
|
|
|
DVD OUT |
DVD/VCR |
|
VCR |
|
LINE OUT 2 |
LINE OUT 1 |
LINE IN 1 |
ANTENNA IN |
COMPONENT |
|
R |
R |
|
Y |
DIGITAL |
AUDIO |
AUDIO |
|
AUDIO |
|
|||
|
|
|
RF OUT |
|
|
|
L |
L |
|
PB |
S-VIDEO R |
VIDEO |
VIDEO |
|
(CB) |
AUDIO |
|
|
|
|
|
|
|
|
PR |
L |
|
|
|
(CR) |
|
|
|
|
|
|
|
|
This Product |
To coaxial |
|
DIGITAL OUT jack |
Coaxial digital cable (commercially available)
To coaxial |
digital input jack |
DIGITAL IN |
COAXIAL |
Audio equipment
 Digital Connection to an MD to Record a CD
Some Audio CDs and VIDEO CDs have a short silent section between musical tracks. When sound from discs such as these is digitally recorded by connecting the Product directly to a digital recorder (such as an MD player), the music may be recorded continuously and track numbers may be lost.
■ Digital Connection to Audio Equipment or MD Player without a Dolby Digital Decoder
•Audio CD or VIDEO CD
Play the disc as you normally would, with the audio mode set to “L+R” (see page 85). With a digital connection, audio of a disc recorded with DTS sounds abnormal in this case.
•DVD
With a digital connection, audio cannot be produced from a DVD recorded with Dolby Digital (5.1 channel), Dolby Surround (Pro Logic), DTS or MPEG Audio, so you should use an analogue connection to play such discs. Discs with linear PCM audio should play normally.
•This connection is not possible if the processor or amplifier to which you want to connect does not have a coaxial digital input jack.
17 GB
 Preparations Before Using the Product
Preparing to Watch a VCR or a DVD
1 Turn on the TV and switch the TV channel to the external “VIDEO” or “AV” channel connected to the DVD/VCR shared output jacks.
2 Press OPERATE.
• The product is turned on.
OPERATE EJECT/STOP REW PLAY/×2 |
|
|
PLAY STOP OPEN/CLOSE |
/ |
REC |
|
TIMER |
|
CH |
VCR/DVD |
|
AV 2 IN VIDEO L(MONO)-AUDIO-R |
|
|
VCR DVD |
OPERATE |
|
VCR/DVD |
VCR/DVD |
|
SELECTOR |
||
|
|
|
SELECTOR |
3 Press VCR/DVD SELECTOR on the remote control to switch to the “VCR” mode or “DVD” mode.
•The VCR/DVD SELECTOR on the product lights up in orange for “VCR” or green for “DVD”.
VCR/DVD
SELECTOR
•Each time VCR/DVD SELECTOR is pressed, the mode changes between “VCR” mode and “DVD” mode.
•The mode can be switched by pressing the VCR/DVD SELECTOR on the product.
4 Move the VCR/DVD CHANGE Switch on the Remote to either “VCR” or “DVD”.
VCR |
DVD |
VCR |
DVD |
||||
|
|
|
|
|
|
||
The VCR functions on |
The DVD functions on |
||||||
the Remote will now |
the Remote will now |
||||||
take priority. |
take priority. |
||||||
OPERATE ON/OFFTIMER |
PROG |
|
EJECT |
OPERATE ON/OFFTIMER |
PROG |
|
EJECT |
||
DISPLAY |
ON |
VCR/DVD |
VCR MENU |
DISPLAY |
ON |
VCR/DVD |
VCR MENU |
||
SCREEN |
SELECTOR DVD SETUP |
SCREEN |
SELECTOR DVD SETUP |
||||||
FUNCTION |
PROG/ |
ANGLE |
OPEN/ |
FUNCTION |
PROG/ |
ANGLE |
OPEN/ |
||
CONTROL |
REPEAT |
CLOSE |
CONTROL |
REPEAT |
CLOSE |
||||
TITLE |
|
|
|
DVD MENU |
TITLE |
|
|
|
DVD MENU |
CLEAR |
|
|
|
SET |
CLEAR |
|
|
|
SET |
RETURN |
|
|
|
ENTER |
RETURN |
|
|
|
ENTER |
|
|
|
|
ZERO BACK |
|
|
|
|
ZERO BACK |
|
|
|
|
SKIP SEARCH |
|
|
|
|
SKIP SEARCH |
AM/PM |
|
INPUT SELECT VCR DVD |
AM/PM |
|
INPUT SELECT VCR DVD |
||||
/ |
|
|
|
|
/ |
|
|
|
|
REV |
|
|
|
FWD |
REV |
|
|
|
FWD |
|
|
PLAY |
|
|
|
|
PLAY |
|
|
REC |
|
|
|
PAUSE/STILL |
REC |
|
|
|
PAUSE/STILL |
|
STOP |
|
|
|
STOP |
|
|
||
TAPE |
DPSS |
|
SLOW |
TAPE |
DPSS |
|
SLOW |
||
SPEED |
SKIP |
|
SPEED |
SKIP |
|
||||
CH |
|
AUDIO |
|
|
CH |
|
AUDIO |
|
|
|
OUTPUT |
|
|
OUTPUT |
|
||||
|
VCR |
DVD |
|
VCR |
DVD |
||||
VCR/DVD COMBINATION |
VCR/DVD COMBINATION |
||||||||
GB 18
 Adjusting the Video Channel
To view the output of your Product on the television screen, you must select an unused channel on your TV and tune it to the output of your Product (see Table 1 for factory preset to UHF Channel).
1 Make sure both Products (TV and this Product) are connected (power cord) to the power outlet.
2 Turn on your TV.
3 Select an unused channel on your TV.
4 Set the power on the Product to off. (If the Product is ON, press OPERATE to turn off the power.)
5 Keep pressing VCR MENU for more than two seconds to light up the UHF Channel (see Table 1) on the VCR Front Panel display.
Table 1
Factory Preset UHF Channel
Middle East,
South Africa 39
Saudi Arabia
6 Adjust the tuning of the selected TV channel until the RF pattern appears on your TV screen. (Refer to your Operation Manual for tuning procedures.)
RF
SYSTEM I B/G D/K
(RF pattern)
OPERATE |
TIMER |
PROG |
|
EJECT |
|
ON/OFF |
|
||
DISPLAY |
ON |
VCR/DVD |
VCR MENU |
|
SCREEN |
SELECTOR DVD SETUP |
|||
FUNCTION |
PROG/ |
ANGLE |
OPEN/ |
|
CONTROL |
REPEAT |
CLOSE |
||
TITLE |
|
|
|
DVD MENU |
CLEAR |
|
|
|
SET |
RETURN |
|
|
|
ENTER |
|
|
|
|
ZERO BACK |
|
|
|
|
SKIP SEARCH |
AM/PM |
|
INPUT SELECT VCR DVD |
||
/ |
|
|
|
|
REV |
|
|
|
FWD |
|
|
PLAY |
|
|
REC |
|
|
|
PAUSE/STILL |
|
STOP |
|
|
|
TAPE |
DPSS |
|
SLOW |
|
SPEED |
SKIP |
|
||
CH |
|
AUDIO |
|
|
|
OUTPUT |
|
||
|
VCR |
DVD |
||
VCR/DVD COMBINATION
19 GB
Adjusting the Video Channel
7 Press \ / | to select the RF output system that corresponds to your TV by referring to the chart shown to the below, and press
SET.
|
|
I,B/G,D/K (RF system) |
|
Hong Kong, South Africa |
I |
Ex. |
China, Russia |
D/K |
South East Asia |
|
|
|
Middle East |
B/G |
|
Saudi Arabia |
|
8 Press OPERATE to turn on the power of the Product. Select any channel on the VCR tuner. If a picture appears and sound can be heard, then the RF output system is correctly set. If a picture appears but no sound can be heard, then perform step 7 above to select another RF output system.
•Make sure the sound is not muted when checking the RF output system.
•It is not necessary to change the system to RF system “M”. The Product will automatically detect and change the RF system to “M” when receiving the NTSC signal.
•If picture interference appears on the TV screen in step 6 above, you can change the video channel (RF output channel from the Product to TV) with the following procedure. If UHF Channel (see Table 1) is an active broadcast channel in your area, manually select a different channel (UHF 21 to UHF 69) (see below) and then retune your TV as
above.
1 Press OPERATE to turn off the power.
2 Keep pressing VCR MENU for more than two seconds to light up
the UHF Channel (see Table 1) on the VCR Front Panel display. 3 Press ' / " on the Remote to manually select an unused channel
for use as the video channel.
4 Perform steps 6 to 7 above using the newly selected video
channel.
5 Repeat steps 3–4 to select the optimal video channel.
OPERATE ON/OFFTIMER |
PROG |
|
EJECT |
|
DISPLAY |
ON |
VCR/DVD |
VCR MENU |
|
SCREEN |
SELECTOR DVD SETUP |
|||
FUNCTION |
PROG/ |
ANGLE |
OPEN/ |
|
CONTROL |
REPEAT |
CLOSE |
||
TITLE |
|
|
|
DVD MENU |
CLEAR |
|
|
|
SET |
RETURN |
|
|
|
ENTER |
|
|
|
|
ZERO BACK |
|
|
|
|
SKIP SEARCH |
AM/PM |
|
INPUT SELECT VCR DVD |
||
/ |
|
|
|
|
REV |
|
|
|
FWD |
|
|
PLAY |
|
|
REC |
|
|
|
PAUSE/STILL |
|
STOP |
|
|
|
TAPE |
DPSS |
|
SLOW |
|
SPEED |
SKIP |
|
||
CH |
|
AUDIO |
|
|
|
OUTPUT |
|
||
|
VCR |
DVD |
||
VCR/DVD COMBINATION
GB 20
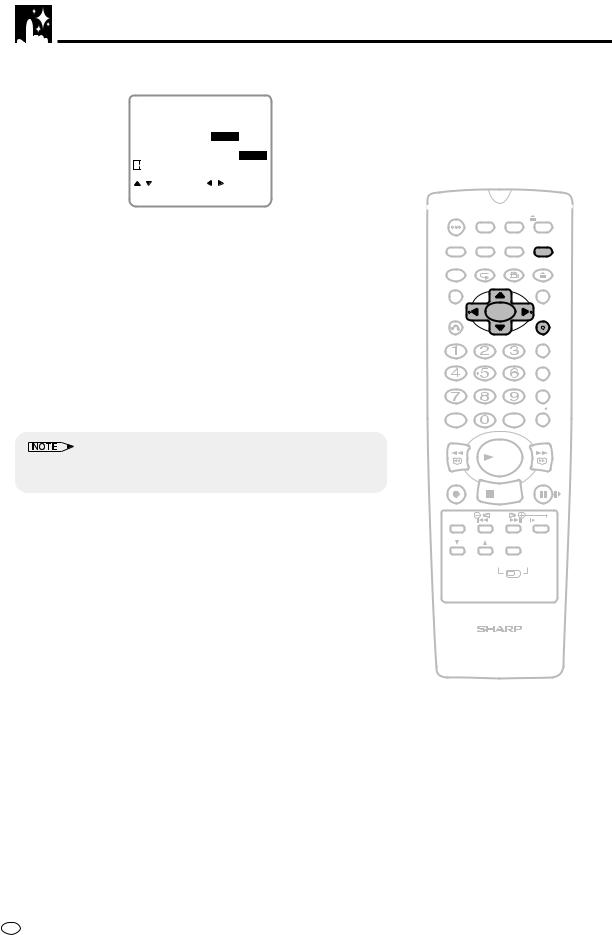
 Auto Tuning System
This Product is equipped with an Auto Tuning System to provide easier set up of the Product. After following the instructions for “Basic Connection” on pages 14 and 15 and “Adjusting the Video Channel” on page 19, turn on your TV, press OPERATE to turn on the Product, and select the video channel. The Product will automatically display the setting screens as shown below.
LANGUAGE setting screen |
|
Selection of language to be used for |
|
|
|||
|
the On Screen Display. (See page 37.) |
||
|
|
|
|
|
|
|
|
|
|
|
|
OPERATE ON/OFFTIMER |
PROG |
EJECT |
|
DISPLAY |
ON |
VCR/DVD |
VCR MENU |
SCREEN |
SELECTOR DVD SETUP |
||
FUNCTION |
PROG/ |
ANGLE |
OPEN/ |
CONTROL |
REPEAT |
CLOSE |
|
Press SET. (Manual operation)
|
|
|
|
Selection of broadcast system(SYSTEM) |
SYSTEM setting screen |
|
|||
|
(I, B/G, D/K or M) that correspond with your |
|||
|
|
|
|
|
|
|
|
|
area. (See page 28, step 3.) |
|
|
|
|
|
|
Press SET. (Manual operation) |
|
|
|
|
|
|
|
Setting and sorting the channels for your |
AUTOMATIC TUNING screen |
|
|||
|
area. (See page 28.) |
|||
|
|
|
|
|
|
|
|
|
|
|
Press VCR MENU to cancel the next step. |
|||
|
|
|
|
Setting the present time. (See page 35.) |
CLOCK setting screen |
|
|||
|
|
|||
|
|
|
|
|
|
|
|
|
|
|
Press SET. (Manual operation) |
|
|
|
Normal screen appears.
•If the Language selection and Auto Tuning have already been performed, the Clock setting screen will first appear. To reset all VCR settings and perform the Auto Tuning from the Language setting screen, see page 37. (Perform “VCR-RESET”)
TITLE |
|
DVD MENU |
CLEAR |
|
SET |
RETURN |
|
ENTER |
|
|
ZERO BACK |
|
|
SKIP SEARCH |
AM/PM |
INPUT SELECT VCR DVD |
|
/ |
|
|
REV |
|
FWD |
|
PLAY |
|
REC |
|
PAUSE/STILL |
|
STOP |
|
TAPE |
DPSS |
SLOW |
SPEED |
SKIP |
|
CH |
AUDIO |
|
OUTPUT |
||
|
VCR |
DVD |
VCR/DVD COMBINATION
21 GB

GB 22

VCR Setup
|
VCR Setup |
24 |
|
|
|
|
|
|
|
||
|
Menu Screen ............................................................................... |
24 |
|
|
|
|
Mode Selection |
25 |
|
|
|
|
|
|
VCR |
||
|
Setting the Channels |
27 |
|
|
|
|
|
|
|
||
|
Auto Tuning ................................................................................. |
28 |
|
|
SETUP |
|
Manual Tuning |
30 |
|
|
|
|
|
|
|
||
|
Channel Skip/Cancelling Skip ..................................................... |
32 |
|
|
|
|
............................................................................Channel Skip |
32 |
|
|
|
|
Cancelling Skip ........................................................................ |
34 |
|
|
|
|
Setting the Clock ......................................................................... |
35 |
|
|
|
|
Initial Setting of Clock .............................................................. |
35 |
|
|
|
|
Changing the Clock Setting ..................................................... |
36 |
|
|
|
|
Setting the Language .................................................................. |
37 |
|
|
|
|
VCR-RESET ............................................................................ |
37 |
|
|
|
|
Initial Setting of Language ....................................................... |
37 |
|
|
|
|
Changing Language ................................................................. |
37 |
|
|
|
|
VCR Display Information ............................................................. |
38 |
|
|
|
|
How to Display Indicators ........................................................... |
38 |
|
|
|
|
VCR Front Panel Display ............................................................ |
38 |
|
|
|
|
|
|
|
|
|
|
|
|
|
|
|
Web-site:www.sharp.co.uk/support Help line:08705 274277 (office hours) 23 23
GB

 VCR Setup
Menu Screen
The menu screen is a home screen used to select various screen functions. A sub-menu will appear once you select an item for the menu. See the following pages for details on each menu procedure.
Menu Screen
MENU
TIMER
MODE
CHANNEL PRESET
CLOCK
LANGUAGE

 :SELECT
SET:ENTER MENU:EXIT
MENU item list
Main Menu
65 |
TIMER |
|
|
|
|
|
|
|
|
|
25 |
|
|
|
|
|
|
|
|
|
|
MODE |
|
|
|
COLOUR [AUTO/PAL/MESECAM/NTSC] |
|
|
|
|||
|
|
|
|
|
|
|||||
|
|
|
|
|
|
|
|
|
|
|
|
|
|
|
|
|
NTSC [3.58/4.43/PAL TV] |
|
|
|
|
|
|
|
|
|
|
|
|
|
||
|
|
|
|
|
|
|
|
|
|
|
|
|
|
|
|
|
BLUE BACK [AUTO/OFF] |
|
|
|
|
|
|
|
|
|
|
|
|
|
||
|
|
|
|
|
|
|
|
|
|
|
|
|
|
|
|
|
AUTO RENTAL [ON/OFF] |
|
|
|
|
|
|
|
|
|
|
|
|
|
||
|
|
|
|
|
|
|
|
|
|
|
|
|
|
|
|
|
|
|
|
|
|
|
|
|
|
|
|
REPEAT [ON/OFF] |
|
|
|
|
|
|
|
|
|
|
|
|
|
||
|
|
|
|
|
|
|
|
|
|
|
|
|
|
|
|
|
NICAM [AUTO/OFF] |
|
|
|
|
|
|
|
|
|
|
|
|
|
||
|
|
|
|
|
|
|
|
|
|
|
28 |
|
|
|
|
|
S. PICTURE [ON/OFF] |
|
|
|
|
|
|
|
|
|
|
|
|
|||
|
|
|
|
|
|
|
|
|
|
|
CHANNEL PRESET |
|
|
AUTO |
|
|
|
||||
|
|
|
|
|
||||||
|
|
|
|
|
|
|
|
|
|
|
|
|
|
|
|
|
MANUAL |
|
|
PRESET CH |
|
|
|
|
|
|
|
|
|
|||
|
|
|
|
|
|
|
|
|
|
|
|
|
|
|
|
|
|
|
|
|
SYSTEM |
|
|
|
|
|
|
|
|
|
|
|
|
|
|
|
|
|
|
|
|
|
|
|
|
|
|
|
|
|
|
|
|
|
|
|
|
|
|
|
|
|
|
|
CHANNEL |
|
|
|
|
|
|
|
|
|
|
|
|
|
|
|
|
|
|
|
|
|
|
|
|
|
|
|
|
|
|
|
|
FINE TUNING |
|
|
|
|
|
|
|
|
|
|
|
|
|
|
|
|
|
|
|
|
|
|
|
|
|
|
|
|
|
|
|
|
|
35 |
|
|
|
|
|
|
|
|
|
SKIP [ON/OFF] |
|
|
|
|
|
|
|
|
|
||
|
|
|
|
|
|
|
|
|
|
|
CLOCK |
|
|
|
|
|
|
|
|
||
37 |
|
|
|
|
|
|
|
|
|
|
LANGUAGE |
|
|
ENGLISH |
|
|
|
||||
|
|
|
|
|
||||||
|
|
|
|
|
|
|
|
|
|
|
|
|
|
|
|
|
|
|
|
|
|
|
|
|
|
|
|
|
|
|
|
|
|
|
|
|
|
|
|
|
|
|
|
• Numbers in |
refer to the pages where the setting |
|
|
|
|
|||||
procedures are described. |
|
|
|
|
|
|
|
|||
|
|
|
|
|
|
|
|
|
|
|
GB 24
VCR Setup
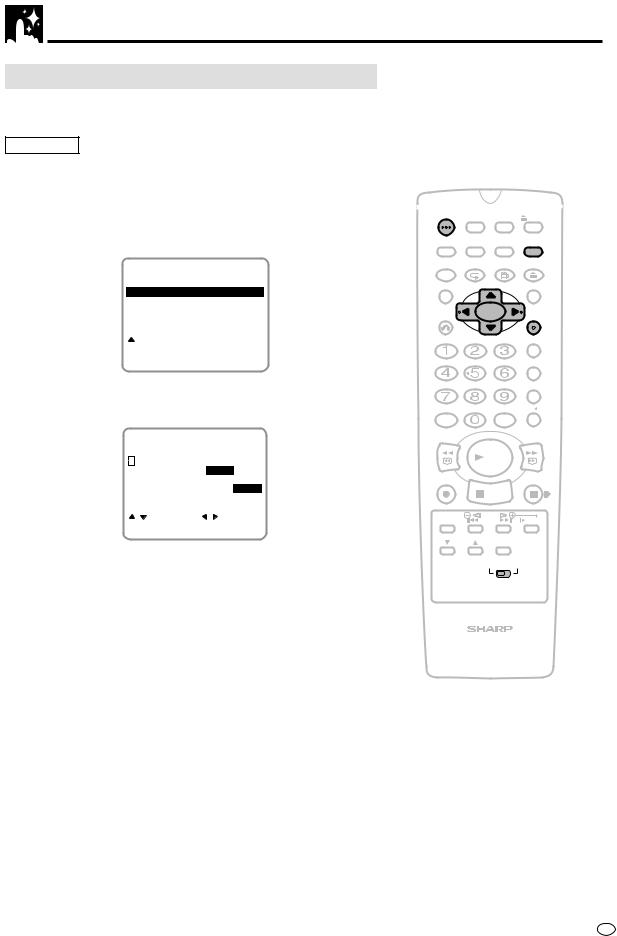
Mode Selection
You can set the basic functions listed in the table below on the MODE selection screen.
Preparation
•Press OPERATE. Then move the VCR/DVD CHANGE Switch to VCR.
1 Press VCR MENU to display the menu screen.
2 Select “MODE” with ' / " and then press SET to confirm.
MENU
TIMER
MODE
CHANNEL PRESET
CLOCK
LANGUAGE
 :SELECT
SET:ENTER MENU:EXIT
3 Set “NTSC” to “3.58”, “4.43” or “PAL TV” with \ / |. Then press ".
|
COLOUR |
|
|
|
|
|
|
||||
|
|
AUTO |
PAL |
MESECAM |
NTSC |
||||||
|
NTSC |
|
|
|
4.43 PAL TV |
||||||
|
|
|
3.58 |
||||||||
|
BLUE |
BACK |
|
AUTO |
OFF |
||||||
|
AUTO |
RENTAL |
|
ON |
|
OFF |
|||||
|
REPEAT |
|
ON |
OFF |
|||||||
|
NICAM |
|
|
|
|
AUTO |
|
OFF |
|||
|
S.PICTURE |
|
|
|
|
OFF |
|||||
|
ON |
||||||||||
|
|
:SELECT |
|
:CHANGE |
|||||||
SET:ENTER |
MENU:EXIT |
||||||||||
NTSC 3.58 ..... When using NTSC 3.58 TV system. (Input signal: NTSC 3.58)
NTSC 4.43 ..... When using NTSC 4.43 TV system. (Input signal: NTSC 4.43)
PAL TV........... When using PAL TV system. (Input signal: NTSC 4.43)
OPERATE |
TIMER |
PROG |
EJECT |
|
|
ON/OFF |
|||
DISPLAY |
ON |
VCR/DVD |
VCR MENU |
|
SCREEN |
SELECTOR DVD SETUP |
|||
FUNCTION |
PROG/ |
ANGLE |
OPEN/ |
|
CONTROL |
REPEAT |
CLOSE |
||
TITLE |
|
|
|
DVD MENU |
CLEAR |
|
|
|
SET |
RETURN |
|
|
|
ENTER |
|
|
|
|
ZERO BACK |
|
|
|
|
SKIP SEARCH |
AM/PM |
|
INPUT SELECT VCR DVD |
||
/ |
|
|
|
|
REV |
|
|
|
FWD |
|
|
PLAY |
|
|
REC |
|
|
|
PAUSE/STILL |
|
STOP |
|
|
|
TAPE |
DPSS |
|
SLOW |
|
SPEED |
SKIP |
|
||
CH |
|
AUDIO |
|
|
|
OUTPUT |
|
||
|
VCR |
DVD |
||
VCR/DVD COMBINATION
25 GB
VCR Setup
4 Set “NICAM” to “AUTO” or “OFF” with \ / |. Then press ".
|
COLOUR |
|
|
|
|
|
||||
|
|
AUTO |
PAL |
MESECAM |
NTSC |
|||||
|
NTSC |
|
|
3.58 |
4.43 PAL TV |
|||||
|
BLUE |
BACK |
|
AUTO |
OFF |
|||||
|
AUTO |
RENTAL |
|
ON |
|
OFF |
||||
|
REPEAT |
|
ON |
OFF |
||||||
|
NICAM |
|
|
|
|
AUTO |
|
|
OFF |
|
|
S.PICTURE |
|
ON |
|
OFF |
|||||
|
|
:SELECT |
|
:CHANGE |
||||||
SET:ENTER |
MENU:EXIT |
|||||||||
AUTO............. Usually select “AUTO”.
OFF................ Select “OFF” when your TV does not have good NICAM signal reception and a lot of noise is heard when the AUTO mode is set. (Selecting “OFF” will change it to normal audio signal reception.)
•You can change the COLOUR, BLUE BACK, AUTO RENTAL, REPEAT and S.PICTURE settings the same way (See pages 55, 56, 58 and 59).
5 Press SET to enter.
•The screen returns to normal.
•If you press VCR MENU to exit the mode selection screen in Step 4, the data will not be stored. Be sure to press SET to store the data.
OPERATE ON/OFFTIMER |
PROG |
EJECT |
|
DISPLAY |
ON |
VCR/DVD |
VCR MENU |
SCREEN |
SELECTOR DVD SETUP |
||
FUNCTION |
PROG/ |
ANGLE |
OPEN/ |
CONTROL |
REPEAT |
CLOSE |
|
TITLE |
|
|
DVD MENU |
CLEAR |
|
|
SET |
RETURN |
|
|
ENTER |
|
|
|
ZERO BACK |
|
|
|
SKIP SEARCH |
AM/PM |
|
INPUT SELECT VCR DVD |
|
/ |
|
|
|
REV |
|
|
FWD |
|
|
PLAY |
|
REC |
|
|
PAUSE/STILL |
|
STOP |
|
|
TAPE |
DPSS |
SLOW |
|
SPEED |
SKIP |
||
CH |
|
AUDIO |
|
|
OUTPUT |
|
|
VCR DVD
VCR/DVD COMBINATION
GB 26
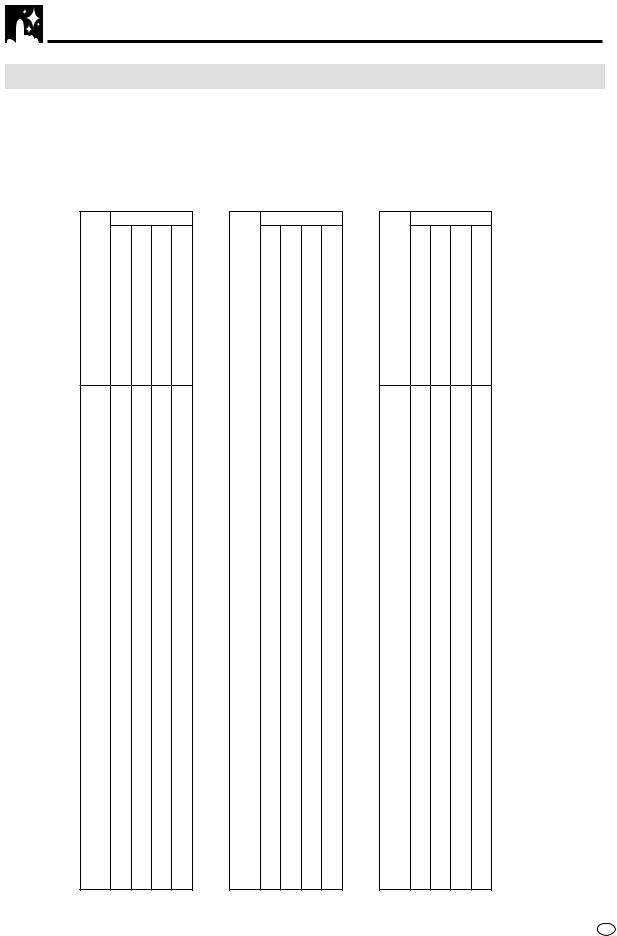
VCR Setup
Setting the Channels
Your Product can receive VHF channels 1A to E12 (US AIR 2 to 13), CATV/HYPER channels S1 to S41 and UHF channels E21 to E69 (US AIR 14 to 78). Your Product has 84 programmable channel positions, each of which can be set to any of the broadcast and CATV/HYPER channels.
•Channel positions 13 through 83 will not be displayed when selected. These channel positions have been set at the factory to be skipped.
•To view a skipped channel position, tune that position to a broadcast CATV/HYPER channel, or cancel the channel skip function for that position.
|
BROADCAST TV CHANNEL |
|
|||
UCHANNEL |
UCATV ICH |
||||
|
NA TH |
TH |
|||
|
I |
|
|
CA |
|
EAST SO VCR |
|
ASOF |
|||
|
|
|
|
R |
|
|
|
|
|
|
|
4 |
4EA |
C |
|
|
|
1 |
1 |
|
|
|
|
|
|
1 |
|
|
|
|
E |
C |
|
4 |
|
|
E |
C |
|
SA |
|
|
E |
C |
|
||
|
E |
C |
1 |
SA |
|
|
E |
1C |
1 |
SA |
|
1 |
1E |
11 |
1 |
SA |
|
1 |
1E |
Z C |
4 |
SA1 |
|
11 |
E |
C |
|
SA |
|
11E |
1C |
|
|
|
|
1 |
E1 |
1 |
|
SA |
|
4 |
E |
1C |
|
|
|
E4 |
1C |
|
|
|
|
|
E |
14 |
|
|
|
|
1C |
1 |
|
|
|
|
E |
1C |
|
|
|
|
E |
1C |
|
|
|
|
E |
C |
|
|
|
|
E |
C1 |
|
|
|
|
E |
C |
|
|
|
1 |
E1 |
C |
|
|
|
|
E |
C4 |
|
|
|
|
E |
C |
1 |
|
|
4 |
E4 |
C |
|
|
|
|
E |
|
4 |
|
|
|
E |
|
|
|
|
|
E |
|
|
|
|
|
E |
|
|
|
|
|
E |
C |
|
|
|
4 |
4E |
1 |
|
|
|
41 |
41E |
C |
|
|
|
4 |
4E |
C |
|
|
|
4 |
4E |
C |
1 |
|
|
4 |
4E |
C |
1 |
|
|
4 |
4E |
C |
1 4 |
|
|
44 |
44E |
C1 |
1 1 |
|
|
4 |
4E |
C4 |
1 |
|
|
4 |
4E |
C |
1 |
|
|
4 |
4E |
C |
1 |
|
|
|
E |
C |
1 |
|
|
|
E |
C |
11 |
|
|
1 |
E1 |
C |
11 |
|
|
|
E |
4C |
11 |
|
|
4 |
E4 |
41C |
114 |
|
|
|
E |
44C |
11 |
|
|
|
E |
4C |
11 |
|
|
|
E |
4C |
1 |
|
|
|
E |
4C |
11 |
|
|
|
E |
4C |
1 1 |
|
|
|
E |
4C |
1 |
|
|
|
E |
4C |
1 |
|
|
1 |
E |
C |
1 4 |
|
|
E1 |
4C |
|
|
||
4 |
E4 |
C1 |
|
|
|
|
E |
C |
|
|
|
|
E |
C |
|
|
|
|
E |
C4 |
|
|
|
|
E |
C |
|
|
|
|
E |
C |
|
|
|
|
E |
C |
|
|
|
1 |
E |
C |
|
|
|
|
|
C |
|
|
|
|
|
|
1 |
|
|
411
1
|
|
THBROADCASTI |
TV CHANNEL |
|
||
UCHANNEL |
UCATV ICH |
|||||
|
|
|
NA |
TH |
||
EAST SO VCR |
|
CA |
||||
|
ASOF |
|||||
|
|
|
|
|
R |
|
|
|
|
|
|
|
|
|
1 |
1 |
|
9 |
|
|
|
|
S |
1 |
14 |
|
|
|
|
S |
4 |
1 |
|
|
|
4 |
S |
|
1 |
|
|
|
4S |
|
1 |
|
|
|
|
|
S |
|
1 |
|
|
|
|
S |
|
2 |
|
|
|
|
S |
|
21 |
|
|
|
|
1S |
|
|
|
|
|
|
1S |
1 |
|
SA1 |
|
|
1 |
1S |
11 |
|
||
|
11S |
|
|
11 |
|
|
|
|
1S |
1 |
|
SA |
|
|
4 |
14S |
|
|
|
|
|
|
1S |
1 |
|
|
|
|
|
1S |
1 |
1 |
|
|
|
|
1S |
1 |
|
|
|
|
|
1S |
14 |
|
|
|
1 |
|
S |
1 |
|
|
|
1 |
|
S |
1 |
4 |
|
|
1 |
1 |
S |
1 |
|
|
|
1 |
S1 |
|
|
|
||
1 |
|
S |
|
4 |
|
|
1 |
4 |
S4 |
1 |
41 |
|
|
1 |
|
S |
|
4 |
|
|
1 |
|
S |
|
44 |
|
|
1 |
|
S |
|
4 |
|
|
1 |
|
S |
4 |
4 |
|
|
11 |
|
S |
|
|
|
|
11 |
|
S |
|
4 |
|
|
11 |
|
S |
|
|
|
|
111 |
S1 |
|
1 |
|
|
|
11 |
|
S |
|
|
|
|
11 |
|
S |
1 |
|
|
|
114 |
S4 |
|
|
|
||
11 |
|
S |
|
|
|
|
11 |
|
S |
4 |
|
|
|
1 |
|
4S |
|
|
|
|
11 |
|
S |
|
1 |
|
|
1 |
|
S |
4 |
4 |
|
|
1 |
1 |
S |
4 |
|
|
|
1 |
41S |
|
|
|
||
1 |
|
+ |
C |
|
|
|
1 |
4 |
|
C |
|
|
|
1 |
|
+1 |
|
|
|
|
1 |
|
|
4C |
|
|
|
1 |
|
|
|
|
|
|
1 |
|
|
|
|
|
|
1 |
|
|
C |
|
|
|
1 |
|
|
|
|
|
|
1 |
1 |
|
|
|
|
|
1 |
|
|
|
|
|
|
1 |
4 |
|
|
1 |
|
|
11
11
11
14 |
11 |
141 |
|
14 |
|
14 |
|
144 |
|
14 |
|
14 |
4 |
14 |
|
14 |
|
|
|
THBROADCASTI |
TV CHANNEL |
|
||
|
UCHANNEL |
UCATV ICH |
||||
|
|
|
NA |
TH |
||
EAST SO VCR |
|
CA |
||||
|
ASOF |
|||||
|
|
|
|
|
R |
|
|
|
|
|
|
|
|
14 |
|
|
41 |
|
|
|
1 |
|
|
1 |
42 |
|
|
1 |
1 |
|
|
45 |
|
|
1 |
|
|
1 |
46 |
|
|
14
1 |
4 |
0 |
13
1 |
1 |
4 |
17
11
11
1 |
1 |
2 |
11
17
1 |
4 |
0 |
11
13
14
1 |
1 |
1 |
12
13
14
1
1
1
191
194
1 |
1 |
1 |
11 2
11 4
1 |
4 |
1 |
11
11
111
1111
1114
111
1 |
1 |
11 |
111
1119
1 |
4 |
12 |
112
1124
27 GB

VCR Setup
Auto Tuning
Preparation
•Press OPERATE. Then move the VCR/DVD CHANGE Switch to VCR.
•Ensure the Video channel is selected on the TV.
1 Press VCR MENU. Press ' / " to select “CHANNEL PRESET”. Press SET to confirm.
MENU
TIMER
MODE
CHANNEL PRESET
CLOCK
LANGUAGE
 :SELECT
SET:ENTER MENU:EXIT
2 Press ' / " to select “AUTO”. Press SET to confirm.
CHANNEL PRESET
AUTO
MANUAL
 :SELECT
SET:ENTER MENU:EXIT
3 Press \ / | to select the SYSTEM you desire. Press SET to confirm. Select the broadcast system used for areas where I, B/G, D/K, M reception is necessary.
AUTOMATIC |
|
TUNING |
SYSTEM |
I |
B/G D/K M |
:CHANGE
SET:ENTER MENU:EXIT
|
|
I,B/G,D/K,M (Receiving system) |
|
Hong Kong, |
I |
|
South Africa |
|
|
|
|
|
China, Russia |
D/K |
Ex. |
South East Asia, |
B/G |
|
Middle East |
|
|
|
|
|
U.S.A., Japan, |
M |
|
Philippine |
|
|
|
•If the broadcast signal system does not match the Product receiving system, tuning is not possible.
4 The channel display on the TV screen will continue through all of the channels and when finished, the TV screen will return to the MOVE (channel sort) screen. The bar display indicates the estimated amount of channels tuned.
OPERATE ON/OFFTIMER |
PROG |
EJECT |
||
DISPLAY |
ON |
VCR/DVD |
VCR MENU |
|
SCREEN |
SELECTOR DVD SETUP |
|||
FUNCTION |
PROG/ |
ANGLE |
OPEN/ |
|
CONTROL |
REPEAT |
CLOSE |
||
TITLE |
|
|
|
DVD MENU |
CLEAR |
|
|
|
SET |
RETURN |
|
|
|
ENTER |
|
|
|
|
ZERO BACK |
|
|
|
|
SKIP SEARCH |
AM/PM |
|
INPUT SELECT VCR DVD |
||
/ |
|
|
|
|
REV |
|
|
|
FWD |
|
|
PLAY |
|
|
REC |
|
|
|
PAUSE/STILL |
|
STOP |
|
|
|
TAPE |
DPSS |
|
SLOW |
|
SPEED |
SKIP |
|
||
CH |
|
AUDIO |
|
|
|
OUTPUT |
|
||
|
VCR |
DVD |
||
VCR/DVD COMBINATION
GB 28
 Loading...