


 Loading...
MODEL
AR-153E
AR-157E
DIGITAL LASER COPIER/PRINTER
OPERATION MANUAL
Page
AR-153E
INTRODUCTION |
4 |
LOADING PAPER |
7 |
MAKING COPIES |
12 |
SPECIAL FUNCTIONS |
20 |
MAINTENANCE |
25 |
TROUBLESHOOTING |
|
THE UNIT |
30 |
OPTIONAL EQUIPMENT |
38 |
INSTALLING THE |
|
SOFTWARE |
40 |
APPENDIX |
69 |
AR-157E

FOR YOUR RECORDS ...
To protect against loss theft, record and retain for reference the copier's serial number located on the back of the unit.
Model Number
Serial Number
Date of Purchase
Authorized Sharp Copier
Service Department Number

CAUTIONS
Caution label on the unit
The label (
 ) in the fusing area of the unit indicates the following:
 : Caution, risk of danger
  : Caution, hot surface
Cautions on using
Follow the cautions below when using this unit.
 Warning:
•The fusing area is hot. Exercise care in this area when removing misfed paper.
•Do not look directly at the light source. Doing so may damage your eyes.
•Do not switch the unit rapidly on and off. After turning the unit off, wait 10 to 15 seconds before turning it back on.
•Unit power must be turned off before installing any supplies.
 Caution:
•Place the unit on a firm, level surface.
•Do not install the unit in a humid or dusty location.
•When the unit is not used for a long time, for example for consecutive holidays, turn the power switch off and remove the power cord from the outlet.
•When moving the unit, be sure to turn the power switch off and remove the power cord from the outlet.
•Do not cover the unit with a dust cover, cloth or plastic film while the power is on. Doing so may prevent heat radiation, damaging the unit.
•Use of controls or adjustments or performance of procedures other than those specified herein may result in hazardous radiation exposure.
•The socket-outlet shall be installed near the unit and shall be easily accessible.
Important points when selecting an installation site
Do not install your unit in areas that are:
•damp, humid, or very dusty
•exposed to direct sunlight
•poorly ventilated
•subject to extreme temperature or humidity changes, e.g., near an air conditioner or heater.
Be sure to connect the power cord only to a power outlet that meets the specified voltage and current requirements. Also make certain the outlet is properly grounded.
Connect the unit to a power outlet which is not used for other electric appliances. If a lighting fixture is connected to the same outlet, the light may flicker.
Be sure to allow the required space around the machine for servicing and proper ventilation.
|
8" |
4" |
4" |
1
Cautions on handling
Be careful in handling the unit as follows to maintain the performance of this unit.
Do not drop the unit, subject it to shock or strike it against any object.
Store spare toner cartridges in a cool dry place without removing from the package before use.
• If they are exposed to direct sunlight or excessive heat, poor copies may result.
Do not touch the photoconductive drum (green portion).
• Scratches or smudges on the drum will cause dirty copies.
Proper storage for supplies
Store the supplies (paper and toner cartridges) in a location that is:
•clean and dry
•at a stable temperature
•not exposed to direct sunlight
Store paper in the wrapper and lying flat.
•Paper stored out of the wrapper or in packages standing on end may curl or get damp, resulting in paper misfeeds.
Trademark acknowledgements
•Microsoft and Windows are trademarks of Microsoft Corporation in the U.S.A. and other countries.
•IBM and PC/AT are trademarks of International Business Machines Corporation.
•Adobe and Acrobat are trademarks of Adobe Systems Incorporated.
•All other trademarks and copyrights are the property of their respective owners.
As an ENERGY STAR® Partner, SHARP has determined that this product meets the ENERGY STAR® guidelines for energy efficiency.
Safety precautions:
This Digital Copier is rated Class 1 and complies with 21 CFR 1040.10 and 1040.11 of the CDRH standards. This means that the unit does not produce hazardous laser radiation. For your safety, observe the precautions below.
•Do not remove the cabinet, operation panel or any other covers.
•The unit’s exterior covers contain several safety interlock switches. Do not bypass any safety interlock by inserting wedges or other items into switch slots.
A small amount of ozone is produced within the unit during operation. The emission level is insufficient to cause any health hazard.
Note:
The present recommended long term exposure limit for ozone is 0.1ppm (0.2mg/m3) calculated as an 8hr. time-weighted average concentration.
However, since the small amount that is emitted may have an objectionable odor, it is advisable to place the unit in a ventilated area.
2

CONTENTS
1 INTRODUCTION |
|
USING THE MANUAL ................... |
4 |
PART NAMES ............................... |
5 |
OPERATION PANEL..................... |
6 |
2 LOADING PAPER |
|
PAPER........................................... |
7 |
LOADING THE PAPER TRAY....... |
8 |
BYPASS FEED |
|
(including special paper).............. |
10 |
3 MAKING COPIES |
|
COPY FLOW ............................... |
12 |
POWER ON................................. |
13 |
ORIGINAL PLACEMENT............. |
14 |
SET THE COPY QUANTITY ....... |
16 |
EXPOSURE ADJUSTMENT/ |
|
PHOTO COPYING ...................... |
16 |
REDUCTION/ENLARGEMENT/ |
|
ZOOM .......................................... |
18 |
SELECTING THE TRAY.............. |
19 |
4 SPECIAL FUNCTIONS |
|
ABOUT THE SPECIAL |
|
FUNCTIONS OF AR-157E .......... |
20 |
DESCRIPTION OF SPECIAL |
|
FUNCTIONS................................ |
22 |
TONER SAVE MODE.................. |
22 |
USER PROGRAMS..................... |
23 |
DISPLAYING TOTAL NUMBER |
|
OF COPIES ................................. |
24 |
5 MAINTENANCE |
|
TONER CARTRIDGE |
|
REPLACEMENT.......................... |
25 |
CLEANING THE UNIT................. |
28 |
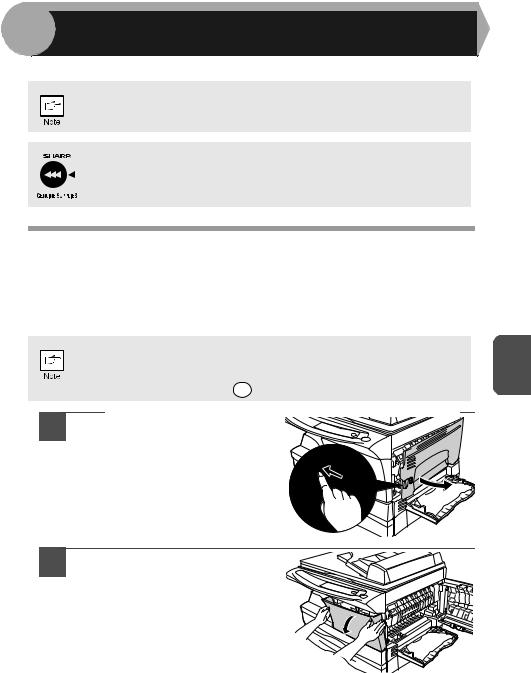
6 TROUBLESHOOTING THE UNIT
TROUBLESHOOTING................. |
30 |
STATUS INDICATORS ............... |
31 |
MISFEED REMOVAL .................. |
32 |
DEVELOPER REQUIRED........... |
37 |
MAINTENANCE REQUIRED....... |
37 |
7 OPTIONAL EQUIPMENT |
|
SYSTEM CONFIGURATION ....... |
38 |
PRINTER/SCANNER |
|
EXPANSION KIT (AR-PG2)......... |
38 |
SINGLE PASS FEEDER |
|
(AR-SP5)...................................... |
38 |
250-SHEET PAPER FEED UNIT |
|
(AR-D16) ...................................... |
39 |
8 INSTALLING THE SOFTWARE |
|
SOFTWARE FOR THE SHARP |
|
PERSONAL MFP SERIES........... |
40 |
HARDWARE AND SOFTWARE |
|
REQUIREMENTS ........................ |
41 |
BEFORE INSTALLATION............ |
41 |
INSTALLING THE SOFTWARE .. |
43 |
INDICATORS ON THE |
|
OPERATION PANEL ................... |
53 |
USING THE PRINTER MODE ..... |
54 |
USING THE SCANNER MODE ... |
56 |
HOW TO USE THE ONLINE |
|
MANUAL ...................................... |
64 |
USING OTHER INSTALLED |
|
DRIVERS ..................................... |
66 |
CONNECTING THE INTERFACE |
|
CABLE ......................................... |
67 |
9 APPENDIX |
|
SPECIFICATIONS ....................... |
69 |
INDEX .......................................... |
72 |
SOFTWARE LICENSE ................ |
75 |
1
2
3
4
5
6
7
8
9
3
1 INTRODUCTION
This chapter provides basic information for using the unit.
USING THE MANUAL
The operation manual contains explanations of how to operate the unit, important considerations, and maintenance procedures. To get the most out of the unit, please read the operation manual. Please keep the operation manuals in a suitable location that will allow for convenient future reference.
Conventions used in the manual
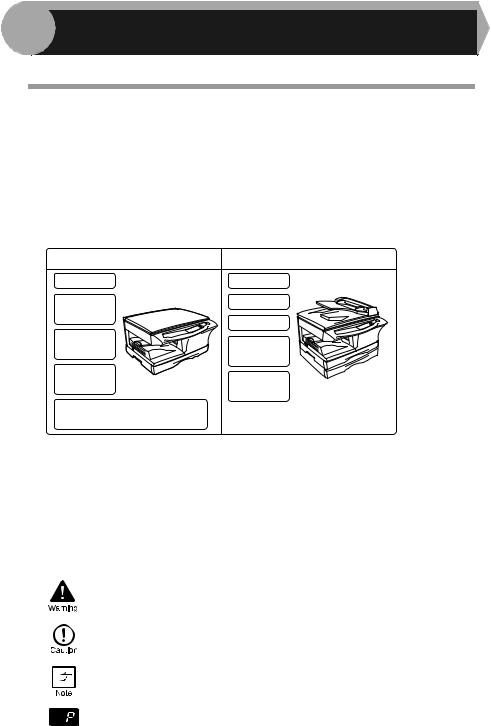
This operation manual explains the operation of the AR-153E and AR-157E models. In cases where the operation is the same, AR-157E is used. The differences between AR-153E and AR-157E are shown below.
AR-153E |
AR-157E |
|
Copier |
Copier |
|
Printer *1 |
RSPF |
|
(AR-PG2) |
2 trays |
|
|
||
Scanner *1 |
Printer *1 |
|
(AR-PG2) |
||
(AR-PG2) |
||
|
||
SPF *2 |
Scanner *1 |
|
(AR-SP5) |
||
(AR-PG2) |
||
|
||
250-sheet paper feed unit *3 |
|
|
(AR-D16) |
|
 :Standard functions and equipment
 :Optional functions and equipment
*1 Can be used when the optional Printer/Scanner Expansion Kit (AR-PG2) is installed. *2 The optional single pass feeder (AR-SP5) can be installed.
*3 The optional 250-sheet paper feed unit (AR-D16) can be installed.
•This operation manual refers to the Reverse Single Pass Feeder as the "RSPF" and Single Pass Feeder as the "SPF".
•In this manual, the following icons are used to provide the user with information pertinent to the use of the unit.
Warns the user that injury may result if the contents of the warning are not properly followed.
Cautions the user that damage to the unit or one of its components may result if the contents of the caution are not properly followed.
Notes provide information relevant to the unit regarding specifications, functions, performance, operation and such, that may be useful to the user.
Indicates a letter displayed in the display.
4

PART NAMES
RSPF |
|
Original cover |
(AR-157E) |
Original guide |
(AR-153E) |
|
1 |
|
|
Feeding |
|
|
roller cover |
|
Original |
Original feeder tray |
|
exit area |
|
|
|
|
1 |
|
|
|
2 |
|
8 |
|
5 |
9 |
||
|
3 |
6 |
10 |
|
7 |
11 |
||
4 |
|||
|
12 |
||
|
|
Paper tray 2 |
Multi-bypass |
|
tray |
|
Photoconductive |
|
drum |
Toner cartridge |
5 |
|
|
13 |
|
3 |
14 |
|
15 |
1 |
Original table |
10 |
Power switch |
2 |
Operation panel |
11 |
Handle |
3 |
Front cover |
12 |
Power cord |
4 |
Paper tray |
13 |
Fusing unit release lever |
5 |
Side cover |
14 |
Transfer charger |
6 |
Side cover open button |
15 |
Charger cleaner |
7Bypass paper guides
8Paper output tray
9Paper output tray extension
5
OPERATION PANEL
1Original to copy key and indicators (AR-157E)
Two-sided copies from one-sided originals. Turn on Long Edge or Turn on Short Edge can be selected.
Two-sided copies from two-sided originals. (Can be selected only when the RSPF is used.)
Single-sided copies from two-sided originals. (Can be selected only when the RSPF is used.)
2Exposure mode selector key and indicators
Use to sequentially select the exposure modes: AUTO, MANUAL or PHOTO. Selected mode is shown by a lit indicator. (p.16)
3Light and dark keys and indicators
Use to adjust the MANUAL or PHOTO exposure level. Selected exposure level is shown by a lit indicator. (p.16) Use to start and terminate user program setting. (p.23)
4Alarm indicators
Developer replacement required indicator (p.37)
Misfeed indicator (p.32)
Toner cartridge replacement required indicator (p.25)
Maintenance indicator (p.37)
5RSPF/SPF indicator (p.15)
Can be used only when your unit has the RSPF/SPF.
6RSPF/SPF misfeed indicator (p.35)
Can be used only when your unit has the RSPF/SPF.
7Copy ratio selector key and indicators
Use to sequentially select preset reduction/enlargement copy ratios. Selected copy ratio is shown by a lit indicator. (p.18)
8Copy ratio display (%) key (p.18)
9Display
Displays the specified copy quantity, zoom copy ratio, user program code, and error code.
10SCANNER key and indicator (p.53, p.60)
Can be used when the Printer/Scanner Expansion Kit (AR-PG2) is installed.
11ONLINE key and indicator (p.53)
Can be used when the Printer/Scanner Expansion Kit (AR-PG2) is installed.
12Power save indicator
Lights up when the unit is in a power save mode. (p.22, p.23)
13Paper feed location indicators
Light up to show the selected paper feed station.
14Tray select key
Use to select a paper feed station (paper tray 1, paper tray 2 or multi-bypass tray) (p.19)
15ZOOM keys and indicator
Use to select any reduction or enlargement copy ratio from 25% to 400% in 1% increments. (p.18)
16Copy quantity keys
•Use to select the desired copy quantity (1 to 99). (p.16)
•Use to make user program entries. (p.23)
17Clear key
•Press to clear the display, or press during a copy run to terminate copying. (p.16)
•Press and hold down during standby to display the total number of copies made to date. (p.24)
18Start key and indicator
•Copying is possible when the indicator is on.
•Press to start copying.
•Use to set a user program. (p.23)
6

2 |
LOADING PAPER |
|
Follow the steps below to load paper into the tray.
PAPER
For best results, use only paper recommended by SHARP.
Type of paper |
Type of media |
Size |
Weight |
2 |
|
|
|||||
feeding |
|
||||
|
|
|
|
|
|
|
|
|
|
|
|
Paper tray |
Standard paper |
Letter (8-1/2" x 11") |
15 lbs. to 21lbs. |
|
|
|
|
|
Legal (8-1/2" x 14") |
|
|
|
|
|
Invoice (5-1/2" x 8-1/2") |
|
|
|
|
|
|
|
|
Multi-bypass |
Standard paper and |
Letter (8-1/2" x 11") |
14 lbs. to |
|
|
tray |
thick paper |
Legal (8-1/2" x 14") |
34.5 lbs.** |
|
|
|
|
|
Invoice (5-1/2" x 8-1/2") |
|
|
|
|
|
|
|
|
|
Special |
Transparency |
Letter (8-1/2" x 11") |
|
|
|
media |
film |
|
|
|
|
|
|
|
|
|
|
|
Envelope* |
Commercial 10 |
|
|
|
|
|
(4-1/8" x 9-1/2") |
|
|
|
|
|
Monarch |
|
|
|
|
|
(3-7/8" x 7-1/2") |
|
|
|
|
|
|
|
|
*Do not use non-standard envelopes, and envelopes that have metal clasps, plastic snappers, string closures, windows, linings, self-adhesive, patches or synthetic materials. Do not use envelopes that are filled with air or envelopes that have labels or stamps attached. These will cause physical damage to the unit.
**For paper weighing from 28 lbs. to 34.5lbs, 8-1/2" x 11" is the maximum size that
can be fed through the multi-bypass tray.
•Special papers such as transparency film, labels and envelopes must be fed one sheet at a time through the multi-bypass tray.
7
LOADING THE PAPER TRAY
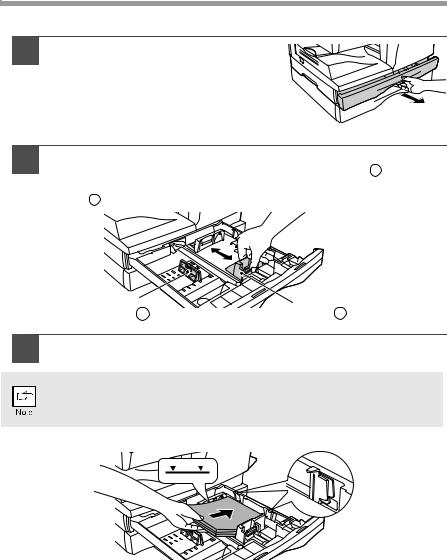
1 Raise the handle of the paper tray and pull the paper tray out until it stops.
2 Adjust the paper guides on the paper tray to the copy paper width and length. Squeeze the lever of paper guide A and slide the guide to match with the width of the paper. Move paper guide B to the appropriate slot as marked on the tray.
Paper |
Paper |
guide B |
guide A |
3 Fan the paper and insert it into the tray. Make sure the edges go under the corner hooks.
Do not load paper above the maximum height line ( 
 ). Exceeding the line will cause a paper misfeed.
8
4 Gently push the paper tray back into the unit.
• After loading paper, to cancel the blinking  without restarting copying, press the clear (
 ) key. The
  in the display will go out and the start (
 ) indicator will light up.
•Be sure that paper is free of rips, dust, wrinkles, and curled or bent edges.
•Make sure all the paper in the stack is the same size and type.
• When loading paper, ensure there is no space between the paper and |
2 |
the guide, and check if the guide is not set too narrow causing the |
paper to bend. Loading paper in these ways will result in document skew or a paper jam.
•When not using the unit for an extended period, remove all paper from the paper tray and store it in a dry place. If paper is left in the unit for an extended period, the paper will absorb moisture from the air, resulting in paper jams.
•When adding new paper to the paper tray, remove the old paper already contained in the tray. Placing new paper on top of the paper already contained in the tray may result in feeding two sheets at one time.
9
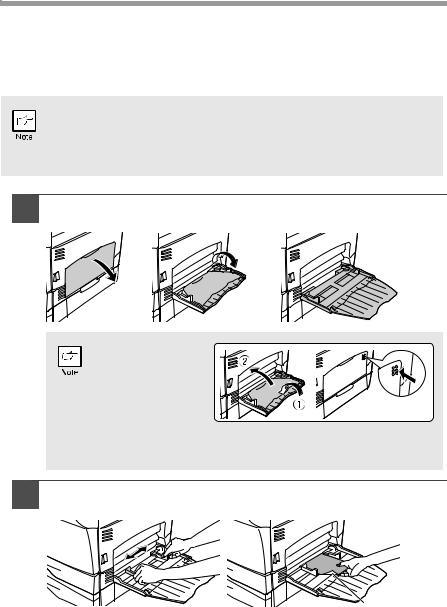
BYPASS FEED (including special paper)
The multi-bypass tray can be used to feed standard paper, transparency film, labels, envelopes and other special purpose paper. Paper measuring from 3-1/2" x 5-1/2" to 8-1/2" x 14" and in the weight range of 14 lbs. to 34.5 lbs. can be used in this tray.
(For paper weighing from 28 lbs. to 34.5 lbs., 8-1/2" x 11" is the maximum size.)
• The multi-bypass tray can hold maximum of 50 sheets of paper. (Capacity will vary depending on the type of paper loaded.)
• The original image must be smaller than the paper or media for copying. If the original image is bigger than the paper or media, this may cause smudges on the edges of the copies.
1 Open the multi-bypass tray and extend the tray.
To close the multibypass tray, perform step 1 and then step 2 in the illustration and push the round projections at the right of the tray until they click.
2 Set the paper guides to the paper width. Insert the paper (print face down) all the way into the multi-bypass tray.
Print face
10
• Paper must be fed narrow side into the feed slot.
• Special papers such as transparency film and labels must be fed one sheet at a time through the multi-bypass tray.
•When copying onto transparency film, remove each copy promptly. Do not let copies stack up.
3 Press the tray select ( ) key to select the multi-bypass tray.
2
Note for loading envelopes
•Envelopes must be fed narrow side into the feed slot one at a time.
•Do not use non-standard envelopes, and envelopes that have metal clasps, plastic snappers, string closures, windows, linings, self-adhesive, patches or synthetic materials. Do not use envelopes that are filled with air or envelopes that have labels or stamps attached.
•Envelopes of which the surface is not flat because of embossing may cause the copies/prints to become smudged.
•Under high humidity and temperature conditions the glue flaps on some envelopes may become sticky and be sealed closed when copied/printed.
•Use only envelopes which are flat and crisply folded. Curled or poorly formed envelopes may be poorly copied/printed or may cause misfeeds.
•It is recommended that you perform a test copy before performing the actual copied/ printed job.
•Be sure to select either Com 10, DL, C5 or Monarch on the paper size setting of the printer driver. (For detailed information on printer driver, refer to the online manual.)
11
3 |
MAKING COPIES |
|
This chapter explains basic and other copying functions.
The unit is equipped with a one-page memory buffer. This memory allows the unit to scan an original once only and make up to 99 copies. This feature improves workflow, reduces operation noise from the copier, and provides higher reliability by reducing wear and tear on the scanning mechanism.
If the unit does not function properly during use, or if a function cannot be used, see "TROUBLESHOOTING THE UNIT" (p.30).
COPY FLOW
1Make sure that paper has been loaded in the paper tray (p.8) or multi-bypass tray (p.10), and check the paper size (p.7).
If paper is not loaded, see page 8.
2Turn on the unit (p.13).
3Place the original.
If you are using the original table, see "Using the original table" (p.14). If you are using the RSPF/SPF, see "Using the RSPF/SPF" (p.15).
When copying onto paper larger than 8-1/2" x 11" size, pull out the paper output tray extension.
4Select the copy settings.
If you wish to copy using the initial settings (p.13), proceed to the next step.
To set the number of copies, see page 16.
To adjust the resolution and contrast settings, see page 16. To enlarge or reduce the copy, see page 18.
To change the tray, see page 19.
To print on both sides of paper, see page 20. (AR-157E)
5 Start copying.
Press the start ( ) key.
12
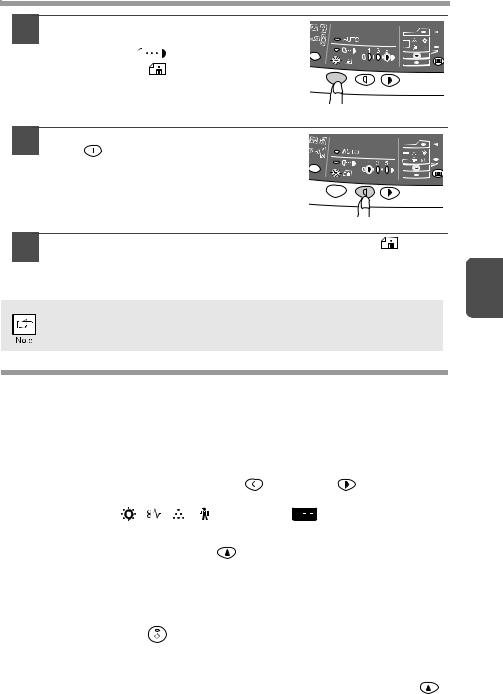
POWER ON
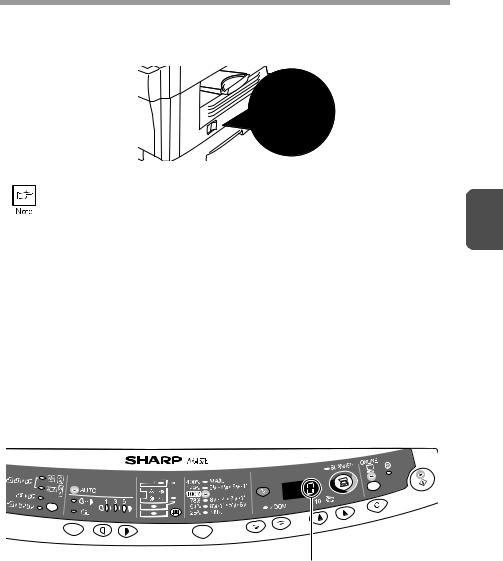
Turn the power switch on the left side of the unit to the "ON" position. The start ( ) indicator will light up.
|
|
|
• |
The unit will enter a power save mode once the set time has elapsed |
|
|
without any unit operation. The settings of the power save modes can |
3 |
|
be modified. See "USER PROGRAMS" (p.23). |
|
|
|
|
• |
The unit will return to the initial settings a preset amount of time after |
|
|
the end of copy or scanner job. The preset amount of time (auto clear |
|
|
time) can be changed. See "USER PROGRAMS" (p.23). |
|
|
|
|
About the scan head
The scan head lamp remains on constantly when the unit is in the ready condition (when the start (  ) indicator is illuminated).
The unit adjusts the scan head lamp periodically to maintain copying quality. At this time, the scan head moves automatically. This is normal and does not indicate unit trouble.
Initial settings of operation panel
When the unit power is on, the operation panel will revert to the initial settings when the time set with the "Auto clear time" setting (p.22) elapses after a copy or scanner job is finished, or when the clear ( ) key is pressed twice.
The initial settings of the operation panel are shown below.
"0" is displayed in the display.
When copying is begun in this state, the settings in the following table are used.
Copy quantity |
1 copy |
|
|
Exposure adjustment |
AUTO |
|
|
Zoom |
100% |
|
|
Tray |
Paper tray 1 |
|
|
Original to copy (AR-157E) |
The "Original to copy" indicator does |
|
not illuminate. (One-sided copying only) |
|
|
13
Power off methods
If not used for a certain period of time, the unit will automatically enter auto power shut-off mode (p.22) in order to minimize power consumption. In cases where the machine will not be used for a long time, turn off the power switch and remove the power cord from the outlet.
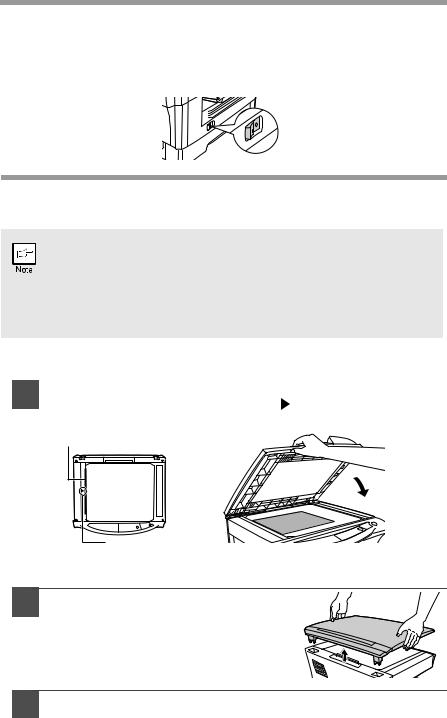
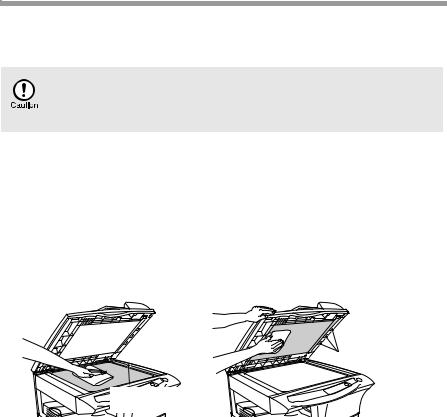
ORIGINAL PLACEMENT
Using the original table
• The original table can read up to 8-1/2" x 14" original.
• Image loss 5/32" can occur at the leading and trailing edges of the copies. Also image loss 11/64" in total can occur along the other edges of the copies.
•When copying a book or an original which has been folded or a crumpled original, press down the original cover lightly. If the original cover is not securely closed, the copies may be striped or blurred.
1 |
|
Open the original cover/RSPF/SPF, and place the original. |
2 |
|
|
|
Place an original face down on the original table. Align it with |
the original scale and the centering ( ) mark. Gently close the original cover/RSPF/SPF.
Original scale
 mark
mark
Setting a large original (AR-153E)
The original cover can be removed to allow copying of bulky objects.
1 Simply lift the original cover straight up.
2 To reattach the original cover, reverse the above procedure.
14
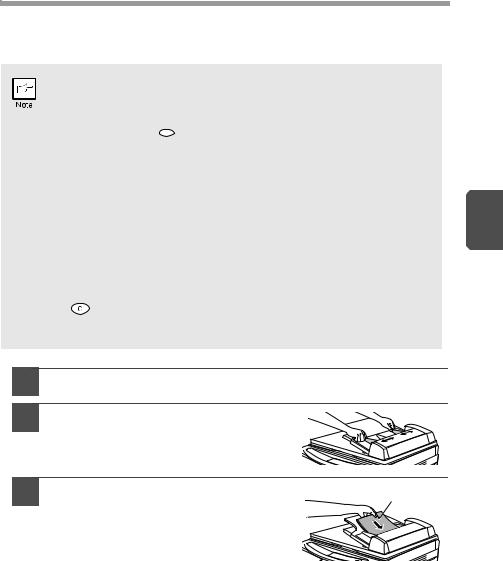
Using the RSPF/SPF
The RSPF/SPF is designed to hold up to 30 originals measuring from 5-1/2" x 8-1/2" to 8-1/2" x 14" and weighting from 14 lbs. to 23.9 lbs.
• Before feeding originals in the original feeder tray, be sure to remove any staples or paper clips from them.
• Before placing curled or wavy originals into the original feeder tray, be sure to flatten them. If not, original misfeeds may result.
|
• |
The RSPF/SPF ( ) indicator on the operation panel will light up. If |
|
|
|
|
this indicator does not light up, the originals are not properly set or the |
|
|
|
|
RSPF/SPF is not properly closed. |
|
|
|
• |
Badly damaged originals may misfeed in the RSPF/SPF. It is |
|
|
|
|
recommended that such originals be copied from the original table. |
3 |
|
|
• |
Special originals such as transparency film should not be fed through |
||
|
|
the RSPF/SPF, but should be placed directly on the original table. |
||
|
• |
Image loss (max. 5/32") can occur at the leading and trailing edges of |
||
|
|
the copies. Also image loss (max. 11/64" in total) can occur along the |
|
|
|
|
other edges of the copies. It can be 15/64" (max.) at the trailing edge |
|
|
|
|
of the second copy of two-sided copying. |
|
|
|
• |
To stop continuous copying using the RSPF/SPF, press the clear |
|
|
|
|
( ) key. |
|
|
|
• |
Copying using one-sided to one-sided mode (AR-157E): |
|
|
|
|
Ensure that no indicator is lit among the original to copy indicators. |
|
|
1 |
Make sure that no original is left on the original table. |
|
||
2 |
Adjust the original guides to the size |
|
|
|
|
of originals. |
|
|
|
3 |
Set the originals face up in the |
Original face up |
|
|
|
original feeder tray. |
|
|
|
Stream feeding mode
The stream feeding mode allows easy operation of continuous copying from the RSPF/SPF. If the stream feeding mode has been enabled using user program No.4, the RSPF/SPF (  ) indicator will blink approximately 5 seconds after the last original has been fed by the RSPF/SPF. While this indicator is blinking, any new originals placed in the original feeder tray will be fed and copied automatically. If the stream feeding mode has been disabled, the start (
 ) key must be pressed each time the originals are set even immediately after completion of a copy run from the RSPF/SPF. The default setting of the stream feeding mode is "ON". See "USER PROGRAMS" (p.23).
15
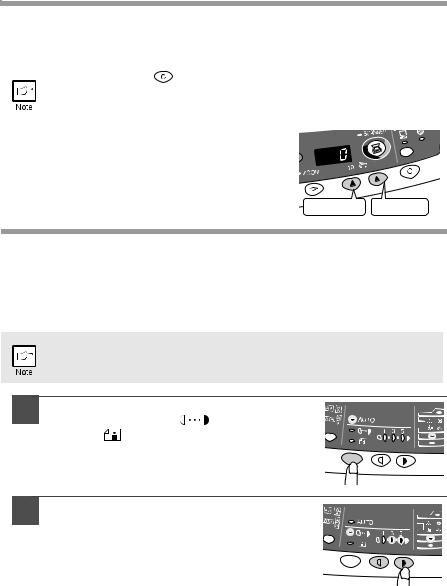
SET THE COPY QUANTITY
Set the number of copies using the two copy quantity ( ,
,  ) keys when copying from the original table or copying from RSPF/SPF.
• |
Press the clear ( |
) key to clear an entry if a mistake is made. |
• |
A single copy can be made with the initial setting, i.e., when "0" is |
|
|
displayed. |
|
|
|
|
• Press the right copy quantity key to set the unit digit from 0 to 9. This key will not change the tens digit.
• Press the left copy quantity key to set the tens digit from 1 to 9.
Tens digit Unit digit
EXPOSURE ADJUSTMENT/PHOTO COPYING
Exposure adjustment
Copy density adjustment is not required for most originals in the automatic exposure mode. To adjust the copy density manually or to copy photographs, the exposure level can be adjusted in five steps manually.
The copy resolution used for AUTO and MANUAL (  ) mode can be changed. (p.23)
1 Press the exposure mode selector key to
select the MANUAL ( |
) mode or |
PHOTO ( ) mode. |
|
2 Use the light ( ) and dark (
 ) keys to adjust the exposure level. If exposure level 2 is selected, the two left-handmost indicators for that level will light up simultaneously. Also, if level 4 is selected, the two right-handmost indicators for that level will light up simultaneously.
16

Automatic exposure adjustment
This automatic exposure level will remain in effect until you change it again by this procedure.
The automatic exposure level can be adjusted to suit your copying needs. This level is set for copying from the original table and copying from the RSPF/SPF respectively.
1 |
|
When adjusting the automatic exposure level for copying from |
|
||
|
|
the RSPF/SPF, place an original in the original feeder tray and |
|
||
|
|
|
|||
|
|
make sure that the RSPF/SPF ( ) indicator lights up. When |
|
||
|
|
adjusting the level for copying from the original table, make |
|
||
|
|
sure that no original is left in the original feeder tray. |
3 |
||
|
|
|
|
|
|
2 |
|
Press the exposure mode selector key to |
|
|
|
|
|
||||
|
|
select the PHOTO ( ) mode. |
|
|
|
|
|
|
|||
|
|
|
|
|
|
3 |
Press and hold down the exposure mode |
|
|
selector key for approximately 5 seconds. |
|
|
The PHOTO ( |
) indicator will go out and |
|
the AUTO indicator will begin to blink. One |
|
|
or two light and dark indicators |
|
|
corresponding to the automatic exposure |
|
|
level which has been selected will light up. |
|
4 |
Press the light ( |
) or dark ( ) key to |
|
lighten or darken the automatic exposure |
|
|
level as desired. If exposure level 2 is |
|
|
selected, the two left-handmost indicators |
|
|
for that level will light up simultaneously. |
|
|
Also, if level 4 is selected, the two right- |
|
|
handmost indicators for that level will |
|
|
light up simultaneously. |
|
5 |
Press the exposure selector key. The AUTO indicator will stop |
|
|
blinking and light up steadily. |
|
17
REDUCTION/ENLARGEMENT/ZOOM
Three preset reduction ratios and two enlargement ratios can be selected. The zoom function enables copy ratio selection from 25% to 400% in 1% increments.
1 |
|
Set the original and check the paper size. |
|
|
|
|
|
2 |
|
Use the copy ratio selector key and/or ZOOM ( , |
) keys to |
|
|
select the desired copy ratio. |
|
|
|
|
• To verify a zoom setting without changing the zoom ratio, press and hold down the copy ratio display (%) key. When the key is released, the display will return to the copy quantity display.
•To reset the ratio to 100%, press the copy ratio selector key repeatedly until the 100% indicator lights up.
3 Set the reduction/enlargement ratio.
To decrease or increase the zoom ratio rapidly, press and hold down the ZOOM ( ) or (
 ) key. However the value will stop at the preset reduction or enlargement ratios. To move beyond these ratios, release the key and then press and hold it down again.
To select a preset copy ratio:
Preset reduction and enlargement ratios are: 25%, 64%, 78%, 129% and 400%.
To select a zoom ratio:
When a ZOOM ( or
or  ) key is pressed, the ZOOM indicator will light up and the zoom ratio will be displayed in the display.
18
SELECTING THE TRAY
• Paper sizes that can be used in the duplex copy mode are letter, legal, and invoice. When copying from the original table in the duplex copy mode, only letter size paper can be used. (AR-157E)
• The multi-bypass tray cannot be used in the duplex copy mode.
Press the tray select ( ) key.
Each time you press the tray select ( ) key, the location indicated by the paper feed location indicator changes in the following order: paper tray 1, paper tray 2, multibypass tray.
3
19

4 |
SPECIAL FUNCTIONS |
|
This chapter describes the special functions of this unit. Use these functions as needed.
ABOUT THE SPECIAL FUNCTIONS OF AR-157E
Two sided copying
When copying from the RSPF, two-side originals can be copied automatically without having to manually turn them over. Automatic two-sided copying can also be performed without using the RSPF. When copying from one-sided originals to twosided copies, copying orientation can be selected between Turn on Long Edge and Turn on Short Edge.
• When making two-sided copies from the original table, the paper size must be letter. When making two-sided copies from the RSPF, letter, legal, and invoice sizes can be used. Non-standard size paper cannot be used.
•When making two-sided copies, the multi-bypass tray cannot be used.
•When using two-sided invoice size originals from the RSPF, be sure to place them in the landscape orientation. Otherwise, an original misfeed will occur.
|
|
|
|
|
|
|
|
A |
|
|
|
A |
|
|
|
|
|
|
|
|
||||||
A |
A |
|
|
A |
A |
|
||
|
|
|
|
|
||||
|
A |
|
|
A |
||||
|
|
|
|
|
|
|
||
|
|
|
||||||
|
|
|
|
|
|
|||
Turn on Long Edge |
|
Turn on Short Edge |
||||||
20
Making two-sided copies
1 |
|
Place the original(s) on the original table or in the RSPF. (see |
|
|
"ORIGINAL PLACEMENT" (p.14). |
|
|
|
|
|
|
2 |
|
Select two-sided copy mode. |
|
|
|
A: When copying in a one-sided to two-sided mode:
Use the original to copy key to select the desired one-sided to two-sided copying mode (Turn on Long Edge or Turn on Short Edge). See the illustrations on page 20.
B: When copying in the two-sided to two-sided mode:
Use the original to copy key to select the two-sided to two-sided copying mode. The originals must be set in the RSPF before this mode can be set in step 3 on page 15.
C: When copying in the two-sided to one-sided mode:
Use the original to copy key to select the two-sided to one-sided copying mode. The originals must have been set in the RSPF in step 3 on page 15.
4
A  B
B  C
C
3 Select the copy settings. See "SET THE COPY QUANTITY" (p.16), "EXPOSURE ADJUSTMENT/PHOTO COPYING" (p.16), and "REDUCTION/ENLARGEMENT/ZOOM" (p.18).
Using the original table
If you are using the original table, copying is only possible in one sided to two-sided mode ("A" above).
1Press the start ( ) key.
The original is scanned into the unit's memory and the number of the copy quantity blinks in the display.
2Place the original that you wish to copy onto the rear side of the paper, and press the start ( ) key again.
Copying begins.
Using the RSPF
Press the start (  ) key. Copying begins in the selected two-sided copy mode.
21
DESCRIPTION OF SPECIAL FUNCTIONS
Toner save mode (page 22)
Reduces toner consumption by approximately 10%.
Power save modes (page 23)
The unit has two power save modes of operation: preheat mode and auto power shut-off mode.
Preheat mode
When the unit enters the preheat mode, the power save (  ) indicator will light up and other indicators will remain on or off as before. In this condition, the fuser in the unit is maintained at a lower heat level, thereby saving power. To copy from the preheat mode, make desired copier selections and press the start (
  ) key using the normal copying procedure.
Auto power shut-off mode
When the unit enters the auto power shut-off mode, the power save (  ) indicator will light up and other indicators except the ONLINE indicator will go out. The auto power shut-off mode saves more power than the preheat mode but requires a longer time before starting copying. To copy from the auto power shut-off mode, press the start (
  ) key. Then make desired copier selections and press the start (
  ) key using the normal copying procedure.
Auto clear (page 23)
The unit returns to the initial settings a preset amount of time after the end of copy, or scanner job. This preset amount of time (auto clear time) can be changed.
Stream feeding mode (page 23)
For description of the stream feeding mode, see "Stream feeding mode" (p.15).
Resolution of AUTO & MANUAL mode (page 23)
You can set the copy resolution used for AUTO and MANUAL (  ) exposure mode.
TONER SAVE MODE
1 Press the exposure mode selector key to select the MANUAL ( ) mode.
22
2 |
Press and hold down the exposure mode |
|
|
selector key for approximately 5 seconds. |
|
|
The MANUAL ( |
) indicator will go out |
|
and the PHOTO ( |
) indicator will begin |
|
to blink. The light and dark indicator |
|
|
marked "5" will light up, indicating the |
|
|
standard toner mode is active. |
|
3 |
To enter the toner save mode, press the |
|
|
light ( ) key. The light and dark |
|
|
indicator marked "1" will light up, |
|
|
indicating the toner save mode is |
|
|
selected. |
|
4 |
Press the exposure mode selector key. The PHOTO ( ) |
|
|
indicator will stop blinking and light up steadily. The light and |
|
dark indicator marked "3" will light up. The toner save mode is |
4 |
|
now active. |
||
|
To return to the standard mode, repeat the procedure but use the dark ( ) key to select exposure level "5" in step 3.
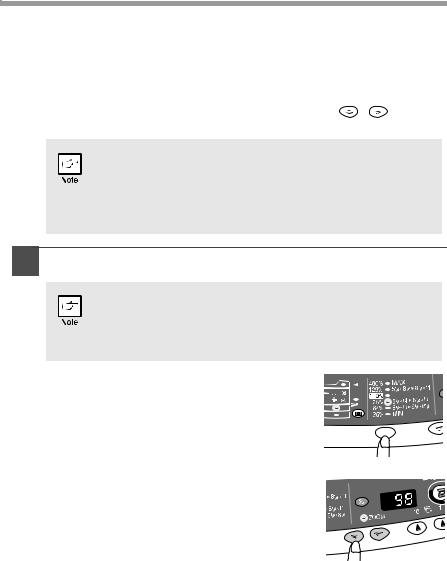
USER PROGRAMS
The user programs allow the parameters of certain functions to be set, changed, or cancelled as desired.
Setting the power save modes, auto clear time, stream feeding mode and resolution of AUTO & MANUAL mode
1 |
|
Press and hold down the light ( ) and dark ( ) keys |
|||
|
|
simultaneously for more than 5 seconds until all the alarm |
|||
|
|
||||
|
|
indicators ( , |
, , |
) blink and " |
" appears in the |
|
|
display. |
|
|
|
|
|
|
|||
2 |
|
Use the left copy quantity ( ) key to select a user program |
|||
|
|
number (1: auto clear time, 2: preheat mode, 3: auto power |
|||
|
|
||||
|
|
shut-off timer, 4: stream feeding mode, 5: auto power shut-off |
|||
|
|
mode 6: resolution of AUTO & MANUAL mode). The selected |
|||
|
|
number will blink in the left side of the display. |
|||
|
|
|
|
||
3 |
|
Press the start ( |
) key. The entered program number will be |
||
|
|
steadily lit and the currently selected parameter number for the |
|||
|
|
||||
|
|
program will blink on the right side of the display. |
|||
|
|
|
|||
4 |
|
Select the desired parameter using the right copy quantity ( ) |
|||
|
|
key. The entered parameter number will blink on the right of the |
|||
|
|
||||
display.
23
|
|
|
|
|
|
|
|
|
Program |
Mode |
|
Parameters |
|
||
|
No. |
|
|
||||
|
|
|
|
|
|
||
|
|
|
|
|
|
|
|
1 |
Auto clear time |
0 |
OFF, 1 |
10sec., 2 |
30sec. |
||
*3 |
60sec., 4 |
90sec., 5 |
120sec. |
||||
|
|
|
|||||
|
|
|
|
|
|
|
|
2 |
Preheat mode |
*0 |
30sec., 1 |
60sec., 2 |
90sec. |
||
|
|
|
|
|
|
|
|
3 |
Auto power shutoff |
0 |
2min., *1 |
5min., 2 |
15min., |
||
timer |
3 |
30min., 4 |
60 min., 5 |
120min. |
|||
|
|
||||||
|
|
|
|
|
|
|
|
4 |
Stream feeding |
0 |
OFF, *1 |
ON |
|
||
mode |
|
||||||
|
|
|
|
|
|
||
|
|
|
|
|
|
|
|
5 |
Auto power shutoff |
0 |
OFF, *1 |
ON |
|
||
mode |
|
||||||
|
|
|
|
|
|
||
Resolution of AUTO
6 *0 300dpi, 1 600dpi & MANUAL mode
* Factory default settings are indicated with an asterisk (*).
Program No. 4 can be used when your unit has the RSPF/SPF.
5 Press the start ( ) key. The right-hand number in the display will be steadily lit and the entered value will be stored.
To change the setting or to set another mode, press the clear ( ) key. The unit will return to step 2.
6 Press the light ( ) or dark (
 ) key to return to the normal copy mode.
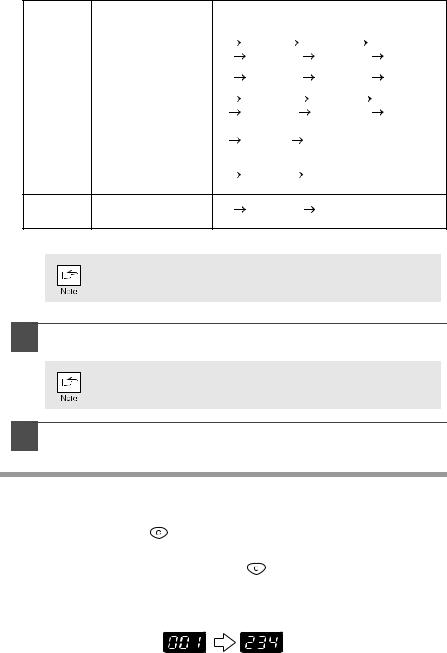
DISPLAYING TOTAL NUMBER OF COPIES
Use the following procedure to display the total number of copies.
1 |
|
Press the clear ( ) key to reset the display to zero. |
|
|
|
2 |
|
Press and hold down the clear ( ) key for approximately 5 |
|
|
seconds. The total number of copies will appear in two steps, |
|
|
each with three digits.
Example: Total number of copies is 1,234.
24
5 MAINTENANCE
This chapter describes how to replace the toner cartridge and how to clean the unit.
Be sure to use only genuine SHARP parts and supplies.
For best copying results, be sure to use only SHARP Genuine Supplies which are designed, engineered, and tested to maximize the life and performance of SHARP copiers. Look for the Genuine Supplies label on the toner package.
TONER CARTRIDGE REPLACEMENT
When the toner cartridge replacement required ( ) indicator lights up, replacement of the toner cartridge will be needed soon. Obtain a new cartridge. When the toner cartridge replacement required (
 ) indicator blinks, the toner cartridge must be replaced before copying can be resumed. Replace the toner cartridge by following the procedure below.
During long copy run of a dark original, the start ( ) indicator may
blink, the indicator light up, and the unit stop, even though toner is left. 5 The unit will feed toner up to 2 minutes and then the start ( ) indicator
will light up. Press the start (  ) key to restart copying.
1 Open the multi-bypass tray, and then open the side cover while pressing the side cover open button.
2 Push gently on both sides of the front cover to open the cover.
25
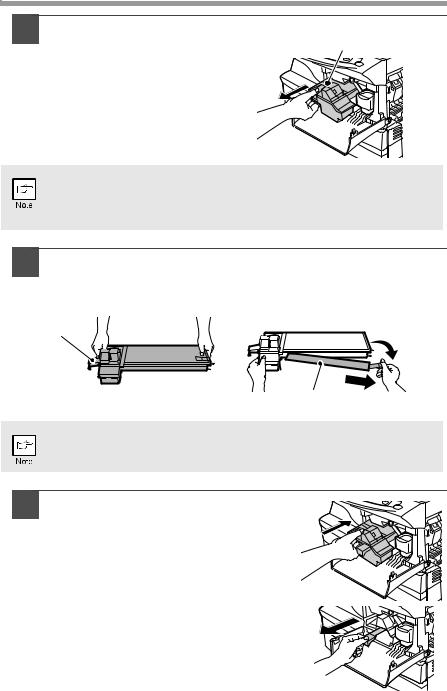
3 Gently pull the toner cartridge |
Toner cartridge lock |
|
out while pressing the lock |
release lever |
|
release lever. |
||
|
• After removing the toner cartridge, do not shake it or tap on it. Doing so may cause toner to leak from the cartridge. Put the old cartridge immediately in the bag contained in the box of the new cartridge.
• Dispose of the old toner cartridge in accordance with local regulations.
4 Remove the toner cartridge from the bag. Grasp the cartridge on both sides and shake it horizontally four or five times. After shaking the cartridge, remove the toner seal.
4 or 5 times Shutter 


Toner seal
Grasp the toner cartridge as shown in the illustration. Do not hold the cartridge by the shutter. Be sure to only shake the cartridge before the toner seal is removed.
5 Gently insert the toner cartridge along the guides until it locks in place while pushing the lock release lever.
Remove the tape from the shutter. Pull the shutter out of the toner cartridge as shown in the illustration. Discard the shutter.
26
6 Close the front cover and then the side cover by pressing the round projections near the side cover open button. The indicator will go out and the start ( ) indicator will light up.
When closing the covers, be sure to close the front cover securely and then close the side cover. If the covers are closed in the wrong order, the covers may be damaged.
Even after a new toner cartridge is installed, the start ( ) indicator may not light up, indicating copying cannot be restarted (toner is not sufficiently fed). In this case, open and close the side cover. The
copier will feed toner again approximately 2 minutes and then 5 copying can be restarted.
27
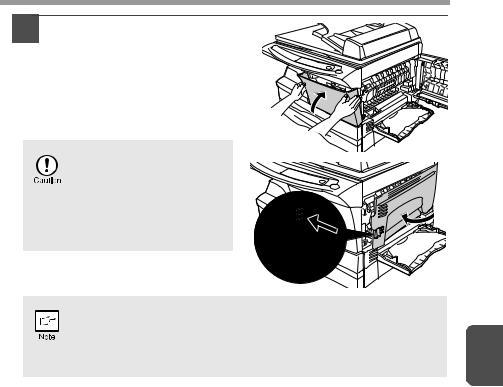
CLEANING THE UNIT
Proper care is essential in order to get clean, sharp copies. Be sure to take a few minutes to regularly clean the unit.
• Before cleaning, be sure to turn the power switch off and remove the power cord from the outlet.
• Do not use thinner, benzene or other volatile cleaning agents. Doing so may cause deformation, discoloration, deterioration or malfunction.
Cabinet
Wipe the cabinet with a soft, clean cloth.
Original table and the back side of the original cover/RSPF/ SPF
Stains on the glass, RSPF/SPF scanning window, cover or RSPF/SPF roller will also be copied. Wipe the glass, RSPF/SPF scanning window, cover and RSPF/SPF roller with a soft, clean cloth. If necessary, dampen the cloth with a glass cleaner.
Original table/scanning window |
Original cover/RSPF/SPF |
RSPF/SPF roller
RSPF/SPF scanning window
28
Loading...