


26SL72
POWER POWER
7381 GJ
MODELS
26SL72
29SL82
29SL82M
COLOR TELEVISION
OPERATION MANUAL
CONTENTS
• IMPORTANT INFORMATION ........................ 2
• Supplied Accessories ..................................
• IMPORTANT SAFEGUARDS .............
• Before Operating Your Television ...............
• Antenna Connections .......................
• Quick Reference Control Operation ...........
• EZ SETUP during First Use .........................
• Demo Mode ...................................................
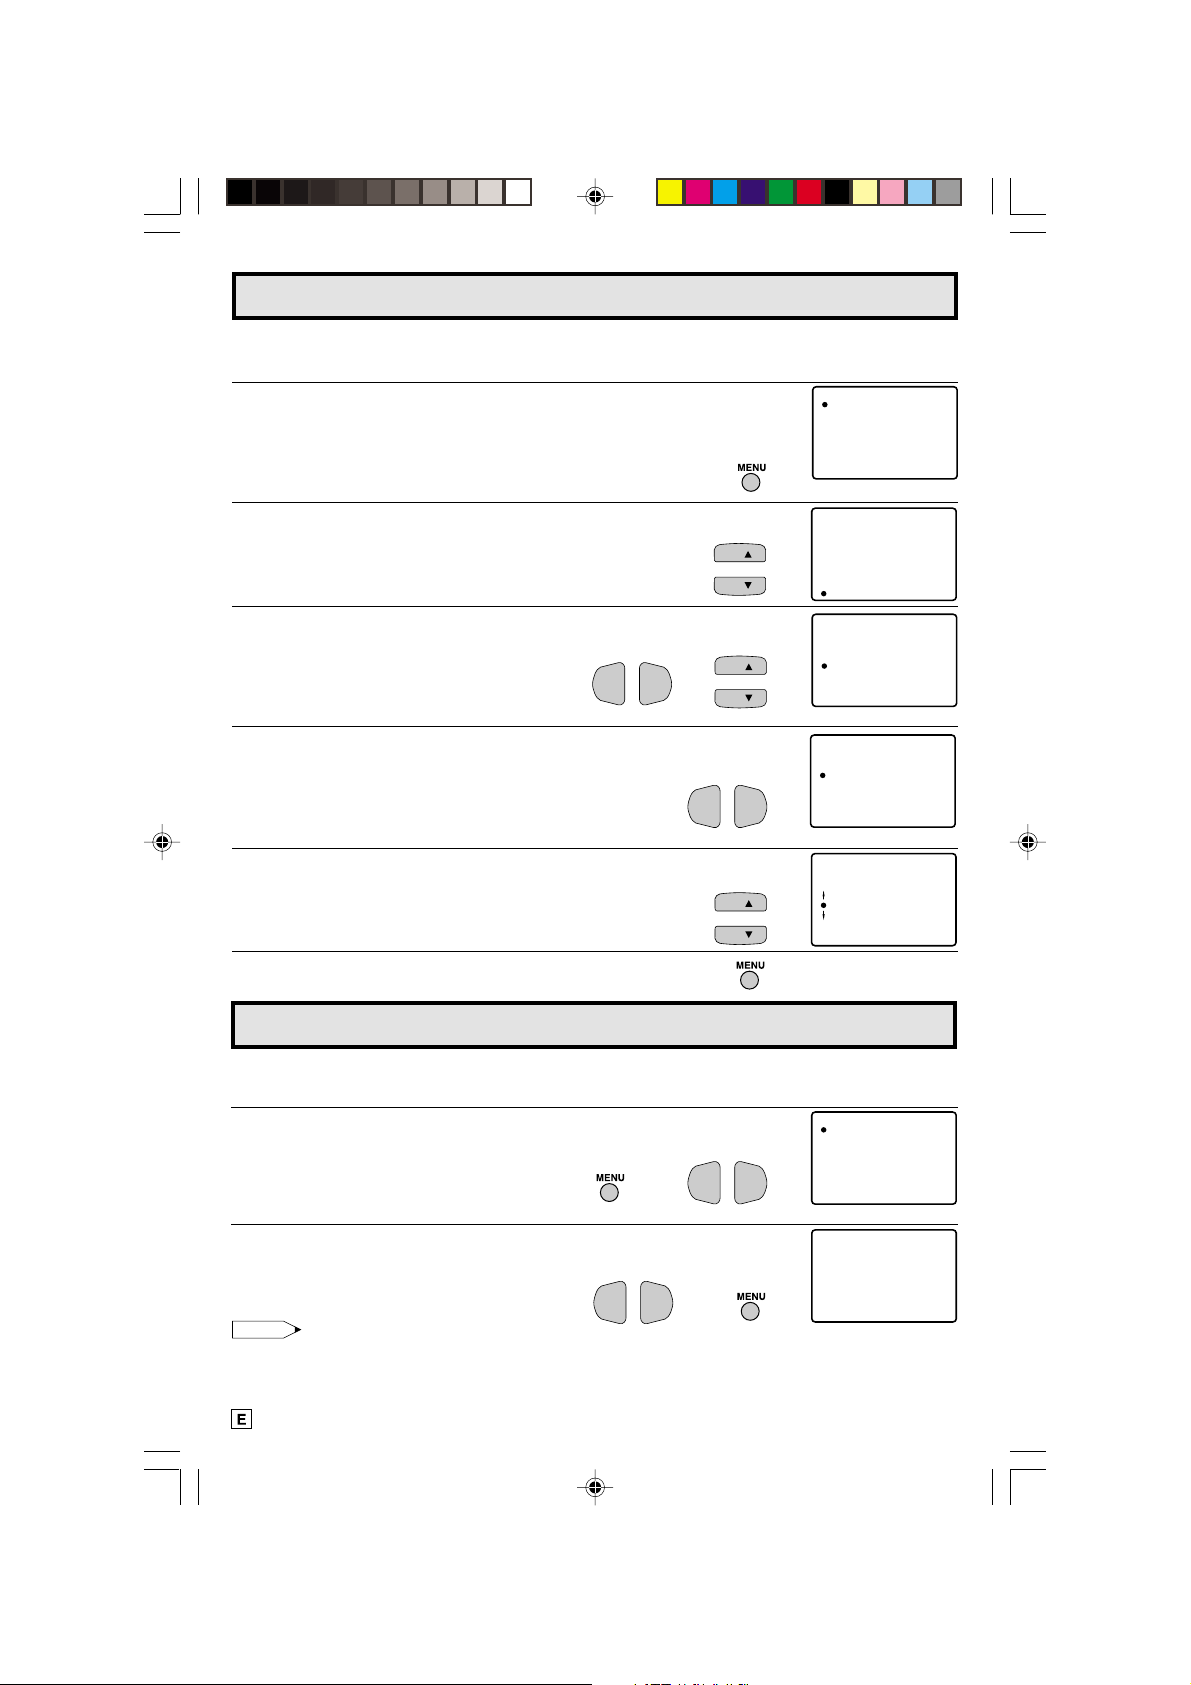
• Language .....................................................
• Sleep Timer .................................................
• Video Adjust ................................................
• Audio Select ...................................
MTS (Multichannel TV Sound) ...............
INTERNAL SPEAKER SWITCH ..............
FAO (Fixed Audio Output) ......................
• Closed Caption ...........................................
• Parent Control ................................
View Timer ..................................
• Energy Save ................................................
• Set Up .............................................
EZ SETUP ................................................
Channel Setting ..........................
Blue Screen .............................................
Personal Preference ...............................
Universal Plus Function .........................
• Using the Video and Audio Input
Jacks ..............................................
PUSH OPEN
MTS STEREO
• Using the Audio Output Jacks ..................
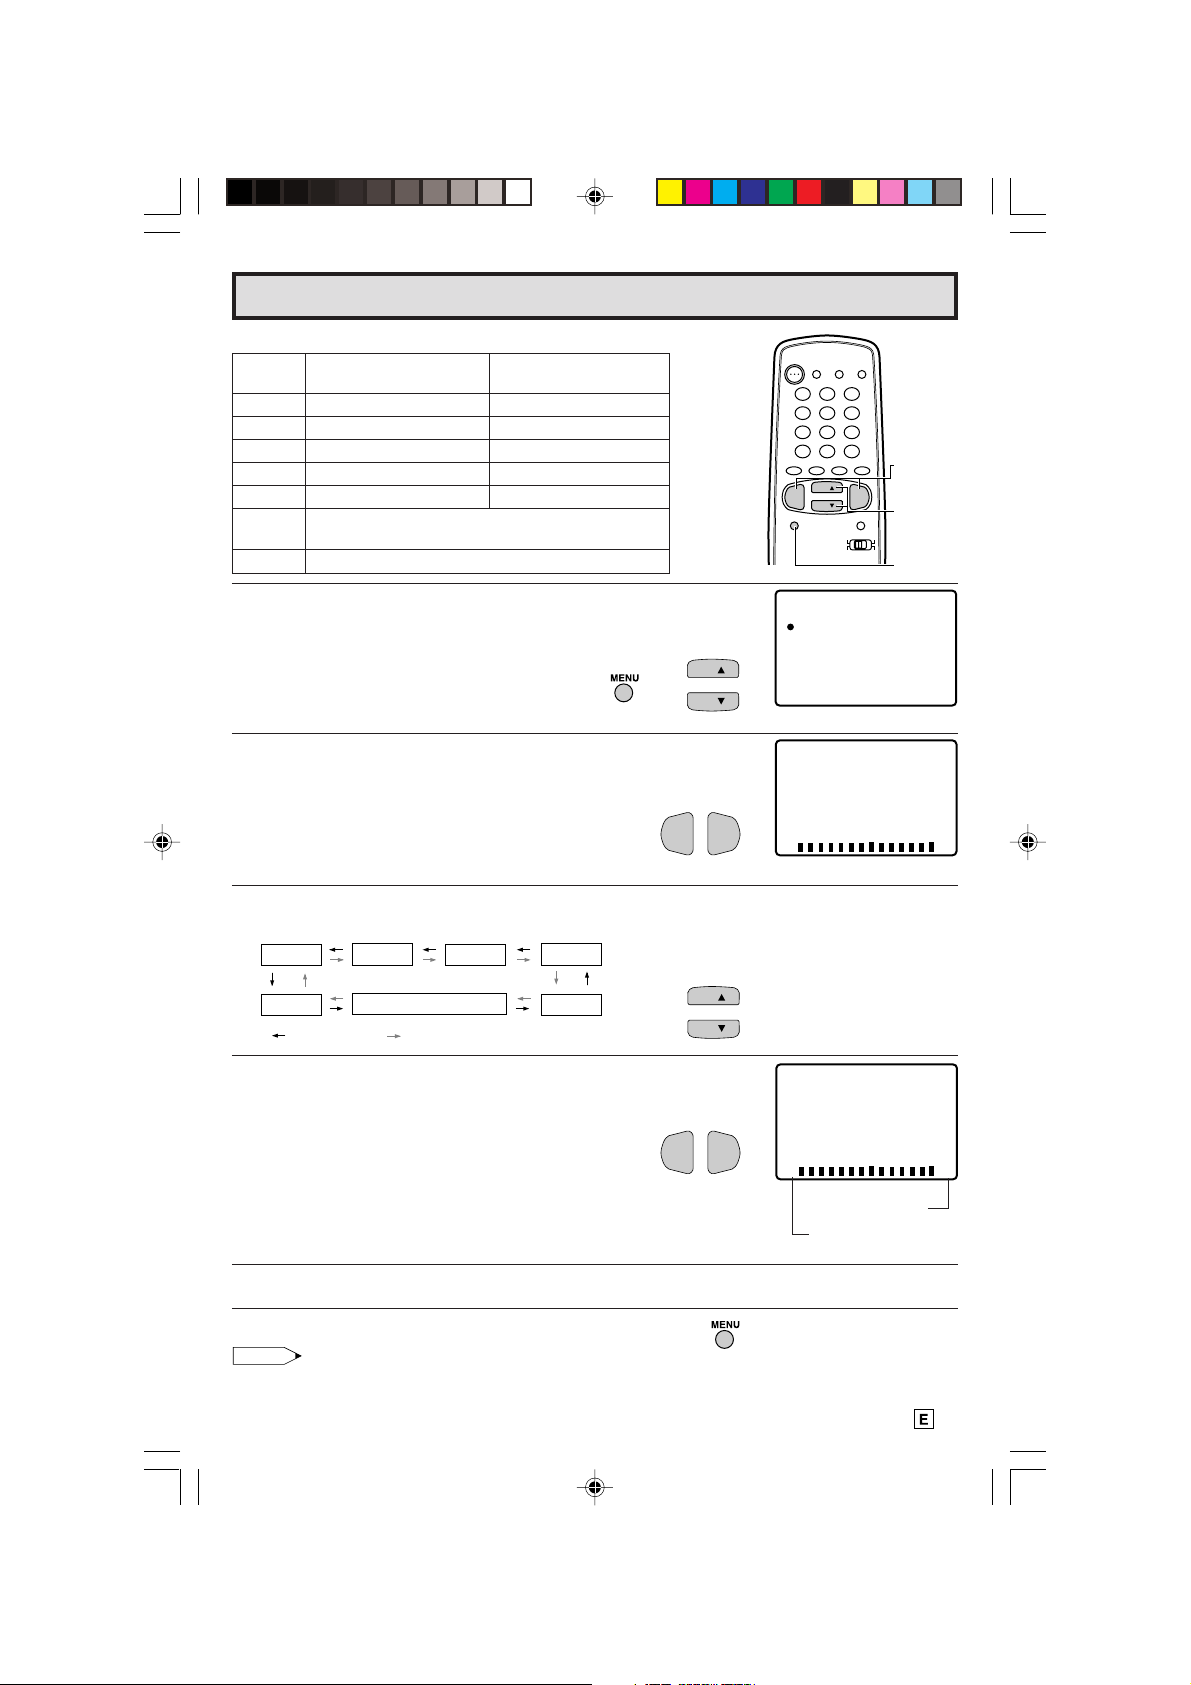
Operation of Remote Control ..........
•
• Specifications .............................................
• Before Calling for Service ..........................
• Calling for Service ......................................
PAGE
3~ 4
5~ 6
10
10
11
12 ~ 13
12
12
12
14
15 ~ 17
15 ~ 17
17
18 ~ 23
18
19 ~ 21
21
22
23
24 ~ 25
26
27 ~ 31
32
34
34
2
5
7
8
9
01 26SL72/29SL82[E].p6.5e 14/5/01, 11:19 AM1
READ THIS OPERATION MANUAL
COMPLETELY BEFORE OPERATING
THIS PRODUCT.
1
Welcome to the SHARP Family. We are pleased that you are now the owner of a SHARP Color Television
– built for outstanding quality, reliability and performance.
Every SHARP Color Television set is tuned and adjusted for proper color and sound, and has passed
through the most stringent quality control tests at the factory. We have prepared this OPERATION MANUAL
so that you may adjust the picture and color to your personal viewing preference.
We sincerely hope that you receive the greatest satisfaction and enjoyment from your new SHARP Color
Television set for years to come.
Please read these instructions carefully, and keep them handy for your future reference.
IMPORTANT
To aid reporting in case of loss or theft, please record the TV’s
model and serial numbers in the space provided. The numbers
are located at the rear of the TV.
Model No.:
Serial No.:
IMPORTANT INFORMATION
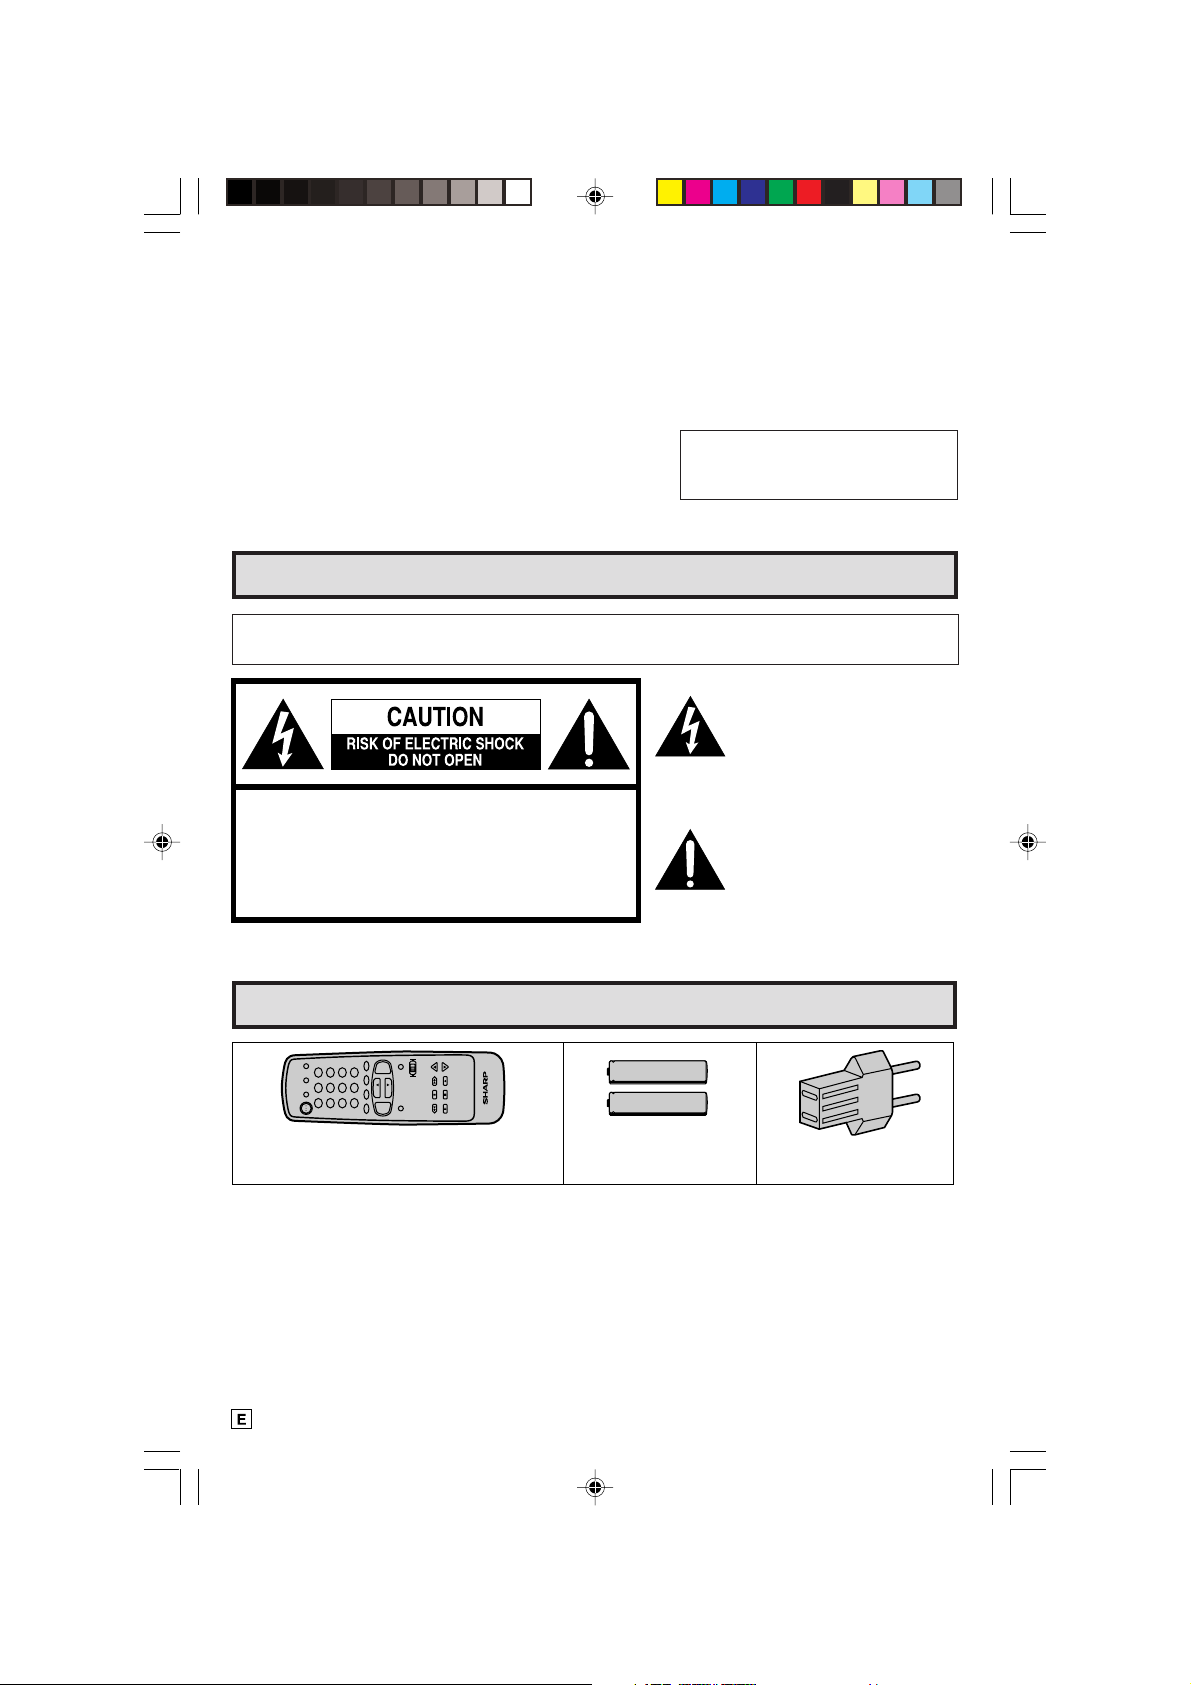
WARNING:
TO REDUCE THE RISK OF FIRE OR ELECTRIC SHOCK, DO NOT
EXPOSE THIS APPLIANCE TO WET LOCATIONS.
CAUTION: TO REDUCE THE RISK OF
ELECTRIC SHOCK,
DO NOT REMOVE COVER (OR BACK).
NO USER-SERVICEABLE PARTS INSIDE.
REFER SERVICING TO QUALIFIED SERVICE
PERSONNEL.
Supplied Accessories
TV
INPUT
DISPLAY
DVD
VCR
1 2 3
POWER
TV
Infrared Remote Control
Part Number : RRMCG1639CESA
+
VOL
100
ENTER
0
CH
4 5 6
7 8 9
PERSONAL PREFERENCE
FLASHBACK
A B C D
CH/SKIP
DVD VCR
CATV
CH
STOP REC
—
VOL
REW PLAY FF
MENU MUTE
TV • CATV• VCR • DVD
PAUSE
Size AA
Dry Batteries
The lightning flash with
arrowhead within a triangle is
intended to tell the user that
parts inside the product are a
risk of electric shock to
persons.
The exclamation point within a
triangle is intended to tell the
user that important operating
and servicing instructions are
in the papers with the
appliance.
AC Plug Adaptor
(Except for 29SL82M)
2
02-08 26SL72/29SL82[E].p6.5e 9/5/01, 10:22 AM2

IMPORTANT SAFEGUARDS
CAUTION: Please read all of these instructions before you operate your television and save
these intructions for later use.
Electrical energy can perform many useful functions. This unit has been engineered and manufactured to
assure your personal safety. BUT IMPROPER USE CAN RESULT IN POTENTIAL ELECTRICAL SHOCK
OR FIRE HAZARDS. In order not to defeat the safeguards incorporated in this equipment, observe the
following basic rules for its installation, use and servicing.
1. Unplug this television equipment from the wall outlet before cleaning.
2. Do not use liquid cleaners or aerosol cleaners. Use a damp cloth for cleaning.
3. Do not use attachments not recommended by the television equipment manufacturer as they may
cause hazards.
4. Do not use this television equipment near water — for example, near a bathtub, washbowl, kitchen sink
or laundry tub, in a wet basement, or near a swimming pool, etc.
5. Do not place this equipment on an unstable cart, stand, or table. The television equipment may fall,
causing serious injury to a child or an adult, and serious damage to the equipment.
Use only with a cart or stand recommended by the manufacturer or sold with the
television equipment.
Television equipment and cart combination should be moved with care. Quick stops,
excessive force, and uneven surfaces may cause the equipment and cart combination
to overturn.
6. Wall or shelf mounting should follow the manufacturer’s instructions, and should use a mounting kit
approved by the manufacturer.
7. Slots and openings in the cabinet and the back or bottom are provided for ventilation, and to insure
reliable operation of the television equipment and to protect it from overheating, these openings must
not be blocked or covered. This television equipment should not be placed in a built-in insulation such
as a bookcase unless proper ventilation is provided.
8. The openings should never be covered with a cloth or other material, and the bottom openings should
not be blocked by placing the television equipment on a bed, sofa, rug, or other similar surface. This
television equipment should never be placed near or over a radiator or heat register.
9. This television equipment should be operated only from the type of power source indicated on the
marking label. If you are not sure of the type of power supplied to your home, consult your television
dealer or local power company.
For television equipment designed to operate from battery power, refer to the operating instructions.
If the plug does not fit, ask your electrician to replace your obsolete outlet. Do not modify the plug and
defeat this safety feature.
10. Do not allow anything to rest on the power cord. Do not locate this television equipment where the cord
will be abused by persons walking on it.
11. As a safety feature, television equipment is equipped with a 2-wire polarized plug (one plug blade
bigger than the other.) The 2-wire polarized plug will fit only one way into the power outlet.
If the plug does not fit, ask your electrician to replace your obsolete outlet. Do not modify the plug and
defeat this safety feature.
12. Follow all warnings and instructions marked on the television equipment.
13. If an outside antenna is connected to the television equipment, be sure the antenna system is grounded
so as to provide some protection against voltage surges and built-up static charges.
02-08 26SL72/29SL82[E].p6.5e 4/25/01, 11:50 AM3
3
IMPORTANT SAFEGUARDS (Continued)
EXAMPLE OF ANTENNA GROUNDING
ACCORDING TO NATIONAL ELECTRICAL CODE.
ANTENNA LEAD-IN WIRE
GROUND CLAMP
ANTENNA DISCHARGE UNIT
ELECTRIC
SERVICE
EQUIPMENT
14. For added protection for this television equipment during a lightning storm, or when it is left unattended
and unused for long periods of time, unplug it from the wall outlet and disconnect the antenna. This
will prevent damage to the equipment due to lightning and power-line surges.
15. An outside antenna system should not be located in the vicinity of overhead power lines or other electric
light or power circuits, or where it can fall into such power lines or circuits. When installing an outside
antenna system, extreme care should be taken to keep from touching such power lines or circuits as
contact with them might be fatal.
16. Do not overload wall outlets and extension cords as this can result in fire or electric shock.
GROUNDING CONDUCTORS
GROUND CLAMPS
POWER SERVICE GROUNDING ELECTRODE
SYSTEM
17. Never push objects of any kind into this television equipment through cabinet slots as they may touch
dangerous voltage points or short out parts that could result in a fire or electric shock. Never spill liquid
of any kind on the television equipment.
18. Do not attempt to service this television equipment yourself as opening or removing covers may
expose you to dangerous voltage or other hazards. Refer all servicing to qualified service personnel.
19. Unplug this television equipment from the wall outlet and refer servicing to qualified service personnel
under the following conditions:
A. When the power cord or plug is damaged or frayed.
B. If liquid has been spilled into the television equipment.
C. If the television equipment has been exposed to rain or water.
D. If the television equipment does not operate normally by following the operating instructions. Adjust
only those controls that are covered by the operating instructions as improper adjustment of other
controls may result in damage and will often require extensive work by a qualified technician to
restore the television equipment to normal operation .
E. If the television equipment has been dropped or the cabinet has been damaged.
F. When the television equipment exhibits a distinct change in performance — this indicates a need
for service.
20. Upon completion of any service or repairs to this television equipment, ask the service technician to
perform routine safety checks to determine that the television is in safe operating condition.
21. When replacement parts are required, be sure the service technician has used replacement parts
specified by the manufacturer that have the same characteristics as the original part. Unauthorized
substitutions may result in fire, electric shock, or other hazards.
4
02-08 26SL72/29SL82[E].p6.5e 4/25/01, 11:50 AM4
Before Operating Your Television
Location
• For normal operation, your TV should be located in an area of the room where cool adequate ventilation
is provided. Do not place the back of the television set in a place where free airflow will be restricted.
• Any magnetic force may disturb the color picture. Make sure that magnets, electric clocks, toys using
magnets or any other magnetic substance, such as iron are kept well away from the TV set.
Power
Y our TV operates on 120 V olts , 60 Hz (29SL82M)/110-220 V olts, 50/60 Hz (26SL72/29SL82) (normal
household current).
Note:
• If the set will not be used for a long period, such as during a vacation, unplug the set from the wall
outlet to economize power. (If the TV set is plugged in, a slight current still flows, even with the
POWER BUTTON in the OFF position.)
• Lines and other noise may appear in TV broadcast images when an FM tuner or radio is located near
the TV and both radio and TV broadcasts are being received. Should such noise appear, turn off
either the TV or the radio.
• If you are listening to an AM broadcast, turn the TV off. AM broadcast signals may not be received
due to interference from the TV.
L Before using the television, prepare the Remote Control
To use the remote control, insert batteries first.
Insert the batteries
• With your thumb nail, pull up the slit as indicated by the arrow to remove the back cover. Insert two
batteries (size “AA”). Be sure to match the battery e/d terminals with the e/d marks inside the
compartment.
Pull up
Battery
Cover
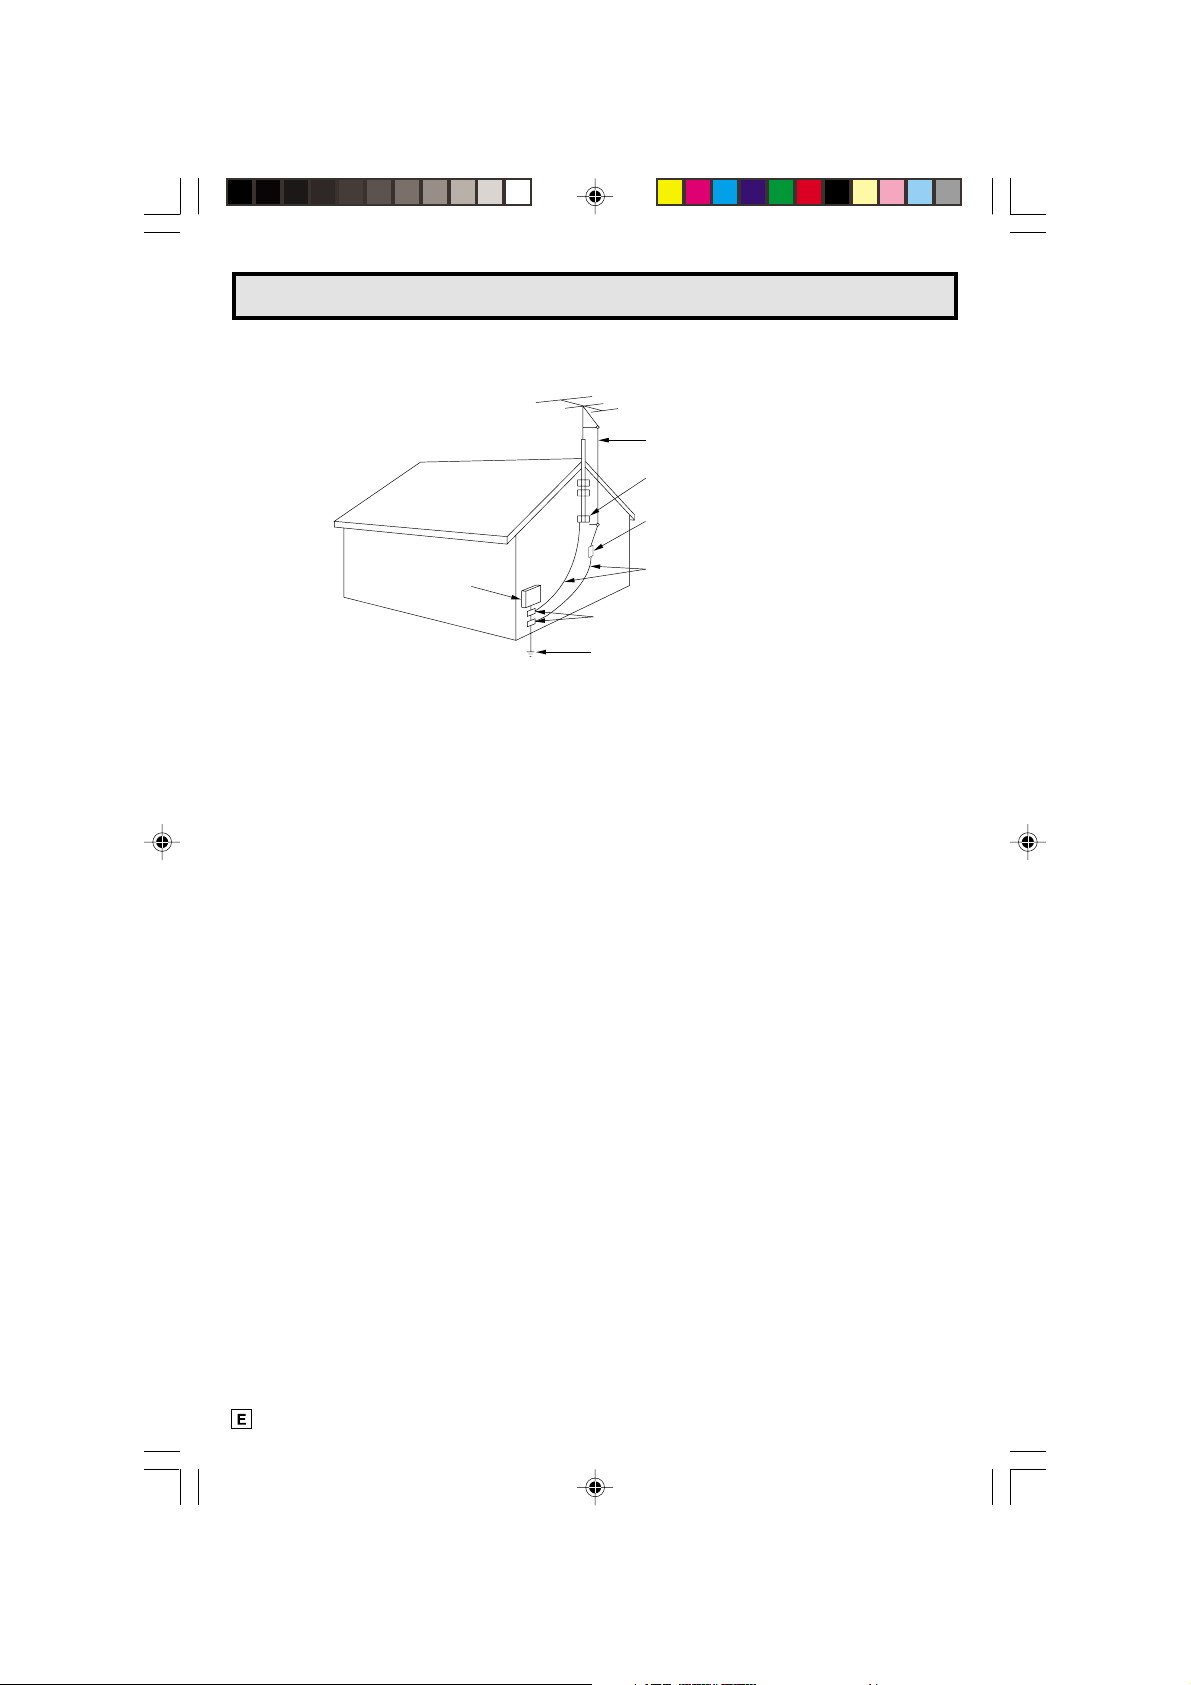
Antenna Connections
Antennas
• The antenna requirements for good color television reception are more important than those for
black & white television reception. For this reason, a good quality outdoor antenna is strongly
recommended.
The following is a brief explanation of the type of connections that are provided with the various
antenna systems:
1. A 75 ohm system is generally a round cable with Ftype connector that can easily be attached to a
terminal without tools (not supplied).
75-ohm coaxial cable (round)
2. A 300 ohm system is a flat “twin-lead” cable that
can be attached to a 75 ohm terminal through a
300-75 ohm ADAPTOR (not supplied).
300-ohm twin-lead cable (flat)
F-type connector
02-08 26SL72/29SL82[E].p6.5e 4/25/01, 11:50 AM5
5
Antenna Connections (Continued)
OUTDOOR ANTENNA CONNECTION
• Use one of the following two diagrams if you connect an outdoor antenna.
A: Using a VHF/UHF combination outdoor antenna.
B: Using separate VHF and/or UHF outdoor antenna.
• Connect an outdoor antenna cable lead-in to the COAXIAL CABLE CONNECTOR on the rear of the
TV set.
A. Combination VHF/UHF Antennas
VHF/UHF ANTENNA
VHF/UHF
ANTENNA
75-ohm
coaxial
cable
or
300/75-ohm
ADAPTOR
(not supplied)
300-ohm
twin-lead
REAR OF TV
B. Separate VHF/UHF Antenna
VHF
ANTENNA
or
UHF
ANTENNA
300-ohm
twin-lead
300-ohm
twin-lead
75-ohm coaxial
cable
COMBINER
(not supplied)
IN OUT
REAR OF TV
CABLE TV (CATV) CONNECTION
• A 75 ohm coaxial cable connector is built into the set for easy hookup. When connecting the 75 ohm
coaxial cable to the set, screw the 75 ohm cable to the COAXIAL CABLE CONNECTOR.
• Some cable TV companies offer “premium pay channels”. Since the signals of these premium pay
channels are scrambled, a cable TV converter/descrambler is generally provided to the subscriber
by the cable TV company. This converter/descrambler is necessary for normal viewing of the scrambled
channels. (Place your TV on channel 3 or 4, typically one of these channels is used. If this is unknown,
consult your cable TV company.) For more specific instructions on installing cable TV, consult your
cable TV company. One possible method of utilizing the converter/descrambler provided by your
cable TV company is explained below.
Please note: RF switch equipped with position A/B (not provided) is required.
“A” position on the RF switch (not supplied) : You can view all unscrambled channels using the TV’s
“B” position on the RF switch (not supplied) : You can view the scrambled channels via the converter/
channel keys.
descrambler using the converter’s channel keys.
RF switch (not supplied)
Two-set
OUTAIN
B
OUT
IN
signal
splitter
(not
supplied)
Cable TV Line
Cable TV converter/
descrambler
(not supplied)
Note:
• Consult your SHARP Dealer or Service Center for the type of splitter, RF switch or combiner that
might be required.
6
02-08 26SL72/29SL82[E].p6.5e 9/5/01, 3:38 PM6
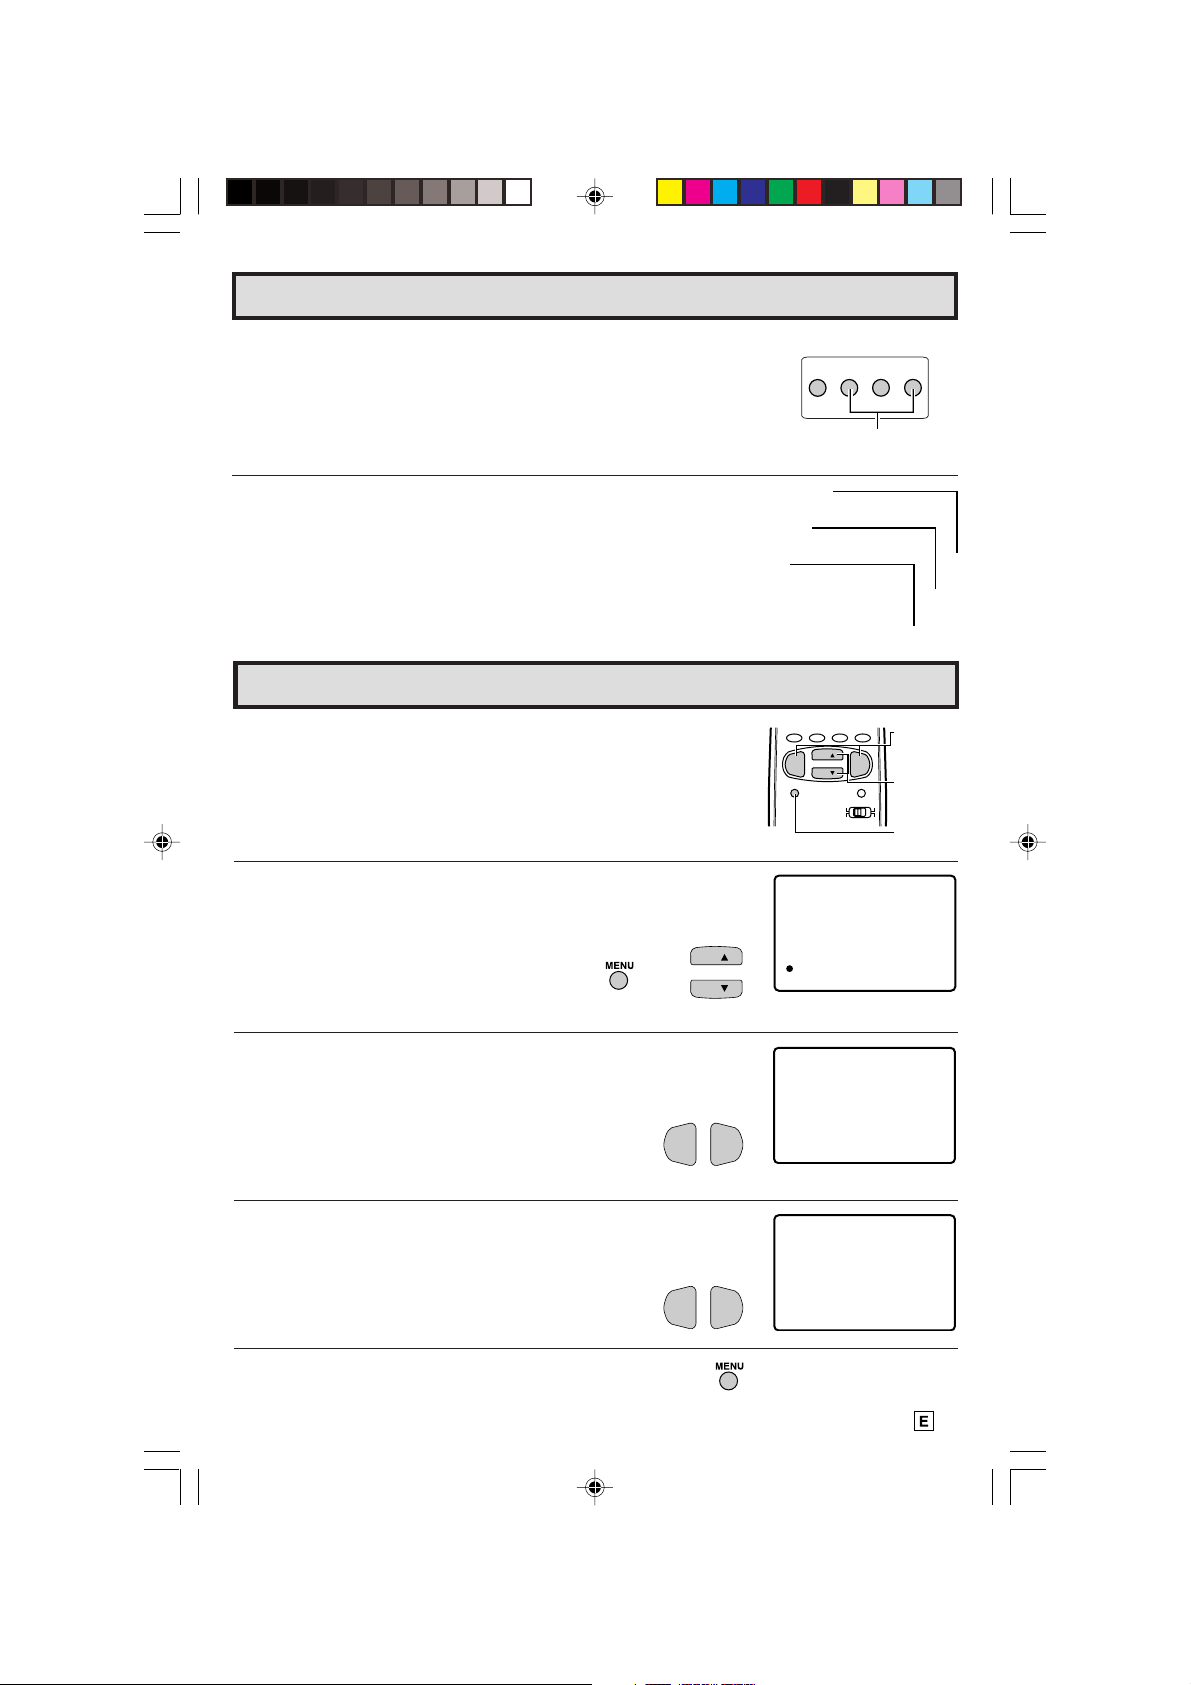
Quick Reference Control Operation
L Location of Controls
Front Panel
POWER
Press → On.
Press again → Off.
SENSOR AREA FOR
REMOTE CONTROL
VOLUME UP/DOWN
(+) Increases sound.
(–) Decreases sound.
Basic Remote Control Functions
POWER
Press → On.
Press again → Off.
REMOTE KEYPAD
Accesses any channel from keypad.
FLASHBACK
Returns to previous channel.
PERSONAL PREFERENCE
With the Personal Preference buttons,
you can program your favorite
programs by using the 4 categories A,
B, C and D. The channels can be
accessed quickly by using these
buttons. (See page 22.)
VOLUME UP/DOWN
(+) Increases sound.
(–) Decreases sound.
• In menu mode, changes or selects
the TV adjustments.
MENU
Press → Accesses MAIN MENU.
Press again → Exits MAIN MENU.
CATV/DVD-TV/VCR MODE SELECT
SWITCH
In TV/VCR position, sends power and
channel select commands (Channel
up/down and Random Access buttons)
to the TV and VCR control.
In CATV/DVD position, sends power
and channel select commands to a
cable TV converter and DVD control.
DVD/VCR CONTROL
See page 27.
POWER POWER
POWER POWER
A B C D
MENU MUTE
REW PLAY FF
PAUSE
VIDEO IN 2 L-AUDIO-R– VOL + ? CH >MENU
POWER
TV
DVD
DISPLAY
VCR
1 2 3
4 5 6
7 8 9
FLASHBACK
PERSONAL PREFERENCE
VOL
—
TV • CATV • VCR • DVD
0
CH
CH
STOP REC
ENTER
100
CATV TV
DVD VCR
VIDEO/AUDIO TERMINALSIN 2
MTS STEREO
– VOL + ? CH > MENU
MENU
Press → Accesses MAIN
MENU.
Press again → Exits MAIN
MENU.
CHANNEL UP/DOWN
(8) Selects next higher channel.
(9) Selects next lower channel.
Infrared Transmitter Window
DISPLAY
Press → Displays receiving channel for
INPUT
VOL
+
CH/SKIP
four seconds.
Press again → Removes display.
• Temporarily displays receiving
channel when in Closed Caption
mode.
INPUT
Press → Switch to external video
INPUT 1 mode.
Press 2 times → Switch to external video
INPUT 2 mode.
Press 3 times → Switch to external
COMPONENT mode.
Press 4 times → Switch back to the
original TV mode.
See page 25.
ENTER
Used in some instances where a Cable
Converter Box requires an “enter”
command after selecting channels,
when using the REMOTE KEYPAD
button. (See page 27)
CHANNEL UP/DOWN
(8) Selects next higher channel.
(9) Selects next lower channel.
• See pages 19 ~ 21 for channel
presetting.
• Moves the “ a ” mark of the MENU
screens.
MUTE
Press → Mutes sound.
Press again → Restores sound.
• CLOSED CAPTION appears when
sound is muted.
Note:
• The above shaded buttons on the Remote Control glow in the dark. To use the glow-in-the-dark display on the
remote control, place it under a fluorescent light or other lighting.
• The phosphorescent material contains no radioactive or toxic material, so it is safe to use.
• The degree of illumination will vary depending on the strength of lighting used.
• The degree of illumination will decrease with time and depending on the temperature.
• The time needed to charge the phosphorescent display will vary depending on the surrounding lighting.
• Sunlight and fluorescent lighting are the most effective when charging the display.
02-08 26SL72/29SL82[E].p6.5e 15/5/01, 3:52 PM7
7
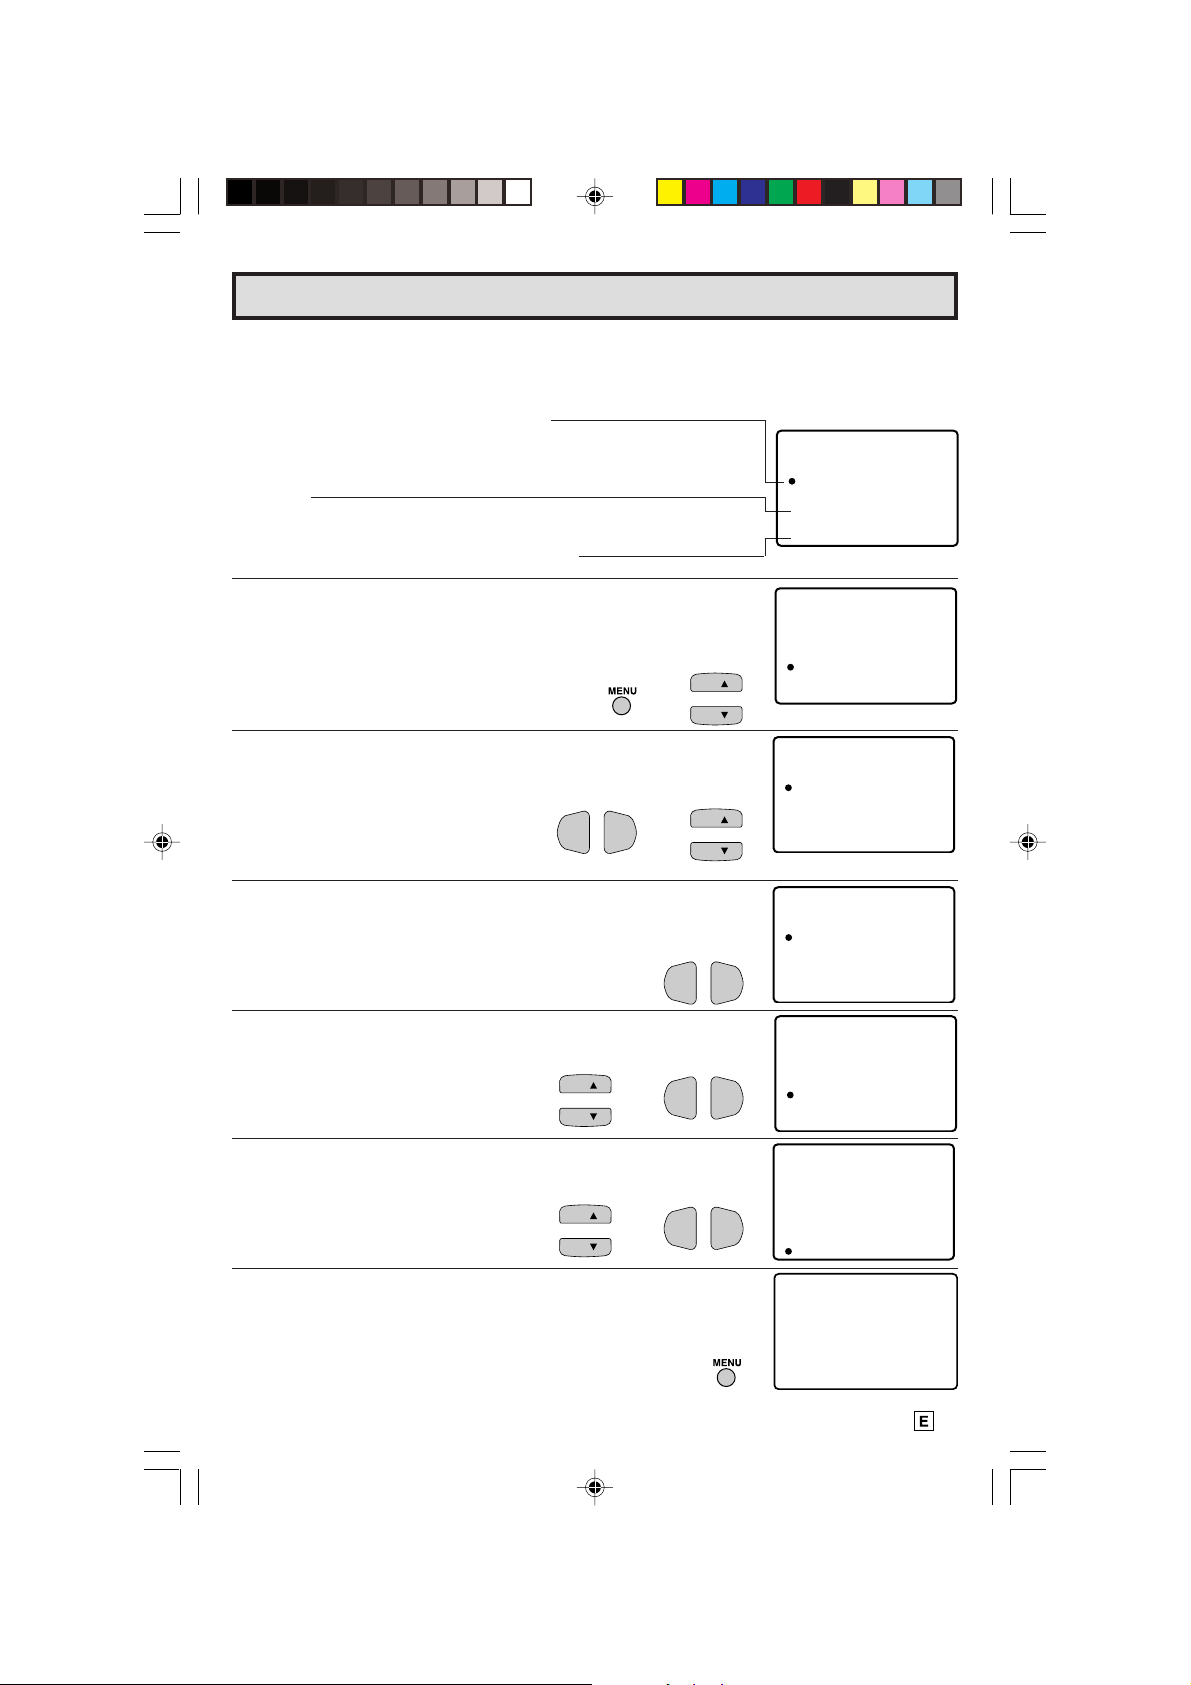
EZ SETUP during First Use
L When you turn on the TV for the first time, it will automatically
memorize the broadcast channels.
Please perform the following instructions before pressing the
power button.
(1) Insert the batteries into the remote control. (See page 5)
(2) Connect the antenna cable to the TV set. (See page 5 ~ 6)
(3) Plug in the AC POWER cord to the wall outlet.
1 Press the
POWER
button on the TV set or on the Remote Control
to turn on the TV. The SELECT LANGUAGE mode will be
displayed.
2 Press
CH UP (8)
or
DOWN (9)
(On the Set)
POWER
to select “ENGLISH”, “SPANISH
(ESPAÑOL)” or “FRENCH (FRANÇAIS)”. Then press
(–)
to SET LANGUAGE.
3 Press
VOL (+)
or
(–)
to access EZ SETUP mode.
(Remote Control)
CH
→
CH
POWER
TV
VOL (+)
VOL—VOL
VOL—VOL
or
+
+
POWER
TV
DVD
VCR
DISPLAY
1 2 3
4 5 6
7 8 9
FLASHBACK
0
PERSONAL PREFERENCE
ABCD
CH
VOL
—
CH
MENU MUTE
CATV TV
DVD VCR
ENGL I SH
ESPAÑOL
FR NCA I S
A
SE ECT : CH8/9
L
SE :TL+–/
INPUT
ENTER
100
VOL
+
LANGUAGSELECT E
POWER
VOLUME
(+)/(–)
CHANNEL
UP (8)/
DOWN (9)
MENU
VO
(SELECT LANGUAGE mode)
LANGUAGSELECT E
ENGL I SH
ESPAÑOL
FR NCA I S
A
SE ECT : CH8/9
L
SE :TL+–/
OR CAB LE .
TSART SETUP?ZE
VO
ANTENNCONNE C T A
YE : VOL+
S
NO :
VOL –
(EZ SETUP mode)
4 Press
VOL (+)
.
The tuner will automatically search for the
broadcast and cable TV channels. (The CH No.
will automatically increase when it appears.)
If you want to stop the EZ SETUP process once it
VOL (–)
has started, press
and it will be cancelled.
VOL
WA I TPLE EAS
AU18TO RGGAMMI NORP
+
TSOP:
If you want to SETUP again, please refer to page
18 on SETUP.
To cancel EZ SETUP
Press
VOL (–)
.
5 Once EZ SETUP is completed, the lowest channel number
memorized will be displayed.
Note:
• If EZ SETUP does not memorize all the channels in your region, please refer to page 19 for more
information on manually memorizing the channels using CHANNEL SETTING.
• It may be difficult to PRESET when the broadcast signals are weak, the channel cycle frequency is
incorrect or frequency jamming is occuring around the area. Please refer to pages 19~ 21 for
more information on manually memorizing the channels using CHANNEL SETTING.
8
02-08 26SL72/29SL82[E].p6.5e 4/25/01, 11:50 AM8
VOL –
Demo Mode
• To quickly learn more about the TV set, press and hold for more than
three seconds
MENU
or both
CH UP (
88
8
)
and
DOWN (
88
99
9
)
on the TV
99
set. The TV set will go into DEMO mode and briefly explain the various
features.
• To cancel DEMO mode, again press
DOWN (
99
9
)
on the TV set.
99
MENU
or both
CH UP (
88
8
)
and
88
MENU
(On the Set)
? CH >
or
MENU
button
Example:
DEMO mode display
CHANNEL
UP (8)/
DOWN(9)
buttons
Siempre
Mejor,
Siempre
Sha rp
Accessing the MAIN MENU screen without Remote Control
• If you misplaced your Remote Control you can still access most settings
via the MAIN MENU screen when you press
88
(
8
)
and
88
DOWN (
99
9
)
on the TV set.
99
MENU
or both
CH UP
• Some features of your TV set will not be accessible without the Remote
Control. If you lost your Remote Control, contact a Sharp Service
Center for a replacement.
MENU
MENU
button
(On the Set)
? CH >
or
CHANNEL
UP (8)/
DOWN(9)
buttons
09-14 26SL72/29SL82[E].p6.5e 14/5/01, 11:58 AM9
9
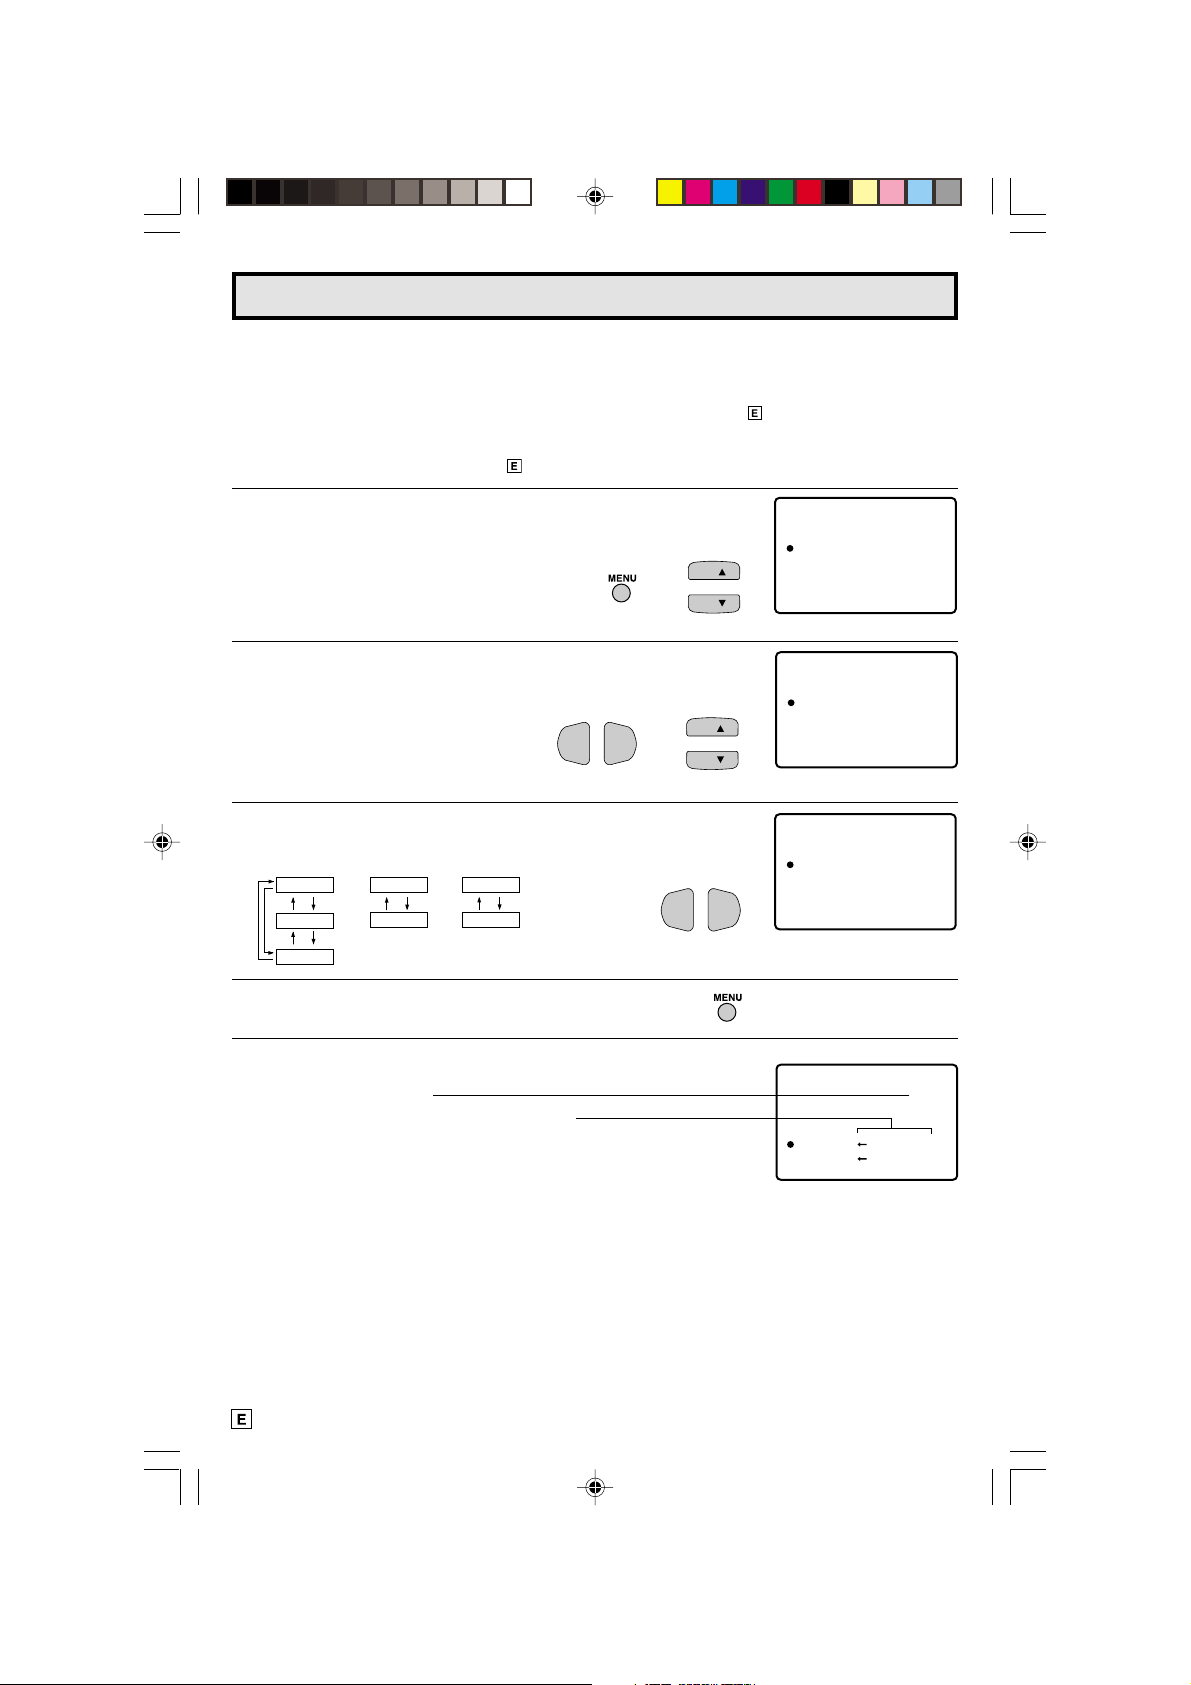
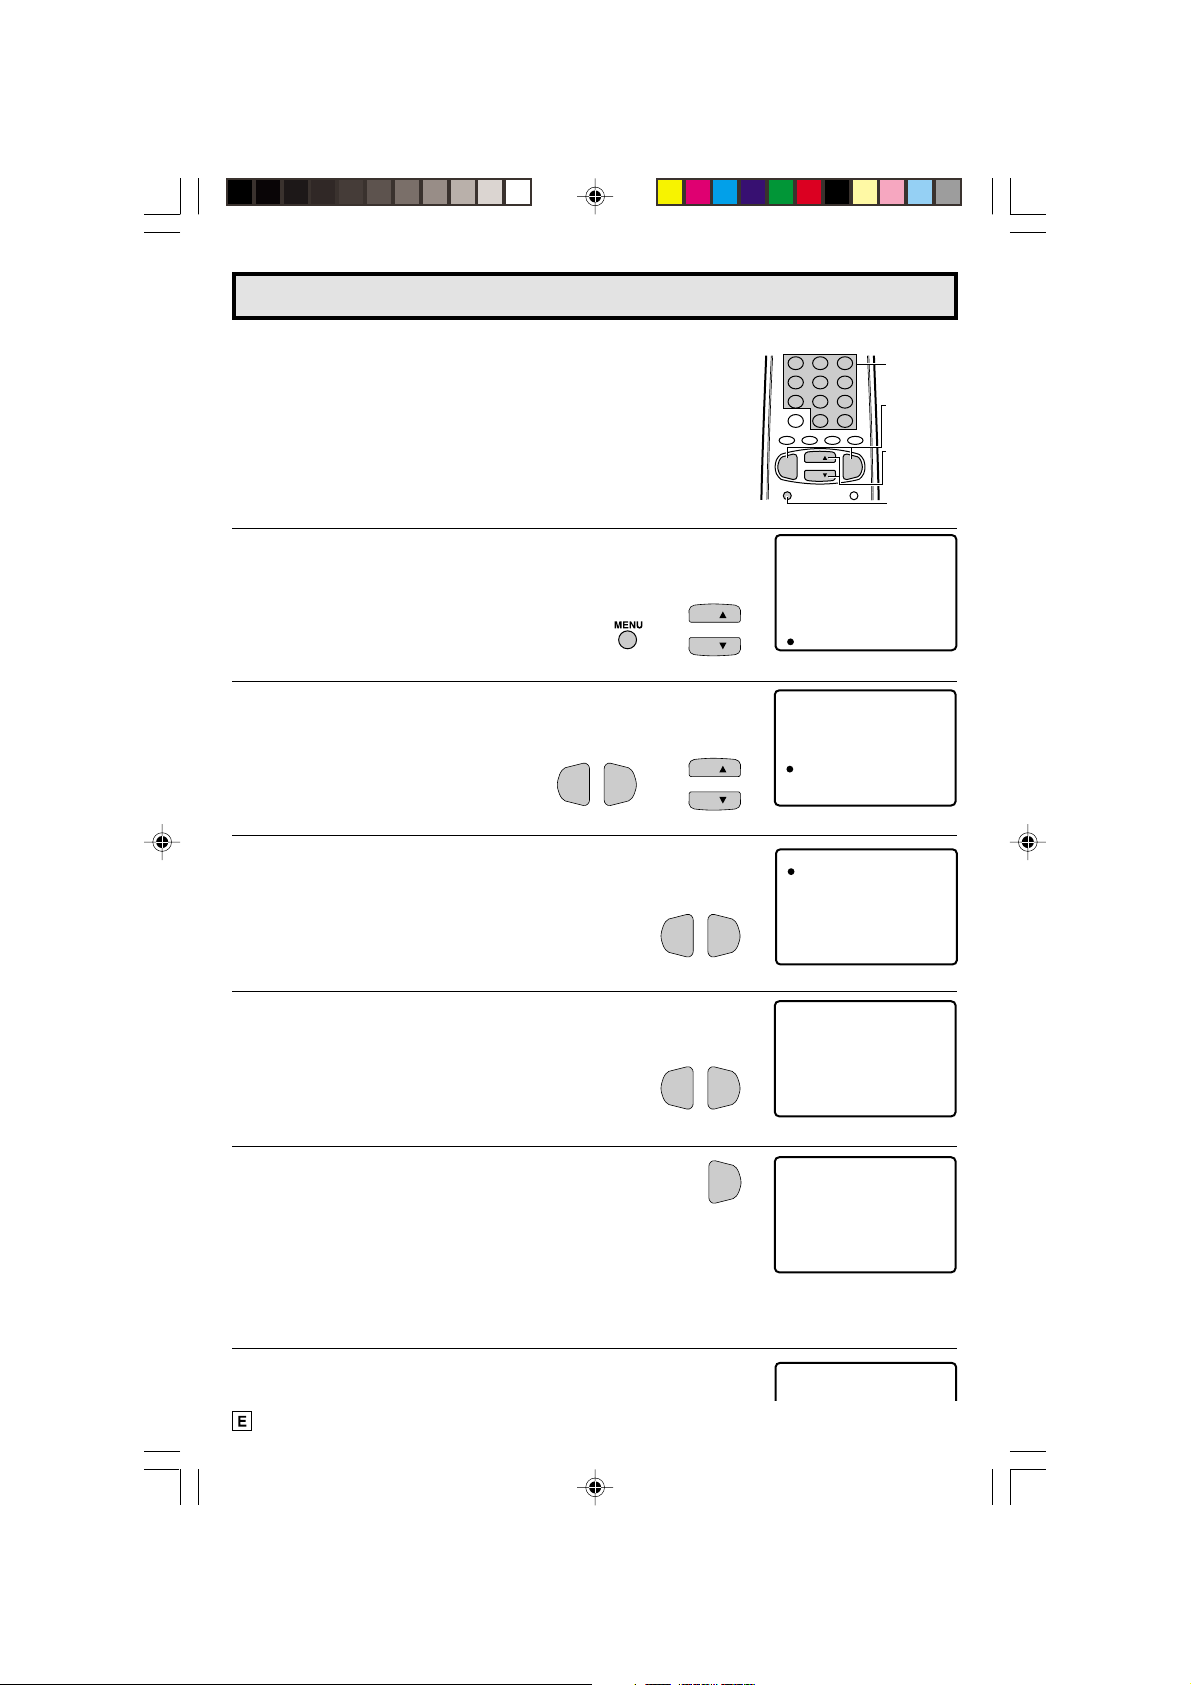
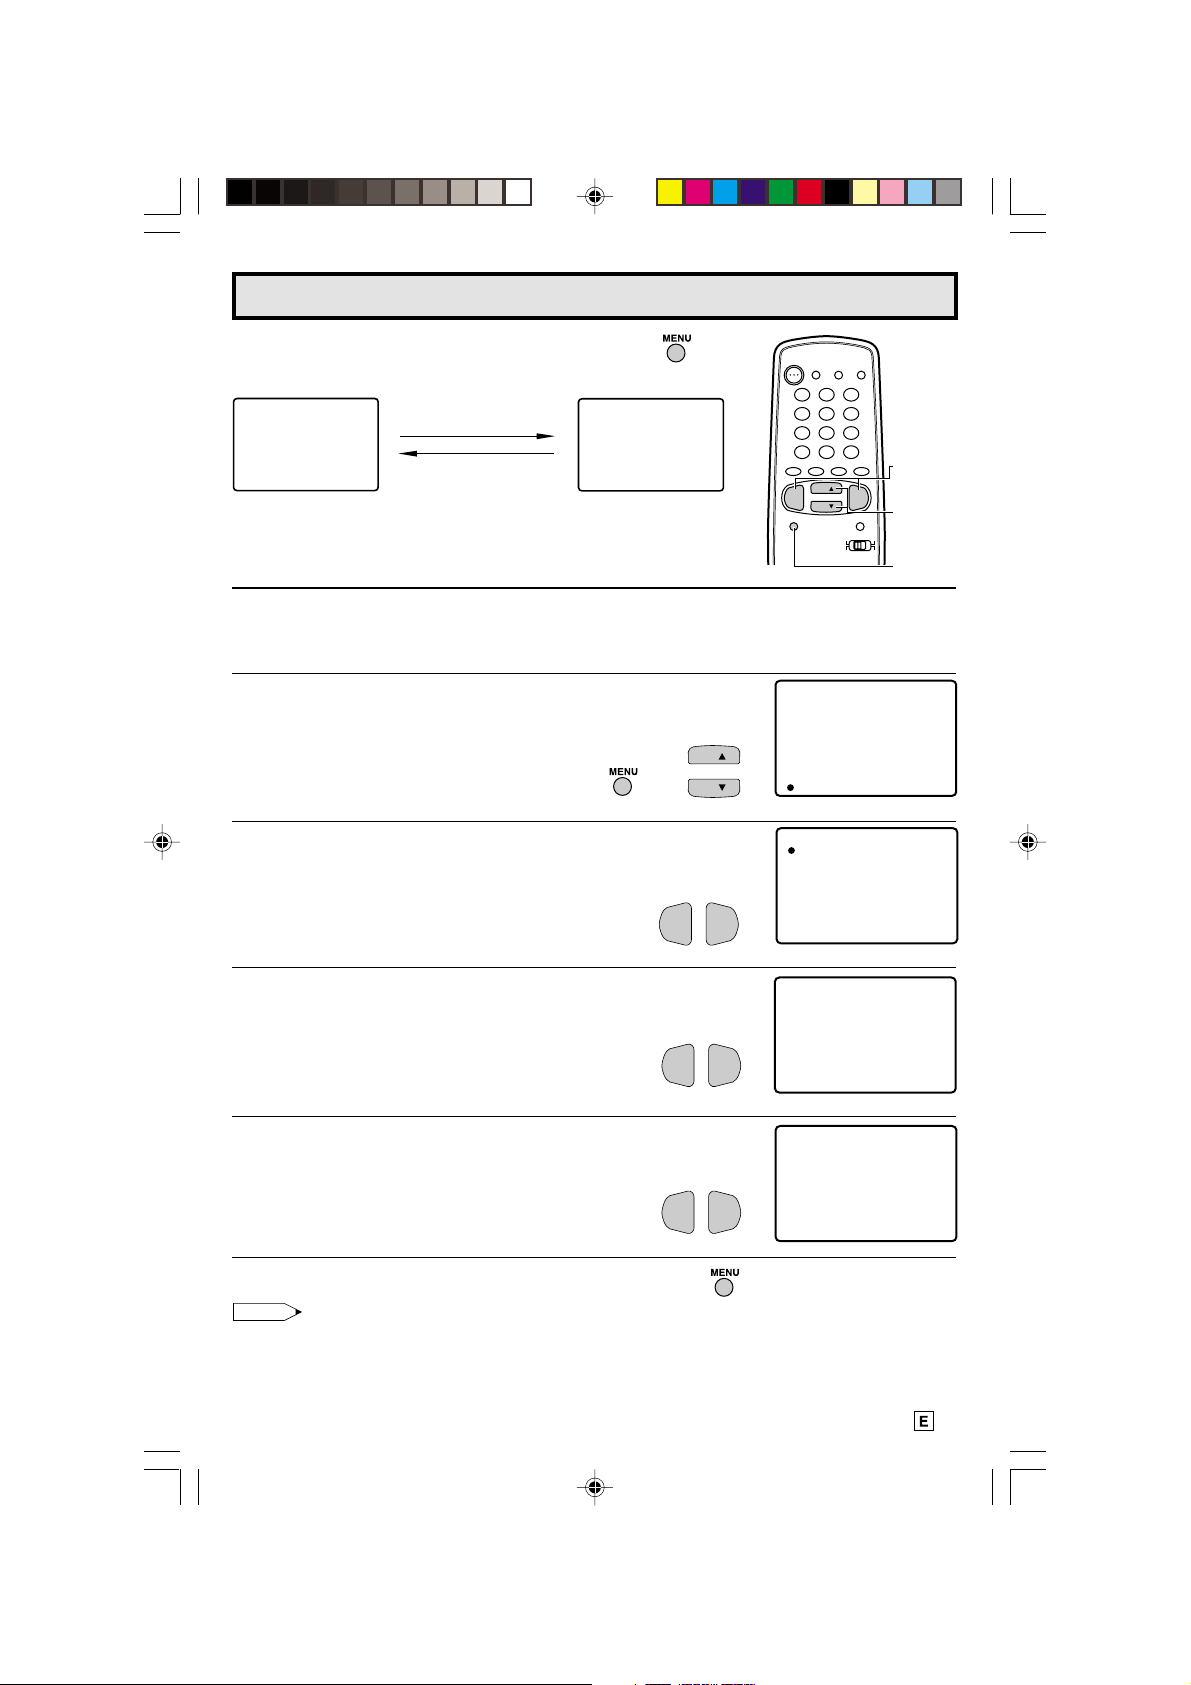
Language
TI ERM
VIDEO ADJUST
ELECTAUD I O S
SET UP
CAPT I ONCLOSED
CONTROLPARENT
ENERGY SAVE
SEPE
L
TI ERM
VIDEO ADJUST
ELECTAUD I O S
SET UP
CAPT I ONCLOSED
CONTROLPARENT
ENERGY SAVE
SEP
E
L
TI ERM
VIDEO ADJUST
ELECTAUD I O S
SET UP
CAPT I ONCLOSED
CONTROLPARENT
ENERGY SAVE
SEPE
L
FR NCAIS
ENGL I SH
ESPAÑOL
IDIOMA
A
BL E SCREENU
PE SONAL PREF .R
UN VER SA L P LU SI
LANGUAGE
INGCH S E T T
L The language for the ON SCREEN DISPLAY can be set to ENGLISH, SPANISH or FRENCH.
L Setting the ON SCREEN DISPLAY Language.
1 Press
2 Press
3 Press
4 Press
5 Press
MENU
CH UP (8)
VOL (+)
or
DOWN (9)
VOL (+)
CH UP (8)
to access the MAIN MENU screen.
or
DOWN (9)
or
(–)
to access SET UP mode, then press
to move the “a” mark to “LANGUAGE”.
or
(–)
to access LANGUAGE change mode.
or
DOWN (9)
(ESPAÑOL)” or “FRENCH (FRANÇAIS)”.
6 Press
MENU
to exit.
to move the “a” mark to “SET UP”.
CH
CH
CH UP (8)
VOL—VOL
+
→
VOL—VOL
CH
CH
+
to select “ENGLISH”, “SPANISH
CH
CH
(MAIN MENU screen)
(SET UP mode)
LANGUAGE
ENGL I SH
ESPAÑOL
FR NCAI S
A
(LANGUAGE change mode)
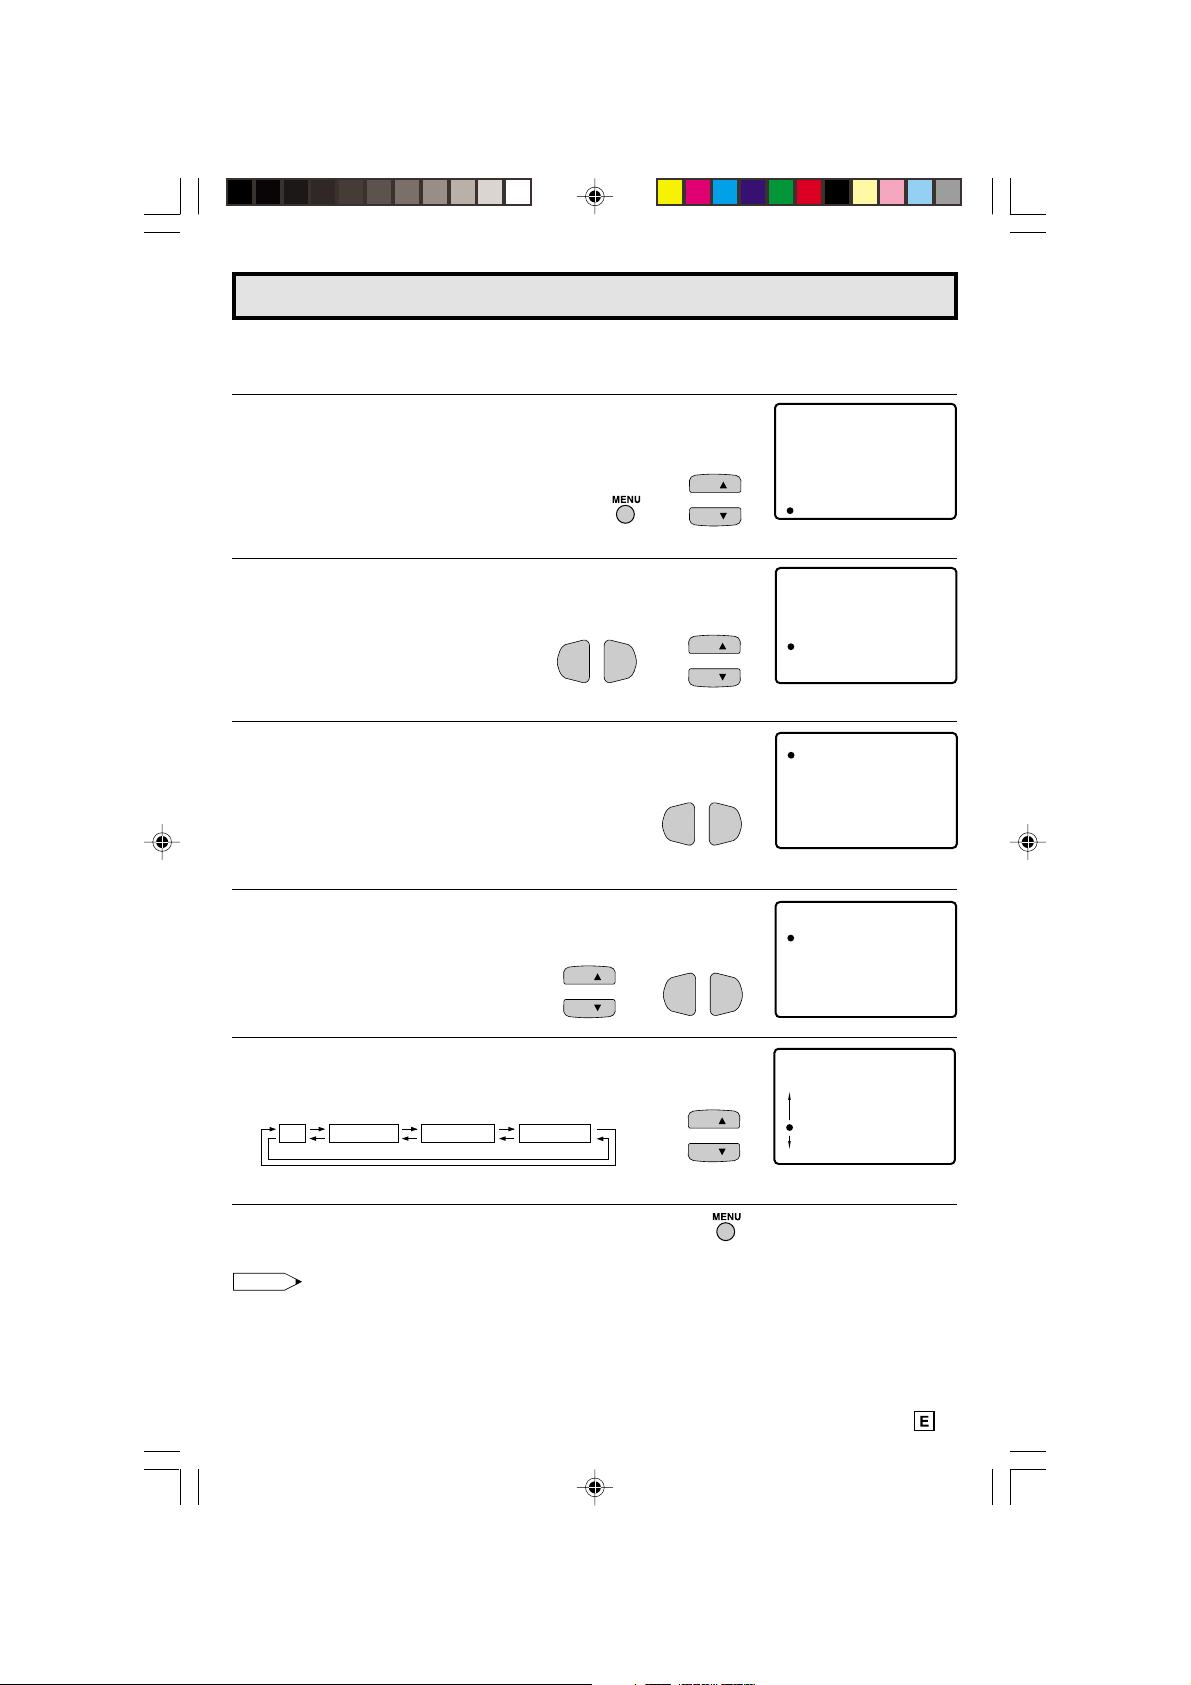
Sleep Timer
L You can preset your Television to turn off automatically in increments of 30, 60, 90 or 120
minutes.
1 Press
2 Press
3 Press
4 Press
Note:
• To turn off the Sleep Timer , repeat the abo ve SLEEP TIMER steps and select “– – – REMAIN” during
• While SLEEP TIMER is active, the time remaining will be briefly displayed on-screen at regular
09-14 26SL72/29SL82[E].p6.5e 4/25/01, 11:51 AM10
MENU
to access the MAIN MENU screen.
VOL (+)
VOL (+)
MENU
or
(–)
to access sleep timer mode.
or
(–)
to set a sleep time of 30, 60, 90 or 120 minutes.
to exit.
VOL—VOL
step 3.
intervals or when the remote’s Display key is pressed.
10
→
+
VOL—VOL
→
+
(MAIN MENU screen)
SL EP TI MERE
120 RE A IMN
(TIMER SET mode)
Video Adjust
ICTUR
E
– +
P50ICTUR
E
– +
P
50
TI ERM
VIDEO ADJUST
ELECTAUDI O S
SET UP
CAPT IONCLOSED
CONTROLPARENT
ENERGY SAVE
SEPE
L
Description of Adjustment Items
Selected VOL UP (+) button VOL DOWN (–) button
item
PICTURE To increase contrast To decrease contrast
TINT To make skin tones greenish To make skin tones purplish
COLOR To increase color intensity To decrease color intensity
BRIGHT To increase brightness To decrease brightness
SHARP To increase sharpness To decrease sharpness
COLOR To choose a LOW, ML, MH or HIGH COLOR TONE.
TEMP.
RESET To return all adjustments to factory preset levels.
1 Press
2 Press
MENU
to access the MAIN MENU screen.
CH UP (8)
or
DOWN (9)
to move the “a” mark to “VIDEO
ADJUST”.
→
3 Press
4 Press
VOL (+)
or
CH UP (8)
(–)
to access PICTURE adjust mode.
or
DOWN (9)
(Refer to the diagram below.)
PICTURE
TINT
COLOR
to select the desired mode.
BRIGHT
CH
CH
VOL—VOL
POWER
TV
DVD
VCR
1 2 3
4 5 6
7 8 9
FLASHBACK
PERSONAL PREFERENCE
A B C D
CH
VOL
—
CH
MENU MUTE
(MAIN MENU screen)
+
(PICTURE adjust mode)
0
DISPLAY
ENTER
CATV TV
DVD VCR
INPUT
100
VOLUME
(+)/(–)
VOL
+
CHANNEL
UP (8)/
DOWN (9)
MENU
RESET
: CH UP (8)
5 Press
VOL (+)
COLOR TEMP
: CH DOWN (9)
or
(–)
to adjust the setting.
SHARP
CH
CH
VOL—VOL
+
VOL UP (+)
increase contrast
VOL DOWN (–)
decrease contrast
6 Repeat steps 4 to 5 to adjust other settings.
7 Press
Note:
09-14 26SL72/29SL82[E].p6.5e 16/5/01, 8:59 AM11
MENU
to exit.
• VIDEO ADJUST setting is available for AIR or CABLE/INPUT 1/INPUT 2 and COMPONENT
respectively.
11
SL EP T IMERE
VIDEO ADJUST
ELECTAUDI O S
SET UP
CAPT I ONCLOSED
CONTROLPARENT
ENERGY SAVE
SELECT
:SAPMTS
AUD I O
:OFFFAO
:ONSPEAKER
Audio Select
L MTS (Multichannel TV Sound)
This circuit allows reception of stereo or bilingual TV sound.
L INTERNAL SPEAKER SWITCH
This function turns the TV’s internal speakers “ON” or “OFF” when listening to sound from
external speakers by using the AUDIO OUTPUT JACKS on page 26.
L FAO (Fixed Audio Output)
This function turns the TV’s internal speakers “OFF” and allows fixed audio output from the
AUDIO OUTPUT JACKS on page 26. With FAO, the TV’s volume control is disabled.
1 Press
2 Press
3 Press
4 Press
MENU
CH UP (8)
SELECT”.
VOL (+) or (–)
CH UP (8)
to access the MAIN MENU screen.
or
DOWN (9)
to move the “a” mark to “AUDIO
to access AUDIO SELECT mode.
or
DOWN (9)
to move the “a” mark to “MTS”,
→
CH
CH
“SPEAKER” or “FAO”.
→
CH
CH
5 Press
VOL (+) or (–)
VOL—VOL
+
to select “STEREO”, “SAP” or “MONO” when
the “a” mark is at “MTS” position.
MTS
STEREO
MONO
6 Press
SAP
MENU
SPEAKER
ON
OFF
to exit.
FAO
ON
VOL—VOL
OFF
Ex: Actual screen indicating ON AIR when receiving STEREO broadcasts
(MAIN MENU screen)
(AUDIO SELECT mode)
AUD I O
FAO
+
(AUDIO SELECT mode)
SELECT
:STEREOMTS
:OFSPEAKER
:ON
F
Actual channel number
“← ON AIR” will appear next to STEREO or
SAP when receiving STEREO or SAP
broadcasts.
12
09-14 26SL72/29SL82[E].p6.5e 4/25/01, 11:51 AM12
12
REO
SSAE
T IRON A
P
N
MO O
(CHANNEL call on screen)
ON A
IR

Audio Select (Continued)
L You can enjoy Hi-Fi stereo sound or SAP broadcasts where available.
• Stereo broadcasts
Live television transmission of sports, shows, concerts, etc. can be received in dynamic stereo sound.
• SAP broadcasts
Television broadcast can be received with either MAIN or SAP sound.
MAIN sound: The normal program soundtrack. (Monaural or stereo where available.)
SAP sound: Second language, supplementary commentaries, etc. (SAP sound is monaural.)
L If stereo sound is difficult to hear.
• You can obtain clearer sound by manually switching to the fixed monaural mode.
Note:
• Once MONO mode is selected, the TV sound remains monaur al e v en if the TV set receiv es a stereo
broadcast. You must switch the mode back to STEREO if you want to hear stereo sound again.
• Selecting MTS while in the INPUT mode does not change the type of sound; in this case, sound is
determined by the video source.
• If the “FAO” mode is selected “ON”, the “SPEAKER” mode will automatically turn “OFF”.
“SPEAKER” selecting will not affect “FAO” mode.
09-14 26SL72/29SL82[E].p6.5e 4/25/01, 11:51 AM13
13
CAPT I ONCLOSED
MODE : CAP
DATA : CH 1
TION
CAPT I ONCLOSED
MODE : CAP
DATA : CH 1
TION
CAPT I ONCLOSED
MODE : CAP
DATA : CH 1
TION
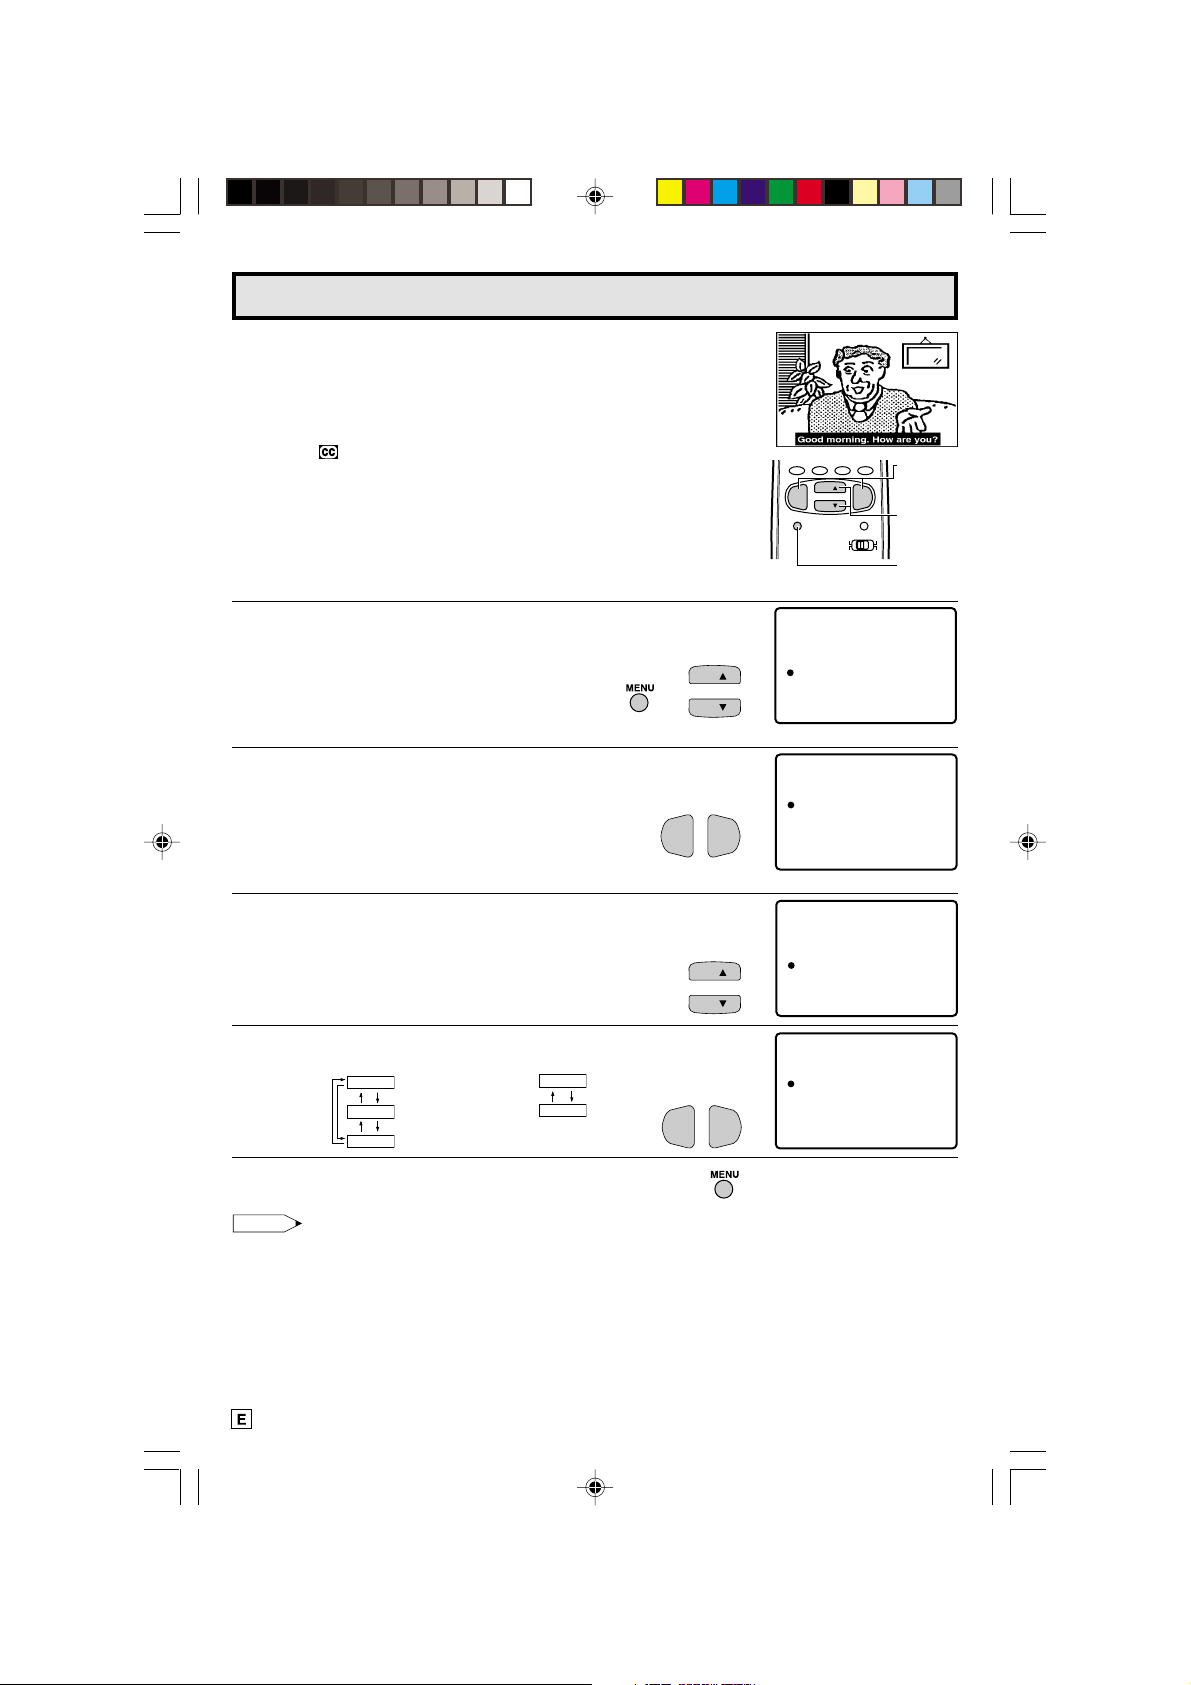
Closed Caption
L HOW TO SET CLOSED CAPTION
• Your TV is equipped with an internal Closed Caption decoder. “Closed
Caption” is a system which allows y ou to view conversations, narr ation,
and sound effects in TV programs and home videos as subscript on
your TV screen as shown on the right.
• Not all the programs and videos will offer closed caption. Please look
for the “ ” symbol to ensure that captions will be shown.
• Closed Caption broadcast can be viewed in two modes: CAPTION
and TEXT. For each mode, two channels are av ailable, CH1 and CH2:
The [CAPTION] mode subscripts dialogues and commentaries of TV
dramas and news programs while allowing clear view of the picture.
The [TEXT] mode displays over the picture other v arious inf ormation
(such as TV program schedule, weather forecast, etc.) that is
independent of the TV programs.
PERSONAL PREFERENCE
ABCD
CH
VOL
MENU MUTE
VOL
—
CH
+
CATV TV
DVD VCR
VOLUME
(+)/(–)
CHANNEL
UP (8)/
DOWN (9)
MENU
1 Press
2 Press
MENU
CH UP (8)
CAPTION”.
3 Press
4 Press
VOL (+)
CH UP (8)
“MODE” or “DAT A”.
5 Press
VOL (+)
MODE :
6 Press
MENU
to access the MAIN MENU screen.
or
or
or
CAPTION
TEXT
OFF
DOWN (9)
(–)
to access CLOSED CAPTION setting mode.
or
DOWN (9)
(–)
to change the CLOSED CAPTION setting.
to move the “a” mark to “CLOSED
to move the “a” mark to either
DATA :
CH 1
CH 2
to exit.
→
VOL—VOL
VOL—VOL
SEPE
L
TI ERM
VIDEO ADJUST
CH
CH
ENERGY SAVE
SET UP
ELECTAUDI O S
CAPT I ONCLOSED
CONTROLPARENT
(MAIN MENU screen)
+
(CLOSED CAPTION setting mode)
CH
CH
+
Note:
• If a broadcast has CLOSED CAPTION and the
mode automatically. Pressing
MUTE
again will return the set to its previous condition.
MUTE
button is pressed, the set enters [CAPTION]
• Closed Caption may malfunction (white bloc ks , strange characters, etc.) if signal conditions are poor
or if there are problems at the broadcast source. This does not necessarily indicate a problem with
your TV .
• If any button is pressed to call up the ON SCREEN DISPLAY while viewing a CLOSED CAPTION
broadcast, the closed captions will disappear momentarily.
• When viewing in TEXT mode, if no TEXT broadcast is being received, for some programs the screen
may become dark and blank. Should this occur, set the Closed Caption mode to “OFF”.
14
09-14 26SL72/29SL82[E].p6.5e 4/25/01, 11:51 AM14
TI ERM
VIDEO ADJUST
ELECTAUDI O S
SET UP
CAPT IONCLOSED
CONTROLPARENT
ENERGY SAVE
SLEEP
Parent Control (VIEW TIMER)
L VIEW TIMER
This function allows you to restrict TV viewing time and also allows you to control TV usage.
This function is to prevent your children from watching too much TV.
VIEWING TIME (an accumulative timer: counts only the time
duration acquired while the TV is on.)
• VIEWING TIME can be set from 30M (30 minutes) to 10H00M (10
hours) in 30 minutes intervals.
OFF TIME (Restricts TV watching after the VIEWING TIME reaches
zero.)
• OFF TIME can be set from 30M (30 minutes) to 10H00M (10 hours)
in 30 minutes intervals.
STATUS (ON/OFF setting of VIEW TIMER)
L How to set VIEW TIMER.
1 Press
2 Press
MENU
to access the MAIN MENU screen.
CH UP (8)
or
DOWN (9)
to move the “a” mark to “PARENT
CONTROL”.
→
CH
CH
VEWT
IIMER
VEWINGITIME
––H
––M
TIME
OFF
––H ––M
STATU
S:OFF
(MAIN MENU screen)
3 Press
4 Press
VOL (+)
or
CH UP (8)
(–)
to access PARENT CONTROL mode.
or
DOWN (9)
to move the “a” mark to “VIEW
TIMER”.
5 Press
6 Press
VOL (+)
or
CH UP (8)
(–)
to access “VIEW TIMER”.
or
DOWN (9)
to select “VIEWING TIME” and
“OFF TIME”. For each selection, press the
the time duration.
7 Press
VOL (+)
CH UP (8)
or
or
(–)
DOWN (9)
to turn ON the “VIEWING TIMER”. (If STATUS is
to select “STATUS”. Press the
OFF, VIEW TIMER will not operate.)
8 Press
MENU
. “INPUT SECRET No.” will be displayed.
VOL—VOL
VOL (+)
CH
CH
CH
CH
PARENT CONTROL
VIE
W
TIMER
CH
→
+
CH
(PARENT CONTROL mode)
VIWTIMER
E
W
ITIME
EGN
→
→
or
VOL—VOL
(–)
to set
VOL—VOL
VOL—VOL
VI
OFF TIME
+
+
+
ST TAUS
VEWT
IIMER
VEWINGITIME
OFF
STATU
VEWT
IIMER
VEWINGITIME
OFF
STATU
NI PUT SECRET No .
––––H
––––H
2H
00M
TIME
––H ––M
S:OFF
2H
00M
TIME
5H 00M
S:ON
–
– – –
M
M
:OFF
15
15-20 26SL72/29SL82[E].p6.5e 14/5/01, 11:21 AM15
Parent Control (VIEW TIMER Continued)
9 Enter the 4-digit SECRET No. using the
10
Press
MENU
, and SECRET No. is registered.
REMOTE KEYPAD
1 2 3
4 5 6
7 8 9
ENTER
0
100
.
→
Example
• To restrict anybody from watching the TV for 5 hours, after watching
the TV for 2 hours, your settings would look like this:
• They can choose to watch the 2 hours of TV however they wish. For
example, they could watch 1 hour of TV, turn TV off for 30 minutes,
then turn TV on and watch the remaining 1 hour on the VIEWING
TIMER.
L To change the VIEW TIMER settings. (SECRET No. is registered)
1 Repeat “How to set VIEW TIMER” steps and select
“PARENT CONTROL VIEW TIMER” during step 3.
Press
VOL (+)
be displayed.
2 Enter the 4-digit SECRET No. using the
KEYPAD
be displayed. Repeat step 5 ~ 6.
Note:
• When you choose the correct SECRET No., the VIEW TIMER access
screen is displayed. If the wrong SECRET No. is chosen, “SECRET
No. IS INCORRECT” is displayed. Input the SECRET No. again in
this case.
or
(–)
, and “INPUT SECRET No.” will
REMOTE
, and the VIEW TIMER access screen will
VOL—VOL
1 2 3
4 5 6
7 8 9
0
+
ENTER
100
NI PUT SECRET No .
1
2 3 4
VEWT
IIMER
VEWINGITIME
2H
00M
TIME
OFF
5H 00M
STATU
S:ON
NI PUT SECRET No .
–
– – –
I PUT ESN CRET No .
****
S ECRET No . I S
INC
O
RRECT
L To cancel the VIEW TIMER (While the TV set is OFF but the VIEW
TIMER is set)
1 Turn on TV; a blue screen message “TIME OVER” will appear. If
you do nothing, the TV will turn off in approximately 30 seconds.
2 Enter the 4-digit SECRET No. using the
KEYPAD
the VIEW TIMER is canceled. If the wrong SECRET
No. is chosen, “SECRET No. IS INCORRECT” is
displayed. Input the SECRET No. again in this case.
. When you choose the correct SECRET No.,
REMOTE
1 2 3
4 5 6
7 8 9
0
L To cancel the VIEW TIMER setting or change the SECRET No.
(When you forget the SECRET No.)
1 Repeat “How to set VIEW TIMER” steps and select
“PARENT CONTROL VIEW TIMER” during step 3.
VOL (+)
Press
be displayed.
16
15-20 26SL72/29SL82[E].p6.5e 9/5/01, 9:59 AM16
or
(–)
, and “INPUT SECRET No.” will
VOL—VOL
+
ENTER
100
TMEO
I VER
I PUT ESN CRET
–––
–
TMEOI VER
I PUT ESN CRET
****
NI PUT SECRET No .
–
– – –
No .
No .
Parent Control (VIEW TIMER Continued)
TI ERM
VIDEO ADJUST
ELECTAUDI O S
SET UP
CAPT IONCLOSED
CONTROLPARENT
ENERGY SAVE
SLEEP
2 Press and hold both
VOL (+)
and
CH UP (8)
on the TV set
simultaneously until the VIEW TIMER access screen is displayed.
Now you can cancel the VIEW TIMER settings or change the
SECRET No. while “INPUT SECRET No.” is displayed.
L Notice of Remaining VIEWING TIME
• For every 30 minute interval, the “remaining time” will be displayed for
4 seconds. For the last 5 minutes, the “remaining time” will be displayed
every minute.
•“0 REMAIN” will be displayed for 10 seconds just before the VIEWING
TIME is complete.
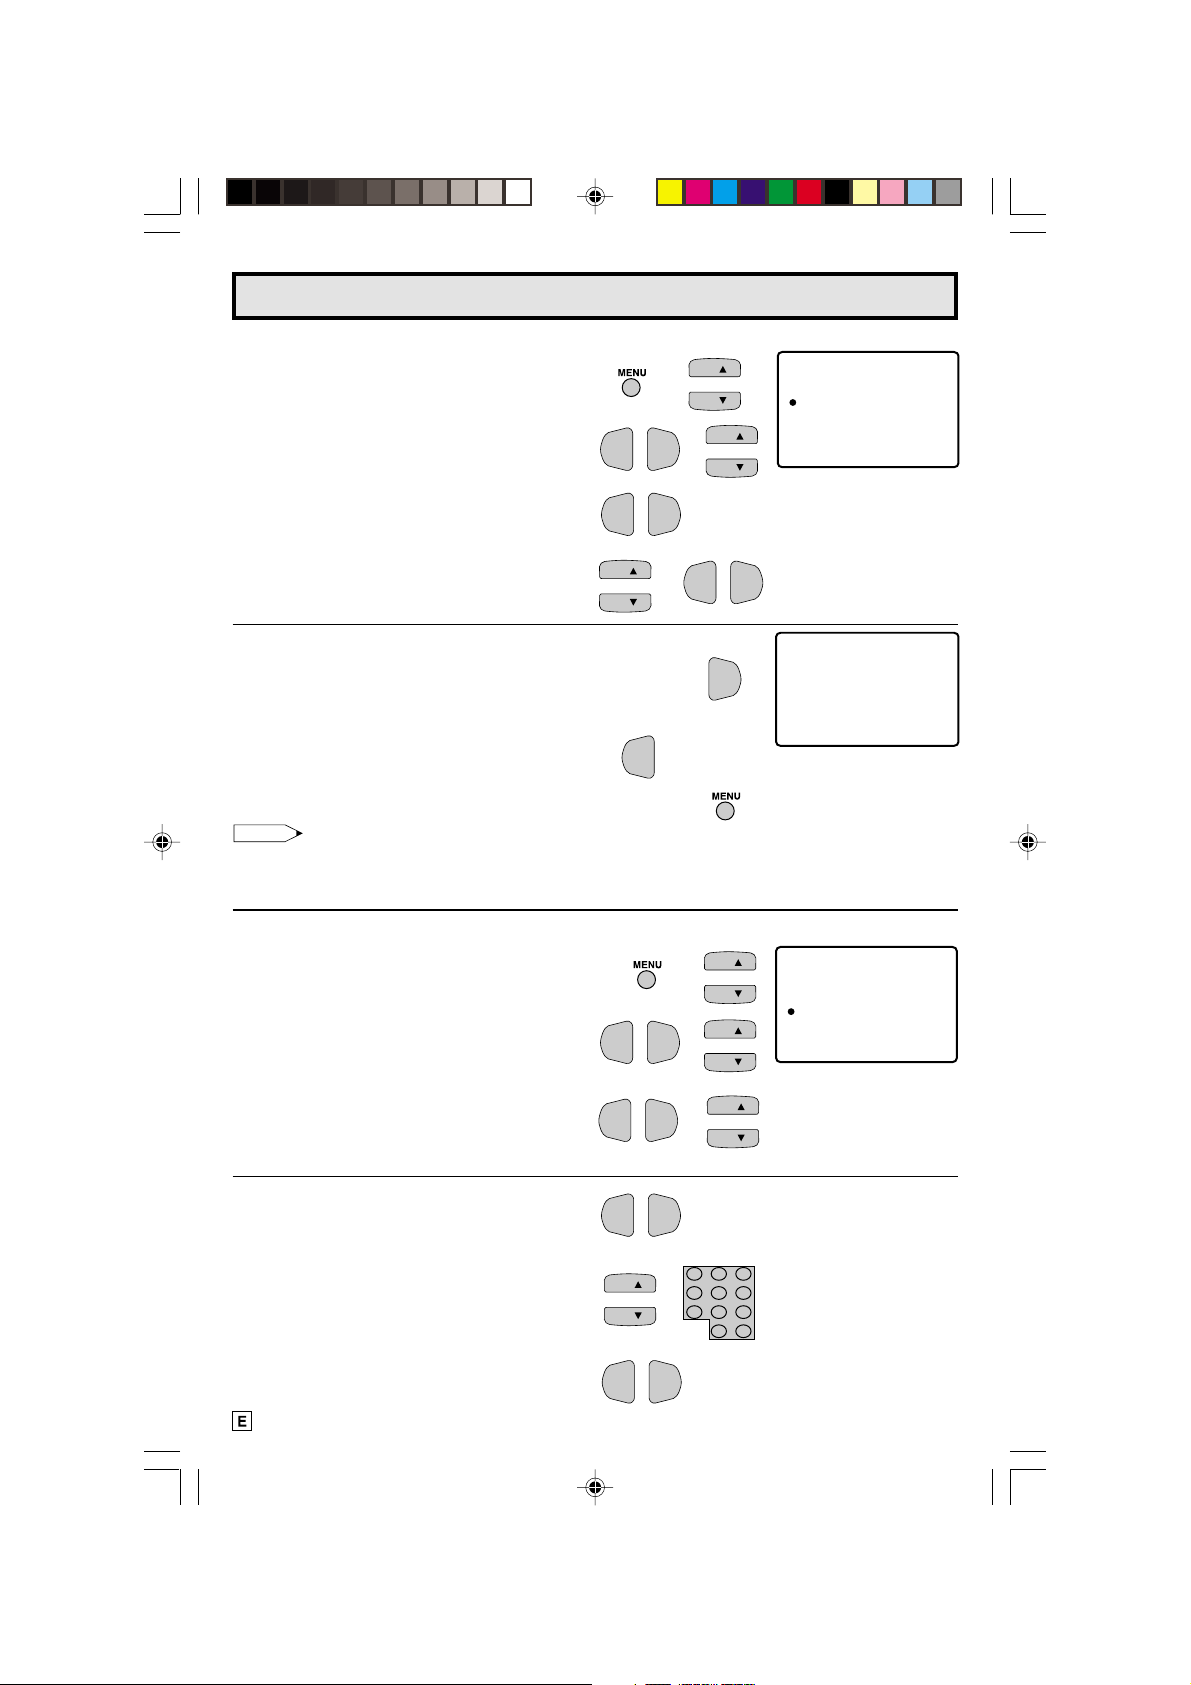
Energy Save
L This feature lets you lower the power consumption of your TV
set which in turn saves you money and minimizes the impact on
the environment. When this feature is turned on, it reduces the
brightness of the TV to a level that consumes approximately 20
percent less energy than when the feature is turned off.
The reduction in brightness will be less noticeable under low
room lighting conditions.
1 Press
2 Press
SAVE”.
MENU
to access the MAIN MENU screen.
CH UP (8)
or
DOWN (9)
to move the “a” mark to “ENERGY
→
CH
CH
(On the Set)
– VOL + ? CH >
VOL (+)/CHANNEL
UP
(8)
buttons
VIEWING TIME
30M
0H
REMAIN
VIEWING TIME
0H
05M
REMAIN
VIEWING TIME
0
REMAIN
PERSONAL PREFERENCE
ABCD
CH
VOL
—
CH
MENU MUTE
CATV TV
DVD VCR
VOL
+
VOLUME
(+)/(–)
CHANNEL
UP (8)/
DOWN (9)
MENU
(MAIN MENU screen)
3 Press
4 Press
5 Press
15-20 26SL72/29SL82[E].p6.5e 9/5/01, 9:59 AM17
VOL (+)
VOL (+)
MENU
or
(–)
to access ENERGY SAVE select mode.
or
(–)
to select “ON”.
to exit.
VOL—VOL
VOL—VOL
EN REGYSAVE
+
:OFF
(ENERGY SAVE select mode)
EN REGYSAVE
+
:ON
17
Set Up
BL E SCREENU
LANGUAGE
INGCH SE T T
PE SONAL PREF .R
UN VE RSA L PL U SI
A I / CABLER
EZ
SETUP
CH SE ARCH
CH MEMORY
TI ERM
VIDEO ADJUST
ELECTAUDI O S
SET UP
CAPT I ONCLOSED
CONTROLPARENT
ENERGY SAVE
SLEEP
L EZ SETUP
By operating the channel preset functions, you can preset your
TV to the desired channels for viewing.
1 2 3
4 5 6
7 8 9
FLASHBACK
0
PERSONAL PREFERENCE
A B C D
CH
VOL
—
CH
MENU MUTE
ENTER
100
VOL
+
REMOTE
KEYPAD
VOLUME
(+)/(–)
CHANNEL
UP (8)/
DOWN (9)
MENU
1 Press
2 Press
MENU
to access the MAIN MENU screen.
CH UP (8)
or
DOWN (9)
to move the “a” mark to “SET
UP”.
3 Press
4 Press
5 Press
6 Press
8
(
VOL (+)
)
or
DOWN (9)
VOL (+)
VOL (+)
VOL (+)
or
(–)
to access SET UP mode, then press
to move the “a” mark to “CH SETTING”.
or
(–)
to access CH SETTING mode.
or
(–)
to access EZ SETUP mode.
.
The tuner will automatically search for the
broadcasting and cable TV channels . (The CH No.
will automatically increase when it appears.)
If you want to stop the EZ SETUP process once it
has started, press
VOL (–)
. Search will be
canceled.
To cancel EZ SETUP
Press
VOL (–)
.
VOL—VOL
CH
→
CH
(MAIN MENU screen)
CH UP
CH
→
+
CH
VOL—VOL
VOL—VOL
VOL
(SET UP mode)
+
(CH SETTING mode)
OR CAB LE .
TSART SETUP?ZE
+
ANTENNCONNE C T A
YE : VOL +
S
NO :
VOL –
(EZ SETUP mode)
+
AU18TO RGGAMMI NORP
WA I TPLE EAS
TSOP:
VOL –
7 Once EZ SETUP is completed, the lowest channel number
memorized will be displayed.
18
15-20 26SL72/29SL82[E].p6.5e 4/25/01, 12:04 PM18
Set Up (Continued)
A I / CABLER
EZ
SETUP
CH SE ARCH
CH MEMORY
TI ERM
VIDEO ADJUST
ELECTAUDI O S
SET UP
CAPT I ONCLOSED
CONTROLPARENT
ENERGY SAVE
SLEEP
L CHANNEL SETTING
If EZ SETUP does not memorize all the channels in your region, follow the instructions below
to manually memorize the channel.
1 Press
2 Press
UP”.
MENU
to access the MAIN MENU screen.
CH UP (8)
or
DOWN (9)
to move the “a” mark to “SET
→
CH
CH
(MAIN MENU screen)
3 Press
4 Press
VOL (+)
CH UP (8)
SETTING”.
5 Press
6 Press
VOL (+)
CH UP (8)
CABLE”, then press
7 Press
CH UP (8)
desired mode.
A
AIR
CABLE STD
or
(–)
to access SET UP mode.
or
DOWN (9)
or
(–)
to access CH SETTING mode.
or
DOWN (9)
VOL (+)
or
DOWN (9)
to move the “a” mark to “CH
to move the “a” mark to “AIR/
or
(–)
to access AIR/CABLE mode.
to move the “a” mark to the
CABLE HRC CABLE IRC
VOL—VOL
CH
CH
BL E NSCREE
U
PE SONAL PREF .R
UN VE RSA L PL U SI
LA
+
CH
CH
→
NGUAGE
CH SE T T I NG
(SET UP mode)
VOL—VOL
+
(CH SETTING mode)
EZ SETUP
AI /CABLER
H SEARCH
C
HMEMORYC
VOL—VOL
→
+
AI /CABLER
AI
R
C
CH
CH
ABLE S TD
ABLE HRCC
ABLE I RCC
(AIR/CABLE mode)
8 Press
MENU
to exit.
Note:
• Receivable channels of your TV set are:
AIR channels: CABLE channels:
VHF: 2 through 13. 1 (HRC and IRC mode only)
UHF: 14 through 69. 2 through 125 (STD, HRC and IRC)
15-20 26SL72/29SL82[E].p6.5e 4/25/01, 12:04 PM19
19
A I / CABLER
EZ
SETUP
CH SE ARCH
CH MEMORY
A I / CABLER
EZ
SETUP
CH SE ARCH
CH MEMORY
CH
CH
Set Up (Continued)
L Saving broadcast TV channels into memory.
1.1 Press
1.2 Press
1.3 Press
1.4 Press
MENU
to access the MAIN MENU
screen, then press
9
)
to move the “a” mark to “SET UP”.
(
VOL (+)
mode, then press
(
9
)
to move the “a ” mark to “CH
CH UP (8)
or
(–)
to access SET UP
CH UP (8)
or
or
DOWN
DOWN
SETTING”.
VOL (+)
or
(–)
to access CH
SETTING screen.
CH UP (8)
or
DOWN (9)
to move
the “a” mark to “CH SEARCH”, then press
VOL (+)
or
(–)
to access CH SEARCH
screen.
VOL—VOL
VOL—VOL
CH
CH
→
+
+
→
CH
CH
→
VOL—VOL
CH
CH
(CH SETTING mode)
+
START
2.1 Press
VOL (+)
. The tuner will search
through all available channels in y our area
and add them into the TV’s memory.
STOP
2.2 Press
VOL (–)
. CH SEARCH will stop at
the current channel and will not add any
(STOP)
VOL
(START)
VOL
+
—
CH SE ARCH
1
2
ST
TO –P:
S
AR +T:
AIR
(CH SEARCH mode)
higher channels.
2.3 Press
MENU
to exit.
Note:
• If you press
VOL (+)
again while in the CH SEARCH mode, autoprogram will start again, and the previously memorized channels will
be lost.
L Adding weak or additional channels or erasing unwanted channels from TV memory.
1.1 Press
1.2 Press
1.3 Press
MENU
to access the MAIN MENU
screen, then press
(
9
)
to move the “a” mark to “SET UP”.
VOL (+)
mode, then press
9
)
to move the “a ” mark to “CH
(
CH UP (8)
or
(–)
to access SET UP
CH UP (8)
or
or
SETTING”.
VOL (+)
SETTING mode, then press
DOWN (9)
or
(–)
to access CH
CH UP (8)
to move the “a” mark to “CH
DOWN
DOWN
or
VOL—VOL
VOL—VOL
CH
→
CH
CH
→
+
CH
(CH SETTING mode)
CH
→
+
CH
MEMORY”.
2.1 Press
VOL (+)
MEMORY.
or
(–)
to access CH
VOL—VOL
+
2.2 Use
CH UP (8)
KEYPAD
or
DOWN (9)
to select each desired channel
to add or erase.
2.3 Press
VOL (+)
to add a channel to the TV’s
memory or press
VOL (–)
channel from the TV’s memory.
20
15-20 26SL72/29SL82[E].p6.5e 4/25/01, 12:04 PM20
or
REMOTE
to erase a
VOL—VOL
or
+
1 2 3
4 5 6
7 8 9
0
ENTER
100
LANG GEUA
BL E NSCREEU
CH SE T T I NG
PE SONAL PREF .R
UN VE RSA L PL U SI
:OFF
BL EUSCREEN
:ON
BL EUSCREEN
TI ERM
VIDEO ADJUST
ELECTAUDI O S
SET UP
CAPT I ONCLOSED
CONTROLPARENT
ENERGY SAVE
SLEEP
Set Up (Continued)
2.4 Press
MENU
to exit.
VOL (+)
H MEMORY
C
AIR
2
1
D+:
ADTO
(CH MEMORY
unmemorized channel)
To add channel 12 to
the TV memory
VOL (–)
To erase channel 12 from
the TV memory
CH MEMORY
21
AIR
ESTO AR
(CH MEMORY
memorized channel)
L BLUE SCREEN
Automatically turns the screen blue if a broadcast signal is not
received.
1 Press
2 Press
MENU
to access the MAIN MENU screen.
CH UP (8)
or
DOWN (9)
to move the “a” mark to “SET
UP”.
→
3 Press
4 Press
VOL (+)
VOL (+)
or
(–)
to access SET UP mode.
or
(–)
to access BLUE SCREEN select mode.
E –:
CH
CH
VOL—VOL
POWER
TV
DVD
VCR
DISPLAY
INPUT
1 2 3
4 5 6
7 8 9
ENTER
FLASHBACK
0
100
PERSONAL PREFERENCE
A B C D
CH
VOL
—
CH
MENU MUTE
CATV TV
VOL
+
DVD VCR
VOLUME
(+)/(–)
CHANNEL
UP (8)/
DOWN (9)
MENU
(MAIN MENU screen)
+
(SET UP mode)
VOL—VOL
+
(BLUE SCREEN select mode)
5 Press
6 Press
VOL (+)
MENU
or
(–)
to exit.
to select “ON”.
VOL—VOL
+
Note:
• Poor reception due to weak signals, or too much noise might activate the BLUE SCREEN function
despite the presence of a broadcast signal. To continue watching TV under these conditions , switch
the BLUE SCREEN “OFF”.
• While VCR or COMPONENT VIDEO input mode is selected, the BLUE SCREEN will not be shown
on your TV even if the BLUE SCREEN is turned on.
21-24 26SL72/29SL82[E].p6.5e 4/25/01, 12:05 PM21
21
 Loading...