

Samsung YP-W3L Service Manual
PORTABLE DIGIT AL AUDIO PLAYER
Basic Model : YP-W3L
* Application : YP-W3LV[256MB]
SERVICE
YP-W3LX[512MB]
YP-W3LZ[1GB]
Manual
PORTABLE DIGITAL AUDIO PLAYER
Model :YP-W3L
Features
- MP3,WMA, Audio ASF and Ogg
Playback
- Removable Storage Device
- FM Reception and Recording
- SRS WOW Surround Sound
- USB 2.0 High Speed Data Transfe
- Upgradable
- Built-in Rechargeable Li-Ion Battery
- Voice Recording Function
- Confidential -
ELECTRONICS
YP-W3LV
YP-W3LX
YP-W3LZ
© Samsung Electronics Co.,Ltd. May. 2005
Printed in Korea
Code no.AH68-01654J
Ch1 Precautions
1-1. Safety Precautions 1-1
1-2. Servicing Precautions 1-2
1-3. Precautions for Electrostatically
Sensitive Device (ESDs) 1-3
1-4. Special Precations and Waring
Lables for Laser Products 1-4
1-5. Special Precautions for HDD 1-5
INDEX
Ch2 Product Descriptions
1. Product Feature 2-1
2. Specifications 2-2
3. Accessories 2-3
Ch3 Product Functions
1. Basic Functions 3-1
2. New Functions 3-4
3. PC Connection 3-6
Ch4 Adjustments
1.How to recover the device 4-1
2. How to upgrade Firmware 4-5
Ch5 How to disassemble
How to disassemble 5-1
Ch6 Troubleshooting
1. It keeps being turned off 6-1
2. No Sound can be heard 6-2
3. It can not record voice 6-3
4.The buttons does not work 6-4
5. File can not be download 6-5
Ch7
Exploded View & Parts List
1.Total Exploded View 7-1
2. Parts List 7-2
Ch8 Electrical Parts List
Electrical Parts List 8-1
Ch9 Block Diagram
Block Diagram 9-1
Ch10 Wiring Diagram
Wiring Diagram 10-1
Ch11 PCB Diagram
1.Top Side 11-1
2. Bottom side 11-2
Ch12 Schematic Diagram
1. MAIN 12-1
Ch13 Circuit Description
Circuit Board Description 13-1
Ch14
Basic Information of MP3
1. Operating Principle of yepp 14-1
2. MP3 Overview 14-5
3.
Understanding of Digital Audio Format
14-6
4.Type of Storage 14-9
5. Copyright 14-11
1. Precautions
Follow these safety, servicing and ESD precautions to prevent damage and protect against potential hazards
such as electrical shock and X-rays.
Samsung Electronics 1-1
1-1 Safety Precautions
1. Be sure that all of the built-in protective
devices are replaced.
2. When reinstalling the chassis and its
assemblies, be sure to restore all protective
devices, including control knobs and
compartment covers.
3. Make sure that there are no cabinet
openings through which people-particularly children--might insert fingers
and contact dangerous voltages. Such
openings include the spacing between the
picture tube and the cabinet mask,
excessively wide cabinet ventilation slots,
and improperly fitted back covers.
4. Design Alteration Warning:
Never alter or add to the mechanical or
electrical design of the unit. Example: Do
not add auxiliary audio or video connectors. Such alterations might create a safety
hazard. Also, any design changes or additions will void the manufacturer's warranty.
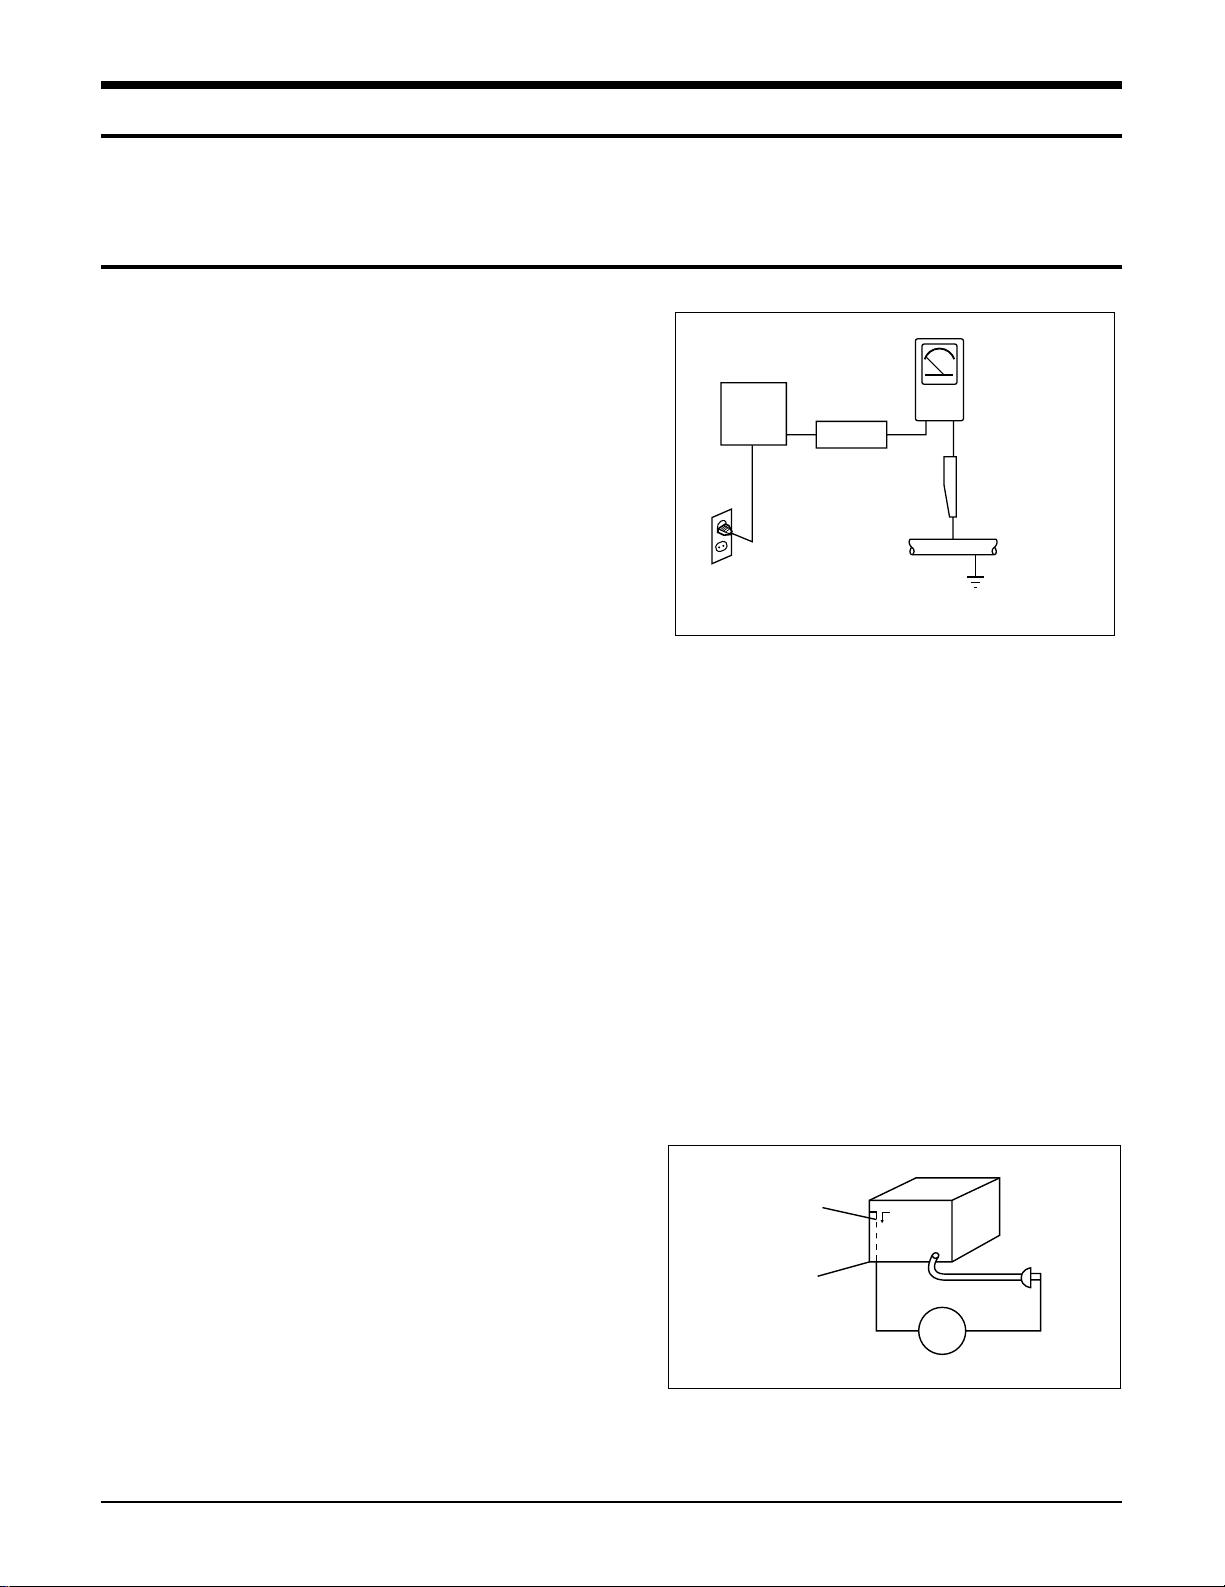
5. Leakage Current Hot Check (Figure 1-1):
Warning: Do not use an isolation
transformer during this test. Use a leakagecurrent tester or a metering system that
complies with American National Standards
Institute (ANSI C101.1, Leakage Current for
Appliances), and Underwriters Laboratories
(UL Publication UL1410, 59.7).
With the unit completely reassembled, plug
the AC line cord directly into a 120V AC
outlet. With the unit's AC switch first in
the ON position and then OFF, measure the
current between a known earth ground
(metal water pipe, etc.) and all exposed
metal parts. Examples: Handle brackets,
metal cabinets, screwheads and control
shafts. The current measured should not
exceed 0.5 milliamp. Reverse the powerplug prongs in the AC outlet and repeat.
6. Insulation Resistance Cold Check:
(1) With the unit's AC plug disconnected
from the AC source, connect an electrical
jumper across the two AC prongs. (2) Set
the power switch to ON. (3) Measure the
resistance between the shorted AC plug and
any exposed metallic parts. Example:
Screwheads, antenna, control shafts or
handle brackets.
If any of the exposed metallic parts has a
return path to the chassis, the measured
resistance should be between 1 and 5.2
megohms. If there is no return path, the
measured resistance should be "infinite." If
the resistance is outside these limits, a shock
hazard might exist. See Figure 1-2
Device
Under
Test
(Reading should
not be above
0.5mA)
Leakage
Currant
Tester
Earth
Ground
Test all
exposed metal
surfaces
Also test with
plug reversed
(using AC adapter
plug as required)
2-Wire Cord
Antenna
Terminal
Exposed
Metal Part
ohm
Ohmmeter
Fig. 1-1 AC Leakage Test
Fig. 1-2 Insulation Resistance Test

Samsung Electronics1-2
1-1 Safety Precautions (Continued)
7. Components, parts and wiring that appear
to have overheated or that are otherwise
damaged should be replaced with parts
that meet the original specifications.
Always determine the cause of damage or
overheating, and correct any potential
hazards
8. Observe the original lead dress, especially
near the following areas: Antenna
wiring, sharp edges, and especially the
AC and high voltage power supplies.
Always inspect for pinched, out-of-place,
or frayed wiring. Do not change the
spacing between components and the
printed circuit board. Check the AC
power cord for damage. Make sure that
no wires or components touch thermally
hot parts.
9. Product Safety Notice:
Some electrical and mechanical parts
have special safety-related characteristics
which might not be obvious from visual
inspection. These safety features and the
protection they give might be lost if the
replacement component differs from the
original--even if the replacement is rated
for higher voltage, wattage, etc.
10 Components that are critical for safety are
indicated in the circuit diagram by
shading, or . Use replacement
components that have the same ratings,
especially for flame resistance and
dielectric strength specifications. A
replacement part that does not have the
same safety characteristics as the original
might create shock, fire or other hazards.
1-2 Servicing Precautions
1. Servicing precautions are printed on the
cabinet. Follow them.
2. Always unplug the unit's AC power cord
from the AC power source before
attempting to: (a) Remove or reinstall any
component or assembly, (b) Disconnect an
electrical plug or connector, (c) Connect a
test component in parallel with an
electrolytic capacitor.
3. Some components are raised above the
printed circuit board for safety. An
insulation tube or tape is sometimes used.
The internal wiring may be clamped to
prevent contact with thermally hot
components. Reinstall all such elements to
their original position.
4. After servicing, always check that the
screws, components and wiring have been
correctly reinstalled. Make sure that the
portion around the serviced part has not
been damaged.
5. Check the insulation between the blades of
the AC plug and accessible conductive parts
(examples: metal panels, input terminals
and earphone jacks).
6. Insulation Checking Procedure: Disconnect
the power cord from the AC source and
turn the power switch ON. Connect an
insulation resistance meter (500V) to the
blades of the AC plug.
The insulation resistance between each
blade of the AC plug and accessible
conductive parts (see above) should be
greater than 1 megohm.
7. Never defeat any of the B+ voltage
interlocks. Do not apply AC power to the
unit (or any of its assemblies) unless all
solid-state heat sinks are correctly installed.
8. Always connect a test instrument's ground
lead to the instrument chassis ground
before connecting the positive lead; always
remove the instrument's ground lead last.
Precautions
Warning1: First read the "Safety Precautions" section of this manual. If some unforeseen circumstance creates a conflict
between the servicing and safety precautions, always follow the safety precautions.
Samsung Electronics 1-3
1-3 Precautions for Electrostatically Sensitive Devices (ESDs)
1-4 Special Precautions and Warning Labels for Laser Products
1. Some semiconductor ("solid state") devices
are easily damaged by static electricity.
Such components are called Electrostatically
Sensitive Devices (ESDs). Examples include
integrated circuits and some field-effect
transistors. The following techniques will
reduce the occurrence of component
damage caused by static electricity.
2. Immediately before handling any
semiconductor components or assemblies,
drain the electrostatic charge from your
body by touching a known earth ground.
Alternatively, wear a discharging
wrist-strap device. (Be sure to remove it
prior to applying power--this is an electric
shock precaution.)
3. After removing an ESD-equipped assembly,
place it on a conductive surface such as
aluminum foil to prevent accumulation of
electrostatic charge.
4. Do not use freon-propelled chemicals.
These can generate electrical charges that
damage ESDs.
5. Use only a grounded-tip soldering iron
when soldering or unsoldering ESDs.
6. Use only an anti-static solder removal
device. Many solder removal devices are
not rated as "anti-static" (these can
accumulate sufficient electrical charge to
damage ESDs).
7. Do not remove a replacement ESD from its
protective package until you are ready to
install it. Most replacement ESDs are
packaged with leads that are electrically
shorted together by conductive foam,
aluminum foil or other conductive
materials.
8. Immediately before removing the protective
material from the leads of a replacement
ESD, touch the protective material to the
chassis or circuit assembly into which the
device will be installed.
9. Minimize body motions when handing
unpackaged replacement ESDs. Motions
such as brushing clothes together, or lifting
a foot from a carpeted floor can generate
enough static electricity to damage an ESD.
Precautions
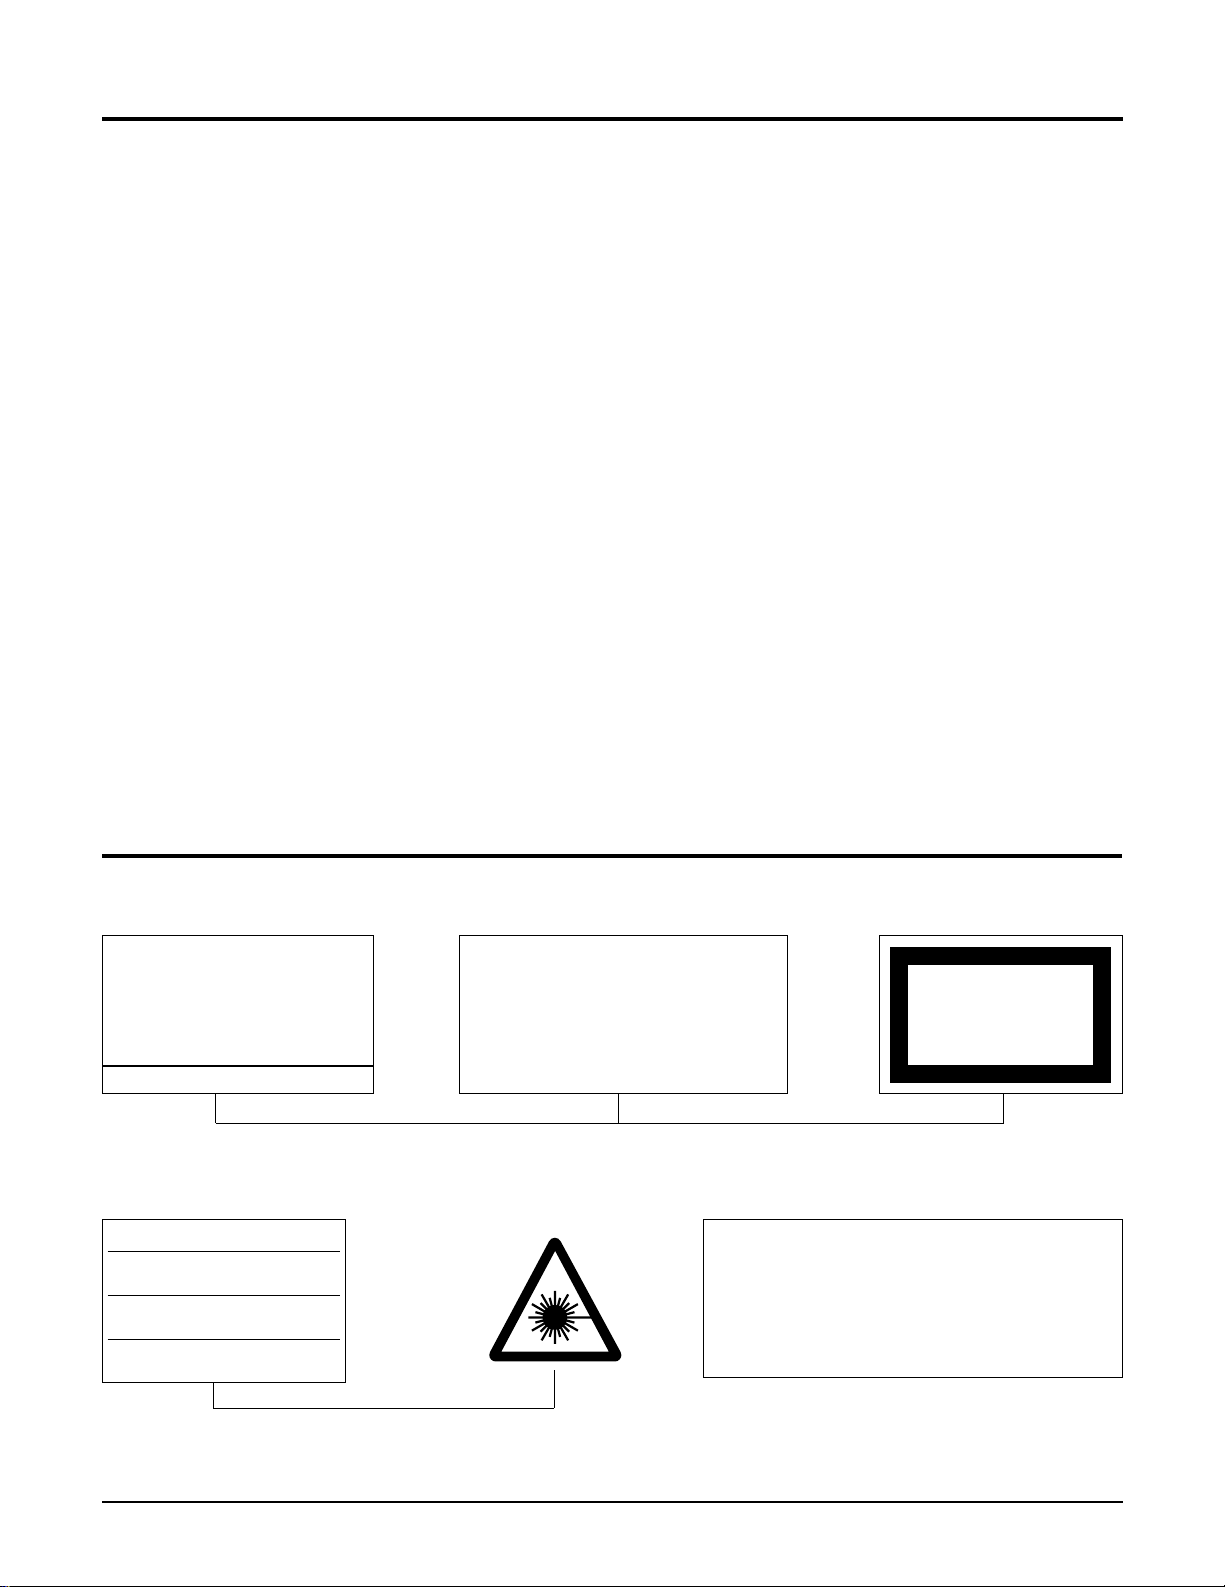
UL : Manufactured for U.S.A. Market.
CSA : Manufactured for Canadian Market.
EU : Manufactured for European Market.
SCAN : Manufactured for Scandinavian
Market.
This Product Complies with
DHHS Rules 21CFR, Sub
chapter J.At date of Manufacture
(UL)
(UL,CSA,SCAN)
(EU)
CERTIFIED ONLY TO CANADIAN
ELECTRICAL CODE.
CERTIFIE EN VERTU DU CODE
CANADIAN DE LELETRICITE
SEULEMENT
(CSA)
CLASS 1
LASER PRODUCT
(UL,CSA,EU)
Fig. 1-3 Warning Labels (Location: Enclosure Block)
Fig. 1-4 Warning Labels (Location: Disc Clamper, Inner Side of Unit Door or Nearby Unit Chassis )
CAUTION : INVISIBLE LASER RADIATION WHEN OPEN
AND INTERLOCKS DEFEATEO AVOIDEXPOSURE TO BEAM
ADVARSEL:USYNLIG LASERSTRÅLING VED ABNING
NÅR SIKKERHEDSAFBRYDERE ER UDE AF FUNKTION
UNDGA UDSAETTELSE FOR STRALING
VARO:AVATTAESSA JA SUOJALUKITUS OHITETTAESSA
OLET ALTTINA NAKYMATTÖMALLE LASERSATEILYLLE ALA
KATSO SATEESEEN!
VARNING:
OSYNLIG LASERSTRÅLNING NAR DENNA DEL
AR OPPNAD OCH SPARREN AR URKOPPLAD BETRAKTA
EJSTRÅLEN!
Samsung Electronics1-4
1-4 Special Precautions and Warning Labels for Laser Products (Continued)
1-4-1 Warnings
1. When servicing, do not approach the LASER
exit with the eye too closely. In case it is
necessary to confirm LASER beam emission,
be sure to observe from a distance of more
than 30 cm from the surface of the objective
lens on the optical pick-up block.
2. Do not attempt to handle the objective lens
when the DISC is not on the tray.
1-4-2 Laser Diode Specifications
Material: GaAs+ GaAlAs
Wavelength: 760-800 nm
Emission Duration: Continuous
Laser Output: 0.2 mw (measured at a
1.6 mm distance from the objective lens
surface on the optical pick-up block.)
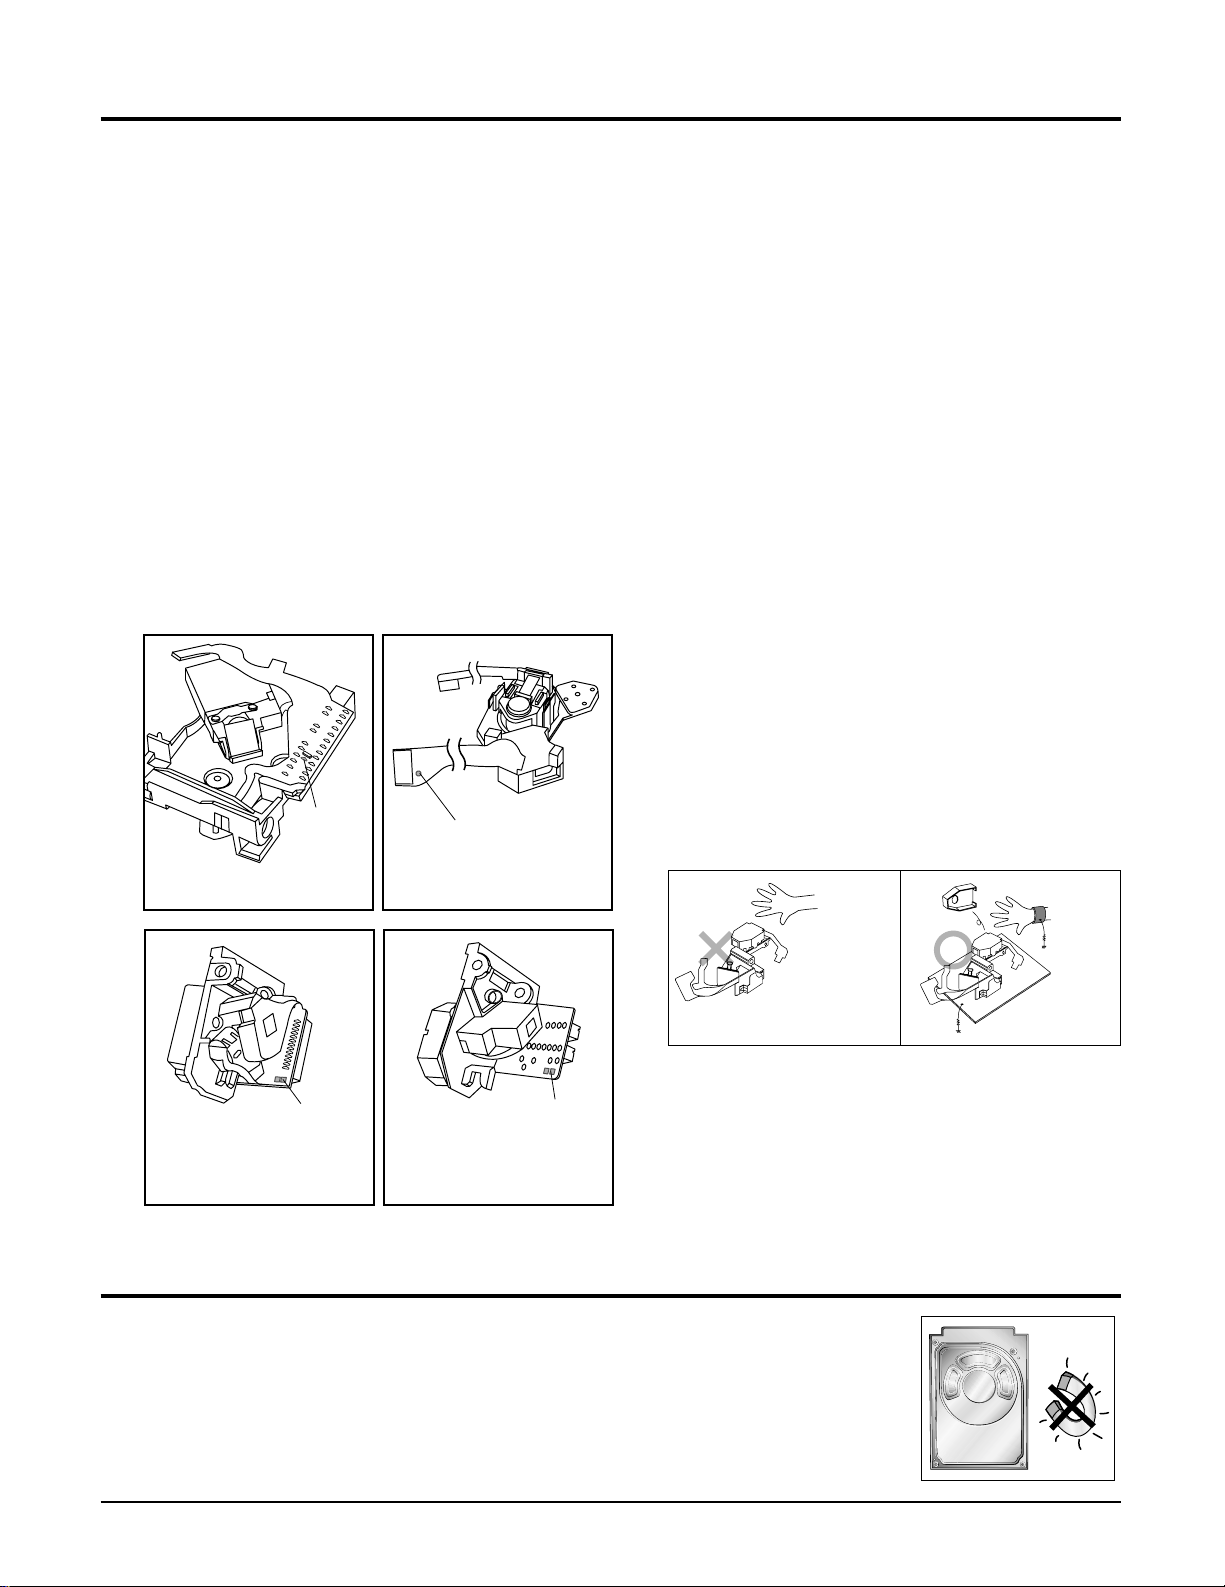
1-4-3 Handling the Optical Pick-up
1. Static electricity from clothing or the body
may cause electrostatic breakdown of the
laser diode in the Optical Pickup. Follow
this procedure:
2. Place a conductive sheet on the work bench
(i.e., the black sheet used for wrapping
repair parts.) Note: The surface of the work
bench should be covered by a copper
ground plane, which is grounded.
3. The repair technician must wear a wrist
strap which is grounded to the copper sheet.
4. To remove the Optical Pickup block:
Place the set on the conductive sheet, and
momentarily touch the conductive sheet
with both hands. (While working, do not
allow any electrostatic sources--such as
clothes--to touch the unit.)
5. Ground the "Short Terminal" (located on the
PCB, inside the Pickup Assembly) before
replacing the Pickup. This terminal should
be shorted whenever the Pickup Assembly
is lifted or moved.
6. After replacing the Pickup, reopen the Short
Terminal. See diagrams below:
Precautions
THE UNIT
(1) WRIST-STRAP
FOR GROUNDING
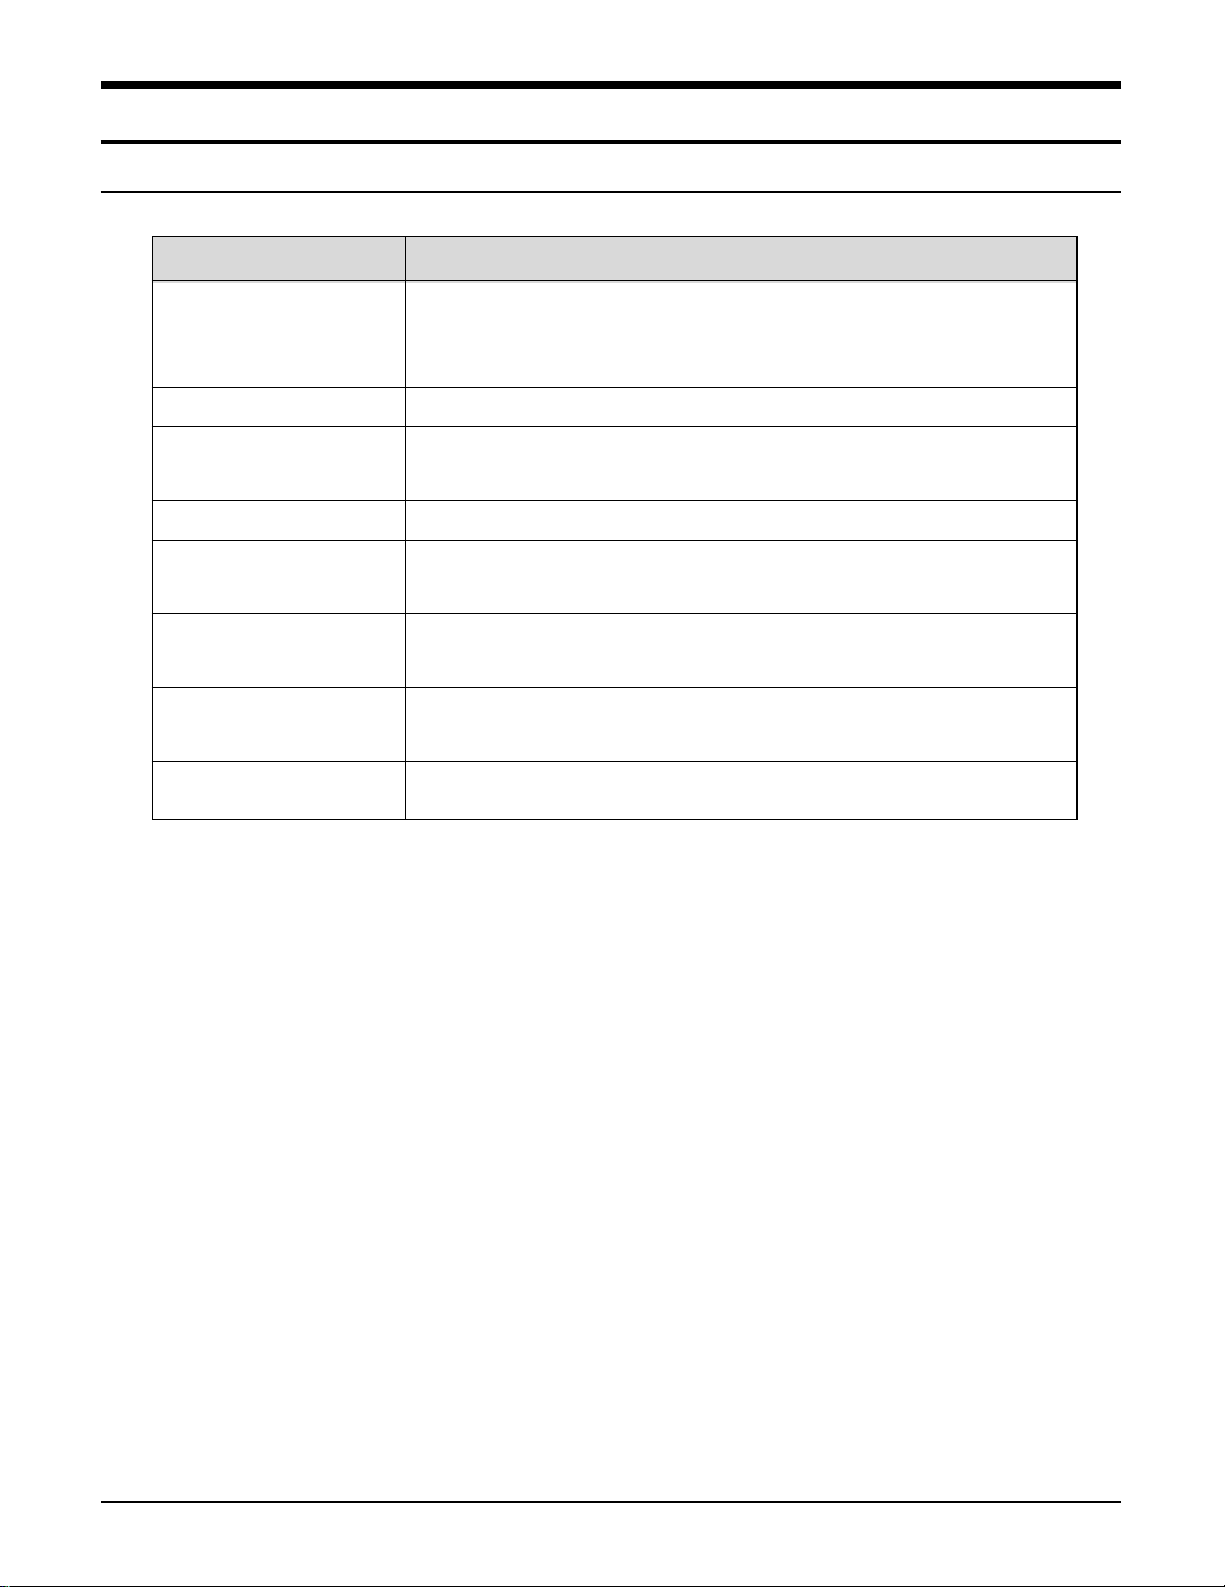
1-5 Special Precautions for HDD
* HDD Data Maintenance Step
1. Since the data on the HDD is weak to mechanical shock, place the HDD in a safe
location that is free from mechanical shock once it is removed from the main unit.
2. In order to safe keep the data on the HDD, back up the data before the repair or
make sure not to place the HDD near any electrical appliance that generates a strong
magnetic field.
short
terminal
SOH91VI(LDP)
short
terminal
SOH-A1
(CMS-V10,CMS-V30)
short terminal
SOH91CI(CAR,walkman)
short
terminal
SOH94T4N
(CMS-V10,CMS-V30)
1M
1M
CONDUCTIVE SHEET
Samsung Electronics 2-1
2. Product Descriptions
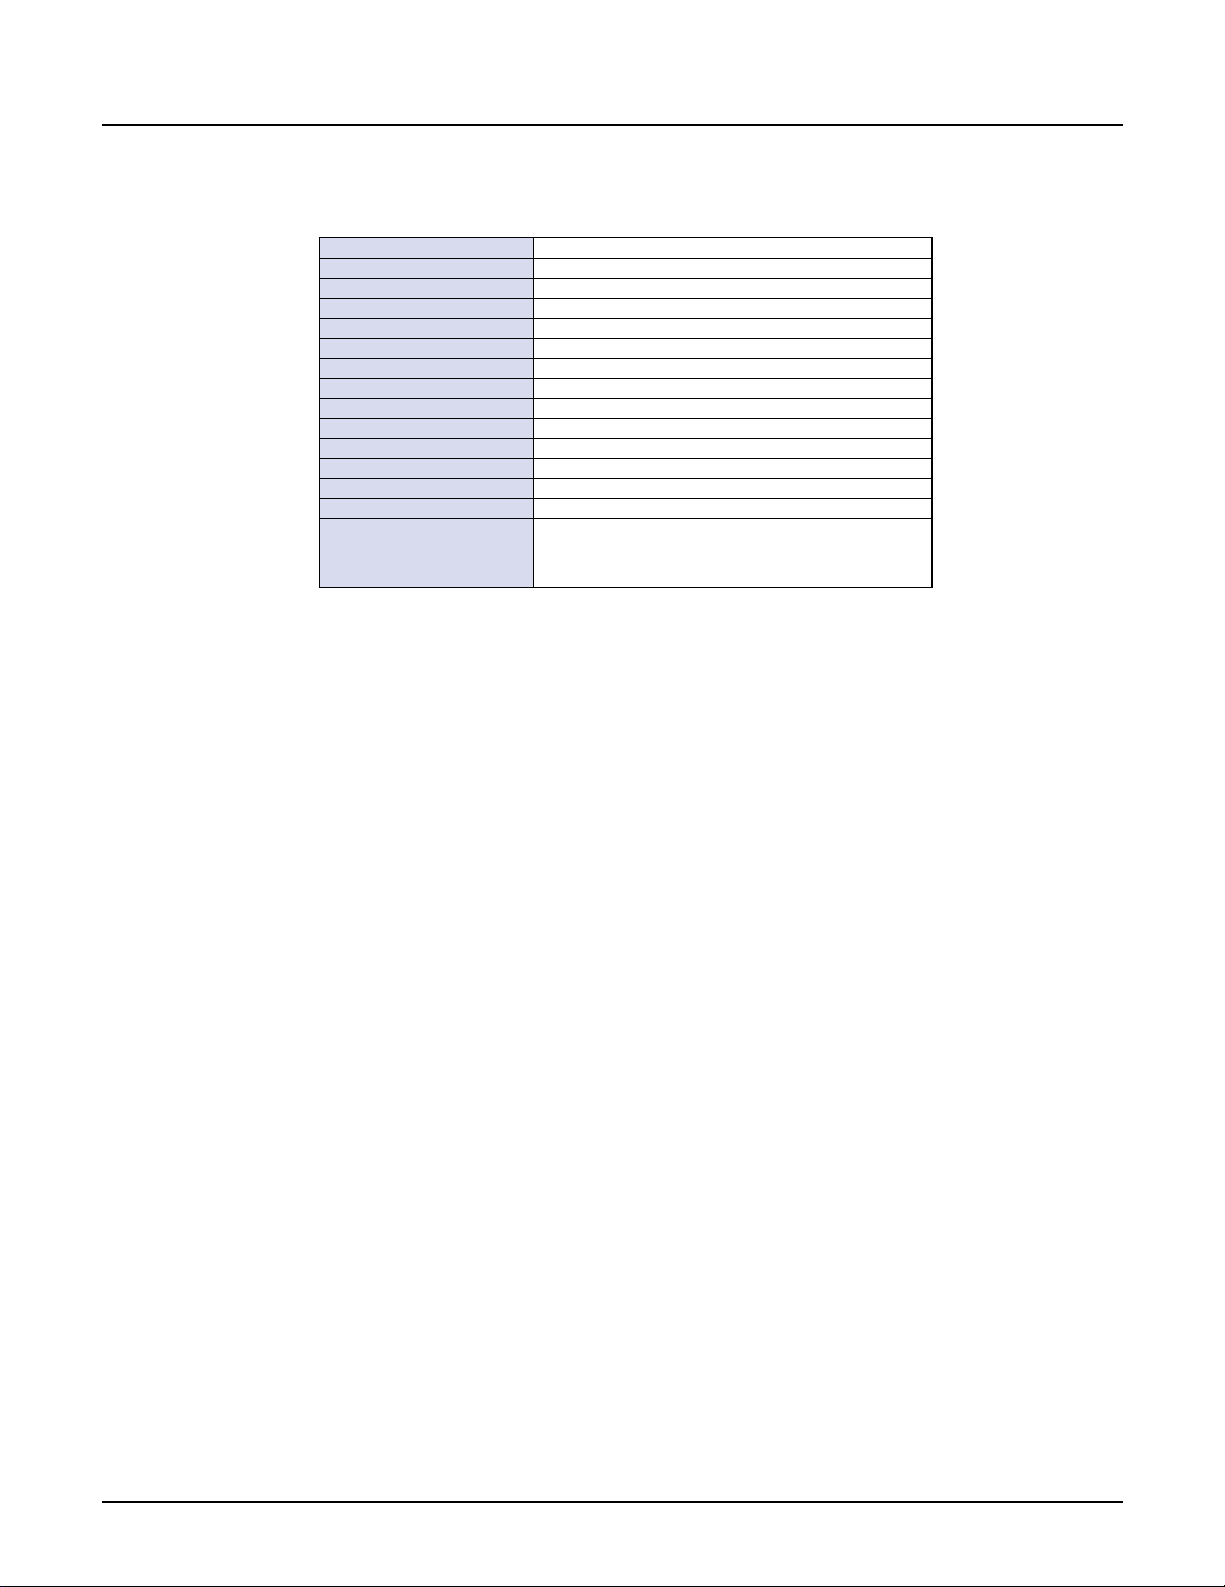
1. Product Feature
PRODUCT FEATURE
MP3, WMA , Audio ASF The player supports playback of MP3, WMA, Audio ASF and Ogg.(Ogg Vorbis)
and Ogg Playback OGG is a new audio compression format that is free, open and unpatented.
For more info, see www.vorbis.com
Removable Storage Device
You can easily copy and paste files to the player using Windows Explorer.
FM Reception
Listening to an FM program is made easy with Auto Search and Frequency
and Recording
Memory functions.You can record FM broadcasts.
SRS WOW Surround Sound
The 3D surround(SRS) feature adds spaciousness to the sound.
USB 2.0 High Speed
Maximum data speed transfer of 70 Mbps
Data Transfer
Upgradable
You can upgrade the built-in programs when available.
Please check the home page (www.samsung.com) for upgrades.
Built-In Rechargeable The built-in rechargeable lithium battery provides up to 9 hours of play time.
Li-Ion Battery
Voice Recording Function You can make high quality voice recordings.
2-2 Samsung Electronics
2. Specifications
The product unit accompanying this user manual is licensed under certain
intellectual property rights of cer tain third parties.This license is limited to
private non-commercial use by end-user consumers for licensed contents.
No rights are granted for commercial use.The license does not cover any
product unit other than this product unit and the license does not extend to any
unlicensed product unit or process conforming to ISO/IEC 11172-3 or ISO/IEC
13818-3 used or sold in combination with this product unit.The license only covers the use of this product unit to encode and/or decode audio files
conforming to the ISO/IEC 11172-3 or ISO/IEC 13818-3. No rights are granted
under this license for product features or functions that do not conform
to the ISO/IEC 11172-3 or ISO/IEC 13818-3.
Model YP-W3L
Built-in Memory capacity
256MB(YP-W3L V), 512MB( YP-W3L X), 1GB(YP-W3L Z)
V olta ge 3.7V (Li-ion)
Playing time
lasts up to 9hours (On the basis of measurement by the company)
Dimensions/Weight 52.8 X 62 X 15mm / 68g
Case Zinc/Plastic
Noise Ratio 90dB with 20KHz LPF
Earphones Jack Output Power 18mW/CH (16Ω)
Output Frequency Range 20Hz~20KHz
Operating Temperature Range -5 ~ +35°C(23~95°F)
FM Frequency 87.5 ~ 108.0 MHz
FM Signal to Noise Ratio 50dB
FM T.H.D 1%
FM Useable Sensitivity 10dB
File Support
MPEG1/2/2.5 LAYER 3(8Kbps ~ 320Kbps, 8KHz ~ 48KHz)
MPEG1 LAYER 2(32Kbps ~ 384Kbps,32KHz, 44.1KHz,48KHz)
WMA,ASF(Audio) (8Kbps ~ 192Kbps, 8KHz ~ 44.1KHz), 0gg
Accessories
Name Code No.
Samsung Electronics 2-3
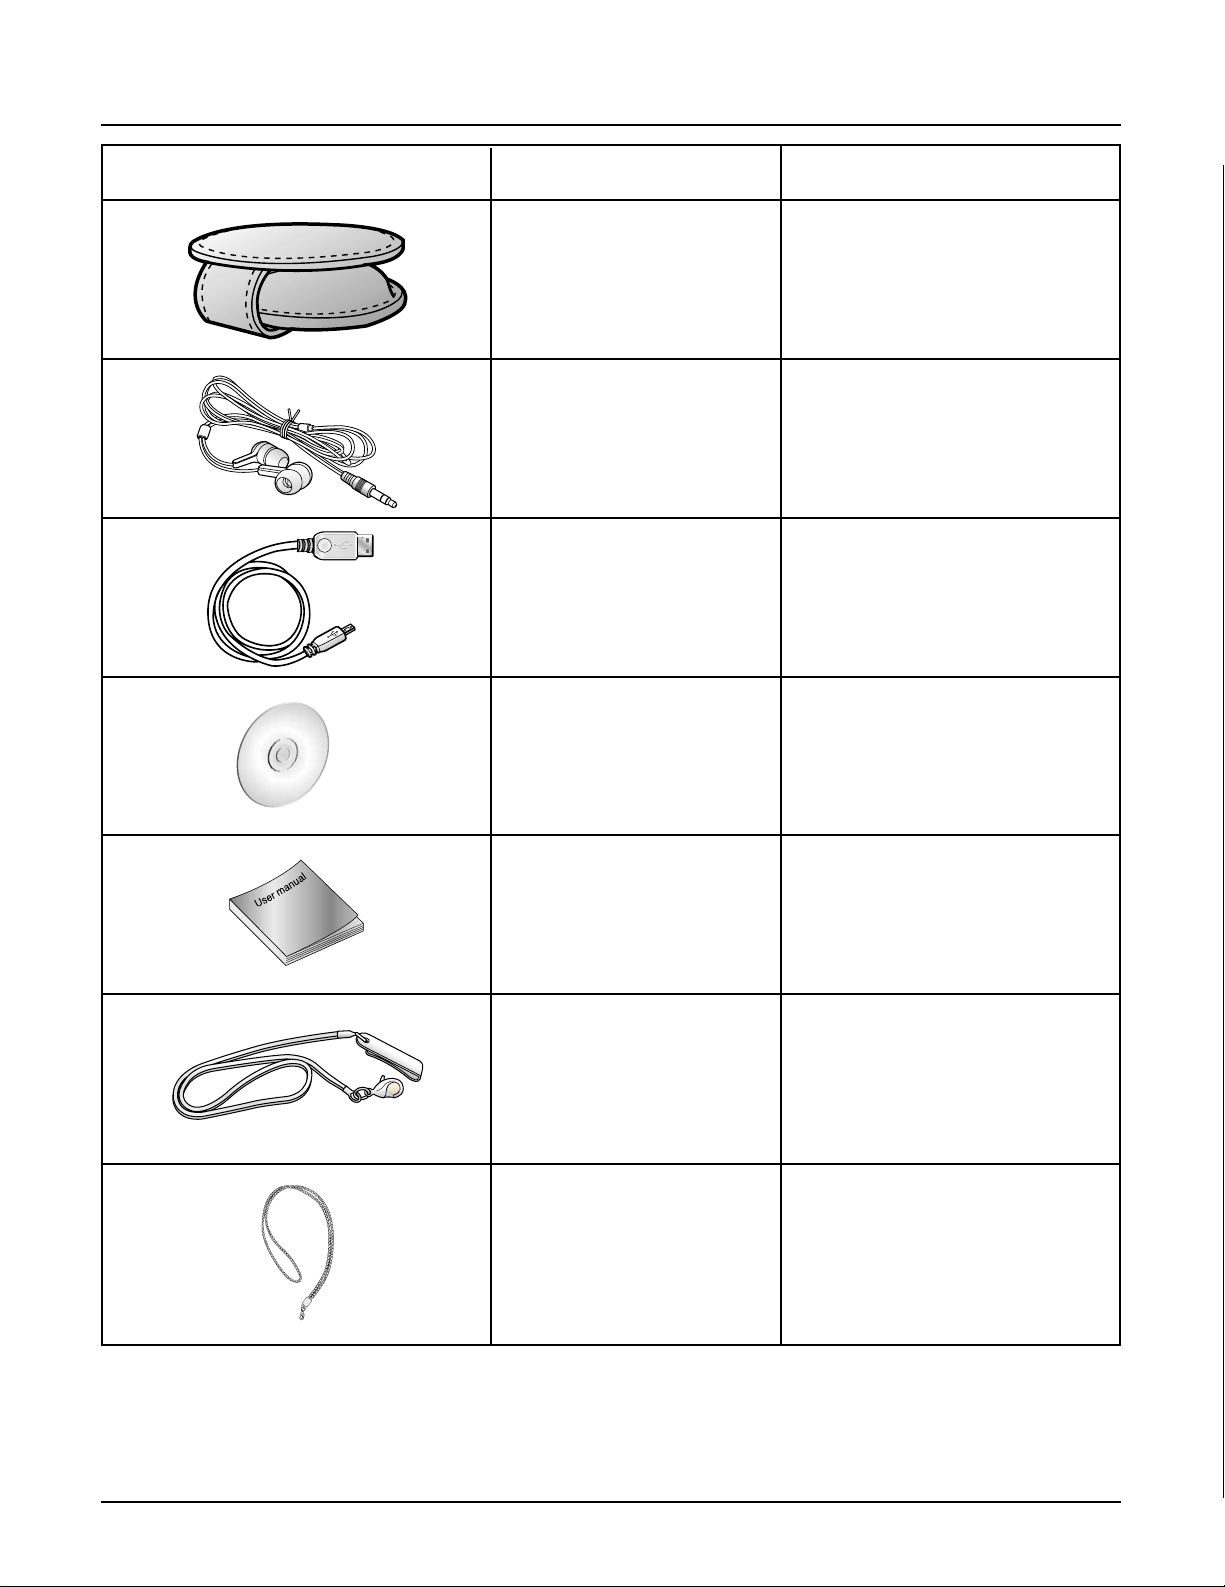
3. Accessories
AH69-01525B
Carrying case
AH30-00081A
Earphones
AH61-01649C
USB Cable
AH80-00102A
Installation CD
AH68-01631A
User manual
AH39-00731A
Belt Chain
AH39-00731A
Necklace
Samsung Electronics 3-1
3. Product Functions
1. Basic Functions
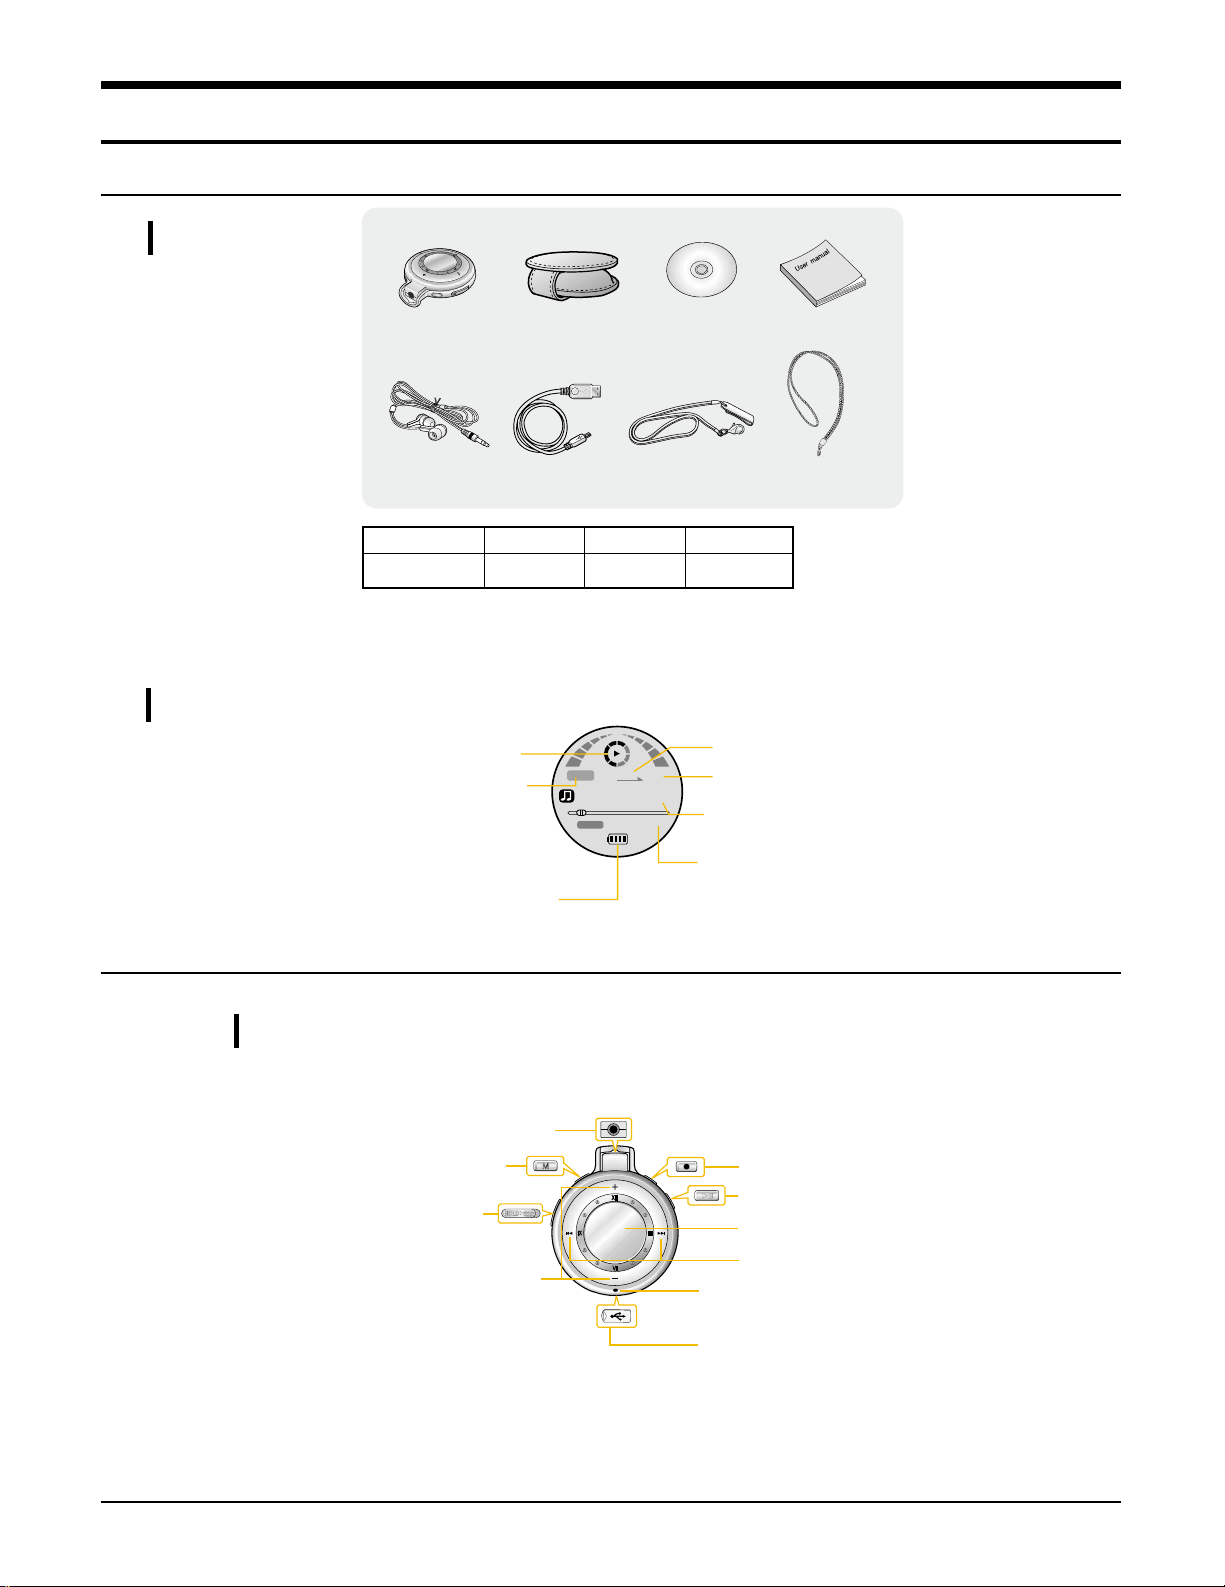
Components
Display¢
Components
● The capacity of the useable built-in memory is less than indicated as the internal
firmware uses part of the memory as well.
● The accessories' design is subject to change for the purpose of improvement, without notice.
Carrying case
Earphones
User manual
Installation
CD
Player
Belt Chain
Necklace
USB Cable
Model
Built-in memory
YP-W3L V
256MB
YP-W3L X
512MB
YP-W3L Z
1GB
NOR NOR
001
00:00:00
7.GUMMY-Tor
MP3
Remaining Battery
Power indicator
Equalizer,
SRS indicator
Play/Stop/Pause
indicator
Playtime indicator
Title (track & artist) indicator
Track Number indicator
Play mode indicator
Earphone Jack
Hold Switch
Record/Loop Repeat
Button
V olume Control
Menu/
Function Button
Play/Pause Button
USB Cable Connection Port
Microphone
Display
Fast Forward/Rewind
3-2 Samsung Electronics
Press and hold the ˆ¨ button to turn off the power.
Make sure the player is fully charged and the earphones are connected.
Playing Music (Power On)
Pausing Music
Adjusting V olume
Playing Music
Press the ˆ¨ button on the
player.The clock appears on the
screen.
Press the ˆ¨ button once again
to play a music/voice file.
● When turning on the main unit, only
analog clock type is supported.
Press , to adjust the volume form 00 to 40.
Press the ˆ¨ button to pause playback.
● If no buttons are pressed within 5 minutes (or a custom set Auto off
time you selected), the player automatically powers off.
● While in Pause mode, press the button again to resume playback.
Power Off
- If the file name is not displayed correctly, move to [Settings] →[Environment]
→
[Language] and then change the language setting.
- The Auto off time can be set in the menu.
Note
HOLD Function
In Hold mode, all buttons are disabled.
This is useful when using the player and walking, jogging etc.
Slide the switch in the direction of the arrow.
❈
When the button is pressed, the “ HOLD” message will appear on
the display.
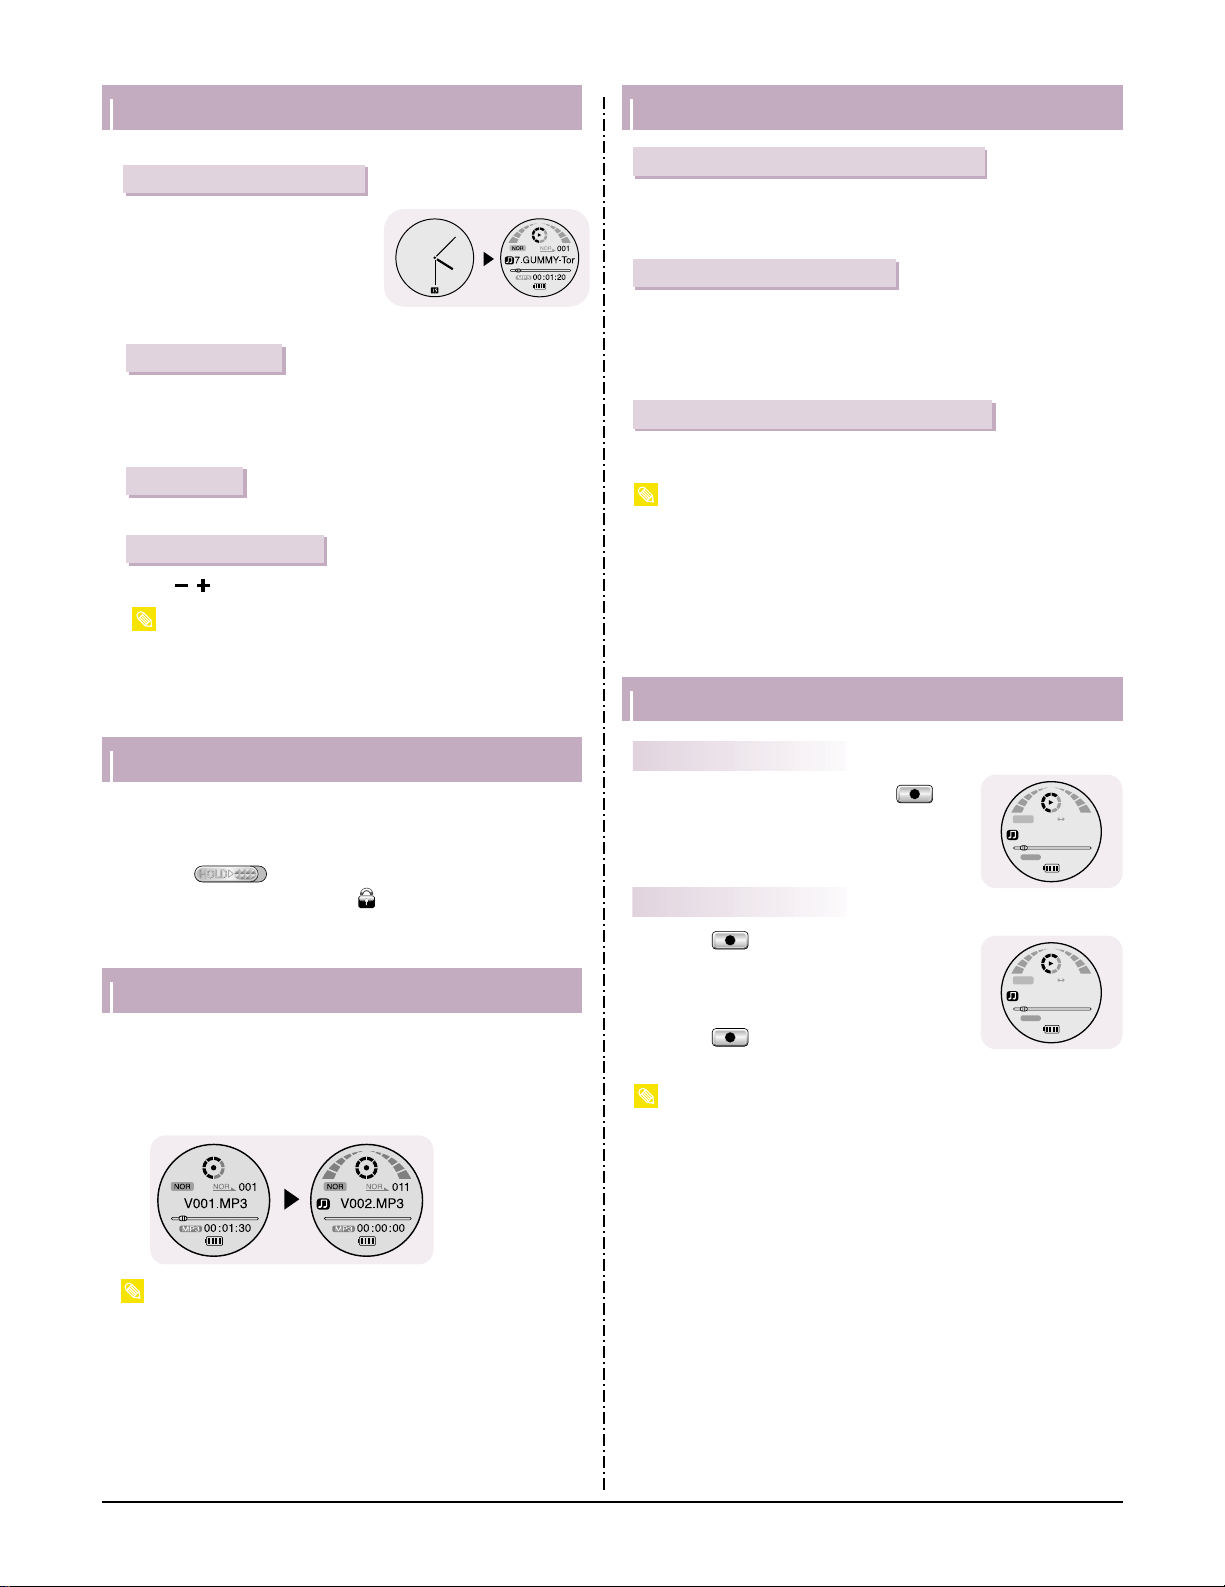
Recording Voice
1
Press and hold the REC button to start voice recording.
Press the REC button again to stop the recording and save
the voice file.
2
- The files are recorded in the order of V001,V002......,and saved as MP3 files in
the VOICE folder after recording.
- If the Memory is full, Voice Recording will be disabled automatically.
Note
Searching for Music/Voice Files
● Press and hold ❙ˇˇ , ˆˆ❙ during playback to search for a specific
section of the music file you want to listen to.
● Release ❙ˇˇ , ˆˆ❙ to resume play normally.
● Press ˆˆ❙ briefly during playback to play the next track.
● Press ❙ˇˇbriefly within 5 seconds after playback starts to move to
and play the previous track. Press ❙ˇˇbriefly after 5 seconds to play
the current track from the beginning.
● Press ❙ˇˇ , ˆˆ❙ in stop/pause mode to move to the previous/next
track.
To search for specific parts during play
To change tracks during play
To change tracks when stopped/paused
- VBR(Variable Bit Rate) file:A file that constantly changes the compression rate
according to the type of sounds, such as their pitch, in the file.
- When playing a VBR file, you cannot move to and play the previous track even if you
press ❙ˇˇwithin 5 seconds after playback starts.
- Files that were downloaded in MP2 or MP1 and had their file extension changed to
MP3 may not play.
Note
Loop Repeating
Starting Point
While playing music files, press the button briefly at the beginning of the loop you
want to set.
● A↔ appears in the display.
Ending Point
Press the button briefly again to set the
end of the loop.
● A↔B appears in the display.
● The loop is played repeatedly.
Press the button briefly to cancel the
loop.
B
NOR A
001
00:01:20
7.GUMMY-Tor
MP3
- Loop Repeat is automatically released if you Speed Search with ❙ˇˇ , ˆˆ❙.
Note
NOR A
B
001
00:01:20
7.GUMMY-Tor
MP3
Samsung Electronics 3-3
Searching for Music/Voice Files
Music
FM Radio
Navigation
Playlist
Settings
Press and hold the "M" button to switch to MENU mode.
Use , to move and press ˆˆ❙ briefly to select the menu you
want.
Press the "M" button again to exit MENU mode.
● Music : To check the file currently playing.
● FM Radio : To listen to FM radio.
● Navigation : To move to Navigation Mode and browse files and folders.
● Playlist : To select and play only tracks you want.
● Settings : To set the functions.
- Menu mode will be cancelled if no buttons are pressed within one minute.
Note
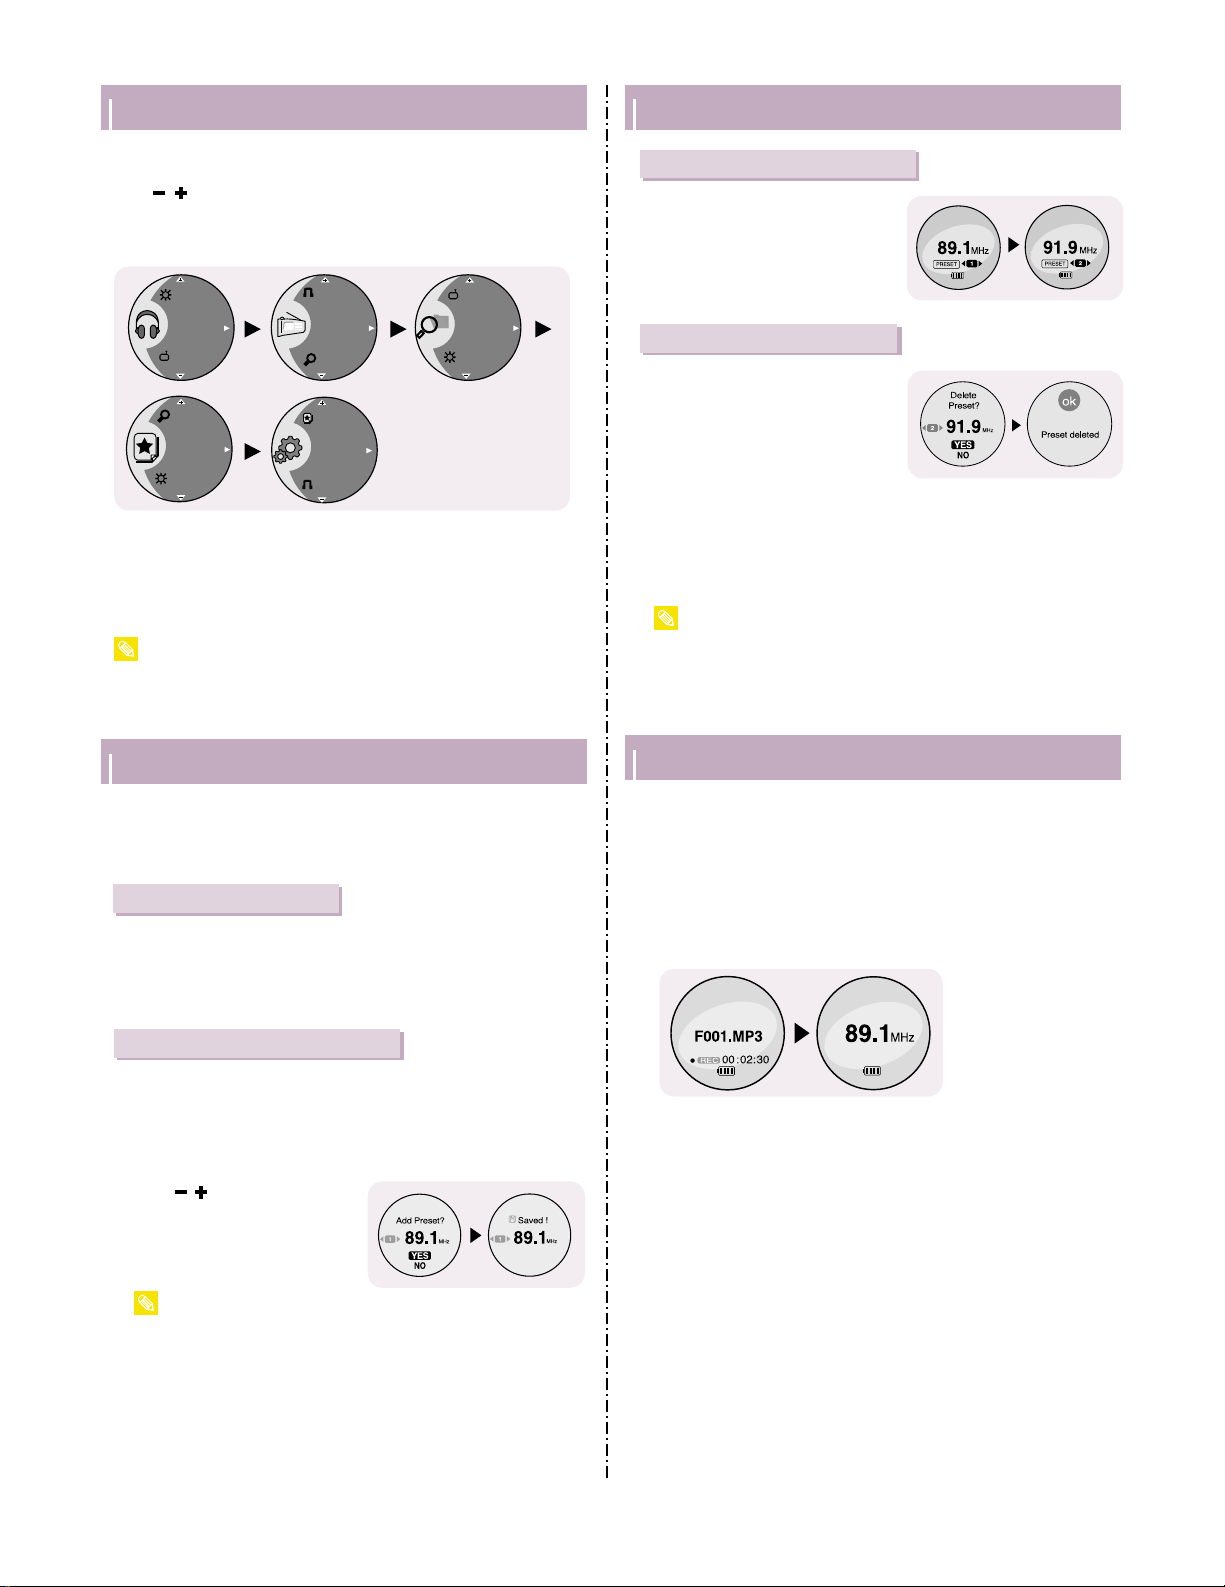
Listening to FM Radio
Use , to select YES, and
then press ˆ¨.
● The selected frequency will be
saved.
2
Use ❙ˇˇ , ˆˆ❙ to select the number you want to assign to sa ve
the frequency .
1
Use ❙ˇˇ , ˆˆ❙to mov e to the frequency to sav e, and then press
the ˆ¨ button.
- To save frequencies to the preset numbers automatically,select [Settings]
→
[Environment] →[FM Setting] →[Auto Preset].
- You can store up to 20 frequencies.
- Mono (MO) or Stereo (ST) is automatically selected.
Note
Press and hold the "M" button to display the menu screen. Select FM Radio and
press ˆˆ❙.
Search for a Frequency
Manual Storage of a Frequency
3
Manual Search : Press ❙ˇˇ , ˆˆ❙ to change the frequency up
or down.
Automatic Search : Press and hold ❙ˇˇ , ˆˆ❙ to automatically
search for receiving frequencies.
Listening to FM Radio
Press the ˆ¨ button to display the Delete screen.
Select YES, and then press the ˆ¨ button to delete the preset
number.
● The saved preset number will be deleted.
2
Use ❙ˇˇ , ˆˆ❙ to move to the
desired frequency.
1
Press the "M" button in FM mode.
● The PRESET screen will appear.
Searching Stored Frequencies
2
Use ❙ˇˇ , ˆˆ❙ to select the
preset number you want to
delete.
1
Press the "M" button in FM
mode.
● The PRESET screen will appear.
Deleting Stored Frequencies
3
- To exit FM mode, press and hold the "M" button.
- Press the "M" button in PRESET screen to exit PRESET mode.
Note
FM Recording
2
Press the REC button again.
● A file is created and the Recording stops.
● Files are recorded in the order F001, F002, F003...
and saved as MP3 files in FM_REC folder.
1
Press and hold the REC button during FM reception.
● Recording of the currently transmitted FM broadcast begins.
3-4 Samsung Electronics
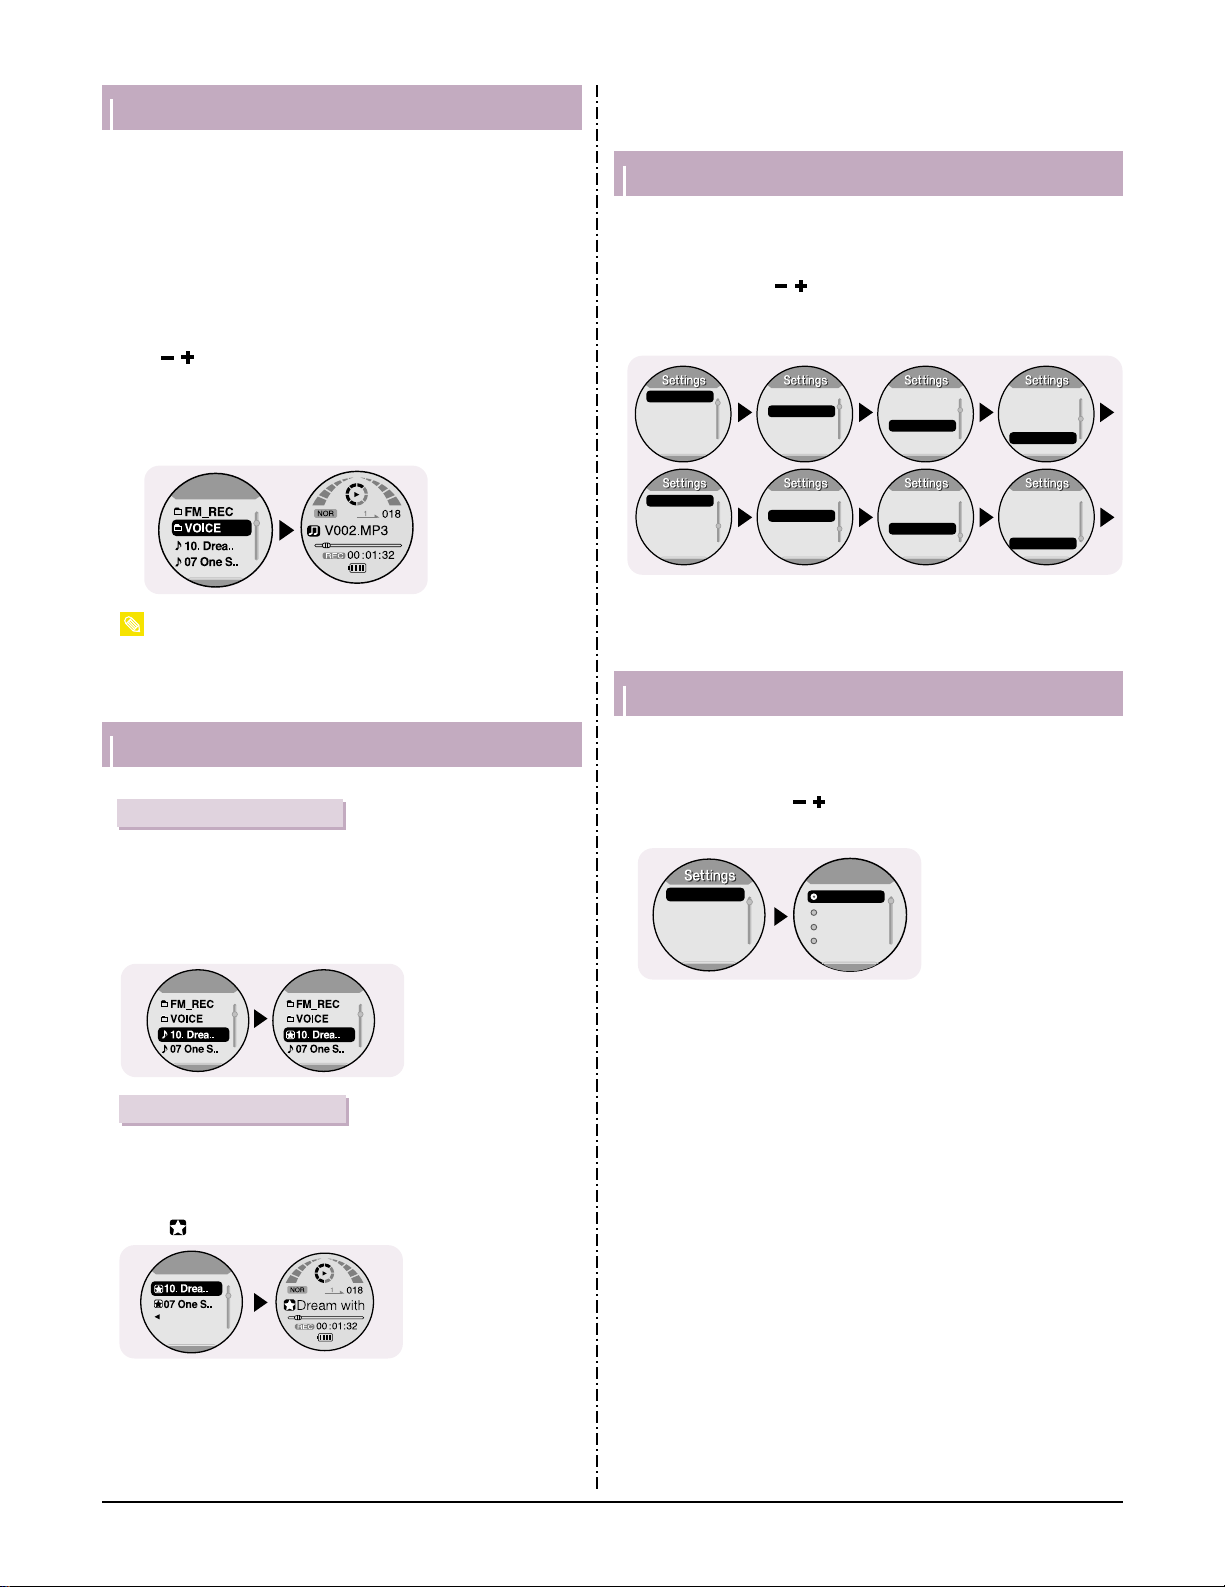
Using Navigation
1
Press the "M" button to enter Navigation mode
(except if you are in FM radio mode), or press and hold the
"M" button to move to Menu and then select Navigation.
2
Select the file that you want to play.
●
❙ˇˇ: To move to a higher-level folder.
● ˆˆ❙ :To move to a lower-level folder.
● , : To move to a file or folder in the same directory.
● ˆ¨ : To move to the next folder down.
3
Press the ˆ¨ button.
● The selected file will be played.
You can easily search for files or switch modes using the Navigation
function.
Navigation
Navigation
Navigation
- Press the "M" button in Navigation mode to exit the Navigation mode.
Note
Setting Playlist
Navigation
Navigation
Navigation
Navigation
Navigation
Navigation
Return
Playlist
Playlist
Move to the file you want in Navigation mode and press the “M”
button.
● The selected file will be marked and added to the playlist.
● To exit the playlist setting, move to the marked file in Navigation
mode and press the “M” button again.
1
Select Playlist from the menu.
● The playlist you set will be displayed.
2
Move to the file you want to play and press the ˆ¨ button.
● " " mark appears and the selected file will be played.
Setting Playlist
Playing Playlist
2. New Functions
Setting the Advanced Functions
1
Select Settings in the menu. (refer to “MENU Options”)
2
In Settings, use , to move to the function you want and
press ˆˆ❙ to select.
● To move to a previous menu, use ❙ˇˇor select Retur n.
Play Mode
Sound Effe..
Recording
Time
Environme..
Delete
Format
About
Environme..
Delete
Format
About About
Environme..
Delete
Format
Environme..
Delete
Format
About
Play Mode
Sound Effe..
Recording
Time
Play Mode
Sound Effe..
Recording
Time
Play Mode
Sound Effe..
Recording
Time
Selecting the Play Mode
Normal
Repeat O..
Repeat F..
Repeat All
Play Mode
Play Mode
Play Mode
Sound Effe..
Time
Environme..
1
Press and hold the “M” Button. Select [Settings] ➔ [Play Mode].
2
In Play mode, use , to move to the mode you want and press
ˆˆ❙ to select.
● Normal :To play all the files in order one time.
● Repeat One :To repeat one file.
● Repeat Folder : To repeat the current folder.
● Repeat All :To repeat all files.
● Shuffle : To play files at random.
● Return : To move to a previous menu.
Samsung Electronics 3-5
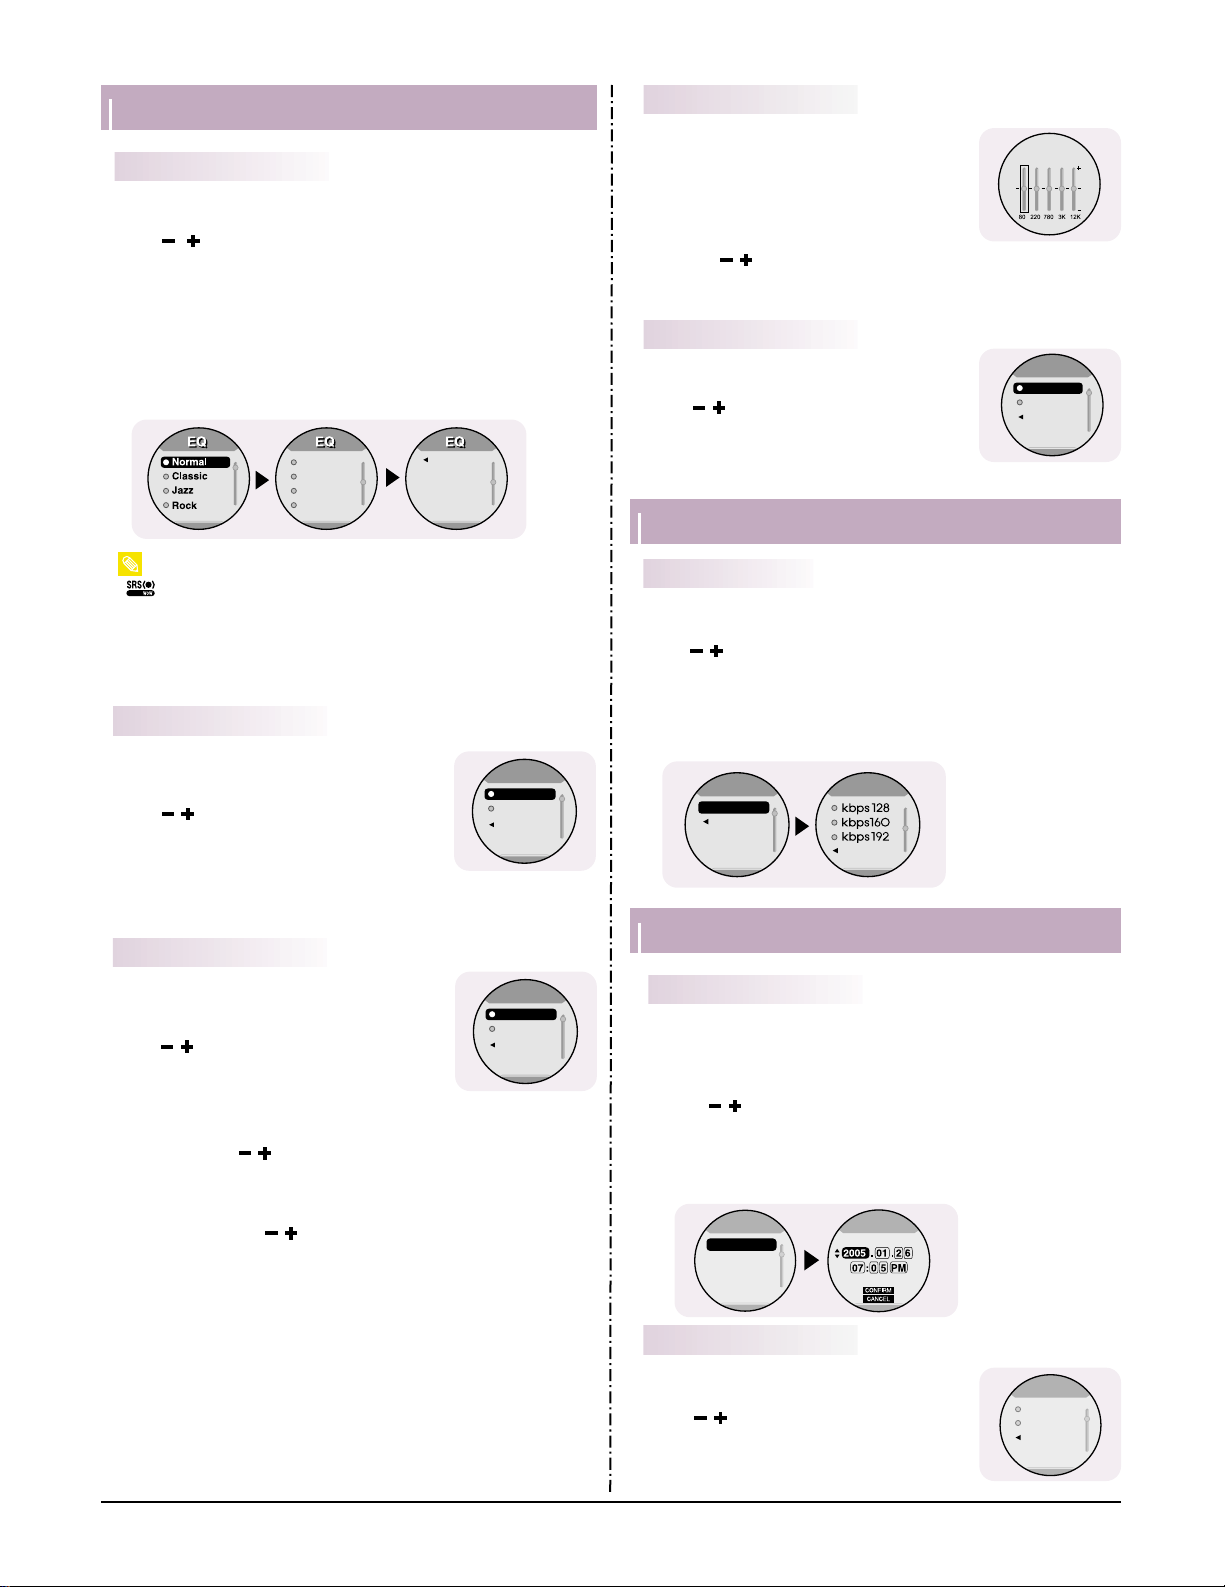
Setting Sound Effects
- is a trademark of SRS Labs, Inc.
WOW technology is incorporated under license from SRS labs, Inc.
- Please adjust the volume to a suitable level, as the volume may increase in the
SRS setting.
- This unit supports sampling frequencies of 32KHz, 44.1KHz or 48KHz.
Note
● Press and hold the “M” Button. Select [Settings] ➔ [Sound Effect] ➔
[EQ].
● Use , to move to the sound mode you want and then press ˆˆ❙
button.
● Normal ➔ Classic ➔ Jazz➔ Rock➔ SRS➔ TruBass ➔ WOW ➔ User
EQ
● Select User EQ to set the EQ as desired.
- SRS : You will hear 3D surround sound.
- TruBass : This is a bass boost feature that adds fullness to the sound.
- WOW : Consists of SRS and TruBass functions. Provides rich bass and 3D
surround sound at the same time.
EQ
SRS
TruBass
WOW
User EQ
Return
● Press and hold the “M” Button.
Select [Settings] ➔ [Sound Effect] ➔ [Bass
Booster].
● Use , to select Bass Booster On or Off.
● Bass Booster function is applied only when you
select Normal,Classic, Jazz or Rock.
● On: The bass is boosted.
● Off: Music is played back normally.
Bass Booster
● Press and hold the “M” Button.
Select [Settings] ➔ [Sound Effect] ➔ [WOW
Level].
● Use , to select the level you want, and then
press the ˆˆ❙ button.
● The SRS function is applied only when you select
the SRS, TruBass or WOW in the EQ.
● SRS Level:You will hear 3D surround sound.
Use , to adjust SRS level from 0
to 10.
● TruBass Level:A bass boost feature that adds
fullness to the sound.
Use , o adjust TruBass level
from 0 to 10.
WOW Level
SRS Level
TruBass L..
Return
WOW Level
WOW Level
Bass Booster
On
Off
Return
Bass Booster
● Press and hold the “M” Button.
Select [Settings] ➔ [Sound Effect] ➔ [User
EQ].
● You can adjust the EQ to your preference in the
User EQ Set.
● Use the ❙ˇˇ , ˆˆ❙ button to move to right or
left and use , to adjust the level.
Press the ˆ¨button after completing the setting.
User EQ
● Press and hold the “M” Button.Select [Settings]
➔ [Sound Effect] ➔ [Beep].
● Use , to select Beep On or Off.
● On : The unit beeps when the buttons are
pressed.
● Off : The unit does not beep.
Beep
Beep
Beep
On
Off
Return
User EQ
Recording Settings
Recording Settings
REC Bit rate
● Press and hold the “M” Button.
Select [Settings] ➔ [Recording] ➔ [Rec Bit rate].
● Use , to set the recording bit rate.
● You can select a bit rate from 32Kbps, 64Kbps, 96Kbps, 128Kbps,
160Kbps, and 192Kbps.
● Selecting a higher bit rate results in better quality sound, but uses
more memory space.
Record
Record
Record
Record
REC Bit rate
Return
Return
● Use the Time Set function to set the current time.
Press and hold the “M” Button. Select [Settings] ➔ [Time]
➔ [Time Set].
Use , to set the clock time, and then press ˆˆ❙ to move
to the next stage.
After setting the current time, move to CONFIRM and then
press ˆˆ❙ .
● The current time will be displayed.
Time Set
● Press and hold the “M” Button. Select [Settings]
➔ [Time] ➔ [Clock Type Set].
● Use , to select Analog type or Digital type
for the clock display .
● When turning on the player, only analog clock
type is supported.
Clock T ype Set
Time
Time
Time Set
Clock Typ..
Sleep
Auto Off Ti..
Time Set
Time Set
Clock Type
Clock Type
Analog
Digital
Return
1
2
3
3-6 Samsung Electronics
3. PC Connection
Connecting the player to your PC
For Windows 98SE, install the USB driver prior to connecting the player to PC.
System Requirements.
The PC system must meet the
following specifications:
● Pentium 200MHz or greater
● Windows 98 SE/ME/2000/XP
● 40MB of available hard disk
space
● CD-ROM drive
(double speed or greater)
● USB port (2.0) suppor ted
● VGA graphic
1
Insert the Installation CD
into the CD-ROM drive.
Select [Install Win98 USB
Driver].
- Log into your PC as an
administrator (Main User) and
install the supplied software
(Music Studio) for Windows
2000 or XP. Otherwise, the
software may not install properly.
Note
Installing software
2
Follow the instructions in the window to complete the installation.
When software installation is completed,
connect the player to PC as shown in
the next page.
Connect the USB cable to the USB port on your computer.
Connect the other side of the USB cable to the USB Cable
Connection Port on the bottom of the player.
● If you disconnect the USB cable from your PC while implementing
a command or initializing during USB driver installation, your PC
may not function correctly.
2
1
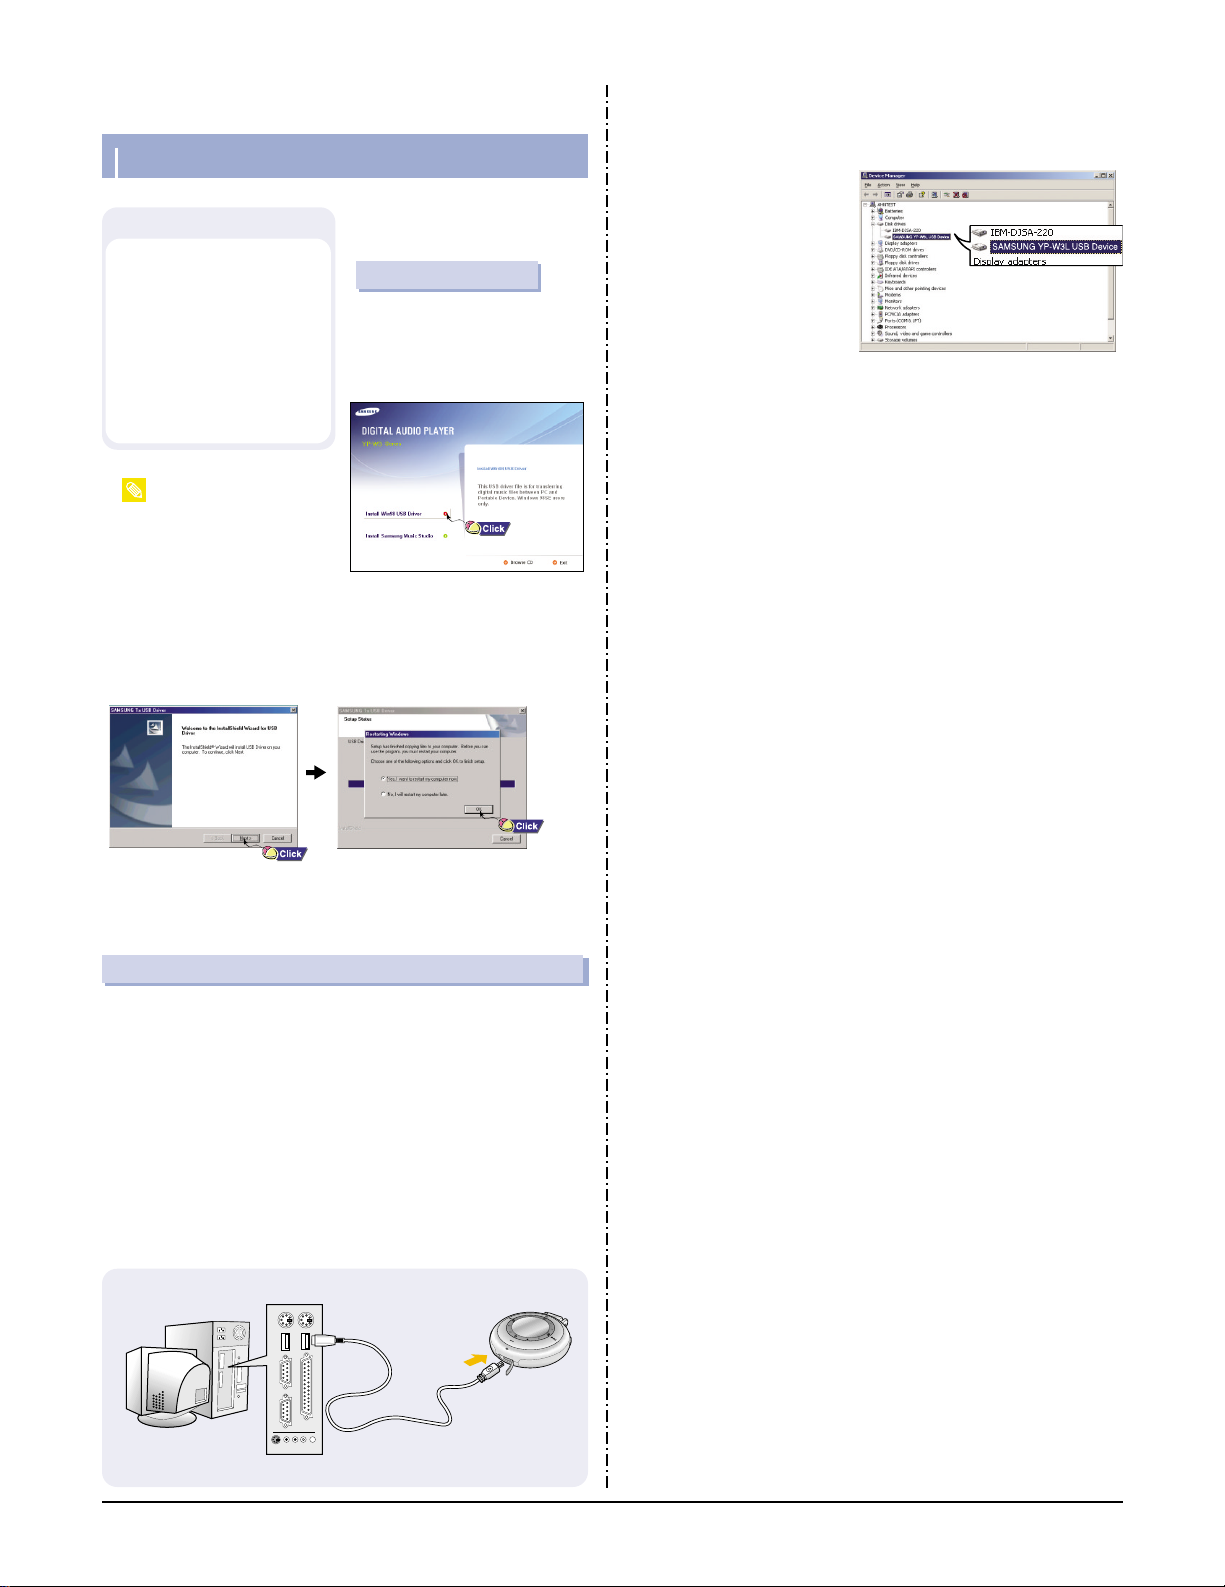
The USB driver is installed with a message saying that it is
searching for a new device.You may not see the display screen
during installation.
Go to the device manager to check that installation has been
successfully completed.
3
Connecting the player to your PC with the USB cable
How to check if USB driver is
properly installed
● Windows 98/ME:
Control Panel
➝ System ➝
Device Manager ➝ Disk Drives ➝
SAMSUNG YP-W3L
● Windows 2000/XP:
Start ➝ Settings ➝ Control Panel
➝ System ➝ Hardware ➝
Device Manager ➝ Disk Drives ➝
SAMSUNG YP-W3L USB Device
Upon installation of the USB driver "SAMSUNG YP-W3L USB
Device" will appear in the [System Properties] ➝ [Device
Manager].
4
 Loading...