

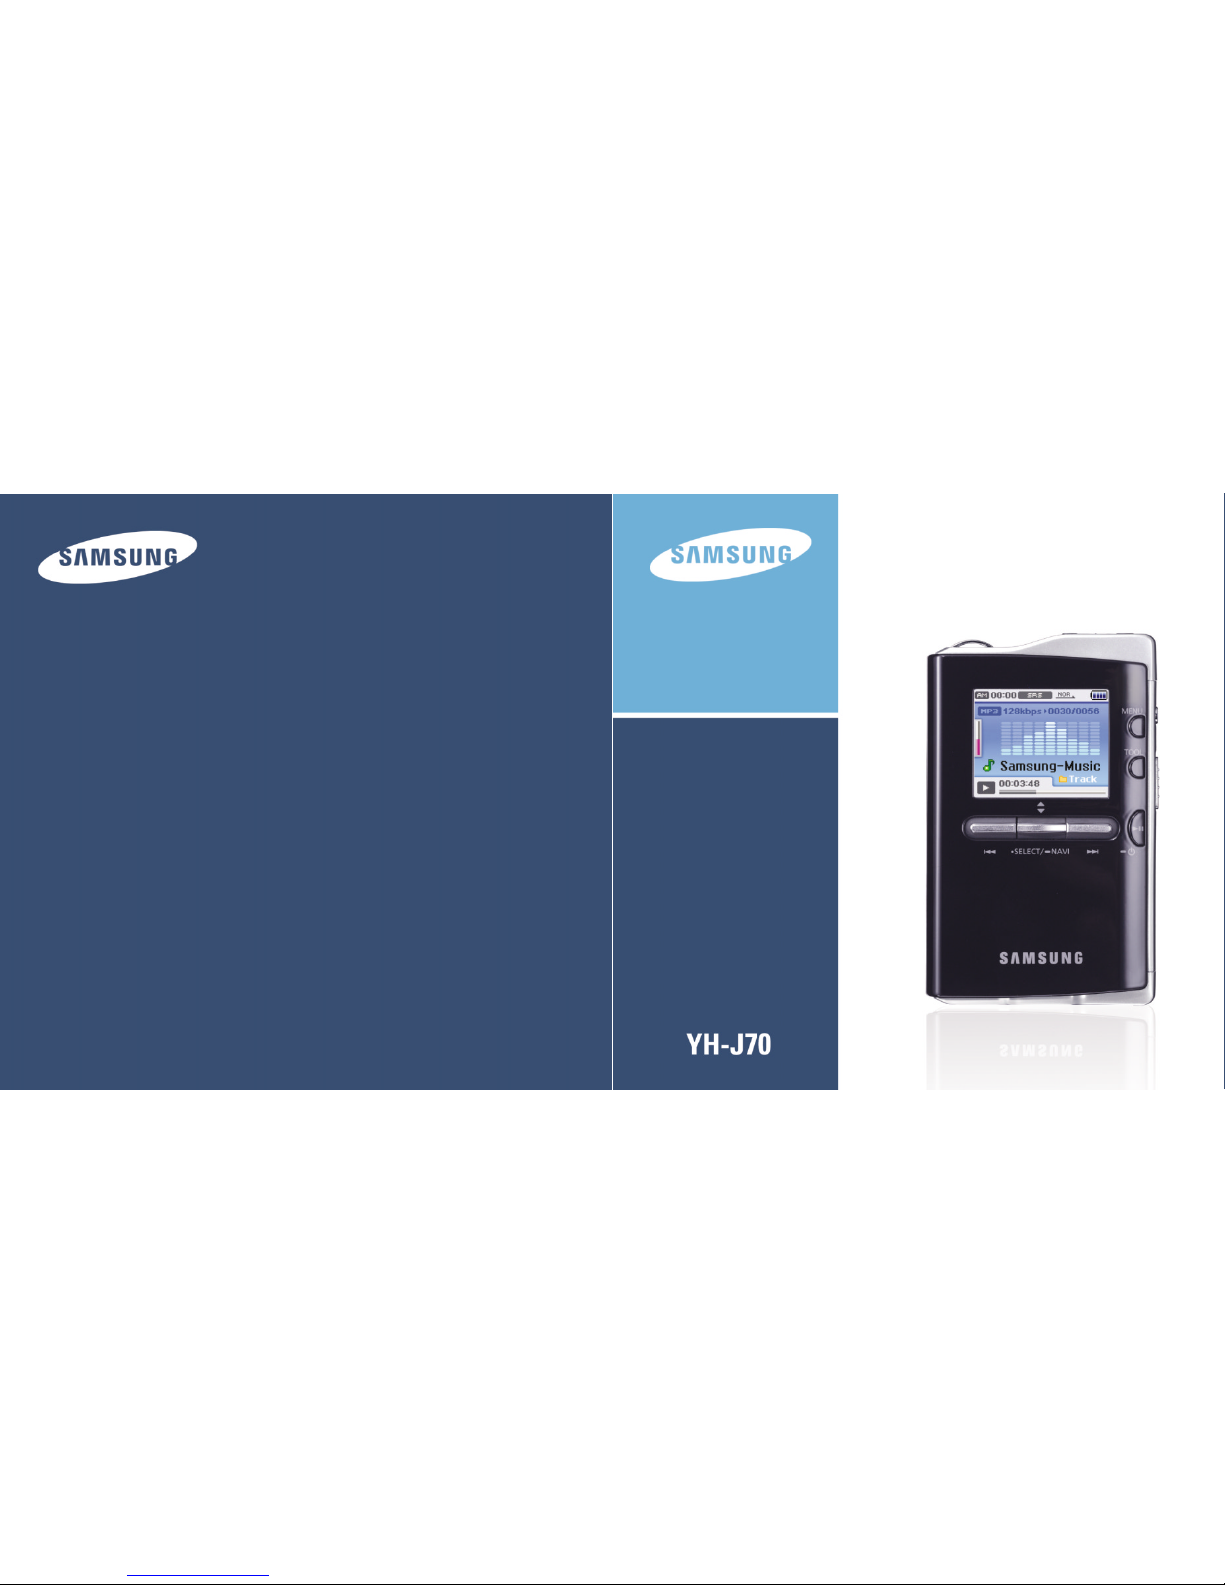
Samsung YH-J70L, YH-J70S, YH-J70JLB, YH-J70JLW, YH-J70SB User Manual
...
AH68-01675D

3
Features
ENG
USB 2.0 High Speed Data Transfer
SRS WOW Surround Sound
● The 3D surround(SRS) feature adds spaciousness to the sound.
1.8-inch Color TFT LCD
● You can enjoy high quality image & video files.
Various Games Support
● You can enjoy games such as Tetris, Omok and Othello.
Built-in Rechargeable Li-ion Battery
● The built-in rechargeable lithium battery provides up to 25 hours of music and 5 hours
and 30 minutes of video files. (According to company measurement)
Playback Speed Control Function
● You can adjust the playback speed of music or voice files.
Upgradable
● You can upgrade the built-in programs when available.
Please check the home page (www.samsung.com) for upgrades.
Features
2
Mass Storage Device Support
● You can use the built-in hard drive to store your entire music library,
plus use it as an external drive for your PC to store other data files.
MP3, WMA, Audio ASF and Ogg Playback
● Your player supports playback of MP3, WMA, Audio ASF and Ogg.
USB Host Function Support
● You can freely transfer data such as music and image files without a PC
by directly connecting digital devices such as digital camera,
MP3 player, etc. to the player.
Video Playback Function
● You can view video files after downloading using the Multimedia Studio.
Image & Text Viewer Function
● You can view JPEG files and TXT file texts.
Direct MP3 Recording
● You can convert music from CDs, cassettes, and radio into MP3 files
without a PC.

5
Contents
ENG
I
Chapter 3 Using Your Player
Viewing Text...........................................56
Setting Main Functions in Text ...............57
● Bookmark............................................57
● Go to page..........................................58
● Page Scroll Type ..................................59
● Auto Scroll...........................................59
Viewing Image Files...............................60
Viewing Video Files................................61
Using USB Host.....................................62
● Connecting an External Device ...............62
● Transferring Files from External Device
to the Player ........................................63
● YH-J70 USB HOST Compatible ..............65
Playing Games.......................................66
● Clear Screen........................................66
● Othello................................................67
● Omok .................................................68
● Tetris ..................................................69
● Chips..................................................70
Setting the Advanced Functions ............71
Screen Display Settings.........................72
● Scroll Speed ........................................72
● Backlight.............................................72
● Lcd Off Time ........................................73
● Text Set...............................................73
Sound Effect Settings............................74
● WOW Level
.........................................74
● WOW Optimum
....................................74
● Auto EQ
..............................................75
● Fade In ...............................................75
● User EQ Set........................................76
● Clicker
................................................76
Time/Schedule Settings .........................77
● Memo.................................................77
● Calendar.............................................78
● Sleep..................................................79
● Date/Time............................................79
FM Radio Settings.................................80
● FM Region...........................................80
● FM Search Level..................................80
Recording Settings.................................81
● Bit Rate...............................................81
● Auto Sync............................................81
System Settings .....................................82
● Languages ..........................................82
● File Language......................................82
● Play Speed..........................................83
● Resume..............................................83
● PC Connect Mode................................83
● Default Set..........................................84
● About..................................................84
I
Chapter 4 Appendix
MENU Table.........................................85
I
Chapter 5 Customer Support
Troubleshooting ...................................86
Specifications.......................................88
Contents
4
I
Chapter 1 Preparations
Features...................................................2
Safety Instructions ...................................6
Battery Charger Safety ...........................8
Charging the Battery ...............................9
Components...........................................10
Location of Controls...............................11
Display...................................................13
I
Chapter 2 Connection to Computer
Connecting the player to your PC..........14
● Installing Software ................................14
● Connecting the player to your PC with a
USB cable...........................................16
Using the Player as a Removable Disk.18
● Downloading Files ................................18
● Disconnecting the USB Cable.................19
Using Media Studio................................20
● Downloading Music Files .......................20
● Sending Playlist....................................22
● Formattimg the Player...........................24
● Ripping Tracks from an Audio CD............25
● Creating a Folder..................................26
● Deleting a Folder/File............................27
● To View Help on Media Studio ................28
Installing Multimedia Studio...................29
● Installing Software ................................29
Using Multimedia Studio........................31
● Editing Images.....................................31
● Sending images....................................32
● Sending Videos....................................34
● Capturing Video....................................36
● To View Help on Multimedia Studio..........39
I
Chapter 3 Using Your Player
Playing Music .......................................40
● Pausing Music......................................40
● Adjusting Volume..................................40
Hold Feature..........................................41
Loop Repeating......................................41
● Starting Point .......................................41
● Ending Point ........................................41
Searching for Music/Voice Files.............42
● To Search for Specific Parts During Play ..42
● To Change Tracks During Play................42
● To Change Tracks when Stopped............42
Setting Main Functions in Music Mode..43
● Add to Favorites ...................................43
● EQ.....................................................43
● SRS...................................................44
● Play Mode...........................................45
● File Info...............................................45
MENU Options .......................................46
Listening to FM Radio............................47
● Switching to FM Radio Mode..................47
● Search for a Frequency.........................47
Setting Main Functions in FM Mode ......48
● Mono / Stereo ......................................48
● Preset Mode ........................................48
● Edit Preset...........................................49
● Auto Preset ..........................................49
Recording Voice.....................................50
Recording FM Radio..............................51
Recording MP3s ....................................52
Setting Main Functions in Navigation....53
● Go to Top ............................................54
● Add to Favorites
...................................55
● Delete File
...........................................55
7
Safety Instructions
ENG
Follow Traffic Safety Instructions
● Do not use the earphones while driving an automobile or riding a bicycle.
It’s not only dangerous, but also against the law.
● To avoid an accident, do not turn up the volume of the earphones too high while walking.
Protect your ears
● Do not turn up the volume too high. Doctors warn against prolonged exposure to high volume.
● Stop using the device or turn the volume down if you have ringing in your ears.
● Take care so that the earphone cable is not caught by your arm or other objects while walking or exercise.
● Follow local guidelines for waste disposal when discarding packages, batteries,
and old electronic appliances.
● Your player is packaged with cardboard, polyethylene etc., and do not use any unnecessary materials.
● Ambient temperature : 5°C ~ 35°C (41°F ~ 95°F)
● Humidity : 10 ~ 75%
I Earphones
I Ambient operating conditions
I Environmental Information
Safety Instructions
6
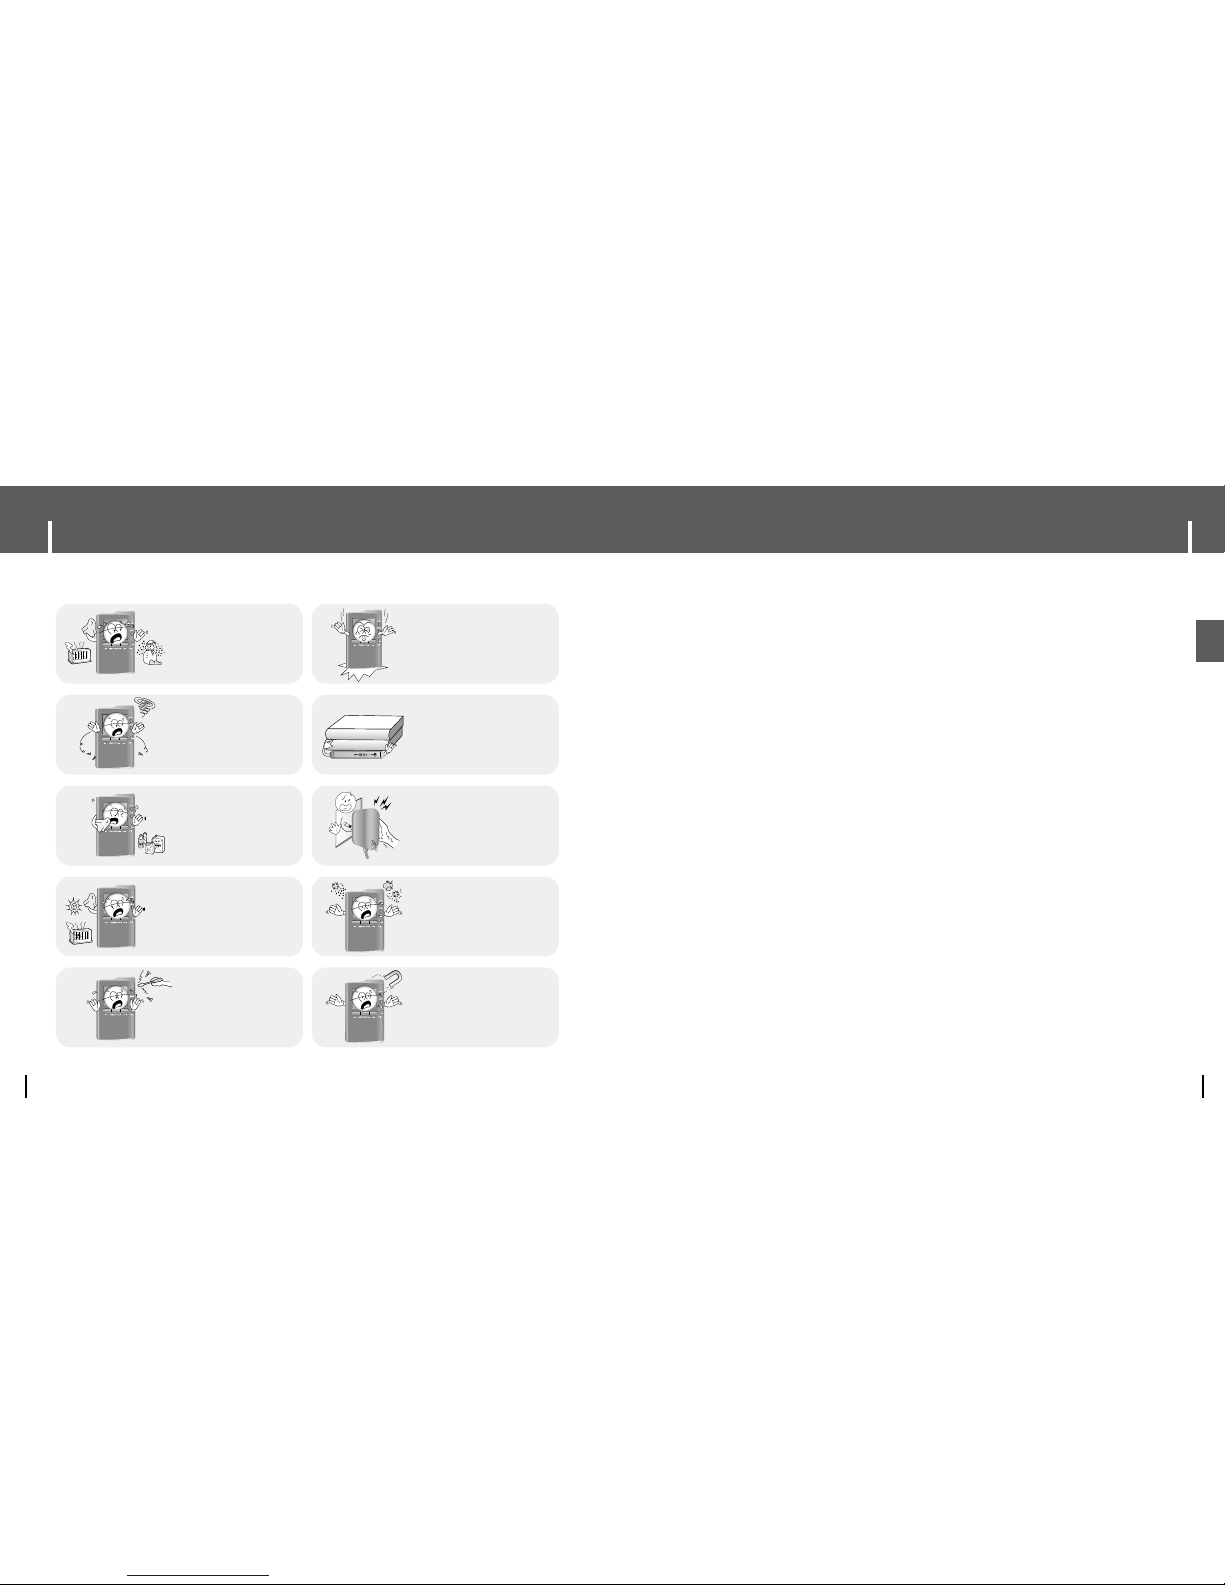
Please read and understand all the instructions to avoid injury to yourself and damage to the device
✽
Please be aware that we disclaim all responsibility for damages from loss of saved or recorded data due to
breakdown, repair or other causes.
Do not let any foreign
matter spill into the
device.
Do not expose to
chemicals such as
benzene and thinners.
Do not apply excessive
pressure on the device.
Do not place heavy objects
on top of the device.
Do not touch the charger
with wet hands.
Do not expose to direct
sunlight or heat sources.
Do not store in dusty areas.
Do not use the unit near
any appliance that
generates a strong
magnetic field.
Do not try to disassemble
and repair the device
yourself.
Do not expose to extreme
temperatures (above 95°F
or below 23°F). Do not
expose to moisture.
9
Charging the Battery
ENG
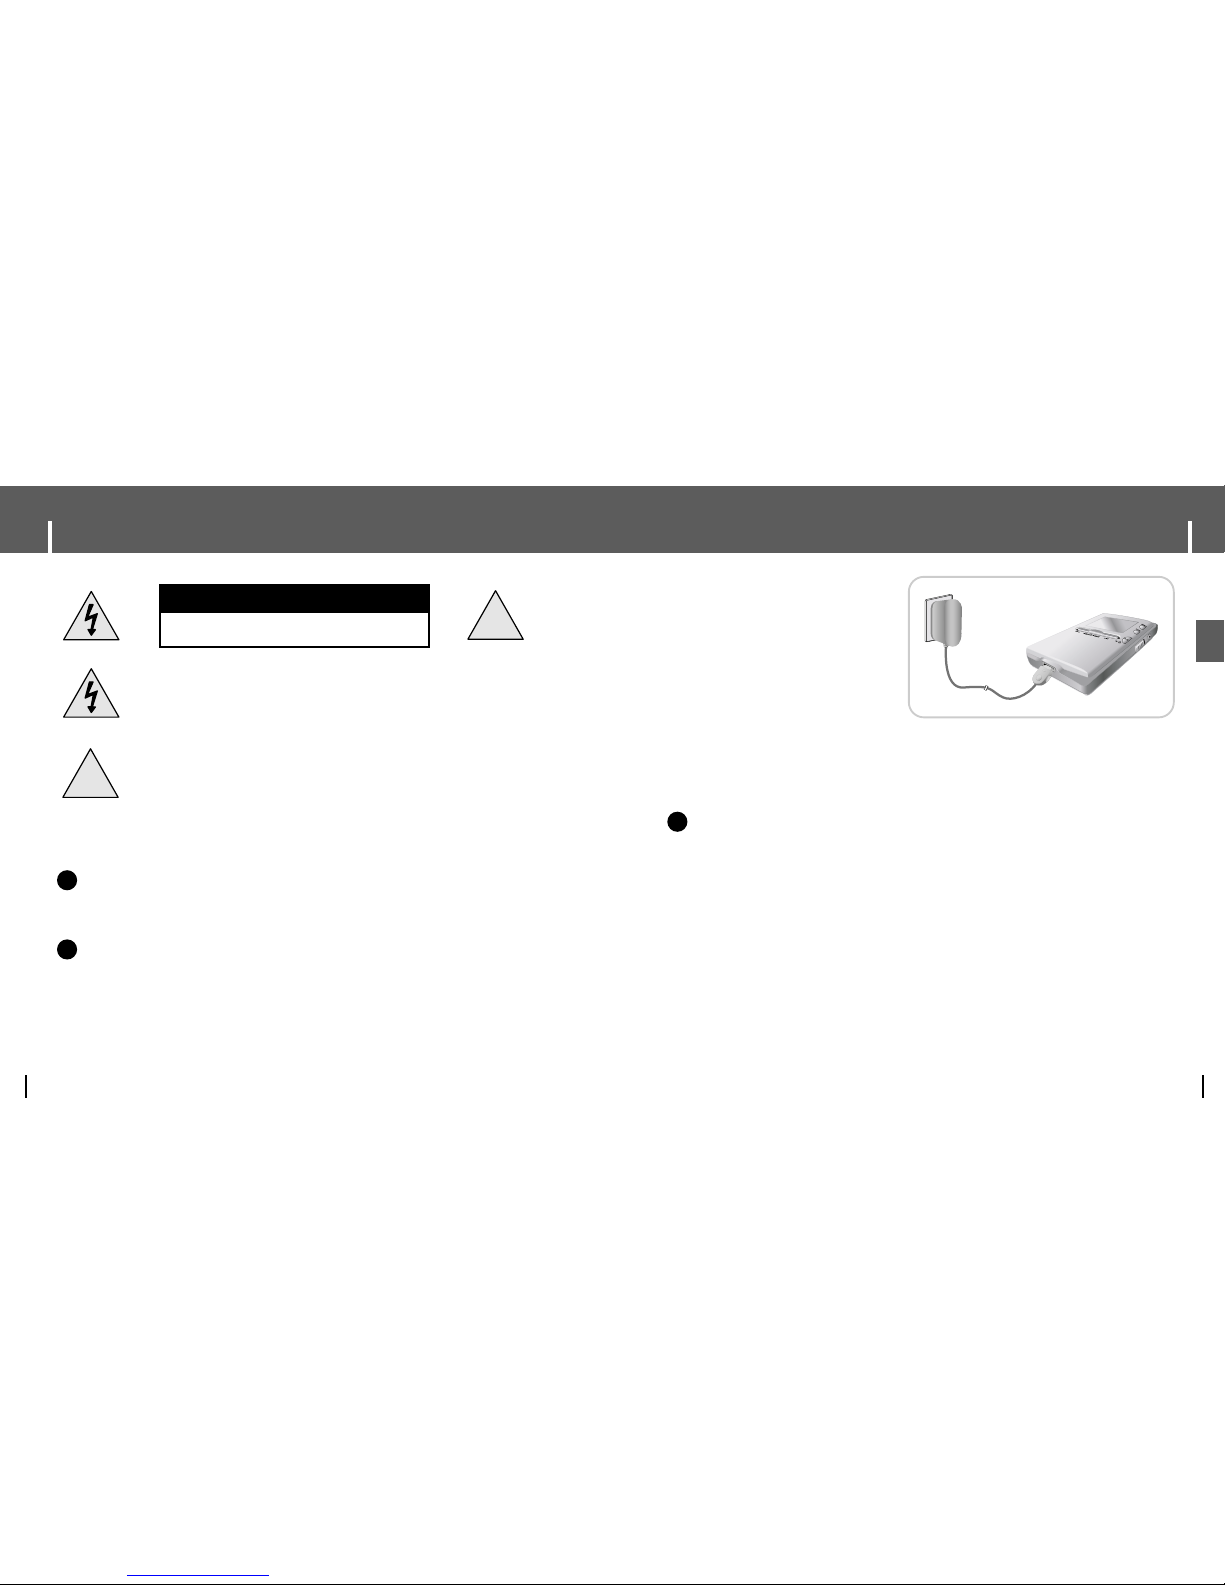
A charger is supplied with your player.
Plug the charger into a wall outlet.
✻ When recharging is complete,
“Charge Completed” will be displayed
on the screen.
✻ To recharge by connecting the USB cable,
select [Settings] → [System] →
[PC Connect Mode] → [Charge] in the
menu screen. To charge through the USB cable,
the PC has to be turned on. If the PC goes into
power saving mode, the battery will not be charged.
✻ Charging the battery through USB cable takes approximate 6 hours, while charging the battery with the
charger takes approximate 4 hours.
CCCCaaaauuuuttttiiiioooonn
nn
- To avoid the risk of fire, do not charge longer than 12 hours.
- Do not plug several devices into the same outlet.
- Do not use a charger that is defective.
- When using the rechargeable battery for the first time or after several months of
non-use, fully charge it first.
- Overcharging will reduce the battery life.
- The rechargeable battery is a consumable item and its capacity will decrease gradually.
- To prolong the life of your battery, use the fully charged battery until it is completely discharged,
and then fully charge it again before use.
- Please be aware that we disclaim all responsibility for damages from loss of saved or recorded data
due to breakdown, repair or other causes.
A fire or electric shock may result.
- Do not touch the charger with wet hands.
✍
Battery Charger Safety
8
!
!
CAUTION
RISK OF ELECTRIC SHOCK. DO NOT OPEN
The uninsulated parts inside the charger could
cause electric shock.
For your safety, do not open the case of the
charger.
Read this User Manual to prevent any problems
that may occur while using the charger.
WWWWaaaarrrrnnnniiiinnnngg
gg
- Use the charger away from water sources to avoid fire or electric shock.
CCCCaaaauuuuttttiiiioooonn
nn
- To avoid electric shock, use the charger only with a power outlet that matches the shape of the
converter's plug.
- Make sure that the charger's plug is inserted all the way into the outlet.
✍
✍
11
Location of Controls
ENG
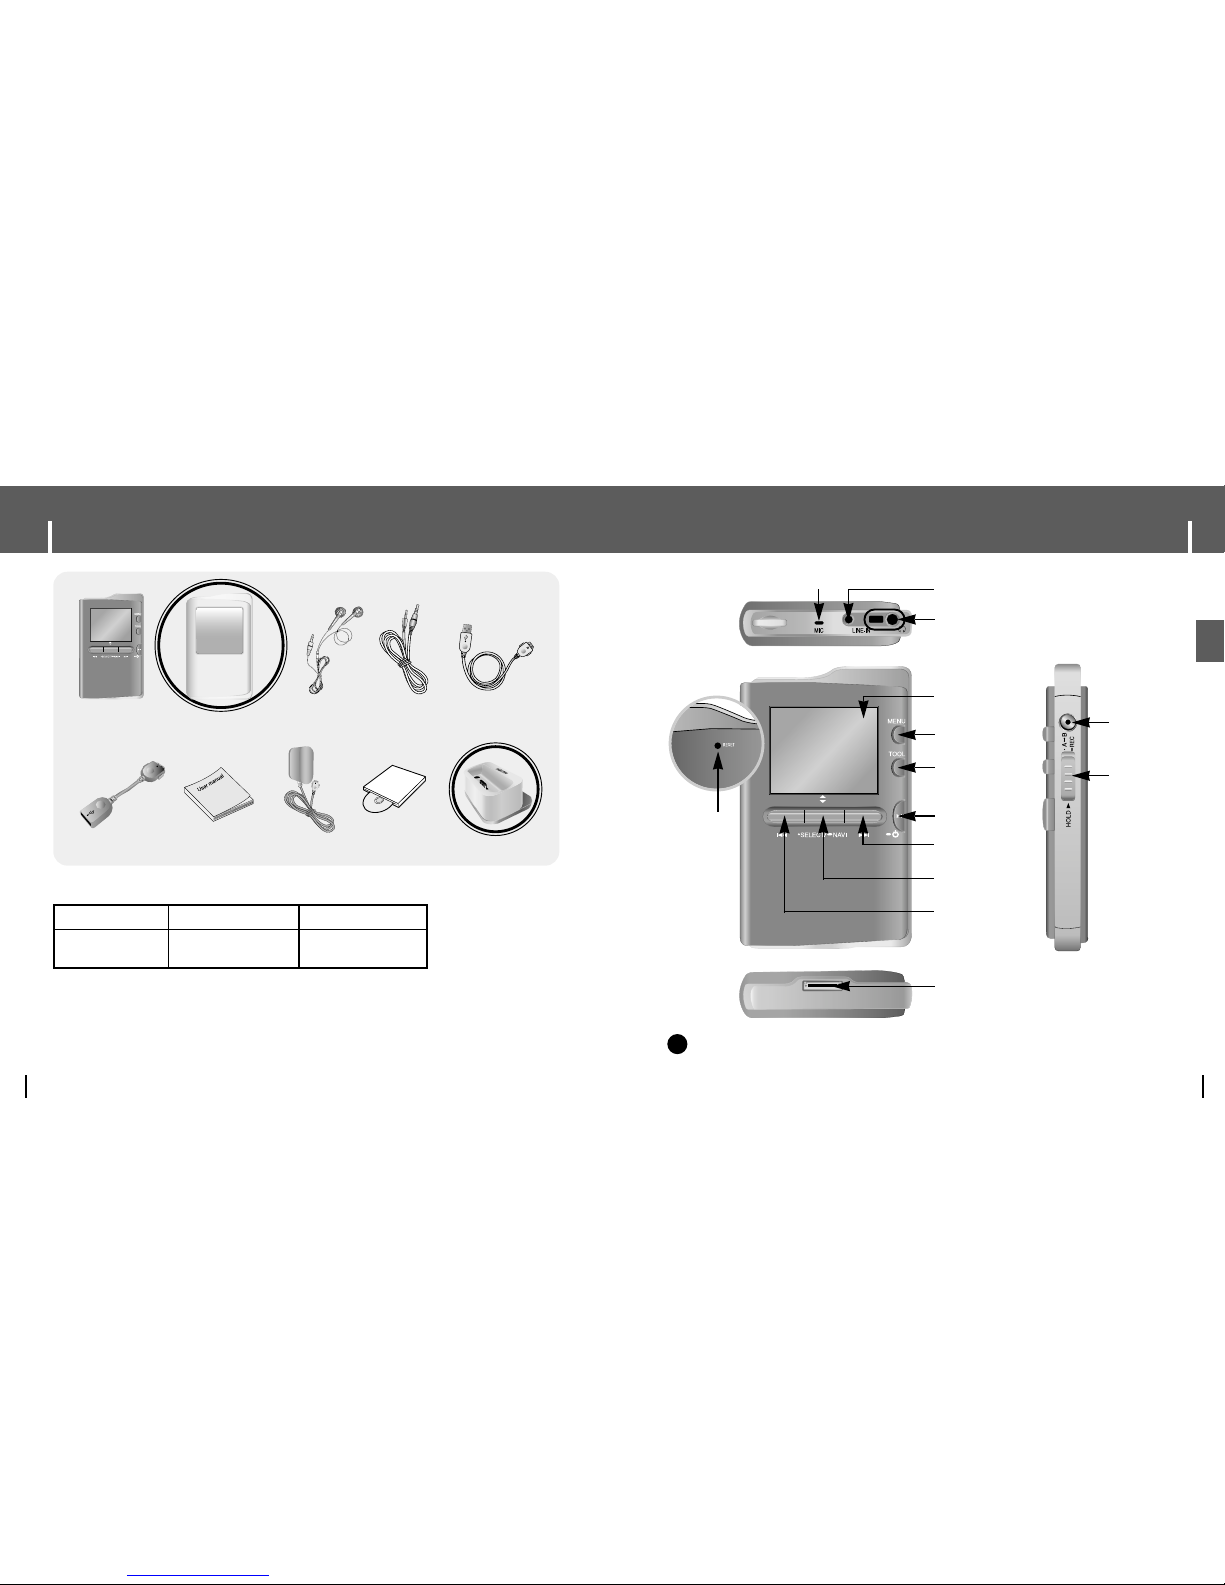
Loop Repeat/
Record button
HOLD switch
MENU button
Display
Earphone Jack
TOOL button
[Back Side]
RESET Hole
Power On/Off
Play/Pause button
Skip/Search button
Select/Navigation/
Volume Control Button
Skip/Search button
USB Cable Connection Port
LINE IN Jack
MIC
NNootte
e
- Reset the player by pressing the RESET hole using a pointed object such as a safety clip.
✍
Components
10
● The capacity of the useable built-in memory is less than indicated as the internal
firmware uses a part of the memory as well.
● The appearance of the accessories shown is subject to change for product improvement
without prior notice.
Player Earphones Line-In Cable
User Manual
Charger
USB Cable
USB Host Adaptor Installation CD Docking Cradle
Model
Built-in memory
YH-J70 SB/SW
20GB
YH-J70 LB/LW
30GB
❊
Docking Cradle and Carrying Case are supplied only for 30GB model.
Carrying Case
13
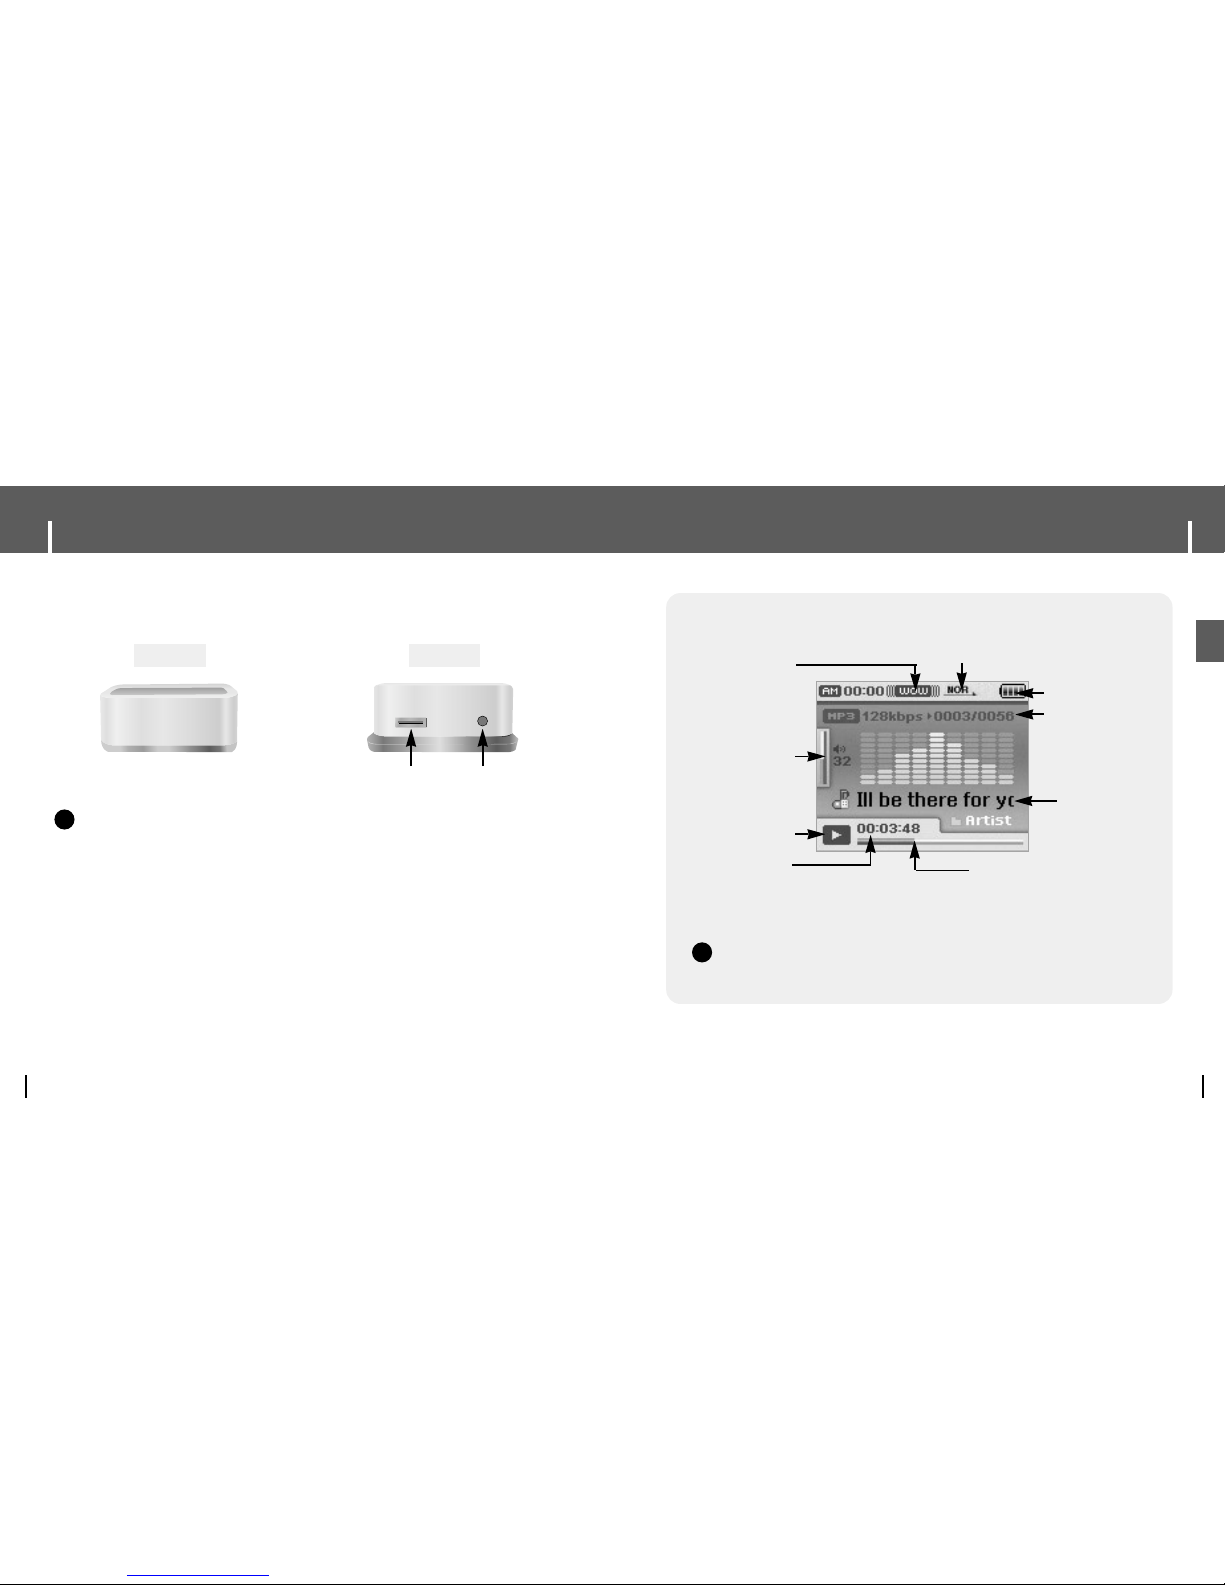
Display
ENG
Play/Pause Indicator
Volume Indicator
Play Time Indicator
Play Mode Indicator
EQ/SRS Indicator
Battery remaining indicator
Song number display
Current Track Title
Progress Indicator
NNootte
e
- The screen pictures are for illustration purposes only. The actual screen may differ.
✍
Location of Controls
12
Front Rear
LINE OUT jackUSB Cable Connection Port
I Docking Cradle
NNootte
e
- You can listen to music by putting the player on the cradle and connecting earphones or speakers via
LINE OUT jack.
- You can't use USB host function using the cradle even if you connect the USB host adapter.
✍
❊
Docking Cradle and Carrying Case are supplied only for 30GB model.
15
Connecting the player to your PC
ENG
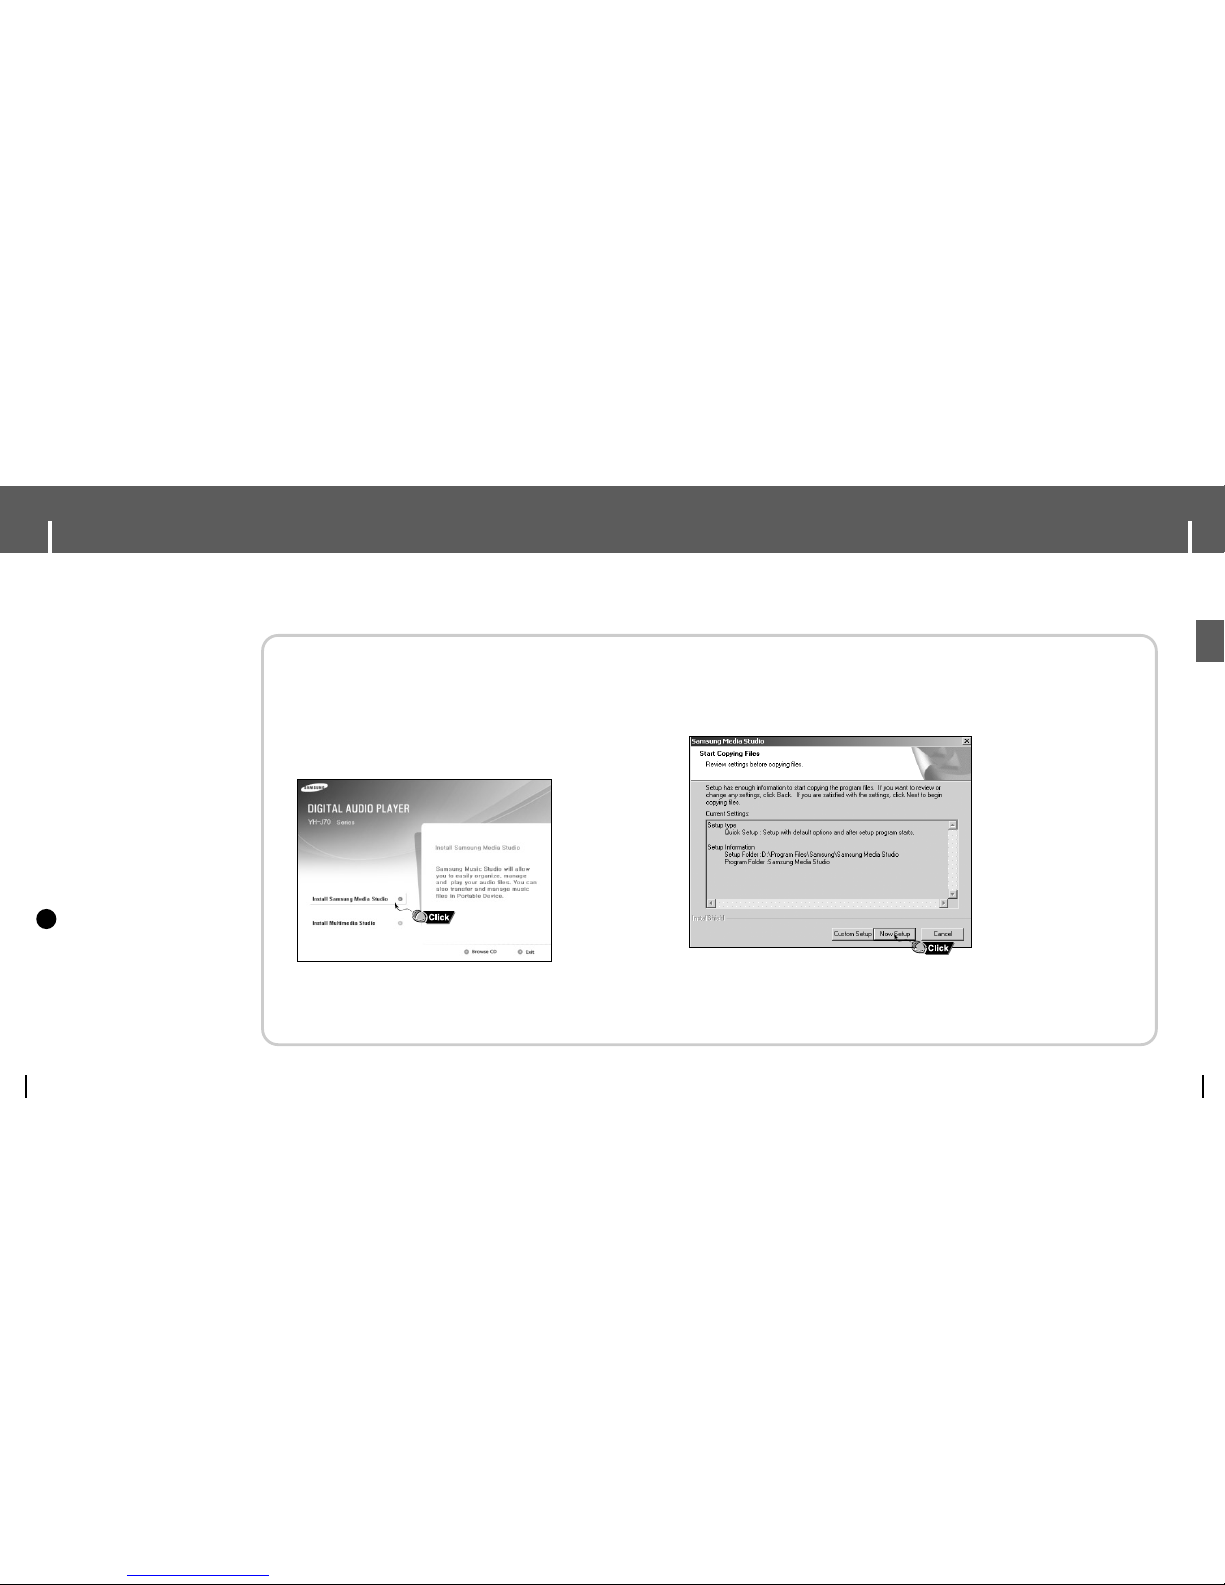
2Follow the instructions in the window to complete the installation.
Connecting the player to your PC
14
Install Samsung Media Studio prior before connecting
the player to PC.
❑ System Requirements.
The PC system must meet the
following specifications:
● Pentium 200MHz or greater
●
Windows XP
● 50MB of available hard disk
space
● CD-ROM drive
(double speed or greater)
● USB port (2.0) supported
● DirectX 9.0 or above.
NNootte
e
- Log into your PC as an administrator
(Main User) and install the supplied
software (Media / Multimedia Studio)
for Windows XP.
You can change account information
by selecting [Start] → [Control Panel]
→ [User Account] from the taskbar of
your PC.
I
Installing Software
1Insert the Installation CD into CD-ROM drive.
The picture shown below appears.
Select [Install Samsung Media Studio].
✍
17
Connecting the player to your PC
ENG
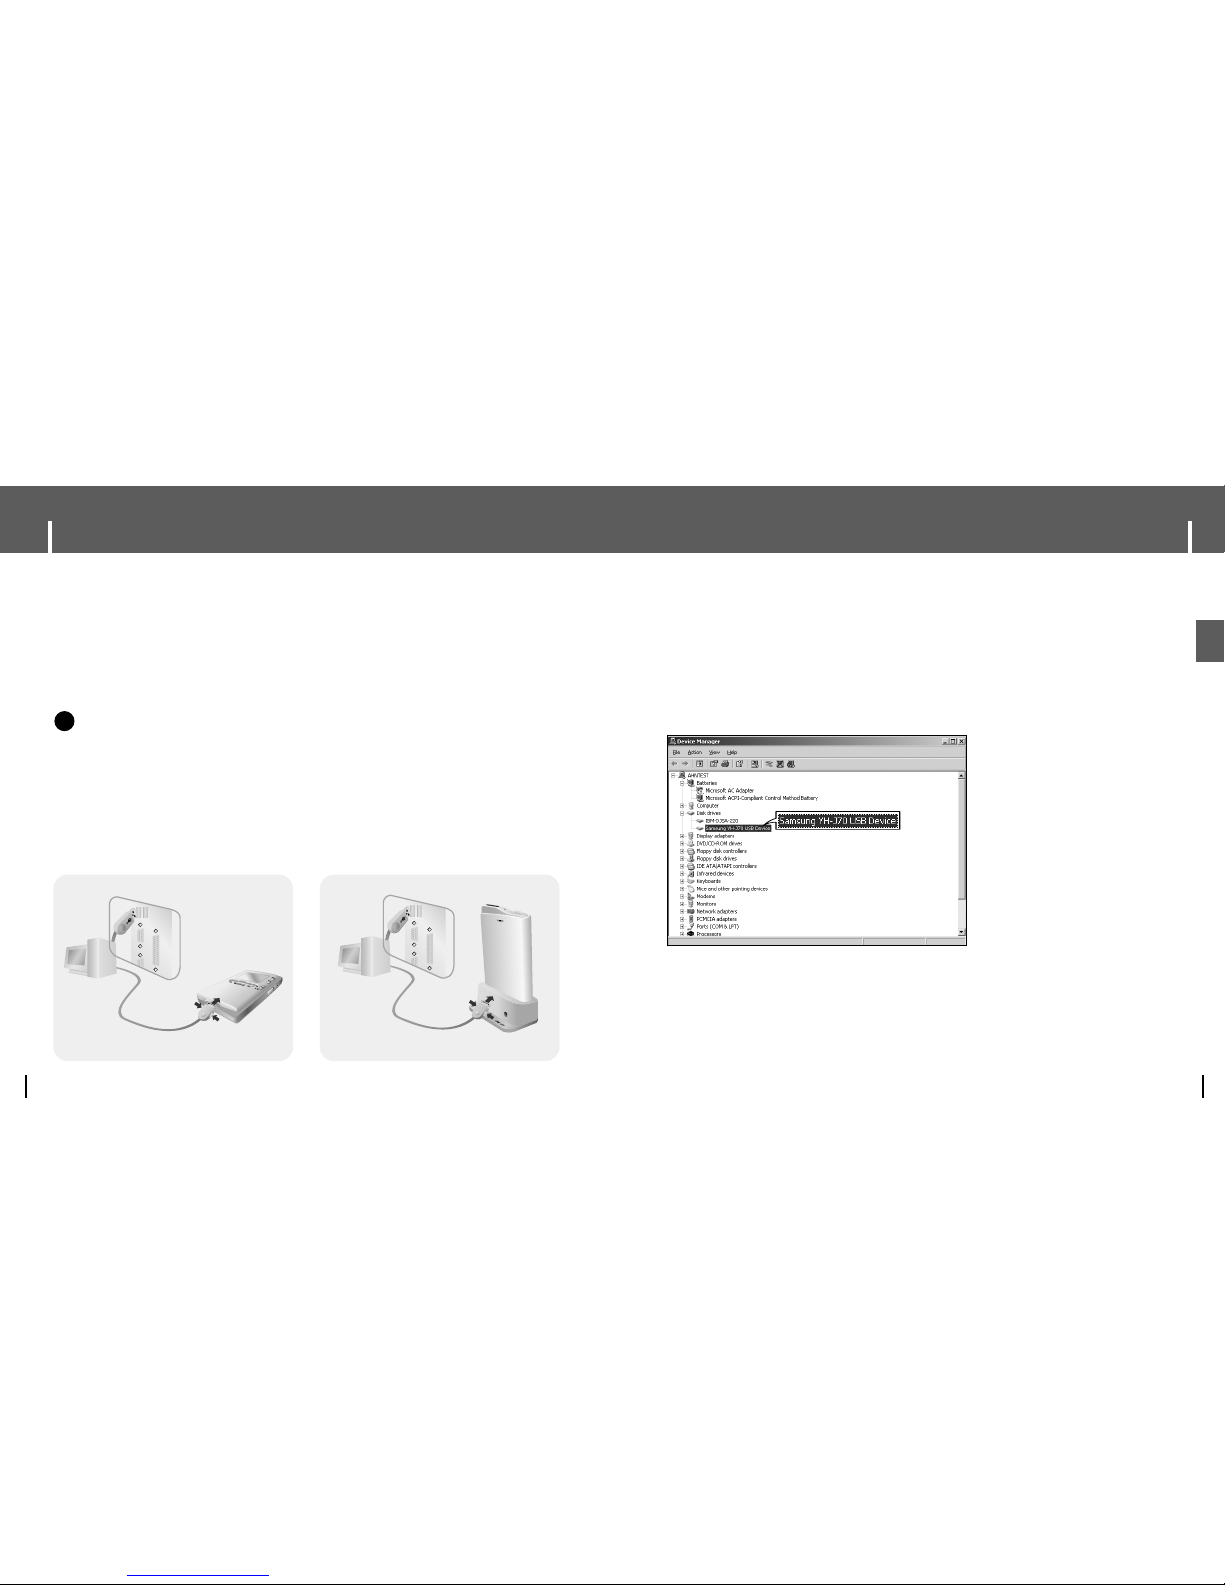
How to check if USB driver is properly installed
Windows XP:
Control Panel → System → Hardware → Device Manager → Disk Drives →
Samsung YH-J70 USB Device
5Falls der USB Treiber nicht automatisch installiert wurde, siehe Seite 18.
Connecting the player to your PC
16
1Connect the USB cable to the USB port of the computer.
2Connect the other end of the USB cable to the USB cable connection port located
at the bottom of the player.
● If you disconnect the USB cable from your PC while implementing a command or
initializing during USB driver installation, your PC may not function correctly.
4Upon installation of the USB driver "Samsung YH-J70 USB Device" will appear
in the [Device Manager].
3
The USB driver is installed with a message saying that it is searching for a
new device. You may not see the display screen during installation.
Go to the device manager to check that installation has been successfully completed.
I
Connecting the player to your PC with a USB cable
PC
PC
USB Cable
USB Cable
Player
Player
Docking Cradle
NNootte
e
- To use by connecting to the rechargeable cradle, connect the USB cable to the USB cable
connection port on the cradle.
✍
19
Using the Player as a Removable Disk
ENG
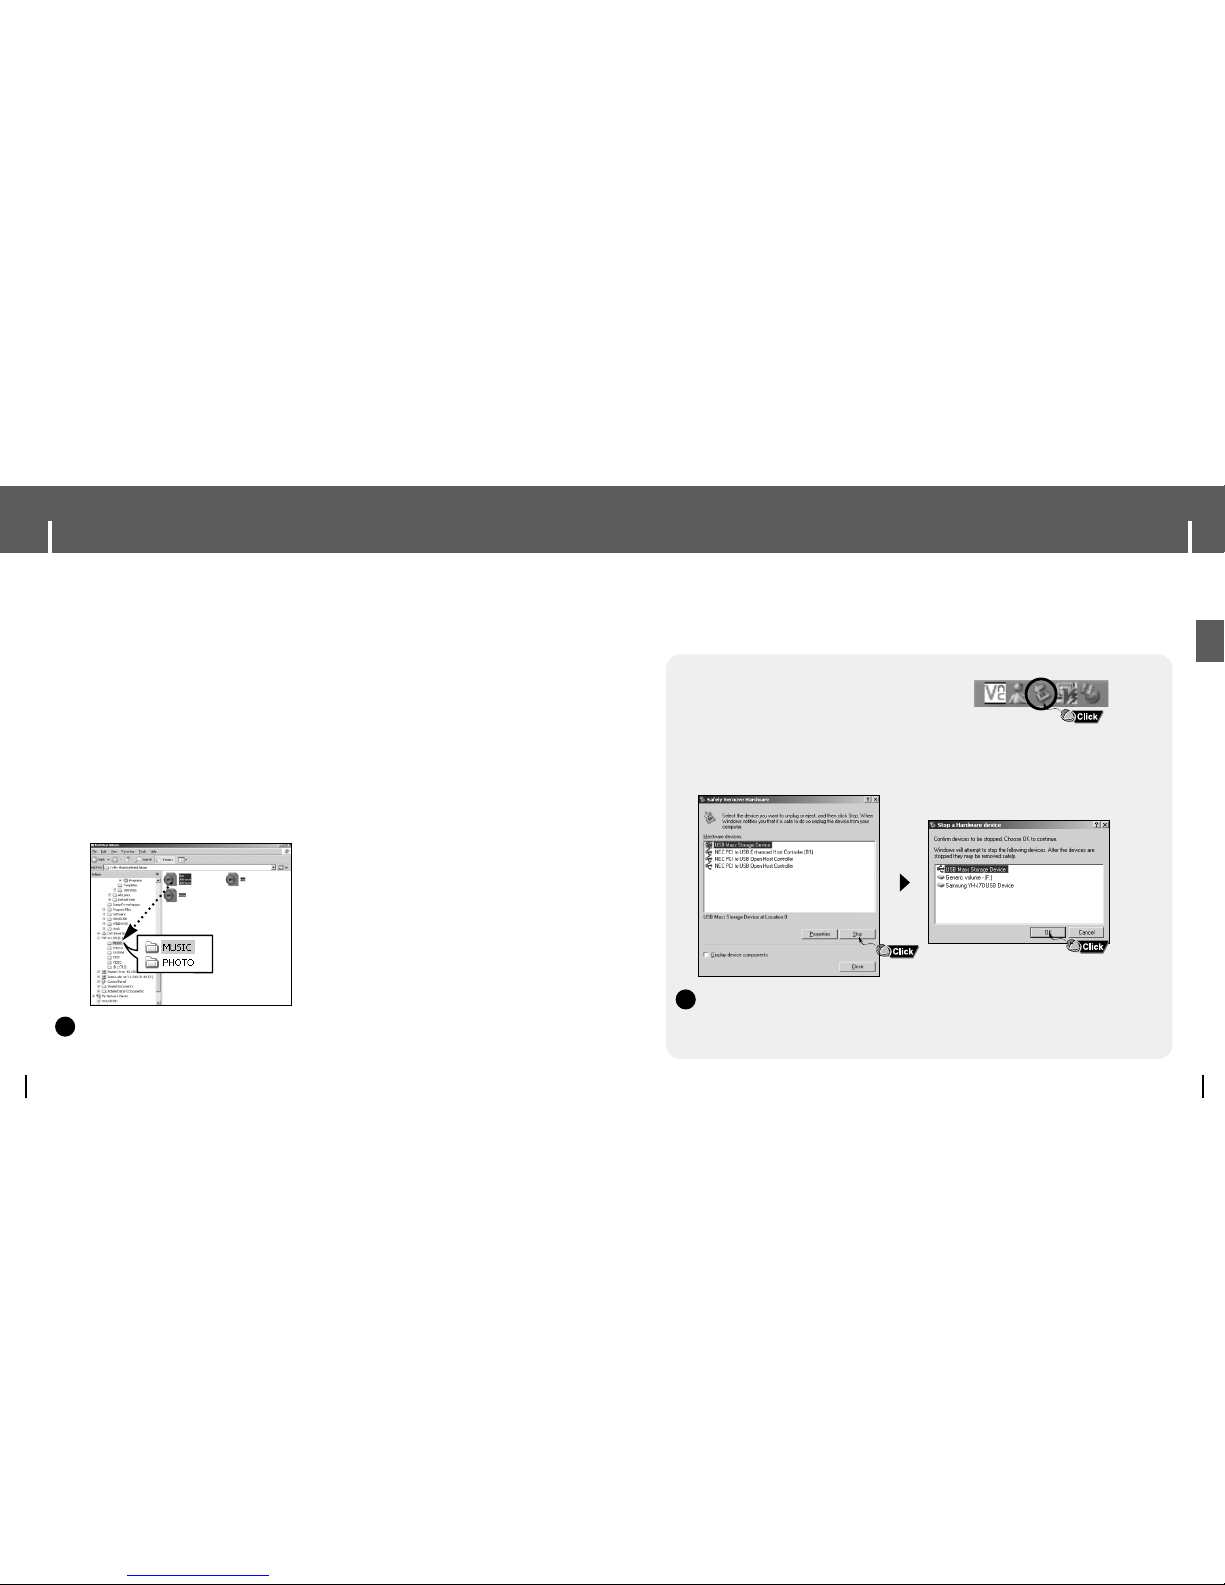
I Disconnecting the USB Cable
After completing all file transfer, you must disconnect the cable using the
follwing way:
1Double click the green arrow in the taskbar
located at the bottom right side of the
screen.
2Select the USB device and click the [Stop] button. When the Stop a
Hardware Device screen appears, click the [OK] button and then
disconnect the USB cable.
CCaauuttiioon
n
- If you disconnect the USB cable improperly, the files on the device may be damaged
and will not play.
✍
Using the Player as a Removable Disk
18
You need to select PC connection mode before using the removable disk.
Press the MENU buton and select [Settings] → [PC Connect Mode] → [Removable Disk] from the menu.
I Downloading Files
1Connect the player to PC.
2Right click on the Start button, then choose Explore to Open Windows
Explorer on PC.
● [Removable Disk] is displayed in Windows Explorer.
3Select the file to save and drag-and-drop it into the desired folder.
● Drag and drop music files to MUSIC folder, text files to TEXT folder, image files to PHOTO
folder, svi files to VIDEO folder and data files to DATA folder.
- DATA folder is not displayed in the player.
●
The player only supports video files which have a .svi extension. To view video files on other
formats, convert the files using Multimedia Studio and then transfer the converted files into the player.
CCaauuttiioon
n
- Disconnecting the USB cable during file download/upload may cause malfunction of the player.
- The music file order displayed in Windows Explorer may differ from the play order on your player.
✍
21
Using Media Studio
ENG
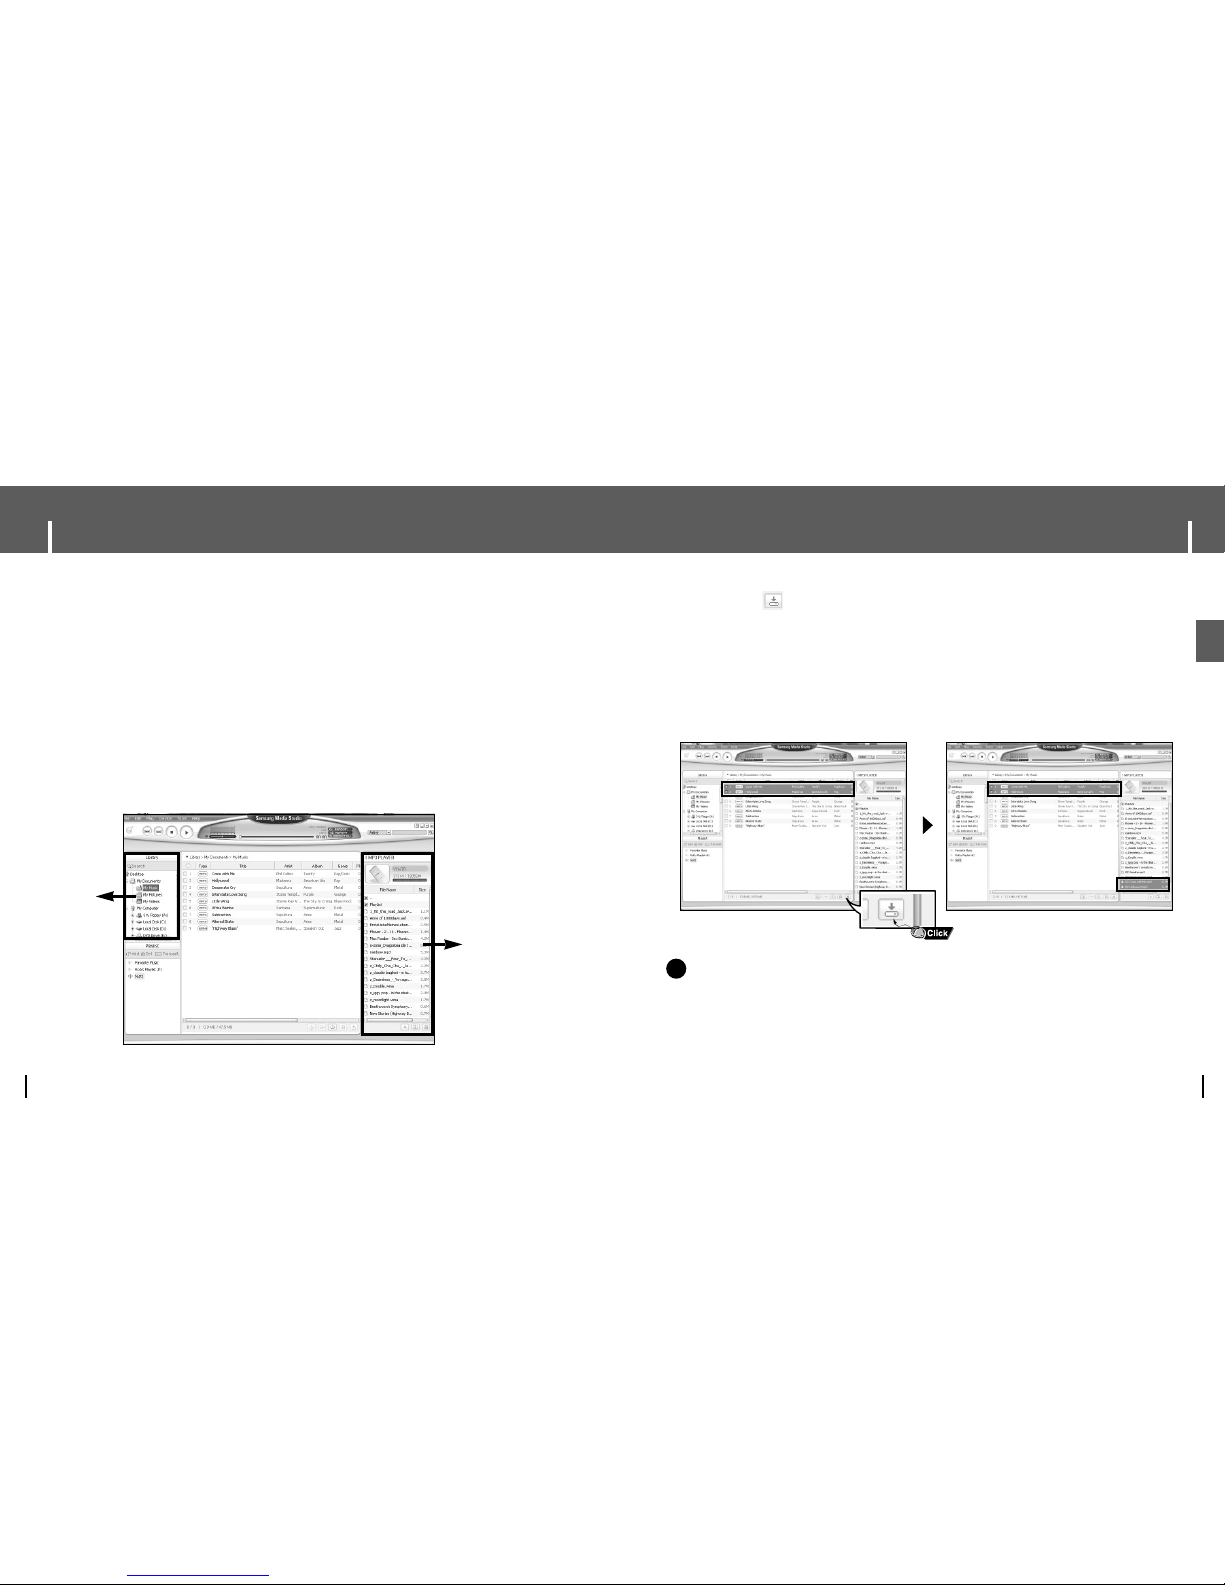
3When music files appear, select the file(s) you want to transfer, and then press
the [Transfer] button.
● The selected file(s) are transferred to the player.
● Select [Device] → [Reconstruct Library] from Media Studio if file(s) are down-
loaded using removable disk.
Music files are automatically classified into Artist, Album, Genre and Track
folders according to tag info. Artist, Album, Genre and Track folders can be
found from [Settings] → [Navigation] → [Music Library].
NNootte
e
- Refer to [Help] for more detailed information.
- What is an ID3 Tag?
This is what is attached to an MP3 to carry information relevant to the file, such as the
title, artist, album, year, genre and a comment field.
✍
Using Media Studio
20
● Media Studio is the program that enables you to download music files to the player,
and play back music files on your PC.
● Click Media Studio icon from the Desktop.
Library
window
Device connection
window
I Downloading Music Files
1
Connect the player to PC.
● A device connection window will appear on the right side of the screen.
If the Device Connection window does not appear automatically, select [Device] →
[Show device Window] from the top menu.
2Select the folder with the file(s) you want to transfer from the [Library] window.
● The music files within the folder appear on the center of the screen.
23
Using Media Studio
ENG
NNootte
e
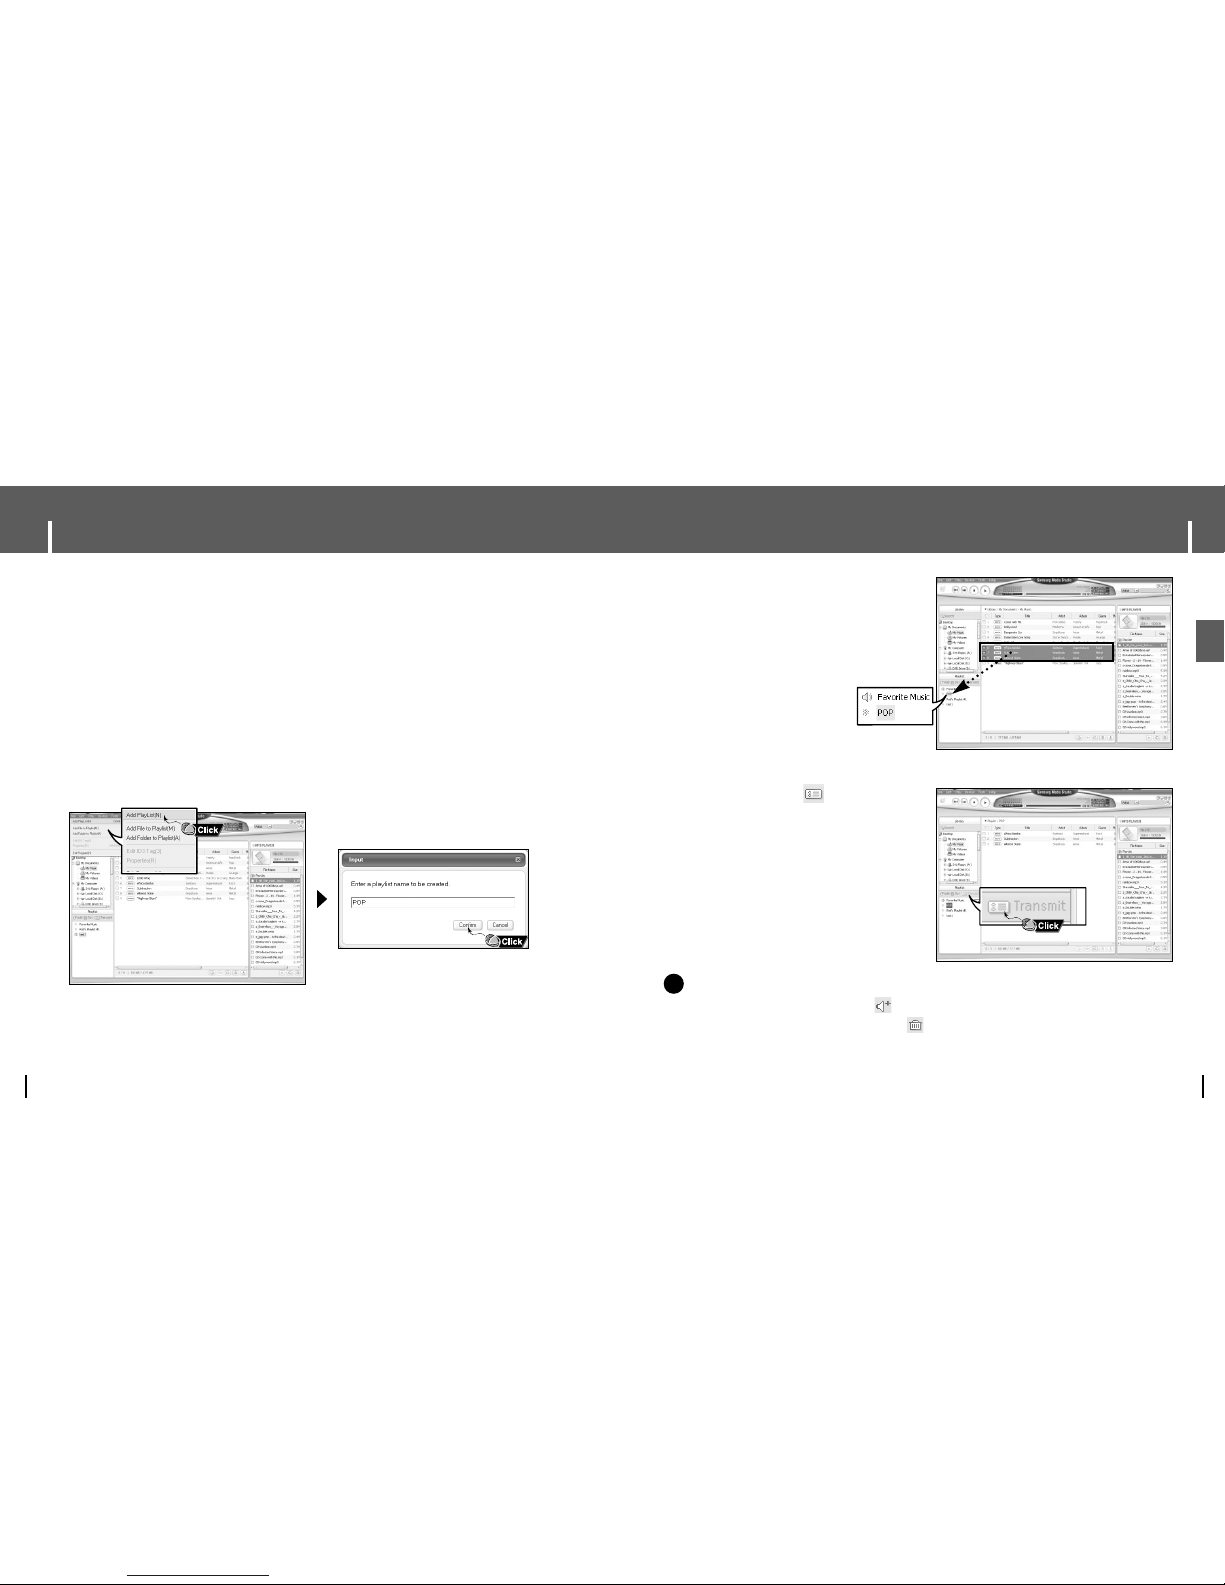
- A new Playlist is created when [Add] button on the Playlist window is pressed.
4Drag & drop the desired files into the
created Playlist.
5Press the [Transmit] button in the
Playlist window after selecting the Playlist.
● Files within the Playlist are transferred
to the player.
● Disconnect the player from the PC and
press the MENU button on the player.
Then, select [Navigation] → [Playlist]
→ [PC Playlist] to view the transfered
playlist.
✍
A selected Playlist is deleted when [Delete] button is pressed.
- Refer to [Help] for more detailed information.
Using Media Studio
22
I Sending Playlist
1Connect the player to PC.
2Press the [File] → [Add Playlist] at the top of the screen.
● Enter the name of Playlist folder when input screen appears.
3Select the folder with the file(s) you want to transfer from the [Library] window.
● The music files within the folder appear on the center of the screen.
25
Using Media Studio
ENG
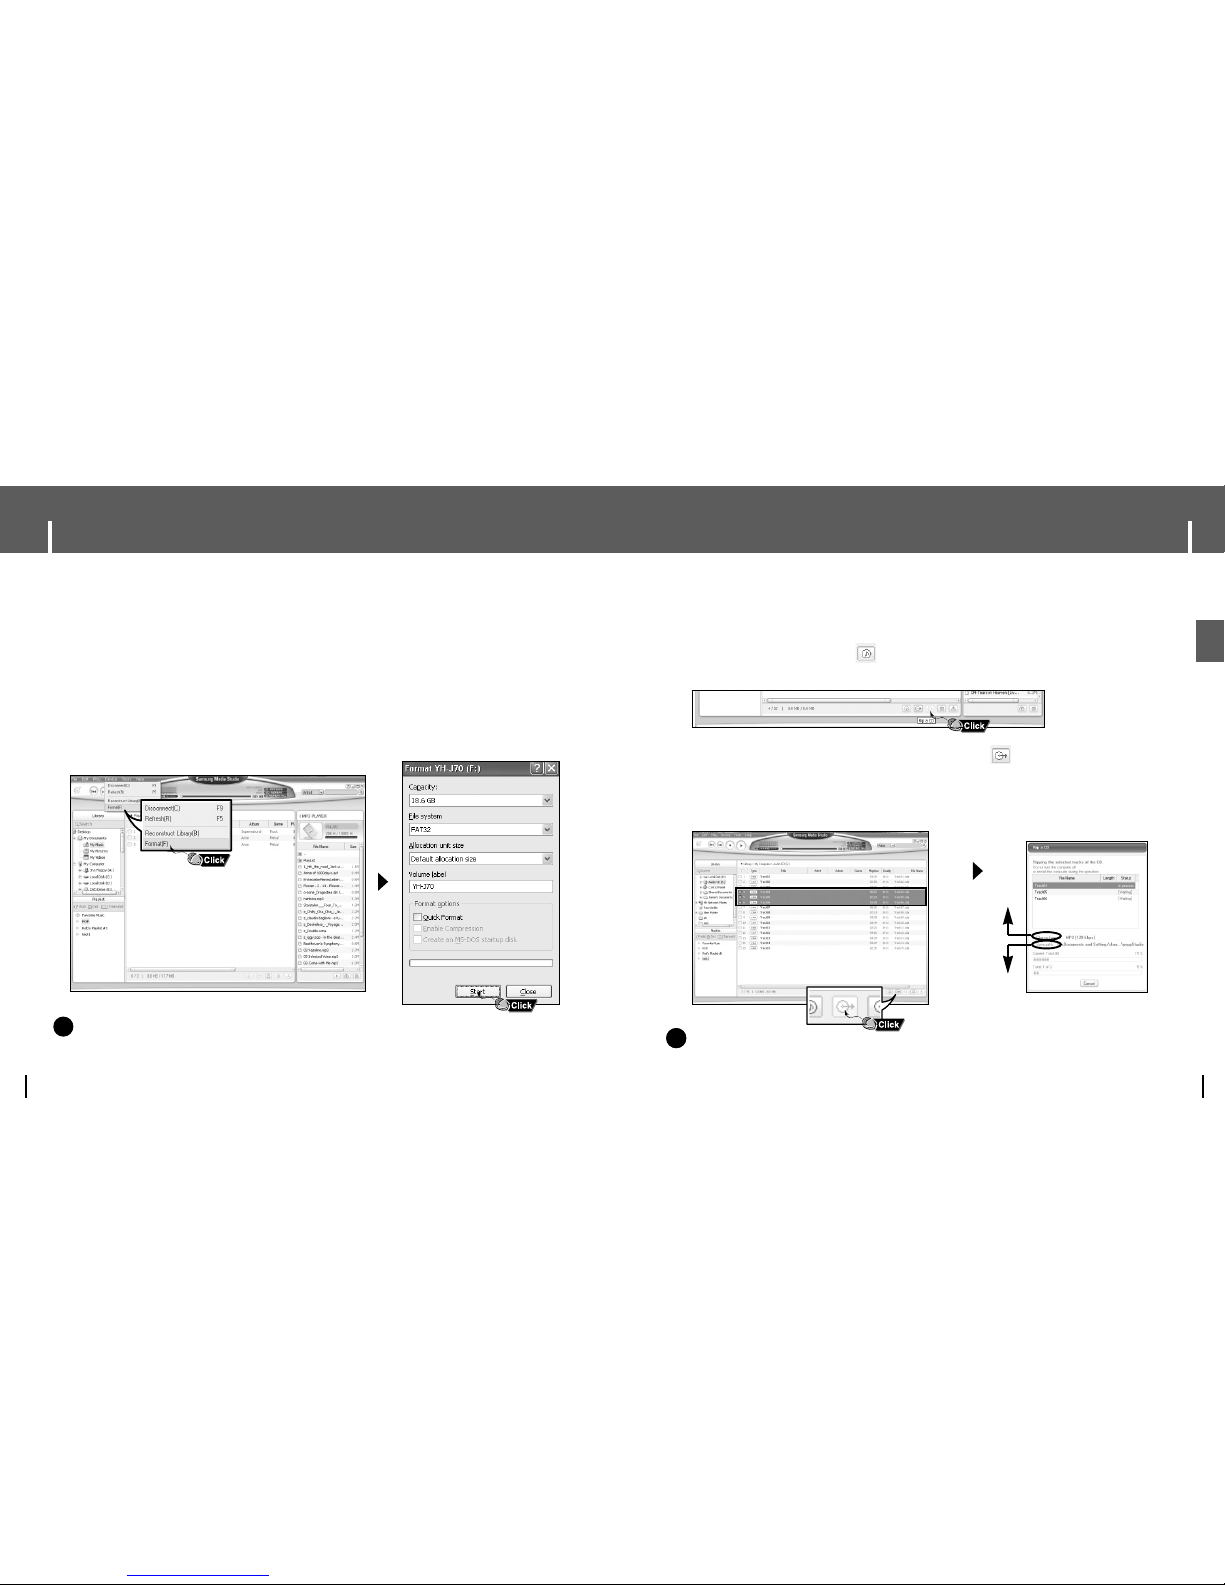
1Insert your CD including tracks to rip into the CD-ROM drive of your PC.
2Press the [Search Audio CD] button on the lower part of the screen.
● The tracks on the CD are displayed.
3Select tracks to be ripped and press the [Rip a CD] button.
● The selected file is converted into an MP3 file.
● Select [Tools] → [Audio Source Format Conversion Settings] on the top of the
screen to change rip settings.
I Ripping Tracks from an Audio CD
NNootte
e
- Refer to [Help] for more detailed information.
Change format
Save path
✍
Using Media Studio
24
1Connect the player to PC.
2Press the [Device] → [Format] at the top of the screen.
3Press the [Start] button when the Format screen appears.
● The memory of the player is formatted and all the saved files will be deleted.
I Formattimg the Player
NNootte
e
- Refer to [Help] for more detailed information.
- If you have formatted the player on your PC, please format it once again using Media Studio.
✍
● Formatting deletes all files on the MP3 player so maximum memory is available for new file
storage. It saves you the trouble of deleting unwanted files one at a time.

27
Using Media Studio
ENG
1Connect the player to PC.
2Press the [Delete] button at the bottom of the connection windows after
selecting required files or folders from the device connection windows.
● A selected folder or file is deleted.
I Deleting a Folder/File
NNootte
e
- Refer to [Help] for more detailed information.
✍
Using Media Studio
26
1Connect the player to PC.
2Press the [Create Folder] button at the bottom of device connection window.
3Enter the name of the new folder when an input screen appears.
● A new folder is created.
● If you open a new folder and transfer a file, the file is transferred to the newly
created folder.
I Creating a Folder
NNootte
e
- Refer to [Help] for more detailed information.
✍
 Loading...