

Samsung yePP YP-90H, yePP YP-90S User Manual

Explorer Usage
Appendix
How to Use yepp Explorer ..............................................................................38
Setting up Options ..........................................................................................39
Copying Files to yepp (PC)..............................................................................40
Copying Files to yepp (Mac)............................................................................42
Deleting Files (PC) ..........................................................................................44
Deleting Files (Mac) ........................................................................................45
Formatting (PC) ..............................................................................................46
Formatting (Mac)..............................................................................................47
Uploading Files (PC)........................................................................................48
Uploading Files (Mac) ......................................................................................49
Change a File Name (PC) ..............................................................................50
Change a File Name (Mac) ............................................................................51
Rearranging Files ............................................................................................52
Installing CD Ripper ........................................................................................53
Description of Buttons......................................................................................54
MENU Table ....................................................................................................56
Customer Support
Precautions ......................................................................................................58
Something Wrong with yepp ? ........................................................................59
Security ............................................................................................................60
Specifications ..................................................................................................61
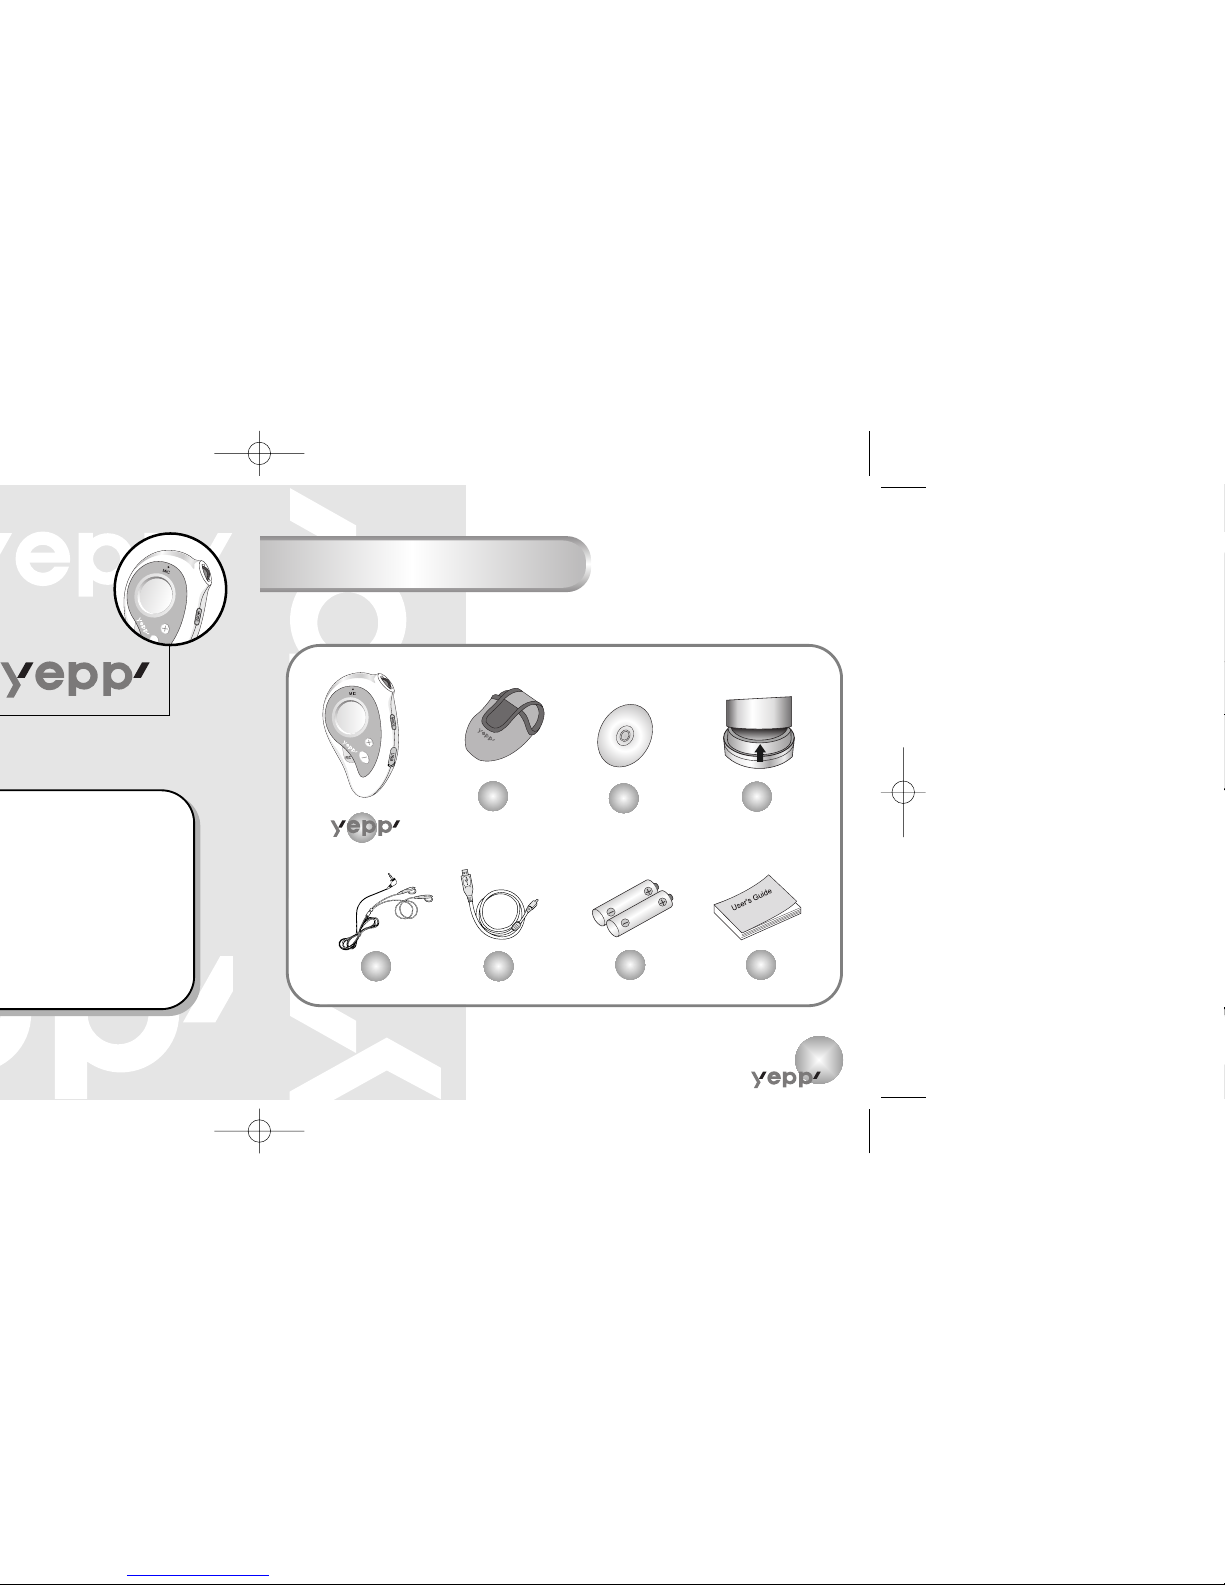
Components
5
Player
Earphones
Two Batteries
(1.5V AAA type)
User’s Manual
Carrying case
USB Cable
Installation CD
Pull the sponge on the
bottom in the direction
of arrow, and there is
an installation CD.
7
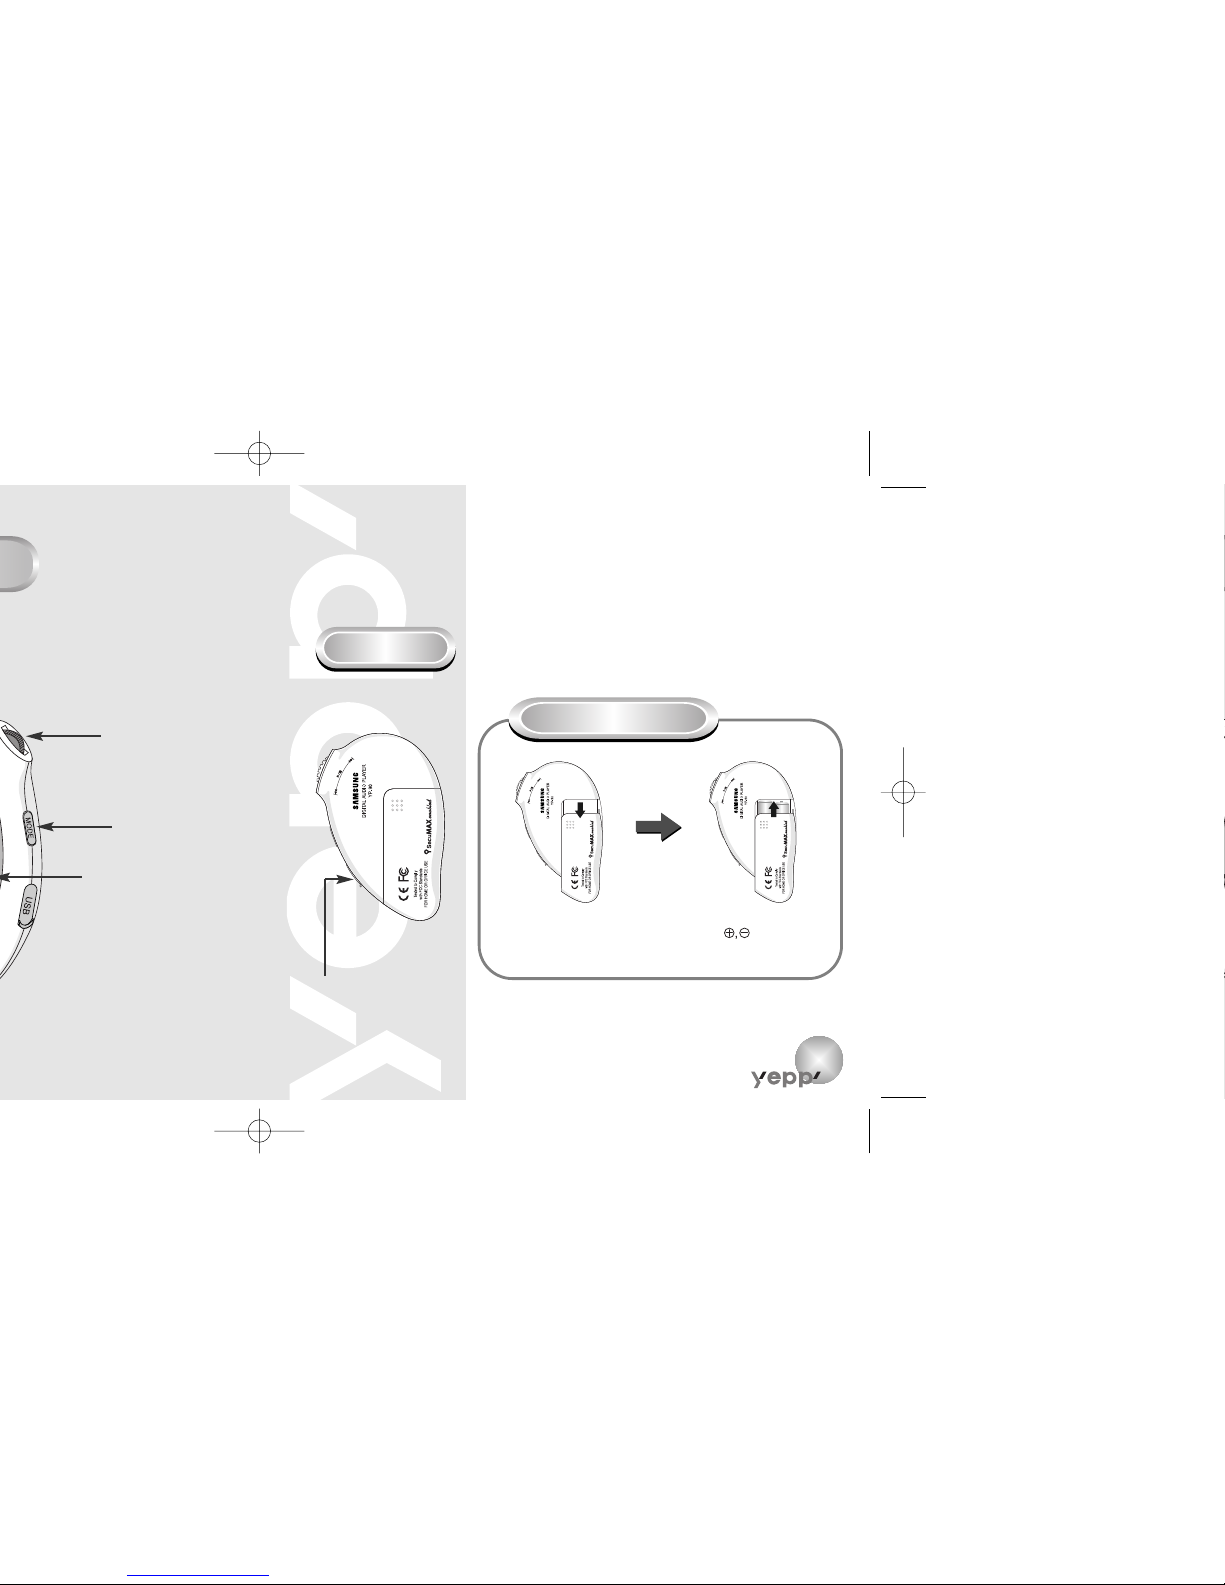
Rear
Play/Stop/
Forward/Backward
Button
Volume
MENU/Mode/Loop
Repeating Button
USB Cable
Connection Port
Inserting batteries
Press and pull the cover in the
direction of the arrow to open it.
Inserting a batteries to the right
poles ( ) and push-close
the cover in the direction the
arrow is indicating
NNNNoooottttiiiicccceeee ::
::
It will be the cause of damage if too much weight
is pressed on the cover.
NNNNooootttteeee ::
::
LCD panel seems to be misty.
Please peel off the tape from
the LCD panel.
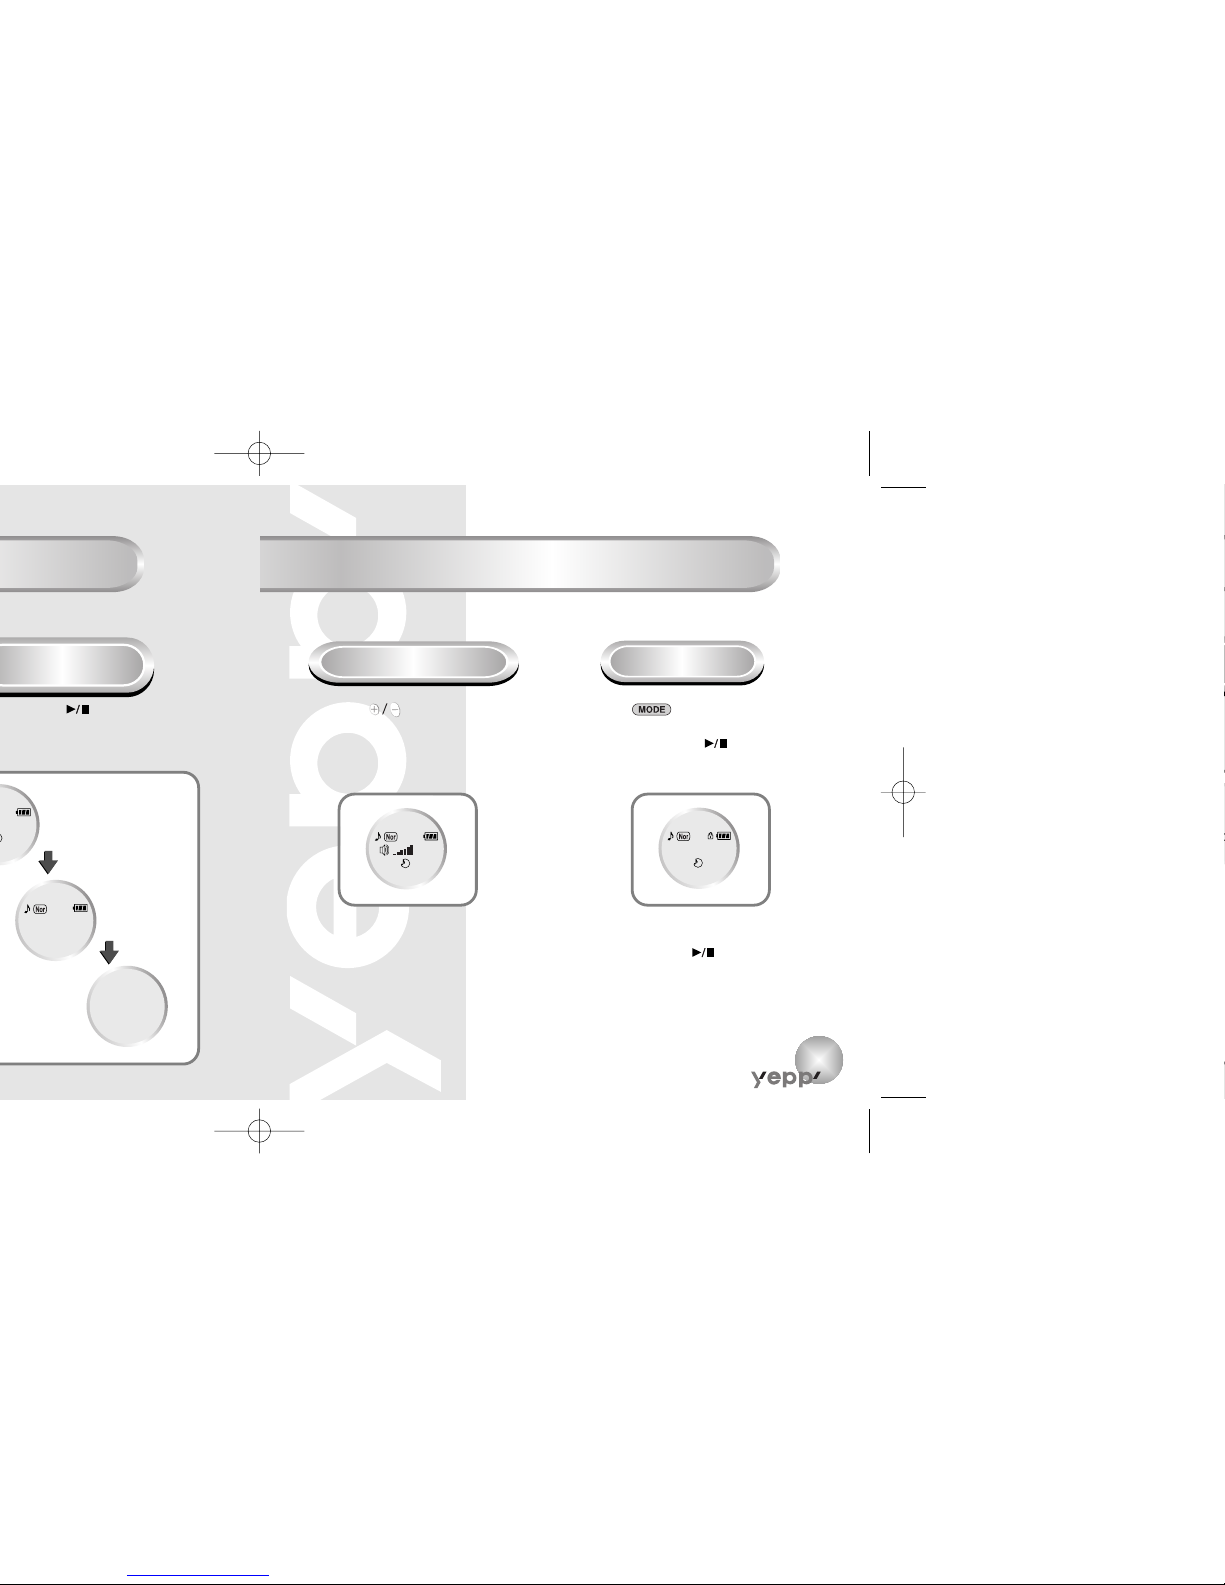
Setting up Volume / Hold Functions
9
(Power Off/Sleep)
Adjusting the Volume
Press the button on the front
adjust the volume while playing.
HOLD Function
Power off
Tr001 STOP
30
Tr001
00:04:35
Tr001 00:04:35
There You’ll Be love
NNNNooootttteeee ::
::
Volume ranges from 00 to 30.
● Press short to adjust step by step.
● Press long to adjust continuously.
Press the key longer and choose 3.
Hold in the MENU mode
➞ 1. Choose the
Confirm. But, press the button longer
(1 second or more) to set HOLD while voice
recording)
NNNNoooottttiiiicccceeee ::
::
Under Hold mode, no key works.
Press the button longer (more
than 1 second) in the HOLD mode to
release.
Recording Voice
11
Press the button longer
(more than 1 second) to start a
voice recording.
Tr001 00:00:01
[REC] 02:15:17
Tr001 00:00:09
Record pause
Tr001 STOP
VI001.WAV
1
Press the button to pause
while recording. Press the
button again to resume recording.
2
Press the button to stop
recording. A new voice file is
created.
3
NNNNoooottttiiiicccceeee ::
::
Recording is done in the order of VI001,VI002..…
● When memory is full, recording stops automatically.
(The available time is displayed on the right from the
center when recording begins.)
● Music mode is switched to voice mode after voice recording stop.
● When recording voice, make sure to record it for longer than 5
seconds. (Recording is not available in case of less than 5 seconds.)
● It is recommended to keep the nuit 10cm away from you in case of
voice recording (If not, the recording quality may be lowered)
R
E
C
R
E
C
13
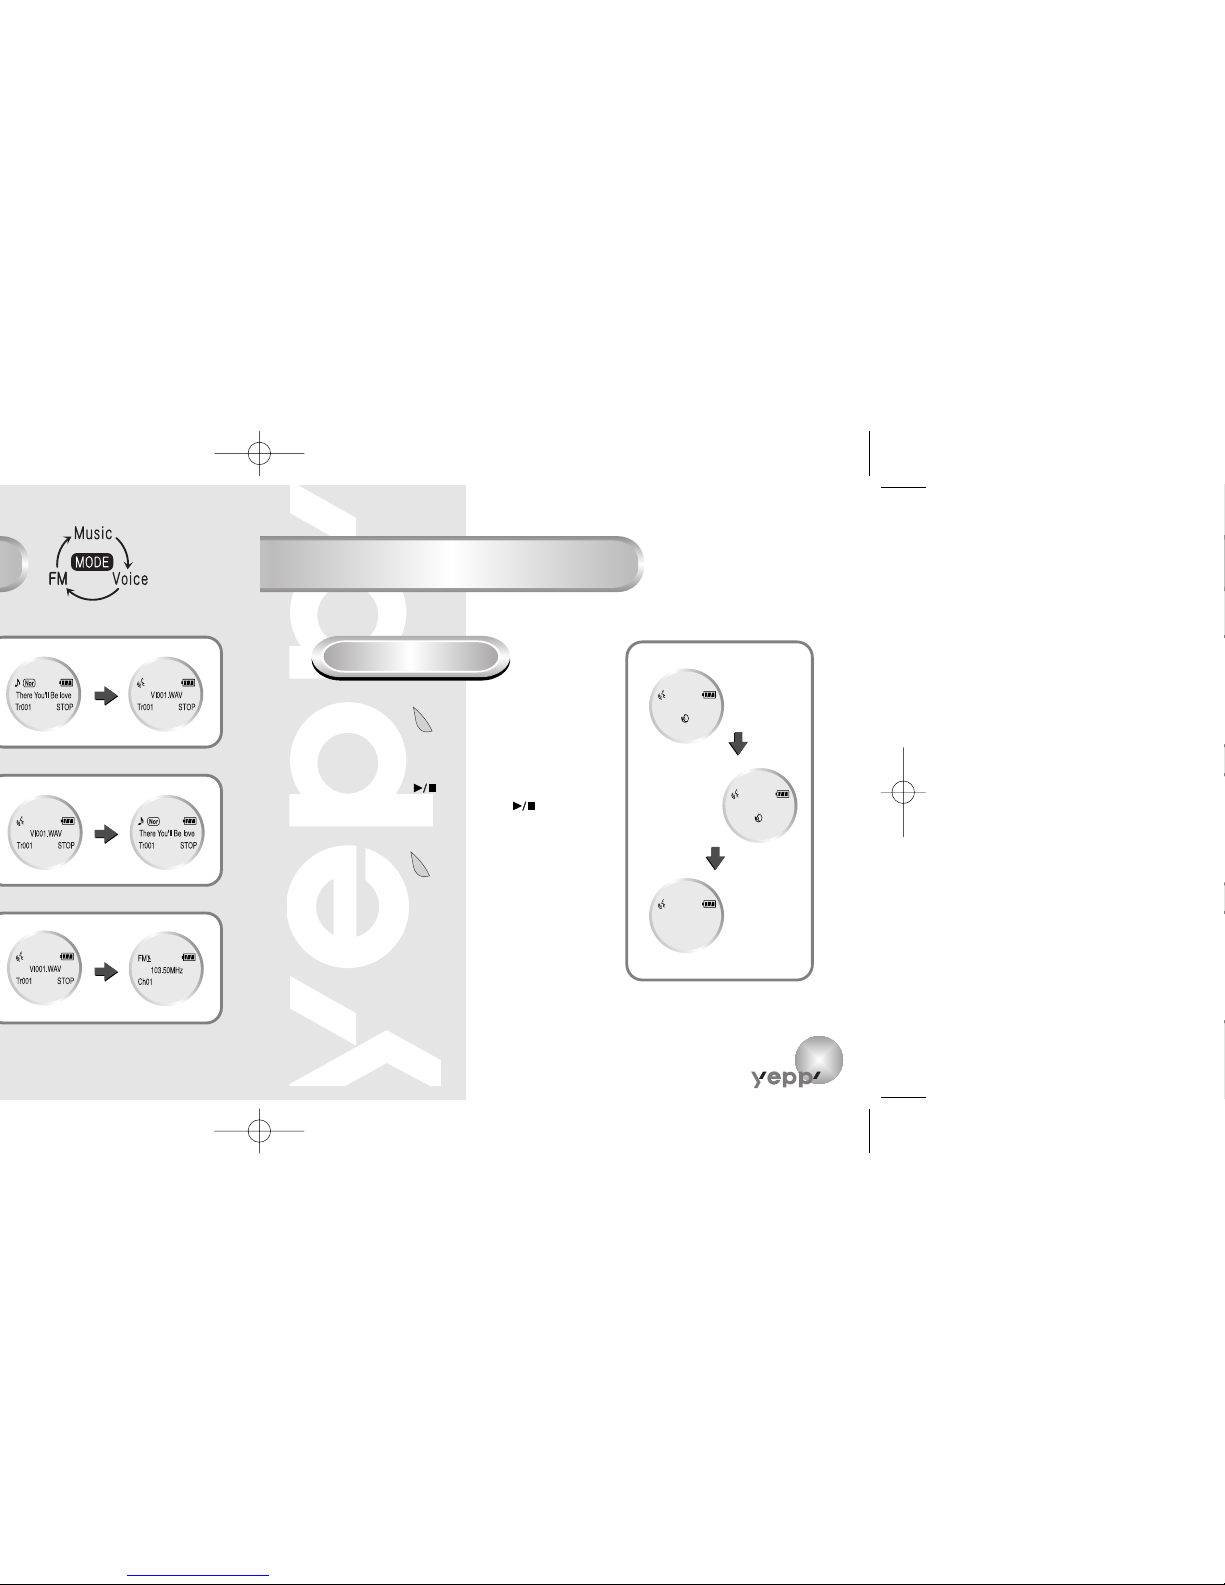
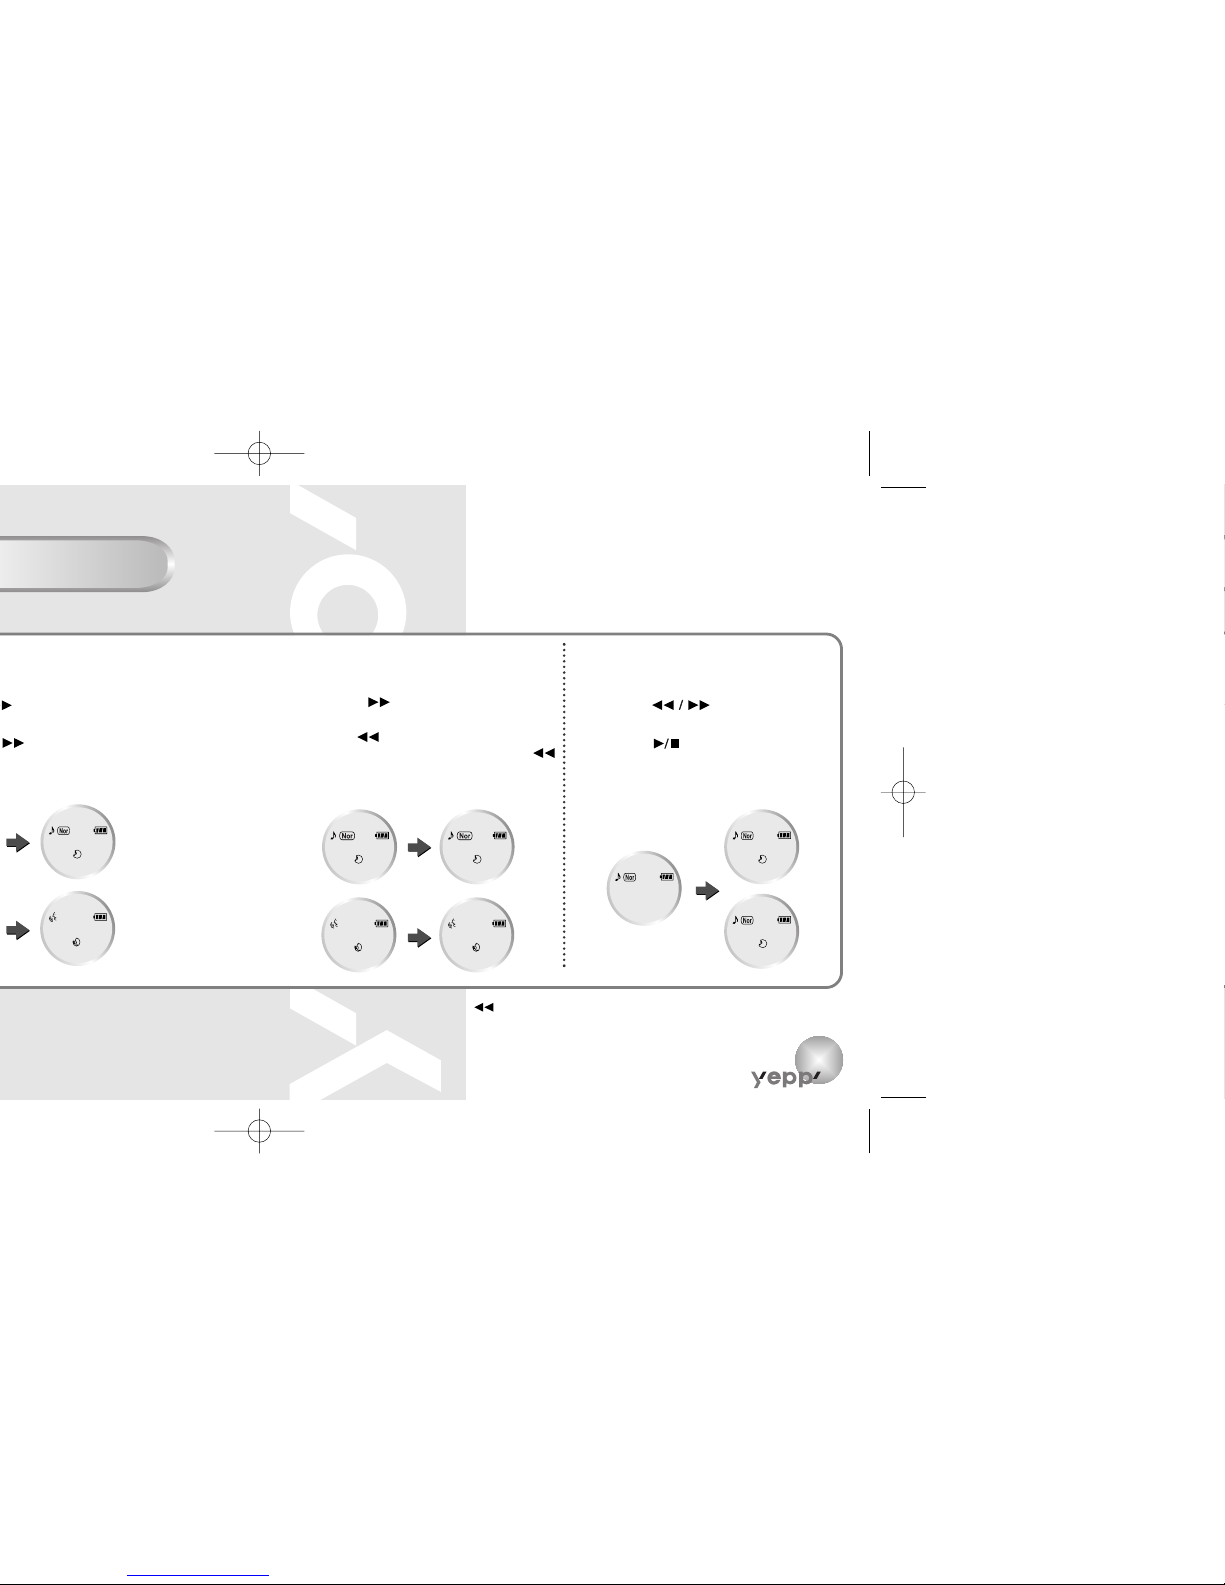
Searching for Music/Voice Files
in Play
● Press the button short while playing
to play the next track.
●
Press the button short within 5 seconds from
the start to play the previous track. Press the
button short after 5 seconds from the start to play
the beginning of the current track.
Searching for Music/Voice Files
in Stop
● Press the button in STOP
mode to skip to the previous or next track.
Press the button to play.
Tr001 00:05:24
Tr001 00:05:24
VI002.WAV
Tr002 00:04:35
Love letter the scent
Tr003 00:00:01
struck by the beauty
Tr003 00:00:01
VI003.WAV
Tr004 00:00:01
VI004.WAV
Tr002 STOP
Love letter the scent
Tr001 00:00:01
Tr003 00:00:01
struck by the beauty
There You'll Be love
NNNNooootttteeee ::
::
● With VBR files, pressing the button within 5 seconds from the start may not result in
playing the previous track.
● With VBR files, the actual running time may differ from that of the player display.
● VBR(Variable Bit Rate) file: MP3 file whose compression rate changes when played.
15
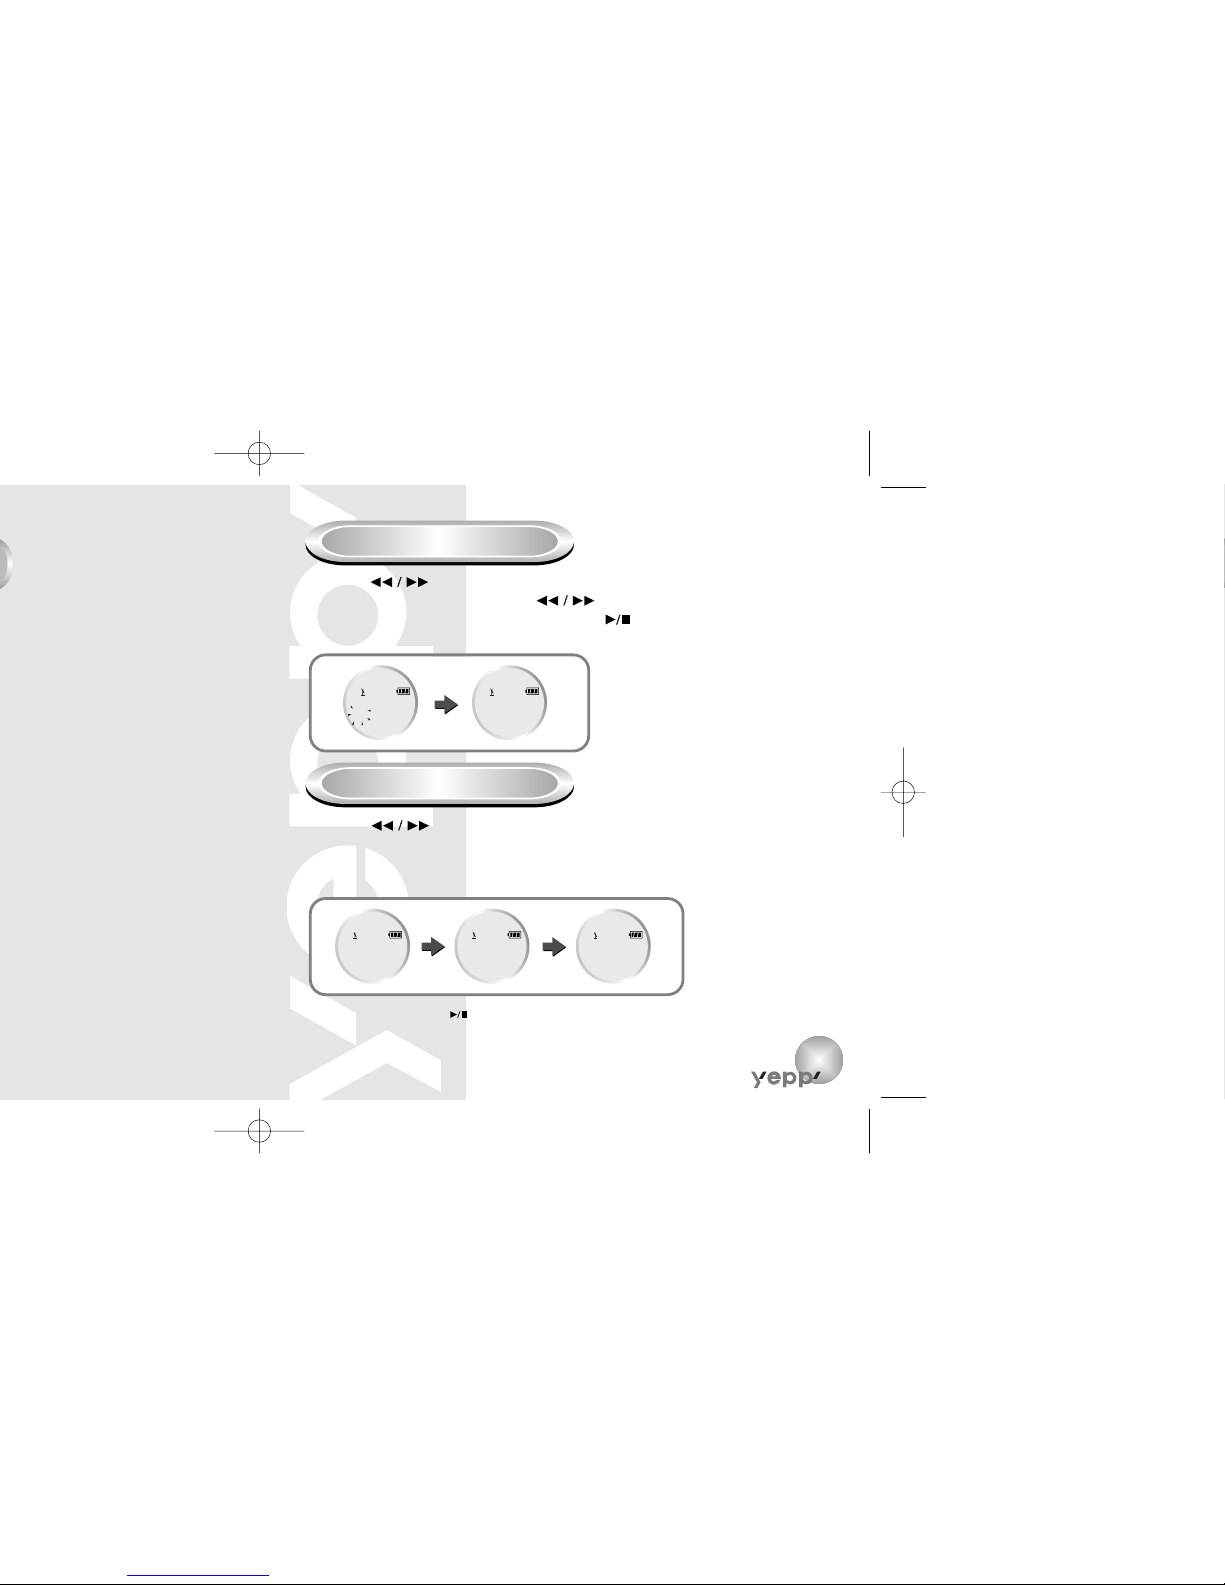
Changing channel frequency
Press the button longer from the channel desired to change
frequency for Auto Search. Press the short during flickering ‘Ch’
to select a desired frequency and then press the button longer to
store the appropriate frequency.
FM
88.80MHz
Ch02
FM
88.80MHz
Ch02
Automatically storing frequency
Press the button longer during the FM reception and then press
the button short during flicking ‘Ch’ (press the button longer once more to
cancel the setting) to search frequencies automatically and to store them in
10 channels respectively (Auto Search).
FM
88.80MHz
Ch01
FM
89.10MHz
Ch02
FM
93.50MHz
Ch03
NNNNooootttteeee ::
::
If you press the button during Auto Search, it will be switched to the modes storing
the channel searched and of manual search for the channel currently being searched.
NNNNoooottttiiiicccceeee ::
::
yepp Explorer is not supported in the FM mode.
To use the yepp Explorer in the FM mode, switch to the Music mode
or Voice mode.
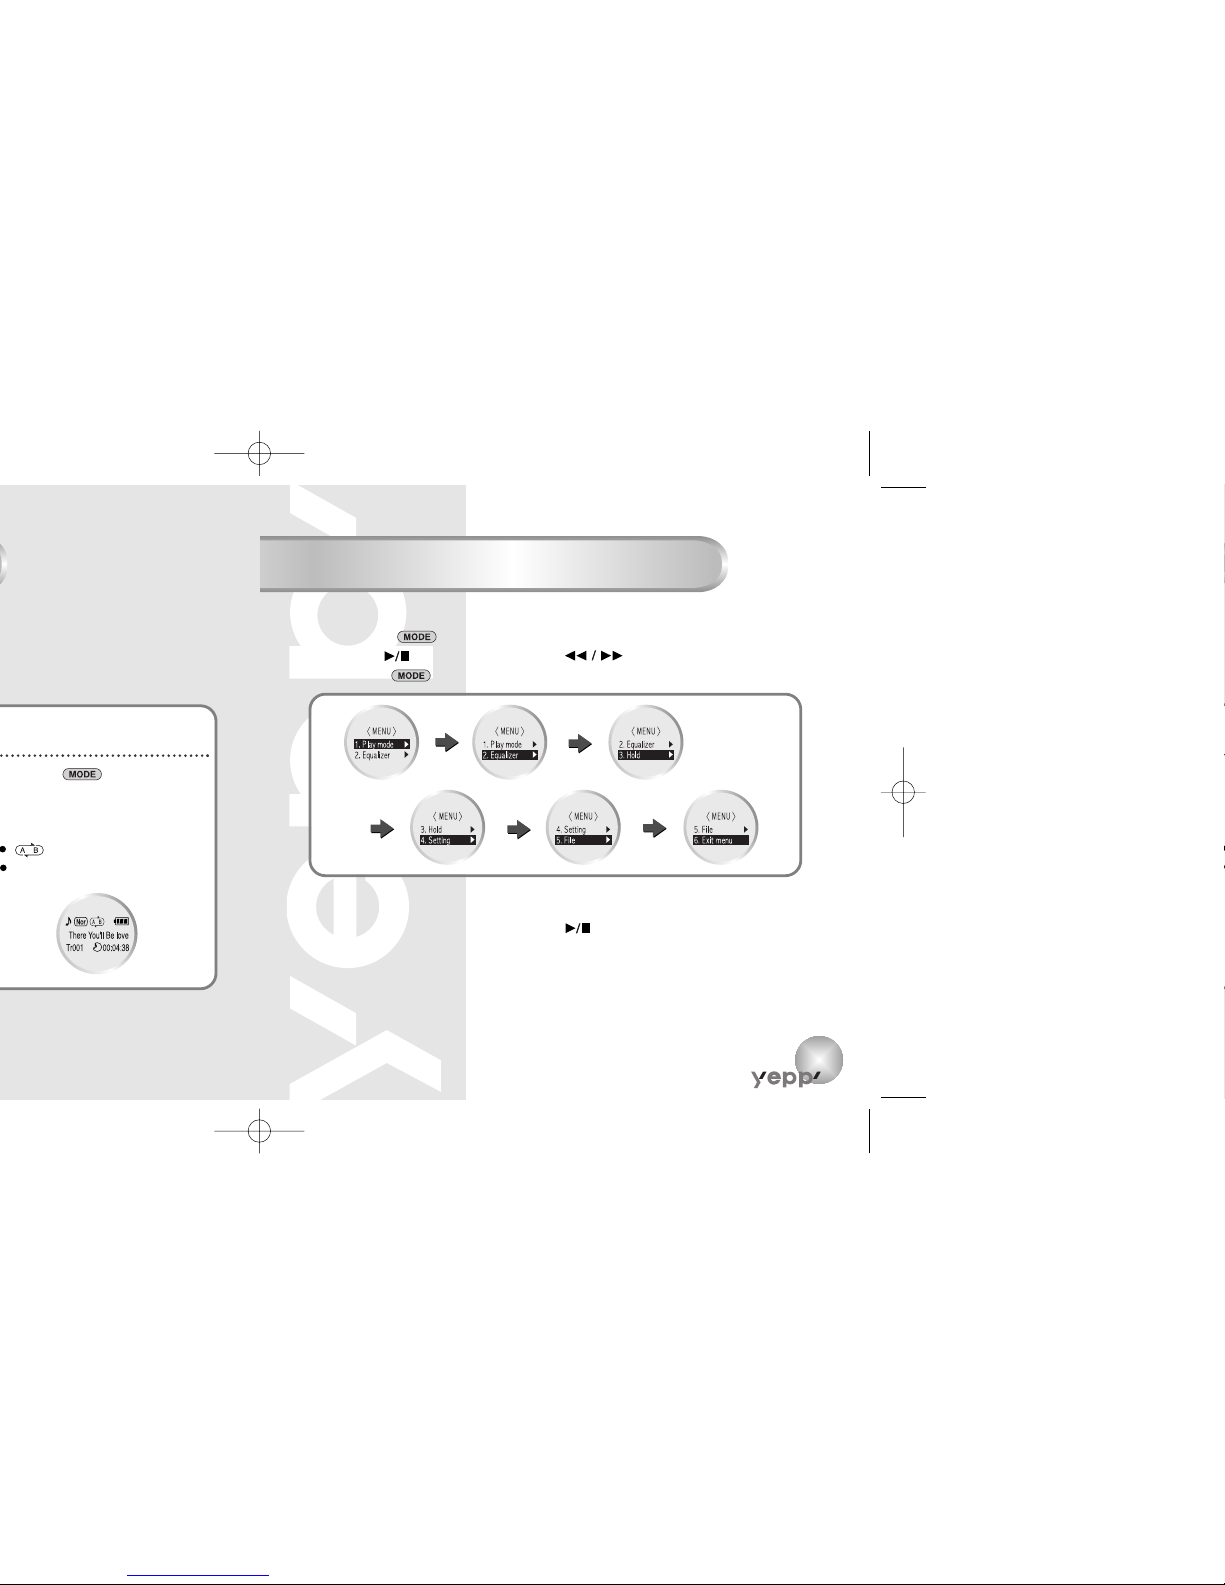
Setting up MENU
17
Press the button short at
the last point of the loop.
appears in the display screen.
The loop is repeatedly played.
● Play mode : To select track repeating mode.
● Equalizer : To use equalizer function
● Hold : To set the Hold function(Press the button for more
than 1 second in the play or stop mode to release it.)
● Setting : To change the basic setup options of the display.
● File : To delete or format music/voice files.
● Exit menu : To exit MENU
● Press the button longer than 1 seconds to switch to MENU mode.
● Use the button to select and the button to move.
● Press the button one more time to cancel the MENU mode.
NNNNooootttteeee ::
::
● In MENU, Go up can be used to exit the current setting.
● In MENU mode, no input for 15 seconds will cancel the mode.
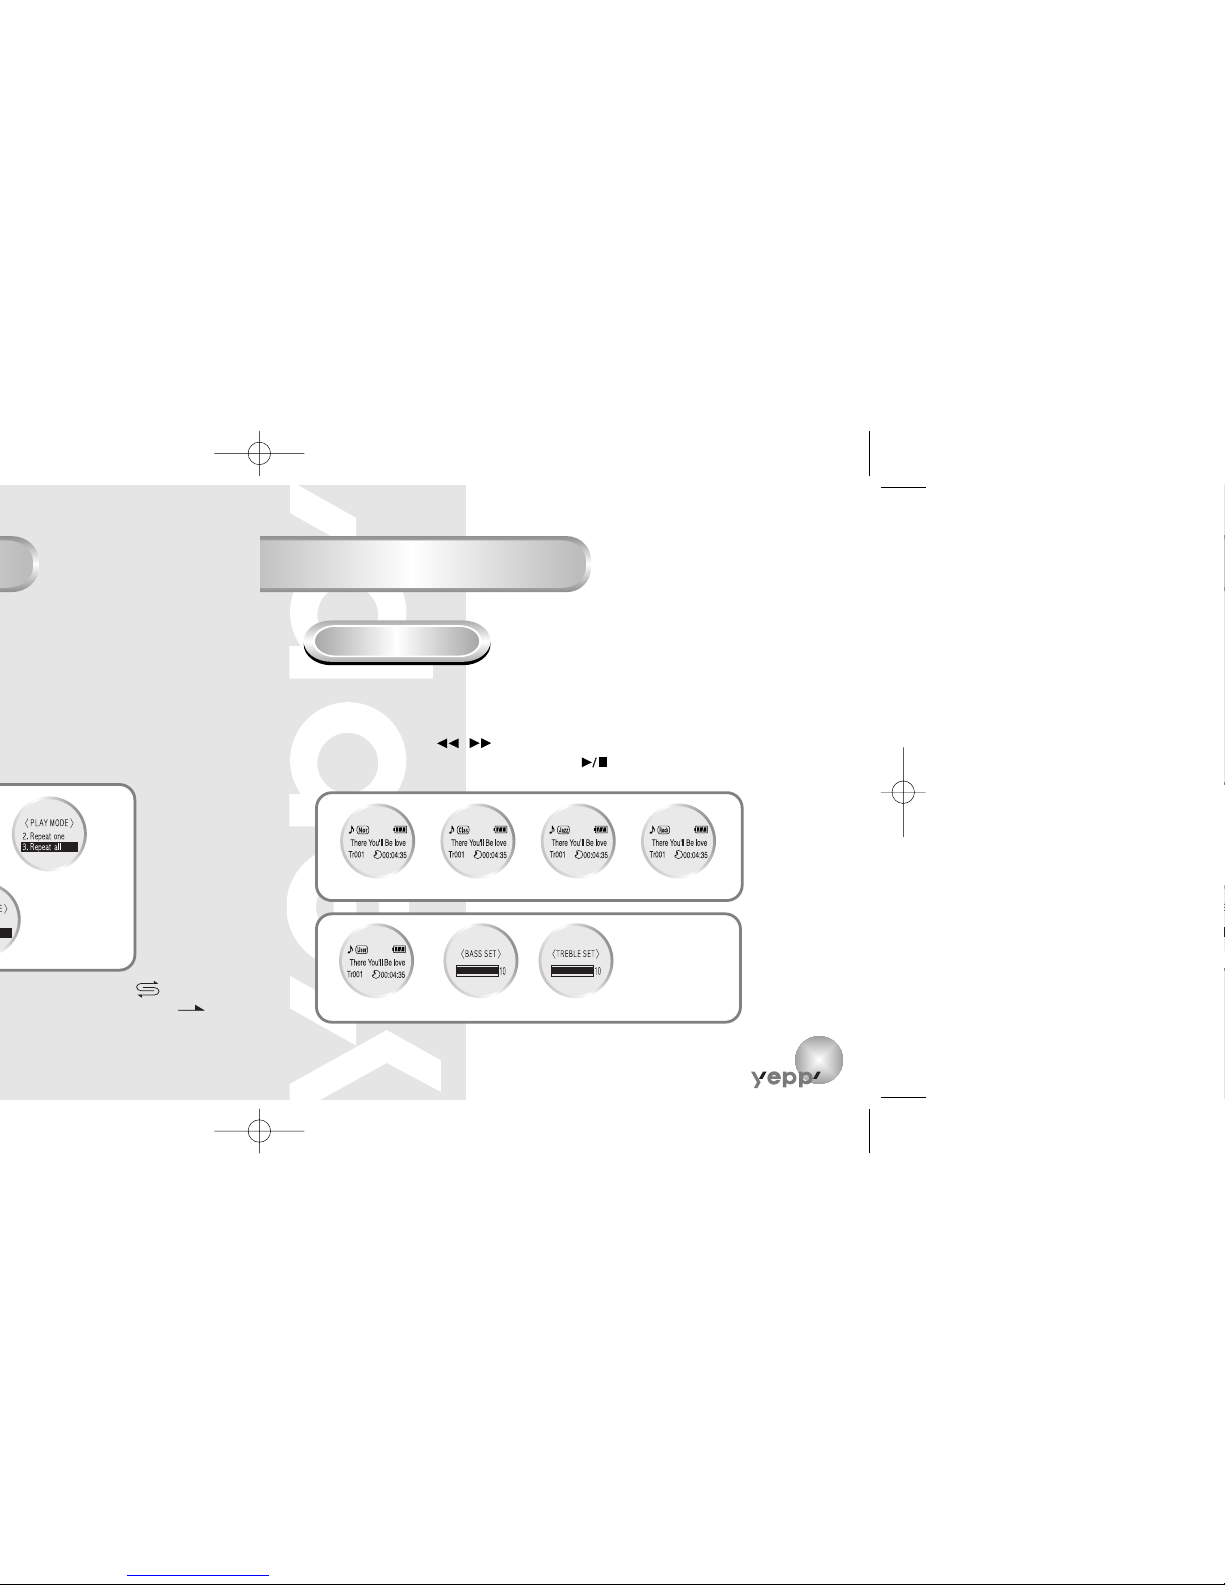
Setting up EQ
19
EQ Function
In MENU, select 2. Equalizer.
1
In EQ, use the / button to move to the tone you
want (out of the 5 tones) and press the button to select.
2
Intro
Normal Classic Jazz Rock
USER
NNNNooootttteeee ::
::
You can adjust Bass and Treble in the USER mode.
 Loading...