

Samsung VC-8916V Disassemble
3. Disassembly and Reassembly
SAMSUNG ELECTRONICS CO., LTD
3
3-1
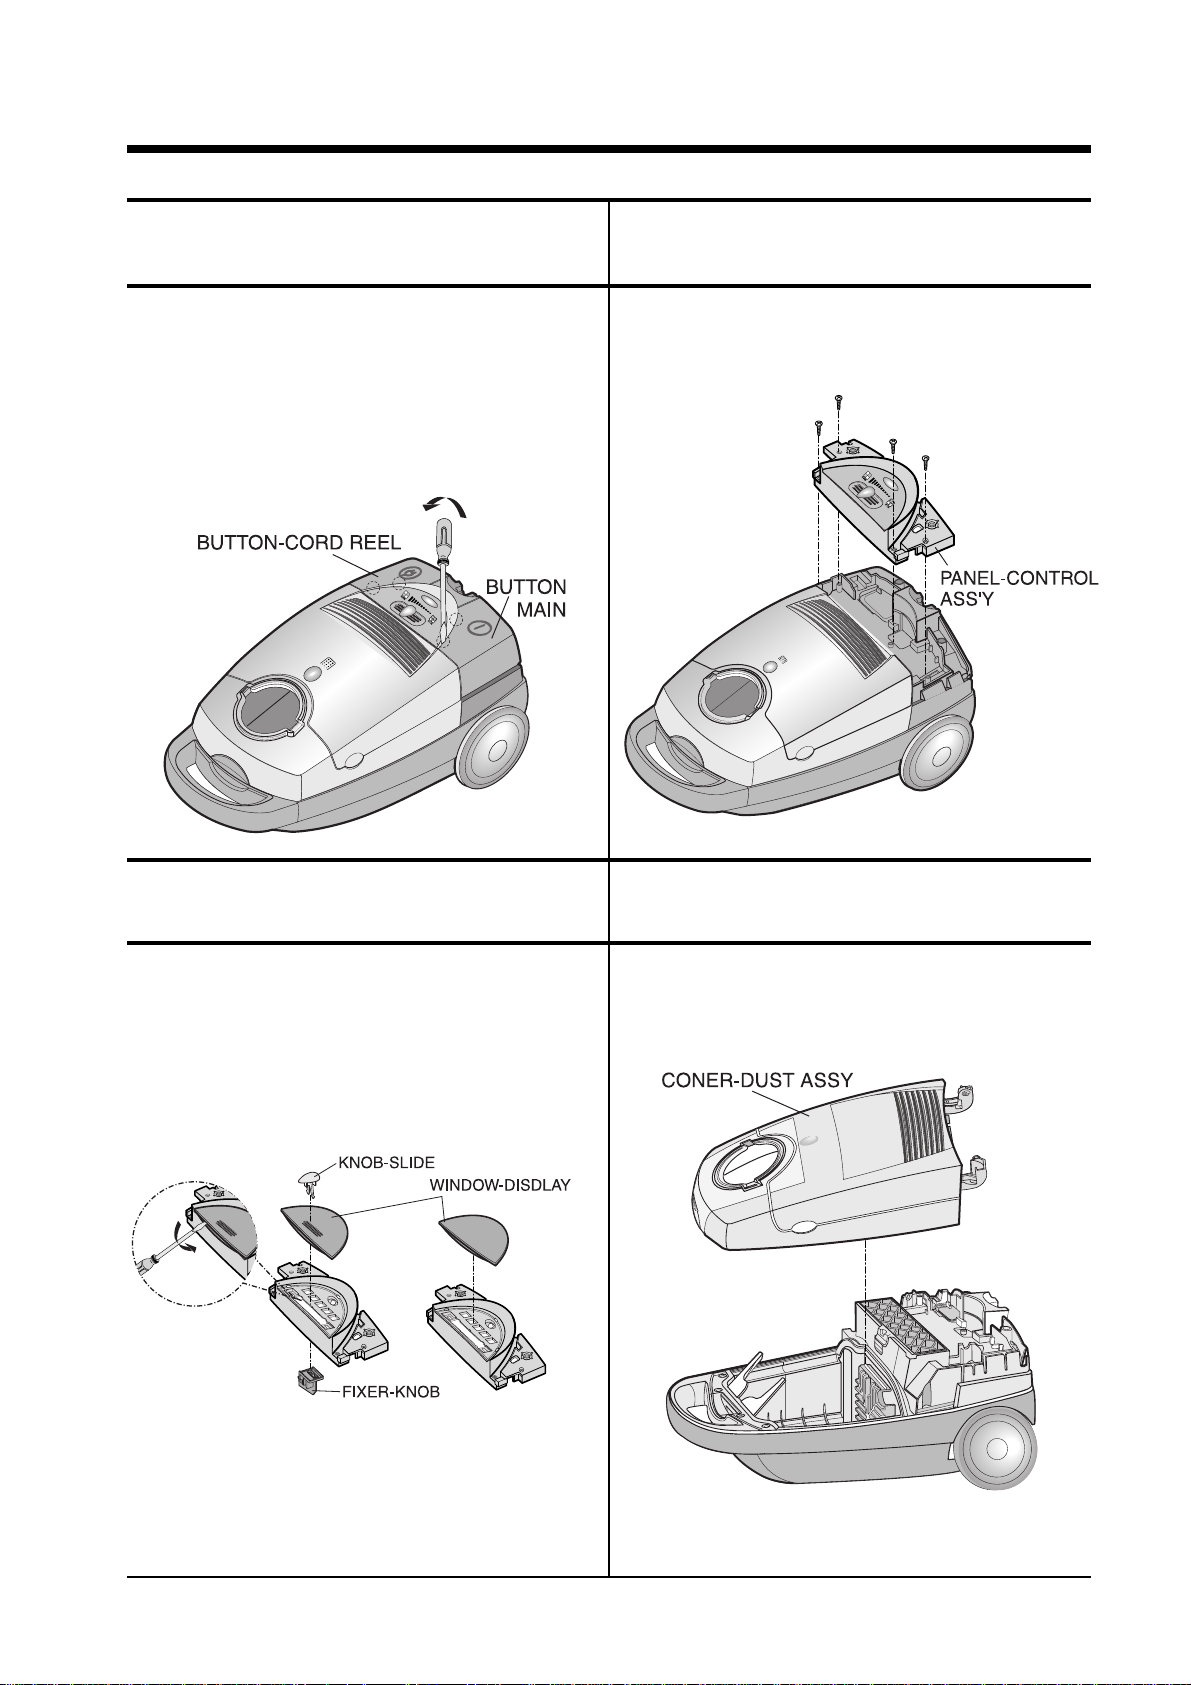
Removal of BUTTON-MAIN the
BUTTON-CORD REEL.
3-3 Disassembly of PANEL-CONTROL
ASS’Y
3-4 Removal of COVER-DUST ASS`Y
Separate the wire-connector(depending on model) and
detach
COVER-DUST ASS`Y
1) Disassemble FIXER-KNOB(depending on model).
2) Disassemble WINDOW-DISPLAY with a flat head
screw driver.
1)
Detach BUTTON-MAIN and BUTTON-CORD REEL
with a flat head screw driver
3) Release 4 screws and detach PANEL-CONTROL ASS`Y
with a screw driver.
3-2
Disassembly of P ANEL-CONTROL
ASS`Y

4
SAMSUNG ELECTRONICS CO., LTD
3-5 Disassembly of COVER-DUST ASS`Y
3-6 Removal of main PCB assembly 3-7 Removal of BODY -CONTROL ASS`Y
1) Loosen 5 screws and detach BODY-CONTROL ASS`Y
1) Remove the connector-wires from PCB.
2) Loosen the screw and remove PCB.
1) Open COVER-ATTATCHMENT ASS’Y fully and
disassemble it widening both hinges.
2) Loosen 5 screws and separate COVER-DUST from
COVER-Dust Low. Disassemble CLAMPER-DUST
with a flat head screw driver.
3)
Remove CAP-SLIDE ASS`Y, DAMPER-ASS`Y and
INDICATOR-ASS`Y.
4)
Disassemble GUIDE-TURNING UP and GUIDE-
TURNING LOW with a flat head screw driver and detach
W/HARNESS-COVER DUST(depending on model).
 Loading...