

Samsung SENS Q40, RIMINI NP-Q40 Service Manual
SENS
Q40
RIMINI
NP-Q40
SERVICE
Manual
If there are the contents not included in this book, please refer to K-zone service manual
SENS Q40
1. High performance Note pc
-. Intel Napa Platform with
Mobile Centrino Technology
-. High-Performance Single Core
2. Comvenient Management
-. 12.1" WXGA Super Bright Glare LCD
-. Port Replicator(X-Dock) support
FEATURES
-. AVS, SRS Sound, Bluetooth
4-in-1 Multi Card Slot, DMB

- 이 문서는 삼성전자의 기술 자산으로 승인자만이 사용할 수 있습니다 -
- This Document can not be used without Samsung's authorization -
Table of Contents
1. Precaution
1) General after sales Service Precautions
2) Safely Precautions
3) Ground
4) Static Electricity Precautions
2. Introduction and Specification
1) Introducion
2) Specification
3) Model Comparison
4) Wireless LAN Specification
5) Option list
6) Separate sales list
3. Function
1) Construction of system
2) Key board
3) Multi card slot
4) PC card slot
5) SPDIF Port
6) DMB
7) WLAN
8) Description of Main board
4. Disassembly and Assembly
1)Q40DisassemblyandAssembly
5. Troubleshooting
1) General
2) Debugging Flow Chart
3) System Diagnosis
4) H/W Troubleshooting
5) Device settings Related S/W Diagnosis
6) Thermal control
7) Battery Use time
6. Exploded view(1)
1) LCD Back Assy
2) LCD Back Assy List
3) LCD Main
4) LCD Main List
5) Housing Top Assy
6) Housing Top Assy(List)
7) System Main
8) System Main(List)
7. Schematic
1) SYSTEM

- 이 문서는 삼성전자의 기술 자산으로 승인자만이 사용할 수 있습니다 -
- This Document can not be used without Samsung's authorization -
8. System Block Diagram
1) Block diagram
9. Exploded view(2)
1) Q40 Top
2) Q401 Bottom
3) LCD
10. Part list
1) SYSTEM
11. References
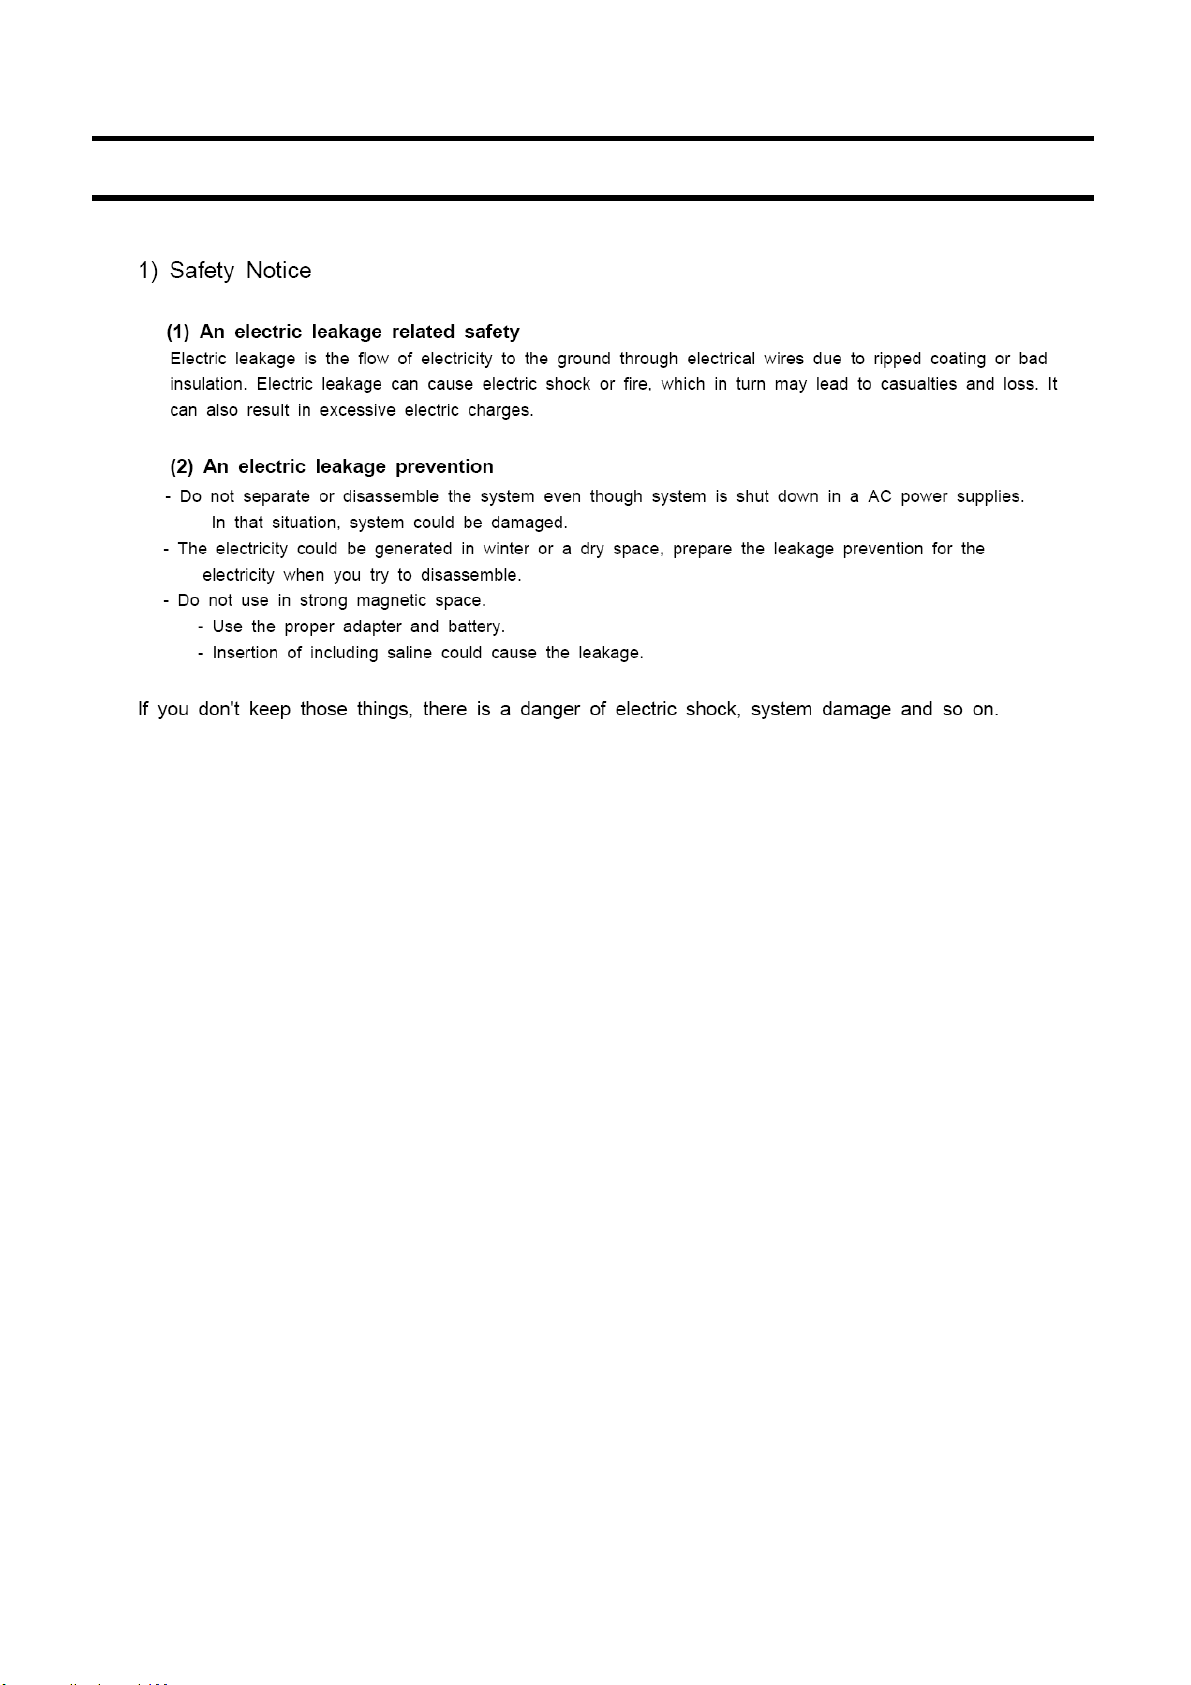
1) Safety Notice
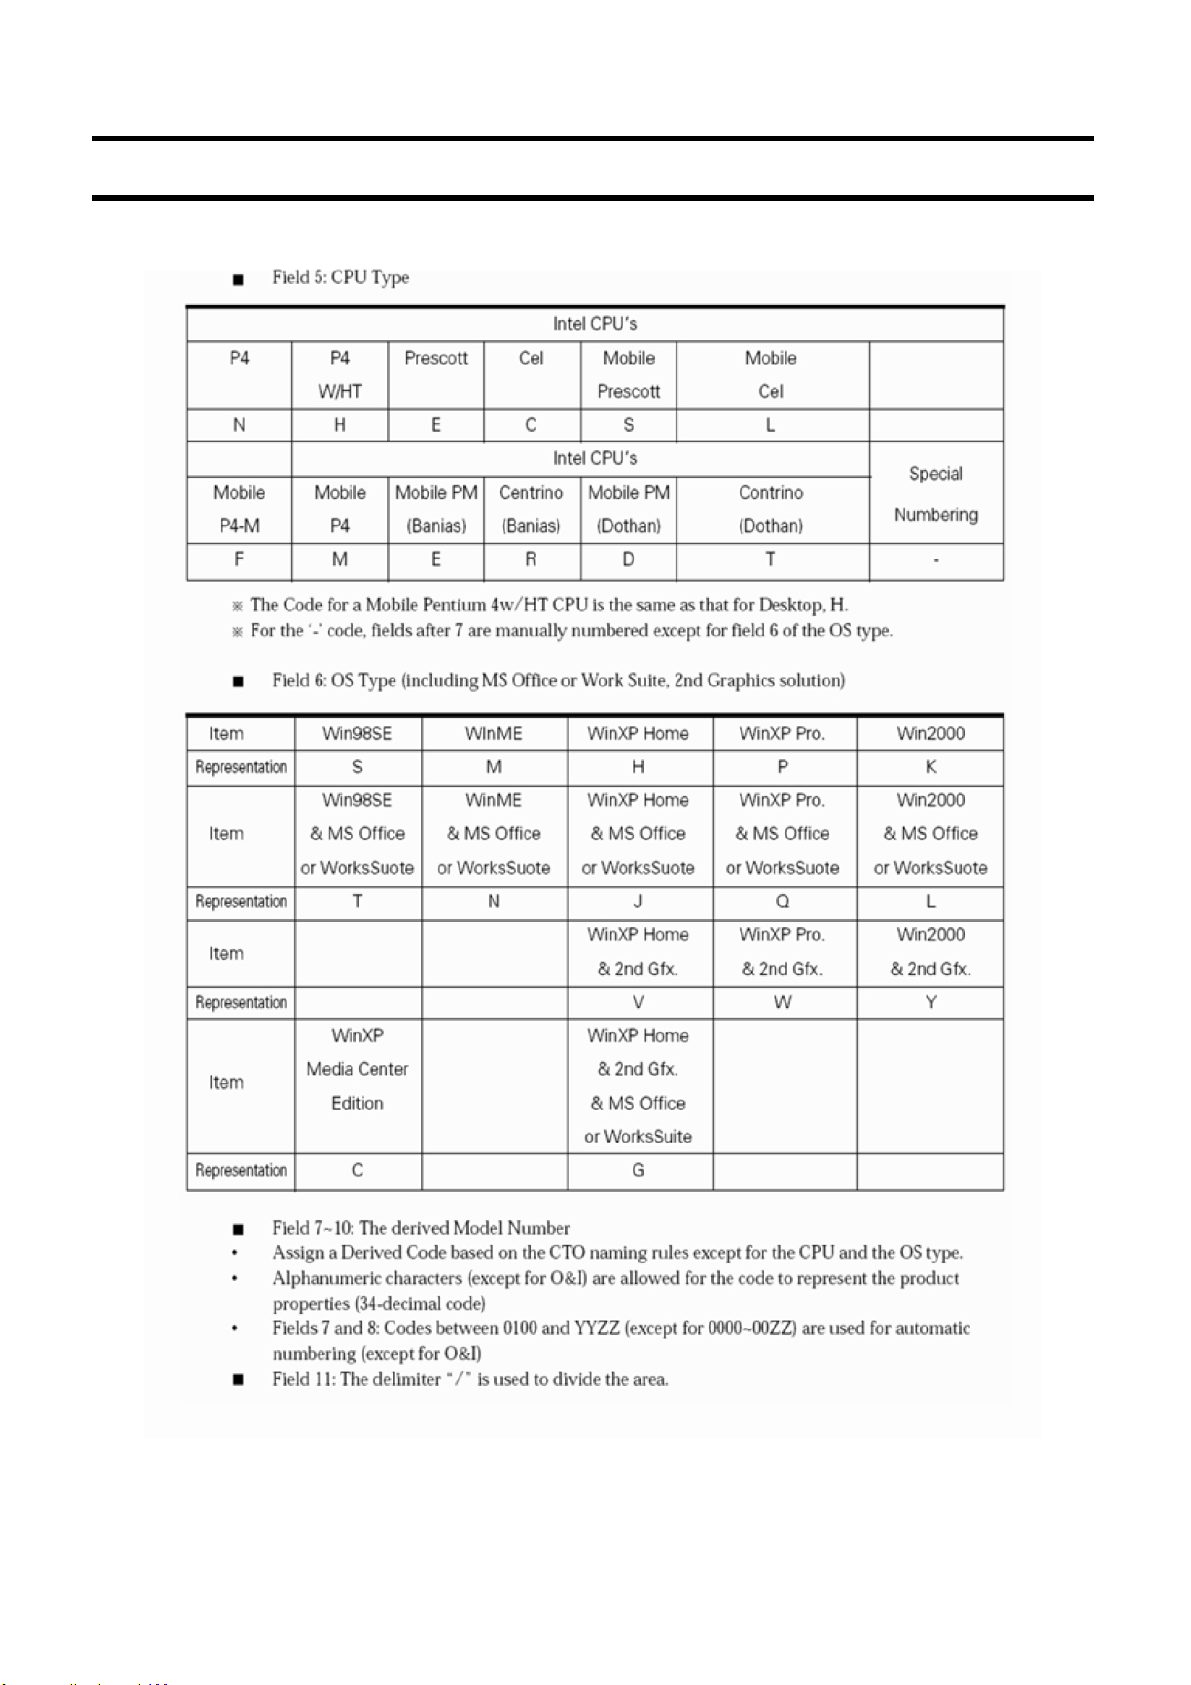
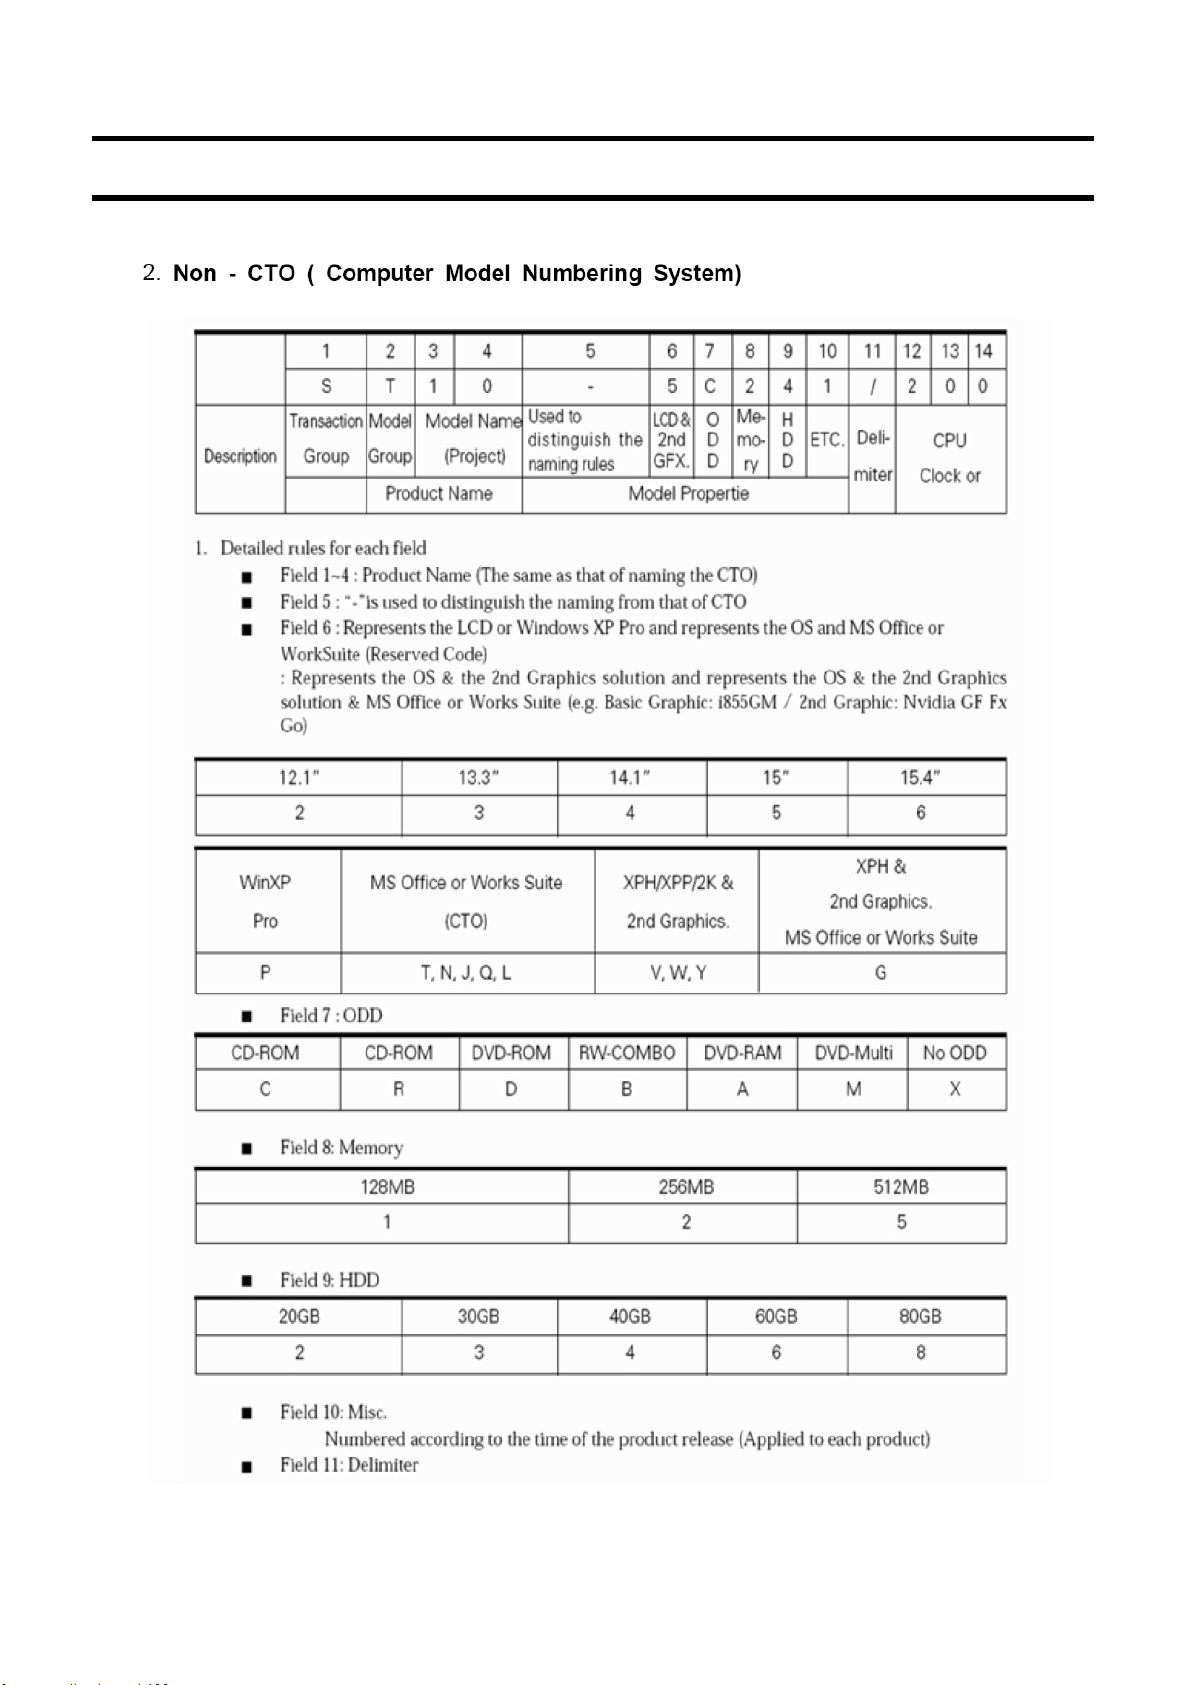
2) Model Numbering Rule
3) Glossary
4) Hard Ware Upgrade

This Document can not be used without Samsung's authorization.
1. Caution
SAMSUNG Q40 < 1 - 1 >
11. References
SENS Q40 < 11 - 1 >

11. References
SENS Q40 < 11 - 2 >
11. References
SENS Q40 < 11 - 3 >
11. References
SENS Q40 < 11 - 4 >

11. References
3
SENS Q40 < 11 - 5 >
11. References
SENS Q40 < 11 - 6 >
11. References
SENS Q40 < 11 - 7 >
11. References
SENS Q40 < 11 - 8 >
11. References
SENS Q40 < 11 - 9 >
11. References
SENS Q40 < 11 - 10 >
11. References
SENS Q40 < 11 - 11 >
11. References
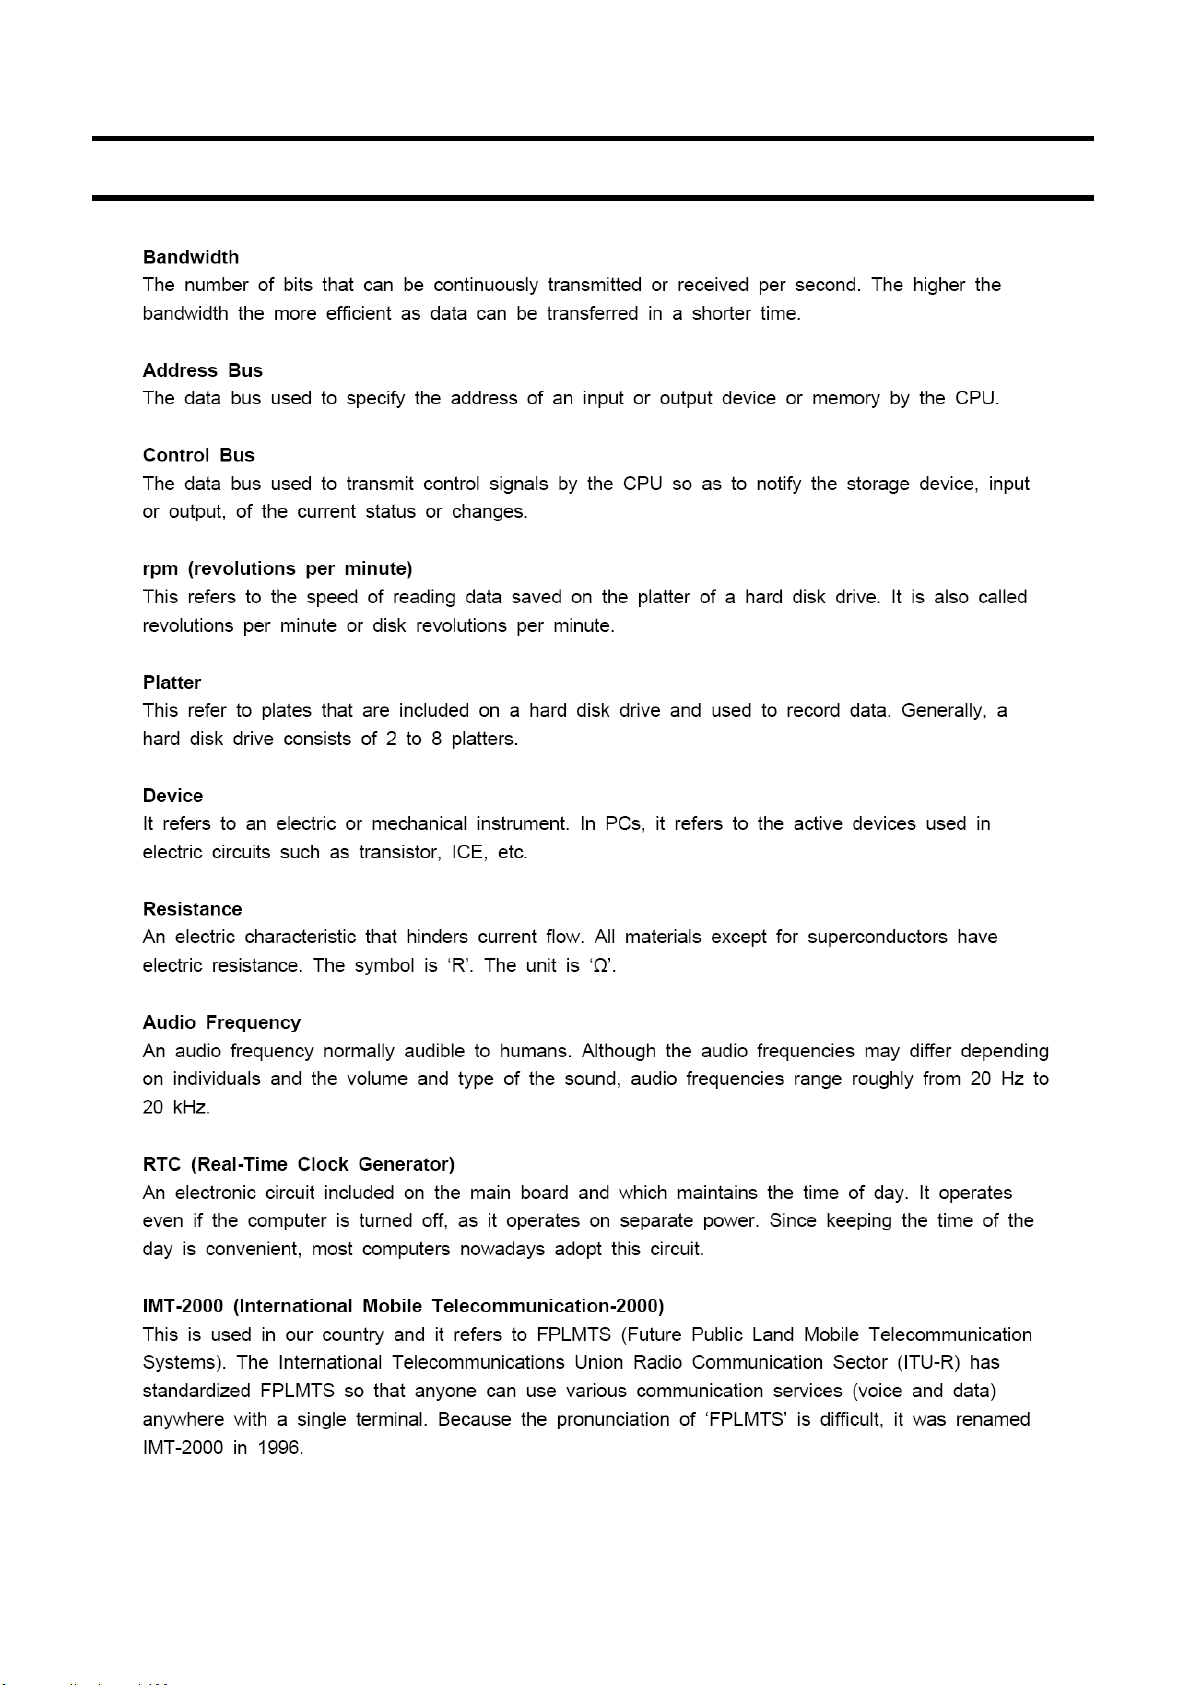
4) Hard Ware Upgrade
(1) Memory Upgrade
1.RemovetheKeyBoardscrew(7points)
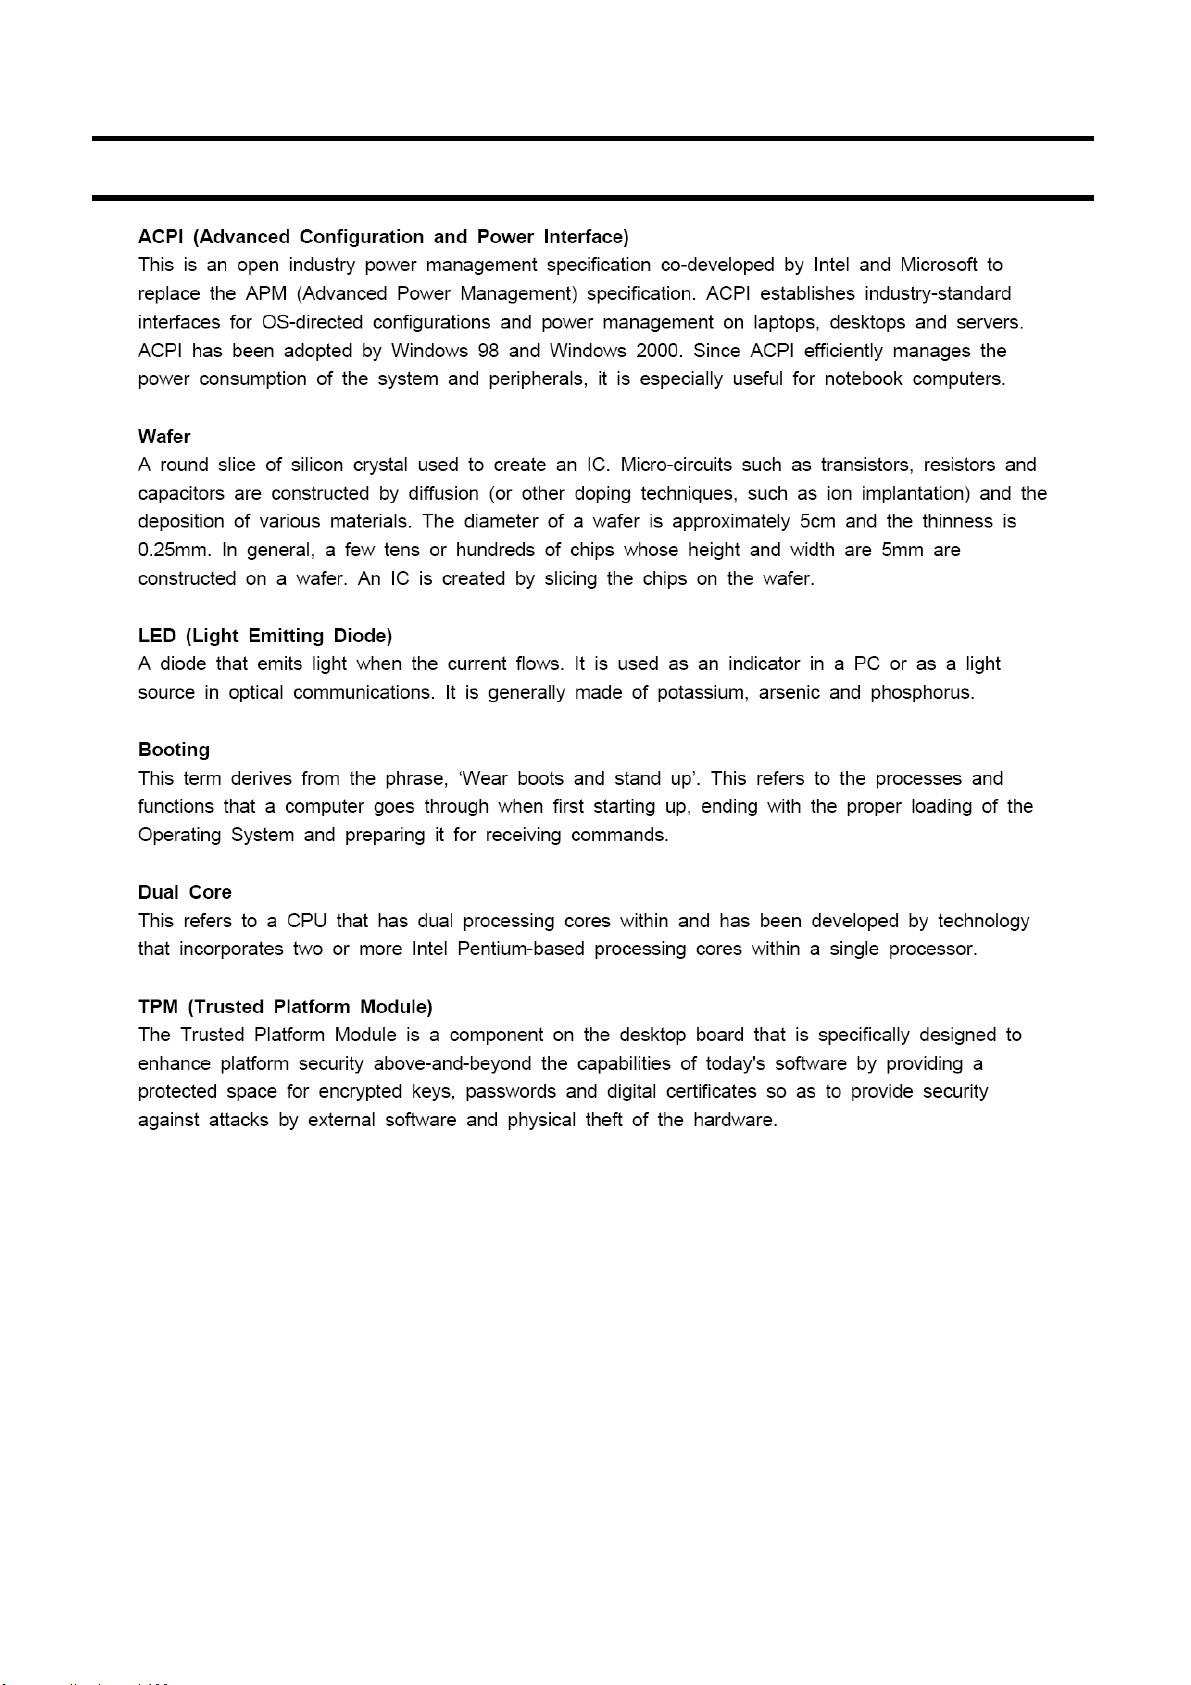
2. Put down top keyboard hook and lift up
keyboard
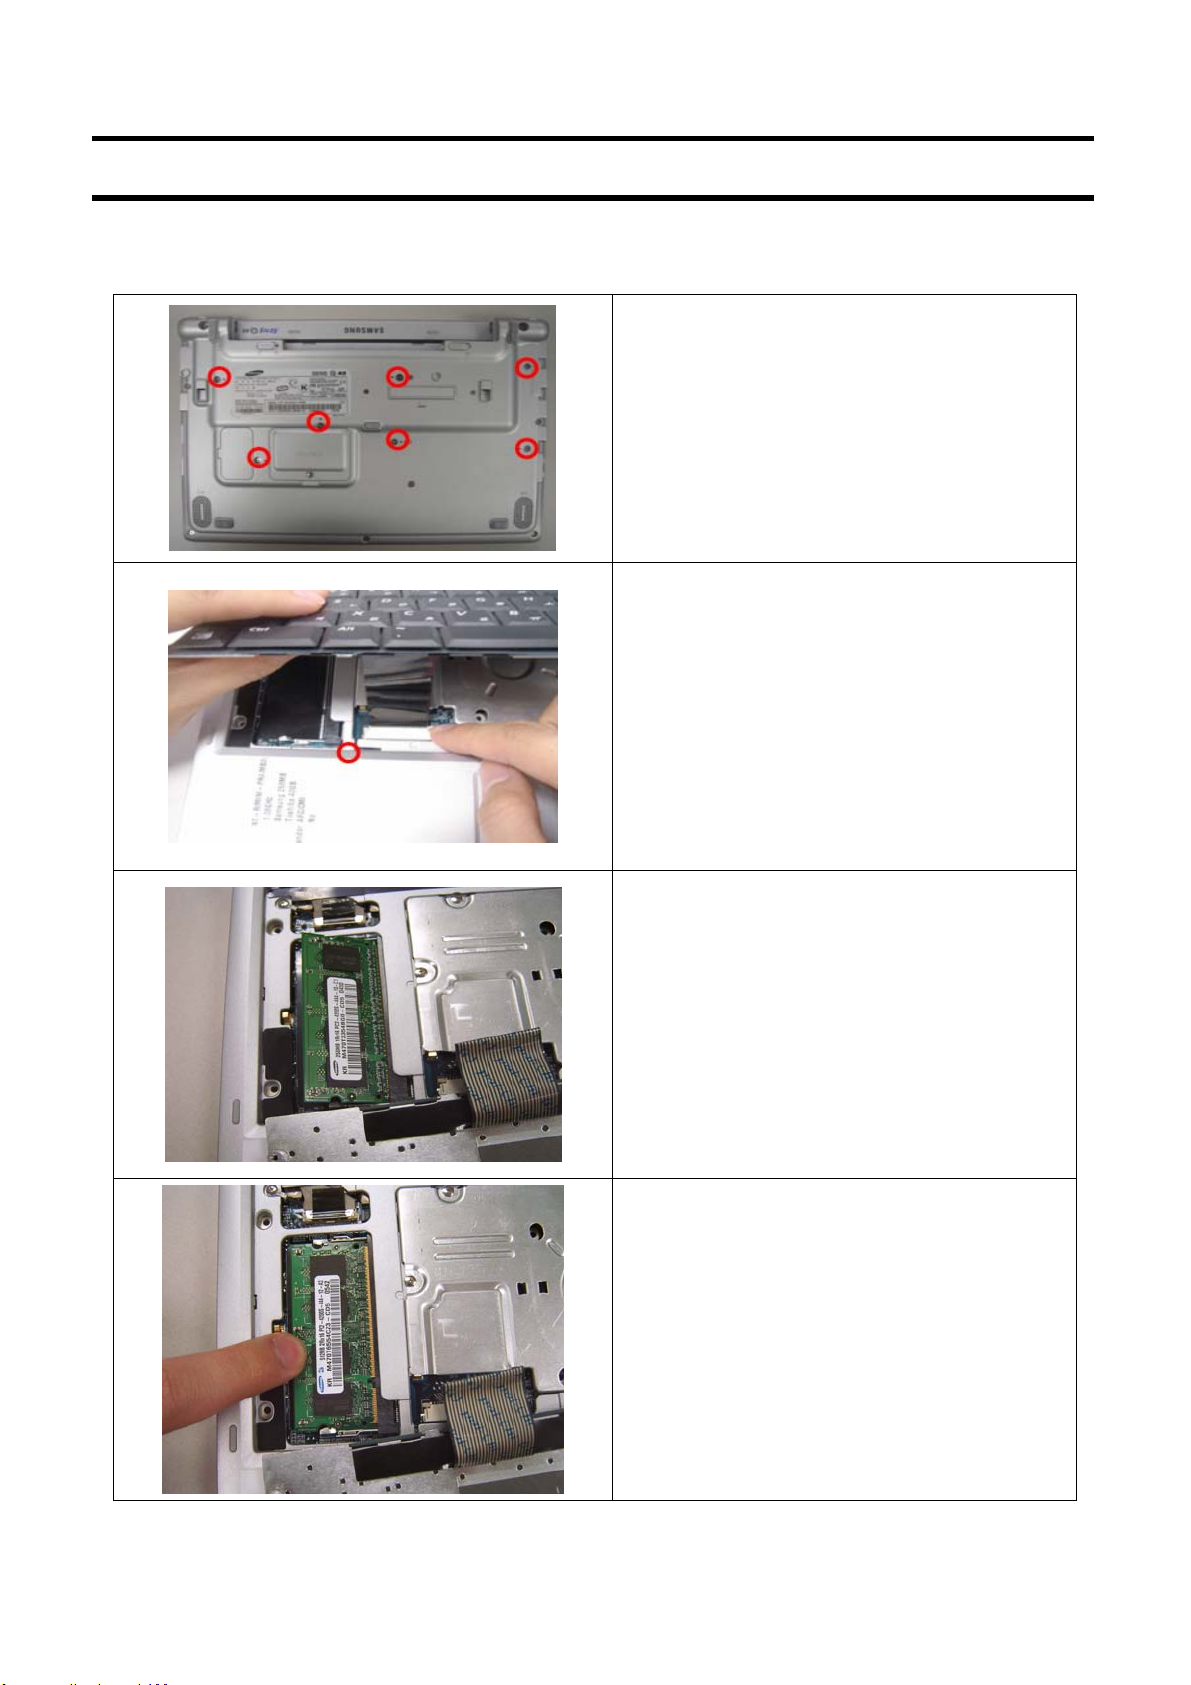
3. Push the memory module tabs outward to
pop the memory module upwards. Carefully pull
the module out at an angle of about 30°.
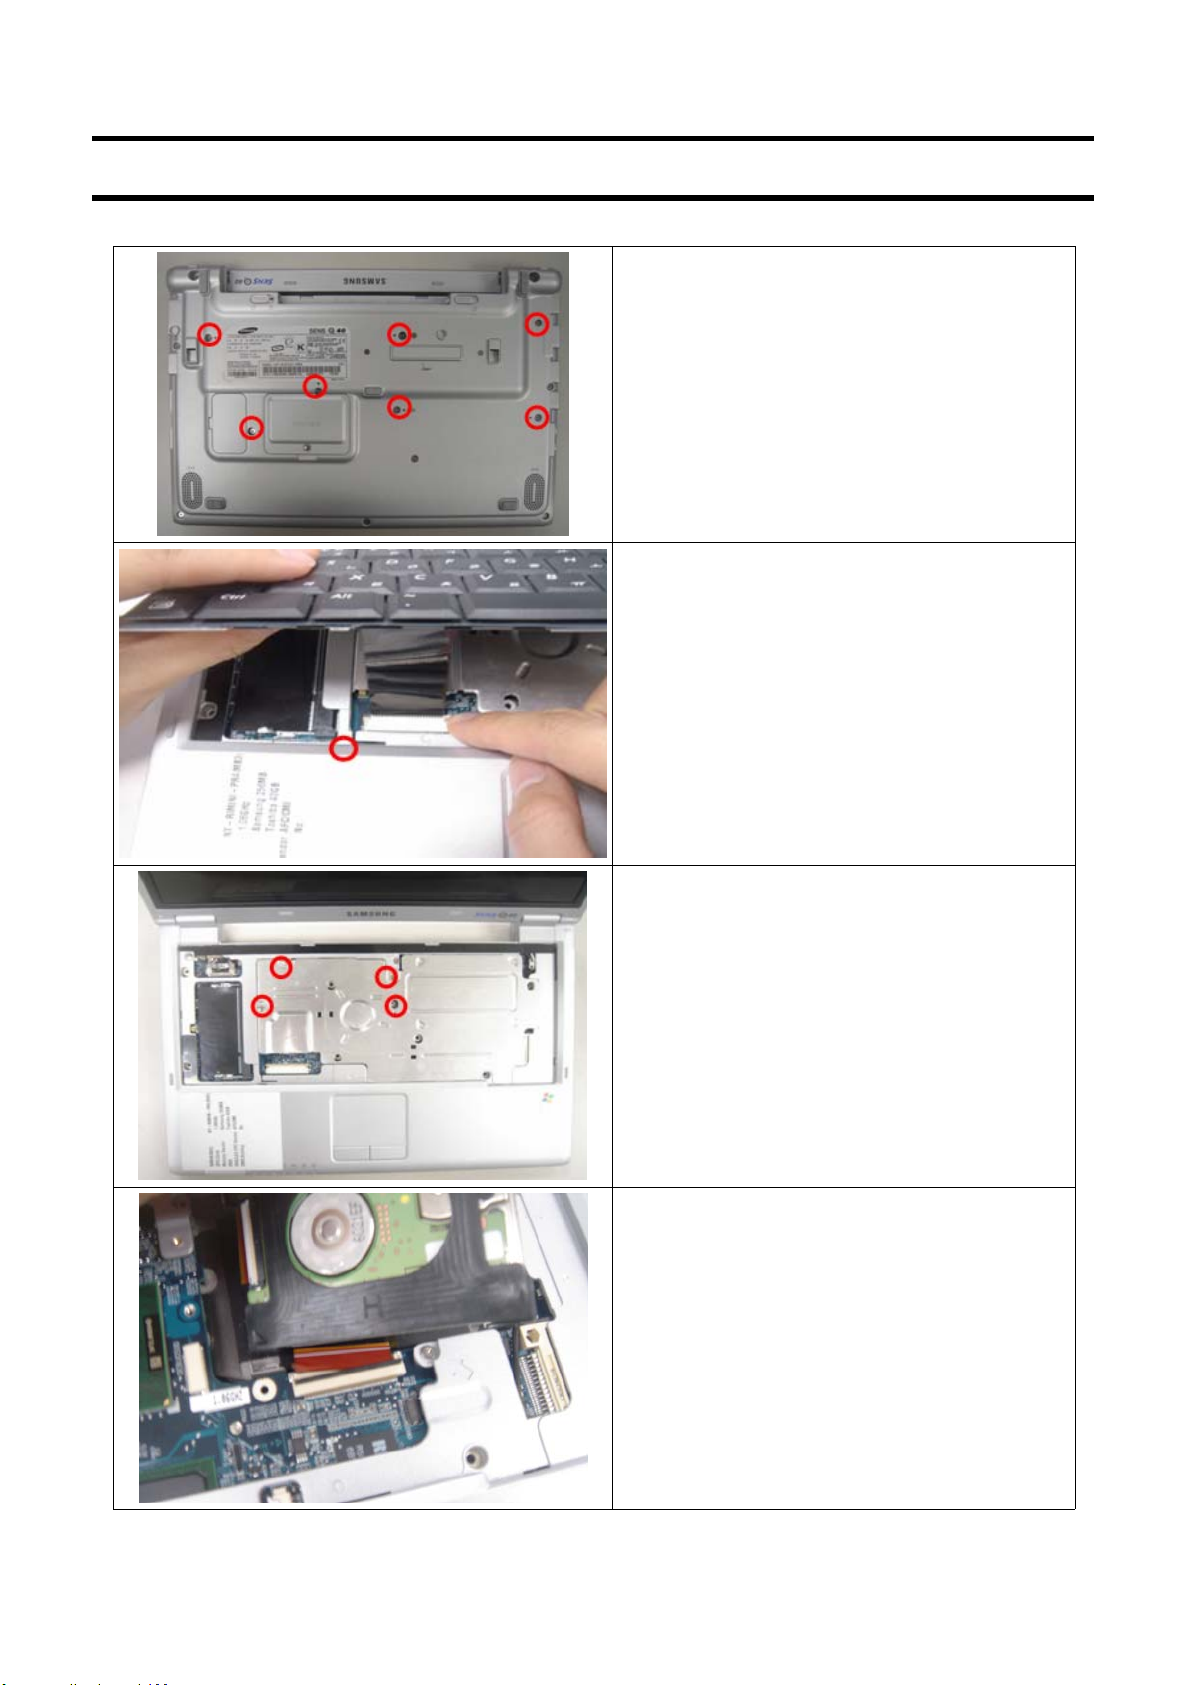
4. Push the memory module tabs outward to
pop the memory module upwards. Carefully pull
the module out at an angle of about 30°.
SENS Q40 < 11 - 12 >
11. References
(2) HDD Upgrade
1.RemovetheKeyBoardscrew(7points)
2. Put down top keyboard hook and lift up
keyboard
3. Remove the Thermal Plate Screw(4 points)
4. Disassemble the HDD FPC and HDD after
lifting up the HDD Connector
SENS Q40 < 11 - 13 >
11. References
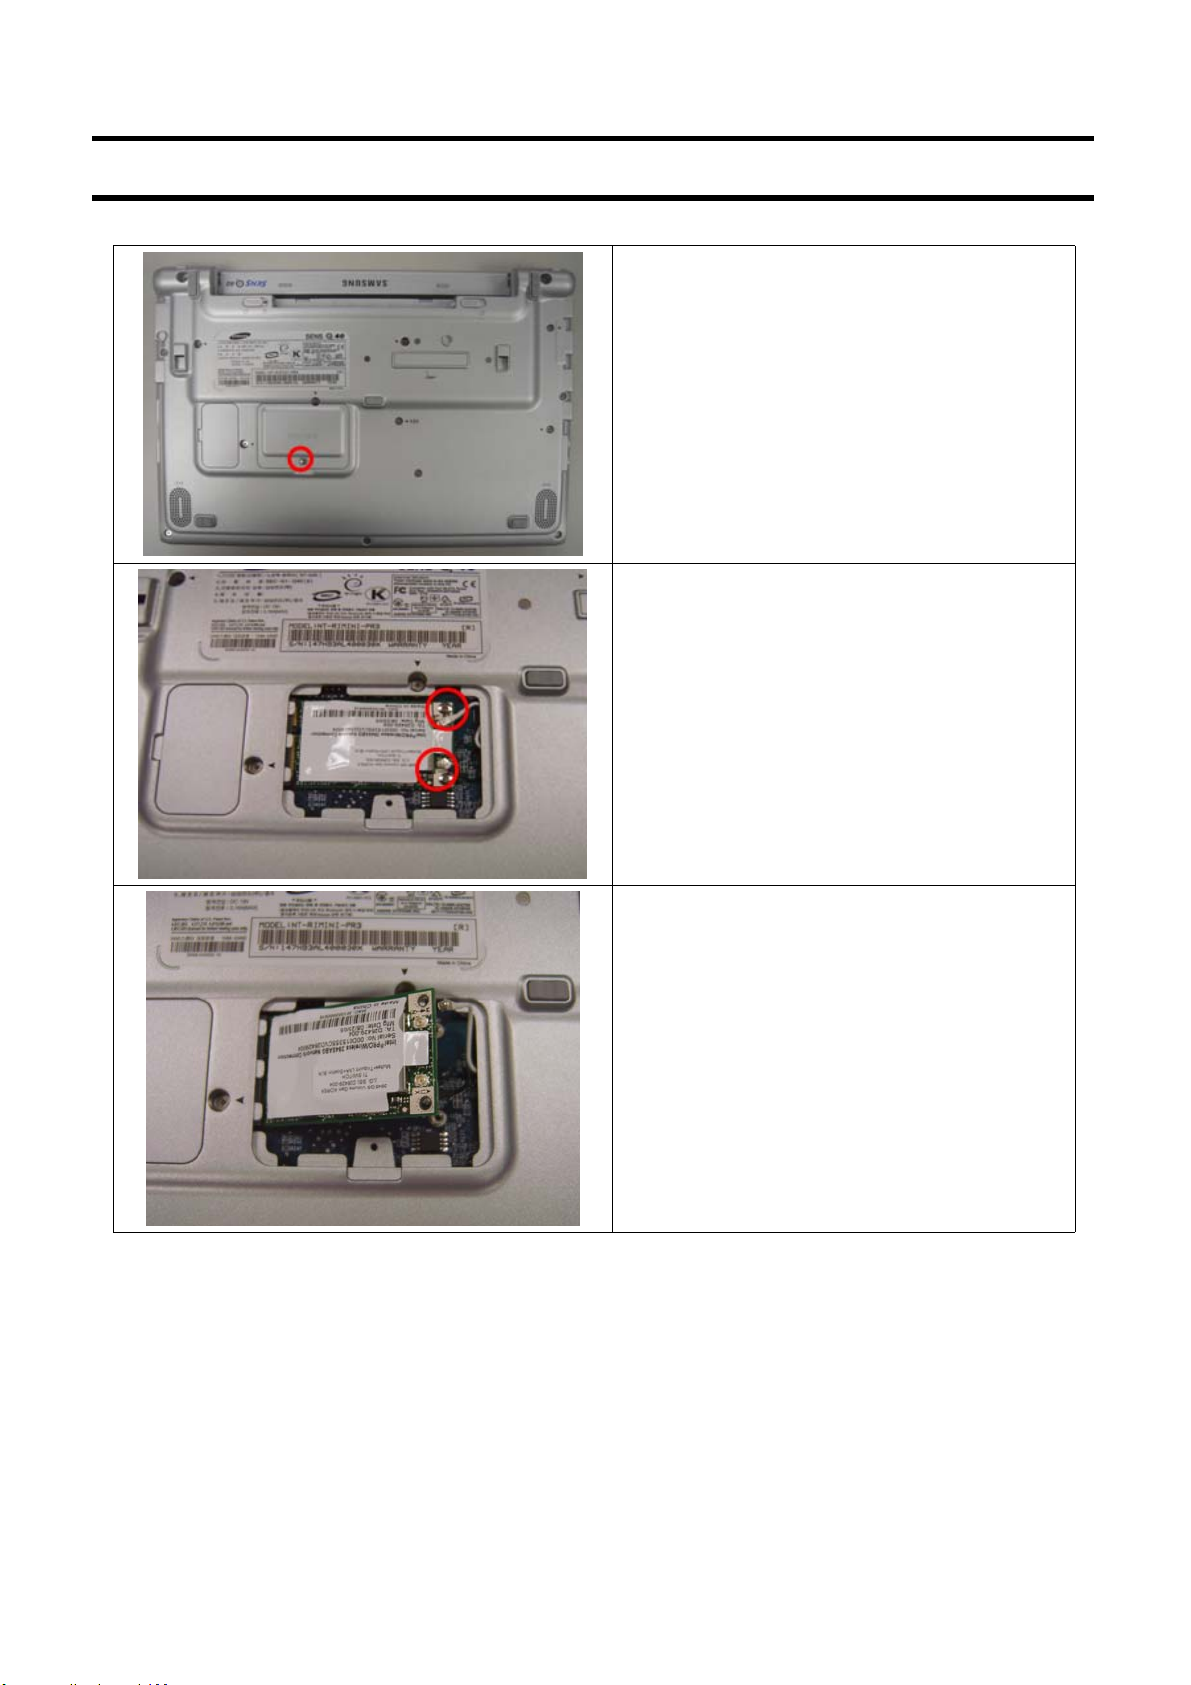
(3) WLAN Upgrade
1. Remove theMini Card Case Screw
2. Disassemble the WLAN Cable-Antenna
andScrew(2 points)
3. Disassemble WLAN ( Lifting up WLAN)
SENS Q40 < 11 - 14 >
 Loading...