

Samsung ProXpress C262x Series User Manual
BASIC
User’s Guide
BASIC
User’s Guide
This guide provides information concerning installation, basic operation and
troubleshooting on Windows.
ADVANCED
This guide provides information about installation, advanced configuration, operation and
troubleshooting on various OS environments.
Some features may not be available depending on models or countries.

2
1. Introduction
Key benefits 5
Features by model 7
Useful to know 9
About the user’s guide 10
Safety information 11
Machine overview 17
Control panel overview 20
Turning on the machine 21
Installing the driver locally 22
Reinstalling the driver 24
2. Menu Overview and Basic Setup
Menu overview 26
Machine’s basic settings 30
Media and tray 31
Basic printing 42
Using USB memory device 47
3. Maintenance
Ordering supplies and accessories 52
Available consumables 53
Available accessories 54
Available maintenance parts 55
Storing the toner cartridge 56
Redistributing toner 58
Replacing the toner cartridge 60
Replacing the waste toner container 63
Installing accessories 65
Monitoring the supplies life 69
Setting the toner low alert 70
Cleaning the machine 71
Tips for moving & storing the machine 75
4. Troubleshooting
Tips for avoiding paper jams 77
Clearing paper jams 78
Understanding the status LED 87
Understanding display messages 89

3
5. Appendix
Specifications 95
Regulatory information 105
Copyright 116

1. Introduction
This chapter provides information you need to know before using the machine.
•Key benefits 5
• Features by model 7
• Useful to know 9
• About the user’s guide 10
• Safety information 11
• Machine overview 17
• Control panel overview 20
• Turning on the machine 21
• Installing the driver locally 22
• Reinstalling the driver 24
Key benefits
Environmentally friendly
• To save toner and paper, this machine supports Eco feature (see "Eco
printing" on page 45).
• To save paper, you can print multiple pages on one single sheet of paper
(see "Using advanced print features" on page 192).
• To save paper, you can print on both sides of the paper (double-sided
printing) (see "Using advanced print features" on page 192).
• To save electricity, this machine automatically conserves electricity by
substantially reducing power consumption when not in use.
• We recommend using recycled paper for saving energy.
Fast high resolution printing
• You can print in a full range of colors using cyan, magenta, yellow, and black.
• You can print with a resolution of up to 9,600 x 600 dpi effective output (600 x 600 x 4 bit).
• Fast, on-demand printing.
- For single-side printing, up to 26 ppm (A4) or up to 27 ppm (Letter).
Convenience
• Simply touch your mobile device on the NFC tag on your printer and get the
print job done (see "Using the NFC feature" on page 160).
• You can print on the go from your smartphone or computer using Google
Cloud Print™ enabled apps (see "Google Cloud Print™" on page 166).
• Easy Capture Manager allows you to easily edit and print whatever you
captured using the Print Screen key on the keyboard (see "Easy Capture
Manager" on page 217).
• Samsung Easy Printer Manager and Printing Status is a program that
monitors and informs you of the machine’s status and allows you to
customize the machine’s settings (see "Using Samsung Easy Printer
Manager" on page 225 or "Using Samsung Printer Status" on page 228).
• Samsung AnyWeb Print helps you screen-capture, preview, scrap, and print
the screen of Windows Internet Explorer more easily than when you use the
ordinary program (see "Samsung AnyWeb Print" on page 218).
• Smart Update allows you to check for the latest software and install the
latest version during the installation of the printer driver. This is available
only for Windows.
• If you have Internet access, you can get help, support application, machine
drivers, manuals, and order information from the Samsung website,
www.samsung.com > find your product > Support or Downloads.

Key benefits
Wide range of functionality and application support
• Supports various paper sizes (see "Print media specifications" on page 97).
• Print watermark: You can customize your documents with words, such as
“CONFIDENTIAL” (see "Using advanced print features" on page 192).
• Print posters: The text and pictures of each page of your document are
magnified and printed across the multiple sheets of paper and can then be
taped together to form a poster (see "Using advanced print features" on
page 192).
• You can print in various operating systems (see "System requirements" on
page 101).
• Your machine is equipped with a USB interface and/or a network interface.
Supports various wireless network setting method
• Using WPS (Wi-Fi Protected Setup™)
- You can easily connect to a wireless network using the WPS feature on
the machine and an access point (wireless router).
• Using a USB cable or a network cable
- You can connect to a network and set various wireless network settings
using a USB cable or a network cable.
• Using Wi-Fi Direct
- You can conveniently print from your mobile device using the Wi-Fi
Direct feature.
See "Introducing wireless set up methods" on page 142.
Support XOA application
The machine supports XOA custom applications.
• Regarding the XOA custom applications, please contact your XOA custom
application provider.
Features by model
Some features and optional goods may not be available depending on
model or country.
Operating System
(●: Supported, Blank: Not supported)
Software
You can install the printer driver and software when you insert the
software CD into your CD-ROM drive.
For Windows, select the printer driver and software in the Select
Software to Install window.
(●: Supported, Blank: Not supported)
Operating System C262x series
Windows ●
Mac ●
Linux ●
Unix ●
Software C262x series
SPL printer driver ●
PCL printer driver ●
PS printer driver
a
●
XPS printer driver
a
●
Samsung Easy Printer
Manager
Device Settings ●
Samsung Printer Status ●
Direct Printing Utility
a
●
Samsung AnyWeb Print
a
●
SyncThru™ Web Service ●
SyncThru Admin Web Service ●
Easy Eco Driver ●
Easy Capture Manager ●
Samsung Easy Color Manager
a
●
a. Download the software from the Samsung website and install it: (http://
www.samsung.com > find your product > Support or Downloads). Before installing,
check whether your computer’s OS support the software.
Software C262x series
Features by model
Variety feature
(●: Supported, ○: Optional, Blank: Not supported)
Features C262x series
Hi-Speed USB 2.0 ●
IEEE 1284B parallel connector
a
a. If you use the parallel port, you cannot use the USB cable.
○
Network Interface Ethernet 10/100/1000
Base TX wired LAN
●
Network Interface 802.11b/g/n wireless
LAN
b
b. Depending on your country, wireless LAN card may not be available. For some
countries, only 802.11 b/g can be applied. Contact your local Samsung dealer or the
retailer where you bought your machine.
●
NFC (Near Field Communication) printing ●
Eco printing ●
Duplex (2-sided) printing ●
USB memory interface ●
Memory module ○
Optional tray (Tray2) ○
Mass Storage Device (SD)
●
AirPrint ●
Google Cloud Print™ ●
Useful to know
The machine does not print.
• Open the print queue list and remove the document from
the list (see "Canceling a print job" on page 43).
• Remove the driver and install it again (see "Installing the
driver locally" on page 22).
• Select your machine as your default machine in your
Windows (see "Setting your machine as a default machine"
on page 191).
Where can I purchase accessories or supplies?
• Inquire at a Samsung distributor or your retailer.
• Visit www.samsung.com/supplies. Select your country/
region to view product service information.
The status LED flashes or remains constantly
on.
• Turn the product off and on again.
• Check the meanings of LED indications in this manual and
troubleshoot accordingly (see "Understanding the status
LED" on page 87).
A paper jam has occurred.
• Open and close the door (see "Front view" on page 18).
• Check the instructions on removing jammed paper in this
manual and troubleshoot accordingly (see "Clearing paper
jams" on page 78).
Printouts are blurry.
• The toner level might be low or uneven. Shake the toner
cartridge (see "Redistributing toner" on page 58).
• Try a different print resolution setting (see "Opening
printing preferences" on page 43).
• Replace the toner cartridge (see "Replacing the toner
cartridge" on page 60).
Where can I download the machine’s driver?
• You can get help, support application, machine drivers,
manuals, and order information from the Samsung
website, www.samsung.com > find your product >
Support or Downloads.
10
1. Introduction
About the user’s guide
This user's guide provides information for your basic understanding of the
machine as well as detailed steps to explain machine usage.
• Do not discard this manual, and keep it for future reference.
• Read the safety information before using the machine.
• If you have a problem using the machine, refer to the troubleshooting
chapter.
• Terms used in this user’s guide are explained in the glossary chapter.
• All illustrations in this user’s guide may differ from your machine depending
on its options or model you purchased.
• The screenshots in this user’s guide may differ from your machine
depending on the machine’s firmware/driver version.
• The procedures in this user’s guide are mainly based on Windows 7.
1
Conventions
Some terms in this guide are used interchangeably, as below:
• Document is synonymous with original.
• Paper is synonymous with media, or print media.
• Machine refers to printer or MFP.
2
General icons
Icon Text Description
Caution
Gives users information to protect the machine from
possible mechanical damage or malfunction.
Warning
Used to alert users to the possibility of personal injury.
Note
Provides additional information or detailed
specification of the machine function and feature.
11
1. Introduction
Safety information
These warnings and precautions are included to prevent injury to you and
others, and to prevent any potential damage to your machine. Be sure to read
and understand all of these instructions before using the machine. After reading
this section, keep it in a safe place for future reference.
3
Important safety symbols
Explanation of all icons and signs used in this chapter
4
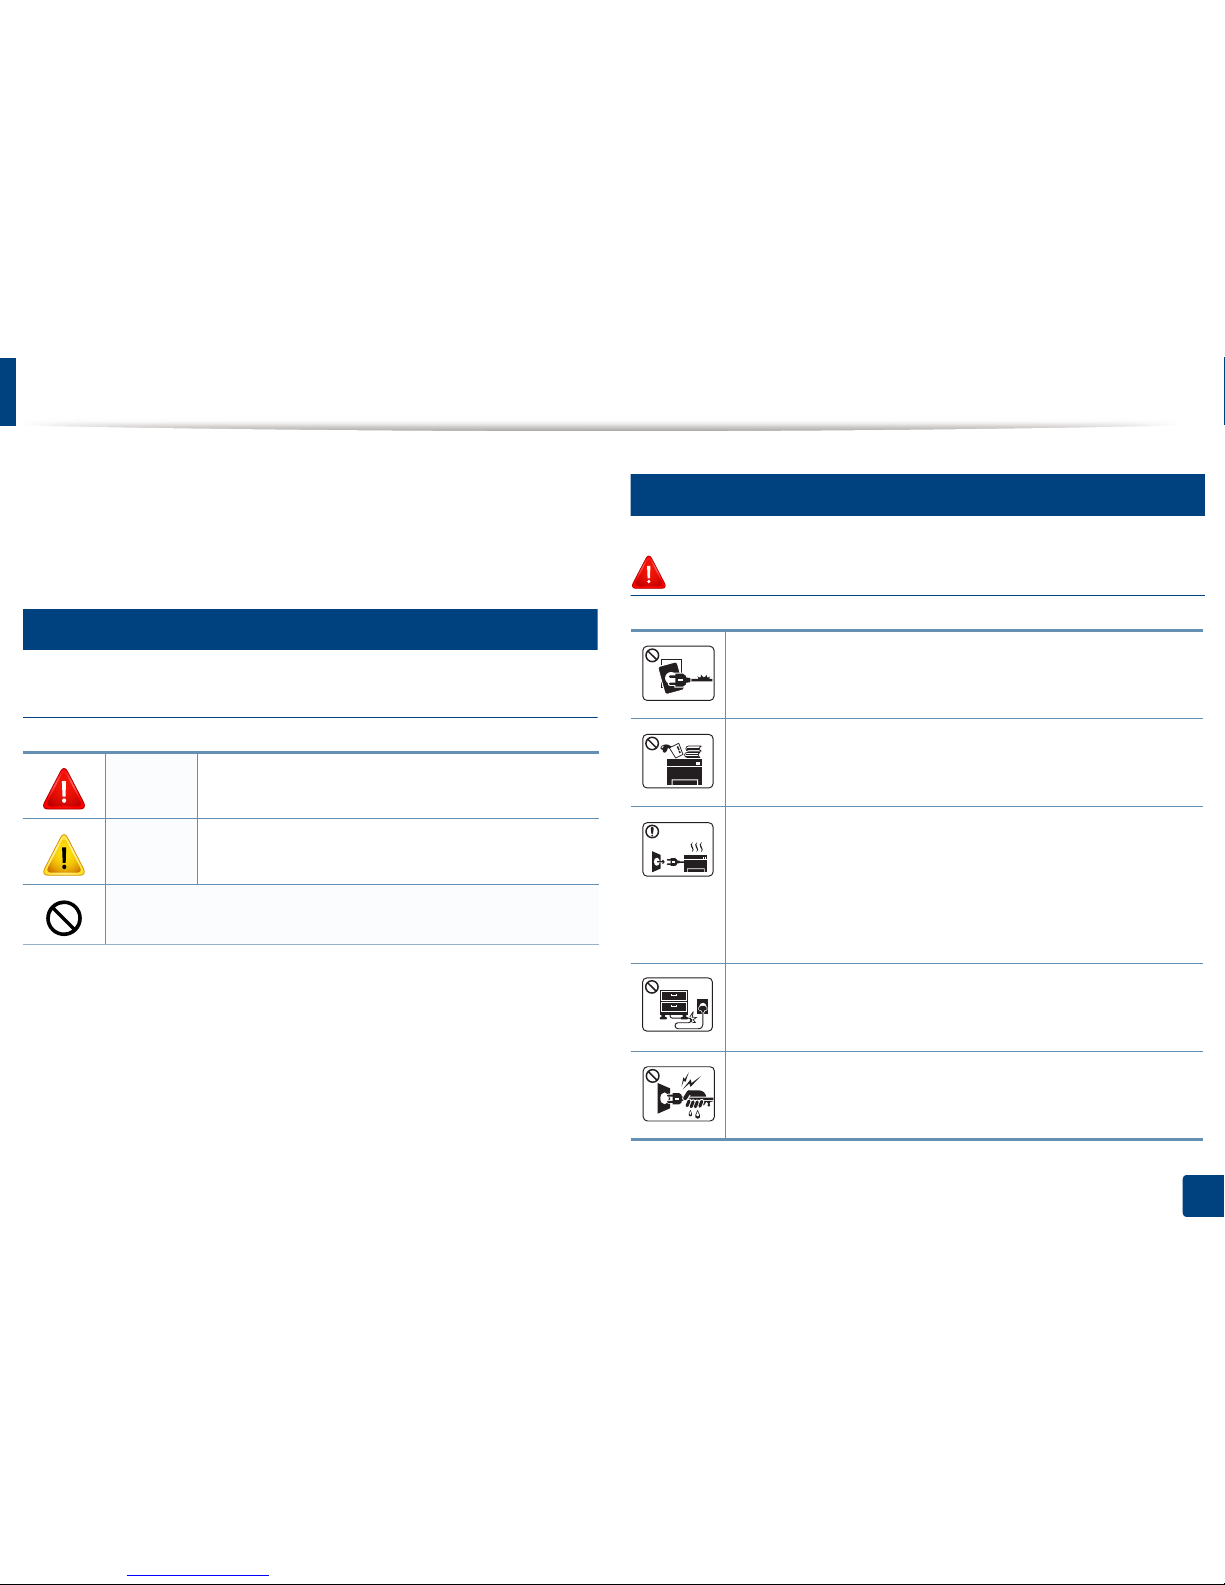
Operating environment
Warning
Warning
Hazards or unsafe practices that may result in severe
personal injury or death.
Caution
Hazards or unsafe practices that may result in minor
personal injury or property damage.
Do not attempt.
Do not use if the power cord is damaged or if the electrical outlet is
not grounded.
This could result in electric shock or fire.
Do not place anything on top of the machine (water, small metal or
heavy objects, candles, lit cigarettes, etc.).
This could result in electric shock or fire.
• If the machine gets overheated, it releases smoke, makes
strange noises, or generates an odd odor, immediately turn off
the power switch and unplug the machine.
• The user should be able to access the power outlet in case of
emergencies that might require the user to pull the plug out.
This could result in electric shock or fire.
Do not bend, or place heavy objects on the power cord.
Stepping on or allowing the power cord to be crushed by a heavy
object could result in electric shock or fire.
Do not remove the plug by pulling on the cord; do not handle the
plug with wet hands.
This could result in electric shock or fire.
Safety information
12
1. Introduction
Caution
5
Operating method
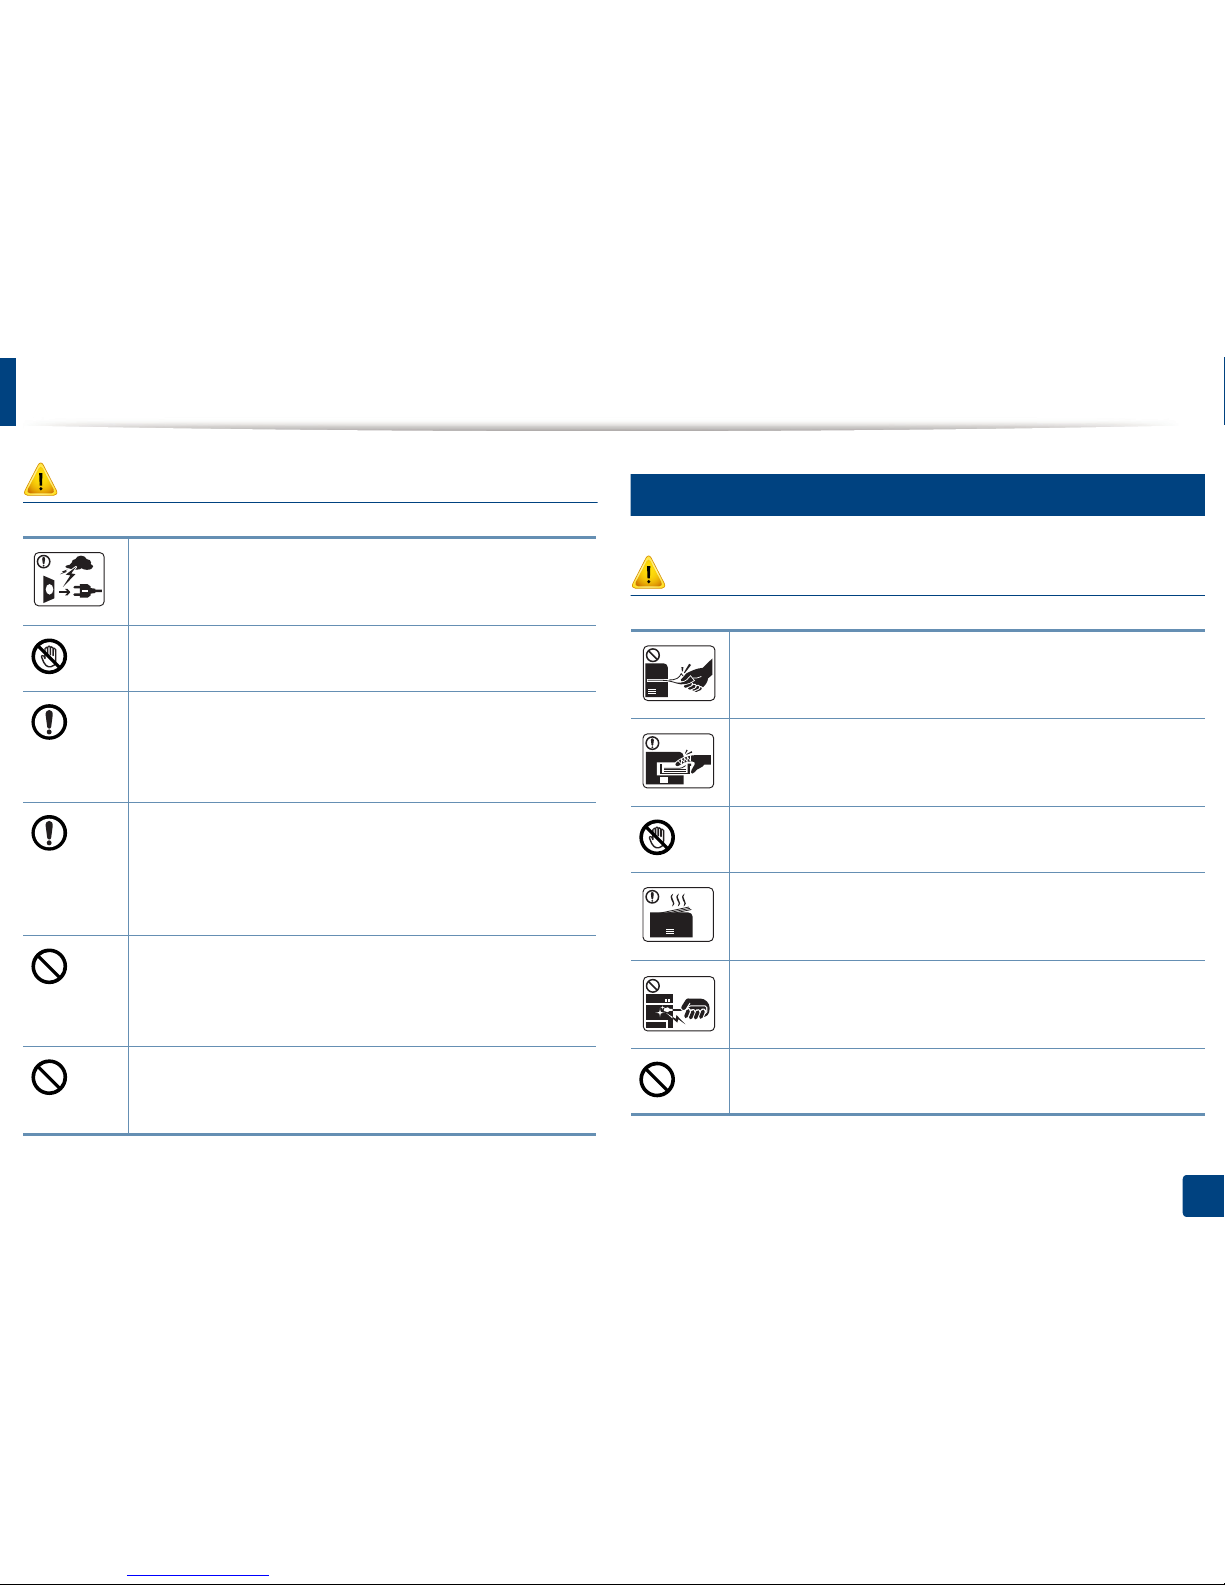
Caution
During an electrical storm or for a period of non-operation,
remove the power plug from the electrical outlet.
This could result in electric shock or fire.
Be careful, the paper output area is hot.
Burns could occur.
If the machine has been dropped, or if the cabinet appears
damaged, unplug the machine from all interface connections and
request assistance from qualified service personnel.
Otherwise, this could result in electric shock or fire.
If the machine does not operate properly after these instructions
have been followed, unplug the machine from all interface
connections and request assistance from qualified service
personnel.
Otherwise, this could result in electric shock or fire.
If the plug does not easily enter the electrical outlet, do not
attempt to force it in.
Call an electrician to change the electrical outlet, or this could
result in electric shock.
Do not allow pets to chew on the AC power, telephone or PC
interface cords.
This could result in electric shock or fire and/or injury to your pet.
Do not forcefully pull the paper out during printing.
It can cause damage to the machine.
Be careful not to put your hand between the machine and paper
tray.
You may get injured.
Be careful when replacing paper or removing jammed paper.
New paper has sharp edges and can cause painful cuts.
When printing large quantities, the bottom part of the paper
output area may get hot. Do not allow children to touch.
Burns can occur.
When removing jammed paper, do not use tweezers or sharp metal
objects.
It can damage the machine.
Do not allow too many papers to stack up in the paper output tray.
It can damage the machine.
Safety information
13
1. Introduction
6
Installation / Moving
Warning
Caution
Do not block or push objects into the ventilation opening.
This could result in elevated component temperatures which can
cause damage or fire.
Use of controls or adjustments or performance of procedures other
than those specified herein may result in hazardous radiation
exposure.
This machine's power reception device is the power cord.
To switch off the power supply, remove the power cord from the
electrical outlet.
Do not place the machine in an area with dust, humidity, or water
leaks.
This could result in electric shock or fire.
Place the machine in the environment where it meets the
operating temperature and humidity specification.
Otherwise, quality problems can occur and cause damage to the
machine.
See "General specifications" on page 95.
Before moving the machine, turn the power off and disconnect all
cords. The information below are only suggestions based on the
units weight.
If you have a medical condition that prevents you from lifting, do
not lift the machine. Ask for help, and always use the appropriate
amount of people to lift the device safety.
The machine could fall, causing injury or machine damage.
Then lift the machine:
• If the machine weighs under 20 kg (44.09 lbs), lift with 1 person.
• If the machine weighs 20 kg (44.09 lbs) - 40kg (88.18 lbs), lift
with 2 people.
• If the machine weighs more than 40 kg (88.18 lbs), lift with 4 or
more people.
Choose a flat surface with enough space for ventilation to place
the machine. Also consider the space required to open the cover
and trays.
The place should be well-ventilated and be far from direct light,
heat, and humidity.
When using the machine for a long period of time or printing a
large number of pages in a non-ventilated space, it could pollute
the air and be harmful to your health. Place the machine in a wellventilated space or open a window to circulate the air periodically.
Safety information
14
1. Introduction
7
Maintenance / Checking
Caution
Do not place the machine on an unstable surface.
The machine could fall, causing injury or machine damage.
Use only No.26 AWG
a
or larger, telephone line cord, if necessary.
Otherwise, it can cause damage to the machine.
Make sure you plug the power cord into a grounded electrical
outlet.
Otherwise, this could result in electric shock or fire.
Use the power cord supplied with your machine for safe
operation. If you are using a cord which is longer than 2 meters (6
feet) with a 110V machine, then the gauge should be 16 AWG or
larger.
Otherwise, it can cause damage to the machine, and could result
in electric shock or fire.
Do not put a cover over the machine or place it in an airtight
location, such as a closet.
If the machine is not well-ventilated, this could result in fire.
Do not overload wall outlets and extension cords.
This can diminish performance, and could result in electric shock
or fire.
The machine should be connected to
the power level which is specified on the label.
If you are unsure and want to check the power level you are using,
contact the electrical utility company.
a. AWG: American Wire Gauge
Unplug this product from the wall outlet before cleaning the
inside of the machine. Do not clean the machine with benzene,
paint thinner or alcohol; do not spray water directly into the
machine.
This could result in electric shock or fire.
When you are working inside the machine replacing supplies or
cleaning the inside, do not operate the machine.
You could get injured.
Keep cleaning supplies away from children.
Children could get hurt.
Do not disassemble, repair or rebuild the machine by yourself.
It can damage the machine. Call a certified technician when the
machine needs repairing.
Safety information
15
1. Introduction
8
Supply usage
Caution
To clean and operate the machine, strictly follow the user's guide
provided with the machine.
Otherwise, you could damage the machine.
Keep the power cable and the contact surface of the plug clean
from dust or water.
Otherwise, this could result in electric shock or fire.
• Do not remove any covers or guards that are fastened with
screws.
• Fuser units should only be repaired by a certified service
technician. Repair by non-certified technicians could result in
fire or electric shock.
• The machine should only be repaired by a Samsung service
technician.
Do not disassemble the toner cartridge.
Toner dust can be dangerous if inhaled or ingested.
Do not burn any of the supplies such as toner cartridge or fuser
unit.
This could cause an explosion or uncontrollable fire.
When storing supplies such as toner cartridges, keep them away
from children.
Toner dust can be dangerous if inhaled or ingested.
Using recycled supplies, such as toner, can cause damage to the
machine.
In case of damage due to the use of recycled supplies, a service
fee will be charged.
For supplies that contain toner dust (toner cartridge, waste toner
bottle, imaging unit, etc.) follow the instructions below.
• When disposing of the supplies, follow the instructions for
disposal. Refer to the reseller for disposal instructions.
• Do not wash the supplies.
•
For a waste toner bottle, do not reuse it after emptying the
bottle.
If you do not follow the instructions above, it may cause machine
malfunction and environmental pollution. The warranty does not
cover damages caused by a user's carelessness.
When toner gets on your clothing, do not use hot water to wash
it.
Hot water sets toner into fabric. Use cold water.

Safety information
16
1. Introduction
When changing the toner cartridge or removing jammed paper,
be careful not to let toner dust touch your body or clothes.
Toner dust can be dangerous if inhaled or ingested.
17
1. Introduction
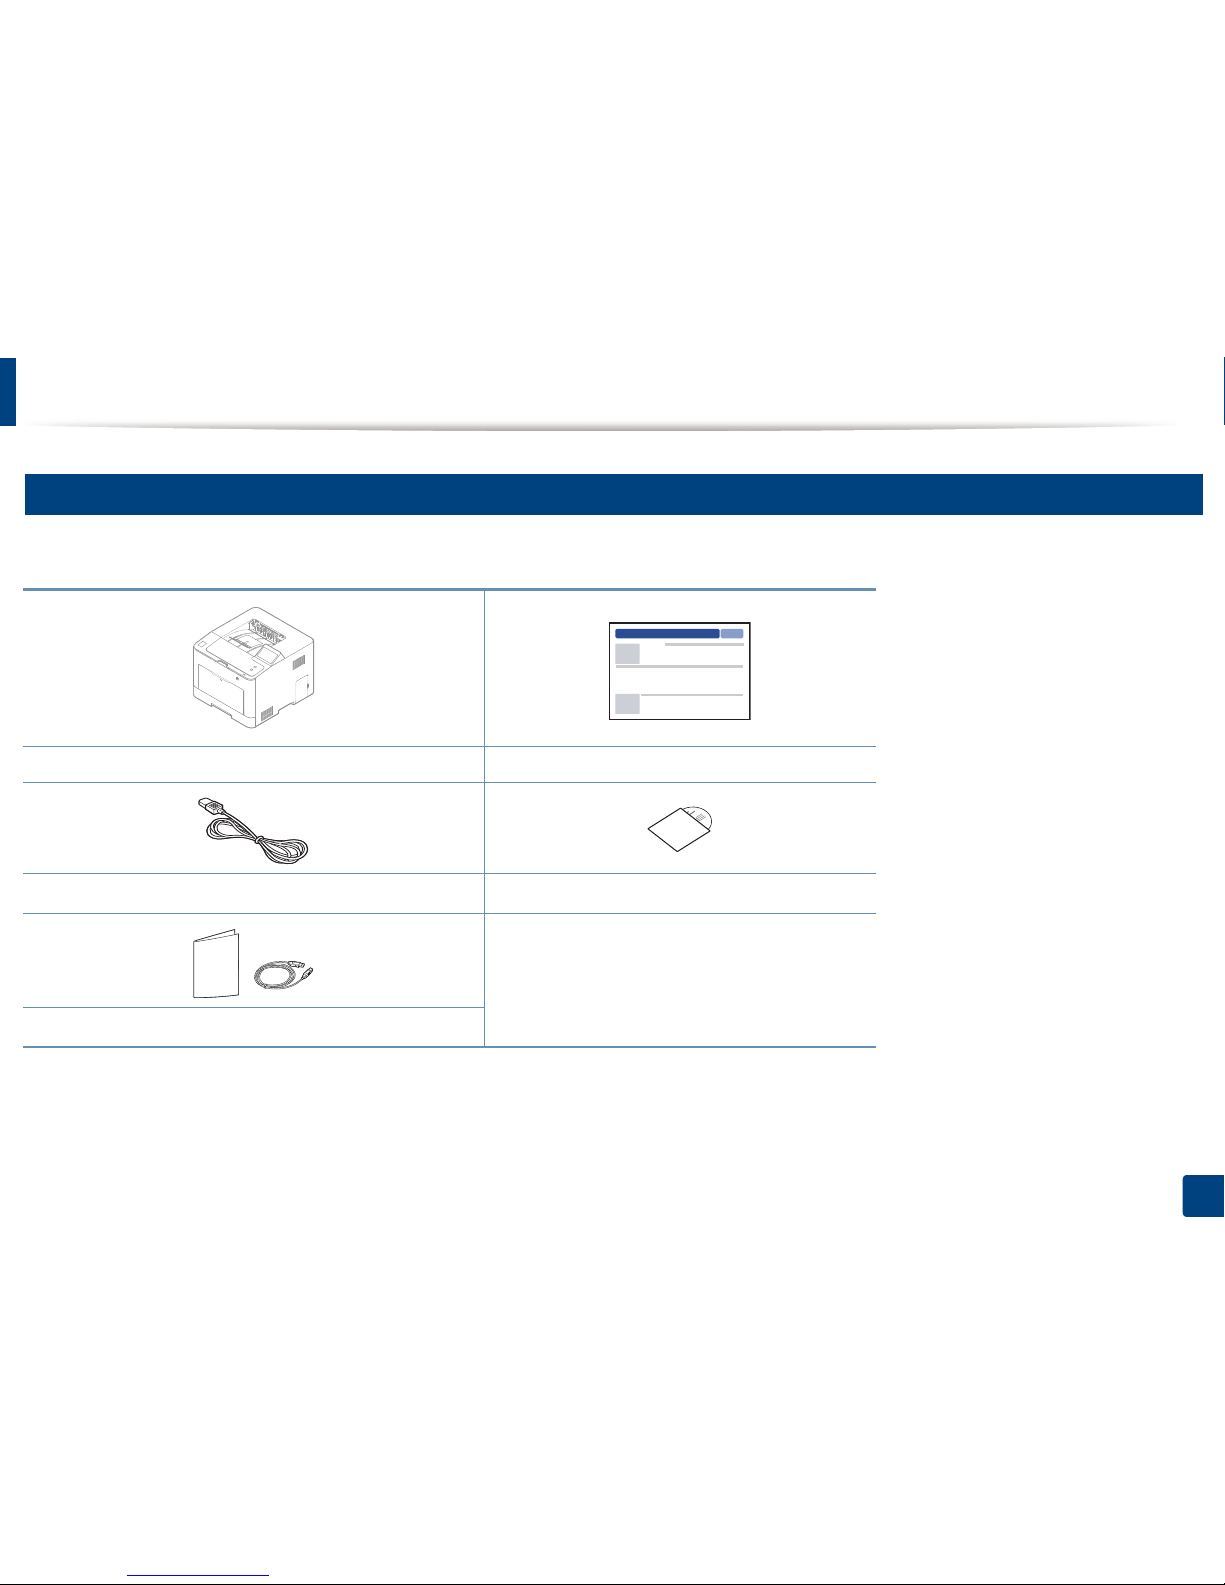
Machine overview
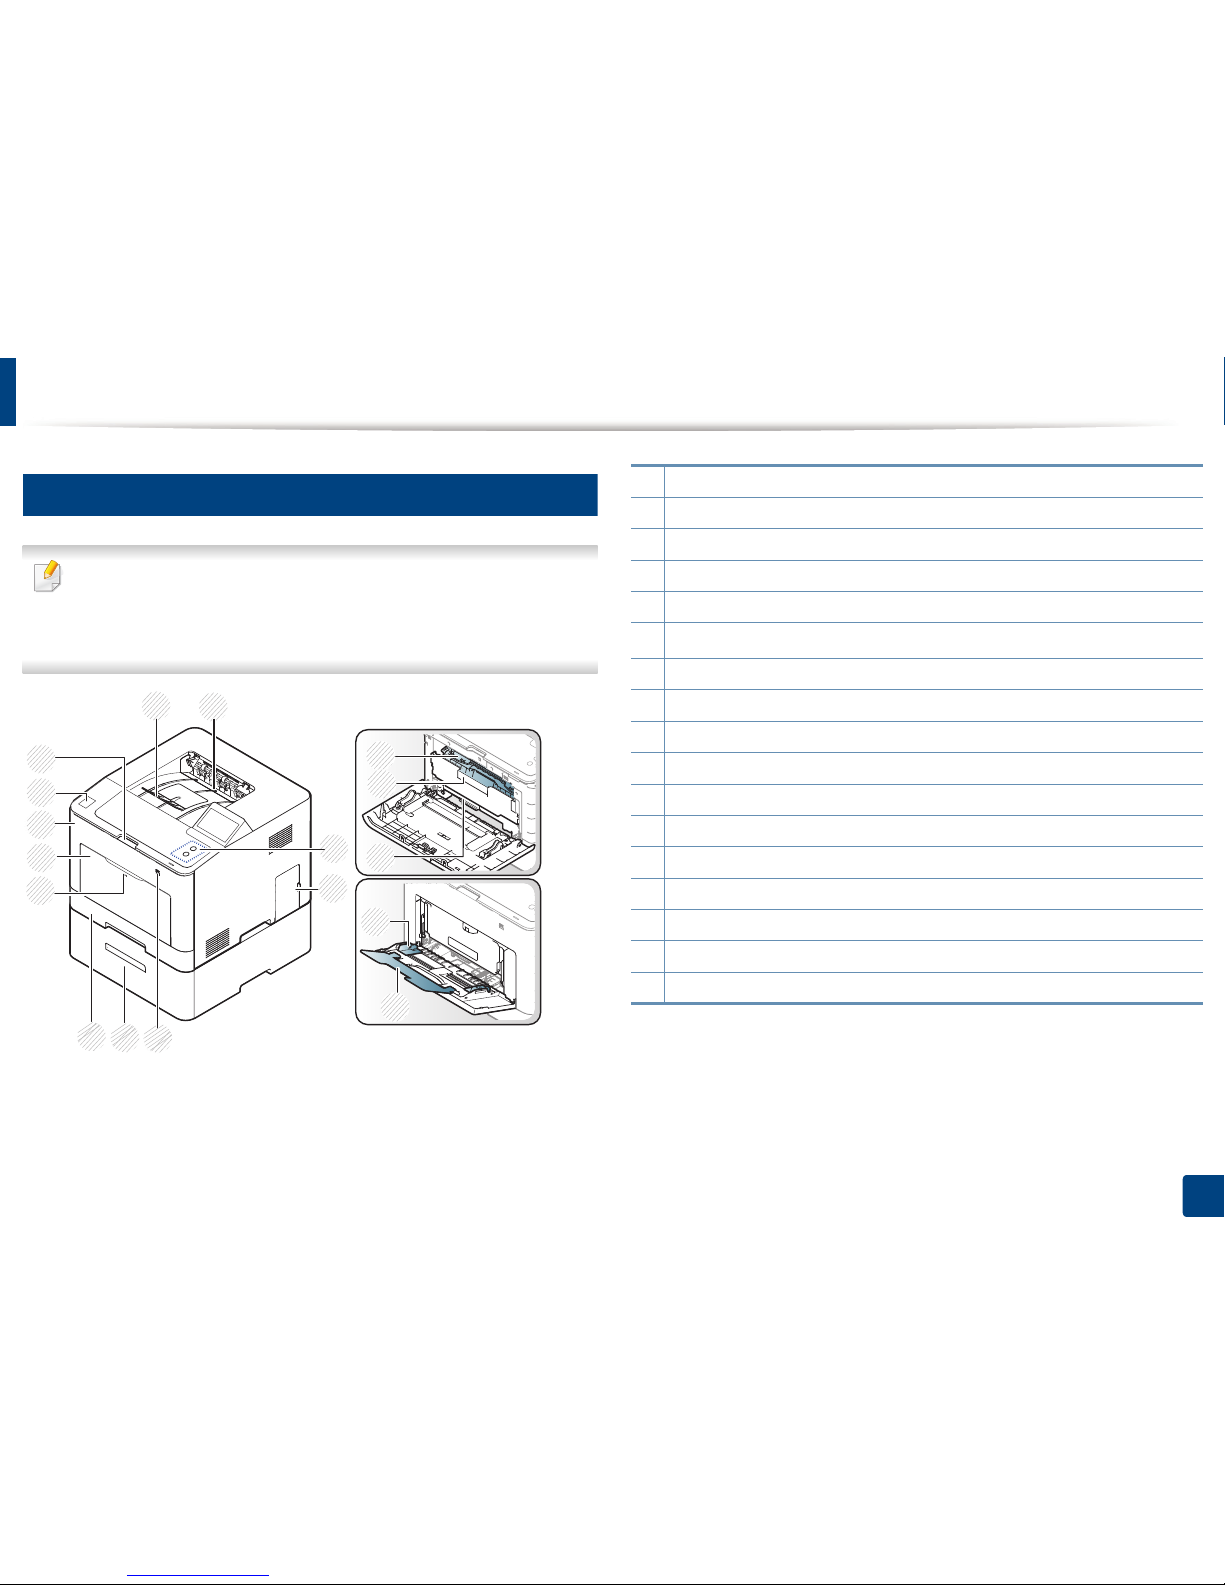
9
Components
The actual component may differ from the illustration below. Some components may change depending on the circumstances.
Machine Quick installation guide
Power cord
Software CD
a
a. The software CD contains the print drivers, user’s guide, and software applications.
Misc. accessories
b
b. Miscellaneous accessories included with your machine may vary by country of purchase and specific model.
Machine overview
18
1. Introduction
10
Front view
• This illustration may differ from your machine depending on your model.
There are various types of machine.
• Some features and optional goods may not be available depending on
model or country (see "Features by model" on page 7).
1
2
3
4
6
5
8
10
12
7
9
16
17
15
13
14
11
1Output support
2 Output tray
3 Control panel
4 Control board cover
5USB memory port
6
Optional tray
a
a. This is an optional feature.
7Tray 1
8 Push-release of Multi-purpose tray
9 Multi-purpose tray
10 Front cover
11 NFC (Near Field Communication) tag
12 Front cover release button
13 Toner cartridges
14 Toner cartridge handle
15 Intermediate Transfer Belt (ITB)
16 Paper width guides on a multi-purpose tray
17 Multi-purpose support tray

Machine overview
19
1. Introduction
11
Rear view
• This illustration may differ from your machine depending on your model.
There are various types of machine.
• Some features and optional goods may not be available depending on
model or country (see "Features by model" on page 7).
2
3
6
7
8
1
4
5
1 Waster toner container
2 Rear cover
3 Rear cover handle
4Power receptacle
5 Power-switch
6
USB port
a
a. The optional IEEE 1284B parallel connector can be used by plugging in both the USB port and
the 5V output port.
7 Network port
8
5V output port for IEEE 1284B Port
a b
b. This is an optional feature.
20
1. Introduction
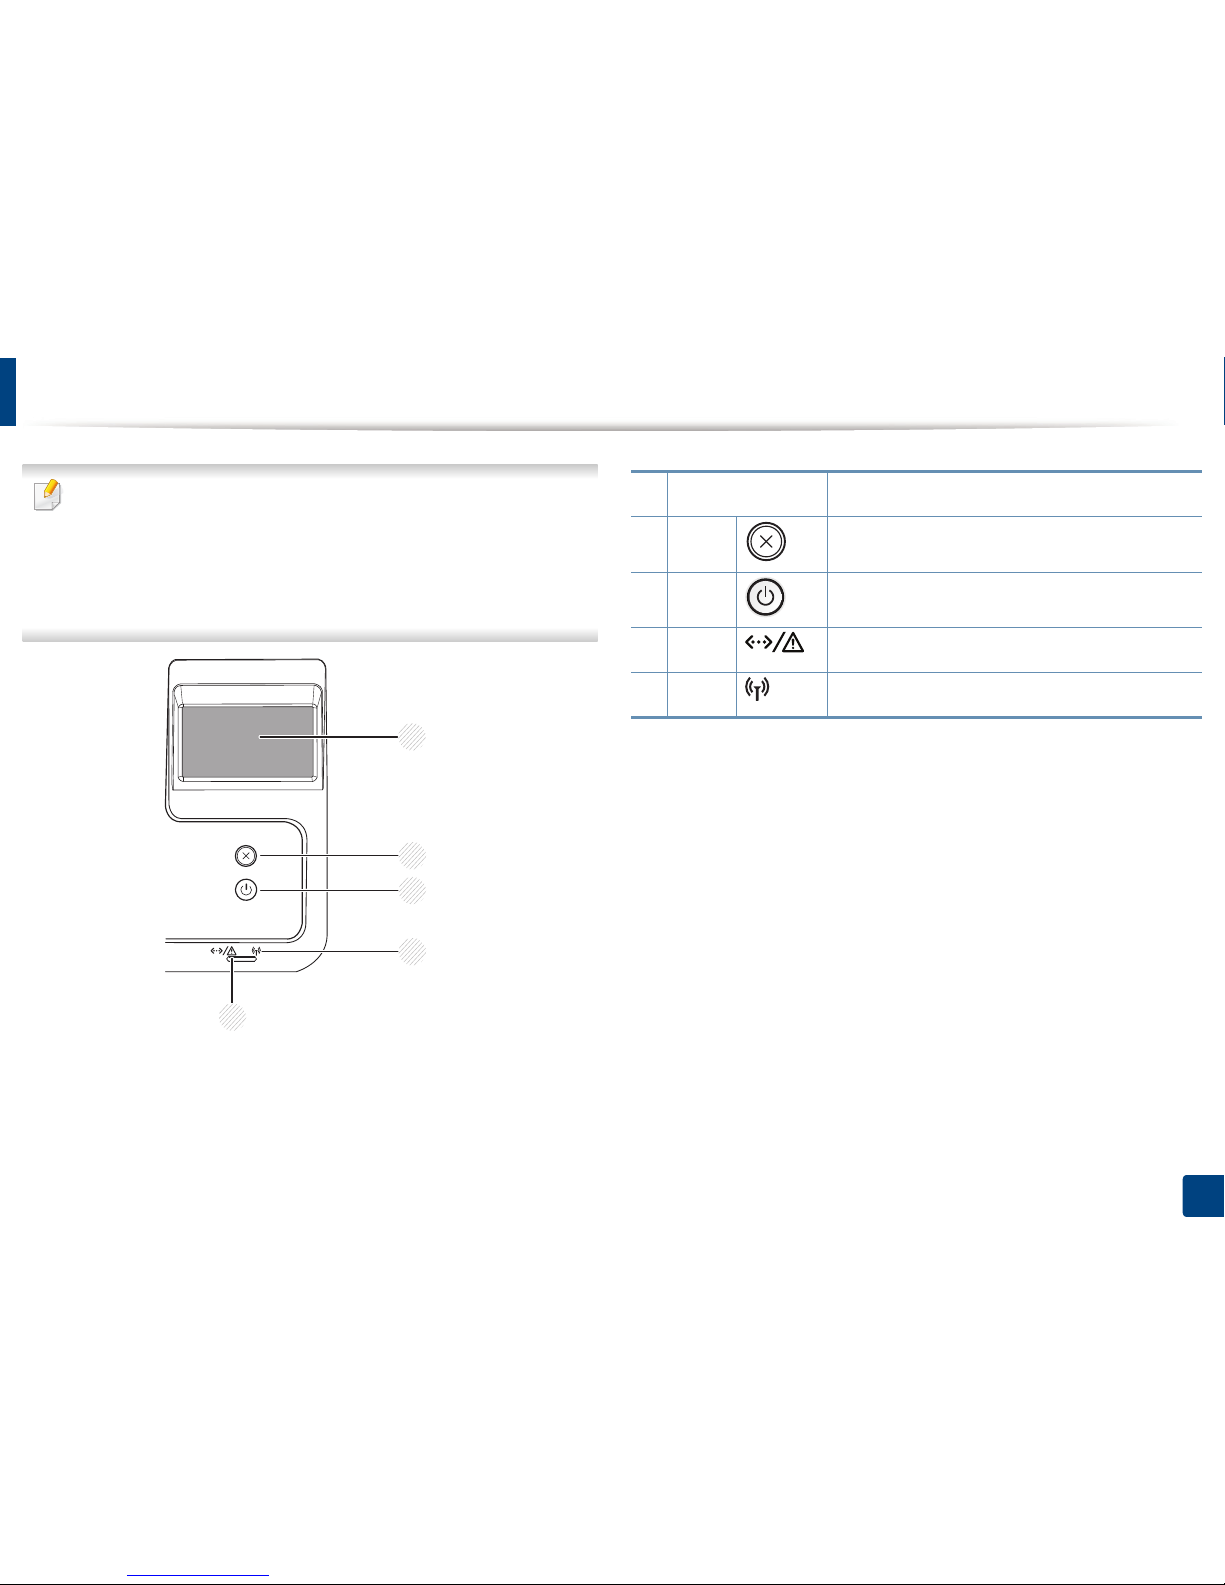
Control panel overview
• This control panel may differ from your machine depending on its model.
There are various types of control panels.
• Some features and optional goods may not be available depending on
model or country (see "Features by model" on page 7).
• When using the touch screen, only use your finger. Sharp objects can
damage the screen.
2
3
4
5
1
1 Touch screen
Displays the current status and allows you to access
available menus.
2 Stop
Stops current operation.
3 Power
You can turn the power on and off with this button.
Or wake up from the power save mode.
4 LED
Indicates the status of your machine (see
"Understanding the status LED" on page 87).
5 LED
Indicates the wireless status of your machine (see
"Understanding the status LED" on page 87).
21
1. Introduction
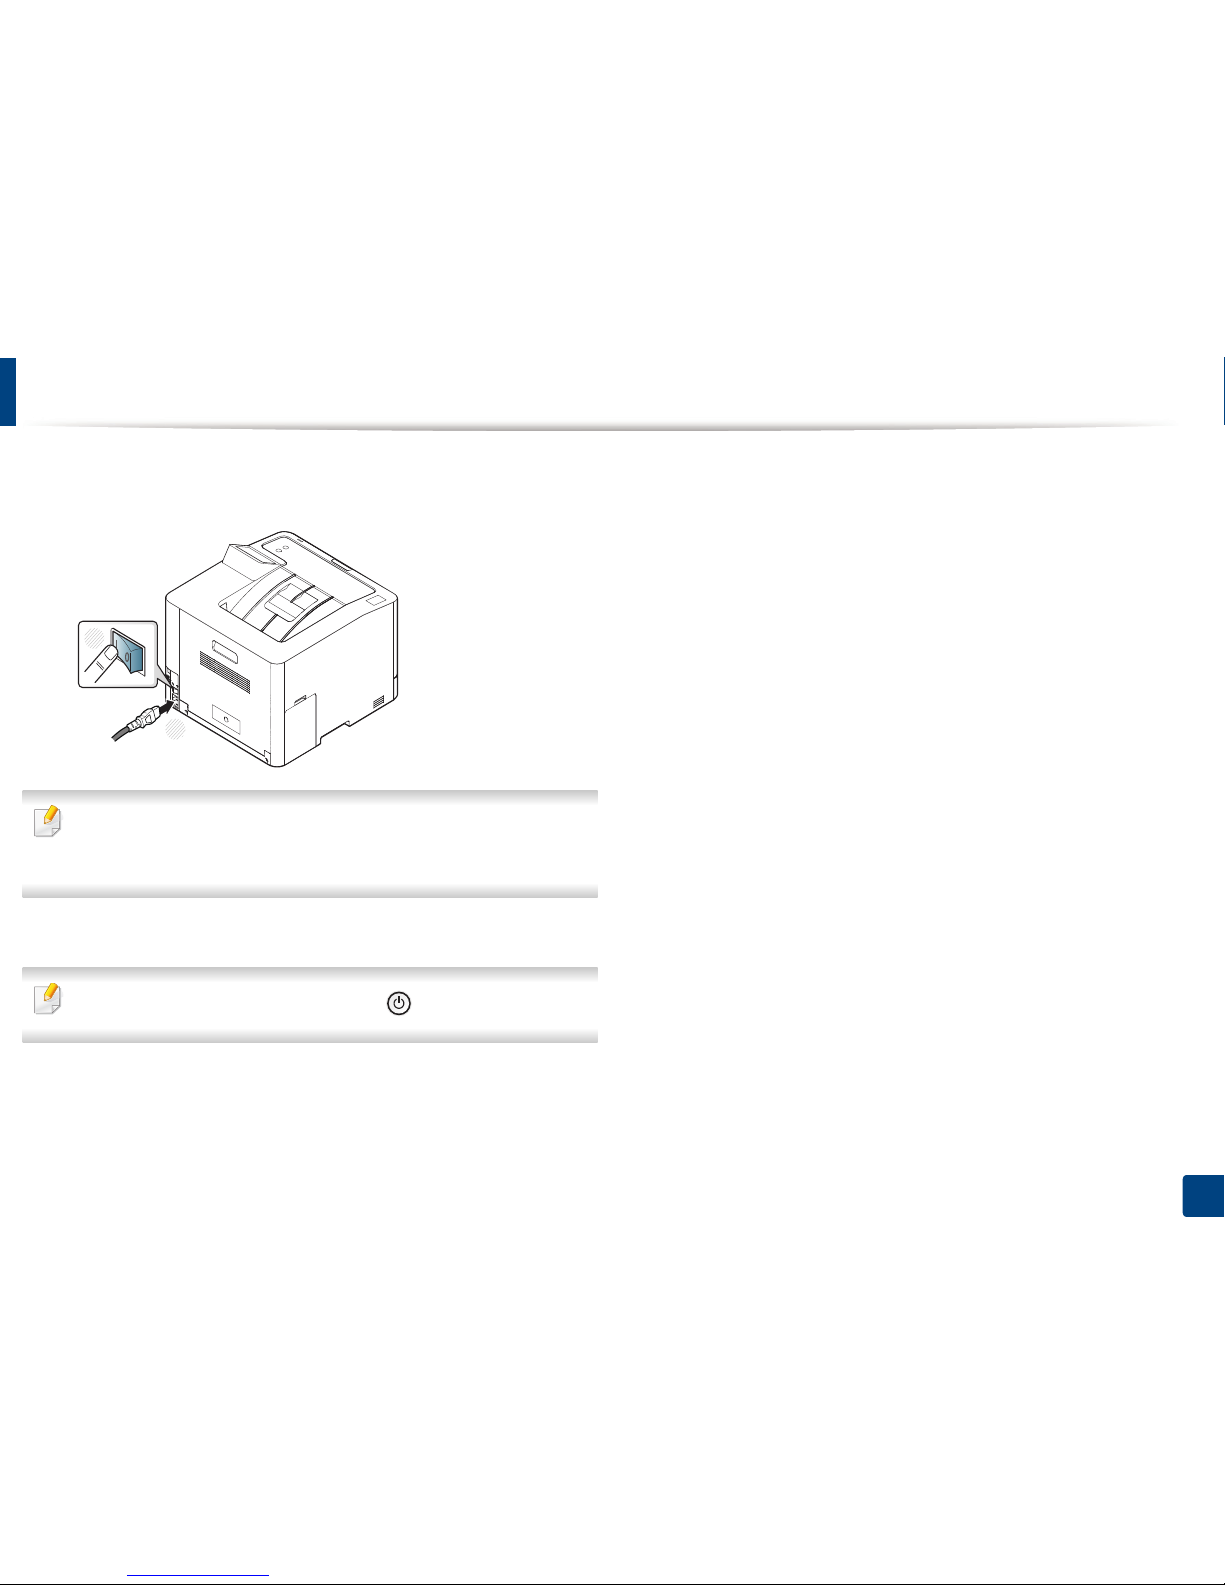
Turning on the machine
1
Connect the machine to the electricity supply first.
Turn the switch on if the machine has a power switch.
Illustrations on this user’s guide may differ from your machine depending
on its options or models. Check your machine type (see "Front view" on
page 18).
2
Power is turned on automatically.
If you want to turn the power off, press the (Power) button.
1
2
22
1. Introduction
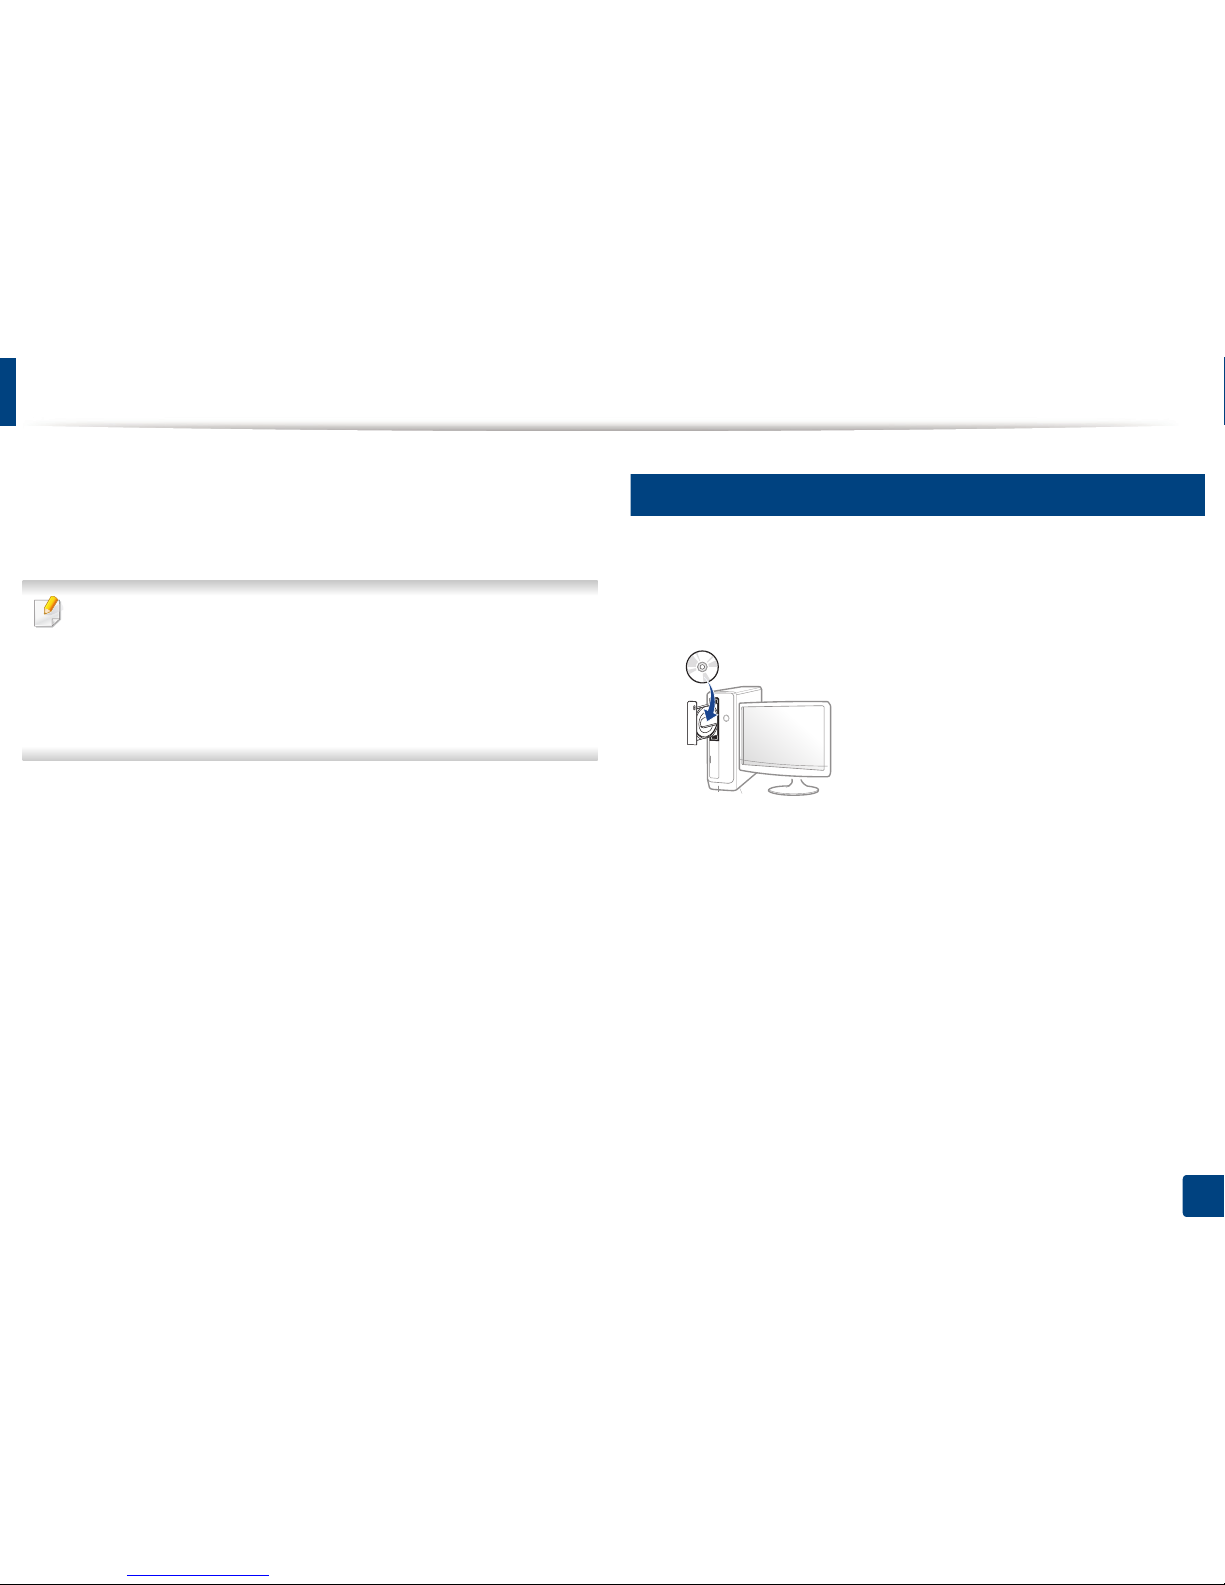
Installing the driver locally
A locally connected machine is a machine directly attached to your computer
using the cable. If your machine is attached to a network, skip the following
steps below and go on to installing a network connected machine’s driver (see
"Installing driver over the network" on page 130).
• If you are a Mac, Linux, or UNIX operating systems user, refer to the
"Installation for Mac" on page 121, "Installation for Linux" on page 123, or
"Installing the UNIX printer driver package" on page 136.
• The installation window in this User’s Guide may differ depending on the
machine and interface in use.
• Only use a USB cable no longer than 3 meters (118 inches).
12
Windows
1
Make sure that the machine is connected to your computer and
powered on.
2
Insert the supplied software CD into your CD-ROM drive.
If the installation window does not appear, click Start > All programs >
Accessories > Run.
X:\Setup.exe replacing “X” with the letter, which represents your CDROM drive and click OK.
• For Windows 8,
If the installation window does not appear, from Charms, select
Search > Apps and search for Run. Type in X:\Setup.exe, replacing
“X” with the letter that represents your CD-ROM drive and click OK.
If “Tap to choose what happens with this disc.” pop-up window
appears, click the window and select Run Setup.exe.
3
Review and accept the installation agreements in the installation
window. Then, click Next.
Installing the driver locally
23
1. Introduction
4
Select USB on the Printer Connection Type screen. Then, click Next.
5
Follow the instructions in the installation window.
You can select the software applications in the Select Software to Install
Window.
From the Windows 8 Start Screen
• The V4 driver is automatically downloaded from the Windows Update if
your computer is connected to the Internet. If not, you can manually
download the V4 driver from Samsung website, www.samsung.com >
find your product > Support or downloads.
• You can download Samsung Printer Experience app from the Windows
Store. You need have a Microsoft account to use the Windows Store.
1 From Charms, select Search.
2 Click Store.
3 Search and click Samsung Printer Experience.
4 Click Install.
• If you install the driver using the supplied software CD, V4 driver is not
installed. If you want to use the V4 driver in the Desktop screen, you can
download from the Samsung website, www.samsung.com > find your
product > Support or downloads.
• If you want to install Samsung’s printer management tools, you need to
install them using the supplied software CD.
1
Make sure that your computer is connected to the Internet and powered
on.
2
Make sure that the machine is powered on.
3
Connect the computer and the machine with a USB cable.
The driver is automatically installed from the Windows Update.
24
1. Introduction
Reinstalling the driver
If the printer driver does not work properly, follow the steps below to reinstall
the driver.
13
Windows
1
Make sure that the machine is connected to your computer and
powered on.
2
From the Start menu, select Programs or All Programs > Samsung
Printers > Uninstall Samsung Printer Software.
• For Windows 8,
1 From Charms, select Search > Apps.
2 Search and click Control Panel.
3 Click Programs and Features.
4 Right-click the driver you want to uninstall and select Uninstall.
5 Follow the instructions in the window.
3
Follow the instructions in the installation window.
4
Insert the software CD into your CD-ROM drive and install the driver
again (see "Installing the driver locally" on page 22).
From the Windows 8 Start Screen
1
Make sure that the machine is connected to your computer and
powered on.
2
Click on the Uninstall Samsung Printer Software tile in the Start
screen.
3
Follow the instructions in the window.
• If you cannot find a Samsung Printer Software tile, uninstall from the
desktop screen mode.
• If you want to uninstall Samsung’s printer management tools, from the
Start screen, right-click the app > Uninstall > right-click the program
you want to delete > Uninstall and follow the instruction in the window.

2. Menu Overview and
Basic Setup
This chapter provides information about the overall menu structure and the basic setup options.
• Menu overview 26
• Machine’s basic settings 30
• Media and tray 31
• Basic printing 42
• Using USB memory device 47
26
2. Menu Overview and Basic Setup
Menu overview
The control panel provides access to various menus to set up the machine or use
the machine’s functions.
You can set menus easily using the touch screen.
• The home screen is shown on the touch screen on the control panel.
• Some menus are grayed out depending on your options or models.
• The menus are described in the Advanced Guide (see "Useful Setting
Menus" on page 171).
1
Introducing the Home Screen
Icon Name Description
Information
Prints various machine information and reports.
Eco
Displays Eco settings.
Direct USB
Enters the USB menu when USB memory is
inserted into the USB memory port on your
machine.
Setup
Browse current machine settings or change
machine values.
Job Status
Displays the jobs currently running, completed or
in queue.
Counter
Displays total pages printed.
Help
View help and troubleshooting information.
Toner Status You can see the toner status.
Menu You can select the LCD brightness, language and
you can edit home menus.
Icon Name Description

Menu overview
27
2. Menu Overview and Basic Setup
Information
(see "Information" on page
172)
Eco
(see "Eco" on page 183)
Direct USB
(see "Direct USB" on page 184)
Setup
(see "System Setup" on page 176)
Configuration
Demo Page
Help List
Network Configuration
Supplies Information
Job Reports
Usage Counter
Font List
Eco-On
Off
On
Settings
Default Mode
Off
On
On-Forced
a
Feature Configuration
Default
Custom
a. If you set the eco mode on with a passcode from the SyncThru™ Web Service (Settings tab > Machine Settings > System > Eco Settings) or Samsung Easy Printer Manager (Device Settings >
Eco), the On-Forced message appears. You have to enter the passcode to change the eco mode status.
Print From
(Options)
Copies
Auto Fit
Duplex
Paper Source
Color Mode
File Manage
(Options)
Delete
Format
Show Space
System
Date & Time
Date Format
Clock Mode
Language
Maintenance
Default Paper Size
Skip Blank Pages
Power Save
Wakeup Event
Auto Power Off
Altitude Adjustment
Vapor Mode
Paper Stacking
Humidity
Job Timeout
File Policy
Held Job Timeout
Import Setting
Export Setting

Menu overview
28
2. Menu Overview and Basic Setup
Setup
(see "System Setup" on page 176)
Admin Setup
a
User Access Control
Authentication
Stamp
Stamp Activate
Item
Opacity
Position
Change Admin Password
Firmware Upgrade
Image Overwrite
Manual
Overwrite Method
Overwrite Times
Application
Application Management
Install New Application
BYOD Connection
a. You need to enter a password to enter this menu. The default password is sec00000.
Network
TCP/IP (IPv4)
TCP/IP (IPv6)
Ethernet
802.1x
Wi-Fi
Wi-Fi On/Off
Wi-Fi Settings
WPS
Wi-Fi Direct
Wi-Fi Signal
Clear Wi-Fi Settings
Protocol Management
HTTP
WINS
SNMPv1/v2
UPnP(SSDP)
mDNS
SetIP
SLP
Network Configuration
Clear Settings
Layout
Orientation
Margin
Duplex
Paper
Copies
MP Tray
Tray X
Paper Source
Tray Confirmation
Tray Behavior
Auto Continue
Auto Tray Switch
Paper Substitution
Tray Protection
Tray Mode
Graphic
Resolution
Clear Text
Edge Enhance
Trapping
Screen
Auto CR
Emulation
Emulation Type
Setup
Menu overview
29
2. Menu Overview and Basic Setup
Job Status
(see "Job Status" on page 185)
Counter
(see "Counter" on page 186)
Help
(see "Help" on page 187)
Current Job
Secure Job
Stored Job
Complete Job
Total Printed Basic Taskflow
Information
Eco
Direct USB
Setup
Troubleshooting
Paper jam in MP Tray
Paper jam in Tray 1
Paper jam in Tray 2
Jam inside machine
Jam in exit area
Jam inside of duplex

30
2. Menu Overview and Basic Setup
Machine’s basic settings
For models that do not have the display screen on the control panel, set the
machine’s settings by using the Device Settings in Samsung Easy
Printer Manager program
For Windows and Mac users, set from Samsung Easy Printer Manager >
(Switch to advanced mode) > Device Settings, see "Device Settings"
on page 227.
After installation is complete, you may want to set the machine's default
settings.
To change the machine’s default settings, follow these steps:
1
Select (Setup) > System > Next on the touch screen.
2
Select the option you want.
• Language: Change the language that is displayed on the control
panel.
• Date & Time: You can set the time and date. They are printed on
reports. If, however, they are not correct, you need to change it for
the correct time being.
Enter the correct time and date using arrows or numeric keypad (see
"Understanding the pop-up keyboard" on page 190).
• Month = 01 to 12
• Day = 01 to 31
• Year = requires four digits
• Hour = 01 to 12
• Minute = 00 to 59
• Clock Mode: You can set your machine to display the current time
using either a 12 hours or 24 hours format.
• Power Save: When you are not using the machine for a while, use
this feature to save power.
• When you press the power button or start printing, the product will wake
up from the power save mode.
• When you press any button except power button, the machine wake up
from the power save mode. Select (Setup) > System > Next >
Wakeup Event > On on the touch screen.
• Altitude Adjustment: Print quality is affected by atmospheric
pressure, which atmospheric pressure is determined by the height of
the machine above sea level. Before you set the altitude value,
determine the altitude where you are (see "Altitude adjustment" on
page 189).
3
Press (Stop) or home ( ) icon to return to ready mode.
 Loading...