

Samsung iPolis SNM-128S User Manual
User's Manual
0

User's Manual
1
, a brand integrated into Samsung’s network products, stands for a convenient
world (Polis) made safe (Police) through Samsung’s superior network performance (Internet
Protocol). Our 1- and 4-channel video servers and network cameras support a wide selection of
advanced network security system features including an Ethernet interface for convenient
Internet connection, various image compression standards such as MPEG-4 and JPEG, high
quality image transfer, basic web viewer, two-way audio, and network management software
enabling remote control and multi-channel management.
Preface
The user who installs and operates the product shall be aware of this manual and other
manuals referenced by this manual before the installation and operation and use it properly.
This manual and the software and hardware explained here are protected by copyright law.
All copy, reprint and translation to other languages of a part of or all contents of this user
manual without permission of Samsung Techwin Co., Ltd. are not allowed except for fair use
within the scope of copyright law.

User's Manual
2
Contents
Chapter 1. Overview.................................... 7
1.1. SNM-128S ................................................................7
1.2. System Requirements ...................................................... 7
1.3. Supported Devices......................................................... 8
1.4. Monitor Setup ............................................................. 8
1.5. Software Installation....................................................... 10
1.6. Deleting Program DB...................................................... 11
1.6.1. For Windows XP...................................................... 11
1.6.2. For Windows Vista .................................................... 11
1.7. Program Login............................................................ 12
Chapter 2. Monitor.........................................13
2.1 Interface ................................................................. 13
2.1.1 View Areas ........................................................... 13
2.2 Toolbars ................................................................. 15
2.3 Site Mode................................................................16
2.3.1 Creating & Deleting Folders ............................................ 16
2.3.2 Registering & Deleting Units............................................ 16
2.3.3 Renewing Unit Information ............................................. 19
2.3.4 Viewing Video ........................................................ 19
2.4 Screen Layout Mode ...................................................... 19
2.4.1 Registering & Deleting Screen Layouts................................... 19
2.4.2 Viewing Video ........................................................ 20
2.5 Map Mode ............................................................... 20
2.5.1 Map Editor ........................................................... 20
2.5.2 Viewing Map ......................................................... 24
2.5.3 Controlling Mapped Devices............................................ 24
2.5.4 Aligning Map Windows................................................. 26
2.5.5 Switching Map........................................................ 26

User's Manual
3
2.6 Monitor Screen ........................................................... 26
2.6.1 Screen Interface ...................................................... 26
2.6.2 Split Screen .......................................................... 27
2.6.3 Full Screen........................................................... 27
2.6.4 Switching Screens .................................................... 27
2.6.5 Caption Information ................................................... 27
2.6.6 Video Transfer Speed.................................................. 27
2.6.7 Video Resolution...................................................... 28
2.6.8 Streaming............................................................ 28
2.6.9 Event................................................................28
2.6.10 Saving Images........................................................ 29
2.6.11 PTZ Control .......................................................... 29
2.6.12 Audio Control......................................................... 30
2.6.13 Buffering............................................................. 30
2.6.14 Closing All Monitors ................................................... 30
2.6.15 Event Log............................................................ 30
2.6.16 Status & Action ....................................................... 30
2.6.17 Viewing Videos ....................................................... 31
2.6.18 Instant Viewer ........................................................ 31
2.6.19 Instant Player......................................................... 32
2.6.20 Alarm Control Station .................................................. 32
2.7 Status & Action ........................................................... 33
2.7.1 Status & Action Information............................................. 33
2.7.2 Viewing Videos ....................................................... 34
2.7.3 Selecting Different Event Alert Types by Unit.............................. 34
2.8 Searching Event .......................................................... 34
2.9 User Settings............................................................. 36
2.10 Changing Passwords ...................................................... 36
2.11 Setting Up Options ........................................................ 36
2.11.1 Setting Up Options .................................................... 37
2.11.2 Recording............................................................ 38
2.11.3 Event Alert ........................................................... 39
Chapter 3. Playback .......................................41
3.1 Interface ................................................................. 41

User's Manual
4
3.1.1 View Areas........................................................... 41
3.1.2 Toolbar .............................................................. 42
3.2 Opening Unit & Backup File ................................................ 43
3.3 Search .................................................................. 43
3.3.1 Image Information Display.............................................. 43
3.3.2 Changing Search Timeli ne ............................................. 43
3.3.3 Selecting Channels.................................................... 44
3.3.4 Calendar Search...................................................... 44
3.3.5 Log Information Display & Search ....................................... 44
3.3.6 Searching Text........................................................ 44
3.3.7 Smart Search......................................................... 45
3.3.8 Searching Thumbnails ................................................. 46
3.4 Playback................................................................. 47
3.4.1 Playback Buttons ..................................................... 47
3.4.2 Playing Audio......................................................... 47
3.4.3 Text ................................................................. 47
3.5 Image Control ............................................................ 48
3.5.1 Zoom/Brightness/Contrast Control....................................... 48
3.5.2 Saving Images........................................................ 48
3.5.3
Printing Images....................................................... 48
3.6 Backup Feature........................................................... 49
3.7 Backup Log .............................................................. 49
3.8 Setting Up Options ........................................................ 50
3.8.1 Captions............................................................. 50
3.8.2 Spilt Screen Auto Control............................................... 50
Chapter 4. Setup ..........................................51
4.1 Program Login............................................................ 51
4.2 Interface ................................................................. 51
4.2.1 Site Tree............................................................. 52
4.2.2 Menu................................................................52
4.2.3 Settings Page ........................................................ 52
4.3 Setup Guidelines.......................................................... 53

User's Manual
5
4.3.1 System Setup ........................................................ 53
4.3.2 Screen .............................................................. 56
4.3.3 Date/Time............................................................ 57
4.3.4 Network ............................................................. 58
4.3.5 COM Port............................................................ 61
4.3.6 PTZ ................................................................. 62
4.3.7 Users................................................................64
4.3.8 IP Filtering ........................................................... 65
4.3.9 Disk................................................................. 66
4.3.10 System Log .......................................................... 66
4.3.11 MD.................................................................. 67
4.3.12 Sensor Setup......................................................... 67
4.3.13 Text ................................................................. 68
4.3.14 Event Action.......................................................... 68
4.3.15 System Event ........................................................ 69
4.3.16 E-Mail ............................................................... 70
4.3.17 Event Preset ......................................................... 70
4.3.18 Digital Input & Output.................................................. 71
4.3.19 Event Schedule
....................................................... 71
4.3.20 Save ................................................................72
4.3.21 Program ............................................................. 73
4.3.22 Audio................................................................74
4.3.23 Miscellaneous ........................................................ 74
4.3.24 SVR-1650/1640/950 Setup ............................................. 75
4.3.25 SVR-940/450 Setup ................................................... 82
4.3.26 Web Server & IP Camera Setup......................................... 97
Chapter 5. Scheduled Backups............................ 100
5.1 Backup Setup ........................................................... 101
5.1.1 Backup File ......................................................... 101
5.1.2 Password Setup .....................................................101
5.1.3 Backup File Retention Period Setup .................................... 102
5.1.4 Backup Drive Setup .................................................. 102
5.1.5 Auto Removal Setup.................................................. 103
5.1.6 Backup Data Area Setup .............................................. 103
5.1.7 Backup Schedule Setup............................................... 104

User's Manual
6
5.1.8 Backup System Tray Icon .............................................105
5.1.9 Creating Backup File ................................................. 105
5.2 Backup Status........................................................... 106
5.2.1 Backup Operation Status Table.........................................106
5.2.2 Viewing Detailed Information...........................................107
5.2.3 Aborting Backups .................................................... 107
The contents of this manual may vary from the actual software depending on its upgrade status,
and its design and specifications may change without prior notice for the improvement of
product performance.
User's Manual
7
Chapter 1. Overview
1.1. SNM-128S
The SNM-128S is a central surveillance system solution that can monitor a maximum of 1000
units installed in remote locations.
This software provides convenient monitoring features such as real-time video monitoring, video
search and backup, and various system setup options. It supports a maximum of 2 monitors,
enabling you to monitor up to 128 channels simultaneously in real time. It is also equipped with
efficient search features including specific area and text searches.
The SNM-128S reports on the real-time situation of registered units via various methods,
helping you understand and take appropriate countermeasures as quickly as possible. It also
offers a feature to save and search event logs.
To register and use products other than the SVR-3200, 1680, 1660, 1645, 960, and
45, their firmware version must be v2.8.0 or higher.
1.2. System Requirements
Minimum Recommended
CPU Intel Core2 duo E6750
or higher
Intel Core2 Quad Q6700
or higher
Main Memory 2GB 2GB or higher
Video Memory 256MB 512MB or higher
Display Resolution 1280 x 1024 (with 32bit color) or higher
Hard Disk 1GB or higher
Operating System Windows XP Professional / Window Vista Business
Miscellaneous DirectX 9.0 or higher

User's Manual
8
The SNM-128S is optimized for Windows XP with Service Pack 3 and the Windows Vista series.
To prevent viruses and malicious code on your monitoring system, install an anti-virus program
and get the latest Windows updates for the operating system on a regular basis.
For real-time multi-channel monitoring, 2GB of memory is recommended for 128 channels and
4GB for 256.
4GB of memory is also recommended when using 512 or more unit s.
Using the default video drivers provided by Microsoft in conjunction with DirectX may cause
flickering or decrease the display quality of the software. In such cases, uninstall DirectX or get
the latest drivers for the corresponding video card.
1.3. Supported Devices
The SNM-128S supports devices as listed below.
Category Model Name Firmware
DVR
SVR-3200/1680/1660/
1645/960/945
1.0.0 or higher
Network Camera SNC-550 2.8.0 or higher
Network Camera SNP-3300 2.8.0 or higher
Network Camera SNP-3300A 2.8.0 or higher
Network Camera SNP-1000 2.8.0 or higher
Network Camera SNP-1000A 2.8.0 or higher
Video Server SNS-100 2.8.0 or higher
Video Server SNS-400 2.8.0 or higher
DVR SVR-1630 4.8.0 or higher
DVR SVR-1650 2.8.0 or higher
DVR SVR-1640 2.8.0 or higher
DVR SVR-950 2.8.0 or higher
DVR SVR-940/450 1.4.0 or higher
1.4. Monitor Setup
Install the VGA card in your monitoring system, and then connect the monitor cable.
Turn on the system power, and then start Windows.
Right-click on the desktop.
User's Manual
9
Choose Properties. (On Windows Vista choose Personalize then Display Settings.)
The Display Settings window appears.
Click the Settings tab.
All monitors except the default monitor are grayed out.
To activate another monitor, place the cursor on the monitor icon, and then right click on the
mouse.
Choose Att ached, and the n click "Apply" at the bottom of the Display Settings window.
Adjust the resolution of the newly activated monitor to the SNM-128S recommended resolution.
User's Manual
10
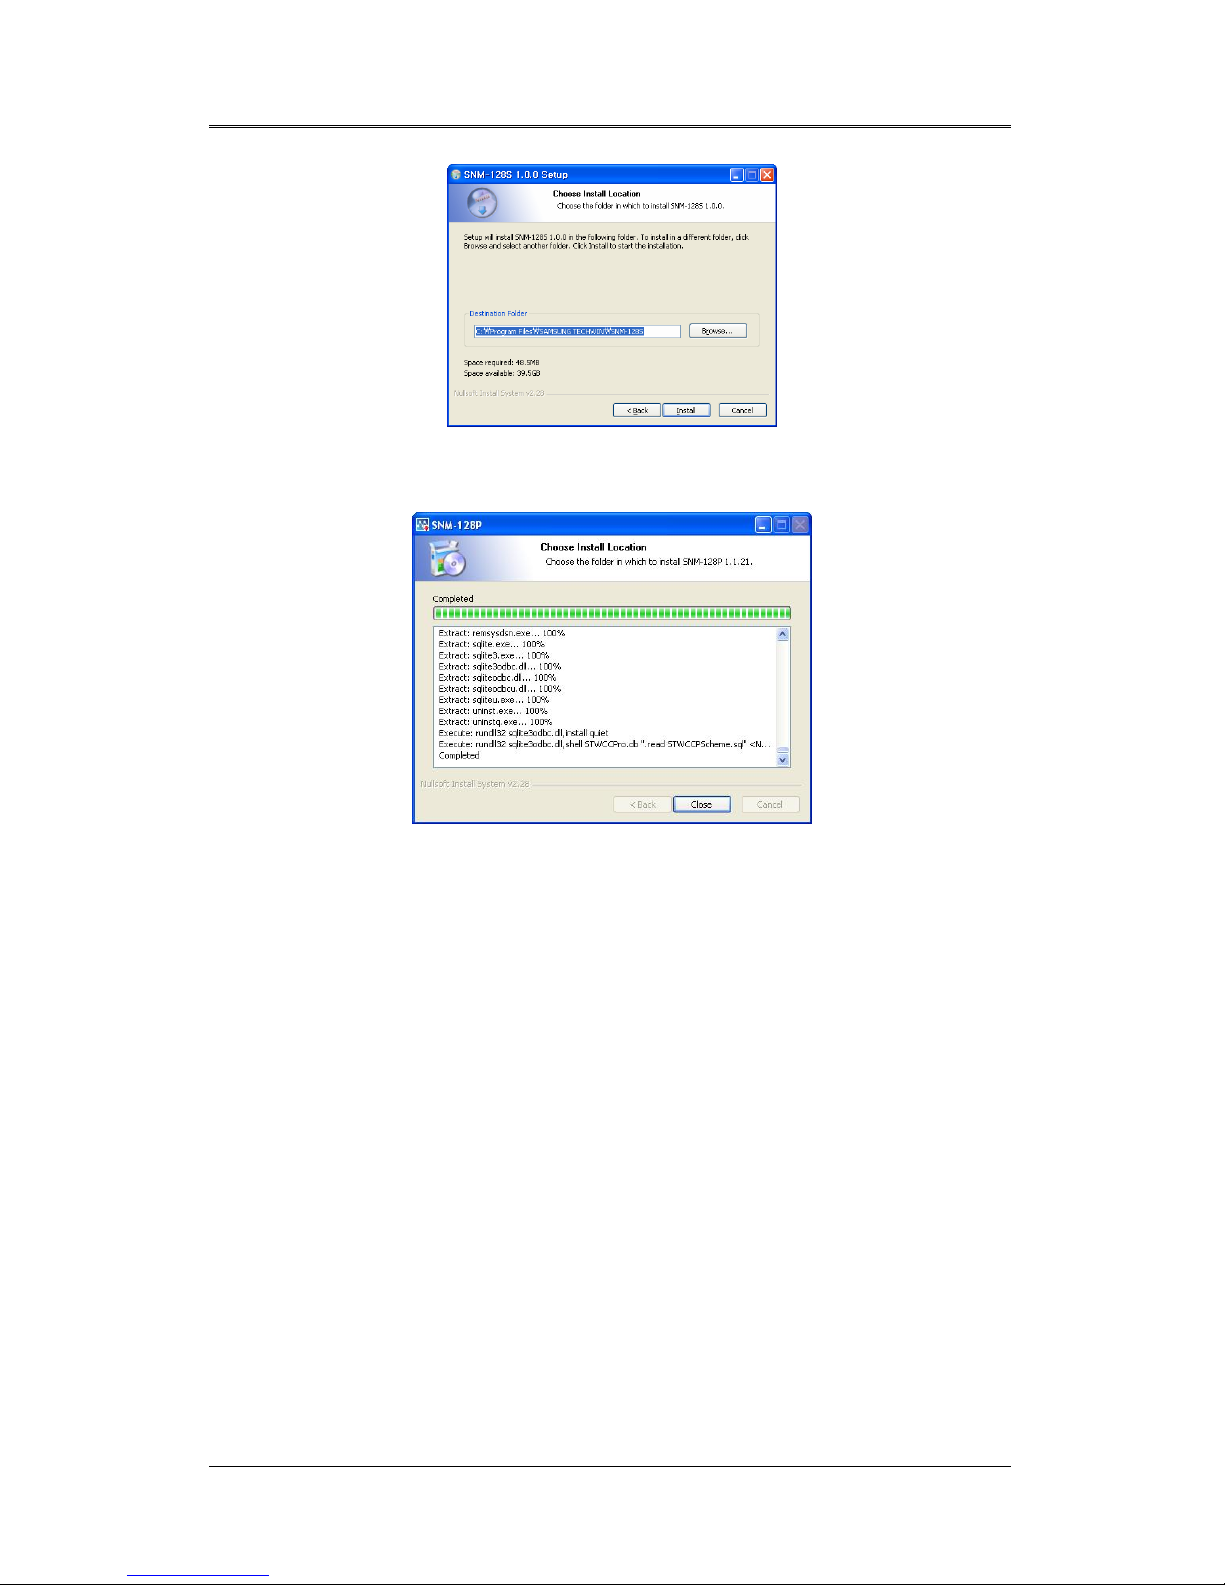
1.5. Software Installation
Insert the SNM-128S USB key to your system.
In the SNM-128S Setup CD menu, run "SNM-128S_Setup_v1.x.x-USBKey.exe". The SNM128S software requires administrator permissions to be installed.
Select your language, and then click "OK".
Click "I agree".
Select the items to install, and then click "Next".
User's Manual
11
Choose an installation folder, and then click "Install".
Clicking "Close" completes the SNM-128S program installation.
1.6. Deleting Program DB
1.6.1. For Windows XP
Uninstall the program, and then delete the entire program folder at "C:\Program
Files\SAMSUNG TECHWIN\SNM-128S".
1.6.2. For Windows Vista
Uninstall the program, and then in Windows Explorer click > View > Folder Options. Under the
View tab, check "Show hidden files and folders" under Hidden files and folders. Then delete the
entire "SNM-128S" folder at "C:\Users\UserName\AppData\Local\VirtualStore\Program
Files\SAMSUNG TECHWIN\SNM-128S".

User's Manual
12
1.7. Program Login
Enter an ID and password, and then click "OK". SNM-128S runs if the ID and password match.
The default login ID is "Administrator" and the default password is "12345". Permissions to run
the program are limited depending on the user settings.

User's Manual
13
Chapter 2. Monitor
2.1 Interface
The SNM-128S provides upgraded UIs; you can drag and drop to move or dock any object on
the screen and customize the screen elements fit to your needs. (For customizing the UI across
multiple monitors, please refer to section 2.11.4, Monitor Layout Manager.)
2.1.1 View Areas
The Control Center screen consists of three different view areas: Unit Explorer at the left side,
Main View in the center displaying video or map, and Event View on the bottom.
2.1.1.1 Unit Explorer
Displays units, screen layouts, and maps in the tree list corresponding to the current mode, and
enables you to register , edit, or delete them.
Tool b a r
Main View
Event Viewer
Unit Explorer

User's Manual
14
(Chart: Unit Explorer Icons)
Icons Description
A folder that cont ains registered units.
A sub folder under a registered unit; you can add sub folders under a registered
unit for management.
Failed to connect a non-hard disk unit.
Failed to login to a non-hard disk unit.
Logged in to a non-hard disk unit.
Alarmed unit: when an alarm is activated, the target icon blinks red for 5 seconds.
Unit under watch; every video channel of the target unit is under watch.
Logged into a hard disk unit (DVR).
Failed to login to a hard disk unit (DVR).
Alarmed unit: when an alarm is activated, the target icon blinks red for 5 seconds.
Failed to connect to a hard disk unit (DVR).
Video channel status: displays if the status of the video channels of each unit is
normal.
Selected video channel status; displays when a specific video channel is under
watch and the status of the video channels of each unit is normal.
Sensor action: displays in blue if the sensor is off.
Sensor action: displays in red if the sensor is on.
Relay Out: off.
Relay Out: on.
Mike: displays when the mike is working properly.
Mike: displays when the mike is currently in use.
A registere d screen layout.
Event: displays if an event occurs in a unit under a registered screen layout.
Map.
2.1.1.2 Main View
Displays the monitor screen and map window of a selected mode.
2.1.1.3 Event View
Event History displays the real-time situation of an event happening in a unit that is registered
under My Unit.
Status & Action displays the event situation of each unit, and enables control of the relay output
and audio output devices.
is to hide windows or drag and dock the title bar.
User's Manual
15
2.2 Toolbars
Frequently used features have toolbar buttons for your convenience.
(Chart. Toolbar Icons)
Button Function
Hides Unit Explorer.
Hides Event View.
Expands the Main View area to the full screen.
Runs the Search program.
Runs the Setup program.
Searches saved events by date, unit, and category.
Enables you to set various options.
Adds units, screen layout, and maps.
Enables you to edit settings for registered units, screen layouts, and map s.
Deletes a unit, screen layout, or map.
Saves the current monitoring screen as a screen layout.
Refreshes the Unit Tree: updates connection status and unit list.
Disconnects from all monitoring units or closes all map windows.
Places a specific map on top of multiple map windows in the Map mode.
Disconnects from a currently monitoring unit, or closes a map window.
Cascade map windows.
Aligns map windows as tiles.
~
Split the monitor screen into 1, 4, 9, 13, 16, 25, 36, 49, or 64 screens.
Displays the software version.
Directs you to www.samsungipolis.com
.
User's Manual
16
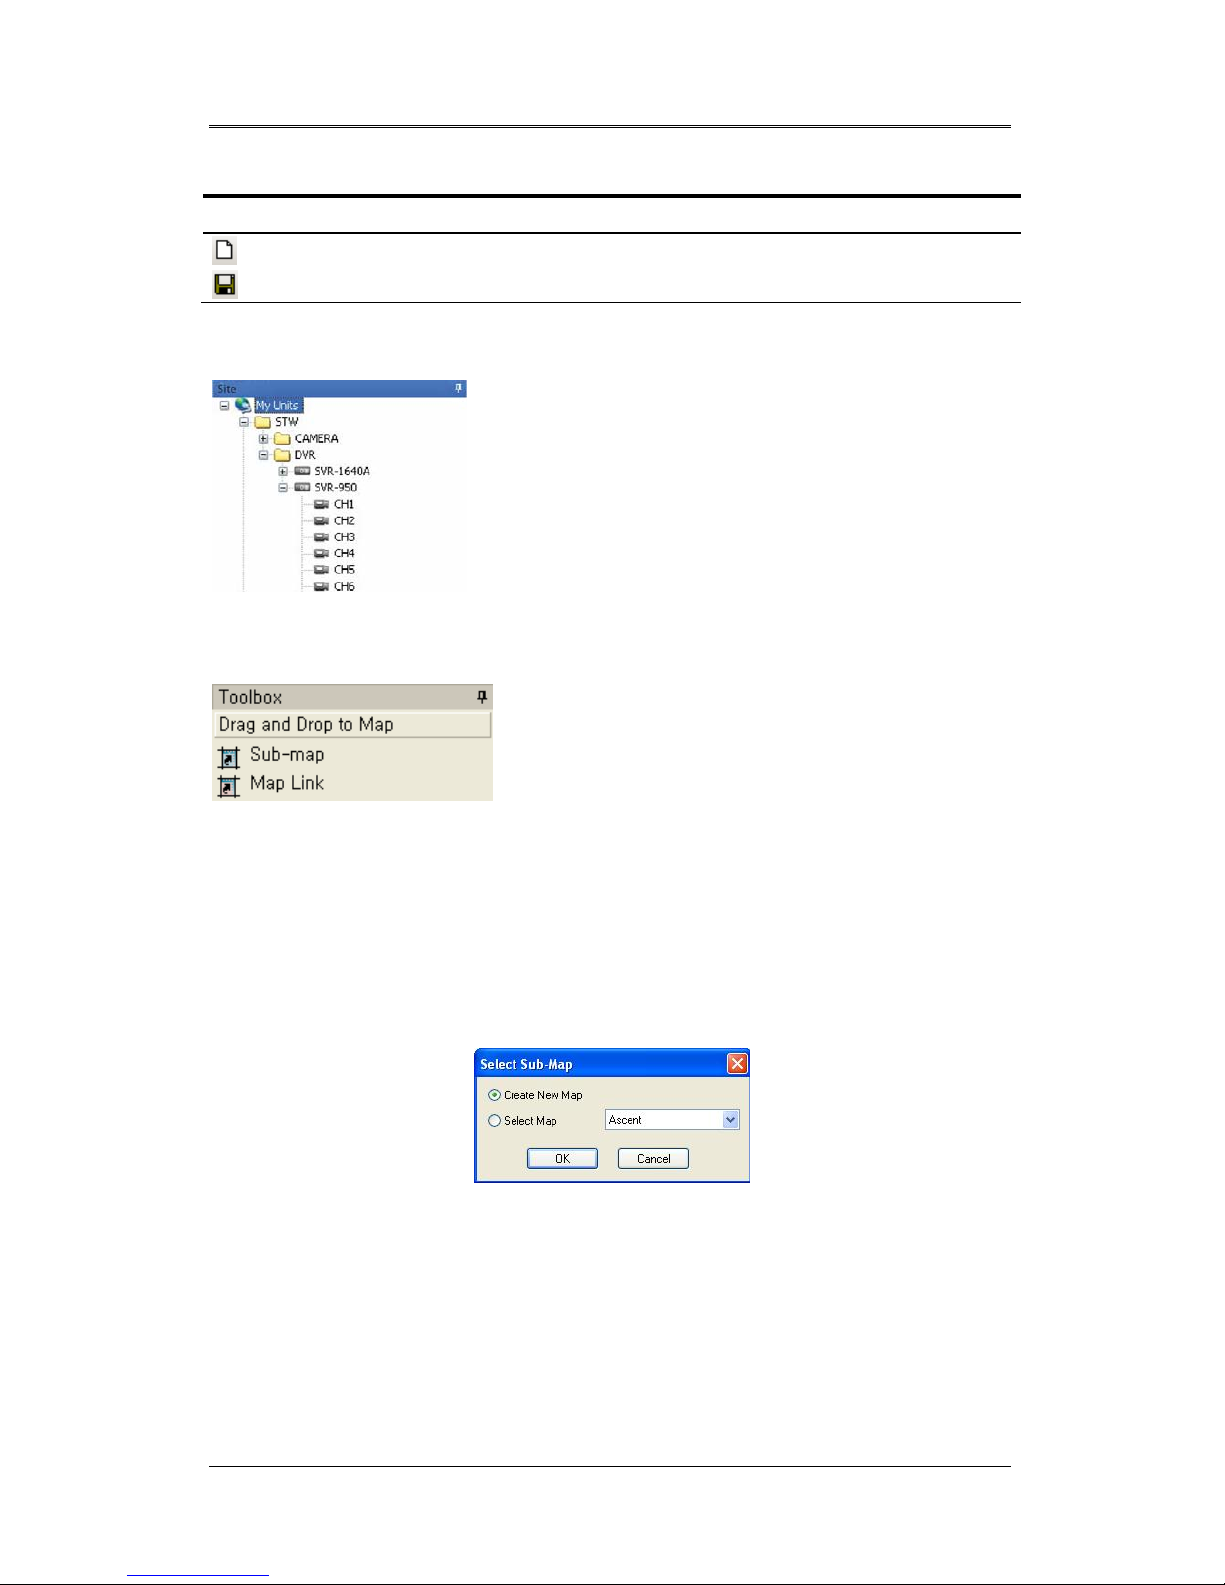
2.3 Site Mode
Site Mode enables you to register and manage multiple units. Units in Unit Explorer are
displayed under the Local Unit folder in your system for convenient registration. Via icons, you
can check unit models and their connection status.
2.3.1 Creating & Deleting Folders
Right click on the My Unit folder, and then select "Add Folder" in the popup menu. When an
input window appears, enter a folder name, and then click "OK" to create the folder.
To delete a folder, right click on a folder, and then select "Delete Folder". Please remember if the
deleted folder contains units, the units are deleted at the same time.
2.3.2 Registering & Deleting Units
To add a unit, drag and drop a unit from Local Unit to My Unit, or right click on a unit and then
click
"Add Unit". The Registration message window then appears. You can also click the
Add button on the toolbar. (The Add button may be inactive depending on the number of
maximum units that is allowed per license.)
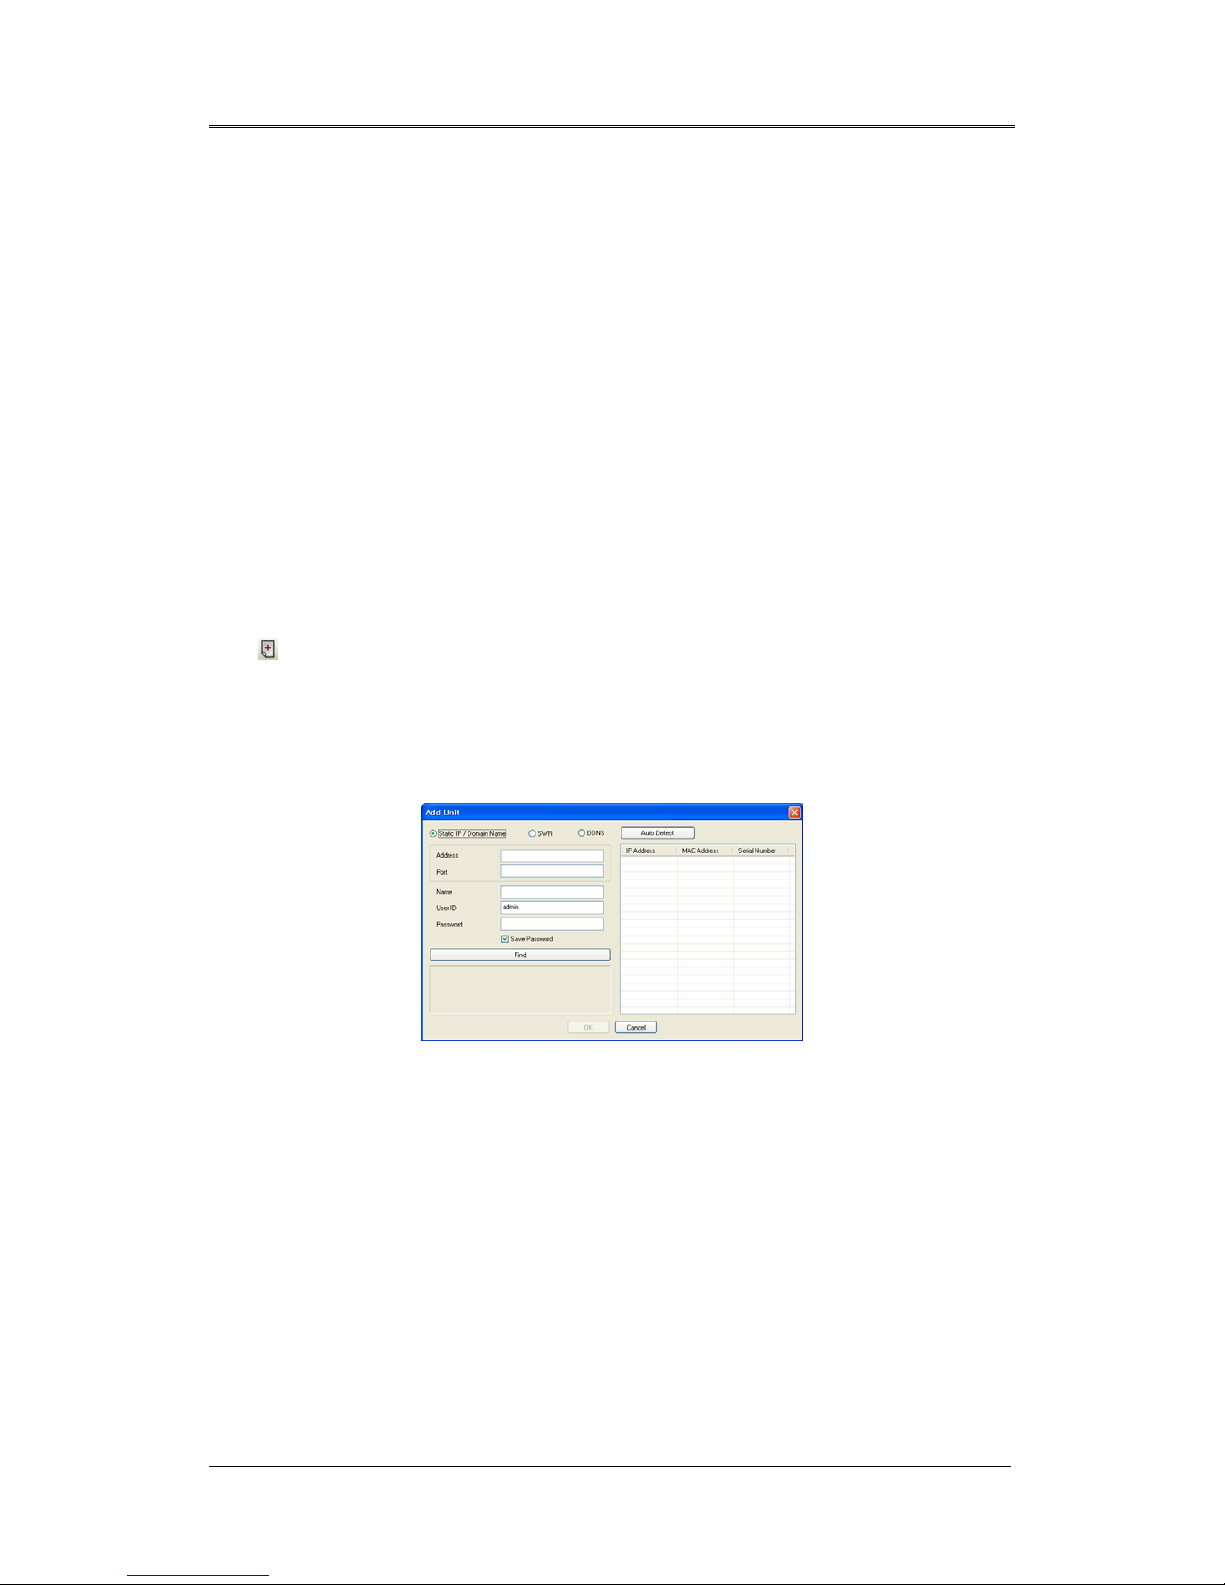
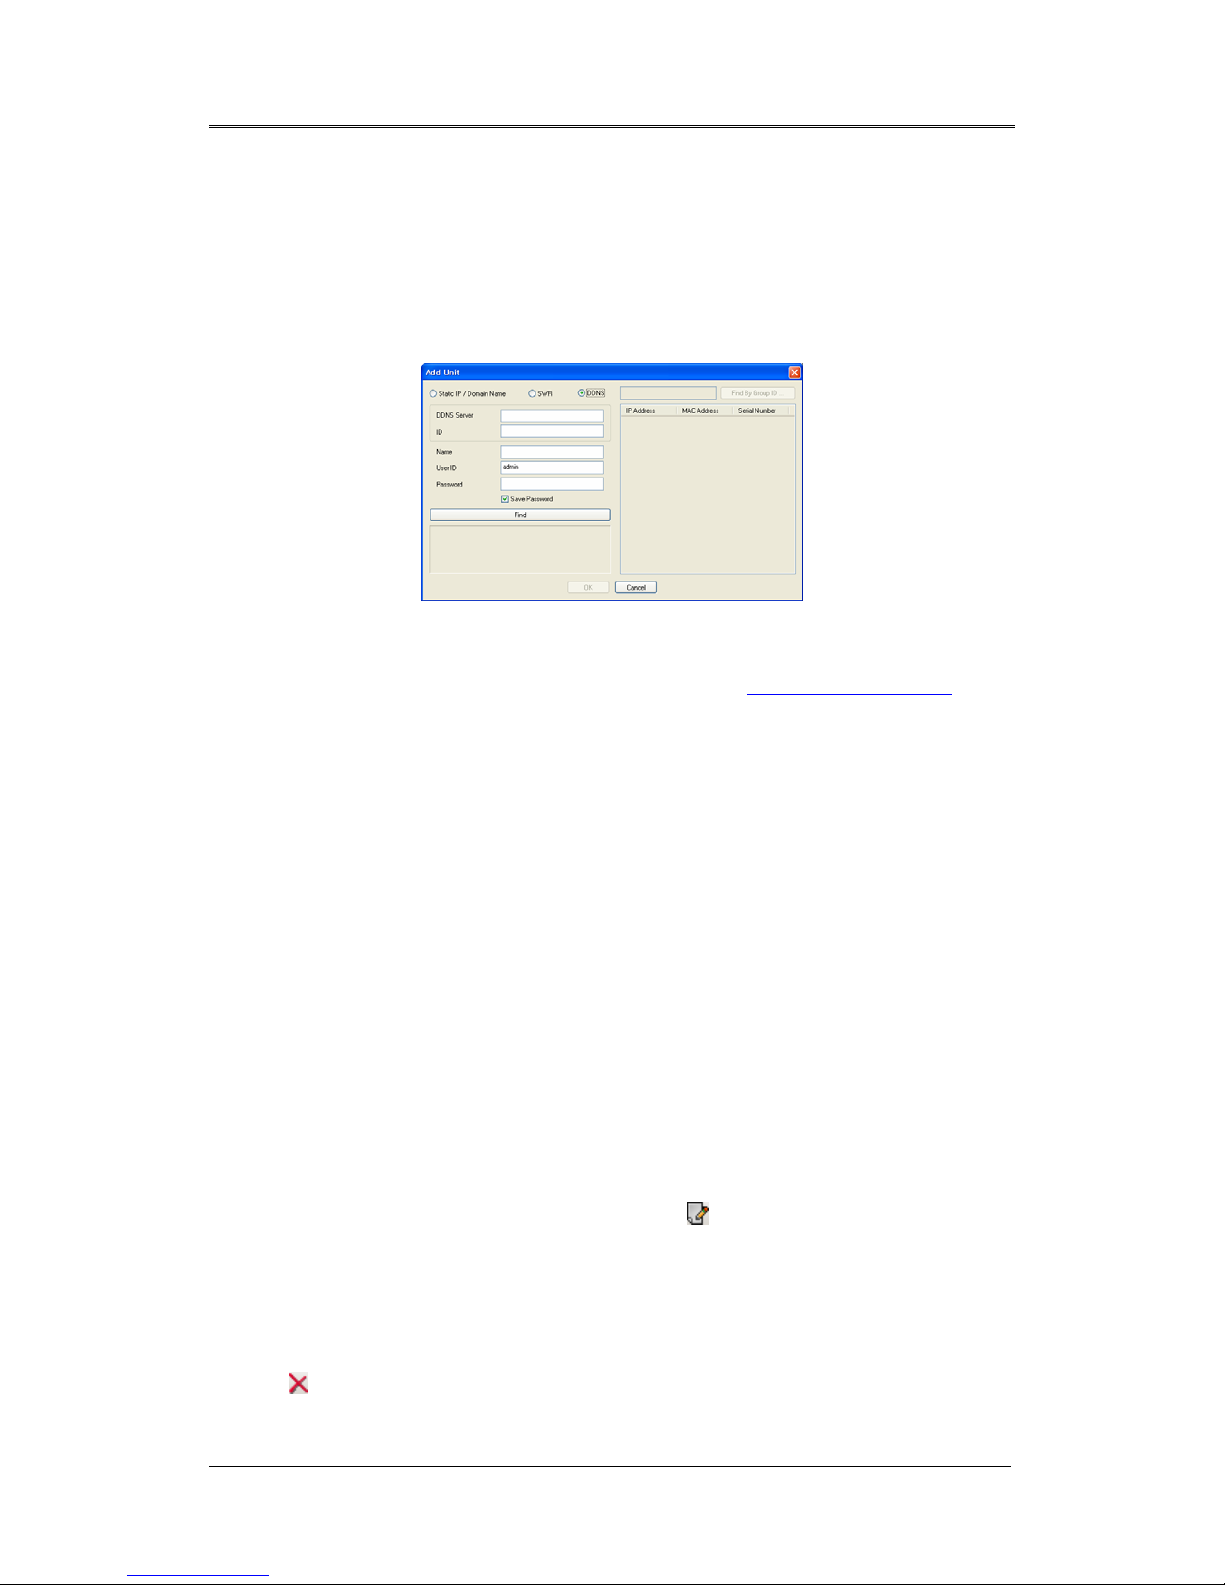
2.3.2.1 Registering Unit by Fixed IP / Domain Name
To register a unit through the "Add Unit" menu, enter the IP address and other information, and
then click "Search".
Address
Enter the IP address of a unit to be registered in My Unit.
Port
Enter the port number for the IP address above.
User's Manual
17
Name
Enter a meaningful name for the unit to help you easily recognize it.
User ID
Enter your administrator or user ID.
Password
Enter the password for the ID.
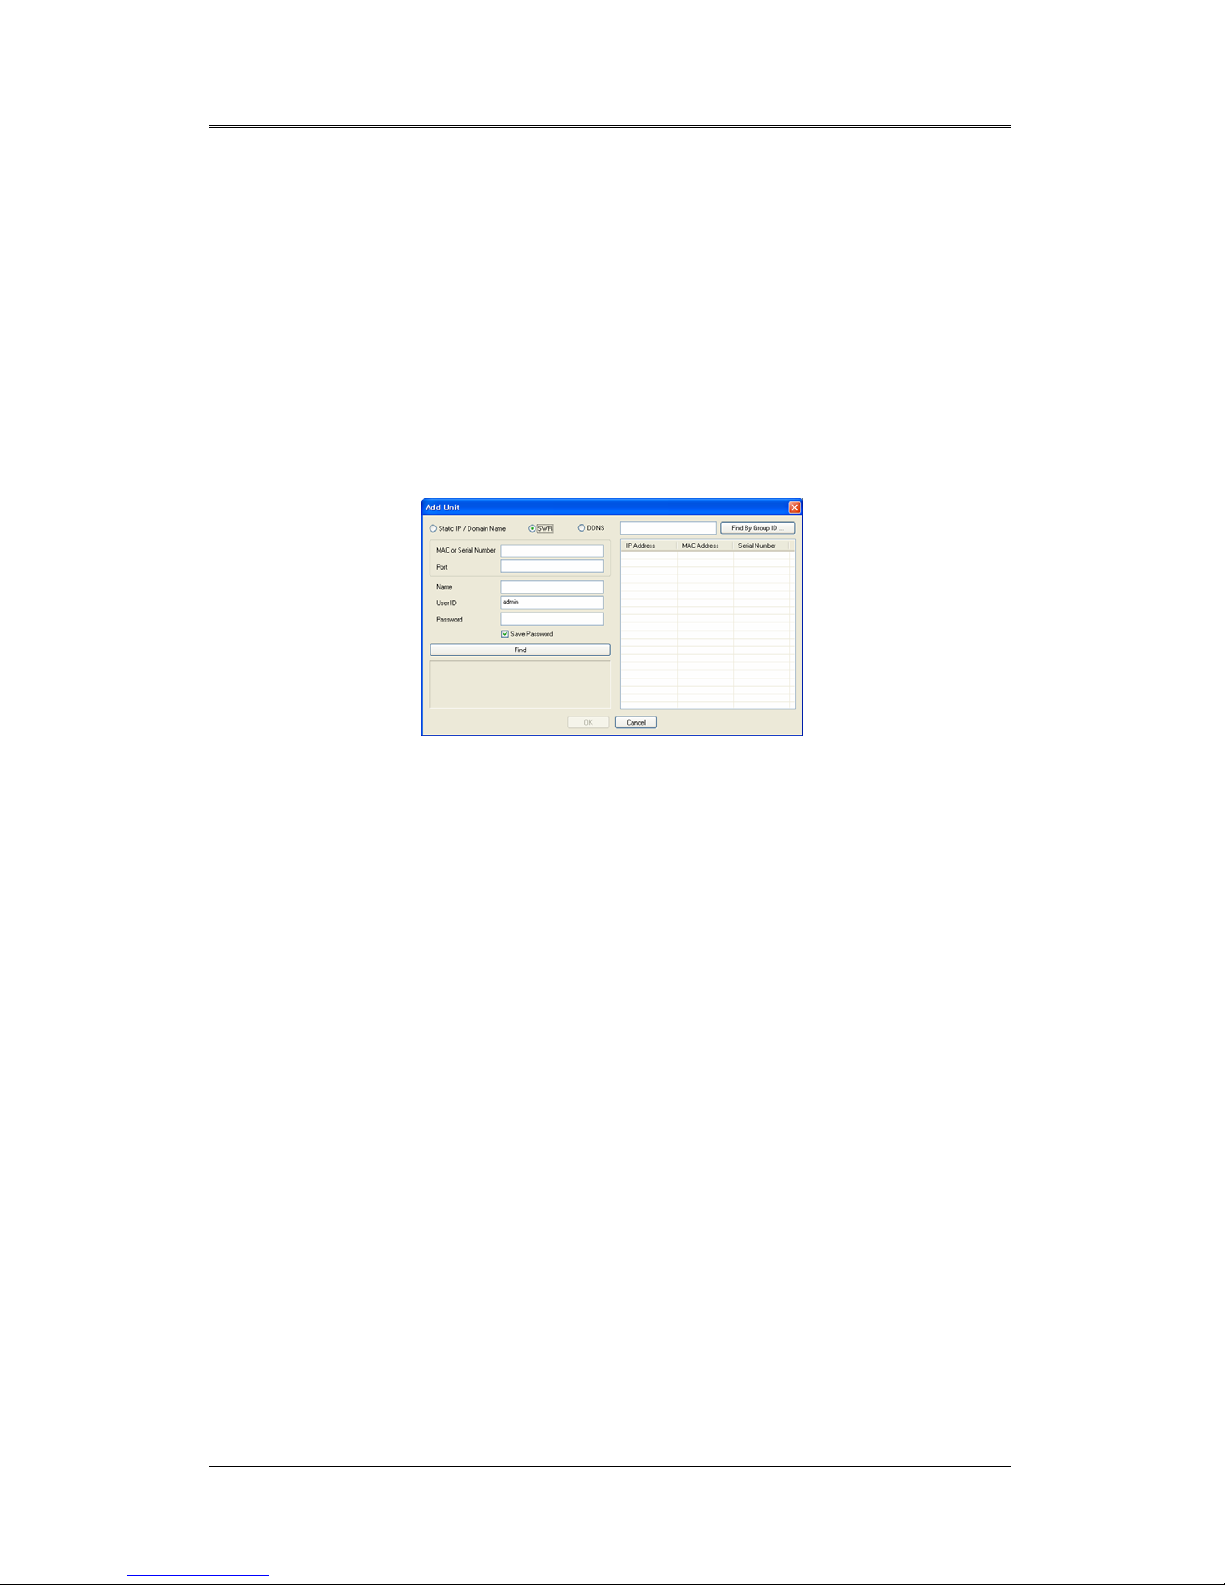
2.3.2.2 Registering Unit Registered in SWR
For units with dynamic IPs, register them in SWR (Samsung Registration Server) for effective
management.
MAC or Serial Number
Enter the MAC address or serial number of a unit that is registered on SWR.
For older models, enter the MAC address, and the serial number for newer models.
Port
Enter the port number for the IP address corresponding to the target unit.
Name
Enter a meaningful name for a target unit to help you easily recognize it.
User ID
Enter your administrator or user ID.
Password
Enter the password for the ID.
User's Manual
18
Searching by Group ID
Enter the group ID of a unit, and then click Search.
If the group ID is entered correctly, the product information of the unit is displayed at the bottom
of the window. If not, an error message like [Cannot find the unit.] appears.
2.3.2.3 Registering Unit Registered on DDNS
This is to register a unit that is registered in DDNS.
To use the DDNS option, you must register the target product at www.samsungipolis.com
.
DDNS Server
Enter the address of the DDNS server: ID
Enter the ID of the product that is registered with the DDNS server.
Name
Enter a meaningful name for a target unit to help you easily recognize it.
User ID
Enter your administrator or user ID.
Password
Enter the password for the ID.
2.3.2.4 Changing Unit Information
To change the information of a registered unit, right click on a unit, and then choose "Edit Unit".
A message window appears. You can also click the
"Edit" button on the toolbar. Port
Number and User Information can also be changed.
2.3.2.5 Deleting Units
To delete a registered unit, right click on the unit, and then choose "Delete Unit". You can also
click the
"Delete" button on the toolbar.
User's Manual
19
2.3.3 Renewing Unit Information
To refresh registered units and the unit list in the network, right click on the unit tree, and then
select "Refresh". Or select the "Refresh Site Tree" button on the toolbar.
2.3.4 Viewing Video
When a connection between the monitoring system and a unit is established, the video channel
of the unit is displayed in the unit tree. Selecting a video channel plays a live video of the
corresponding unit in the currently selected monitor within the Main View. To change the monitor,
drag and drop the channel icon to a different one.
To watch all channels of a unit, select the unit icon. The screen splits into several channels to
play the videos.
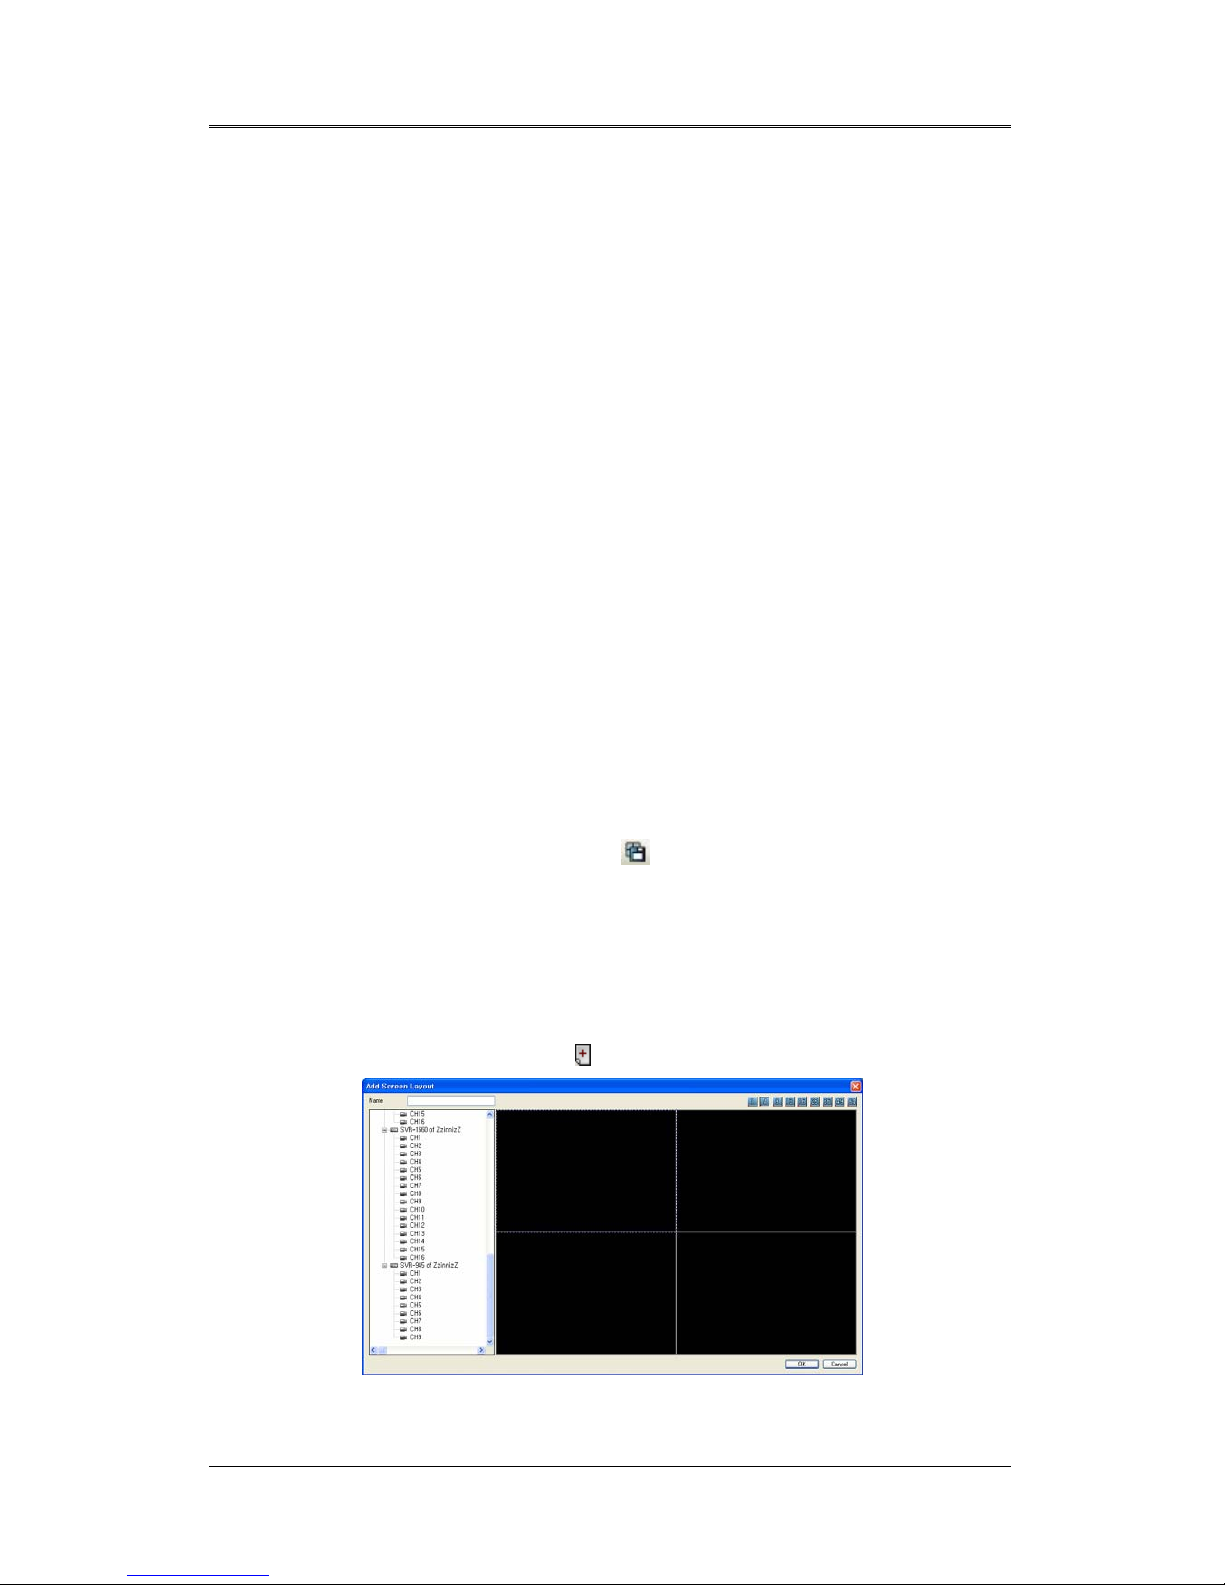
2.4 Screen Layout Mode
For effective management, you can register a group of channel s as a screen layout. To activate
the Screen Layout mode, select the Screen Layout tab under Unit Explorer.
2.4.1 Registering & Deleting Screen Layouts
2.4.1.1 Saving Screen Layout
In the Site mode, you can save the current monitoring screen as a screen layout. To register a
screen layout, select a channel, and then select
"Save Screen Layout". When registering a
screen layout, information for the current monitoring screen—division, transfer speed, and
resolution—is registered at the same time.
2.4.1.2 Registering Using Menu
Right click on the desktop, and then choose "Add Screen Layout". The Registration message
window appears. You can also simply click
"Add" on the toolbar.
User's Manual
20
2.4.1.3 Changing Screen Layout Information
Right click on a screen layout, and then choose "Edit Screen Layout". A message window
appears. You can also simply click
"Edit" on the toolbar.
2.4.1.4 Deleting Screen Layout
Right click on a screen layout, and then choose "Delete Screen Layout". You can also simply
click
"Delete" on the toolbar.
2.4.2 Viewing Video
To play the videos of channels under a screen layout, select or drag and drop the screen layout.
The screen is split into the division of the screen layout and the videos play.
2.5 Map Mode
For convenient management, you can map devices such as channels, audio outputs, relay
outputs and sensors. To activate the Map mode, select the Map tab under Unit Explorer.
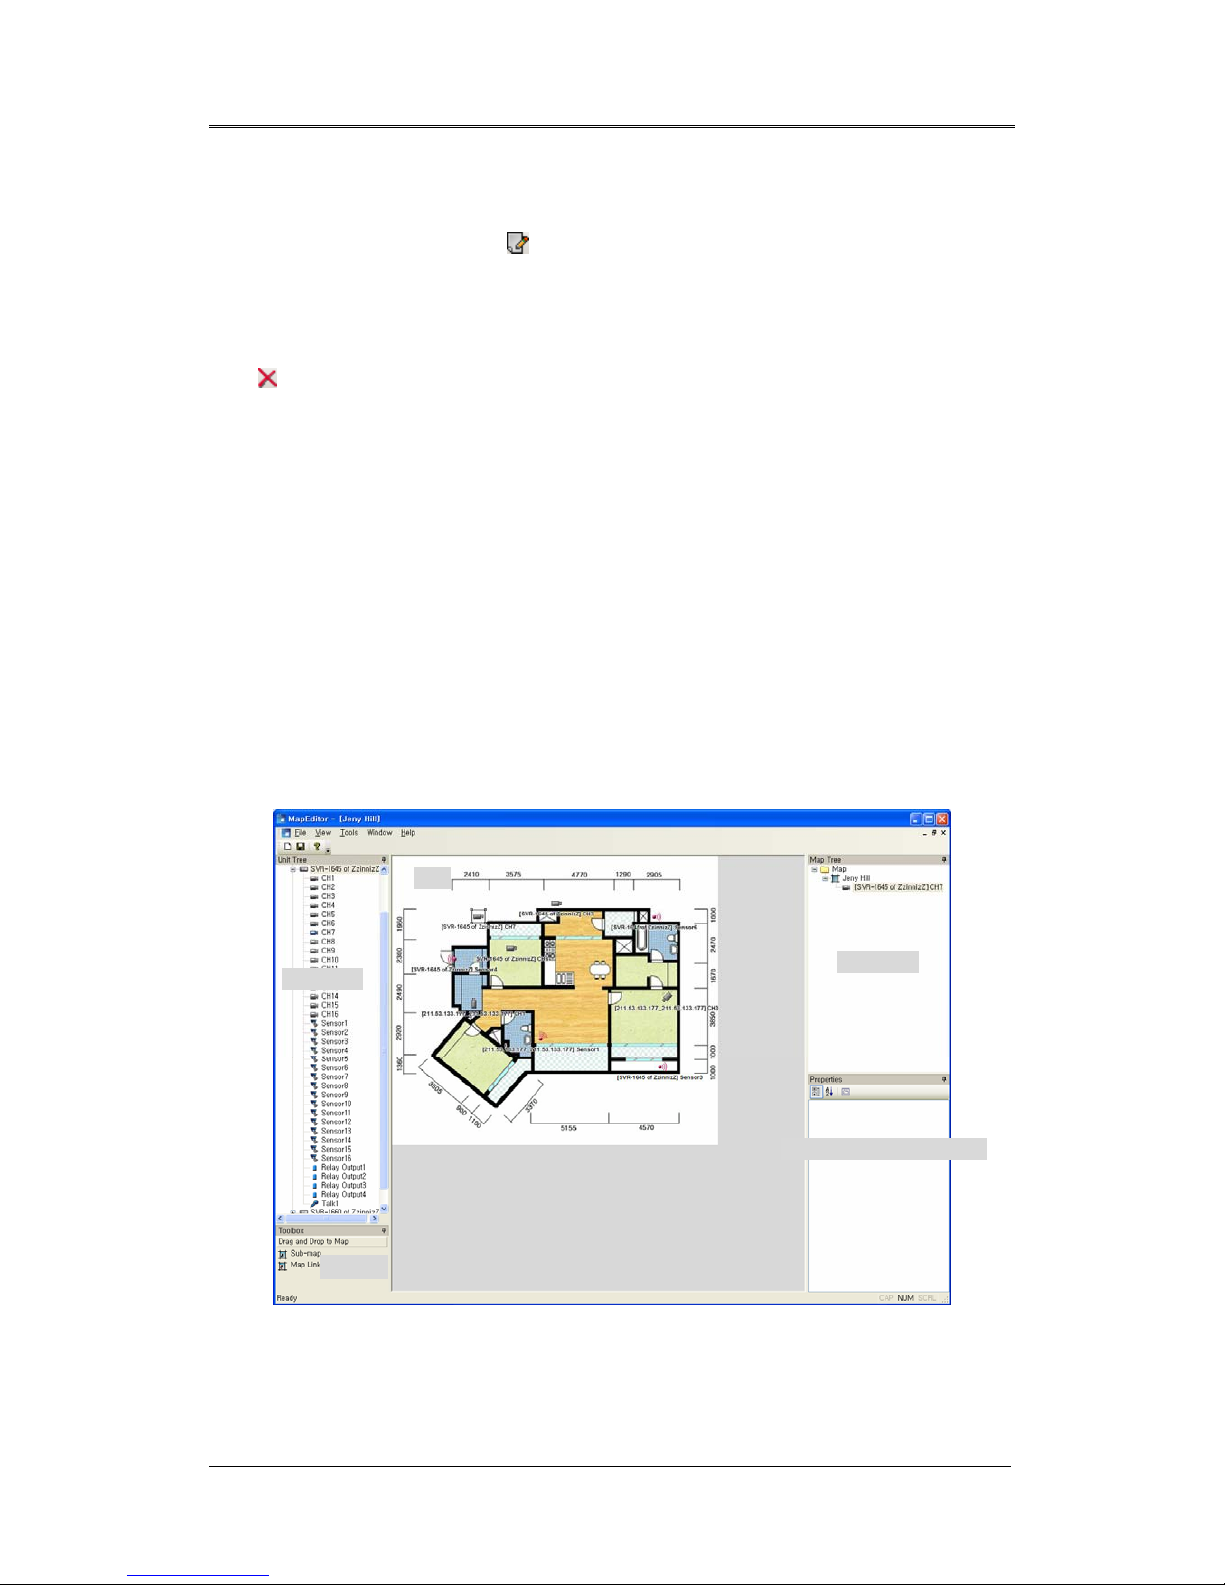
2.5.1 Map Editor
In the Map mode, run the Map Editor under Tools.
Unit Tree
Map Tree
Toolbox
Registered Information
Map
User's Manual
21
(Chart: Map Editor Toolbar)
Button Function
Adds a map.
Saves map information.
2.5.1.1 Unit Tree
Displays available units and devices for mapping. Units ca n be
added only in the Monitor program.
2.5.1.2 Toolbox
To add a sub map or map link to a map, drag and drop
these icons to a map.
2.5.1.2.1 Sub Map
Enables you to create a sub map or related map under a higher map.
Adding Sub Maps
1. Open a map, and then drag and drop the Sub Map icon from the Toolbox to a location on the
map.
2. A message window prompts you to select a sub map. When Make New is selected, the editor
creates a new map, and then connects it as a sub map to the higher map. When Select Map
is selected, the editor connects a selected map as a sub map to the higher map.
3. To change an existing sub map, select the Sub Map icon on a map or the map tree, and then
edit the information in the Registered Information window.
User's Manual
22
4. To move to a higher map from a sub map, double click on
in the higher map, or click on
the X button in the window as shown in the picture below.
2.5.1.2.2 Map Link
Using Map Link, you can move among multiple maps with just one click.
Adding Map Links
1. Open a map, and then drag and drop the Map Link icon from the Toolbox to a location on the
map.
2. A message window prompts you to select a map to link. Select a map, and then press OK to
link the map.
3. To change an existing map link, select the Map Link icon on a map or the map tree, and then
edit the information under the Registered Information window.
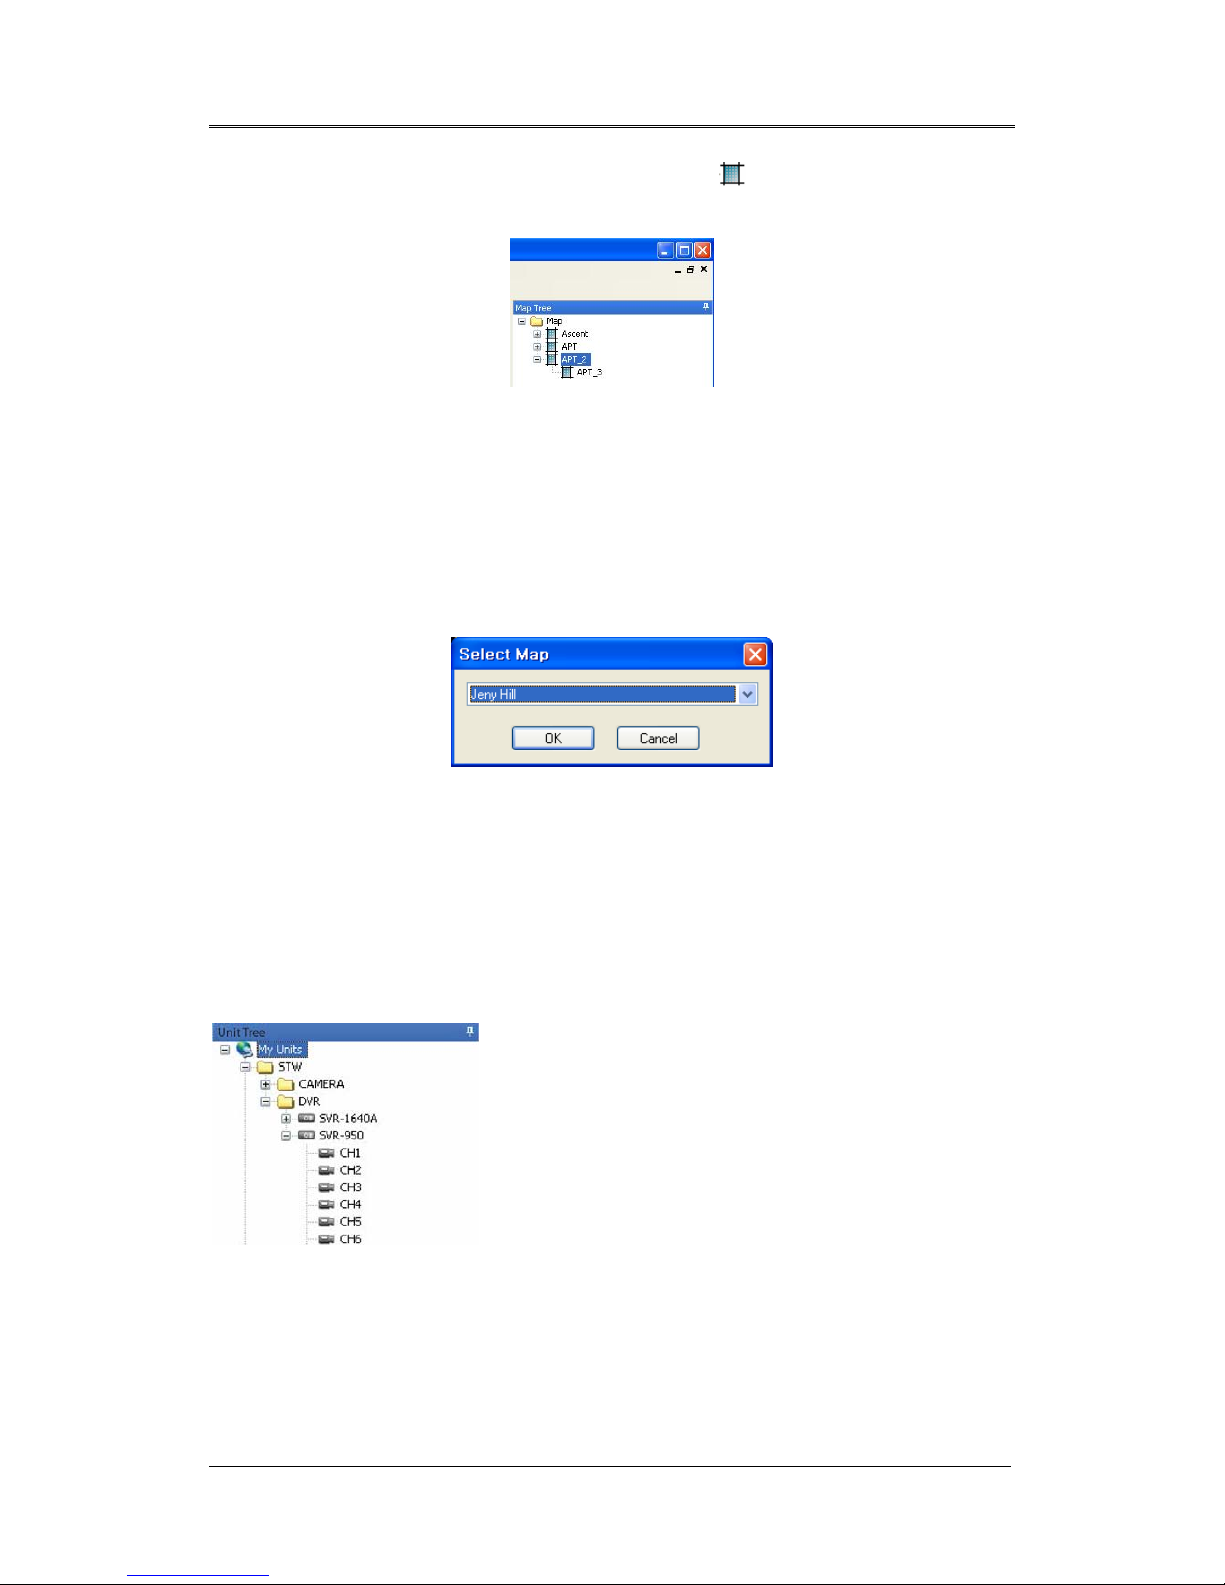
2.5.1.3 Map Tree
Map Tree contains maps and devices that are registered in
the maps. Selecting an item in the tree displays editable
information of the item in the Registered Information window.
User's Manual
23
2.5.1.4 Registered Information
Enables editing the information of an item that is selected in
the map tree.
(Chart: Registered Information Available for Map Tree Icons)
Icon Type Registered Information
Folder Does not show in the Registered Information window.
Map The map name
Sub Map The map name and layout
Map Link The link name and target map
Channel Does not show in the Registered Information window.
Sensor Does not show in the Registered Information window.
Relay Does not show in the Registered Information window.
Mike Does not show in the Registered Information window.
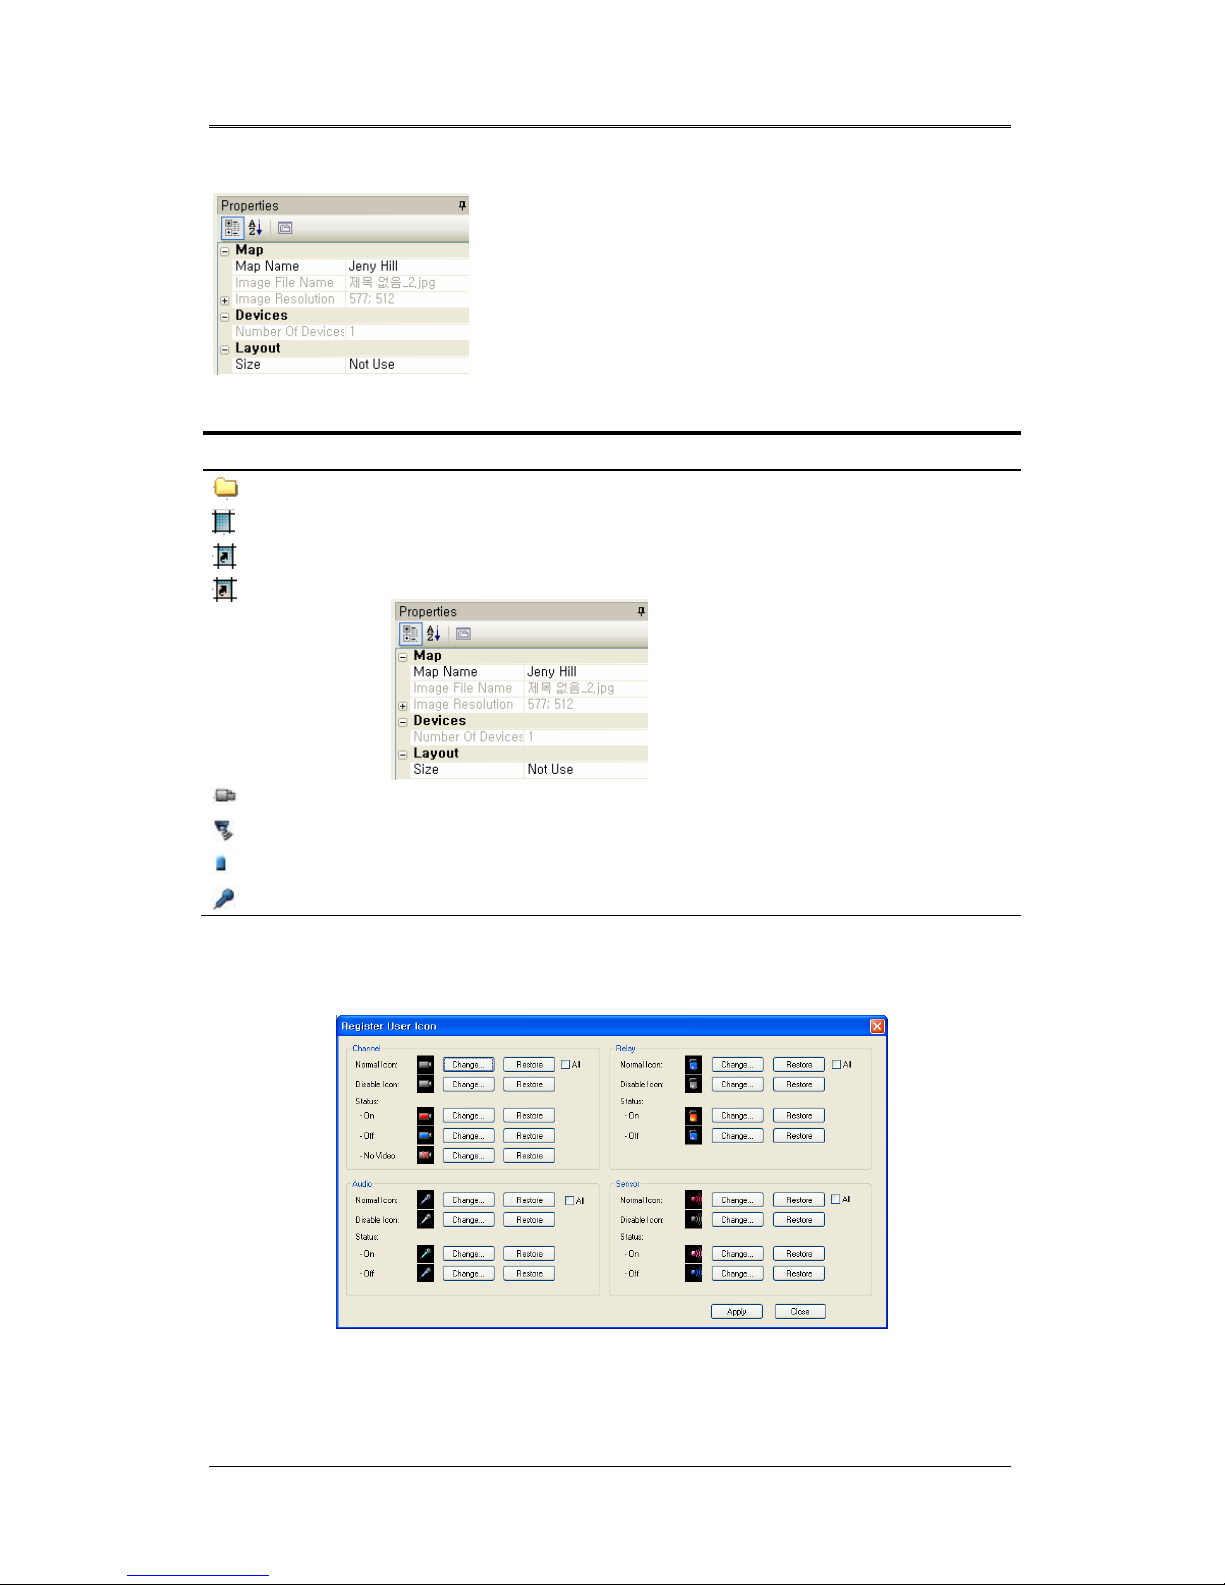
2.5.1.5 Registering User Icons
You can add customized images for map icons: Channel, Mike, Relay , and Sensor. Supported
image formats are JPEG, GIF, and BMP. To add a customized icon, go to "Tools > Register User
User's Manual
24
Icon" under the Edit Map menu.
2.5.1.6 Adding Maps
At the main menu, click
. Select a map image, and then drag and drop it to the unit tree.
When the map is successfully added, click
, and then enter a name for the map.
You can change the direction of each device. To change to Rotation mode, double
click on a device placed on a map icon, and then rotate the cursor while holding down
the left button on the mouse. After changing the direction, double click on the device or click on
a different icon to finish.
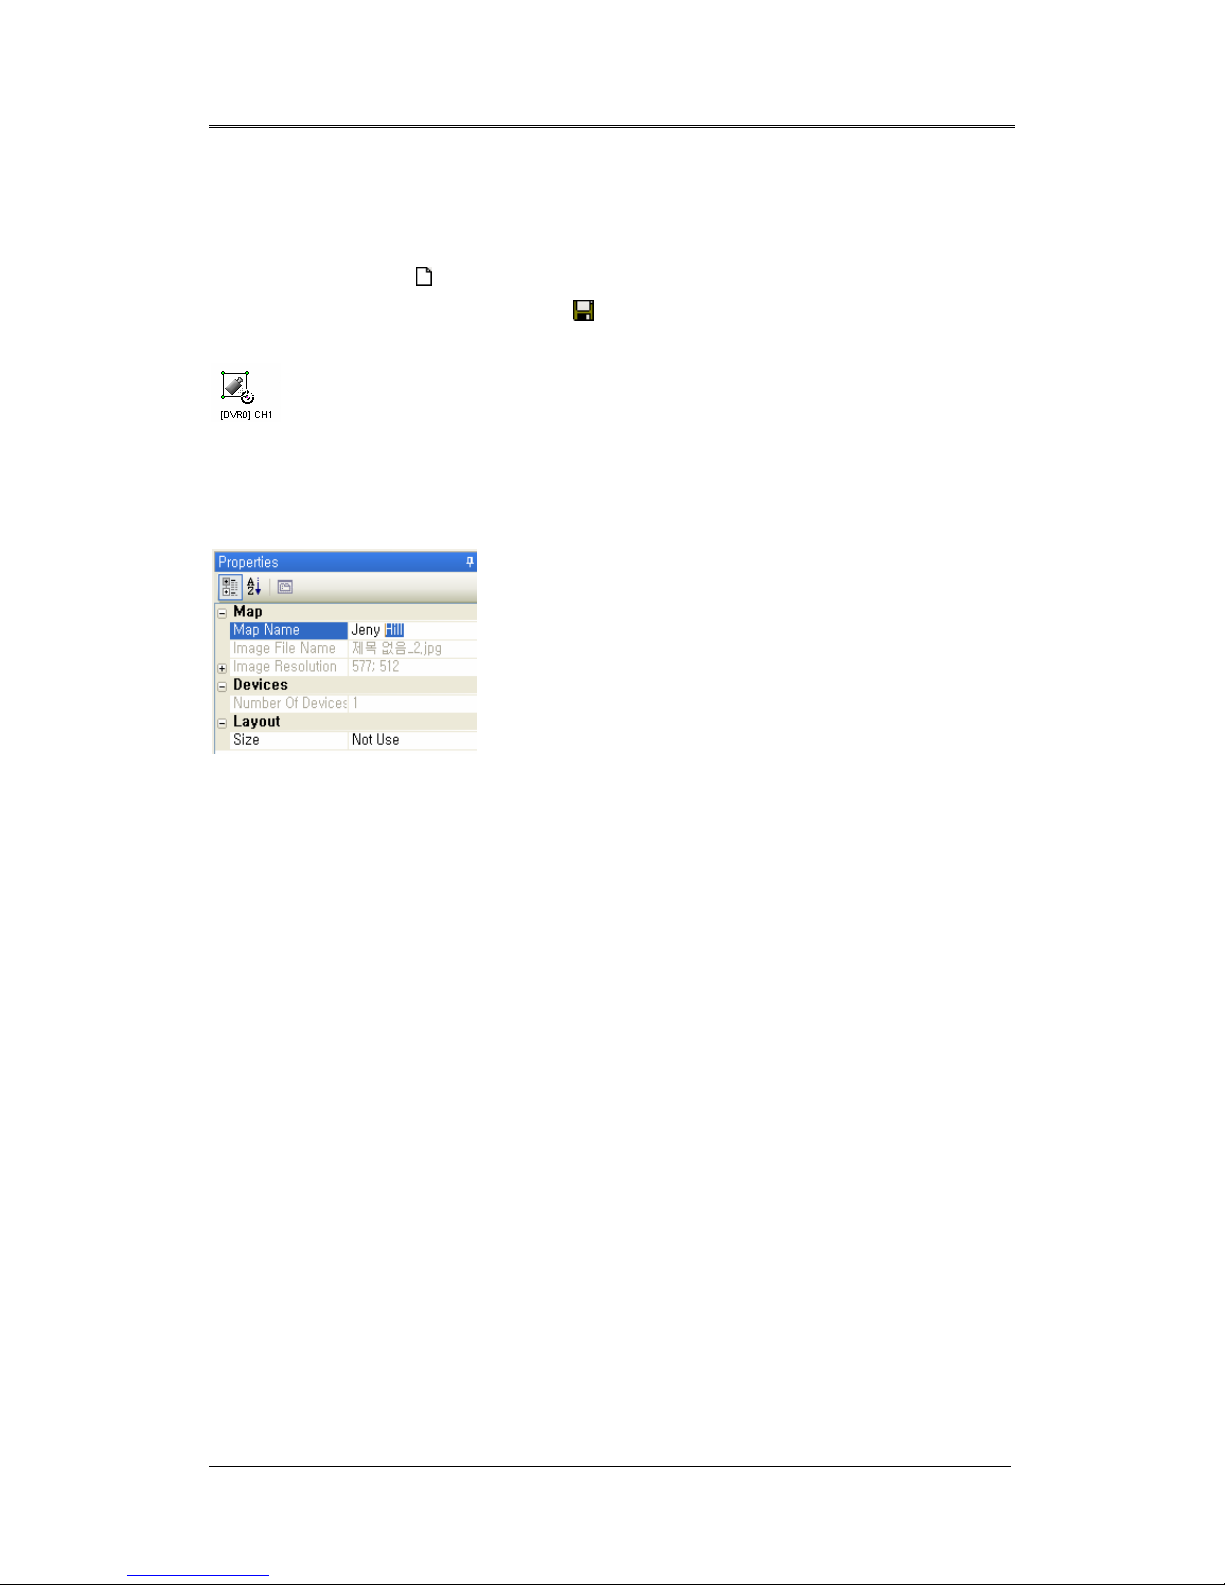
2.5.1.7 Editing Maps
On the map tree on the right side, double click on a map to
open. If you want to change only the name of a map, right
click on a map in the map tree, and then rename the map in
the Properties window.
2.5.1.8 Deleting Maps
In the map tree, right click on a map, and then select Delete in the popup menu.
2.5.2 Viewing Map
Select a map in the map tree, then the map window opens.
2.5.3 Controlling Mapped Devices
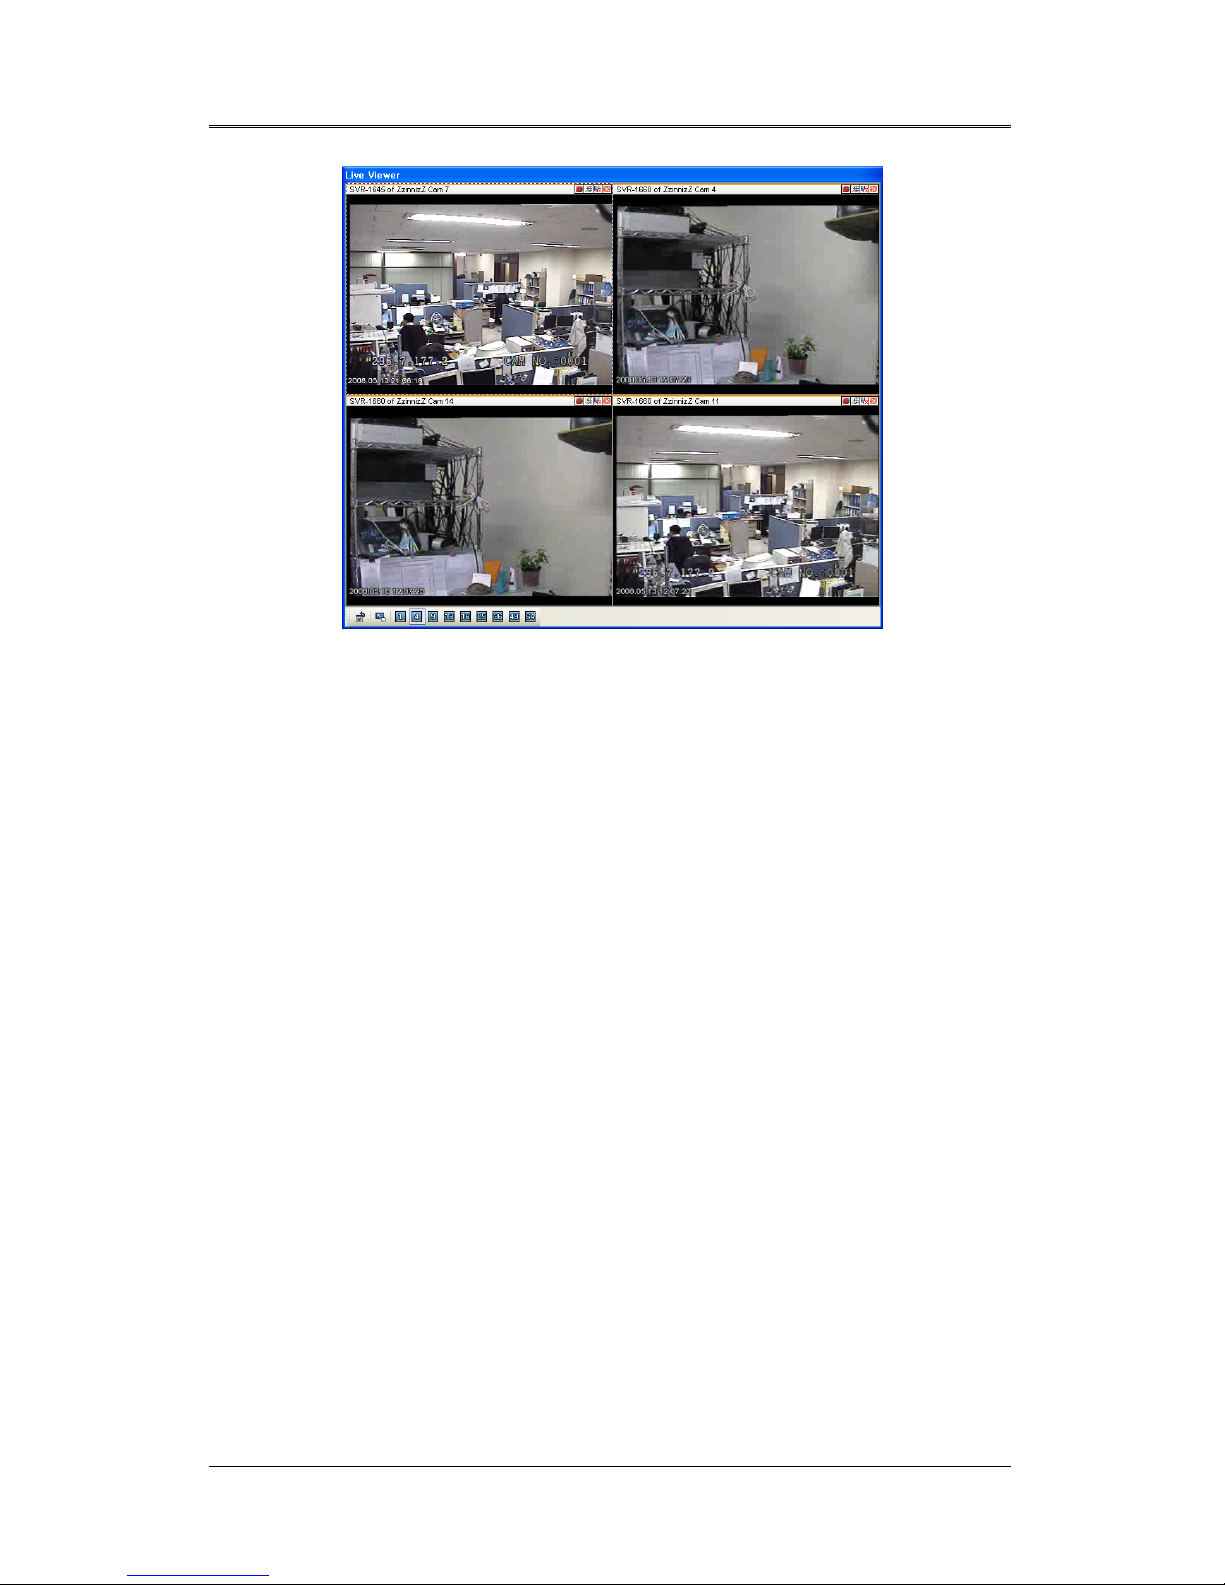
2.5.3.1 Viewing Videos
Select a channel in the map tree, or the Channel icon in the Map window. Then the live video
monitor appears.
User's Manual
25
User's Manual
26
2.5.3.2 Sensor
The Sensor icon on a map starts blinking if a sensor on the map is activated.
2.5.3.3 Relay Out
The Relay icon on a map starts blinking if the relay output has been turned on in the map.
To turn on or off the relay output, click on the Relay icon on the map screen.
2.5.3.4 Mike
You can transmit audio by clicking the Mike icon on the map tree, or opening a map and then
clicking the Mike icon on the map.
2.5.4 Aligning Map Windows
If multiple map windows are open, you can align them by clicking the Cascade Windows or
Align as Tiles option. To place a specific map on top of the map windows, click .
2.5.5 Switching Map
The button on the toolbar toggles when used. When activated, it opens new windows to
navigate between opened maps or opens a new map. When it is disabled, maps are aligned
next to each other, and you can navigate between maps by using the
and buttons on
the toolbar.
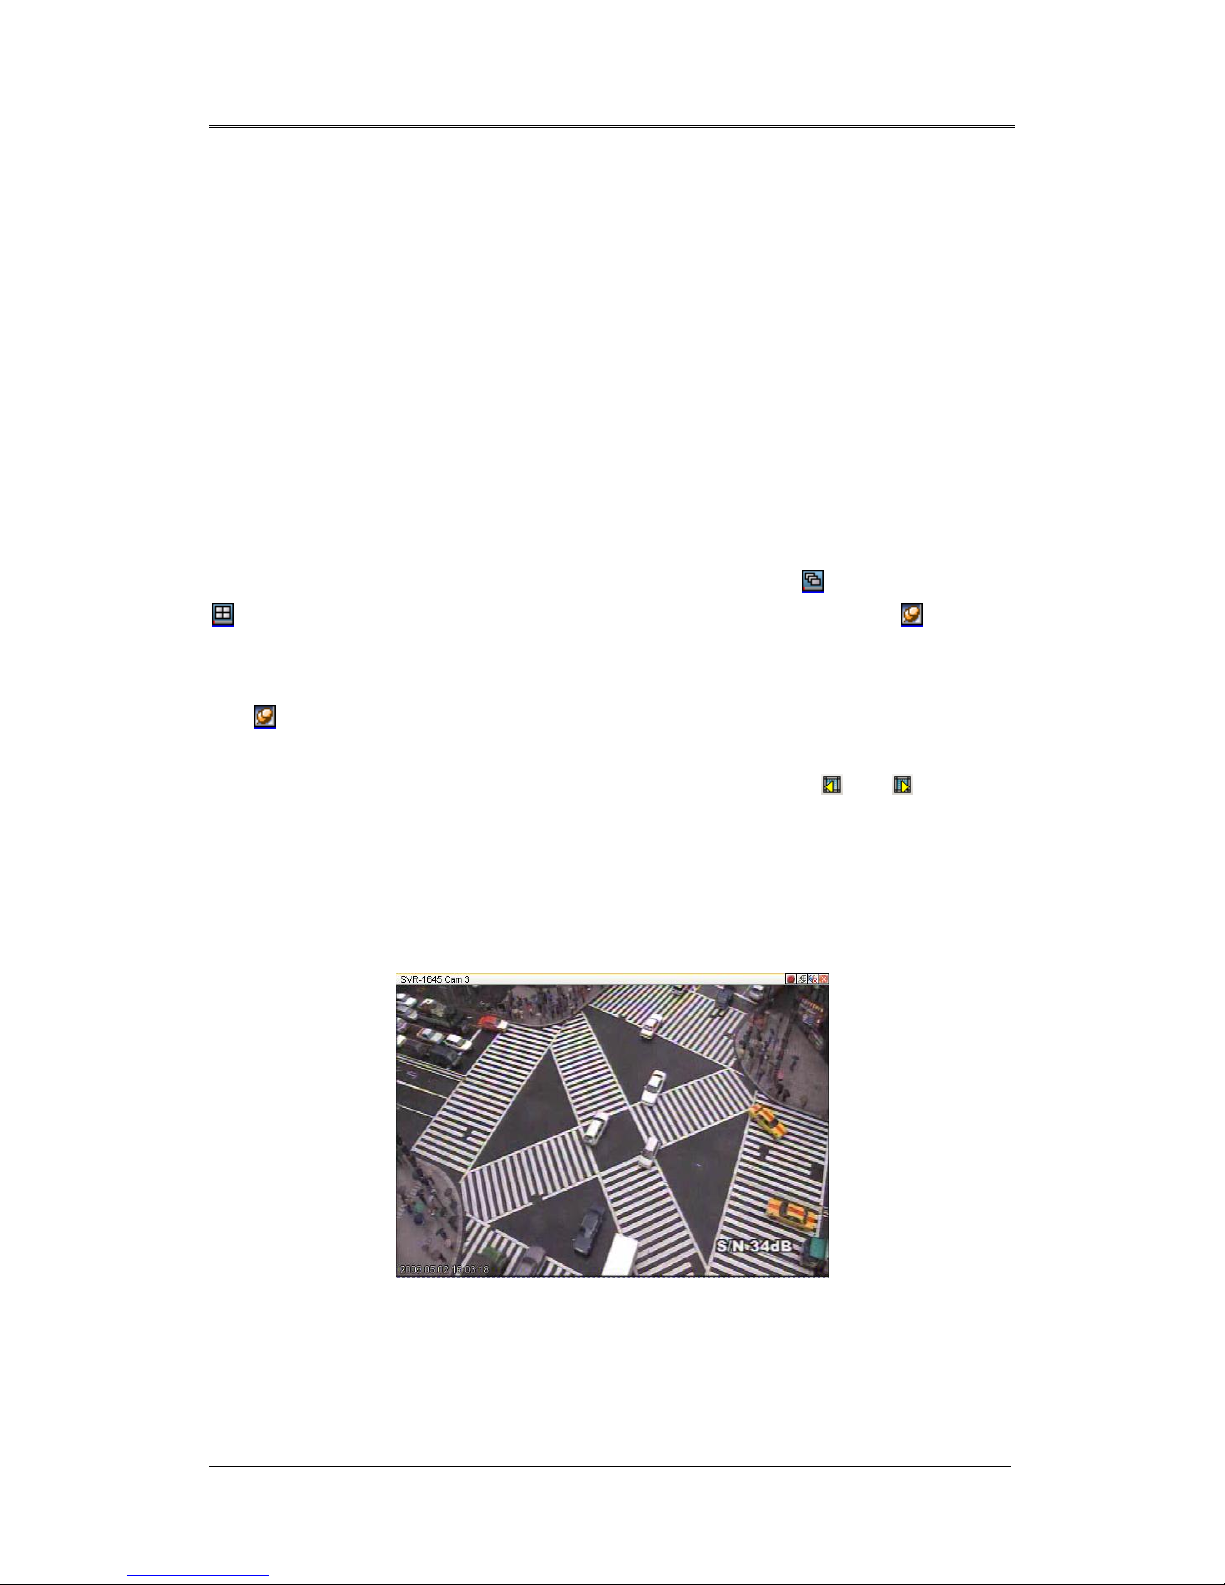
2.6 Monitor Screen
2.6.1 Screen Interface
The caption Title Area is located at the top of the screen. This area contains the name of units
and channels, and buttons to control the recording, PTZ, and audio options. Time and event
information is displayed in the video area.
User's Manual
27
(Chart. Monitor Menu Buttons)
Button Function
Saves video. (Maximum length: 10 min, re4 file)
Performs PTZ operations.
Turns audio on or off.
Disconnects from the current monitor. (Close the current monitor.)
2.6.2 Split Screen
You can split the monitor screen into 1, 4, 9, 13, 16, 25, 36, 49, or 64 screens.
2.6.3 Full Screen
To expand the Main View window to full screen, click in the Tools menu. To return to
normal view, press "E sc".
2.6.4 Switching Screens
To switch to a new monitor screen from the current screen, left click on the current screen, and
then drag and drop it to a new screen.
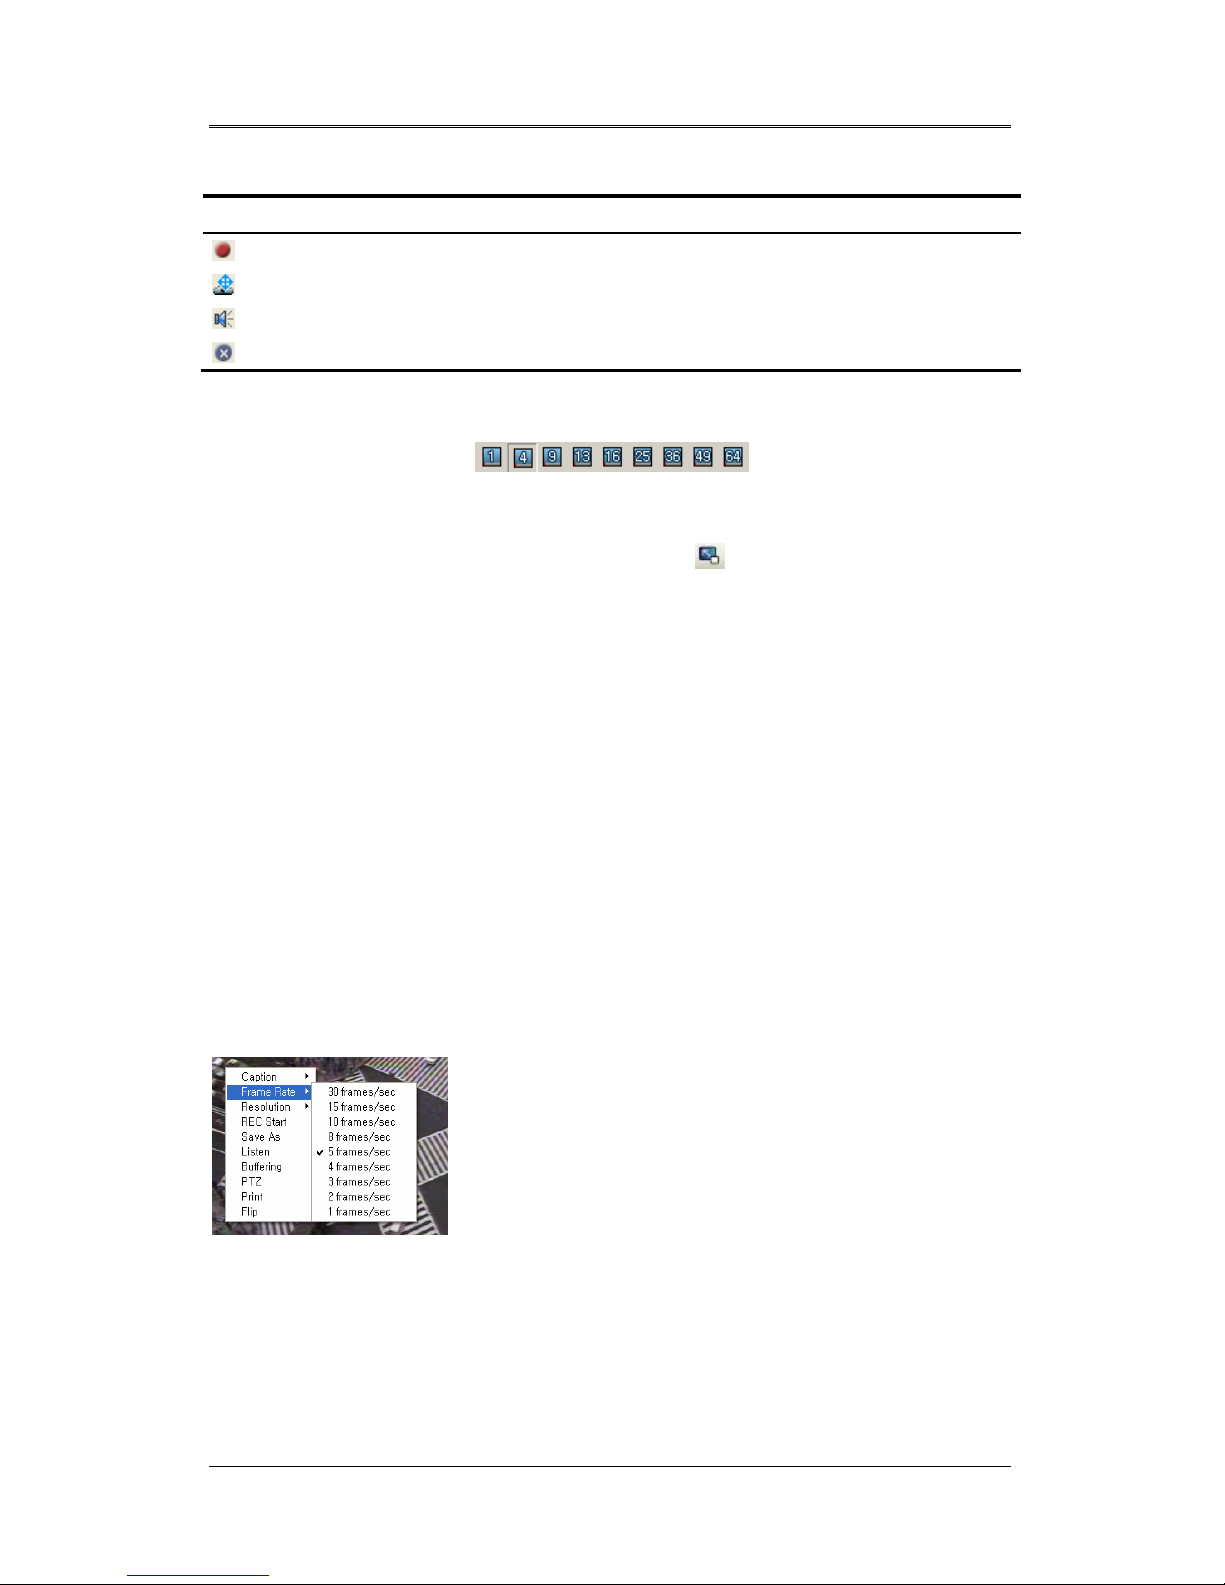
2.6.5 Caption Information
To check and change a caption option, select the option under "Caption" in the Monitor popup
menu.
The caption options include Unit Name, Channel Number, Channel Name, Time, Event, and
Speed.
2.6.6 Video Transfer Speed
You can adjust the video transfer speed under "Transfer Spee d" in the Monitor popup menu.
Only the SVR-1630, SNP-1000/1000A/3300/3300A, SNS100/400, and SNC-550 support this option.
User's Manual
28
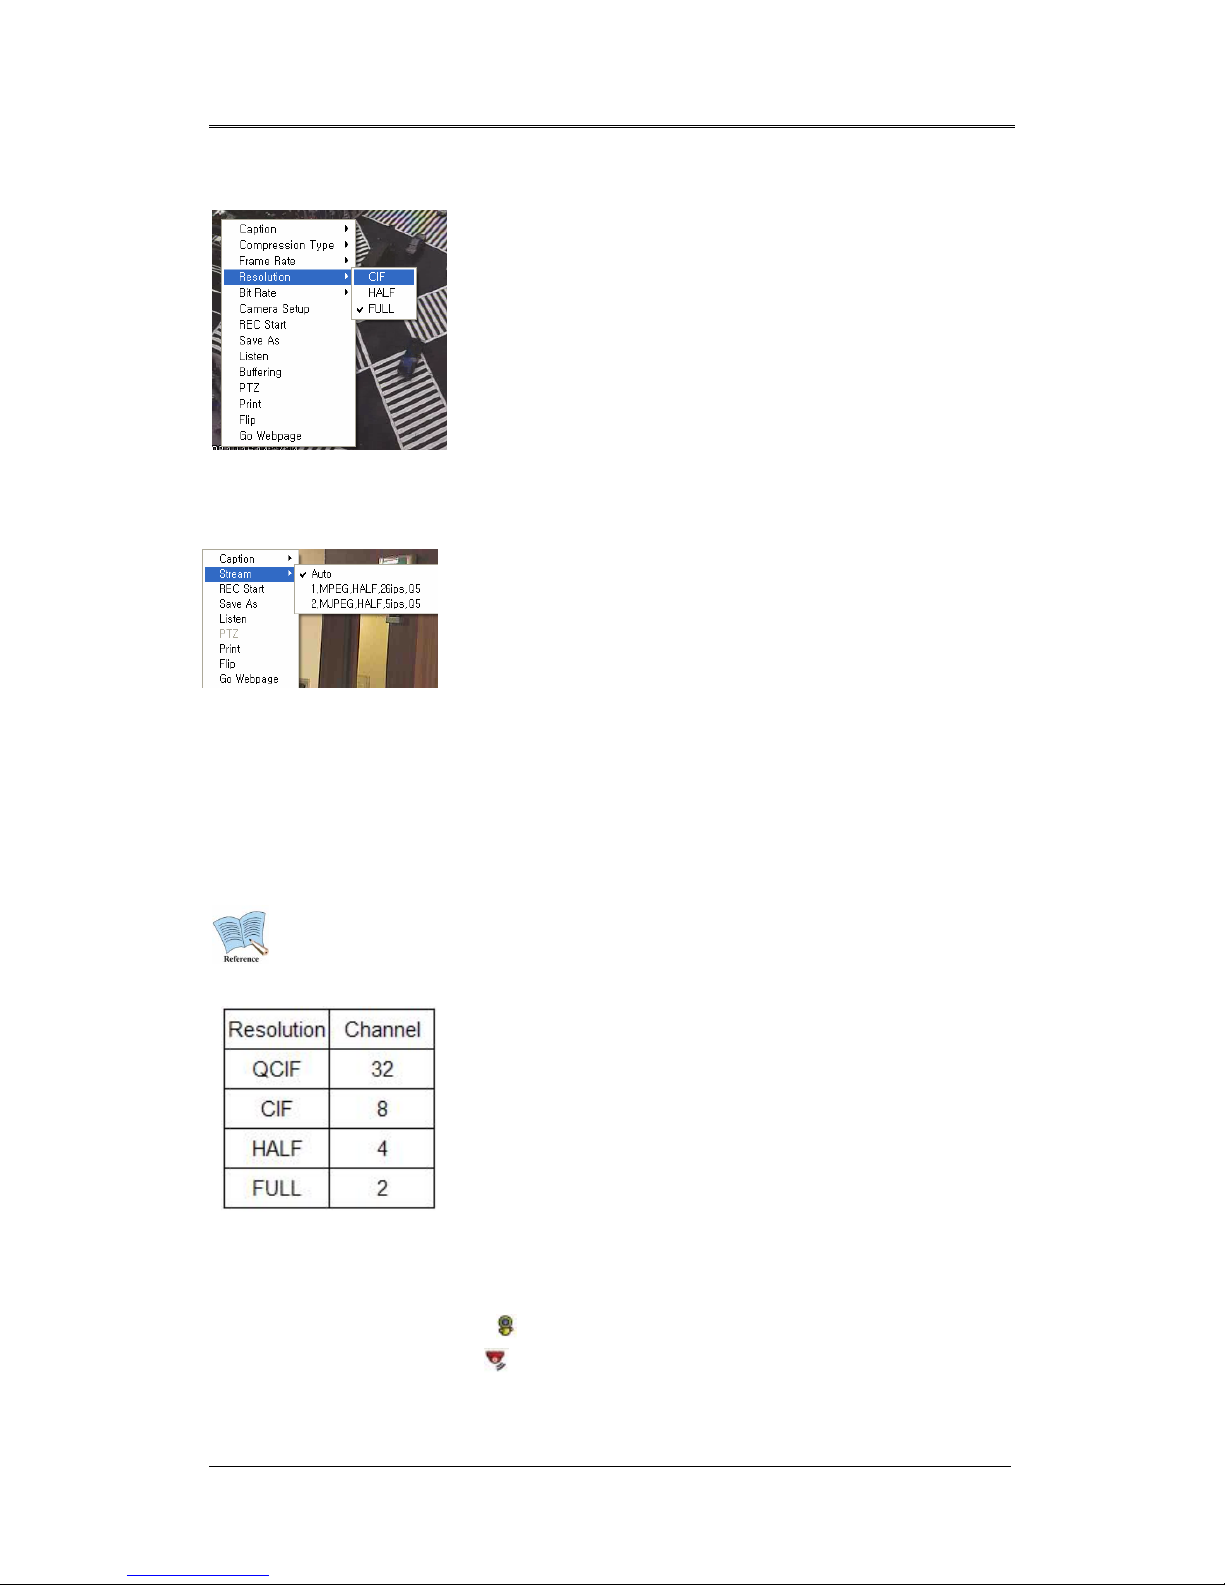
2.6.7 Video Resolution
When Auto is selected, the program automatically adjusts the
resolution of the videos to the monitoring window size. When a
specific resolution is selected, the program plays videos at the
selected resolution regardless of the monitoring window size.
Only the SVR-1630, SNP-1000/1000A/3300/3300A, SNS100/400, and SNC-550 support this option.
2.6.8 Streaming
When monitoring a model that supports MPEG4 streaming, a
streaming menu appears in the Monitor popup menu.
When Auto is selected, the program requests the unit with an
optimal resolution for the monitoring window size and system
performance. Then the unit streams the video at a resolution
closest to the requested resolution. When a specific resolution is
selected, the program requests that resolution from the unit
regardless of the monitoring window size or system performance.
Only the SVR-1645/1660/1680/3200/960/945 models support this
option.
When monitoring MPEG4 streaming videos with SNM-128S, the number of
channels per resolution is as listed below.
(*Streaming Speed: 30 fps)
Based on this chart, SNM-128S can monitor 1 MPEG
streaming video at full-size resolution at 60 fps. When 3 or
more videos of the full-size resolution are selected, it displays
one per second. SNM-128S also displays one per second if
the monitoring system is overloaded by other applications.
2.6.9 Event
When movement is detected, the icon appears on the video.
When a sensor is activated, the
icon appears along with the sensor number.

User's Manual
29
2.6.10 Saving Images
2.6.10.1 Saving Videos
Select "Start Recording" in the Monitor popup menu, or click the
recording button; the
recording time is recorded. The maximum length of a video is 10 minutes. To select a drive to
save videos, go to Tools > Options and select the Recording tab.
2.6.10.2 Saving Still Images
In the Monitor popup menu, select "Save Image" to save the current screen as a bmp, jpg, or
eye-formatted file. Eye-formatted files are viewable using Internet Explorer. To select the Auto
Save feature, image file formats, and a drive to save images, go to Tools > Options > Recording
(tab) > Save Image (heading). (If Manual Save is selected, a message window asking to select
a file format and filename appears upon selecting "Save Image".)
2.6.11 PTZ Control
2.6.11.1 Pan/Tilt Control
Select the "PTZ" menu in the popup menu, or click
. When crosshairs appear in the center of
the screen, use the mouse to perform the Pan and Tilt operations; click on the left or right side
of the cross to pan, and the upper or lower side to tilt. The farther you click from the center, the
faster the Pan and Tilt operations perform.
2.6.11.2 Zoom/Focus Control
To show the Zoom and Focus window, move your mouse to the left or right edge of the screen.
2.6.11.3 Moving to Preset
If preset locations are available, "Move to Preset" appears in the popup menu. Selecting a
preset under the Move to Preset menu moves the screen to the selected preset location.
 Loading...