

Samsung DVD-V2000 Owner’s Manual

DVD-V2000
Instruction Manual
V_DEO
--i
_ Hi-Fi
www.samsungasc.com

WARNING:
TO PREVENT DAMAGE WHICH MAY RESULT IN
FIRE OR ELECTRIC SHOCK HAZARD, DO NOT
EXPOSE THIS APPLIANCE TO RAIN OR
MOISTURE
WARNING:
TO AVOID HAZARDOUS EXPOSURE TO
INVISIBLE LASER RADIATION DO NOT OPEN
OR REMOVE/DEFEAT LASER TRANSPORT
PROTECTIVE HOUSING
USER/INSTALLER CAUTION:
Your authorety to operate this FCC Certified
equkpment Could be voided if you make changes of
modifications not expressly approved by the
manufacturer who is responsible for ¢omphance
w_th Part 15 ECC rules
NOTE TO CATV SYSTEMINSTALLER:
This remrnder is provided to cat_ the CATV system
installer s attention to Article 820-40 of the
Na(Ional Elect_'onlc Code that provides guldeJines
for proper groundtng and _n particular specifies
that the cable ground shaFI be connected to the
grounding syslem of [he building, as close Io the
point of caole entry as pracltcal
Th_s symbol _s intended to .alert
the user to the presence of
unmsulated dangerous voltage
Within the product's enclosure
that may be Of sufficient
magnrtude to constltLIte risk of
fire or electric shock
Th_s symbol Js intended to alert
the user to the presence of
Importan_ operating and
maintenance iFisEuctlons in the
I:terature accompanying this
product
Copy Notification
Federal law provides severe CiVil and ¢rlmtnal
penalties for the unauthorpzed reproduction
d_strlbutJon or exhlbltlOrl Of copyrighted motion
pictures and videotapes (Title 17, United States
Code Sections 501 and 506)
Macrovision Notification
Th_s product incorporates copyright protection
technology that _s pro(ected by method cla=ms of
certain U S patents and other =ntellectua[ property
rights owned by Macrows_on Corporation and other
rights owners Use of this copyright protection
technology must be authorized by Macrows_on
Corporation and _sintended for home and other
I_mded viewing uses only unless otherwise
authorized by MacrovJslon Corpora{ion Reverse
engineering or disassembly _$ prohloKed
CAUTION:
To prevent fire, shock hazard or annoying
intel_erence use only the recommended
accessories To prevent electric shock, do not use
[h_s (polarized) plug w_h an extension cord
receptacle or other outlet unless the Olades can be
fullj inserted to prevent blade exposure TO reduce
the rJsk of electric shock, do not remove the un=t
cover or back There are no _ervlceabl8 parts
Jnslde Refer servicing to quahfled personnel only
CUIDADO:
Pare prevenlr irlcendlO rlesgo de choque o
_nterferenc_a enfadosa use soiamente los
accesor,os recomendados Para prevel_lr
electrochoque, no use este enchufe (pOlar,zero)
con un cordon de extension tome de corrlen(e o
cualqu_er otra tome a mends que los dlentes
puedan ser completamente insel_ados para prevenlr
exposlcldn de los dlentes Pare reducer el rlesgo de
desGarga electnca no remueva la Cublerta o la
porte posterior del eqblpo Dentro del eqL_lpO no
hay partes que requleren servlclo D_rl_ase
so[amen_e a personal ca[_flcado cuando reqLllera
servlcio
ATTENTION:
Pour eviler [es ]ncendis risque de Chocs OU
inlerferences f_cheuses employei" seulemen[ les
accessoires recommat'ldes Pour evl{er les _hocs
electrlques ne pas employer cette pr_se (polanseel
ave[; L_ner_llonge une prise de COL_rartt ou une
aM[re sortie de cogrant a RIOII_S qLse les lathes
peuvent 6tre inserees b fond pour I'exposlt_on des
lames Pour reduire les rlsques de chocs
electrlques ne pas retlrer le couvercle ou I arrlere
du module II n'y a pas de p_ece Utlhsable a
I interleL_r Ne loire effectuer I en{retlen que par un
personnel quahfle

Important Safety Instructions .............................
1 Read these instructions
2 Keep these mstructlom
3 Heed all warnings
4 Follow all instructions
5 DO not use this apparltus near water
6 CJean only With dry cloth
7 Do no( block any ventdat_on opemngs Install in accordance with the manufacturer's ths_JCtiOnS.
8 Do not instil near any heat sources such as radiators, heat registers, of other apparatu_ (ir_cthding amplifiers) that
produce heat.
9 Do not defeat the safety purpose of the polarized or grounding-type plug. A polarized plug has two blades with
one wider than the other A grounding type plug has two blades and a third grounding prong. The wide blade or
the third prong are provtded for your safety If the provtded plug does not fit into your outlet, consult an
electrtclan fo_ replacement of the obsotete outlet
10 Protect the power cord from being from betng walked on or pinched particularly at plugs, convenience
receptacles, and the point where they exit from the apparatus.
11. OnFy use attachments/accessories speclhed by the manufacturer
12 Use only with cart, stand, tripod, bracket, or table specified by the manufacturer, or sold with the applwat_
When a used, caution when moving the cartJapparatus combination to avoid injury from tip-over.
13 Unplug this apparatus When a cart is used, use cauttonlll_en mowng the cart/apparatus combination to avoid
injury from tip-over
14 Refer all servicing to quaidled service personnel Servicing is required when the apparatus has been damaged in
any way. such as power-supply cord or ptug is damaged, hquld has been spdled or obJeCtS have fallen into the
apparatus, the apparatus has been exposed to rain or moisture, does not operate normally, or been dropped

f Table of Contents
Safety ........
• Important Safety Instructions
• Welcome ........
• Feature Summary .........
• Unpacking . .
m Disc Type end Characteristics . . .
1
7
7
7
8
• 1 - System Overview .............
• Front Panel Overview . .
• Rear Panel ..
a Front Panel Dnsplay ........
• Remote Control Overview .
• Insert Remote Control Battenea. .
• Usmg theTV Buttons on the Remote ContTot
• 2 - Gettmg Started ...
• Basic Connectlons/AuloSetu
• 3 - Basic Operation
• Deck Control Buttons . ..
• Beaut DVD Playback
• Bas_cVHS Playback
• Basic TV Tuner Operatnons
• 4 - System Setup
• On-Screen Menu NavlgaL_on
• Menu Language
• ManuaICIock Set .
• Tuner Band Settmg
• Auto Channel Memory
• Channel Add/Delete
• RF Output Channel
• Front Panel Dimmer
• Auto Power Off
9
g
10
10
11
11
12
13
13
14
14
14
15
16
16
16
17
18
19
20
21
22
22
23

Table of Contents
t 5- DVD Setup ...............................................
• Disc Menu Language .............................................
• Audio Language .................................................
• Subtitle Language ...............................................
• Parental .......................................................
• Digital Output ...................................................
• DTS ..........................................................
• Dynamic Compression ............................................
• TV Aspect Ratio ................................................
• Black Level .....................................................
• AIt Video Out ...................................................
6 - DVD•Sound Setup ......................................... 32
• A/V Receiver Connections ......................................... 32
7 - DVD Operations .......................................... 33
• Special Playback Features ......................................... 33
• Disc Menu Navigation ............................................ 34
• Screen Fit Playback .............................................. 34
• Title/Chapter/Time Selection ....................................... 35
• Zoom ......................................................... 36
• Angle ......................................................... 36
• Subtitle ....................................................... 37
• Digest Playback ................................................. 37
• A-B Repeat ..................................................... 38
• Repeat Chapter/Title ............................................. , 39
• Audio ........................................................ 39
• Bookmarks ..................................................... 40
• Programmed Playback ............................................ 41
• Random Playback ............................................. 42
• MP3 Playback ............................................... 42
• 3D Sound ...................................................... 43
24
24
i!!ii!i! i!i i
24
25
26
27
28
29
30
31
31
i_¸¸_i:_!
iii_iii!
2 _
i[

Table of Contents
8 - VCR PZayback ............................................ 44
• Special VGR Playback Features .................................... 44
• Tracking ....................................................... 44
• Auto Play/Rewind ................................................ 45
• S-VHS Playback ................................................ 45
• Vadable Search System ........................................... 46
9 - VCR Recording ........................................... 47
• Basic Recording ................................................. 47
• Special Recording Features ........................................ 48
• One-Touch Recording (OTR) ....................................... 49
• Record Speed .................................................. 49
• 10 - Timer Recording ......................................... 50
• How to Set a Timer Recording ...................................... 50
Appendix A- Advanced Connections ............................. 51
• S-Video/Component Video Connections (for DVD) .................... 51
• Stereo Connections .............................................. 52
• Monitor TV Connections .......................................... 53
• Connecting Other Video Equipment .................................. 54
• Appendix B - Help ............................................ 55
• Technical Specifications ........................................ 55

I Feature Summary
System Features
• Complete versatilityto play DVD, VCDs, audio CDs, MP3 discsor VHS Tapes.
• Watch a DVD whilerecordinga TV show to the VCR.
• Aulo Setup automaticallysets clockand searchesfor channels•
, Remote controlsboth DVD and VCR decks.
• Composite, S-Video and Componenl video outputs for high connectivityand optimum performance.
• RF inputsand outputs for connectionto all TVs-new or old.
• English/French/Spanish on-screen programming
DVD Features
• 10-bgvideo digital to analog converter and 27MHz advanced digital filter,
• Playback of 96KHz/24.bit sources.
• DTS digital output for DTS-enhanced DVDs.
• Playback MP3 filesfrom CD-ROM.
. Continued audio during 2x speed playback.
VCR Features
• Hi-Fi Stereo VCR.
• 4 heads for superiorslow motion and stop action.
• Playback of S-VH$ tapes at betterthan standard resolution.
• VISS Index Search/Scan, Zero Return, Blank Search.
• 8-event/1 month timerrecording.
• Time remaining counter,real time counter•
*Discs which cannot be played withthis player
. DVD-ROM • DVD-RAM
• CD-ROM • CDV
• CDI
• HD layer of super Audio CD
• CDGs play audio only, not graphics.
*Abilityto play back maydepend on recording
conditions.
• DVD.R • CD-RW
• DVD+RW,-RW
Unpacking
As you unpack, please check that the following items are included in your D VD. VCR packing case:
• DVD-VCR
RegistrationCard (AD68-00078A)
User's Guide (AC68-01816A)
RCA cable for Audio/Videoconnection (AC99-tO500H)
RF (Radio Frequency) Antenna Cable (AC39-42001J)
Remote Control (AC59-00058K)
1.5V "AA" Batteries - 2EA (AC43*12002J)
$$_6I _-e$ =
: _;;s_;),}s r i i
i; i
?

Disc Type and Characteristics ]
This DVD player ascapable of playing the following [ypes of discs with the correspondmg Iogos:
DVD
V I D E D
VIDEO-CD
AUDIO-CD
)_Grr,_ AU_
Audio
Video
Audio
Video
Audio
Single-sided
5" 240 rnin,
3_/2" 80 min.
5" 74 rain.
3_/z" 20 rain.
5" 74 min
31_" 20 rain
Double-sided
480 rain
Single-sided
Double-sided
160 rain.
• DVD con_ain$axcellentsound
and videodueto DolbyDigital
and MPEG-2 system.
• VBdou$ screenand audio
lunctions can be easily
selected _rough the on-
. Video_h CD sound,VHS
v
q=Utya,MPEC,.i
compressiontechnology.
• CD is recorded as a
Digital Signal wgh beUer
audio qua!!ty, less
distortion and less
deterioratlon of audio
quality over time.
• Pray • NTSCbroadcast • Dolby • Siereo ols¢ - Digital . DTSdisc • MP3 disc
Regmn _/aSnada.Korea OIg$tal dl_ Audio disc
Number lapan, e{c.
Both The DVD player and the d_scs are coded by region These regional codes must
match in order for Tile disc to Dlay f the codes do not match. Tne disc will not play
The Region Number for this player is described on the rear panel of the player.
s stem in U.S.A

Front Panel Overview
1 2 4 5 6 7
8 9 10 11 12
1 DVD DECK (p.14)
2 DVD OPEN/CLOSE (p.14)
3 VCR DECK (p.15)
4 CHANNEL &/y (p.16)
5 RECORD (p.46)
6 DVD-VCR SELECT (p.14)
7 VCR EJECT (p.15)
8 POWER (p.14)
9 STOP (p.33)
10 REWIND/REV(p.33, 44)
13
11 PLAY/PAUSE (p.14, 15, 33,44)
12 FAST-FORWARD/FWD (p.33, 44)
13 FRONT PANEL DISPLAY (p.10)
14 LINE IN 2 COMPOSITE VIDEO JACK
15 UNE IN 2 LEFT AUDIO JACK
t6 LINE IN 2 RIGHTAUDIO JACK
14 15 16

Rear Panel 1
VIOEo _ AUDbD"_
/
2 3 4
1 RF ANTENNA INPUT 6 COMPONENT VIDEO OUT
2 RF OUT TO TV 7 DIGITAL AUDIO OUT(COAXIAL)
3 LINE OUT TO TV (COMPOSITE) 8 DIG|TAL AUDIO OUT(OPTICAL)
4 LiNE IN 1 9 S-VIDEO OUT
5 AUDIO LiNE OUT TO "iV
-S-VIDEO OR COMPONENT)
5 6 7 8
I Front Panel Display
1 2 3 4 5 6
8 9 10 11 12
I
I
1
The DVD Deck isactive
2
A DVD. CD. VCD, or SVCD is loaded
3
The number to Ibe right of the "TITLE" symbolis
the currentti,e number
The time. counterposition,time remaining or
currentdeck statusisdisplayed
5
VHS tape isinserted
6
Recording is in progress(normal and timer)
7
The VCR Deck is active
8
3D Sound is active
9
A DVD with a DTS soundtrackisloaded
1o
The number to the rightof the"CHAP"symbolis
the current chapter number
11
The Hi-Fi track of a VHS tape is playing
(The current TV show or _ideo is broadcast in
Stereo)
12
A Timer Recording is programmed or inprogress
If blinking there is an error.
Also displayswithout the clock hands _oindicate
that a recording is in progress, and blinks when
lhe VCR is in Pause mode.

Remote Control Overview
© @
2_
3--
4_
®
5_
6
7
8--
9
10_
11_
12_
13
14
15
16--
17
S/IMSUNG
_18
19
-- 20
21
22
23
24
2S
-- 26
27
-- 28
29
30
31
32
33
1 POWER (p.14)
2 SCREEN FIT (p. 34)
3 SHUTTLE <<1>>(p.44)
4 MODE (p.41,42)
REPEAT (p.38, 39, 44)
5 ZOOM (p.36), TV MUTE (p.12)
6 3D SOUND (p.43), 100+ (p.16)
7 DVD(p.14)
8 DIGEST (p.37)
F.ADV/SKIP (p.33, 44)
9 VOLUME +/- (p.12)
10 REWIND (p.33.44)
SKIP BACK (p.33. 44)
11 STOP (p.33)
12 RECORD (p.47)
13 UP (p.16)
14 LEFT (p.16)
15 SETUP (p.16)
ENTER (p.16)
16 RETURN (p.16)
17 TITLE (p.34)
SP/SLP (p.49)
18 OPENICLOSE (p.14, 15)
t9 TVNCR (p.16)
20 0-9 (p.16)
21 AUDIO (p.39)
22 ANGLE (p.36)
INPUT SEL (p.47)
23 CLEAR (p,40, 41,42)
24 VCR, TV SELECT (p.14)
25 DISPLAY (p.16, 35)
26 CHANNEL A/T (p.12, 16)
TRACKING ,&IT (p.44)
27 FAST-FORWARD (p.33,44)
SKIP NEXT (p.33, 44)
28 DISC MENU (p.34)
29 PLAY/PAUSE (p,14, 15)
30 RIGHT (p.16)
31 DOWN (p.16)
32 MARK (p.40)
SEARCH (p,46)
33 SUBTITLE (p.37)
TIMER (p.50)
Insert Remote Control Batteries
• Remove the battery cover by pushing down on the thumbtab and
sliding the cover.
• Inserttwo 1.5V "AA° batteries as shown, paying attention to the correct
polarities(+/-).
• When finished, slide the cover until it clicks back into place

Using the TV Buttons on the Remote Control
Your VCR remote control will work with Samsung televisions and
compatible brands.
Todeterminewhetheryourtelevisioniscompatible,followtheinstructions
below,
1 Switch your televisionon.
2 Pointthe remote controltowardsthe television.
3 Hold down the TV button and enter the two-figure cede
corresponding to the brand of your television, by pressing the
appropriatenumeric buttons.
Brand Codes Brand Codes
$AMSUNG 01, 14, 15, 23 LOEWE 28
SHARP 02, 16,22 ZENITH "_7
SONY 03 LG 06, 08, 18
RCA 07, 29 MAGNAVOX 04
TOSHIBA 09 EMERSON 21
PANASONIC 12, 24 SANYO 05, 20
JVC 11 DAEWOO 19
HITACHI 10 NOBLEX 25
MITSUBISHI 13 TELEFUNKEN 26
NEWSAN 27
Result: If your televisionis compatiblewith the remote control it
(_"= When you change the batleries in the remote cor_trol, you
YOUcan then controlthe television using the following buttons
Button Function
POWER (_ Used to switch the televisiononand off.
INPUT _) Used to select an external source
VOL + or- (_) Used to adjust the volume of the lelevision.
CH (• or T) (_ Used toselect the required channel•
MUTE _ Used to toggle the sound on and off
will switch Off. It is now programmed to operate with the
remote control.
If several codes are.indicated for your television brand, try
each one in turn until you find one that works•
must reprogram the code. following the same procedure
"[he various functions will not necessarily work on all
televisions It you encounter problems, operate the
television directly

I Basic Connections/Auto Setup
in this section, you will connect the D VD-VCR to your television
and run Auto Setup, which automatically searches for channels and
setsthe player's internal clock.
NOTES:
• Advanced Connections are covered inAppendix A.
• Even ifyou plan to use the S.Video or Component Video Outputs,
_y_ you MUST connect the DVD.VCR toyour television with
either the standard RFor the Line Out connection. This
enables you to operate the DVD-VCR setup menus.
1 Connect Antenna/Cable to DVDoVCR
Connectthe RF antenna cable from yourindoor/outdoorantenna or
cable wall outlet tothe IN (FROM ANT.) jack onthe back panel of
the DVD-VCR.
Connect DVD-VCR to TV
Chooseone of the following methods to connectthe DVD-VCR to
yourIV:
RF Connection
Connect the supplied RF antennacable from theOUT (TO TV) jack
on the back panel of theDVD-VCR toyourtelevision'sAntenna
input.
NOTE : Checkthe channelto connectDVD-VCR toyour
television'sAntenna Input; See page 22.
Line Connection
Connect an RCA-type audio/video cable (red. white, yellow)from
the LINE OUT jacks on the back panel of the DVD-VCR to your
_elevision's Line In jacks. Use red for right audio, white for left
audio, and yellow for video.
NOTE: It is recommended thatyou use the Line Connection if your
TV is equipped with RCA jacks.
3
Plug In DVD-VCR
Connect the DVD-VCR power cordto a standard 120V/60Hz wall
ouUet. Don't press any buttons on theDVD-VCR or remote during
auto setup. "AUTO" blinks while the DVD-VCR runs an auto setup
procedure,where it will automatically searchfor all activechannels
and setthe clock. When Auto setting has been completed, the front
panel displays the currenttime. If Auto Clock set is unable to finda
channel to set the clock, you can set the clock manually; See page
18
FromAntennaorCable
To TV's Antenna Input
r
4 Turn On DVD-VCR
PressthePOWERbuttonontheremotecontro_oronthe
DVD-VCR'sfront panel.
5 Turn On TV
PressthePOWERbuttononyour TV.
6
Set TV to Channel 3, 4 or Line
Be sure _ouse the same channel you selected in Step 2 If you
used the Line Connection, set your TV to its Line Input.

Deck Control Buttons
The DVD-VCR uses one set of controls to operate both decks. The
following buttons are helpful in successfully controlling each deck.
1 POWER Button
2 DVD Button
Press the POWER button on the remote controlor frontpanel to
turn on the DVD-VCR.
Press the DVD buttonon Ihe remote controlor front panel when
you want to controlthe DVD deck.
• The DVD thdicator will lighton the FrontPanel Oisplayto show
that the DVD deck is selected.
VCR Button
Press the VCR buttonon the remote controlorfront panel when
you want to controlthe VCR deck.
• The VCR indicatorwilllight onthe FrontPanel Display to show
thatthe VHS deck is selected.
INPUT SEL. Button
Pressthe INPUT SEL buttonrepeatedly to cyclethroughall of
your inputsources, includingthe Tuner (Oh##), Line 1(rear AV
input),and Line 2 (front AV input).
• It isonly available when VCR deckis selected.
]
Basic DVD Playback ]
Follow these instructions to playback a DVD.
1 Open Disc Drawer
Press the OPEN/CLOSE buttonon the remotecontrolor front
panel to automaticallypower on the DVD-VCR and open the disc
drawer,
2 Insert Disc
P_acethe disc in the drawer with the label side of the disc facing
up. If the disc has two sides, orientthe disc with the desired label
facing up. ._- t
3 Close Disc Drawer
Pressthe OPEN/CLOSE button onthe remote controlor front
panel to closethe discdrawer.
4 Play the DVD
Press the ),'-II (Play/Pause) button on the remotecontrolor front
panel.
• Many discs willbegin playback automaticallywhenthe disc
drawer closes.
• If the DVD has a disc menu,or more than one tit;e, the disc
menumay appear.
5 Additional DVD Options
• For sdvancod DVD Setup options, see pages 24~31
• For specia! DVD Playback features, see page 33~43.

Basic VHS Playback
To play a videotape, simply insert it in the VHS deck and press the
Play button. Tapes without Record Safety Tabs can be set to play
automatically when inserted; see page 45.
1 Insert VHS Tape
Insert a standard VHS videotape intothe VHS Deck.
• Power will turn on automatically when you insed a videotape.
2 Play Tape
Press the >..ll (Play/Pause) button onthe remote controlor front
panel. ]f thetape ismissing the Record Safety Tab and Auto Play
is turned on, the tape witl begin to play automatically, see page 45.
3 Stop Playback
Press the • (Stop) button on the remote controlor front panel•
4 Eject Tape
Press the OPENICLOSE button on theremote control or the
EJECT button on the front panel.
5 Additional VCR Options
• For specialVCR Playback features, see pages 44~45.
• For VCR Recordingfeatures, see pages 47~49.
• For Timer Recordthgfeatures, see pages 50.
RecordSafetyTab
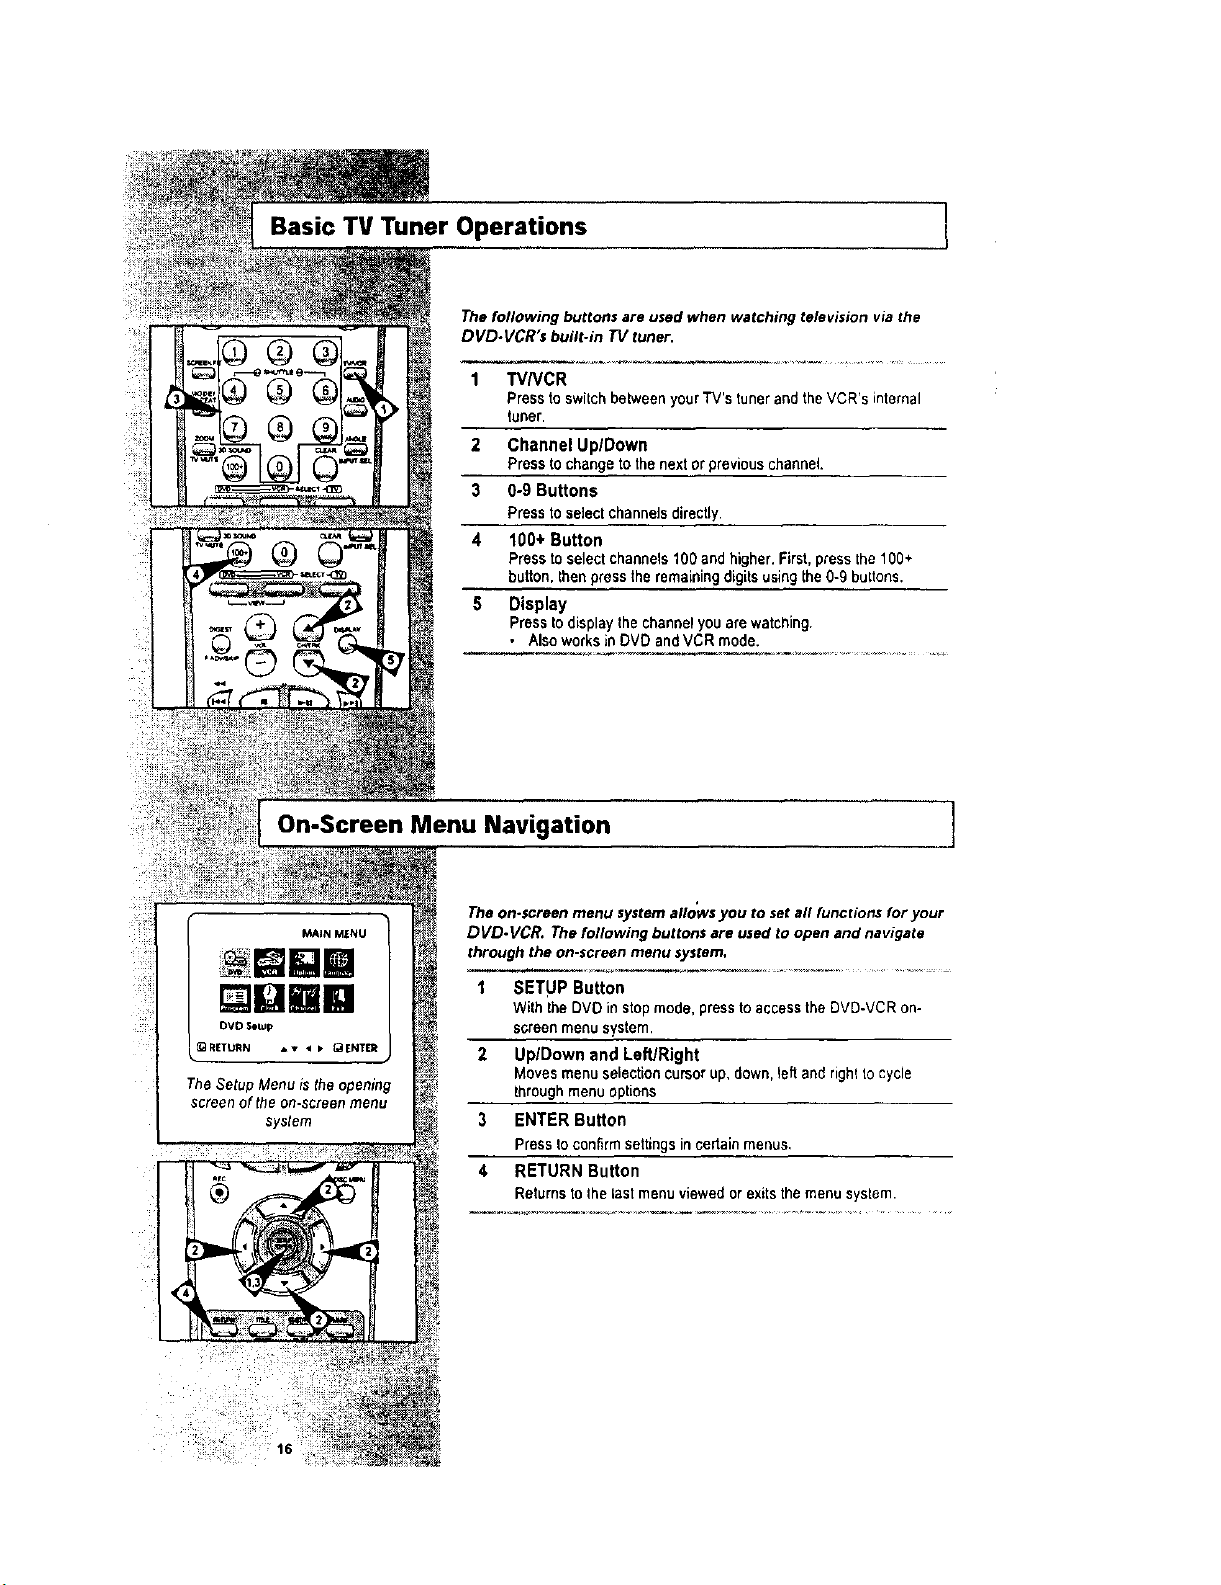
Basic TV Tuner Operations
The following buttons are used when watching television via the
DVD.VCR's built-in TV tuner.
1 TVNCR
Press to switchbetween your TV's tuner and the VCRIs internal
tuner.
2 Channel Up/Down
Press tochange tothe nextor previouschannel.
3 0-9 Buttons
Press to selectchannels directly.
4 100+ Button
Press to selectchannels 100 and higher.First, press the log+
button,then pressthe remaining digitsusing the 0-g buttons.
5 Display
Press to displaythe channel you are watching.
• Alsoworks in DVD and VCR mode.
On-Screen Menu Navigation
MAIN MENU
gBi
OVD $owp
_RETURN _ < I* _ENT_
The Setup Menu is theopening
screen of the on-screen menu
system
]
The on.screen menu system allo'wsyou to setall functions for your
DVD.VCR, The following buttons are used to open and navigate
through the on-screen menu system,
I SETUP Button
With the DVD in stop mode,press to accessthe DVD-VCR on-
screen menu system.
2 UplDown and LefURight
Moves menu selection cursorup, down, leftand right to cycle
throughmenu options
3 ENTER Button
Press to confirmsettings in certain menus,
4 RETURN Button
Returns tothe last menu viewed orexits themenu system.

l Menu Language
Follow these steps to change the on-screen menu language to
English, French or Spanish.
1 Open "SETUP MENU"
With the DVD instop mode, pressthe SETUP button.
2 Set "Language"
UsingtheUp[DownandLeftJRightbuttons,movetheselection
arrowto "LanguagelldiomalLangue,"thenp,'essENTERbutton.
3 Set menu Language
Move the selectionbar toyour desired Language, then press
ENTER button,
gjla

Manual Clock Set
AUtO
• M_nual
]
If Auto Setup was unable to find a local TV station to set the DVD-
VCR'$ internal clock, follow these instructions to set the date/time
ITlanually.
NOTE: It is important to set the clock for accurate Timer
Recording,
1 Open "SETUP MENU"
With the DVD instop mode. pressthe SETUP button.
2 Select "Clock"
Using the up/down andleft/right buttons,move the selectioncursor
to "Clock SeUAdjust,"then press ENTER toselect,
3 Select "MANUAL"
Move the selectionarrowto "MANUAL', than press ENTER to turn
thisfeature "Off,"
• The "SetClock Menu"willchange as shown.
4 Set the Clock
Press LEFT/RIGHT to select each of the followingoptions,then
pressUP/DOWN toset each option:
• Sat Hour - Set the hourusingthe up and down buttons.
, Set Minute - Set the minute using the up anddown buttons.
• Set Month - Set the month using the up and down buttons.
• Set Day - Set the day using the up and down buttons.
• Set Year - Set the year using the up and down buttons.
5 Confirm Settings
Press the RETURN buttonto save your clock settings and return to
the Setup menu.
• Press Return again to e._it.
t8
 Loading...