

Samsung DMT SERIES Service Manual
#1. No Power
1-1. No Power · · · · · · · · · · · · · · · · · · · · · · · · · · · · · · · · · · · · · · · · · · · · · · · · · · · · · · · · · ·
2-1. No Drain · · · · · · · · · · · · · · · · · · · · · · · · · · · · · · · · · · · · · · · · · · · · · · · · · · · · · · · · · · ·
#2. No Drain
3
4
#3. Water Leakage
!"#$%&'#$()
Contents
!"#$%&!
3-1.
From door bottom on washing portion
· · · · · · · · · · · · · · · · · · · · · · · · · · ·
5
3-2. From water supply line & connection · · · · · · · · · · · · · · · · · · · · · · · · · · · ·
6
4-1. Abnormal Noise · · · · · · · · · · · · · · · · · · · · · · · · · · · · · · · · · · · · · · · · · · · · · · · · · · ·
#4. Noise
7
5-1. No Water Supply · · · · · · · · · · · · · · · · · · · · · · · · · · · · · · · · · · · · · · · · · · · · · · · · · ·
#5. Water Supply Problem
8
5-2. No Stop Water Supplying · · · · · · · · · · · · · · · · · · · · · · · · · · · · · · · · · · · · · · · · 10
#6. Improper Operation
6-1. Not Dry · · · · · · · · · · · · · · · · · · · · · · · · · · · · · · · · · · · · · · · · · · · · · · · · · · · · · · · · · · · ·
6-2. Not Clean - If Some Food Particles Remains on Dishes · · · · · · · 1113
6-3. Not Clean - If Spots and Filming on Glasses and Flatware · · · · 15
6-4. Not Clean - If Leaves Glasses with a Dim Polish · · · · · · · · · · · · · · · 17
6-5. Cycle Doesn’t Start · · · · · · · · · · · · · · · · · · · · · · · · · · · · · · · · · · · · · · · · · · · · · · · 18
: Difficult repair

7-1. 1E (High Temperature Heating Error) · · · · · · · · · · · · · · · · · · · · · · · · · · · ·
#7. Error Code
19
7-2. 3E (High Temperature Water Supply Error) · · · · · · · · · · · · · · · · · · · ·
20
7-3. 4E (Water Supply Error) · · · · · · · · · · · · · · · · · · · · · · · · · · · · · · · · · · · · · · · · ·
21
7-4. 5E (Drain Error) · · · · · · · · · · · · · · · · · · · · · · · · · · · · · · · · · · · · · · · · · · · · · · · · · · ·
23
!"#$%&'#$()
Contents
!'#$%&!
7-5. 9E (Low Level Water Error) · · · · · · · · · · · · · · · · · · · · · · · · · · · · · · · · · · · · · ·
24
7-6. HE (Heater Error) · · · · · · · · · · · · · · · · · · · · · · · · · · · · · · · · · · · · · · · · · · · · · · · ·
25
7-7. LE (Leakage Error) · · · · · · · · · · · · · · · · · · · · · · · · · · · · · · · · · · · · · · · · · · · · · · ·
26
7-8. PE (Half Load Function Error – only DMT 800) · · · · · · · · · · · · · · · · ·
27
7-9. bE (Button Error) · · · · · · · · · · · · · · · · · · · · · · · · · · · · · · · · · · · · · · · · · · · · · · · · · ·
28
7-10. oE (Over Level Water Error) · · · · · · · · · · · · · · · · · · · · · · · · · · · · · · · · · · · ·
29
1. DMT800, DMT610, DMT350 Series · · · · · · · · · · · · · · · · · · · · · · · · · · · · · ·
: Difficult repair
# Appendix 1. SVC Inspection Mode
31
2. DMT400 Series · · · · · · · · · · · · · · · · · · · · · · · · · · · · · · · · · · · · · · · · · · · · · · · · · · · ·
33
3. DMR57, DMR77, DMR78 Series · · · · · · · · · · · · · · · · · · · · · · · · · · · · · · · · · ·
35
7-11. tE (Temperature Sensor Error) · · · · · · · · · · · · · · · · · · · · · · · · · · · · · · · · ·
30
Causes
Check Point
Voltage at the outlet, sub PBA, main PBA
ㆍNo Voltage at electrical outlet
ㆍSub or main PBA defective
#1. No Power
1-1. No Power
Symptom
ㆍDishwasher will not turn on.
Step 1 : Voltag e a t Elect rical Outlet
! Check if the voltage at electrical outlet is approximately AC 120V.
The dishwasher should be connected to dedicated breaker
Step 2 : Sub PBA
! Check all the connections of the Sub PBA connector.
!$#$%&!
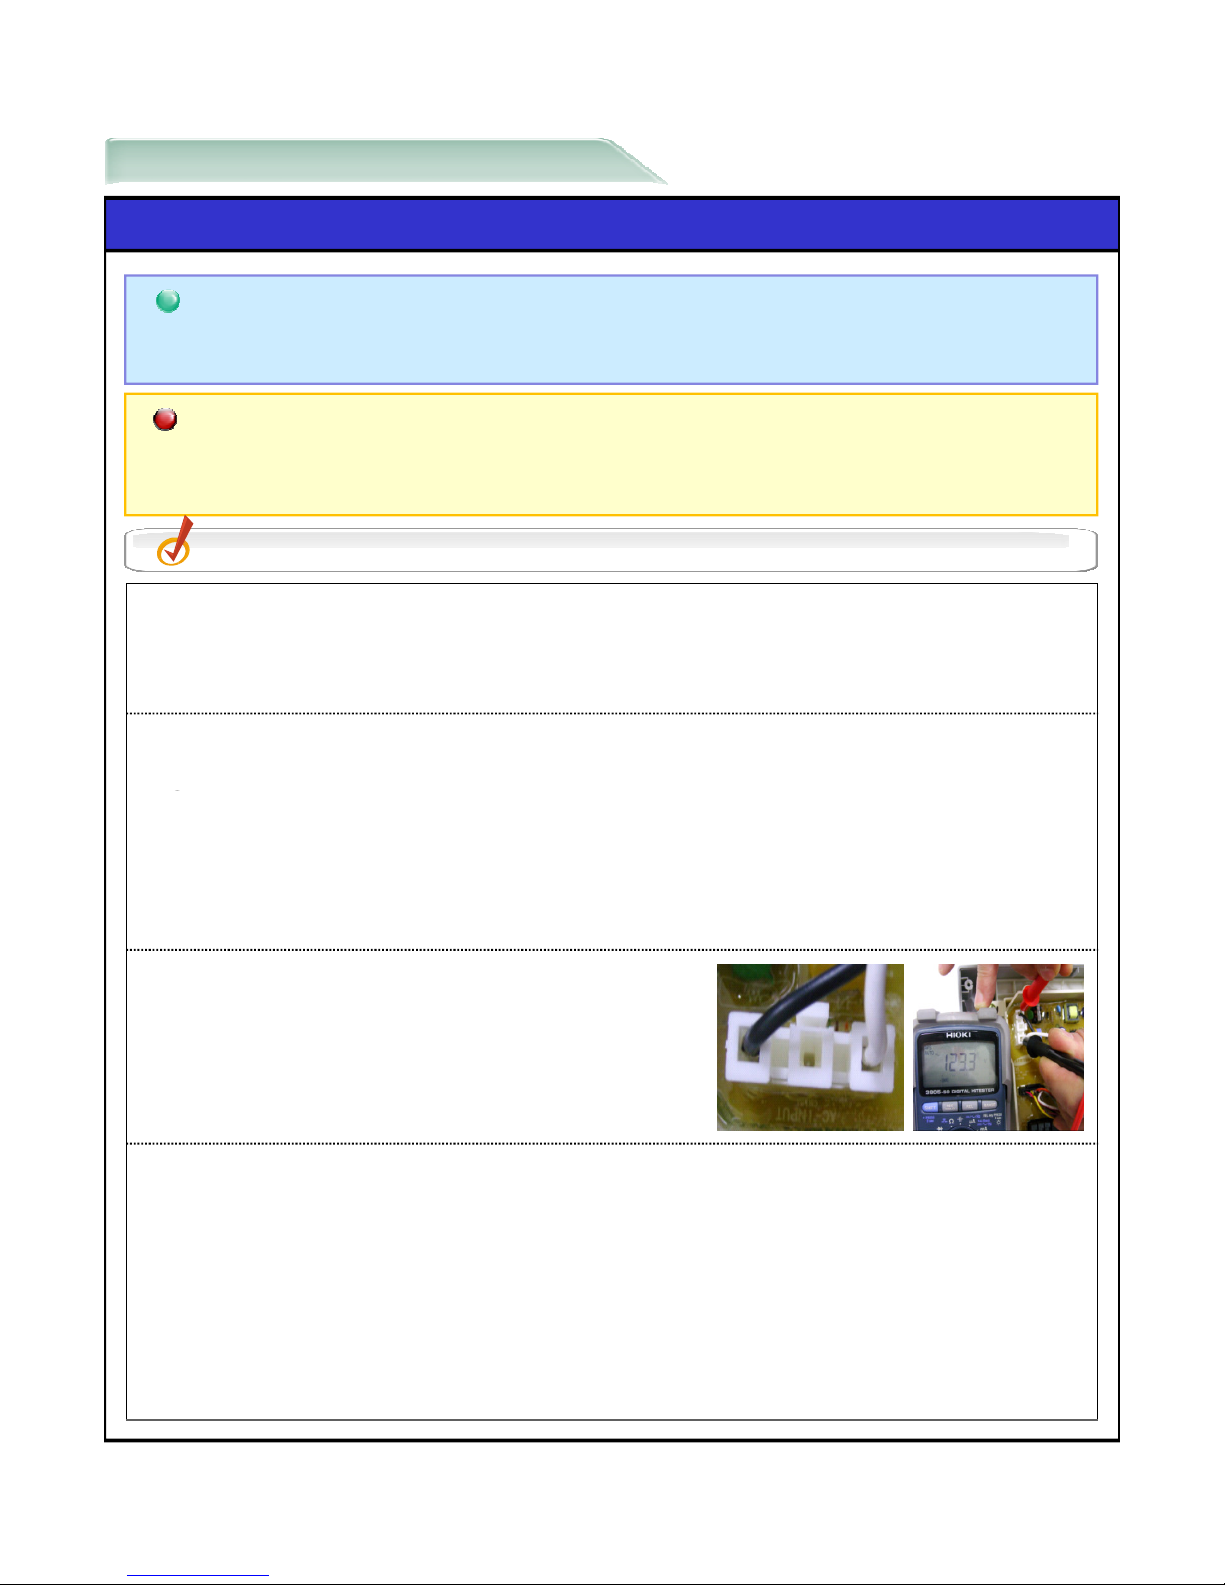
Step 3 : Main PBA (1)
! Verify the AC power lines into the Main PBA.
- Measure the voltage between the black wire and
the yellow wire of CN101.
( If the voltage is not AC120V, check for bad
connections or open circuits of the power part.
Step 4 : Main PBA (2)
! Check for the voltage between pin 4 (orange) of the main PBA CN302 connector and
pin 7 (pink) of the CN301 connector.
( The normal voltage : DC 4.5V ~ 5.5V
" Check for the voltage between pin 10 (blue) of the main PBA CN302 connector and
pin 9 (white) of the CN302 connector.
( The normal voltage : DC 9.5V ~ 12.5V (Power key on)
DC 5.5V ~ 7.0V (Power key off)
If the voltage is not normal, replace main PBA.
"
Check for LED and Input Key
- Push ‘Normal’ + ‘Heavy’ + ‘Power Key’
- Push ‘Normal’ Key 4 times
- Push all key.
( If all LEDs do not light, replace sub PBA.
Causes
Check Point
Drain hose, water level sensor, drain pump, main PBA
ㆍDrain hose blocked
ㆍWater level sensor defective
ㆍDrain pump defective
ㆍMain PBA defective
#2. No Drain
2-1. No Drain
Symptom
ㆍDishwasher doesn’t drain.
Step 1 : Drain Hose
! Check if the drain hose is fold or kinked.
" Check if drain hose is clogged or restricted
!)#$%&!
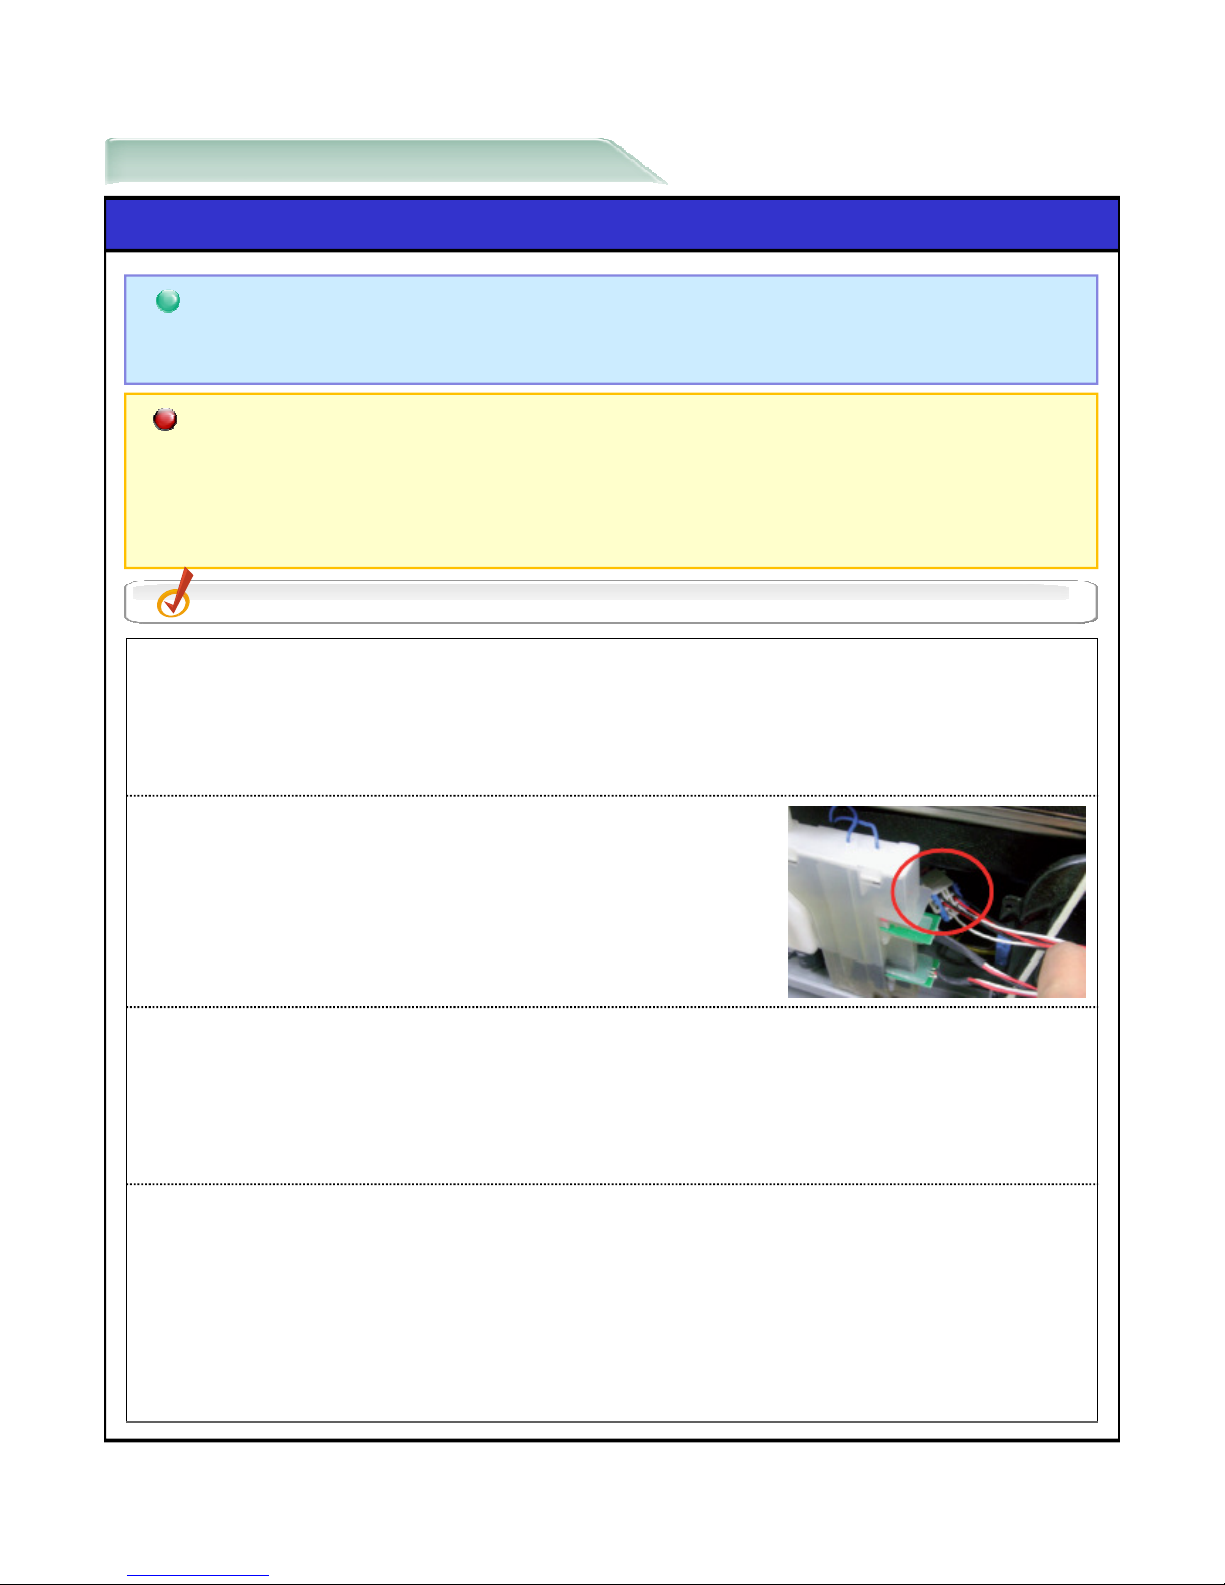
Step 2 : Water Level Sensor
! Check the connections for the Water-level sensor.
" Check for the operation of the Water-level sensor.
If it is faulty, replace the assembly case sensor and
remove foreign material from the float
If it is normal, replace the Main PBA assembly.
Step 3 : Drain Pump
! Check the connections of the Drain Pump.
" Check the resistance of the drain pump coils.
( Drain Resistance : approximately 25Ω
If the value is not normal, replace the Drain pump.
Step 4 : Main PBA
! Check the operation of the Drain Pump Relay.
→ Check for the operating voltage between the yellow wire of the Main PBA CN101
connector and the orange wire of the CN202 connector.
( The Voltage : AC 120V (while operating)
If the value is not normal, replace main PBA.
Causes
Check Point
Installation, lower nozzle
ㆍPoor installation.
ㆍLower nozzle defective.
#3. Water Leakage
3-1. From door bottom on washing portion
Symptom
ㆍWater Leaks from door bottom during washing cycle.
Step 2 : Lower Nozzle
Step 1 : Installation
! Check if the dishwasher is level
If it is tilted forward, water can come out through bottom's corner.
!*#$%&!
!
Check if the Lower nozzle is bended or divided.
( Replace new lower nozzle.
Causes
Check Point
Water connection
ㆍPoor water connection
#3. Water Leakage
3-2. From Water Supply Line & Connection
Symptom
Step 2 : Water Connection (2)
Step 1 : Water Connection (1)
! Check if the water connection is wrong.
( Reconnect water connection properly, be sure to use
thread seal on the 90 degree elbow fitting.
ㆍWater Leaks from water supply line & connection.
!%#$%&!
!
Check the threads on the water valve
( Replace the part.
Causes
Check Point
Installation, sump, drain chamber
ㆍPoor installation
ㆍForeign material inside
ㆍNormal sound (no defect)
#4. Noise
4-1. Abnormal Noise
Symptom
ㆍAbnormal noise occurs during operation.
Step 1 : Installation
! Check if the product is level with the floor.
" Check if there are any deformations in the sink drain pipe.
# Check if the dishwasher drain hose is firmly installed to the sink.
!+#$%&!
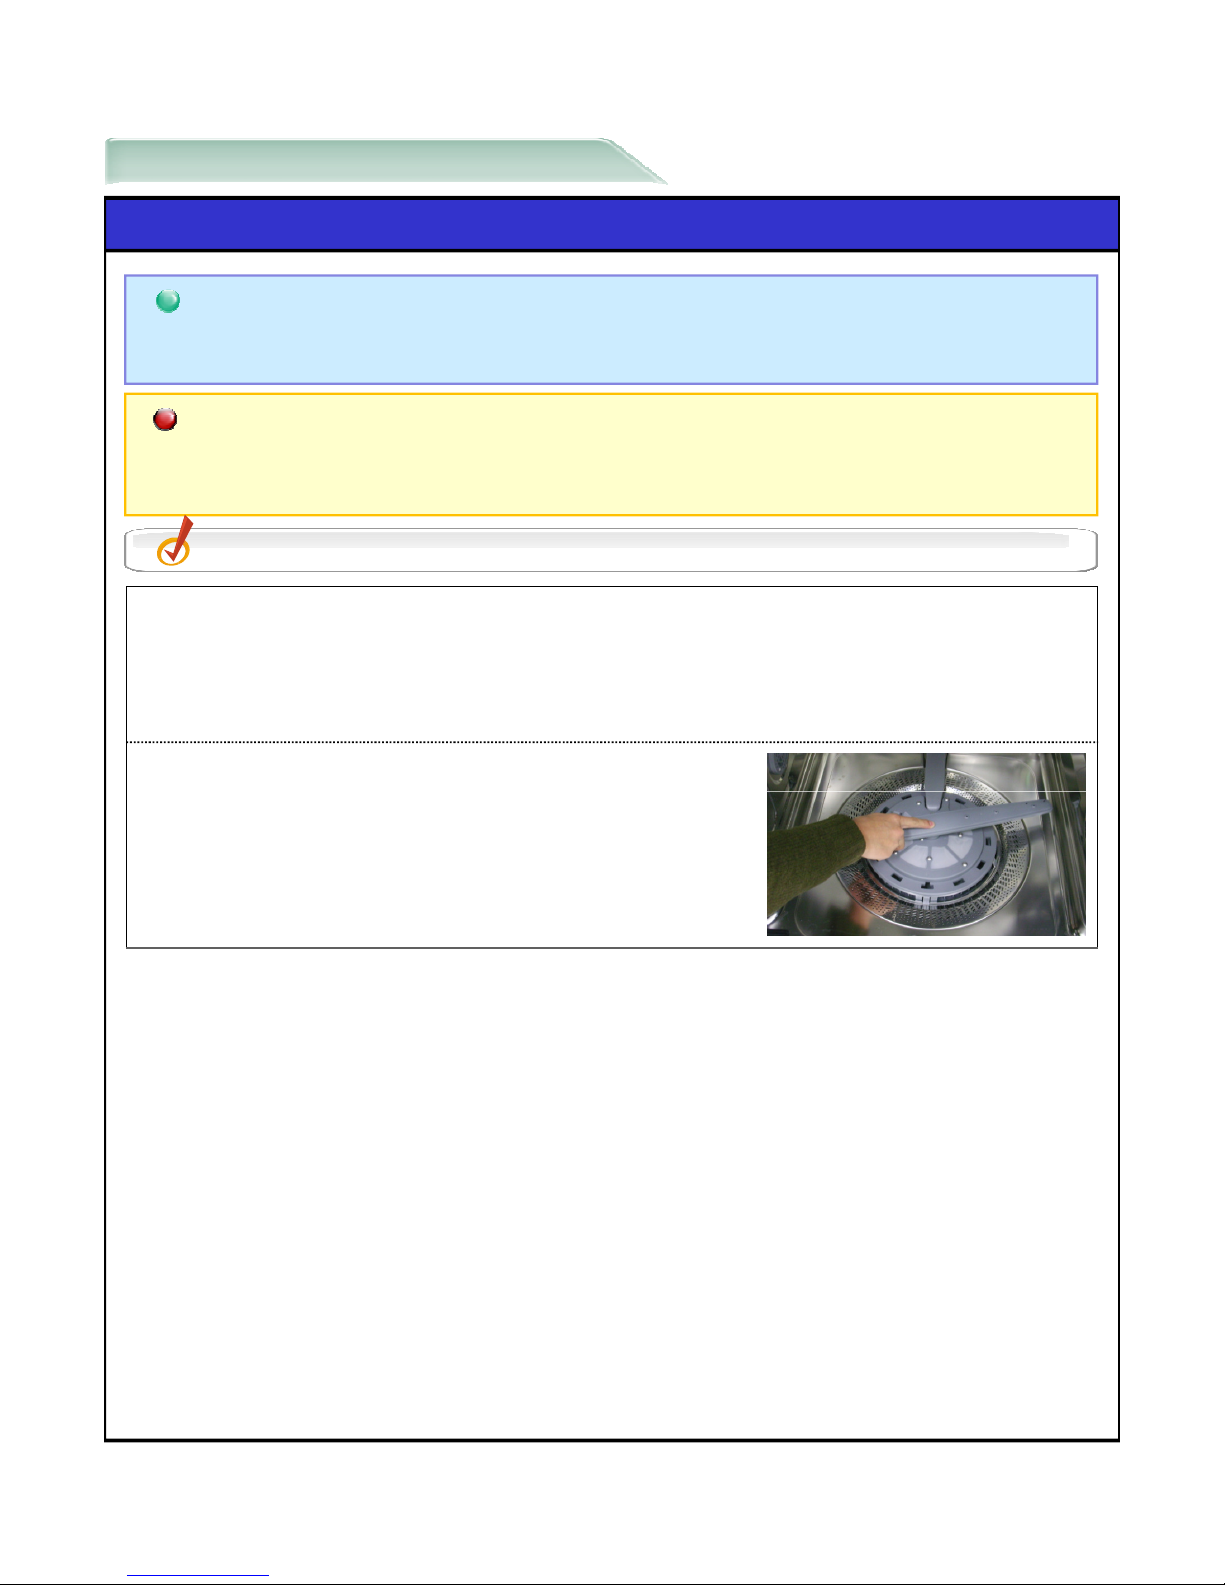
Step 2
: During Wash Cycle
! If the grinding noise occurs during wash cycle,
hard material may be inside Assembly sump.
( Remove the abnormal item in assembly sump and check the disposer blade.
Step 3 : During Drain Cycle
! If grinding noise occurs during drain cycle,
hard material may be inside drain chamber.
( Remove the abnormal item in drain chamber and check the drain pump impeller.
Step 4 : Normal Sound
! These sounds are not defective, please advise customers that they are normal.
- Sound is generated when the dispenser cover is open and the drain pump is operating
in an early stage.
- There may be a ‘chopping’ sound because a nozzle is bumping against the dishes.
( Rearrange the dishes.
Causes
Check Point
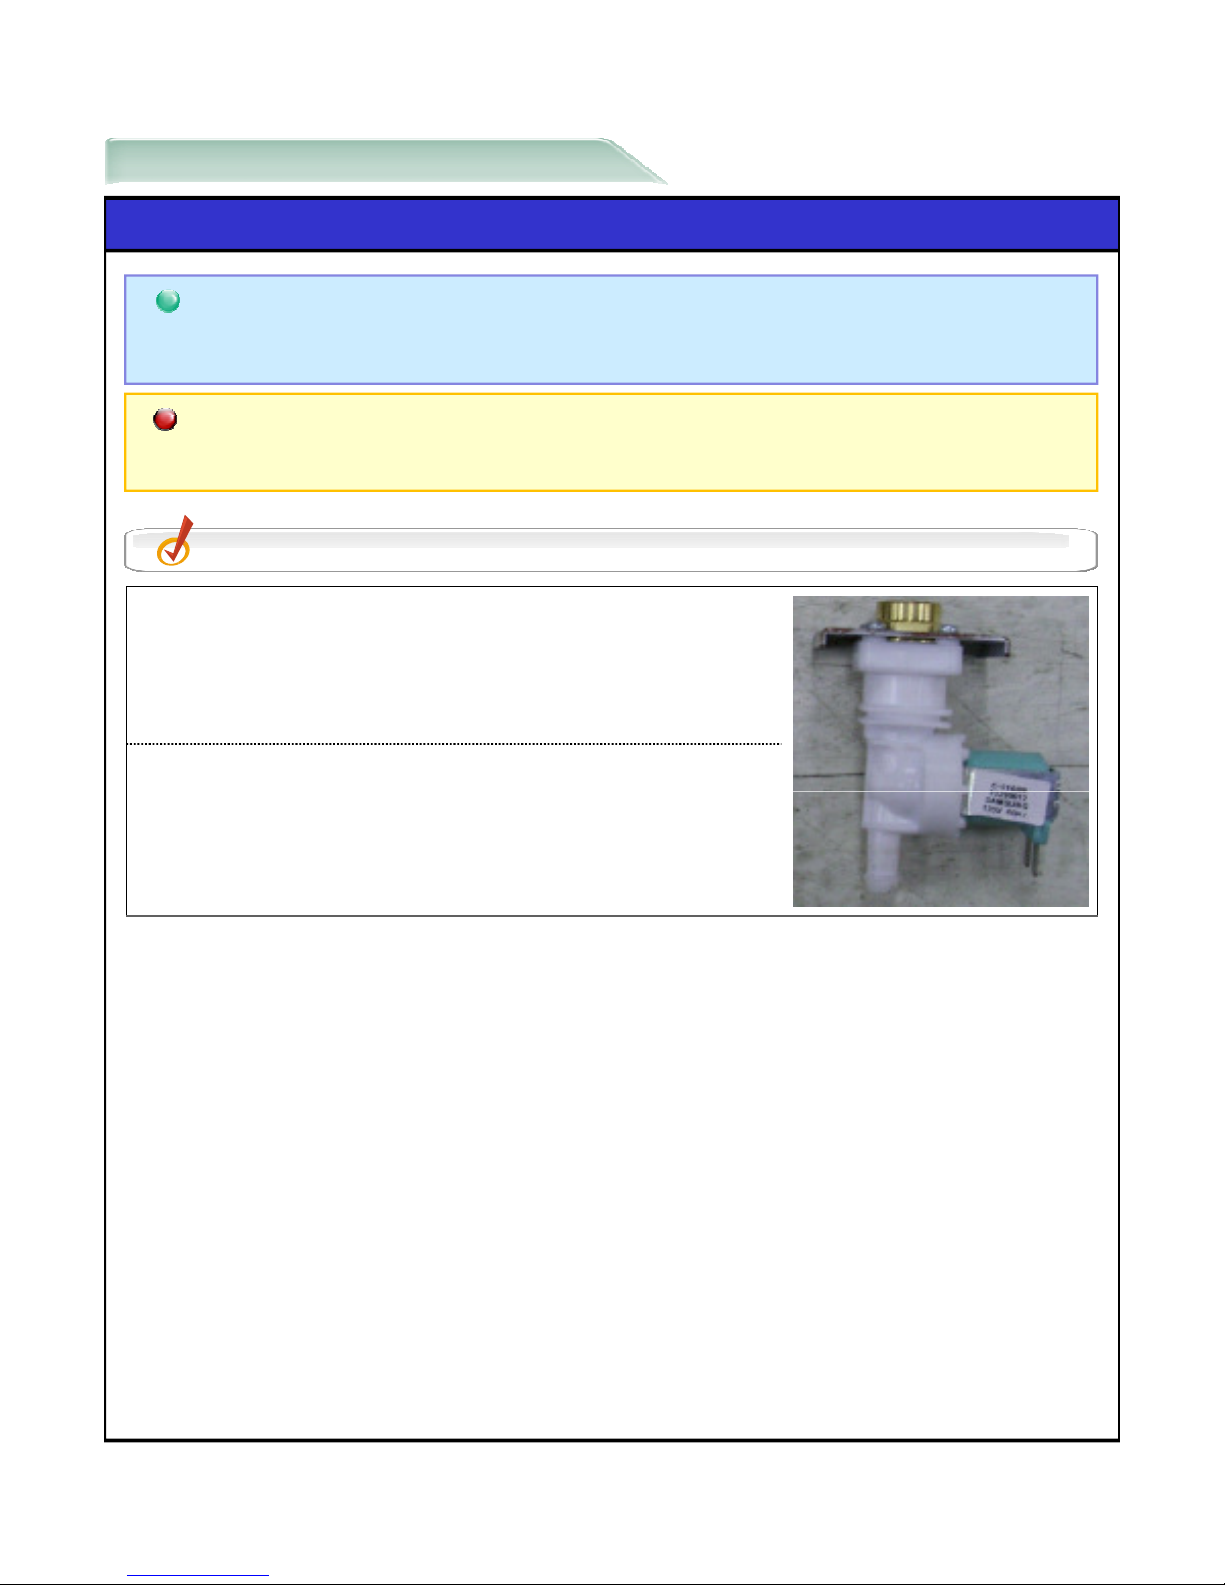
Water tap, water line, water valve filter, case brake, water valve, case sensor
ㆍWater tap is not open / water pressure is low.
ㆍWater line blocked or kinked.
ㆍWater valve filter blocked / water valve defective
ㆍCase brake, case sensor defective
#5. Water Supply Problem
Symptom
ㆍWater is not supplied.
Step 1 : Water Tap
! Check if water tap is open.
" If water pressure is too low, customers may think no water is supplied.
5-1. No Water Supply
!,#$%&!
Step 2 : Water Line
! Check if the water hoses are kinked or not.
" Check if the water hoses are blocked by foreign materials.
# Check for water leakage at the connection of water valve
Step 3 : Water Valve blocked
! Check if the valve is blocked with foreign materials.
( Advise customers to clean the water valve periodically.
Step 4 : Check when water supply is stopped
! If the water supply stops after water is supplied for 5 seconds, go to Step 5.
" If the water supply stops after water is supplied for 1~5 minutes, go to Step 6.
# If the water supply stops after water is supplied fully into the float in Assembly Case
sensor is located in High level sensor, go to Step 8
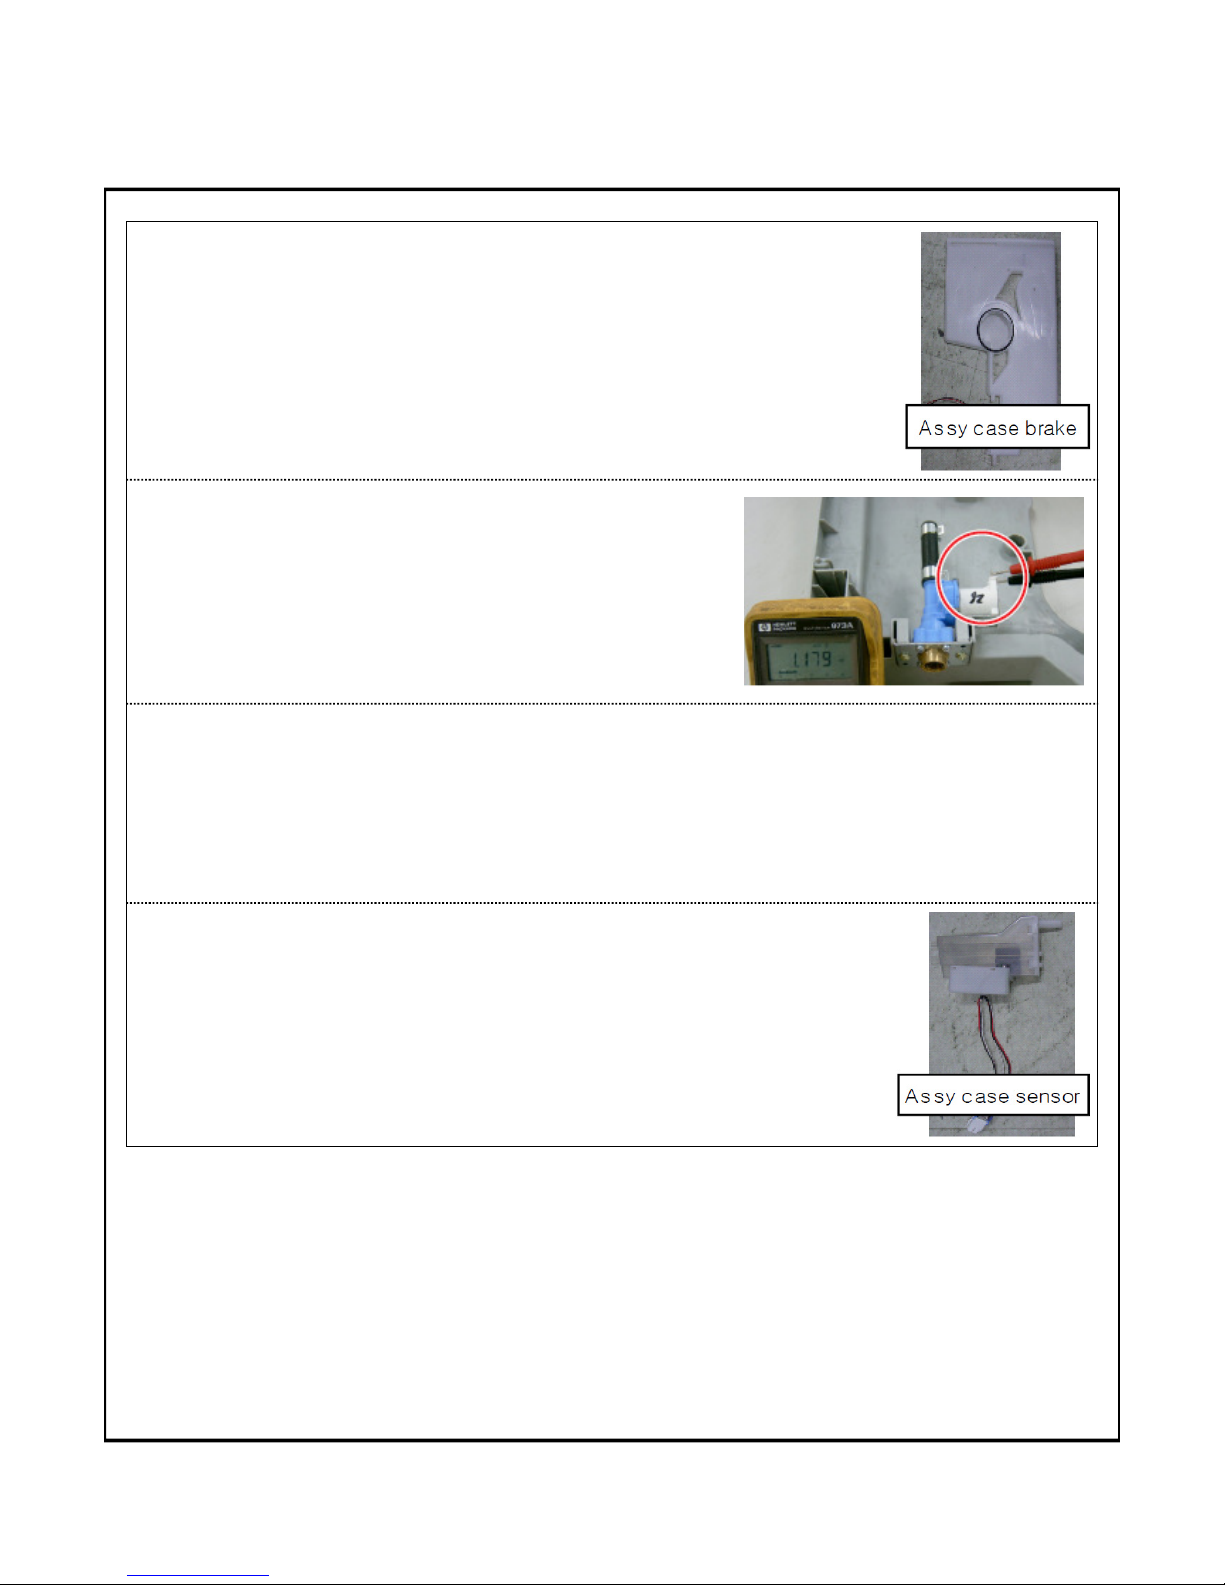
Step 7 : Water Valve (2)
! Check for voltage value of the water valve during operation of water valve.
Step 6 : Water Valve (1)
! Check the wiring connections to the water valve.
" Check the Resistance of the water valve.
(Remove the connector before checking)
( The Resistance : 1.2kΩ
If the value is not normal, Replace the Water valve.
Step 5 : Assembly Case Brake
! If the water supply stops after water is supplied for 5 seconds,
replace the Assembly Case Brake which is including Flow Meter.
!-#$%&!
(
The Voltage value : approximately AC 120V
If the value is not normal, Replace the Main PBA.
Step 8 : Assembly Case Sensor
! If the water supply stops after water is supplied fully into the floater
in the assembly case sensor is located in High level sensor,
Replace the assembly case sensor which is
includes water (high & low) level sensor.

Causes
Check Point
water valve, water level sensor / hose , main PBA
ㆍWater valve defective
ㆍWater level sensor defective
ㆍMain PBA defective
Symptom
ㆍWater is supplied continuously.
Step 1 : Water Valve
! If water is supplied on Power off status, replace the water valve.
#5. Water Supply Problem
5-2. No Stop Water Supplying
Step 2 : Water Level Sensor
!".#$%&!
Step 3 : Main PBA
! Power on and then check voltage of the water valve.
( If the voltage value is approximately AC 120V,
even though the valve is not working, Replace Main PBA.
!
Check the connections to the Water
-
level sensor.
" Check for the operation of the Water-level sensor float.
If it is faulty, replace the assembly case sensor &
remove foreign material from the float
If it is normal, replace the Main PBA assembly.
Causes
Check Point
Water Temperature, dishes, dispenser, fan motor, main PBA
ㆍWater Temperature
ㆍThe amount of dishes, the kind of dishes
ㆍDispenser, fan motor, main PBA defective
Symptom
ㆍDishes are not dry.
#6. Improper Operation
6-1. Not Dry
Step 1 : Water Temperature
! The temperature of the water is too low when the dishwasher is running.
( Connect the water supply line to a hot water supply.
Use the Sanitize option with rinse aid.
!""#$%&!
Step 2 : The Amount of Dishes
! Too many dishes have been loaded.
( Proper loading of items can affect drying. Load your dishes as recommended.
Step 3 : Plastic Dishes
! Check if the plastic dishes are wet.
( Advise customers that plastic dishes often need towel drying as they absorb water
and release it well after the dry cycle is completed .
Step 4 : Water Drops
! Check if water is dropped to lower basket from the upper basket.
( Advise customers to empty the lower rack first and then the upper rack, after cycle ends.
This prevents water from dripping from the upper rack onto the dishes in the lower rack.
" Glasses and cups with concave bottoms hold water.
This water may spill onto other items when unloading.
 Loading...