

Samsung Bd-e5700, BD-EM57C, BD-E5400 User Manual

USER GUIDE

C
nfiguring Yur Nework Connctio
n
: F
rst Seps 3
• For Wired Networks 4
• For Wireless Networks 5
U
grading the Softwre 7
Rnnin
g Smat Hu
b
9
C
eatin Your Samsung Acount 10
Lggin
g into the Smrt Hu Service 11
Lggin
g out of theSmart HubService 11
Rsett
ing a Frgottn Pasword 12
Rmov
ng aSmartHub Acou
nt
t
from
t
the TV Acou
n
t List 12
S
rtingIcon
s
14
Wrkin
g with Icons 14
• Moving an Icon 14
• Create New Folder 15
• Inserting an Icon into a Folder 15
• Renaming a Folder 16
• Locking an App 17
• Unlocking an App 18
gistering Yur Sasung Accont 19
U
ing Samsug Apps 21
U
ing the Smart Search fuctio
n
22
Conteents
※ The functions may vary depending on your player model.
※ The figures in this manual are drawn for illustration purposes, and may differ somewhat from the actual appearance of the product.
3 - English
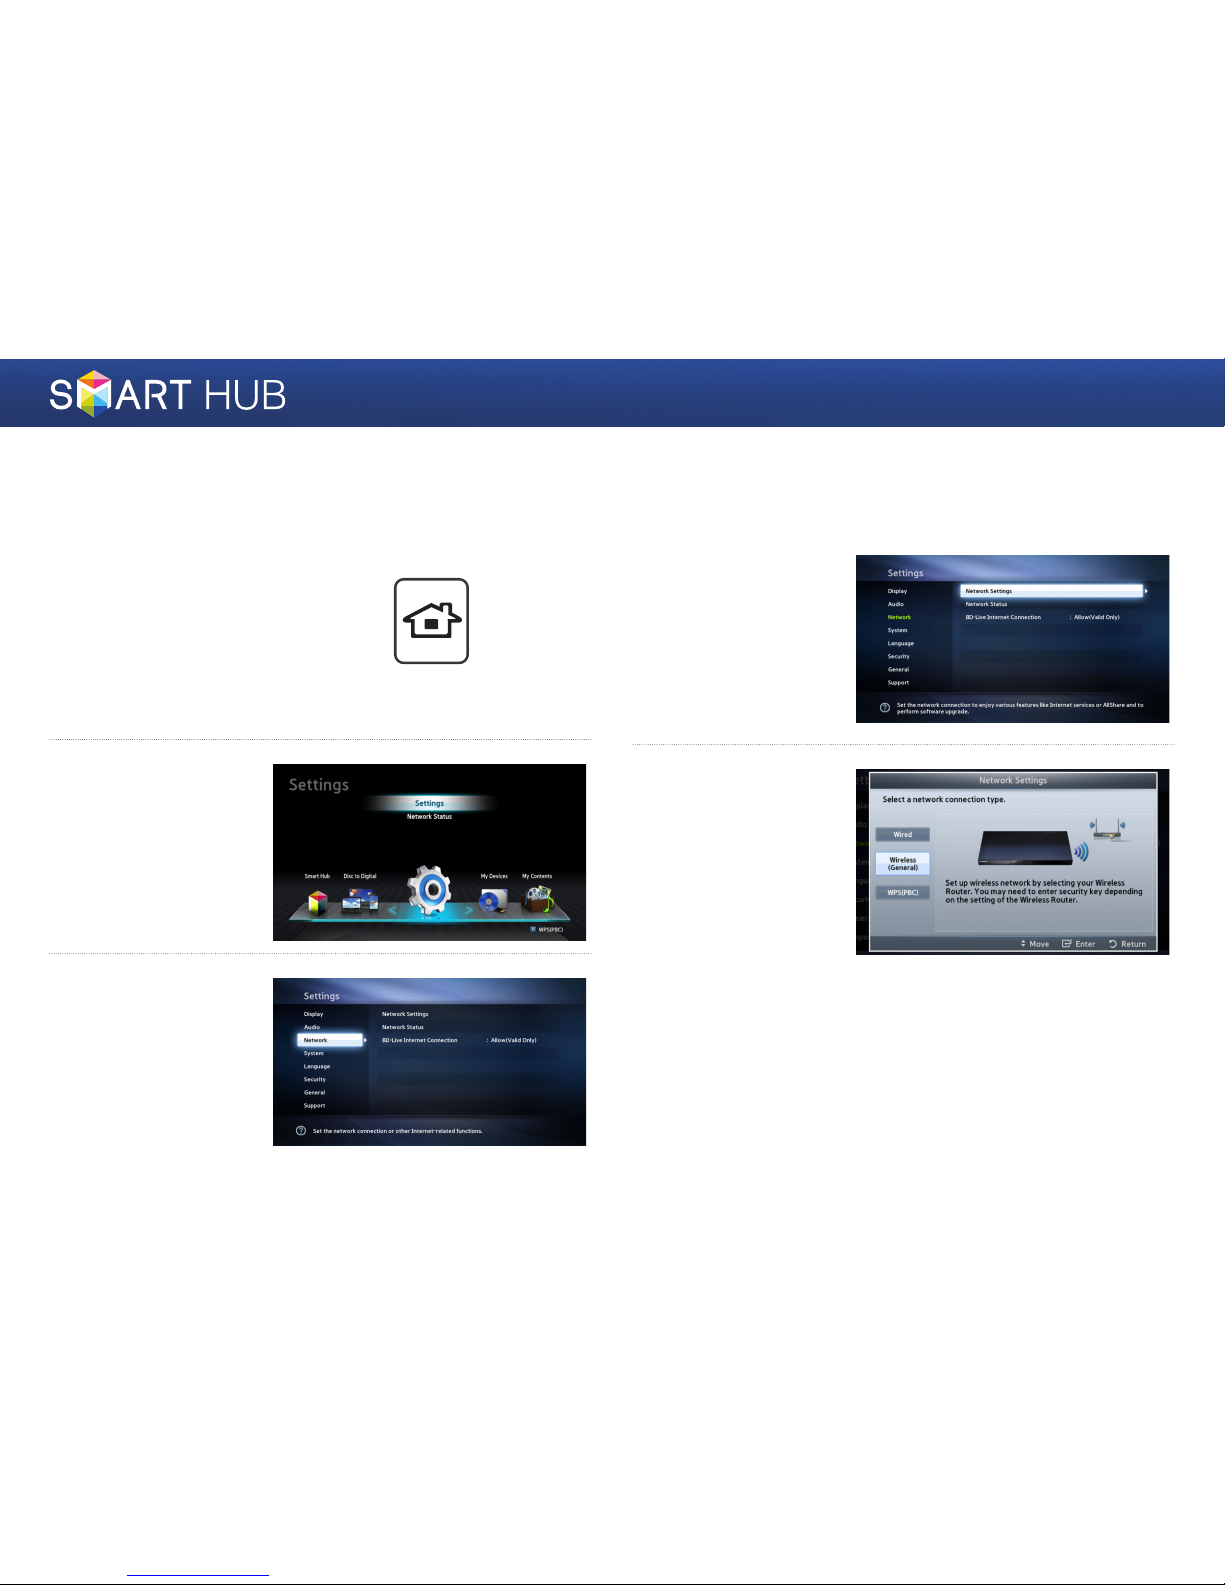
Configuring Your Network Connection:
First Steps
1
Press the [HOME] button on the
remote control.
※ If you have a wireless network, make sure the
access point you want to connect your player
to is turned on. The access point can be a
wireless router, modem, etc. If you have a wired
network, connect one end of a LAN cable to
the LAN port on the back of your player and
the other end to a router or modem.
2
On the Home screen,
move to <Settings>,
and then press the
e
button.
3
Move to <Network>,
and then press the
e
button.
4
Move to <Network
Settings>, and then
press the
e
button.
5
When the Network
Settings window is
displayed, go to "For
Wired Networks" on
page 4 or "For Wireless
Networks" on page 5 to
complete the network
configuration.
※ Your player supports various
network configuration
methods (Wired/Wireless,
WPS (PBC)) that let you
configue your network easily
and quickly.
HOME
4 - English
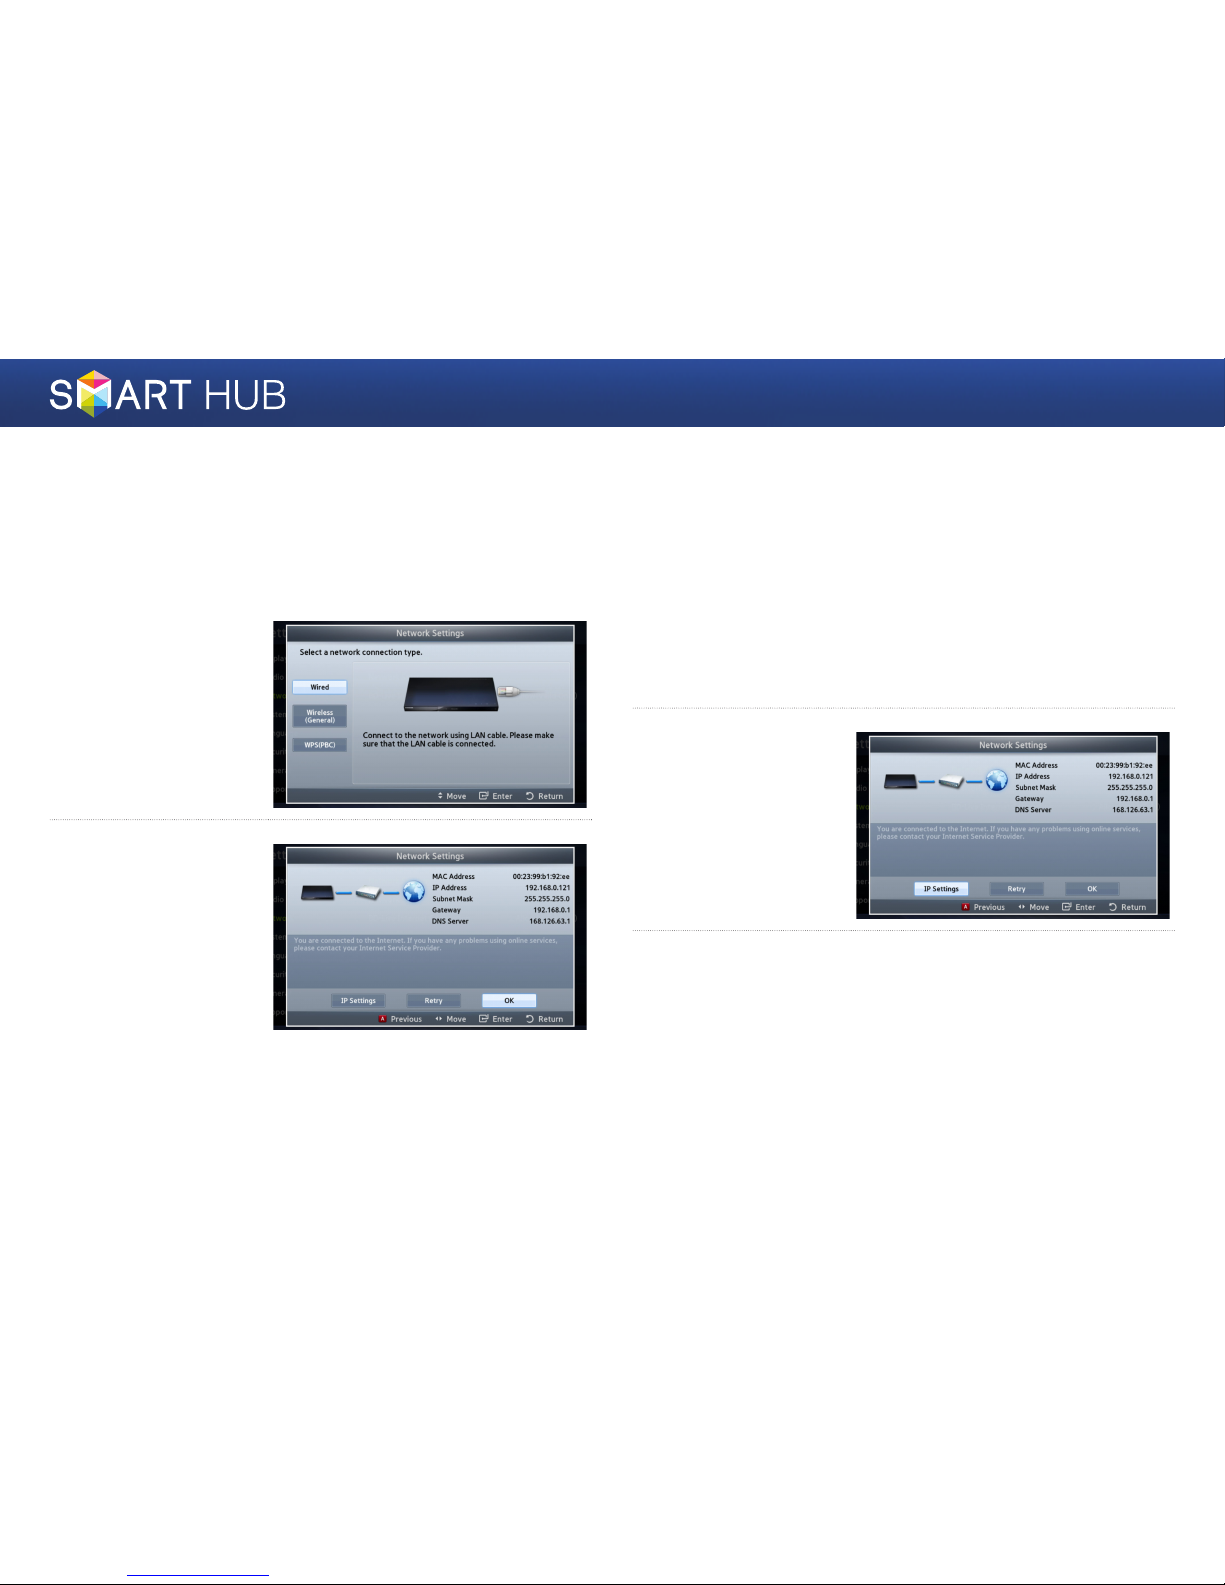
❙For Wired Networks
Wired - Automatic
Use the automatic procedure if your network does not require a Static IP
address. Most networks do not require a Static IP address.
1
Select Wired in the
Network Settings
screen, and then press
the
e
button.
2
The player verifies the
network connection
and then connects to
the network.
Press the
e
button
when the network
connection process is
complete.
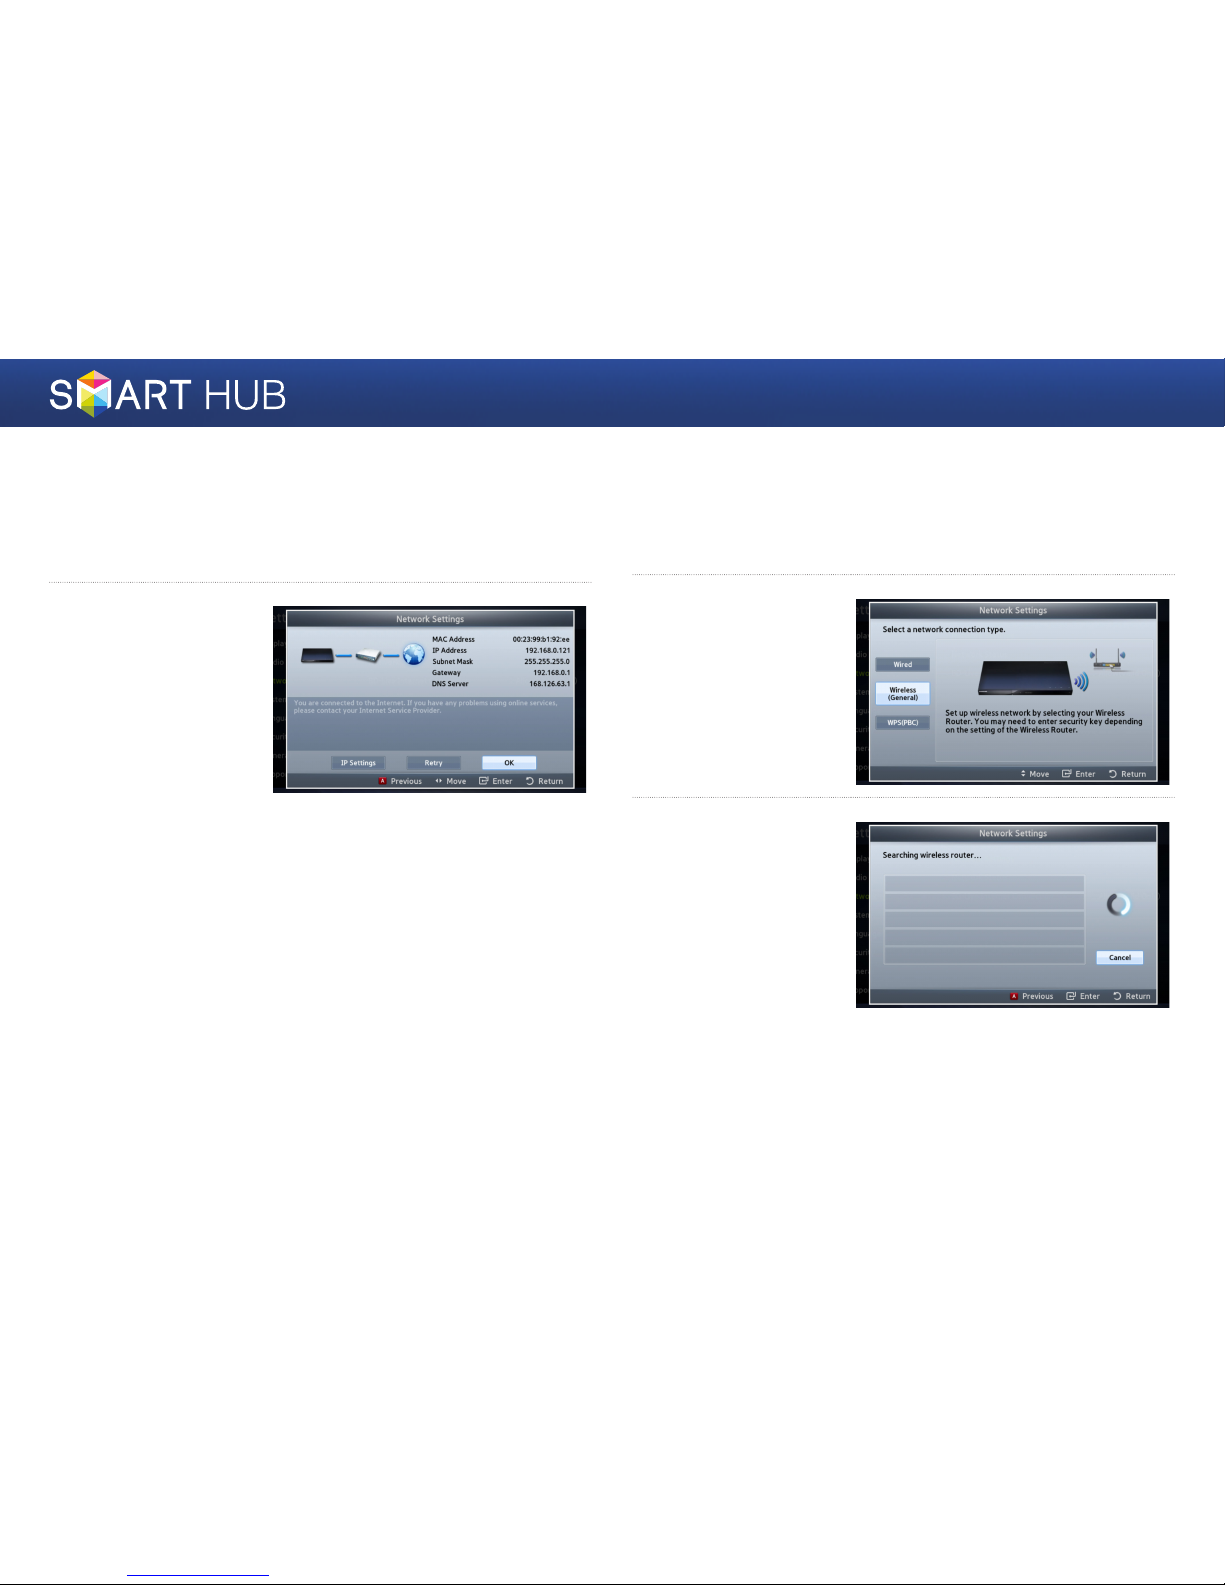
Wired - Manual Configuration
If you have a static IP address or the Automatic procedure does not work, you'll
need to set the Network Settings values manually.
1
Select <Wired> in the Network Settings screen, and then press the e
button. The Network Status screen appears. The player attempts to
verify the network connection and fails.
2
Select <IP Settings>
on the right of the
screen, and then press
the
e
button. The
IP Settings screen
appears.
3
Select the IP Mode field, and then set it to Manual.
5 - English
4
Use the number keypad on your remote to enter the Network values.
Use the ▲▼◄► buttons on the remote to move from entry field to entry
field.
✎You can get these values from your Internet provider. You can also view these values on
most Windows computers.
5
When done, highlight
OK, and then press
e
button. The player
verifies the network
connection and then
connects to the
network.
❙For Wireless Networks
1
Make sure the access point you want to connect your player to is turned
on. The access point can be a wireless router, modem, etc.
2
Select Wireless
(General) in the
Network Settings
menu, and then press
the
e
button.
3
Press the e button.
Your player starts
scanning for access
points. When done, it
displays a list of access
points it has found.
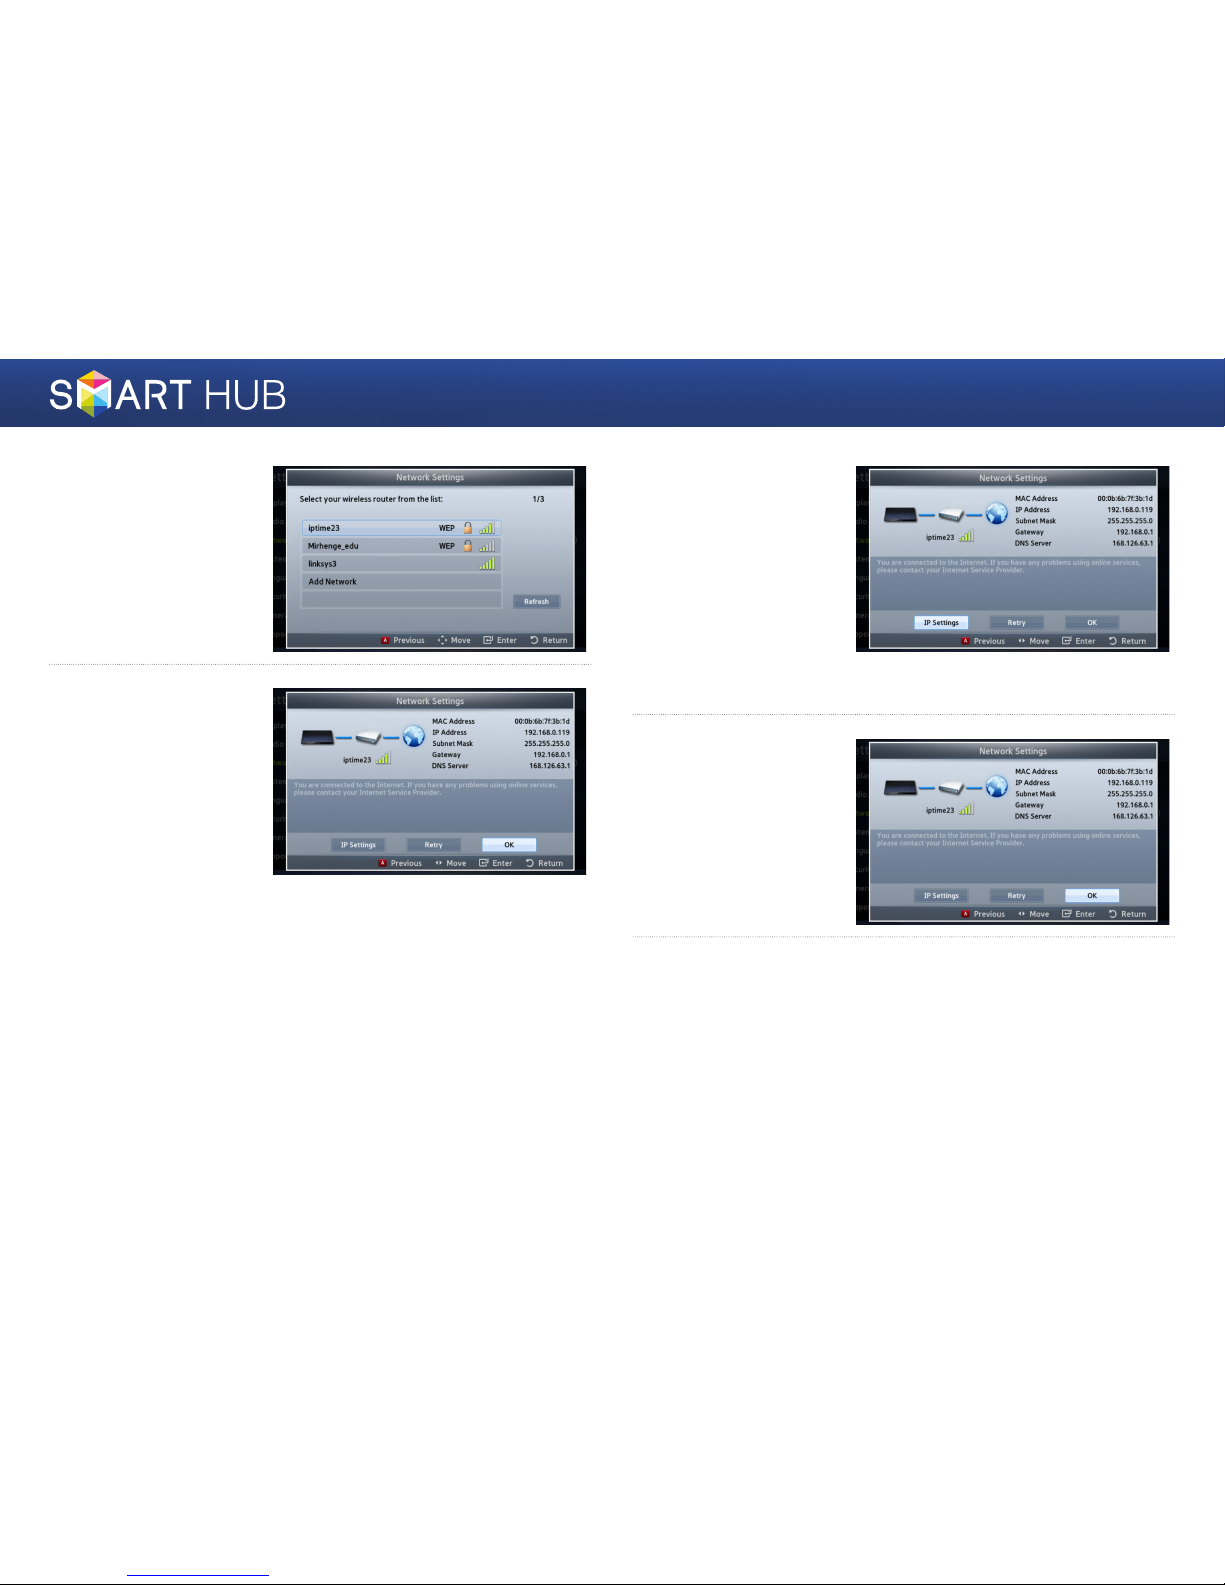
6 - English
4
Move to the access
point you want to
connect your player to,
and then press the
e
button.
5
Press the e button.
The player connects to
your network.
✎If your network has the
Enter Security Key window
appears. Use the keyboard
to enter the key. When done,
use the ▲▼◄►buttons
to select Done, press the
e
button, and then go to
Step 6.
5
-1
If you want to use a
fixed IP address, select
<IP Settings> on the
screen, and then enter
the required IP address
settings manually.
- IP Address
- Subnet Mask
- Gateway
- DNS Server
6
After you have finished
configuring the network
settings, press the
<OK> button.
✔When using a device that supports WPS
1. Perform steps 1 to 5 in “Configuring the Network: First Steps”.
2. Select “WPS(PBC)”.
3. Follow the instructions displayed on the screen.
✎Notes
- Devices that support WPS have a WPS (PBC) button.
7 - English
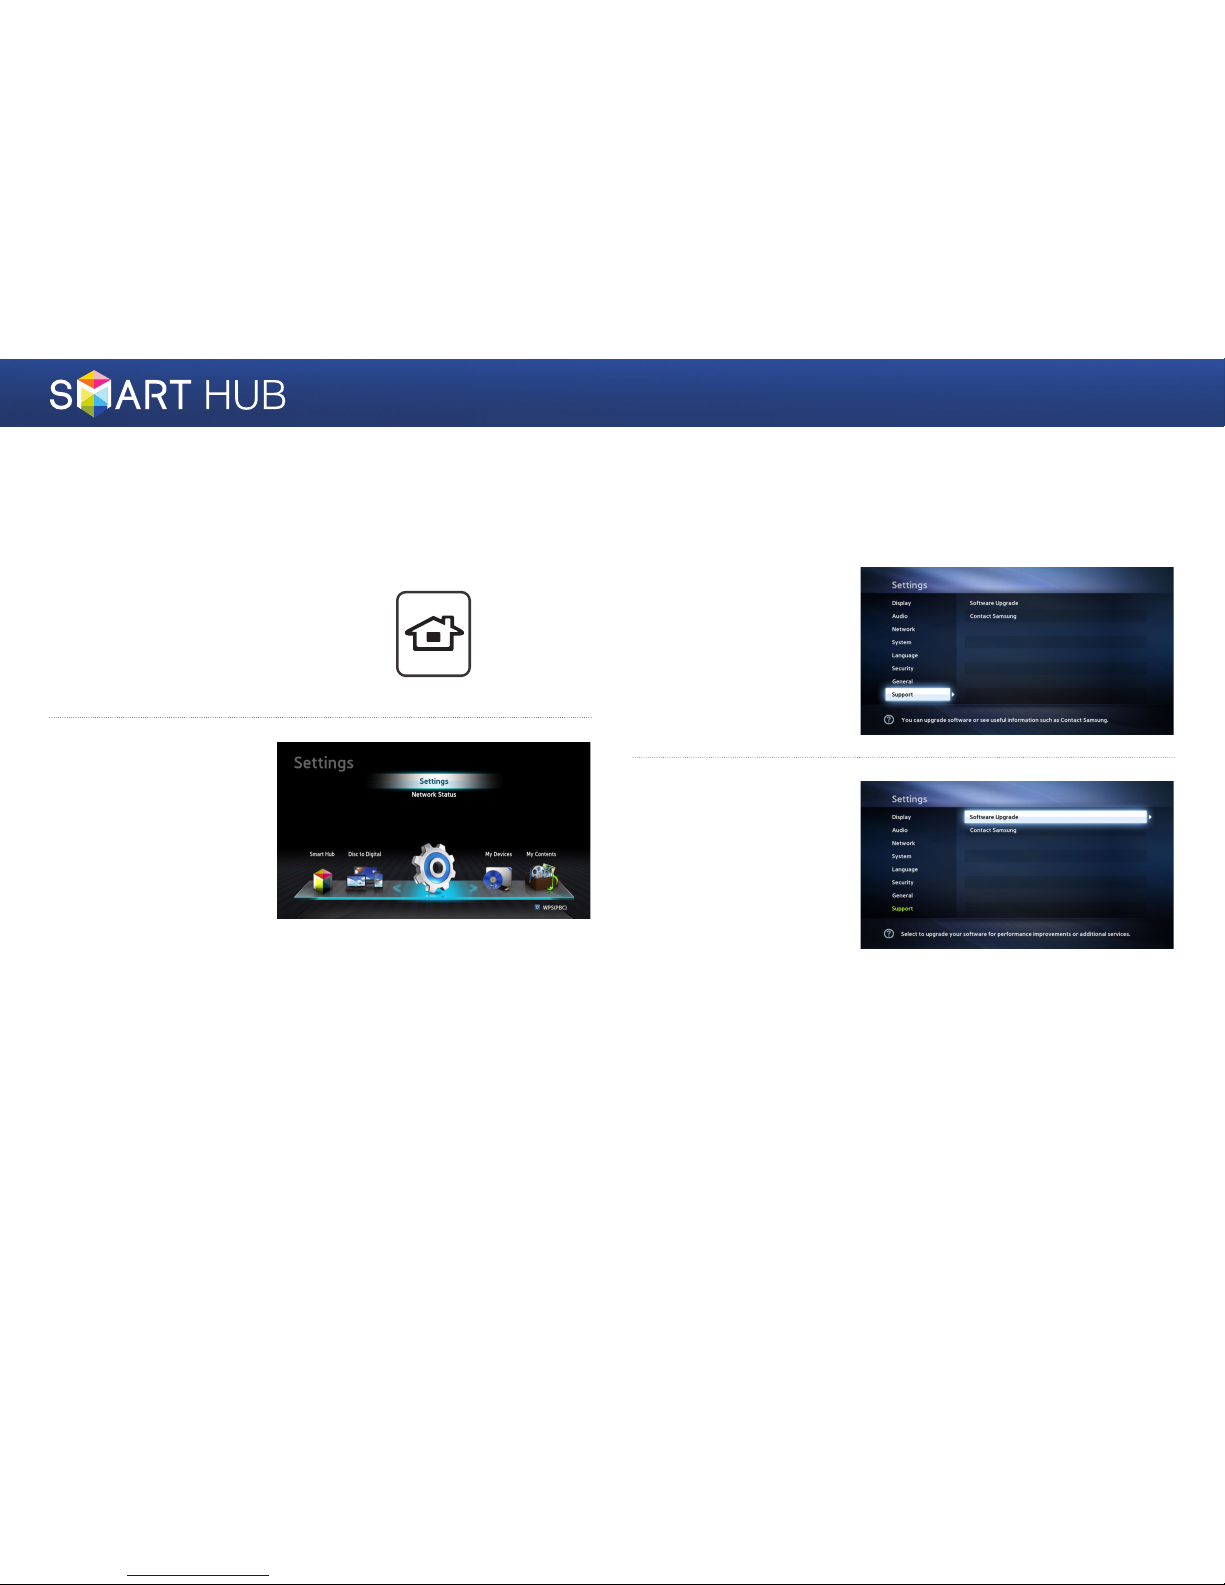
Upgrading the Software
From time to time, Samsung makes updated the software available. To install
the updated software on your player, follow the instructions below.
1
Press the [HOME] button
on the remote control.
HOME
2
On the Home screen,
move to <Settings>,
and then press the
e
button.
3
Move to <Support>,
and then press the
e
button.
4
Move to the <Software
Upgrade> item and
press the
e
button.
 Loading...