

Samsung MCM-A200, A200U, A201U, MCM-A201 Installation Manual
ENGLISH
Centralized Controller
MCM-A200, A200U
MCM-A201, A201U
INSTALLATION MANUAL
MANUAL DE INSTALACIÓN
MANUEL D’INSTALLATION
MANUALE D’INSTALLZIONE
MANUAL DE INSTALAÇÃO
INSTALLATIONS-HANDBUCH
E°XEIPI¢IO E°KATA™TA™H™
азлнкмдсаь ий млнДзйЗдЦ
ESPAÑOL
FRANÇAIS
ITALIANO
PORTUGUÊS
DEUTSCH
E§§HNIKA
RUSSIAN
System Air Conditioner
Aire acondicionado sistemático
Climatiseur numérique multifonctionnel
Sistema Aria Condizionata
Sistema Ar Condicionado
Klimaanlage System
™‡ЫЩЛМ· ∫ПИМ·ЩИЫМФ‡
лЛТЪВПМ˚И ЗУБ‰Ы¯М˚И дУМ‰ЛˆЛУМВ
E S F I P D G R A DB98-12722A(2)
Safety Precautions
◆Please read this installation manual carefully before
installing this product and be sure to check whether
the centralized controller is installed correctly.
◆Do not attempt to install or repair this product by
yourself.
◆This product contains no user-serviceable parts.
So always consult an authorized service personnel
for repairs.
◆When moving, consult an authorized service
personnel for disconnection and reinstallation of the
centralized controller.
◆Ensure that the wall is strong enough to support the
weight of the centralized controller.
◆The centralized controller must be installed by an
installation specialist according to the national
electrical standards.
◆When you want to stop using this product, consult an
authorized installation center.
WARNING
CAUTION
◆Do not install this product in places where it will come
into contact with volatile substances such as machine
oil, benzene, gasoline or naphtha.
◆Do not install this product in places where it will come
into contact with combustible gases such as sulfuric
gas, hydrogen gas, methane gas, etc.
◆Avoid using spray products such as insecticides near
this product.
◆Do not clean this product with substances such as
benzene or acid/alkali solvents.
◆Install this product in a location that is not exposed to
direct sunlight and has a temperature between
0°C (32°F) and 39°C (102°F).
◆Do not spill liquid of any kind into the centralized
controller.
◆When installing the electric wires, do not pull or bend
the wire excessively because it may be disconnected.
◆Do not press the buttons on the centralized connector
with a sharp object.
◆Do not connect the power cable to the control cable
terminal.
◆If the centralized controller is installed in places like a
hospital, take care that the centralized controller does
not interfere or affect other electrical equipments or
devices.
E-2
This installation manual explains how to install the centralized controller which is
connected to the indoor unit. When installing the optional accessories, see an
appropriate installation manual.
E-3
ENGLISH
Centralized Controller Installation
◆If you would like to install the centralized controller, you must install the
optional transmitter in the outdoor unit.
NNNNoooottttee
ee
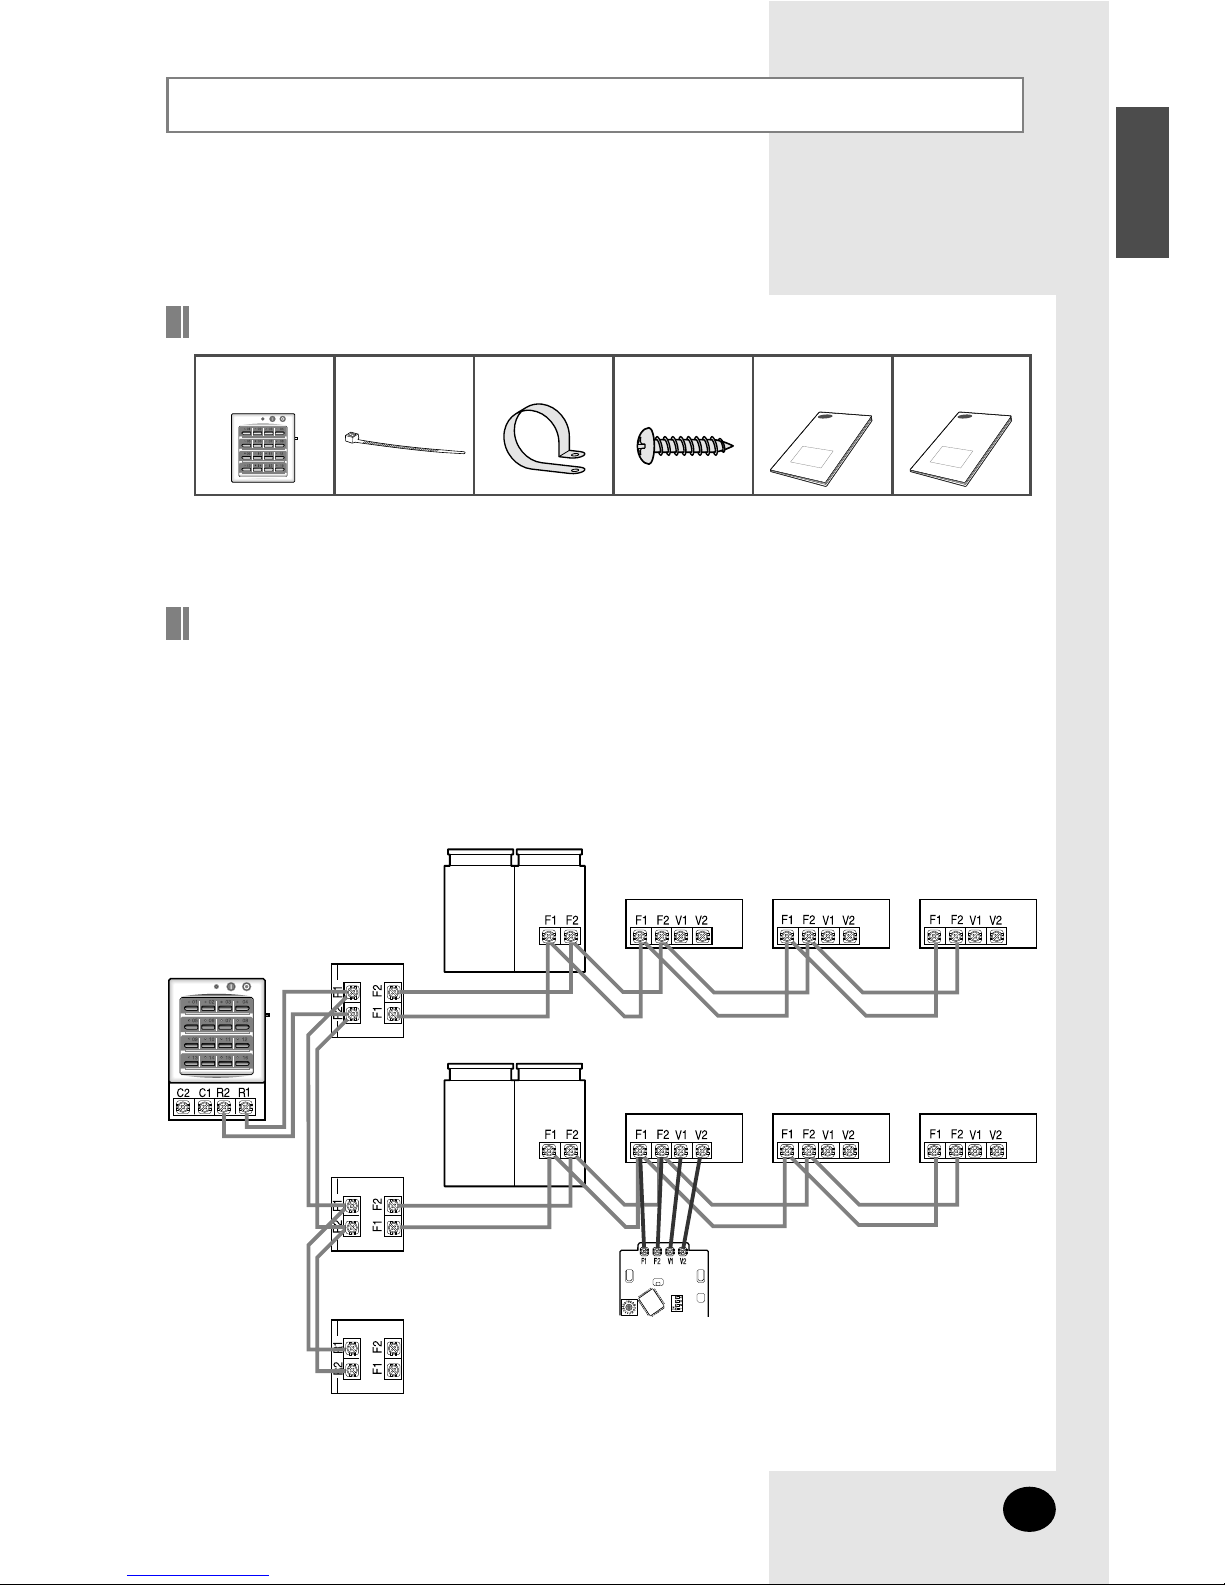
Accessories
Centralized
controller (1)
Cable-tie (2) Cable clamp (5) M4x16 tapped
screw (7)
Owner’s
instructions(1)
Installation
manual (1)
Outdoor unit 1
Transmitter 1
Transmitter 2
Transmitter 3
Centralized
controller
Indoor unit 1 Indoor unit 2 Indoor unit 3
Outdoor unit 2
Indoor unit 4
Wired remote
controller
Indoor unit 5 Indoor unit 6
Wiring Diagram
◆ Each outdoor unit connected to the same centralized controller must have its own
transmitter.
◆ Connect the R1, R2 and F1, F2 terminals to the corresponding indoor unit terminals.
If the R1, R2 and F1, F2 terminals in the centralized controller is not connected to the R1,
R2 and F1, F2 terminals in the indoor unit, the centralized controller will not work properly.
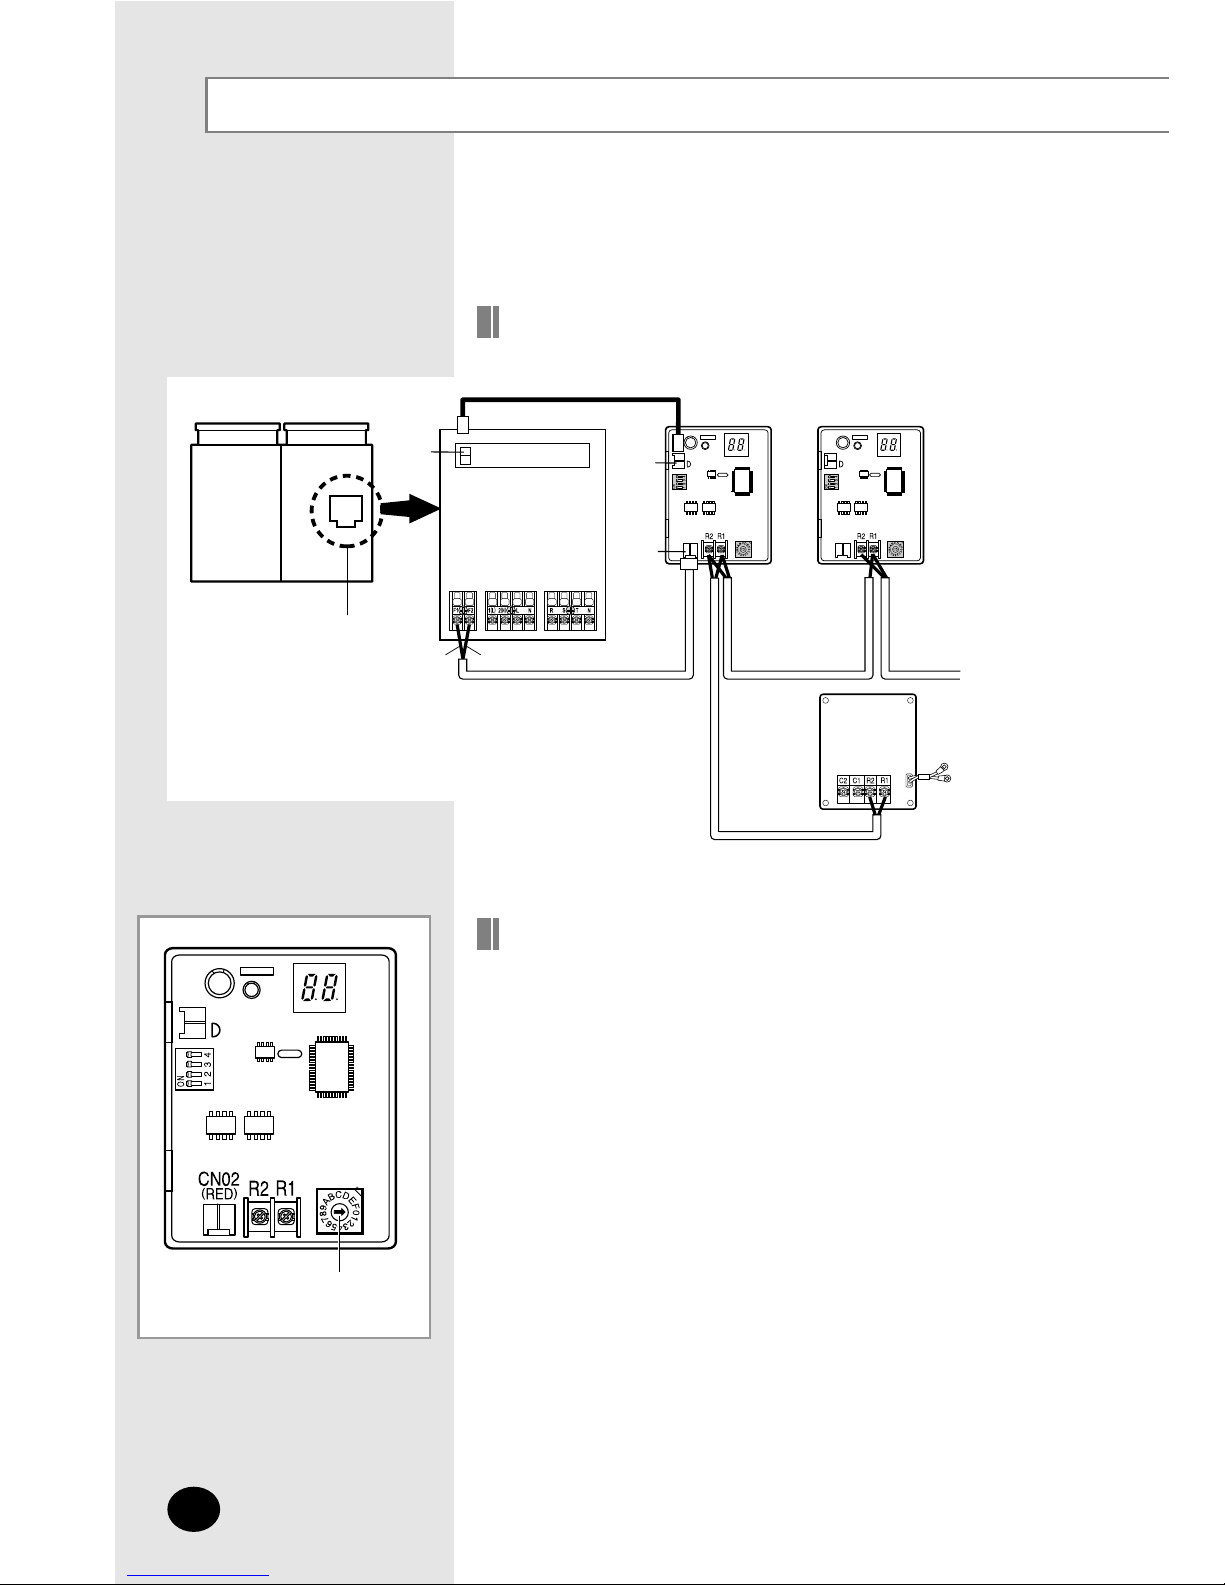
Centralized Controller Installation(cont.)
T ransmitter Installation
Transmitter 1
Transmitter 2
CN01
(BLUE)
CN12
(BLUE)
CN02
(RED)
Transmitter 3
AC power supply
Rear of the
centralized
controller
Outdoor unit PCB
Red
Blue
Transmitter rotary
switch
Turn the arrow of the rotary switch on the transmitter to
the appropriate position. Transmitters controlled with
the same centralized controller must have different
addresses.
Assigning the Address
E-4
 Loading...