

Samsung 1 way cassette type, 2 way cassette type, 4 way cassette type Installation Manual
NASA_PANEL_IM_EN_03683A(1).indd 12 2013-01-14 오후 8:35:41
Air Conditioner
installation manual
imagine the possibilities
Thank you for purchasing this Samsung product.
To receive more complete service, please
register your product at
www.samsung.com/register
Panel (1 way / 2 way / 4 way cassette type)
ITFRESEN PT DE EL
DB68-03683A(1)
ARRU
NASA_PANEL_IM_EN_03683A(1).indd 13 2013-01-14 오후 8:35:41
2
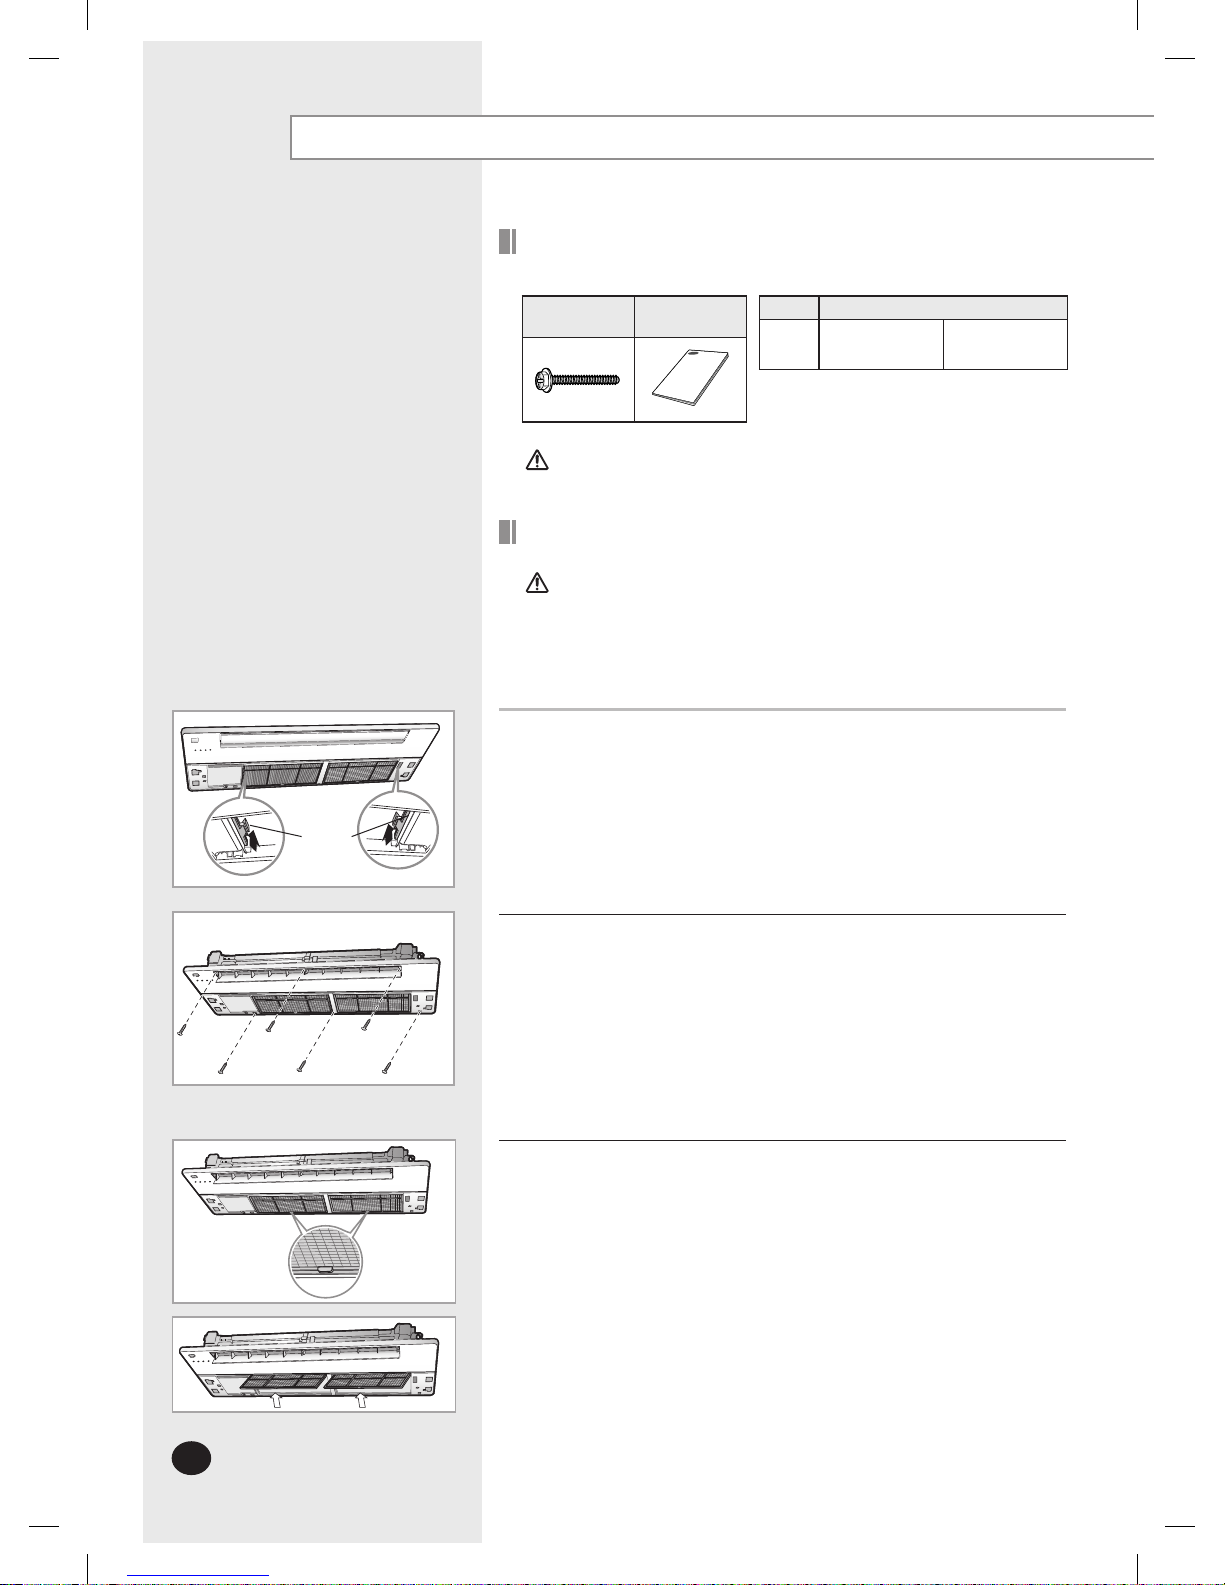
For Slim 1 Way cassette
Fix 2 hooks of the panel on both sides of the indoor unit.
1
Tighten the panel fixing screws.
2-1 Tighten the panel fixing screws temporarily.
2-2 Close the gap between the panel and the ceiling by adjusting the
position of the panel and then tighten the screws completely.
2
Open the filter by pressing the two [PUSH] signs on the filter.
3
Accessories
Handle the panel carefully.
Do not lean the panel against the wall and do not place the
panel on a projecting object. Otherwise, scratches might form on
the surface of the panel.
Be careful when gripping the air intake panel for installation.
Hook
Installing the product
Please check the components below before you install the product.
Screw Tightening torque
M4
12.0 ~ 15.0
kgf•cm
1.2 ~ 1.5
N•m
M4x25
bolt
Installation
manual
After the installation, the installer should explain to users how to
use the product.
CAUTION
CAUTION
6 fixing screws
PC1NUSMAN
2
NASA_PANEL_IM_EN_03683A(1).indd 2 2013-01-14 오후 8:35:32

3
ENGLISH
Connect the cables between the indoor unit and the panel.
4-1 Remove the 3 screws of the electrical component box and take out
the electrical component box cover.
4-2 Connect the panel connector to the indoor unit PCB connector.
Connect the swing motor of the panel or the connectors of
remote controller sensor to each connector of the indoor unit.
Make sure the colors of the connector match.
4-3 Reassemble the electrical component box.
4-4 Close the filter.
4
If the connector is disconnected or the color of the cables is mixed
up, the air conditioner and the remote control will not operate.
5
Make sure that there is no gap here.
Connect the grille.
6-1 Connect the safety clips of the panel to each side of the grille.
6-2 Fix the grille by pushing the [Push] button.
6
Before installing the grille, you should connect the safety clips to
each side of the grille in order to prevent the grille from dropping.
Motor
connector for
driving grille
Check if the panel is firmly fixed to the indoor unit.
5-1 When tightening the screws, make sure that there is no gap between
the panel and the ceiling and the panel should be parallel with the
ceiling or ceiling joint.
If the panel is installed incorrectly, air may leak.
When there is a gap between the panel and the ceiling, adjust the
height of the indoor unit.
5-2 Check the installation again as incomplete installation might
cause the below problems.
If the gap between the panel and the indoor unit is over 15mm,
air may leak or condensing water may come out. Therefore, the
15mm distance between the panel and the indoor unit should be
maintained by using a vertical gauge (pattern sheet).
Air leak
Dirts
Dew
Make sure that there is no gap here.
NOTE
NOTE
3
NASA_PANEL_IM_EN_03683A(1).indd 3 2013-01-14 오후 8:35:33
 Loading...