

Samsung 1404262L User Manual
the possibilities
Thank you for purchasing this Sanqsung product
c ont nt,
SETTING UP YOUR DISHWASHER
USING YOUR DISHWASHER
CLEANING AND MAiNTAiNiNG YOUR
DISHWASHER
CYCLES
/ i
TROUBLESHOOTING
APPENDIX
6 Unpacking your dishwasher
6 Checking parts
7 Meeting installation requirements
8 Control panel
12 Cycle selector
12 Progress displays
13 Basic guidelines
15 Adjusting the angle of the plate supports
16 Adjusting the height of the upper rack
16 Loading the lower rack
17 Loading the upper rack
18 Using the 3rd(cutlery) rack (on some models)
19 Using the cutlery basket
20 Using detergent
21 Using rinse aid
22 Cleaning the exterior
22 Cleaning the interior
22 Cleaning the nozzles
23 Cleaning the filters
23 Storing your dishwasher
24 Cycle chart
25 Check these points if your dishwasher...
28 Information codes
29 Helping the environment
29 Specifications

,s f ty information
Congratulations on your new Samsung Dish washer. This manual contains important
information on the installation, use,and care of your appliance. Please take time to
read this manual to take full advantage of your washer's many benefits and features.
WHAT YOU NEED TO KNOW ABOUT THE SAFETY INSTRUCTIONS
Warnings and Important Safety Instructions in this manual do not cover all
possible conditions and situations that may occur. It is your responsibility to use
common sense, caution, and care when installing, maintaining, and operating
your washer.
IMPORTANT SAFETY INSTRUCTIONS
What the icons and signs in this user manual mean:
H_ards or unsafe practices that may result in severe personal injury or death.
Z_ 1o reduce the risk of fire, explosion, electric shock, or personal injury when using
WARNING your washer, follow these basic safety precautions:
//_ H_ards or unsafe practices that may result in minor personal injury or property
CAUTION damage,
Do NO[ attempt.
_} Do NOT disassemble.
{_ Do NOT touch.
Follow directions explicity.
_} Unplug the power plug from the wall socket.
Make sure the machine is grounded to prevent electric shock.
Call the service center for help.
Note
These warning signs are here to prevent injury to you and others.
Please follow them explicitly.
After reading this section, keep it in a safe place for future reference.
SAVE THESE INSTRUCTIONS
English o 3
iNformatioN
ik
WARMNG : When using your dishwasher, follow basic precautions, including the following:
WARNING
t. Read all instructions before using the dishwasher.
2. Use the dishwasher only for its intended function.
3. Use only detergents or wetting agents recommended for use in a dishwasher and keep them
out of the reach of children.
4. When loading items to be washed:
locate sharp items so that they are not likely to damage the door seal, and
load sharp knives with the handles up to reduce the risk of cut-type injuries.
5. Do not wash plastic items unless they are marked "dishwasher safe" or the equivalent. For
plastic items not so marked, check the manufacturer's recommendations.
6. Do not touch the HEATING ELEMENT during or immediately after use.
7. Do not operate your dishwasher unless all ENCLOSURE panels are properly in place.
8. Do not tamper with controls.
9. Do not abuse, sit on, or stand on the door or dish rack of the dishwasher.
t0. To reduce the risk of injury, do not allow children to play in or on a dishwasher.
t 1. Under certain conditions, hydrogen gas may be produced in a hot-water system that has
not been used for two weeks or more. HYDROGEN GAS IS EXPLOSIVE. If the hot-water
system has not been used for such a period, before using the dishwasher turn on all hot-
water faucets and let the water flow from each for several minutes. This will release any
accumulated hydrogen gas. As the gas is flammable, do not smoke or use an open flame
during this time.
t2. Remove the door to the washing compartment when removing an old dishwasher from
service or discarding it.
/_ WARNING:
wA.""_.,.This product contains chemicals known to the State of California to cause cancer and
reproductive toxicity.
o
CAUTION O
After unpacking the dishwasher, keep the packaging out of the reach of children.
The dishwasher is extremely heavy. Do not attempt to move or carry the dishwasher by
yourself. Two or more people are needed to move a dishwasher and avoid potential injuries.
o As with any equipment using electricity, water, and moving parts, potential hazards exist.
o Do not install the dishwasher near electrical components. Keep the dishwasher away from
open flames.
Install and level your dishwasher on an uncarpeted floor that can support its weight.
o Your dishwasher must be properly grounded. Never connect it to an ungrounded outlet. See
page 7 for more information on grounding your dishwasher.
o Connect the ground wire to the green ground connector in the terminal box.
After the dishwasher is installed, check that the drain hose is properly connected and
that there is no leakage from the hose connectors. If the drain hose is loose, it may cause
property damage.
o The water supply line is susceptible to breakage. As time goes by, it becomes less flexible.
Check the line periodically. If it is swollen, torn, cut, or there is a water leak, replace it
immediately.
o To safely operate this appliance, familiarize yourself with its operations and exercise care
when using it.
SAVE THESE INSTRUCTIONS
English o 4
o Do not put gasoline, solvents, or other flammable materials inside the dishwasher. Do not
wash dishes exposed to these materials.
o Keep your dishwasher detergent out of the reach of children. Detergent has an adverse
effect on human organs. It contains elements for polishing and is corrosive. Avoid letting the
detergent come into contact with your skin and eyes.
Do not push or place pressure on the door when it is open, as this may damage the
dishwasher or cause harm.
Do not allow children to play in or on the dishwasher. They may harm themselves or damage
the dishwasher.
• Disconnect the power cable (or set the circuit breaker to off) before servicing your
dishwasher.
• Do not repair, replace, or service any part of your dishwasher yourself. Disassembly, repairs,
and modifications are permitted by authorized service technicians only. Work done by an
unauthorized person may void your warranty.
• Before disposing of your dishwasher, remove the door of the washing compartment or the
door latch so that children or small animals cannot get trapped inside.
• If the dishwasher is left unused for an extended period of time, turn off the water supply.
This dishwasher is intended for residential use only.
BEFORE USING YOUR DISHWASHER
Z_ WARNING
WARNINe
Tip-Over Hazard
Do not use the dishwasher until it is correctly installed.
Do not push down on an open door.
Do not place excessive weight on the open door.
Electric Shock Hazard
Failure to follow these instructions can result in death, fire, or electric shock:
Electrically ground the dishwasher
Connect the ground wire to the green ground connector in the junction box.
Do not use an extension cord.
SAVE THESE INSTRUCTIONS
English o5
Be sure to have your installer follow these instructions closely so that your new
dishwasher works properly and that you're not at risk of injury when washing
dishes.
UNPACKING YOUR DISHWASHER
o Once your new dishwasher has been delivered to you, carefully unpack it and check for any damage.
If the dishwasher has been damaged, make note of it on the waybill and keep a copy.
Do not install the dishwasher, and contact Samsung Customer Service at the number listed below.
o If there is no damage to the product, you can proceed with the installation. If you are going to install it
yourself, make sure to read through the installation guide and follow the directions inside.
After unpacking your dishwasher, keep the packaging out of the reach of children to ensure their safety.
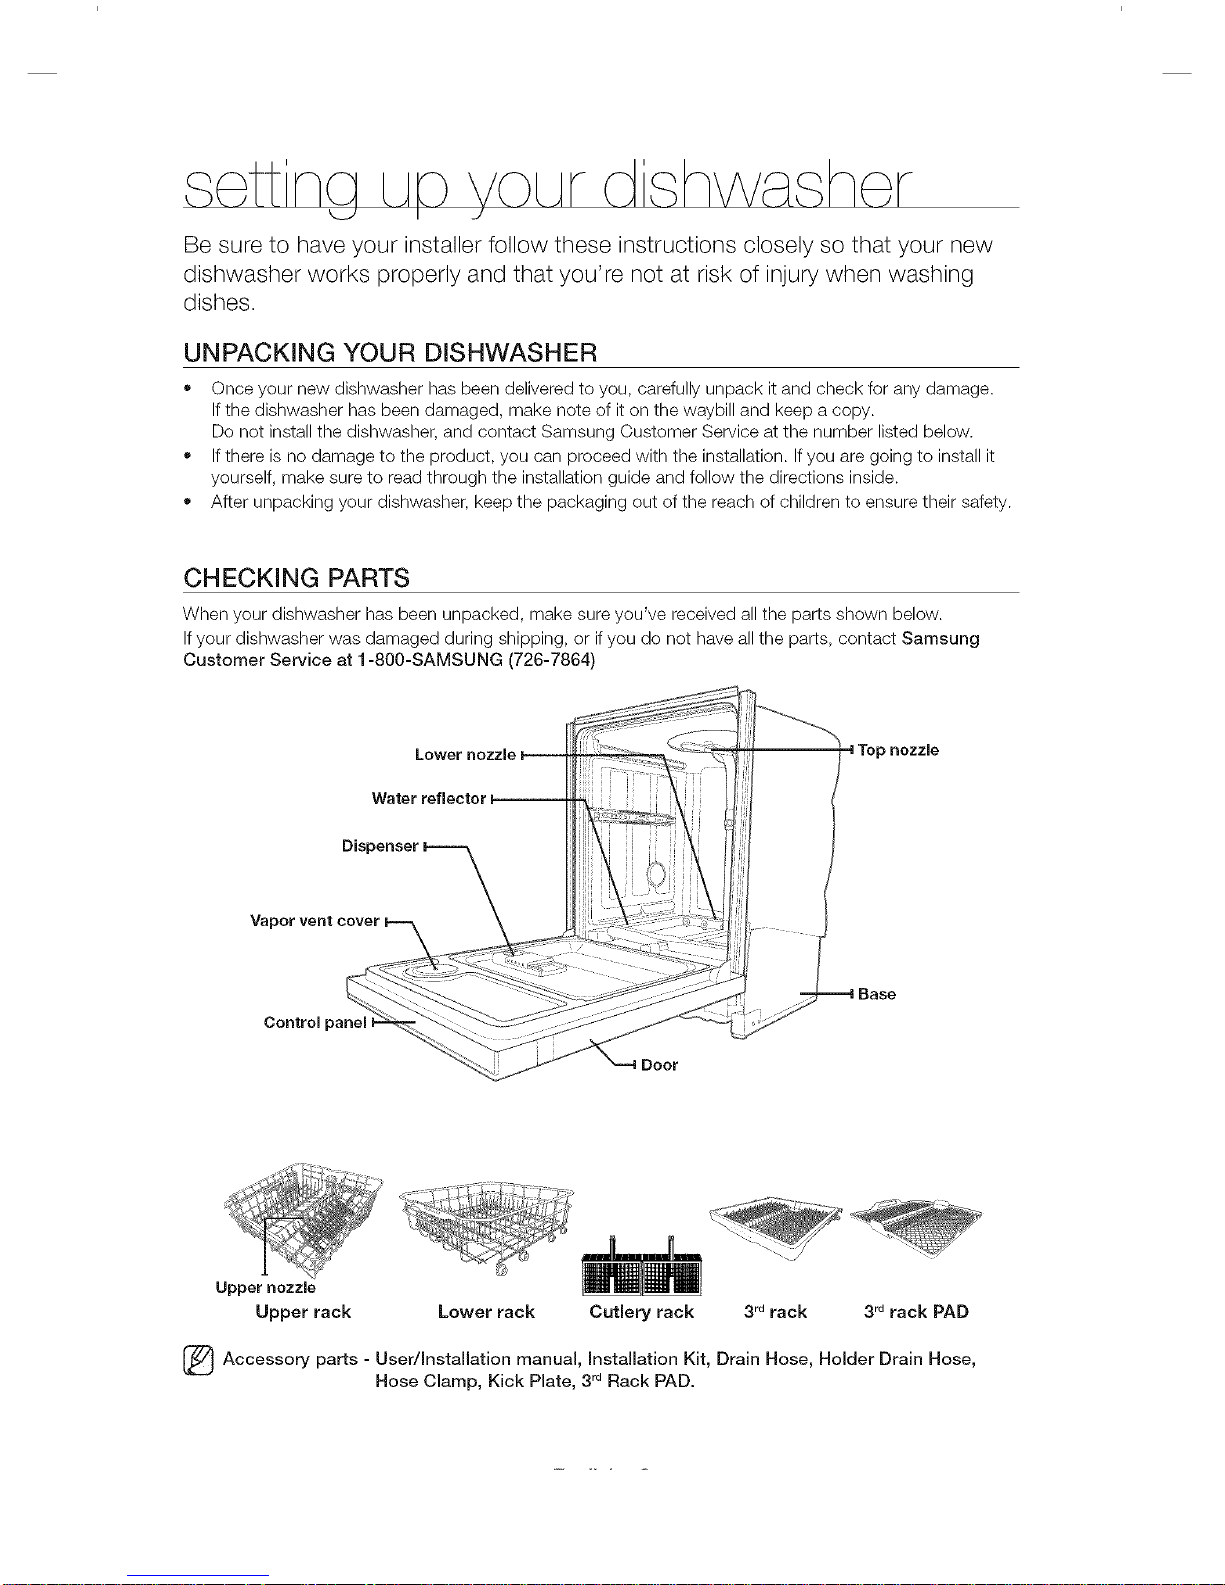
CHECKING PARTS
When your dishwasher has been unpacked, make sure you've received all the parts shown below.
If your dishwasher was damaged during shipping, or if you do not have all the parts, contact Samsung
Customer Service at 1-800-SAMSUNG (726-7864)
Water
Top nozzle
Vapor vent cover
Base
Upper nozzle
Upper rack Lower rack Cutlery rack
_,....... 2-_o.-..
3_drack 3 rd rack PAD
(_ Accessory - User/Installation manual, Installation Kit, Drain Hose, Holder Drain Hose,
parts
Hose Clamp, Kick Plate, 3rdRack PAD.
MEETING iNSTALLATiON REQUIREMENTS
@
Electrical supply and grounding
To prevent the risk of fire, electric shock, or personal injury, all wiring and grounding must be
done in accordance with the National Electrical Code ANSI/FNPA, No. 70 Latest Revision and
local codes and ordinances. It is the personal responsibility of the appliance owner to provide
adequate electrical service for this appliance.
/_k Never use an extension cord.
....... When preparing for installation, ensure that your power supply provides:
o An individual 120 Volt, 60Hz branch circuit serving only your dishwasher with a 15 AMP fuse
or circuit breaker
Your dishwasher must be grounded. If your dishwasher malfunctions or breaks down, grounding
will reduce the risk of electric shock by providing a path of least resistance for the electric
current.
Never connect the ground wire to plastic plumbing lines, gas lines, or hot water pipes.
WARNINe
GROUNDING INSTRUCTIONS
For a permanently connected appliance:
This appliance must be connected to a grounded metal, permanent wiring system, or an
equipment-grounding conductor must be run with the circuit conductors and then connected to
the equipment-grounding terminal or lead on the appliance.
Water supply
The hot water supply line pressure must be between 20-120 psi (140-830 kPa).
Adjust the water heater to deliver water between 120 °F (49 °C) - 149 °F(65 °C).
[_ ost plumbing supply stores sell water supply lines of various lengths up to 10 feet
(305 cm)long.
You can reduce the risk of leaks and water damage by:
o Making water faucets easily accessible.
Turning off faucets when the dishwasher is not in use.
Periodically checking for leaks at water supply line fittings.
/'_ Before using your dishwasher for the first time, check all connections at the water supply valve
......._ and faucets for leaks.
Flooring
For safety, your dishwasher must be installed on a solidly constructed floor.
Never install your dishwasher on a platform or poorly supported structure.
Your dishwasher must be properly installed in accordance with the Installation Guide before you use it.
If you did not receive an Installation Guide with your dishwasher, you can obtain one by visiting our website
at www.samsung.com.
English o7
/_ WARNING: To reduce the risk of fire, electric shock, or injury to persons, read the IMPORTANT
......._ SAFETY INSTRUCTIONS before operating this appliance.
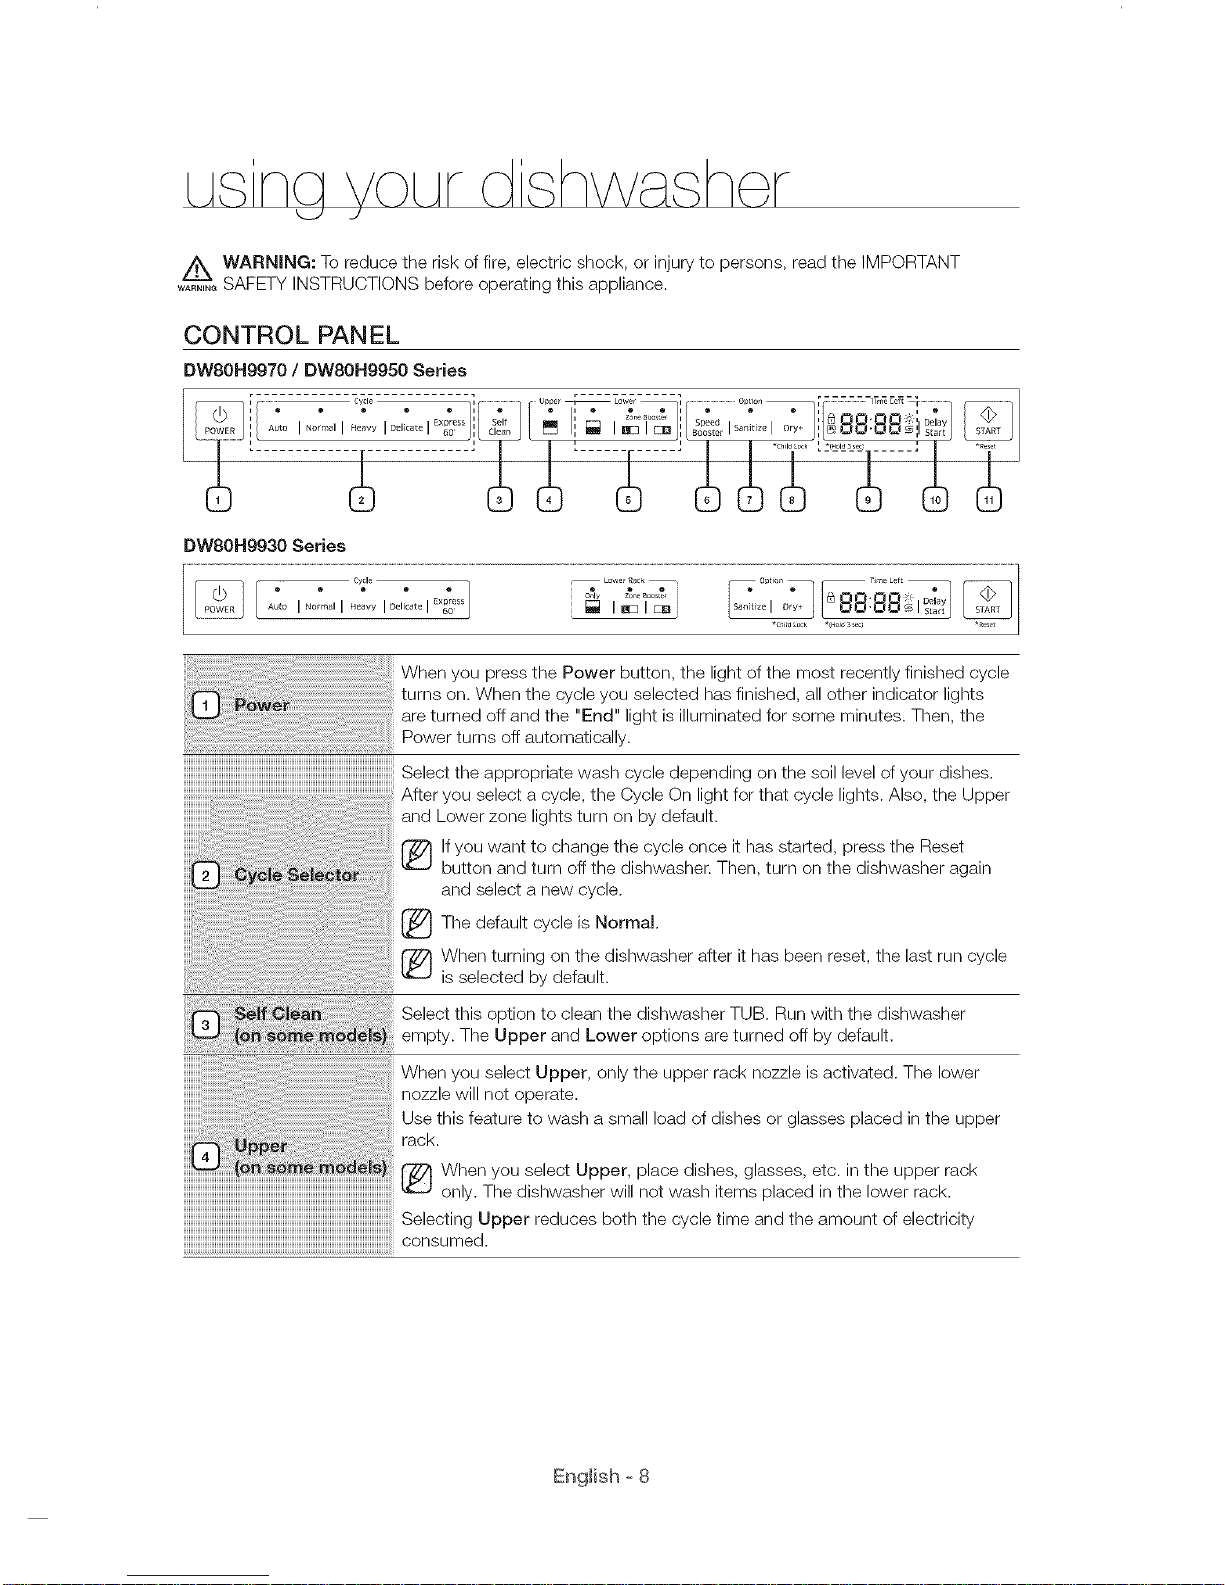
CONTROL PANEL
DW80Hgg70 / DW80Hg950 Series
....................................................- - - - - - - _le ............ _ _ UPPe _ Lower / .......................................O#tio_l [ ['_ 7 7 .......................... __ ]
,o,,, ,;,
DW8oNgg30 Series
When you press the Power button, the light of the most recently finished cycle
turns on. When the cycle you selected has finished, all other indicator lights
are turned off and the "End" light is illuminated for some minutes. Then, the
Power turns off automatically.
Select the appropriate wash cycle depending on the soil level of your dishes.
After you select a cycle, the Cycle On light for that cycle lights. Also, the Upper
and Lower zone lights turn on by default.
If you want to change the cycle once it has started, press the Reset
button and turn off the dishwasher. Then, turn on the dishwasher again
and select a new cycle.
The default is Normal.
cycle
When turning on the dishwasher after it has been reset, the last run cycle
is selected by default.
Select this option to clean the dishwasher TUB. Run with the dishwasher
..... empty. The Upper and Lower options are turned off by default.
When you select Upper, only the upper rack nozzle is activated. The lower
nozzle will not operate.
Use this feature to wash a small load of dishes or glasses placed in the upper
rack.
When you select Upper, place dishes, glasses, etc. in the upper rack
only. The dishwasher will not wash items placed in the lower rack.
Selecting Upper reduces both the cycle time and the amount of electricity
consumed.
English o 8
i_i_i_i_i_i_i_i_i_i_i_i_i_i_i_i_i_i_i_i_i_i_i_i_i_i_i_i_i_i_i__!_i_!_!_!_i_ii_!i_ii_!i_!i_!!_i!_i!_i!_i!_i!_i!_i!_i!_i!_i!_i!_i!_i!_i!_i!_i!_i!_i!ii_ii_ii_ii!ii!ii!ii!ii!ii!ii!ii!ii!ii!ii!i!i!i!i_ii_i_
i_i_i_i_!_!_!_!_!_!_!_i!i!i!_!i_!_!_!_i!_!!_!_!_i_i_i_i_i_i_i_i!_!_!!_!_!_!_!_!_i_!ii_!_!_!_!_!i!_iiiiiiiiiii_i_i_i_i_!_i_i_!i!!_!!_iiiii
iiiiU_i_i_i_i_i_i_iii_!_i!_i_!!_!_iiiiiiiiiiiiiii_ii_ii_ii_ii_ii_ii_ii_i_i_i_i_i_iiiiiiiiiiiiiiiiiiii!iii_ii_ii_ii_iiiiiiiiiiiiiii_i_!_!i!_!_!i!_i_i_ii_i_i_iiiiiiii_i_
_i_i_i_i_i_i_i_i_i_i_i_i_i_i_i_i_i_i_i_i_i_i_i_i_i_i_i_i_i_i!_l_i_l_!!_!_!_!_!_!!!i:_!!_!_!i_!_!!_!_!_!_!_!i_i_
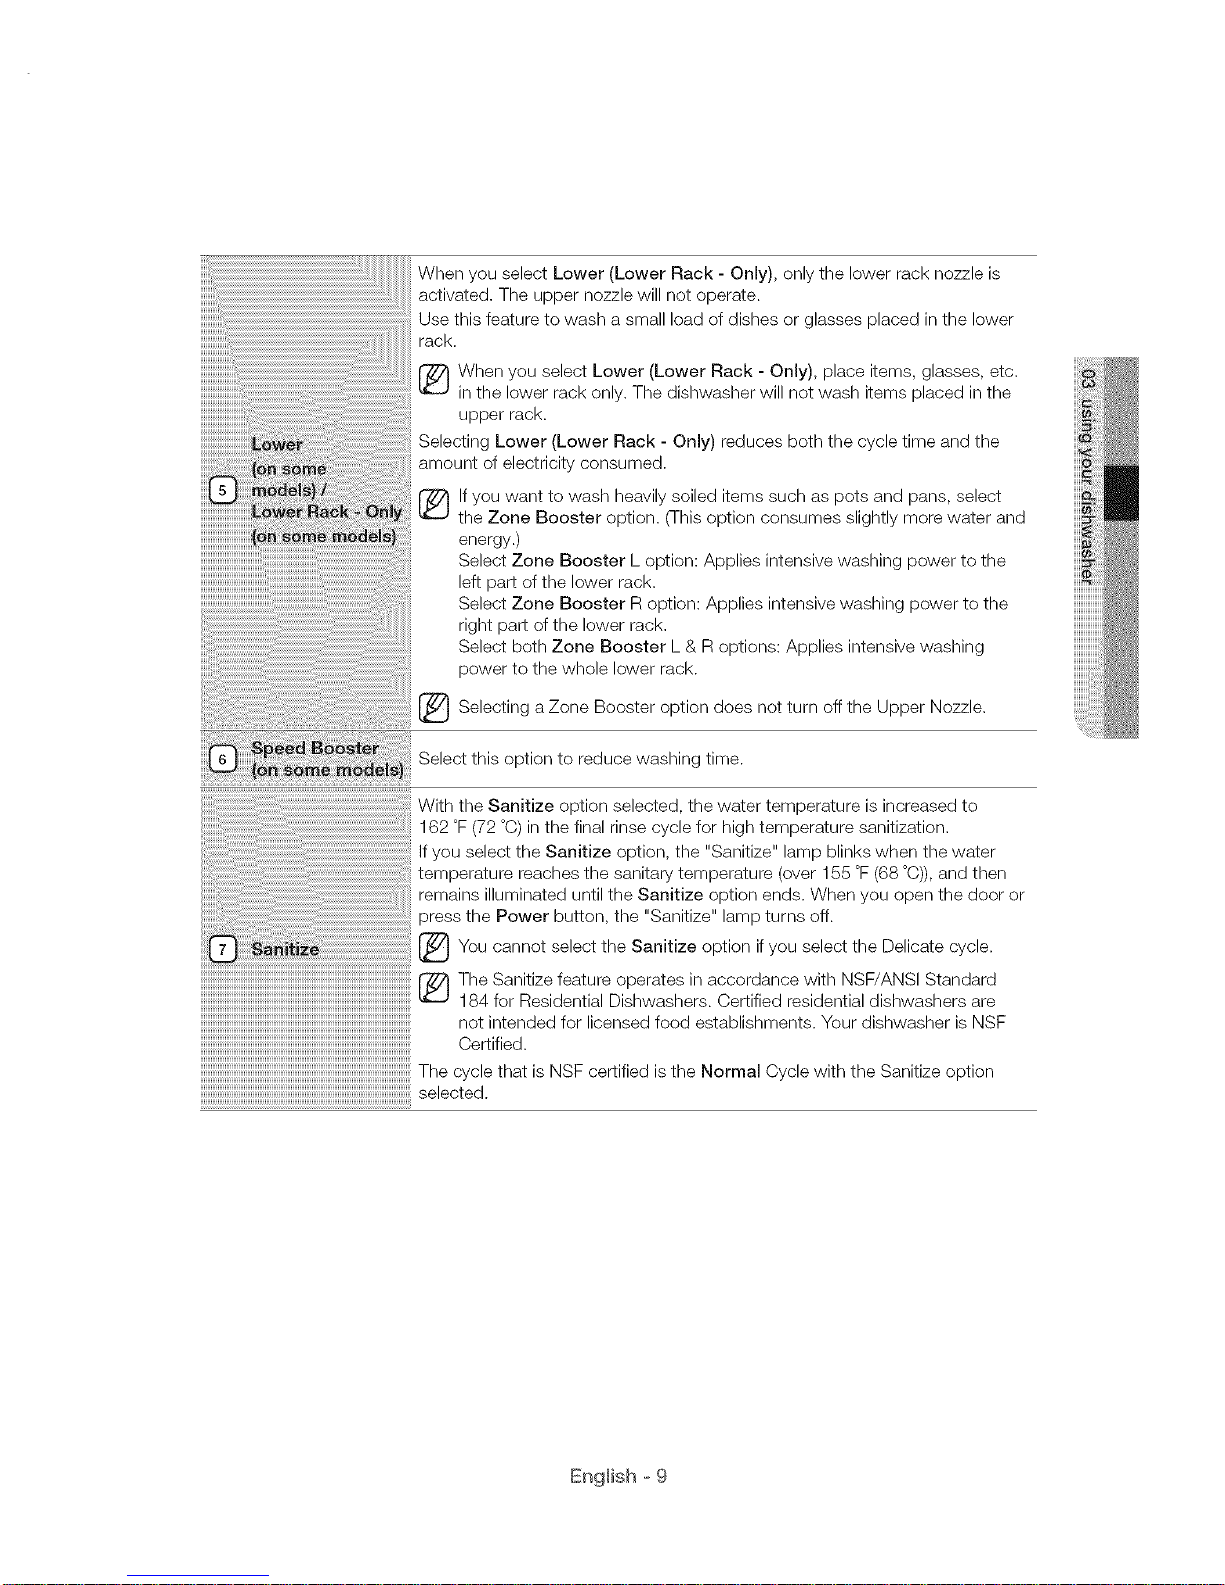
When you select Lower (Lower Rack - Only), only the lower rack nozzle is
activated. The upper nozzle will not operate.
Use this feature to wash a small load of dishes or glasses placed in the lower
rack.
r_ When you select Lower (Lower Rack - Only), place items, glasses, etc.
in the lower rack only. The dishwasher will not wash items placed inthe
upper rack.
Selecting Lower (Lower Rack - Only) reduces both the cycle time and the
amount of electricity consumed.
r_ if you want to wash heavily soiled items such as pots and pans, select
the Zone Booster option. (This option consumes slightly more water and
energy.)
Select Zone Booster L option: Applies intensive washing power to the
left part of the lower rack.
Select Zone Booster R option: Applies intensive washing power to the
right part of the lower rack.
Select both Zone Booster L & R options: Applies intensive washing
power to the whole lower rack.
[_ Selecting Zone Booster does not turn off the Nozzle.
a
option Upper
Select this option to reduce washing time.
With the Sanitize option selected, the water temperature is increased to
162 °F (72 °C) in the final rinse cycle for high temperature sanitization.
If you select the Sanitize option, the "Sanitize" lamp blinks when the water
temperature reaches the sanitary temperature (over 155 °F (68 °C)), and then
remains illuminated until the Sanitize option ends. When you open the door or
press the Power button, the "Sanitize" lamp turns off.
[_You cannot select the Sanitize if select the Delicate
option you cycle.
r_ The Sanitize feature operates in accordance with NSF/ANSI Standard
184 for Residential Dishwashers. Certified residential dishwashers are
not intended for licensed food establishments. Your dishwasher is NSF
Certified.
The cycle that is NSF certified is the Normal Cycle with the Sanitize option
selected.
English o9

Use this option when you wantDry+to optiondry youryoudishes more completely.
The temperature rises to 162 °F (72 °C) in the final rinse cycle and dry time is
increased.
If you select the this option, electricity consumption is increased.
The next time you use the dishwasher, the Dry+ option will be selected
automatically and applied to the next cycle. You can turn off the Dry+ option
by pressing the Dry+ button.
_You cannot select the if select the Delicate
cycle.
*Child Look: This option allows you to lock the buttons on the control panel-
except the Power button - so children cannot accidently start the dishwasher
by pressing the buttons on the panel. Only the Power button remains active.
To lock or unlock the buttons on the control panel, press and hold the
Dry+/Child Lock button for three (3) seconds.
...................................................................................................................- When the Power is On : Press and hold the "Dry+/Child Lock" button for
three (3) seconds.
When the Power is Off : Push the Power button first, and then press and
hold the "Dry+/Child Lock" button for three (3) seconds.
Child Lock remains active until you turn it off. You cannot select cycles or
.................................................................................................................................................................................................................................................................options or start the dishwasher when Child Lock is on.
IIIIIIIIIIIIIIIIIIIIIIIIIIIIIIIIIIIIIIIIIIIIIIIIIIIIIIIIIIIIIIIIIIIIIIIIIIIIIIIIIIIIIIIIIIIIIIIIIIIIIIIIIIIIIIIIII_
Displays cycle time and remaining hours and minutes, Delay Start hours, and
Errormessages.
If an error occurs during an operation, an error message is displayed with a
..................................................................................................................warning sound.
Refer to the information codes page.
i_ Child Lock indicator
- ri_rns on if the Child Lock is set (or the dishwasher is in the standby or
pause modes).
- fi_rns off while the dishwasher is operating.
- When Child Lock is on, the Child Lock indicator blinks for several
seconds if any button except the Power button is pressed.
N Se,fC,eanindicator
fL_rns on when the Self Clean option is enabled (or the dishwasher is
in the standby or pause modes), but turns off while the dishwasher is
operating,
Blinksfor secondseven20to22cycles.
The cycle counter disappears when the Self Clean operation is complete
or when the dishwasher reaches the 23rd cycle without the Self Clean
cycle being used. (-1-heReset or Self Clean operation is not counted by
theoydecounter./
"_'i:"" Rinse Refill indicator
furns on if the dishwasher runs out of rinse aid (or the dishwasher is in
thestandbyorpausemodes/.
furns off while the dishwasher is operating.
English o 10
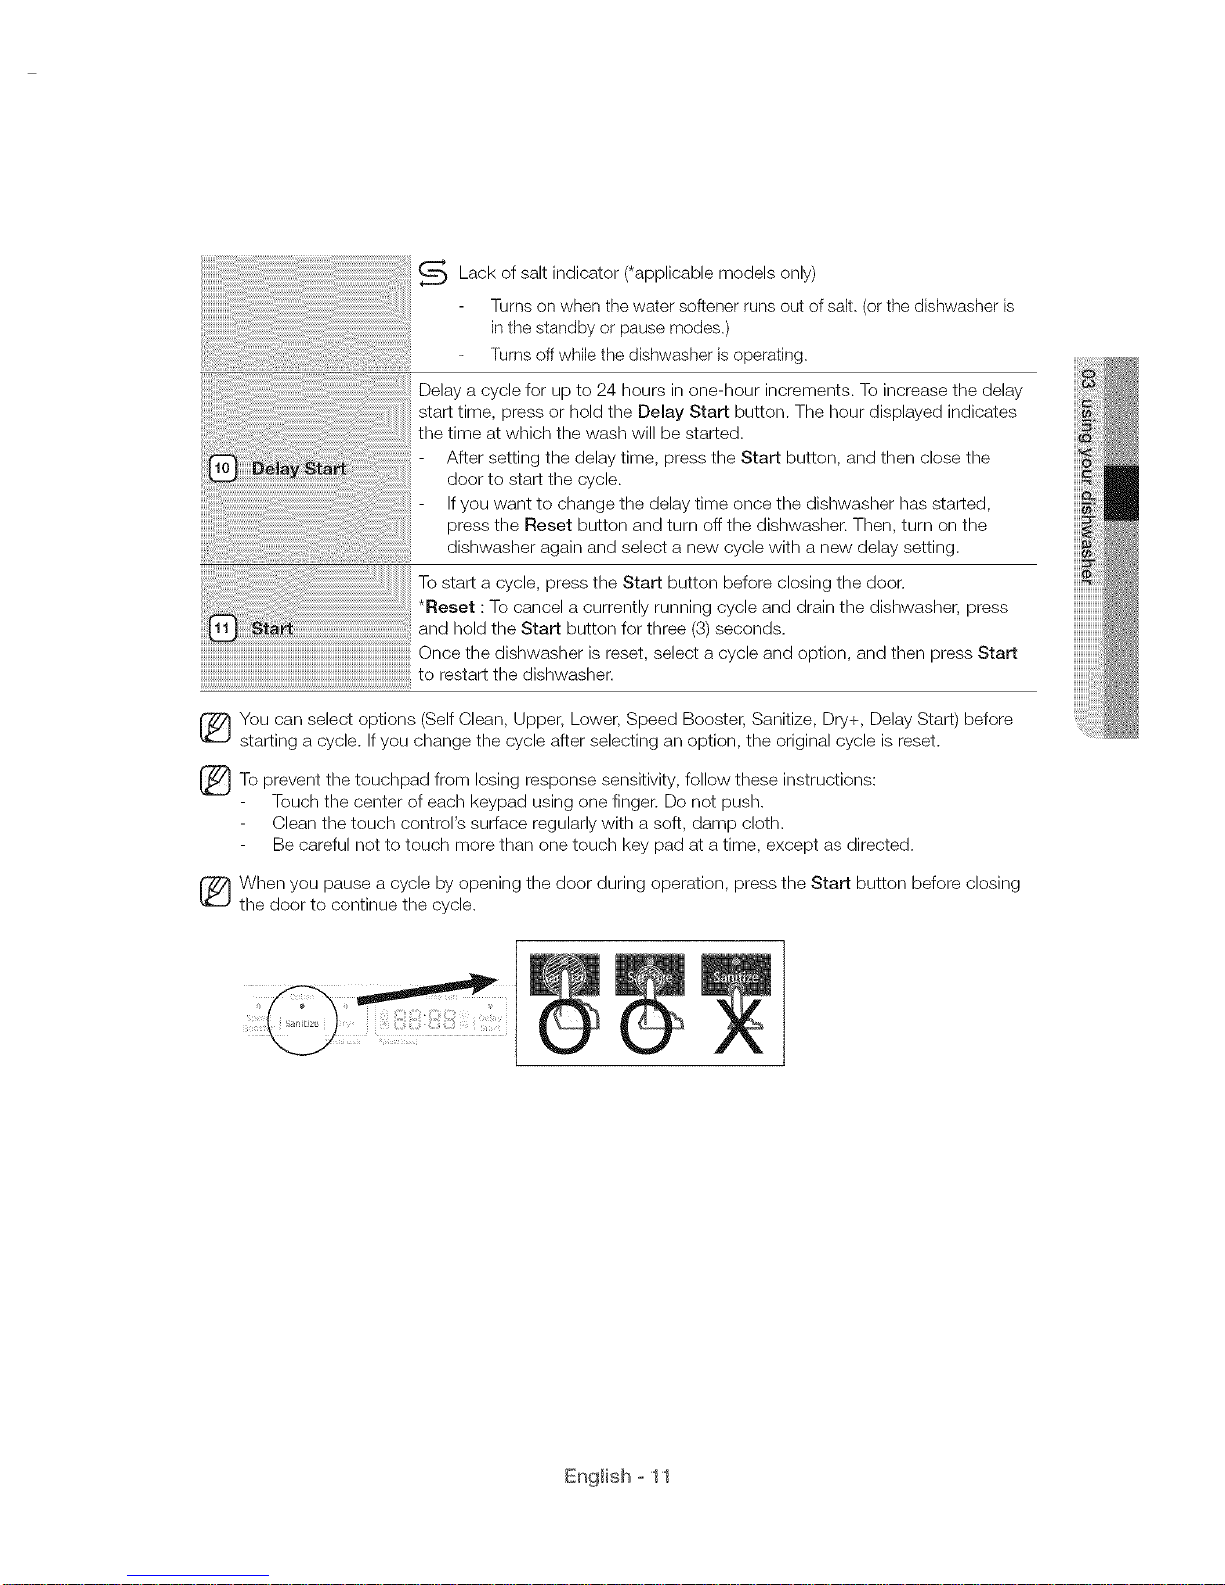
_._ Lack of salt indicator models(*applicable only)
Turns on when the water softener runs out of salt. (or the dishwasher is
in the standby or pause modes.)
Turns off while the dishwasher is operating.
Delay a cycle for up to 24 hours in one-hour increments. To increase the delay
start time, press or hold the Delay Start button. The hour displayed indicates
the time at which the wash will be started.
After setting the delay time, press the Start button, and then close the
door to start the cycle.
If you want to change the delay time once the dishwasher has started,
press the Reset button and turn off the dishwasher. Then, turn on the
dishwasher again and select a new cycle with a new delay setting.
To start a cycle, press the Start button before closing the door.
..... Reset : To cancel a currently running cycle and drain the dishwasher, press
and hold the Start button for three (3)seconds.
Once the dishwasher is reset, select a cycle and option, and then press Start
to restart the dishwasher.
You can select options (Self Clean, Upper, Lower, Speed Booster, Sanitize, Dry+, Delay Start) before
starting a cycle. If you change the cycle after selecting an option, the original cycle is reset.
_To prevent touchpad losing response sensitivity,
the from follow these instructions:
Touch the center of each keypad using one finger. Do not push.
Clean the touch control's surface regularly with a soft, damp cloth.
Be careful not to touch more than one touch key pad at a time, except as directed.
When you pause a cycle by opening the door during operation, press the Start button before closing
the door to continue the cycle.
English o 11
 Loading...