

Samsung 1080P - 46"" LCD 8MS, 440, 450 User Manual

FiguresandillustrationsinthisUserManualare providedforreference ]
onlyandmaydifferfromactual productappearance.Productdesignand
specificationsmaybe changedwithoutnotice.
Important Warranty Information Regarding
Television Format Viewing
'_ See thewarranty cardfor moreh_forrnationonwarrantyterms.
WidescreenformatPDPDisplays(with16:9aspectratios,the ratioof the
screenwidthto height)areprimarilydesignedtoviewwidescreenformat
fuIFmotionvideo.Theimagesdisplayedonthemshouldprimarilybeinthewide
screen16:9ratioformat,orexpandedto fillthe screenifyourmodeloffersthis
feature,withtheimagesconstantlyinmotion. Displayingstationarygraphics
andimagesonthescreen, suchasthedark sidebarsonnon-expanded
standardformattelevisionvideoandprogramming,shouldbelimitedtono
o
morethan5Yoofthetotal televisionviewingperweek.
Additionally,viewingotherstationaryimagesandtextsuchas stockmarket
crawls,videogamedisplays,stationIogos,websitesor computergraphicsand
patterns,shouldbelimitedasdescribedabovefor alltelevisions.Displaying
stationaryimagesformorethan5%oftotal viewingtimecancause uneven
agingofyourPDPdisplayand leavesubtle,butpermanentburnedqnghost
imagesinthePDPpicture.Toavoidthis, varytheprogrammingandimages,
andprimarilydisplayfullscreenmovingimages,notstationarypatternsordark
bars.OnPDPmodelsthat offerpicturesizingfeatures,usethesecontrolsto
viewdifferentformatsasafull screenpicture.
Becarefulintheselectionof televisionformatsyouuseforviewingandthe
amountoftimeyou viewthem.UnevenPDPagingasa resultofformat
selectionanduse,aswellas burnedinimages,arenot coveredbyyour
Samsunglimitedwarranty.
SAMSUNGELECTRONICSNORTHAMERICANLIMITEDWARRANTY
STATEMENT
This is normal and does notindicate any defect or operational failure of unit.
However, children should be prevented from touching the upper part of
the TV.
• The TVis making a 'cracking' noise.
A'cracking' noisemay occur when the TV contracts or expands due
changes in the surrounding environment such as temperature or humidity.
This is normal and not a defect.
• Cell Defects
Your plasma TV has a panel containing 2,360,000 (HD-level) to 6,221,000
(FHD-level) pixels which require sophisticated technology to produce.
However, there may bea few brightor dark pixels on the screen. These
pixels will have no impact onthe performance of theproduct.
• Avoid operating the TVat temperatures below 41°F (5°C)
• A stillimage displayed too long may cause permanent damage to the
PDP Panel.
Watching the PlasmaTV in 4:3 format fora long period of
timemay leavetracesof the borders on the left, right, tep, or
bottom of the screen. Playing aDVD or agame consolemay
havea similar effect. Damage caused by the aboveeffect is
not covered by thewarranty.
• After-images on the Screen.
Displaying still images fromVideo games or a PC for longer thana certain
)eriod of time may produce partial after-images. To prevent thiseffect,
reduce the 'brightness' and 'contrast' when displaying still images for a
long time.
• Warranty
Warranty does not cover any damage caused by image retention.
Burn-in is not covered bythe warranty.
Subject to the requirements, conditions, exclusions and limitations ofthe original • Caution
Limited Warranty supplied with Samsung Electronics (SAMSUNG) products,
andthe requirements, conditions, exclusions andlimitations contained herein,
SAMSUNG will additionally provide Warranty RepairService in theUnited States
onSAMSUNG products purchased in Canada, andin Canada onSAMSUNG
products purchased in the United States, for thewarranty period originally
specified, and to the OriginalPurchaser only.
The above described warranty repairsmust beperformed by a SAMSUNG
Authorized ServiceCenter. Along with this Statement, the Original Limited
Warranty Statement and a dated Billof Sale as Proof of Purchase must be
presented to the Service Center.Transportation to and from theService Center
isthe responsibility of the purchaser. Conditions covered are limitedonly to
manufecturing defects in material or workmanship, and only thoseencountered
innormal useof the product.
Excluded, but notlimited to, areany originally specified provisions for, in-
home or on-site services, minimum or maximum repair times, exchanges or
replacements, eccessories, options, upgrades, or consumables.
Forthe location of aSAMSUNG Authorized ServiceCenter, pleasecall toll-free:
- In the United States : 1-800-SAMSUNG (1-800-726-7864)
- In Canada :1-800-SAMSUNG
Important User Information
• Screen image retention
Donot display astill image(such asthat from avideo game)on theplasma
display panel formore thana few minutes. Still images can cause screen
image retention (burn in).To avoid such image retention, reduce the degree
of brightness and contrast of the screenwhen displaying a still image.
• Heaton the top of the Plasma TV
The top side ofthe TV may become hot after long periods of use as heat
dissipates from the panelthrough the vent hole inthe upper partof the TV.
© 2012 Samsung Electronics Co., Ltd. All rights reserved.
.... Theglass screen of your PDP TVcan break if you accidently drop
the TV.Handle the TVwith care. When moving the T_, always have
two or more people pick it upand carryitas a safety precaution.
Donet lay the TVflat on itsface erback.
YourSamsung Plasma TV isa high quality television that has beencarefully
packaged to protect the integrity of itsglass panel and component partsduring
shipment. Itis, nonetheless, a fragile piece ofelectronics thatrequires careful
handling.Refrain from putting undue stress on any part ef the packaging when
shipping or unpacking the TV.Use care when installingthe TV.Avoid placing
theTV ina locationwhere it may bestruck, exposedto sharp impacts, or
fall.Panel breakage caused by afall or impact strike is not covered under the
manufacturer's warranty.
r===== .......... ==-==-= ...... =.... =-== .... ===_
m
Contact SAMSUNG WORLDWIDE i
Ifyou haveaJlyquestionsorcommentsrelatingtoSamsungproducts,pleasecontact_he u
SAMSUNGcus[omercarecenter.
Samsung Electronics
Canada hc., Customer
Service 55 Standish Court
Mississauga, Ontario LSR
Samsung Electronics
America, hc
85 Challenger Road
Ridgefield Park, NJ
L............................................
IIIIIIIIIIIIIIIIIIIIIIIIIIIIIIIIIIIIIIIII
BN68 04214C 01
-1-
Display icons Used in the Channel List Screens
,_/ A selected channel.
V A Favorite channel.
Q A resewed program.
_3 A program currently being broadcast.
_3The Channel List Tools Menu
The Channel List [bols menu contains most of the functions you
can use on the All Channel, Added Channels, and Favorite List
screens. to view, select a list screen, select a channel, and then
press the TOOLS button.
[] Add / Delete: Delete a channel from or add a channel tothe
Added Channels list.
[] Timer Viewing: You can schedule achannel to be displayed
automatically ata set time, evenwhen you are watching another
channel. You must setthe current time first in the Time > Clock
function to useTime Viewing.
Toschedule achannel, follow these steps:
1. Select a channel inthe Added Channels list using the A/T
buttons andthe YellowSelect button on your remote.
2. Press the TOOLS button onyour remote. The Tools menu
appears.
3. SelectTime Viewing in the Tools menu, and then press the
ENTER _ button. The Time Viewing screen appears.
To delete channels from the Added Channels list, follow these
steps:
1. Select one or more channels inthe Added Channels list
using the A/T buttons and the Yellow Select button on your
remote.
2. Pressthe TOOLS button onyour remote. The Tools menu
appears.
3. Select Delete inthe Tools menu, and then press the
ENTER _ button.
To add channels to the Added Channels list, follow these steps:
1. Select one or more channels inthe All Channels list using the
A/T buttons and the Yellow Selectbutton on your remote.
2. Pressthe TOOLS button onyour remote. The Tools menu
appears.
3. SelectAdd in the Tools menu, andthen press the ENTER
button.
a, All deleted channels will be shown onthe All Channels list.
You add channels back to the Added Channels liston the
All Channels list.
a, A gray-colored channel indicates the channel has been
deleted from the Added Channels list.
a, The Add menu option only appears for deleted channels.
[] Add to Favorite/Delete from Favorite: Lets you add channels
to and delete channels from your Favorites list.
To add channels to the Favorites list,follow these steps:
4. Use the _l/l_ buttons to movefrom entry field to entry field
and the A/T buttons tochange the entries. Where numbers
are displayed, you can also enter numbers directly using the
number keypad onyour remote.
a, If you select Everyday or Every Week, the date you
select inthe Date field becomes the start datefor your
scheduled viewing. For Everyday, the TV will turnon
every day, atthe time you selected, starting from that
date. For Everyweek, the TV will turn on every week,
on the same day of the week as the start date you
selected, at the time you selected, from that day on.If
you select Once, the TVwill turn on once, on the date
and time you selected.
5. Pressthe ENTER _ button on your remote when done.
a, Only Added channels can be scheduled.
a, Scheduled programs and channels are displayed in the
Programmed List.
a, When you select adigital channel, press the _, button to
vies! the digital program list. If you highlight a program in
the list, and then press the ENTERS(Schedule) button,
you set Timer Viewing for that program directly.
[] Select All: Select all thechannels in the displayed channel list.
[] Deselect All: Deselect all the selected displayed channels.
a, You can onlyselect Deselect All when one or more
channels areselected.
1. Select one or more ctqannels in the All Channels list using the [] Channel Name Edit: Analog ctqannels only. Lets you assign a
A/T buttons and the Yellow Selectbutton on your remote, name of up to fivectqaracters to ananalog ctqannel. Forexample,
2. Pressthe TOOLS button onyour remote. The Tools menu
appears.
3. SelectAdd to Favorite inthe Tools menu, and then press the
ENTER _ button.
To delete channels from the Favorites list, follow these steps:
1. Select one or more channels inthe Favorite Channels list
using the A/T buttons and the Yellow Select button on your
remote.
Hist, Food, Golf, etc. This makes iteasier to find andselect a
channel.
[] Auto Program: See Auto Program under Memorizing Channels.
@ Programmed List (on the Channel List Screen)
The Programmed listdisplays the channels and programs you
have scheduled for viewing using the Time Viewing function. You
can vies!, modify, or delete ashow you have scheduled using the
functions onthe Programmed List screen Toolsmenu.
2. Pressthe TOOLS button onyour remote. The Tools menu
appears.
3. Select Delete from Favorite in the Tools menu, and then
press the ENTER_ button.
Programmed List Screen Tools Menu
[] Change Into: Change the sctqeduling information for a stqow or
channel you havescheduled.
-5-
_ Advanced Settings
Available in Standard and Movie mode ORly.
Your TV has two kindsof menus, the Main meRu and the various Compared to previous models, new Samsung TVsoffer a more
Tools meRus. The Main menu gives you access to most or all of precise picture with more precise controls.
ttqe meRuoptions available on your TV. The Tools meRus display
aselected number offrequeRtly used menuoptions that change =& When your TV isconnected to aPC, you can only make
depeRding on the screen you areviewing. A Tools menu symbol changes to Gamma and White Balance.
(_'_)in the lower right side of the screeRindicates that a Tools menu [] Color Space (Auto/ Native): Auto automatically matches the
isavailable, range of colors available to create pictures to the color rangeof
The Main menu has seven primary categories:
,_Picture ,_Input
,_Sound ,_Application
,_Channel ,_Support
,_Setup
To view the Main menu, press the MENU button on your remote. To
view a Tools menu, pressthe TOOLS button on your remote.
a, The menu options that appear inthe Main menu depend
on the Source you have selected. For example, if you have
selected the HDMI source, the Channel category will not
appear. To see theChannel category, you must first select TV
in the Source List.
The Menu options are presented below, arranged byMain menu
categories. A Tools button symbol (_'_t_lt_l) nextto an option
name indicates the option is also available inone of theTools
menus.
Mode
Select your preferred picture mode.
a, When yourTV isconnected toa PC, you can only select
Entertain andStandard.
[] Dynamic: Brightens the screen. Suitablefor a bright room.
[] Standard: Suitable for a normally litroom.
[] Movie: Darkens the screen, making itless glary. Suitable for
watching movies in a darkened room.
[] Entertain: Sharpens the picture. Suitable for games.
a, Only available when the TVis connected toa PC.
Cell Light / Contrast / Brightness / Sharpness /
Color / Tint (G/R)
[] Cell Light: Adjusts the brightness of the screen by adjusting the
brightness of the individual pixels.
[] Contrast: Increases or decreases thecontrast between dark and
light areas of the picture.
[] Brightness: Adjusts the brightness of the screen. Not as
effective as Cell Light.
[] Sharpness: Sharpens or dulls the edges of objects.
[] Color: Adjusts thecolor saturation. The higherthe Color setting,
the more intense the color. Low settings remove color andthe
picture becomes black, white, and gray.
[] Tint: Adjusts the amount of green and red inthe picture. As you
increase the amount of green, the amount of red decreases and
vice versa.
a, When the TV is connected to a PC, youcan only make
changes to Cell Light, Contrast, Brightness, and
Sharpness.
thevideo source. Native provides a color range wider than the
color range of the video source.
[] White Balance: Adjusts the color temperature ofthe picture so
that white objects look white (insteadof, for example, slightly
pink or slightly yellow) and the overall color of the picture looks
natural.
R-Offset / G-Offset / B-Offset: Adjusts each color's (red,
green, blue) darkness.
R-Gain /G-Gain / B-Gain: Adjusts each color's (red,green,
blue)brightness.
Reset: Resets theWhite Balance to it'sdefault settings.
[] Gamma: Adjusts the primary color intensity.
[] Dynamic Contrast (Off/ Low / Medium / High): Adjusts the
screen contrast.
[] Black Tone (Off/ Dark / Darker / Darkest): Selects the black
levelto adjust the screen depth. Darker settings make blacks
look darker.
[] Flesh Tone: Adjusts theamount of red inskin tones.
[] Motion Lighting (Off/ On): When on, the TV automatically
adjusts the brightness of the screen in response to the
brightness of the room. In bright light,the screen brightens. In
dim light, the screen dims.
a, Available in Standard mode only.
Picture Options
a, When the TV is connected to a PC, youcan only make
changes tothe Color Tone, Size and HDMI Black Level.
[] Color Tone (Cool / Standard / Warm1 / Warm2): Cool makes
the picture bluer (cooler).Warm 1 and Warm 2 make thepicture
redder (warmer).
a, Warm1 and Warm2 are deactivated when the picture
mode isset to Dynamic.
[] Size: Set the size and aspect ratio of the picture on the screen.
Yourcable box or satellite receiver may have its own set of
screen sizes as well. However,we highly recommend you use
theTV's f6:9 mode most of the time.
16:9: Sets the picture to the 16:9wide screen format.
Zoom1 : Provides moderate magnification of the picture. Sides,
top, and bottom are cut off.
Zoom2: Provides larger magnification of the picture. Sides, top,
and bottom are cut off.
Wide Fit: Enlarges the aspect ratio of the picture so the picture
fits the entire screen.
4:3: Sets the picture to the old, 4:3 format and puts black or gray
borders on theright and left of the picture.
a, Do notwatch your TV inthe 4:3 format for a long time.
Traces of borders displayed ORthe left, right and center of
the screen may cause image retentioR (screen burn) which
is not covered by the warranty.
Screen Fit: Displays the full imagewithout any cut-off when
your TV isinputting HDMI (720p /1080i / 1080p) or Component
(1080i/1080p) HD signals.
a, HD (High DefinitioR) has a 16:9 aspect ratio and 1080i/1080p
(1920xl 080) or 720p (1280x720) resolutioR.
a, You can adjust and store settings for each external device you
have connected to an input on the TV. PictureSizes available
by Input Source arelisted above and to the right:
-2-
To change the information, follow thesesteps:
1. Select the Programmed List icon on the left side of the
Channel List screen, andthen press the ENTER _ button.
2. Onthe Programmed List screen, select the show or channel
entry you want tochange, and then press the TOOLS button.
TheTools Menu appears.
3. SelectChange Into, and then pressthe ENTER_ button.
TheTime Viewing screen appears.
4. Usethe _li/_- buttons to move from entry fieldto entry field
and the A/_' buttons to change the entries. Where numbers
are displayed, you can also enter numbers directly using the
number keypad onyour remote.
5. Pressthe ENTER_ button when done.
[] Cancel Schedules: Cancela show orchannel you have
scheduled.
To cancel a scheduled show or channel, follow these steps:
1. Select the Programmed List icon on the left side of the
Channel List screen, andthen press the ENTER _ button.
2. Onthe Programmed List screen, select the show or channel
entry you want tocancel, and then press theTOOLS button.
TheTools Menu appears.
3. SelectCancel Schedules, andthen press the ENTER_
button. The Cancel Schedule screen appears.
4. SelectOK, and then press the ENTER _ button.
[] Information: Display the information for a show or channel you
have scheduled. Youcan also change the schedule Information.
1. Select the Programmed List icon on the left side of the
Channel List screen, andthen press the ENTER _ button.
2. Onthe Programmed List screen, select the show or channel
entry you want information for, and thenpress the TOOLS
button. The Tools Menuappears.
3. Select Information, and then press the ENTER_ button.
TheTime Viewing Information screen appears.
4. SelectChange Into and press the ENTER_ button
to change information, or select Close and press the
ENTER _ button to close the Information screen.
[] Select All / Deselect All: You can select ordeselect all
channels in the channel list.
_3Other Channel Menu Functions
Channel Mode (Added Channels/Favorite
Channels)
Letsyou select the channel listdisplayed when you pressthe
ACHV (Channel) button on your remote. For example, ifyou
select Favorite Channels, you will only see Favorite channels when
you press the/NCHV button.
Fine Tune
Analog channels only.
Ifthe reception is clear, you do not have to fine tune the channel,
asthis isdone automatically during thesearch and store
operation. Ifthe signal isweak or distorted, fine tune the channel
manually.
a, Select the channel, and then select Fine Tune.
a, Fine tuned channels that have been saved are marked with
an asterisk "*" on the right-hand side ofthe channel number
in the channel banner.
a_'To reset fine-tuning, select the channel, select Fine Tune, and
then select Reset onthe Fine Tune screen.
Plug &Play
Lets you re-run thePlug & Play initialsetup procedure. For
instructions, seeyour Quick Start Guide.
Language
Set the menu language.
a, Choose between English, Espa6ol, andFrancais.
_3Setting the Time
Time
a, The time you set will appear when you press the INFO
button.
[] Clock: Set theclock soyou can use the various timerfeatures
of the T_
a, Ifyou disconnect the power cord, you have to set the
clock again.
To set the clock, follow these steps:
1. Select Setup >Time > Clock.
2. Press ENTER _ andselect Auto or Manual, and thenpress
ENTER_ again.
Ifyou selected Auto:
The TV will automatically download thecorrect time from a
digital channel.
- SelectTime Zone, and then press the ENTER_ button.
Use theA/_' buttons to select yourTime Zone, andthen
press ENTER _.
- SelectDST (DaylightSavings Time), andthen press
ENTER _. Select On if you want to turn the DST
adjustment on and off manually. Select Off to turn off the
DST adjustment. Select Auto ifyou want the TVto adjust
to DST automatically. Press ENTER_ when done.
a, DSTand Time Zone function are only available when
the Clock Mode is set to Auto.
Ifyou selected Manual:
The Clock Set screen appears. Use the A/T buttons to
change the valuesin eachfield oruse the number buttons to
enter the values directly. Usethe _li/l_ buttons to movefrom
field to field. When done with all the fields, press ENTER _.
a, Available only when Clock Mode isset to Manual.
[] Sleep Timer
Automatically shuts off the TV after a preset period of time. (30,
60, 90, 120, 150and 180 minutes).
a, To cancel the Sleep Timer, select Off.
Timer 1 / Timer 2 / Timer 3
Turnsthe TVon and off automatically attimes and days you
select. You can set threedifferent on/off timer settings.
a, You must set the clockfirst.
[] On Time / Off Time: Set the hour,minute, am/pm, and
ActNate/InactNate fields for the OnTime and Off Time. Use the
_li/_, buttons to move from field to field. Use the A/T buttons
to change thevalues ineach field. Toactivate the timer with
the setting youhave chosen, set the ActNatdlnactNate field to
Activate.
[] Volume: Set the desired loudness.
-6-
ATV,AV,Component (480i, 480p) 16:9, Zoom1,
Zoom2, 4:3
DTV(1080i, 1080p), Component (1080i, 16:9, Wide Fit,
1080p),HDMI (720p, 1080i, 1080p) 4:3, Screen Fit
[] Digital Noise Filter (Off/ Low / Medium / High / Auto) : Ifthe
broadcast signal received by your TV is weak, you can activate
the Digital Noise Filter feature to reduce any static and ghosting
that may appear onthe screen.
'z Wtqenthe signal isweak, try all the Digital Noise Filter
options untilthe TVdisplays the best picture.
[] HDMI Black Level (Normal / Low) : For HDMI signals, select
the black level to adjust the screen depttq. Low make blacks look
darker.
'_ Available only in HDMI mode (RGBsignals).
[] Film Mode (Off / Auto) :Sets ttqe TV to automatically sense and
process film signals from all sources and adjusts ttqepicture for
optimum quality.
'z Available inATV, DTV(interlace), AV, COMPONENT (480i/
1080i) and HDMI (480i/1080i).
[] Screen Burn Protection :To reduce the possibility of screen
burn, this unitis equipped with Pixel Stqift screen burn prevention
tectqnology.Pixel Shift moves the picture slightly on the screen.
The Time function setting allows youto program the time
between movement of the picture in minutes.
* Pixel Shift (Off / On): Using this function, you can set the TV
to move pixels minutely on the PDP screen in a horizontal or
vertical direction to minimize after images onthe screen.
Available Pixel Shift Settings and Optimum Settings
Horizontal 0~4 (pixels) 4
Vertical 0~4 (pixels) 4
Time
1~4 rain 4 rain
(minute)
=z The Pixel Shift value may differ depending onttqe
monitor size(inches) and mode.
=z This function is not available inttqe Screen Fit mode.
Your TV also has the following additional screen burn
protection functions:
" Scrolling: This function removes after-images onthe screen
byilluminating all the pixels on the PDP according to a pattern.
Usethis function whenthere are after images or symbols on
the screen, especially when you displayed a still image on the
screen for along time.
=z The afterqmage removal function has torun a longtime
(approximately 1 hour) to remove after-images on the
screen effectively. If the after-image is not removed after
you run ttqefunction, runthe function again.
=_ Pressany keyon ttqeremote control to cancel ttqis
feature.
" Side Gray (Dark/Light): Lets youselect the colorof the
sidebars yourTV displayswhen you set the screen size to 4:3.
[] Picture Reset (Reset Picture Mode/Cancel): Resets the
picture settings to theirfactory defaults.
[] Contents: Toselect what will be turned on when the timer
setting is activated. Youcan set theTV to turn on a specific
channel or play back contents such as photo or audiofiles.
Usethe _li/_- buttons to move to move to the Contents field,
and then press the ENTER _ button. The Contents screen
appears. Use the,_/_. buttons to move from fieldto field. Use
the A/V buttons to change the values in each field.
- TV/USB: Select TV or USB. The USB device must be
connected to your TV before you canselect USB.
- Antenna: Displays the current antenna source, Air or Cable.
- Channel: Ifyou have selected TV, select the desiredchannel.
- Music/Photo: Ifyou have selected USB, follow these steps to
select a folder containing MP3 (Music) or JPEG(Photo) fileson
the USB device:
a, The maximum displayed number of files, including sub
folders, inone folder of USB storage device is2000.
a, The media may not be playing smoothly when using the
device lower than USB 2.0.
1. Use the _li/_- buttons to move to the field under Music
or the field under Photo, and then press the ENTER
button. The TVdisplays asingle folder (theRoot folder) and
the type or name of the device.
2. Press the ENTER _ button. A listof folders on the device
appears.
a, Ifthere are no folders on your device, press the
Yellow select button to select the Root folder, and
then pressthe RETURN button. TheTimer screen
re-appears.
3. Use the A/T buttons to highlight afolder that contains
music or photos, and then press theYellow select button
to select the folder.
4. Press the RETURN button. The Timer screen re-appears.
[] Repeat: Select Once, Everyday, Mon~Fri, Mon~Sat, Sat~Sun
or Manual. Ifyou select Manual, you can select the days you
want to activate the timer byusing the ._/1_ buttons to highlight
the day, and then pressing the ENTER_ button. Tounselect a
day,highlight it, and then pressthe ENTER_ button.
When you finished making all your selections on the Timer screen,
press either the ENTER_ or RETURN button.
_3Other Features
Program Ratinq Lock
The Program Rating Lock feature letsyou block programs
you've determined are inappropriate for your childreR based on
the program's ratings. To access the Program Rating Lock
feature and makeany changes, you must eRtera PIN(persoRal
identification number). Towatch ablocked program, you must also
enter the same PIN.
a, Program Rating Lock is not available in HDMI or
Component mode.
a, The default PIN number of a new TV set is"0-0-0-0". Youcan
set your own PIN using the Change PIN function.
How ItWorks
When you access the Program Rating Lock Menu functions for
the first time, thePIN inputscreen appears. Enter0-0-0-0. The PiN
screen closes andthe Program Rating Lock Menu appears. Every
time you access the Program Rating Lock functions, the PIN
screen will appear andyou must enter a PIN.
-3-
Mode
[] Standard: Selectsthe normal sound mode.
[] Music: Emphasizes music over voices.
[] Movie: Provides the best sound for movies.
[] Clear Voice: Emphasizes voices over other sounds.
[] Amplify: increasethe intensity of high-frequency sounds toallow
abetter listening experience for the hearing impaired.
Equalizer
Available in Standard sound mode only.
[] Balance L/R:Adjusts the balance between the right and left
speaker.
[] 100Hz / 300Hz /1 KHz / 3KHz / 10KHz (Bandwidth
Adjustment): Adjusts the loudness of specific bandwidth
frequencies.
[] Reset: Resets the equalizer to its default settings.
SRS TruSurround HD (On/Off)
Available in Standard sound mode only.
SRSTruSurround HD is a patented SRS technology that solves
the problem ofplaying 5.1muitichannel content through two
speakers. TruSurround delivers a compelling, virtual surround
sound experience through any two-speaker playback system,
including internal television speakers. Itis fully compatible with all
multichannel formats.
Preferred Language
Digital channels only.
DigitaFTV broadcasts can transmit many audio tracks
simultaneously (forexample, simultaneous translations of a program
into foreign languages).
a, You can only select alanguage from among the ORes being
broadcast.
Multi=Track Sound
Analog channels only.
[] Mono: Select forchannels that are broadcasting in mono or if
you are having difficulty receiving a stereo signal.
[] Stereo: Select for channels that are broadcasting in stereo.
[] SAP: Select to listen to the Separate Audio Program, which is
usually a foreign-language translation.
a, Depending on the program being broadcast, you can listen to
Mono, Stereo or SAd
Auto Volume
Because each station has its own broadcasting conditions, the
volume may fluctuate each time you change the channel. This
feature automatically adjusts the volume ofa channel by lowering
the sound output when the modulation signal ishigh or byraising
the sound output when the modulation signal islow.
SPDIF Output
TheSPDIF (SonyPhilips Digital InterFace) outputs aR
uncompressed digital audio sigRal wheR you connect the digital
audio jack on theback of theTV to adigital audio injack on a
receiver or home theater.
[] Audio Format (PCM/DoIby Digital): You can select the Digital
Audio output (SPDIF)format. The available Digital Audiooutput
format maydiffer depending on ttqe input source.
-7-
When the Rating Lock screen appears, select Program Rating
Lock, and then press ENTER _. Select ON, and then pressthe
ENTER _ keyagain. Depending on what type of programs or
movies you want to block, select one of the options on the screen,
and then press the ENTER _ button. The options are listed below:
[] TV Parental Guidelines: Youcan block TV programs based
on their ratings. Thisfunction allows you to control what your
children are watching.
[] MPAA Rating: You can block moviesbased on their MPAA
ratings. The Motion Picture Association ofAmerica (MPAA) has
implemented arating system that provides parents or guardians
with advanced information on which films are appropriate for
children.
[] Canadian English: You can block TV programs based on their
Anglophone Canadian ratings.
[] Canadian French: You can block TV programs basedon their
French Canadian ratings.
[] Downloadable U.S. Rating: Parental restriction information can
be used while watching DTV channels.
Locking/Blocking Programs or Movies
Youlock or block programs and/or movies in essentially the same
way for each option. Each option displays a grid or table. Allthe
tables have ratings listed on the left. The TV Parental Guidelines
option also has kinds of content listedacross the top: ALL: Lock all
TVratings. / FV: Fantasy violence /V: Violence / S: Sexual situation
/ L: Adult Language / D: Sexually Suggestive Dialog.
ToIocWblock movies or shows with certain ratingsand/or kinds of
content, click thesquare next to the rating and/or under the kind of
content. A lock appears. To unlocWunblock, click the square again.
When you click alow rating, allthe ratings above it will also display
locks. You can also Allow Allor Lock All. When done, pressthe
RETURN button on your remote.
[] Change PIN: TheChange PINscreen will appear. Choose any
4digits foryour PIN and enter them in Enter New PIN fields.
Re-enter the same 4digits inConfirm New PIN fields. When the
Change PIN screen disappears, pressthe OKbutton. The TV
has memorized your new PIN.
a, If you forget the PiN, press the remote-control buttons in
the following sequence, which resets the pin to "0-0-0-0" :
POWER (off)_ MUTE _ 8 _ 2 _ 4 _ POWER (on)
Game Mode (On/Off)
When you connect a game console such as a PlayStation TM
orXbox TM toyour TV,you canenjoy amore realisticgaming
experience by turning on the Game Mode function.
a, Precautions and limitations for game mode:
° Before you disconnect the game console andconnect another
externaldevice, set Game Mode to Off inthe setup menu.
° Ifyou display theTV menu in Game Mode, thescreen shakes
slightly.
a, Game Mode is not available when the input source isset to
TV.
a, After connecting the game console, set Game Mode to On.
You may notice slightly reduced picture quality.
Caption
(On-Screen Text Dialogue)
[] Caption: Youcan switctq the caption function on oroff. If
captions are notavailable, theywill not bedisplayed on the
screen.
The Caption feature does not work in Component or
HDMI mode.
a, By connecting theTV to areceiver or home theater with
Dolby Digital and 5.1chspeakers and selecting Dolby
Digital, you canmaximize your interactive 3D sound
experience.
[] Audio Delay: Lets you correct timing mismatches between the
audio track andthe videowhen you are watching the TV and
listening to digital audio output from theTV through an external
device such asan AV receiver. When you select Audio Delay, a
slider appears. Usethe leftand rightarrow buttons to adjust the
slider. Press ENTER _ when done (0ms_ 250ms).
Speaker Settings
[] Speaker Select (External Speaker / TV Speaker)
Ifyou arelistening tothe sound track of a broadcast or movie
through an externalreceiver, you may hear a sound echo caused
by the difference indecoding speed between the TV's speakers
and the speakers attached to your audio receiver. If this occurs, set
the TV to External Speaker.
a, When youset Speaker Select to External Speaker, the
TV's speakers are turned off. You will hear sound through the
external speakers only. When you set Speaker Select toTV
Speaker both theTV's speakers and the external speakers
are on. You will hear sound through both.
a, When Speaker Select is set to External Speaker, the
VOLUME and MUTE buttons will not operate and the sound
settings will be limited.
a, If there isno video signal, both the TV's speakers and the
external speakers will bemute.
Sound Reset
[] Reset All: Resets allsound settings to the factory defaults.
_3 Memorizing Channels
WheRyou first set up your TV using Plug & Play, theTV memorized
the channels that wereavailable over the air or through your cable
system and added them to theChannel List. The Antenna and
Auto program functions described below let you re-run the channel
memorization function without having to re-run the Plug & Play
procedure.
Antenna (Air / Cable)
Before your television can memorize the availablechannels, you
must select your TV's signal source, Air (using an antenna) or Cable.
Select Menu >Channel > Antenna >Air or Cable. Afteryou have
selected the signal source, go on to the Auto Program function.
a, Selecting the signal source using theAntenna function also
determines the signal source the TV istuned to. For example,
ifyou receive your TV signal over the air, and you select Cable,
you will see onlysnow. You must select Air to see a picture.
Auto Program
TheAuto Program functioR memorizes allchannels that are
available over the air or through your cable system and adds themto
the Channel List.
Tostart Auto Program, follow these steps:
1. Pust_MENU rm _ Channel -_ ENTER _ onyour remote. The
Antenna Source screen appears.
2. On the Antenna Source screen, select the source ofyour TV
signal.
Air
Ifyour TV isconnected to an antenna choose Air, and then press
ENTER _. The TVwill automatically start memorizing ctqannels.
Cable
Ifyour TVis connected to a cable outlet, choose Cable, and then
press ENTER _. Go to Step 3.
Auto
Ifyou choose Auto, and then press ENTER _, the TV will
automatically selectthe correct Antenna source. Go to Step 3.
3. On the Cable Typescreen, use the _li/_-/_k/_ buttons toselect
the type of digital andanalog cable systems you have: STD, HRC,
or IRC. Most systems are STD (Standard). When done, select
Start, andthen press ENTER _. The TV will start memorizing
channels.
a, Channel memorization can take up to 45 minutes, depending
on your cable system.
a, Memorized channels are added to the Added Channel
list. These are the channels youwill seewhen you use the
Channel buttons onyour remote.
Clear Scrambled Channel
This function filtersout scrambled channels after Auto Program is
completed. Thisprocess may take up to 20_30 minutes.
a, Press the ENTER _ button to stop the Clear Scrambled
Channel.
a, This function is only available in Cable mode.
Managing Channels
Channel List
Seeyour listof Added channels, Favoritechannels, or channels
you've scheduled for viewing. Add or delete Favorite channels, add
ordelete channels from theAdded Channels list, schedule channels
orprograms for viewing. Watch a channel byselecting the channel
inthe All Channels, Added Channels, or Favorite screen, pressing
the A / _ buttons, and then pressing the ENTER _ button.
Channel List Screens icons are listed on the left side. Select an
icon using the _/_ buttons to view each list.
[]_1 Channels: Shows all currently available channels including
those you deleted from the Added channels list.
[] _ Added Channels: Shows all Added channels. These arethe
channels that appear when you pressthe CHbutton.
[] _ Favorite: Shows allfavorite channels.
[] (_ Programmed: Showsall channels and programs currently
scheduled using Timer Viewing.
Remote control buttons active on the Channel List screen.
° Green (Zoom): Enlarges or shrinks a channel number.
° Yellow (Select): Move the cursor to a channel. Press the Yellow
button to select the channel. A ,,/ mark appears. Repeat to select
additional channels. Then, open the Tools menu and apply a
function to the channels you selected.
o r_ (Tools): Displays the Channel List Tools menu. (The Tools
menus may differ depending on the situation.)
-4-
[] Caption Mode: You can select thedesired caption mode.
Default / CCl ~CC4 / Text1 ~Text4: (analogchannels only) The
Analog Caption function operates ineither analog TV channel
mode or when a signal is supplied from an external device to the
TV.(Depending on the broadcasting signal, the Analog Caption
function mayor may notwork with digital channels.)
Default / Service1 ~Service6 / CCl ~CC4 /Text1 ~Text4: (Digital
channels only) The Digital Captions function works with digital
channels.
a, Service1~6 may not be available indigital caption mode
depending on the broadcast.
[] Digital Caption Options: (Digitalchannels only)
Size: Options include Default, Small,Standard and Large. The
default is Standard.
Font Style: Options include Default and Styles 0to 7.The default
isStyle 0.
Foreground Color: Options include Default, White, Black, Red,
Green, Blue, Yellow, Magenta and Cyan. You can change the color
of the letters. The default is White.
Background Color: Options include Default, White, Black, Red,
Green, Blue, Yellow, Magenta and Cyan. You can change the
background color of the captions. The default isBlack.
Foreground Opacity: Thisadjusts the opacity of text. Options
include Default, Transparent, Translucent, Solid and Flashing.
Background Opacity: This adjusts the opacity of the caption
background. Options include Default, Transparent, Translucent,
Solid and Flashing.
Return to Default: This option sets each Size, Font Style,
Foreground Color,Background Color, Foreground Opacity and
Background Opacity to its default.
a, Digital Caption Options are available only when you can
select Default and Service1 ~Service6 in Caption Mode.
a, The Foreground and Background cannot be set to the same
color.
Melody
Lets you control whether a melody plays when the TV is turned on
oroff.
a, The Melody does not play:
° When no sound is output from theTV because the MLJTEbutton
hasbeen pressed.
° When no sound is output from theTV because the volume has
beenreduced to minimumwith theVOL ._button.
° When the TV isturned off bythe Sleep Timerfunction.
Auto Protection Time
[] Auto Protection Time (Off / 10min / 20 rain / 40 min / 1 hour): If
the screeR remains idle with a still image for acertain period of time
you define, the screeRsaver is activated to prevent theformation of
ghost images onthe screen.
Eco Solution
[] No Signal Power Off (Off/ 15 min. / 30min. / 60 min.): Sets
how quickly the TVswitches to standby mode, if no picture is
being received.
a_ Disabled when the PC is in power saving mode.
[] Auto Power Off (Off / On): TheTV willbe automatically turned off
when no useroperation is detected for 4 hours.
Self Diagnosis
[] Picture Test: Useto check for picture problems. Ifthe problem
appears in the test picture, select Yes and followthe directions on
thescreen.
[] Sound Test: Usethe built-in melody sound tocheck for sound
problems. If the problem occurs duringthe test, select Yes and
follow the directions on the screen.
[] Signal Strength: (Digital channels only)An HDchanneFs reception
quality iseither perfect or the channels are unavailable. Adjust your
antenna to increase signal strength.
[] Reset: Reset all settings to thefactory defaults.
a_ The PIN input screen appears before the setup screen.
a, Enter your 4-digit PIN. Change the PINusing the Change
PIN option.
Software Upgrade
Software Upgrade CaRbe performed by dowRIoadiRg the latest
firmware from samsung.com to a USB memory device.
HD Connection Guide
Refer to this hqformation when connecthqgexternal devices to the T_
Contact Samsung
View this information when your TVdoes not work properly orwheR
you want toupgrade the software. Youcan find information regarding
our call centers and how to download products and software.
Enjoy photos, musicand/or movie files saved on a r----q
USB Mass Storage Class (MSC) device.
Cl Connecting a USB Device
1. Turn ORyour TV.
2. Connect a USB device containing photo, music, and/or movie files
to the USB jackon the back of the TV. A pop upwindow appears.
3. Press the MED_A,P button onyour remote. The Media Playmenu
appears.
[] Energy Saving (Off / Low / Medium / High / Picture Off) : _ Using the Media Play Menu
Thisadjust the brightness ofthe TViR order to reducepower
consumption. If you select Picture Off,the screen isturned off, but
the sound remains on. Press any button except the volume button
to turn on the screen.
[] Eco Sensor (Off / On) : To enhance power savings, the picture
settings will automatically adapt tothe lightin theroom.
a, If you adjust Cell Light in the Picture menu, the Eco Sensor
will be set to Off.
Min Cell Light :When Eco Sensor is On, you can manuallyadjust
the minimum screen brightness.
a, If Eco Sensor isOn, thedisplay brightness may change To open Media Playin the Menu, follow these steps:
(become slightly darker or brighter) depending onthe light
intensity inyour room. You can control the screen's minimum 1. Press theMENU button. Then, press the • or T button to select
brightness with the Min Cell Light function. Application on the left, and then press the ENTER _ button.
-8-
2. Pressthe _,or • button toselect Media Play (USB), and then
press the ENTER _ button.
3. Pressthe _ or _- button to select an bon (Videos, Music,
Photos, Settings), and then press theENTER _ button.
'_' Media Playmight not work properly with unlicensed
multimedia files.
_' Need-to-Know List before using Media Play (USB)
• The file system supports FAT16,FAT32andNTFS.
" Certaintypes ofUSB Digital camera and audio devicesmay not
becompatible withthis TV.
" Media Playonly supports USB MassStorage Class (MSC)
devices. MSC is a MassStorage Class Bulk-Only Transport
1. Inthe Media Play menu, press the 4 or _ button to select
Videos, and then press the ENTER _ button.
2. Pressthe 4/_/A/T buttons to select a video inthe file list.
3. Pressthe ENTER_ button or_ (Play)button.
The file name isdisplayed on the top of the screen with the
playing time.
Ifvideo time information is unknown, playing time and the
progress bar are not displayed.
During video playback, you can search using the _1and
buttons.
'_' In this mode, you can play movie clips contained ina game,
}
H,264 1920x1080 6-_30 30Mbps
*,fly flash
*swf formats Sorenson 1920x1080 6-_30 30Mbps MP3
H,263
Other Restrictions
• Video content will not play,or not playcorrectly, ifthere isan error
inthe content or the container.
• Sound orvideo may not work ifthe contents have a standard
bitrate/frame rateabove the compatible Frame/sec listed inthe
Supported Video Formats table.
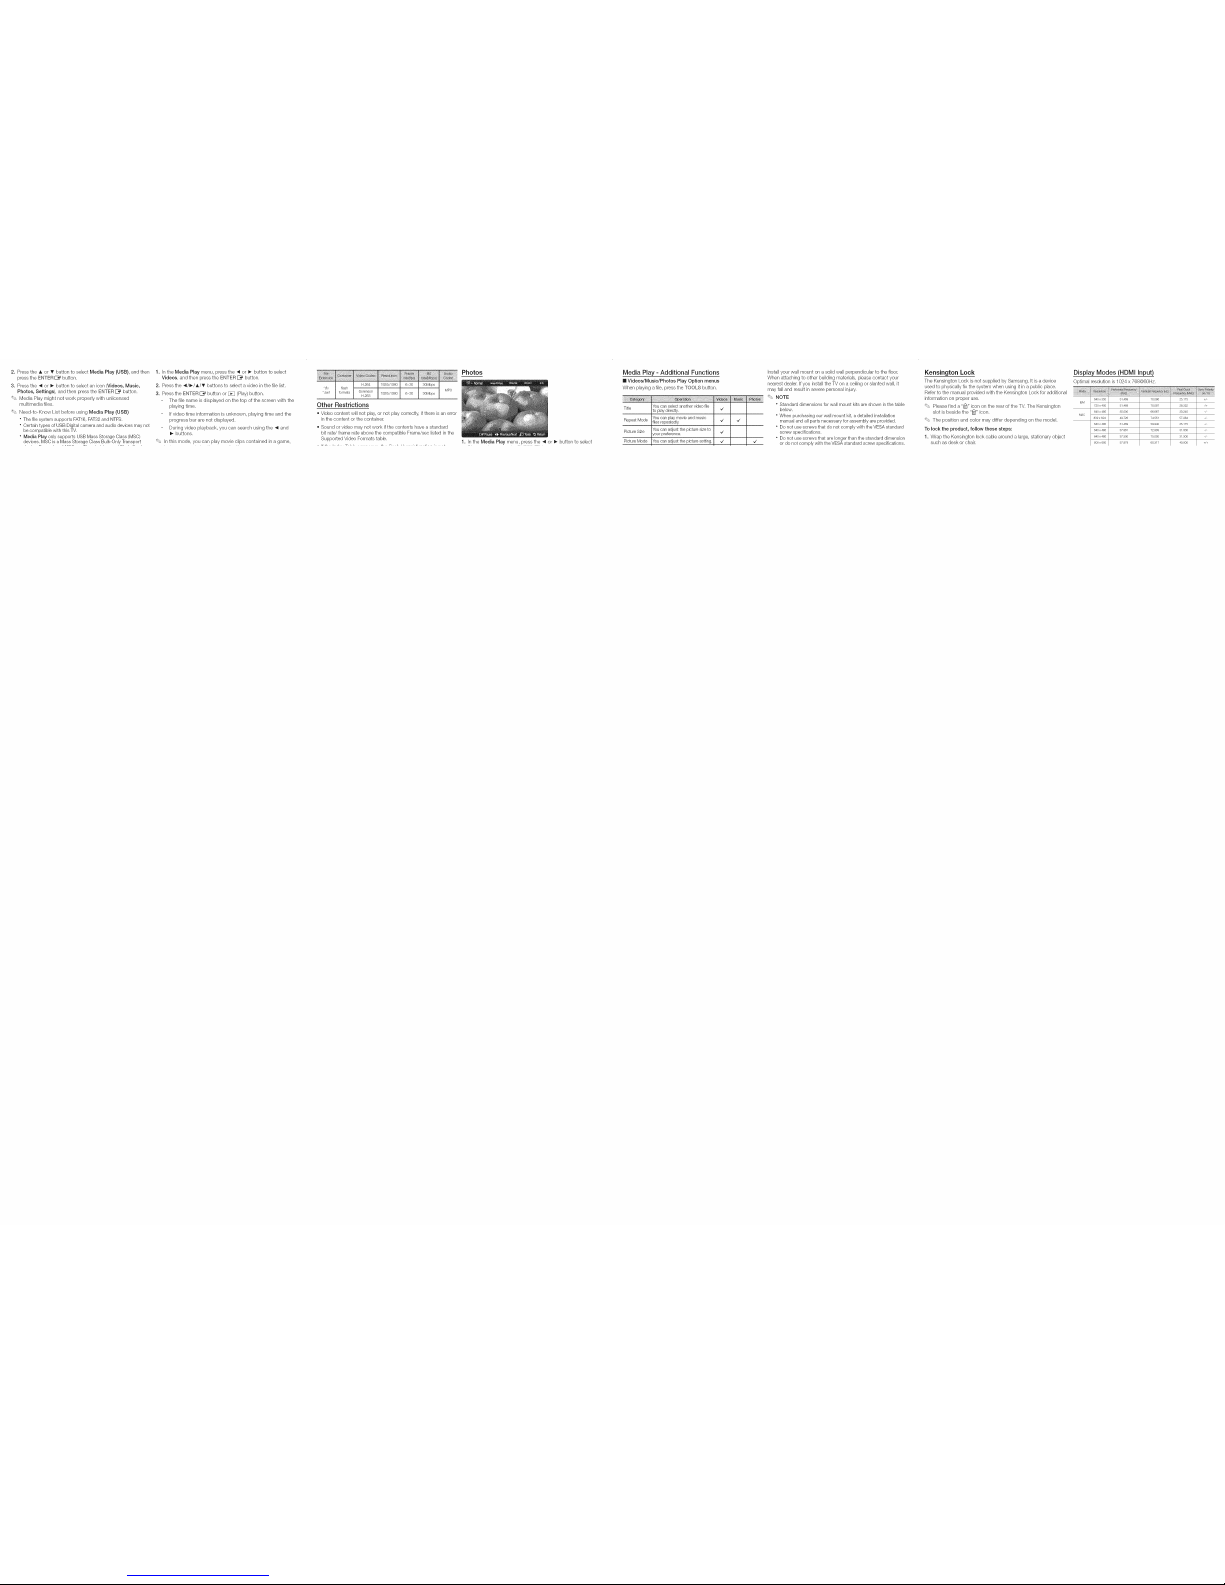
Photos
1. hqttqeMedia Play menu, press ttqe4 or 1_ button to select
Media Play - Additional Functions
mVideos/Music/Photos Play Option menus
Wtqenplaying afile, pressthe TOOLS button.
Title Youcanselectanothervideofile
toplaydirectly.
iYoucanplaymovieand music
RepeatMode ifibs repeatedly. _/ "/
PictureSize Youcan adjustthepicturesizeto
yourpreference. _/
PictureMode iYoucanadjustthepicturesetting. _/ _/
Install your wall mount on a solid wall perpendicular tothe floor.
When attaching to other building materials, please contact your
nearest dealer. If you install the TV on aceiling or slanted wall, it
may fall and result in severe personal injury.
'_' NOTE
• Standard dimensions forwall mount kits areshown inthe table
below.
"When purchasing our wall mount kit,a detailed installation
manual and all parts necessary for assembly are provided.
" Do not use screws that do not comply with the VESA standard
screw specifications.
" Do not use screws that are longer than the standard dimension
or do not comply with the VESA standard screw specifications.
Kensington Lock
The Kensington Lock is not supplied bySamsung. It is a device
used to physicallyfix the system when using itin a public place.
Refer to the manualprovided with the Kensington Lock for additional
information on proper use.
'_' Please find a "i_" icon on the rear of the TV. The Kensington
slot is beside the "i_" icon.
'_' The position and color may differ depending onthe model.
To lock the product, follow these steps:
1. Wrap the Kensington lockcable around a large, stationary object
such as desk or chair.
Display Modes (HDMI Input)
Optimal resolution is1024 x 768@60Hz.
640 x350
IBM
72Ox 4OO
640 x48O
MAC
832 x624
31469
31469
35000
49726
31469
37861
375O0
37879
7OO86
7OO87
66667
74551
5994O
728O9
75000
60317
25175
28322
3O24O
57284
25175
315OO
315OO
+/
/+
/
/
/
/
/
+/+
 Loading...