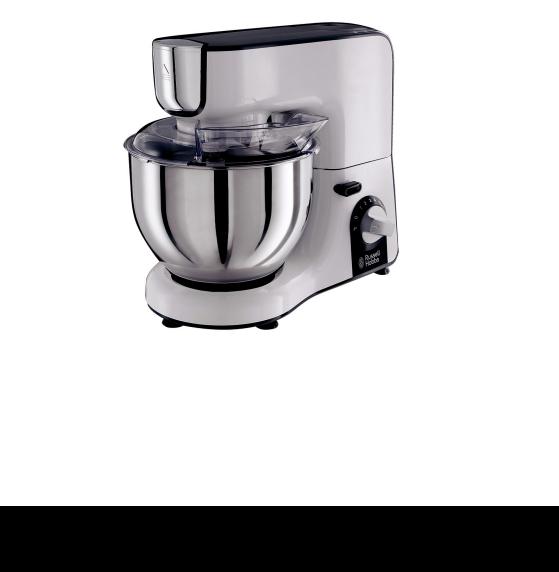
Russell hobbs 25930 User Manual

r
25930 |
I www.russellhobbs.com |
Register online for an EXTRA year guarantee
Visit uk.russellhobbs.com/product-registration You must register within 28 days of purchase

e` f`  g`
g`
n` |
i |
j |
k
o`
 l m
l m
A |
B |
C |
2

Read the instructions, keep them safe, pass them on if you pass the appliance on. Remove all packaging before use.
IMPORTANT SAFEGUARDS
Follow basic safety precautions, including:
This appliance can be used by persons with reduced physical, sensory or mental capabilities or lack of experience and knowledge if they have been supervised/instructed and understand the hazards involved.
Children must not use or play with the appliance. Keep the appliance and cable out of reach of children.
Always disconnect the appliance from the mains supply socket if it is left unattended and before assembling, disassembling or cleaning.
Care must be taken when handling sharp cutting blades during emptying and cleaning.
Don’t run the appliance for more than 10 minutes. After 10 minutes, switch off for at least 20 minutes.
If the cable is damaged, return the appliance, to avoid hazard.
•Don’t put the motor unit in liquid, don’t use it in a bathroom, near water, or outdoors.
•Keep fingers, hair, clothing, kitchen utensils, etc. clear of the bowl and attachments.
•Don’t use the appliance for any purpose other than those described in these instructions.
•Don’t use attachments or accessories unless we supply them.
•Don’t use the appliance if it’s damaged or malfunctions.
•Don’t use the blender at the same time as the mixer.
HOUSEHOLD USE ONLY
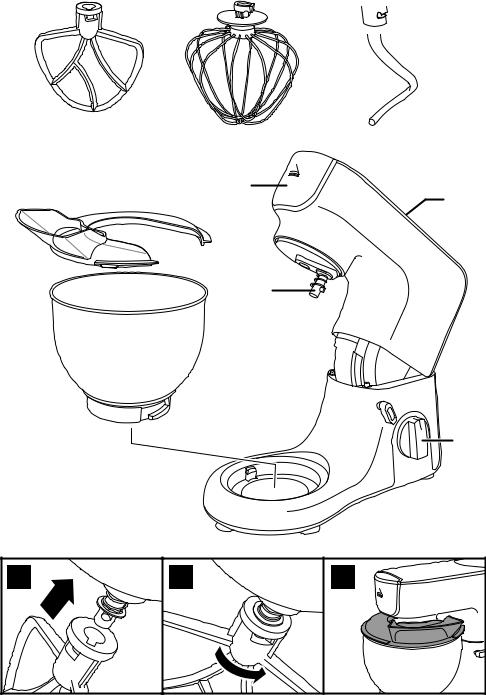
PARTS
1. |
Beater |
7. |
Arm lock lever |
2. |
Whisk |
8. |
Speed control |
3. |
Dough hook |
9. |
Splash guard |
4. Accessory drive (for optional accessories) |
10. |
Bowl |
|
5. |
Arm |
` Dishwasher safe |
|
6.Drive shaft and pin
POSITIONING
1.Sit the appliance on a water-resistant, dry, stable, level surface.
2.Route the cable so it doesn’t overhang, and can’t be tripped over or caught.
3.Don’t plug it in until you have finished assembling it.
3

ASSEMBLY
Raising the arm:
1.The springs in the arm are powerful so place your hand on top of the arm to control its movement.
2.Turn the arm lock lever to the  position and hold it there. The arm will rise.
Lowering the arm:
1. Turn the arm lock lever to the position and hold it there.
2. Press the arm down and, while holding it there, release the arm lock lever.
Fitting the bowl
Raise the arm before fitting or removing the bowl. Use only the bowl supplied.
1.Fit the bowl into the recess in the base and turn it clockwise until it locks.
2.To remove, turn it anti-clockwise then lift it off the base.
Fitting/removing attachments
Switch off, unplug and raise the arm before fitting or removing attachments.
1.Align the slot in the attachment with the pin on the drive shaft (Fig A).
2.Push the attachment onto the drive shaft then turn it anti-clockwise to lock it (Fig B).
To remove an attachment, push it upwards slightly then turn it clockwise and pull it off the shaft.
Splash guard
The splash guard protects you from spills or splashes during mixing while still allowing you to add ingredients. Switch off and unplug your mixer before fitting/removing the splash guard. With the bowl in position and the arm in the lowered position:
1.Slide the splash guard between the arm and the bowl.
2.Align it so that the opening is on the right hand side (Fig C).
•Always remove the splash guard before raising the arm.
USING YOUR MIXER
1.Check that the speed control is set to O.
2.Put the plug into the power socket (switch the socket on, if its switchable).
3.Turn the speed control clockwise to the speed you want.
4.The range is from 1 (low) to 10 (high). Turn the speed control back to O to turn the motor off.
5.To operate the motor in short bursts, turn the speed control to the Yposition. Release the
control to stop the motor.
Recommended Speeds
Attachment |
Speed |
Use for |
|
|
|
Whisk |
7-10 |
beating/aerating cream, egg whites, batter, light mixes |
|
|
|
Beater |
4-7 |
creaming butter and sugar, medium cake mixes |
|
|
|
Dough hook |
1-4 |
heavy mixtures, bread, pastry |
|
|
|
CARE AND MAINTENANCE
Switch off (O) and unplug before cleaning.
1.Clean as soon after use as possible to prevent residues setting inside the bowl.
2.Wash the bowl, splash guard and attachments in warm soapy water, rinse, and dry.
3.You may put the bowl and attachments in a dishwasher, but note: the harsh environment inside the dishwasher will affect the surface finishes. The damage should be cosmetic only, and should not affect the operation of the appliance.
4.Wipe the outside surfaces of the appliance with a clean damp cloth.
4
 Loading...