


C830DN
Table of contents
 Loading...
Read this manual carefully before you use this machine and keep
it handy for future reference. For safe and correct use, be sure to
read the Safety Information in "Read This First" before using the
machine.
For information not in this manual, refer to
the HTML/PDF files on the supplied
CD-ROM.
Replenishing and Replacing Consumables
Troubleshooting
Printing
Getting Started
User Guide


TABLE OF CONTENTS
1. Getting Started
Before You Start..................................................................................................................................................5
How to Read the Manuals.............................................................................................................................5
List of Options.................................................................................................................................................6
Printer Types....................................................................................................................................................7
Model-Specific Information...........................................................................................................................8
Guide to Names and Functions of Components............................................................................................10
Guide to Components.................................................................................................................................10
Guide to the Names and Functions of the Printer's Control Panel...........................................................13
Using the Screen on the Control Panel...........................................................................................................16
How to Use the [Home] Screen..................................................................................................................16
How to Use the Screens on the Control Panel...........................................................................................18
Switching Screen Patterns...........................................................................................................................20
Adding Icons to the [Home] Screen...........................................................................................................21
Logging in the Printer........................................................................................................................................23
User Code Authentication Using the Control Panel..................................................................................23
User Code Authentication Using a Printer Driver......................................................................................23
Logging In Using the Control Panel............................................................................................................23
Logging Out Using the Control Panel.........................................................................................................24
Logging In Using a Printer Driver................................................................................................................24
Logging In Using Web Image Monitor......................................................................................................25
Logging Out Using Web Image Monitor...................................................................................................26
Turning On/Off the Power..............................................................................................................................27
Turning On the Power..................................................................................................................................27
Turning Off the Power..................................................................................................................................27
Saving Energy..............................................................................................................................................28
Displaying the Printer Configuration Screens.................................................................................................30
Displaying the Printer Driver Properties with Windows.............................................................................30
Displaying the Printer Driver Properties with Mac OS X...........................................................................32
2. Printing
Paper Specification..........................................................................................................................................33
Supported Paper for Each Input Tray.........................................................................................................33
Supported Paper for Each Output Tray.....................................................................................................39
1

Notes about Paper Thickness......................................................................................................................46
Print Area......................................................................................................................................................47
Loading Paper..................................................................................................................................................49
Precautions for Loading Paper....................................................................................................................49
Unusable Paper............................................................................................................................................49
Paper Storage..............................................................................................................................................50
Loading Paper into Paper Trays..................................................................................................................51
Loading Paper into the Bypass Tray...........................................................................................................53
Loading Paper into Tray 3 (LCT).................................................................................................................54
Loading Paper into the Large Capacity Tray (LCT)...................................................................................56
Loading Orientation-Fixed Paper or Two-Sided Paper............................................................................57
Standard Printing..............................................................................................................................................59
Printing with Windows (PCL 6/PostScript 3).............................................................................................59
Printing with Windows (PCL 5c/5e)..........................................................................................................60
Printing with Mac OS X...............................................................................................................................61
Printing on Both Sides of Sheets..................................................................................................................62
Combining Multiple Pages into Single Page.............................................................................................63
Printing on Envelopes.......................................................................................................................................65
Loading Envelopes.......................................................................................................................................65
Printing on Envelopes with Windows (PCL 6/PostScript 3).....................................................................67
Printing on Envelopes with Windows (PCL 5c/5e)...................................................................................67
Printing on Envelopes with Mac OS X........................................................................................................68
Storing a Document.........................................................................................................................................69
Storing a Document with Windows............................................................................................................69
Storing a Document with Mac OS X..........................................................................................................70
3. Troubleshooting
When Indicators Are Displayed......................................................................................................................73
When a Panel Tone Beeps..............................................................................................................................74
Checking Printer Status and Settings..............................................................................................................75
When an Indicator for the [Check Status] Key Is Lit......................................................................................77
When You Have Problems Operating the Printer..........................................................................................79
When the Color Registration Shifts.................................................................................................................85
When the Printed Color Changes...................................................................................................................86
2

Setting the Gradation Correction Value....................................................................................................86
Gradation Correction Sheet.......................................................................................................................87
Resetting the Gradation Correction Value to the Default Value..............................................................89
If USB Connection Fails...................................................................................................................................90
When Messages Are Displayed.....................................................................................................................91
Status Messages..........................................................................................................................................91
Alert Messages (Displayed on the Control Panel)....................................................................................92
Alert Messages (Printed on Error Logs and Reports)................................................................................95
Checking the Error Log..................................................................................................................................105
When You Cannot Print.................................................................................................................................106
When the Data In Indicator Does Not Light Up or Flash.......................................................................108
Other Printing Problems.................................................................................................................................109
When PictBridge Printing Does Not Work...................................................................................................121
Removing Jammed Paper..............................................................................................................................122
Locating Jammed Paper............................................................................................................................123
When R1–R4 Is Displayed for the 2000-sheet Booklet Finisher...........................................................124
When R5–R7 Is Displayed for the 2000-sheet Booklet Finisher...........................................................125
When R8–R12 Is Displayed for the 2000-sheet Booklet Finisher........................................................126
When R1–R4 Is Displayed for the 3000-sheet finisher.........................................................................127
When R5 - R8 Is Displayed for the 3000-sheet finisher........................................................................128
Removing Jammed Staples...........................................................................................................................129
2000-sheet Booklet Finisher.....................................................................................................................130
2000-sheet Booklet Finisher (Saddle Stitch)...........................................................................................131
3000-sheet Finisher..................................................................................................................................132
Removing Punch Waste.................................................................................................................................133
4. Replenishing and Replacing Consumables
Adding Toner.................................................................................................................................................135
Replacing Other Consumables.....................................................................................................................138
Adding Staples...............................................................................................................................................140
Trademarks.....................................................................................................................................................141
3

4
1. Getting Started
This section describes the symbols used in the manuals supplied with the printer, available options,
names and functions of components, and setup procedures.
Before You Start
How to Read the Manuals
Symbols used in the manuals
This manual uses the following symbols:
Indicates points to pay attention to when using the machine, and explanations of likely causes of paper
misfeeds, damage to originals, or loss of data. Be sure to read these explanations.
Indicates supplementary explanations of the machine's functions, and instructions on resolving user
errors.
This symbol is located at the end of sections. It indicates where you can find further relevant information.
[ ]
Indicates the names of keys on the machine's display or control panels.
(mainly Europe and Asia)
(mainly North America)
Differences in the functions of Region A and Region B models are indicated by two symbols. Read the
information indicated by the symbol that corresponds to the region of the model you are using. For
details about which symbol corresponds to the model you are using, see p.8 "Model-Specific
Information".
Disclaimer
Contents of this manual are subject to change without prior notice.
To the maximum extent permitted by applicable laws, in no event will the manufacturer be liable for any
damages whatsoever arising out of failures of this machine, losses of the registered data, or the use of
this product and operation manuals provided with it.
5
1. Getting Started
Make sure that you always copy or have backups of the data registered in this machine. Documents or
data might be erased due to your operational errors or malfunctions of the machine.
In no event will the manufacturer be responsible for any documents created by you using this machine or
any results from the data executed by you.
Notes
The manufacturer shall not be responsible for any damage or expense that might result from the use of
parts other than genuine parts from the manufacturer with your office products.
For good output quality, the manufacturer recommends that you use genuine toner from the
manufacturer.
Some illustrations in this manual might be slightly different from the machine.
About IP address
In this manual, "IP address" covers both IPv4 and IPv6 environments. Read the instructions that are
relevant to the environment you are using.
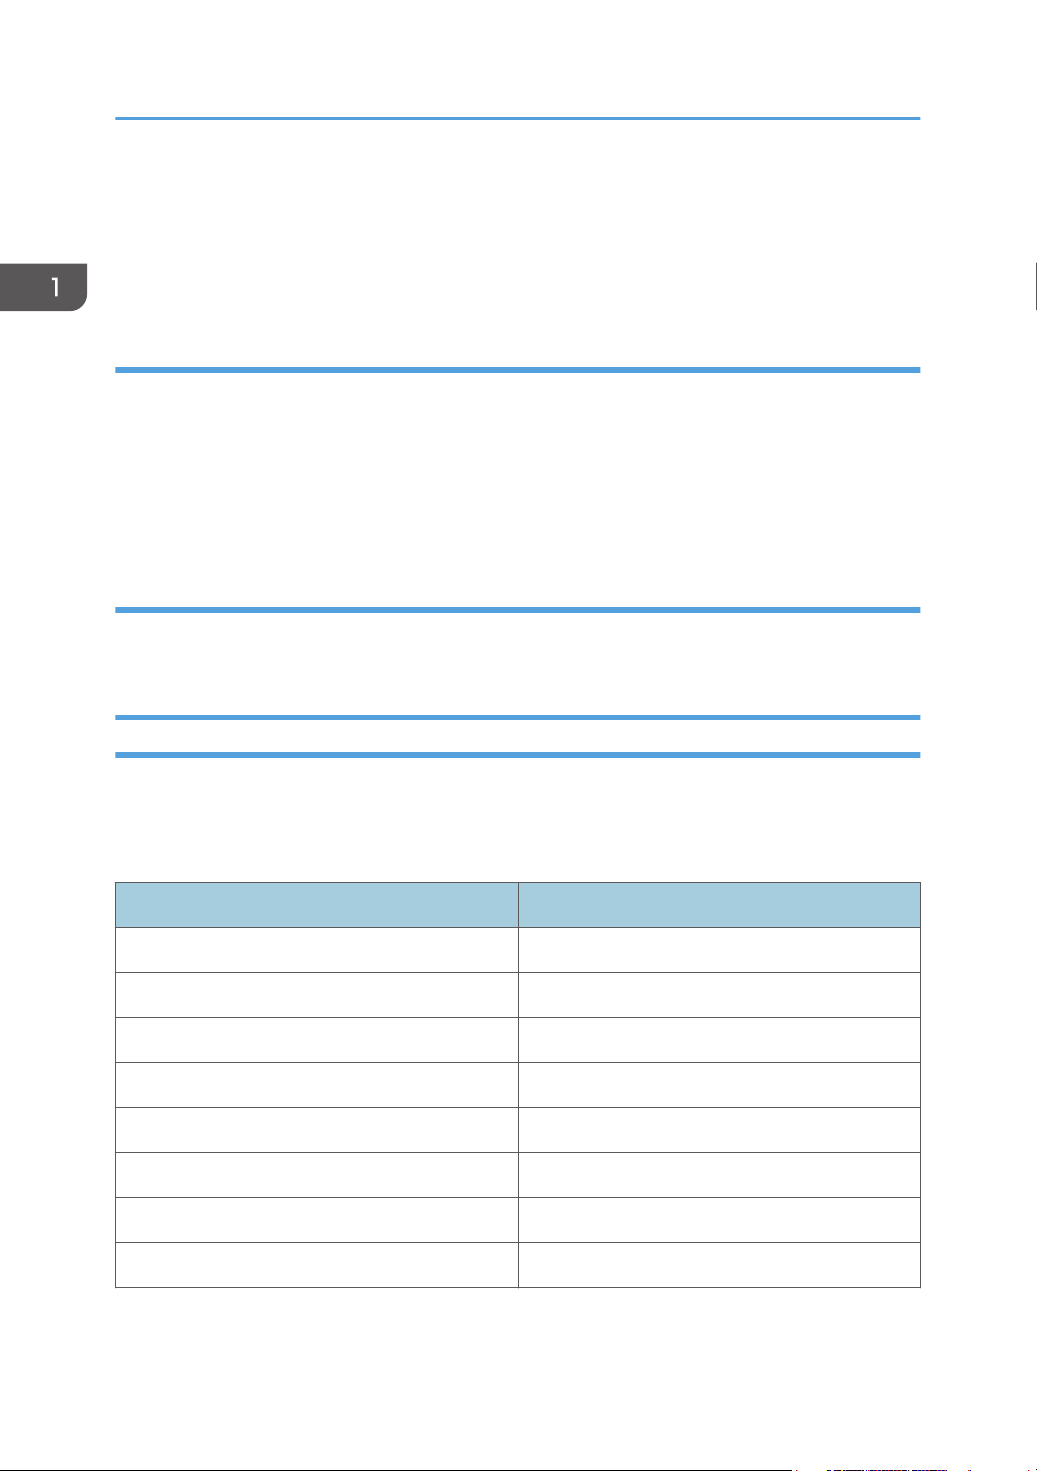
List of Options
This section provides a list of options for this printer and the names commonly used in this manual.
The Type 2 model comes equipped with a hard disk. For information about different models, see .p.7
"Printer Types"
Option name Description
Paper Feed Unit PB3120 500-sheet paper feed unit
Paper Feed Unit PB3130 1000-sheet paper feed unit
LCIT PB3140 2000-sheet paper feed unit
LCIT RT3020 1200-sheet paper feed unit
Mail Box CS3000 Mailbox
Bridge Unit BU3060 Bridge unit
Booklet Finisher SR3110 2000-sheet booklet finisher
Finisher SR3120 3000-sheet finisher
6
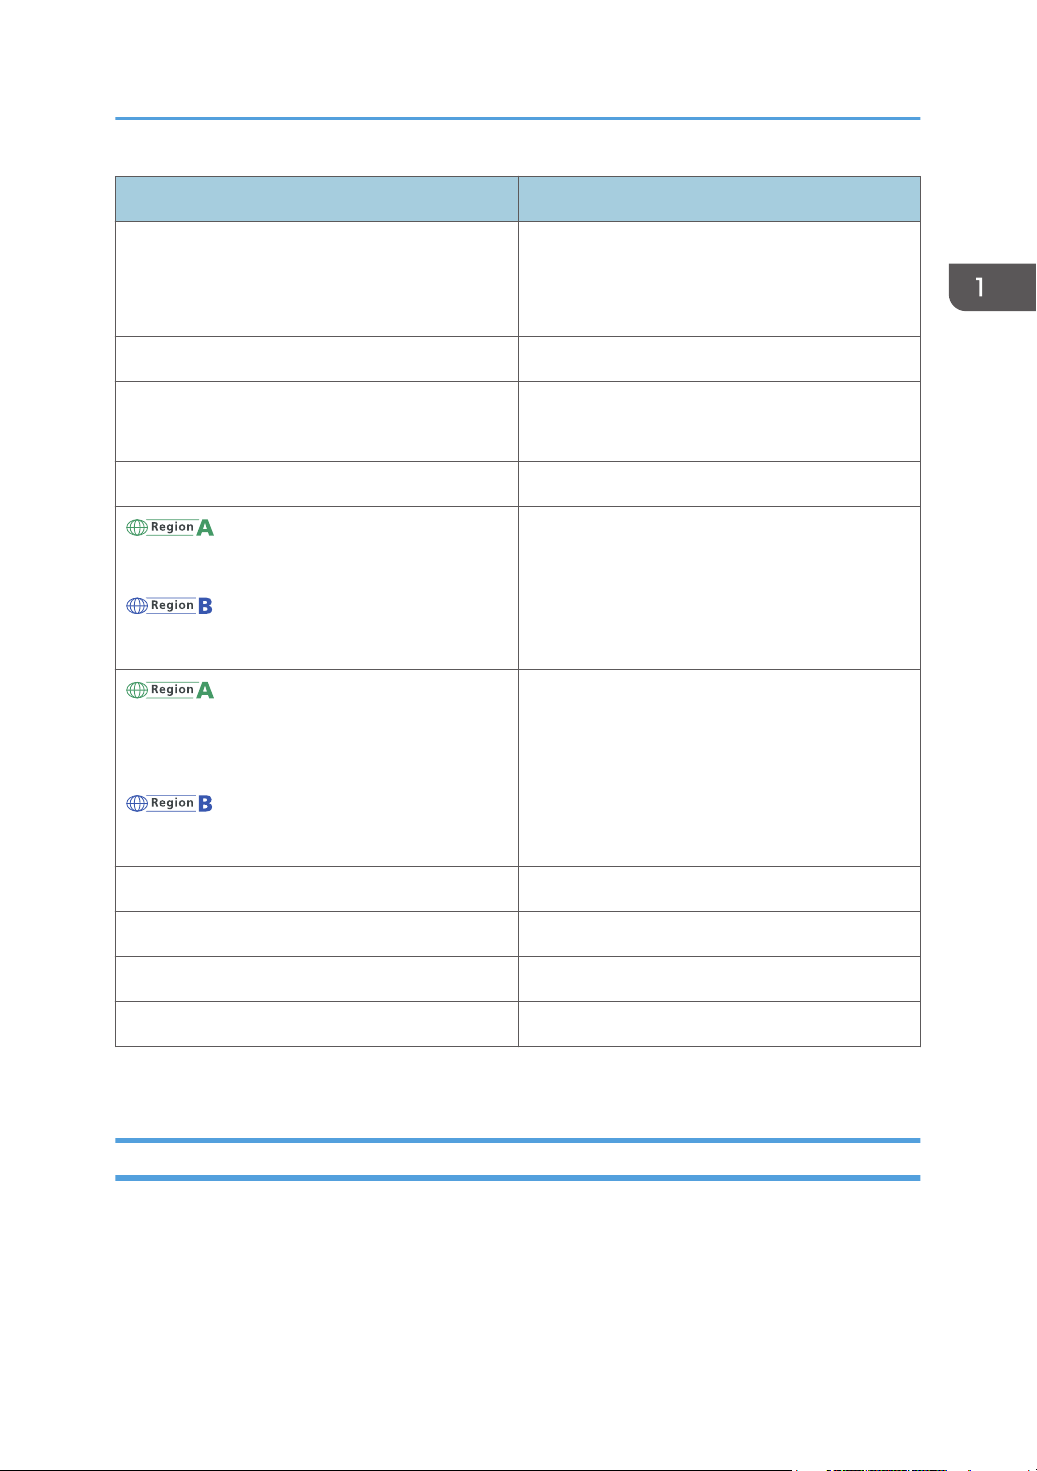
Option name Description
Punch Unit PU 3030 NA
Before You Start
Punch Unit PU 3030 EU
Punch unit
Punch Unit PU 3030 SC
Output Jogger Unit Type 9002A Output jogger unit
Memory Unit Type J 512MB
SDRAM module
Memory Unit Type O 1GB
Hard Disk Drive Option Type C830 *
1
Hard disk
Gigabit Ethernet Board Type B
Gigabit Ethernet board
Gigabit Ethernet Board Type D
IEEE802.11a/g Interface Unit Type M
IEEE802.11 Interface Unit Type P
Wireless LAN interface board
IEEE802.11a/g Interface Unit Type L
IEEE 1284 Interface Board Type A IEEE 1284 interface board
Camera Direct Print Card Type J Camera direct print card
SD card for NetWare printing Type O NetWare card
VM Card Type U VM card
*1 Available for the Type 1 model only.
Printer Types
This printer comes in two models that have different printing speeds.
When describing procedures that are model-specific, this manual refers to the different printer models as
Type 1 or Type 2. The following table describes the model types.
7
CQT651
1. Getting Started
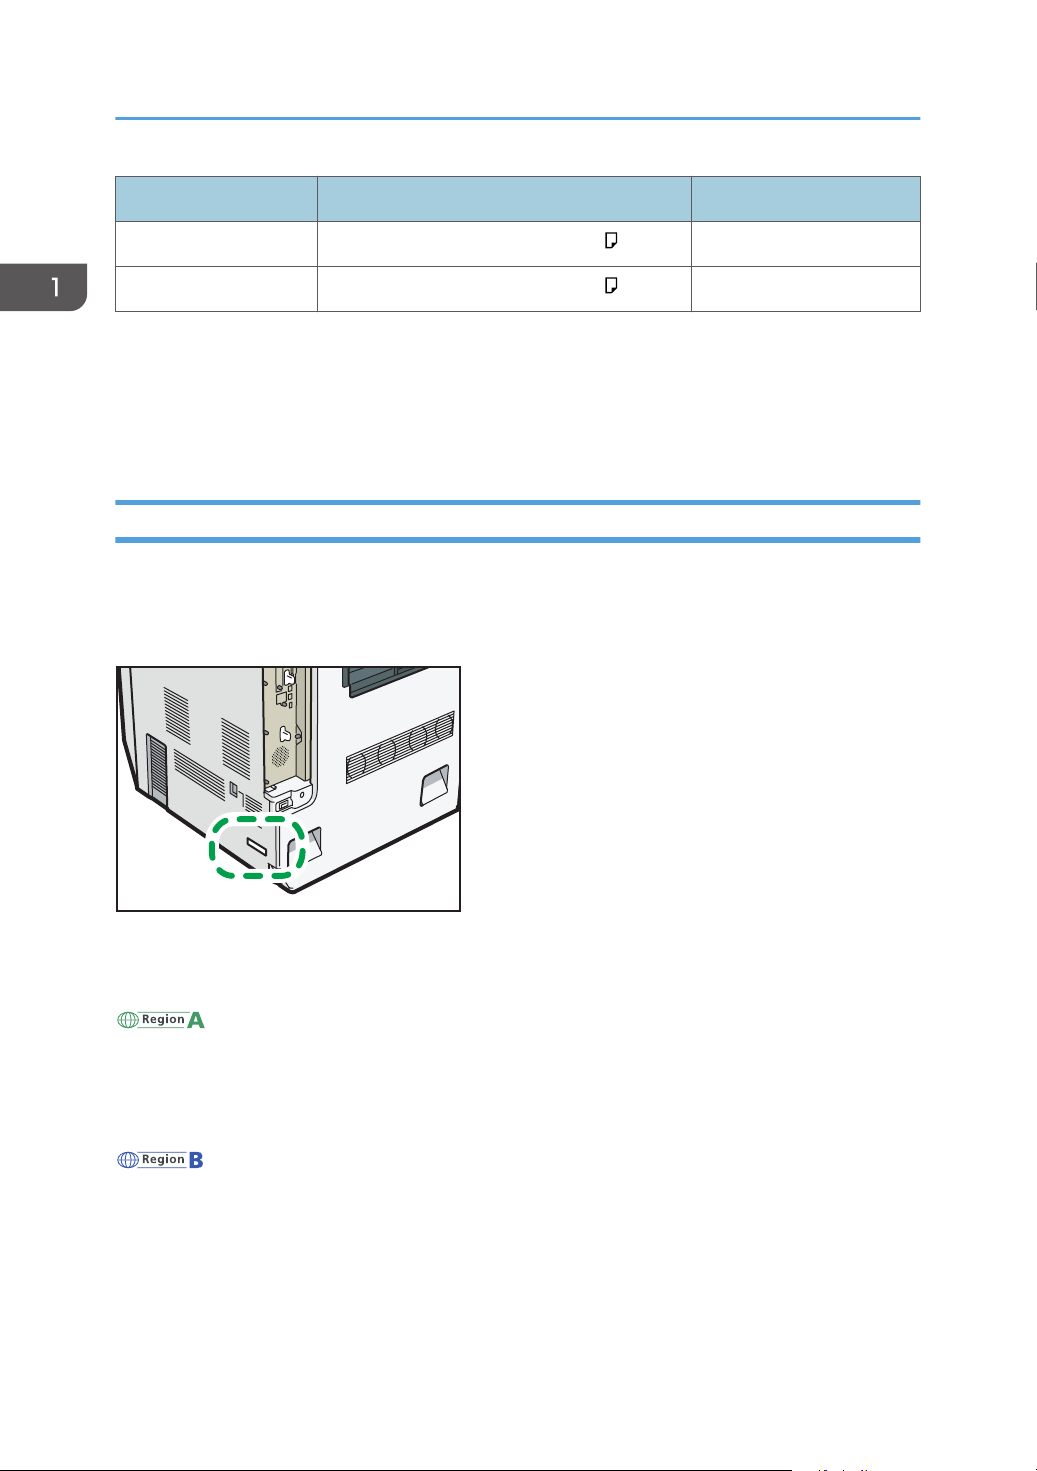
Model types Printing speed Hard disk
Type 1 Maximum 45 pages per minute (A4 ) Optional
Type 2 Maximum 55 pages per minute (A4 ) Standard
Certain types might not be available in some countries. For details, please contact your local dealer.
Certain options might not be available in some countries. For details, please contact your local dealer.
Depending on which country you are in, certain units may be optional. For details, please contact your
local dealer.
Model-Specific Information
This section explains how to identify the region to which your printer belongs.
There is a label on the rear of the printer, located in the position shown below. The label contains details
that identify the region to which your printer belongs. Read the label.
The following information is region-specific. Read the information under the symbol that corresponds to
the region of your printer.
(mainly Europe and Asia)
If the label contains the following, your printer is a region A model:
• CODE XXXX -22, -27, -29
• 220–240 V
(mainly North America)
If the label contains the following, your printer is a region B model:
• CODE XXXX -17
• 120–127 V
8

Before You Start
• Dimensions in this manual are given in two units of measure: metric and inch. If your printer is a
Region A model, refer to the metric units. If your printer is a Region B model, refer to the inch units.
9

1
7 6 5
12
11
10
9
8
2
34
CQT003
1. Getting Started
Guide to Names and Functions of Components
Guide to Components
• Do not obstruct the ventilation holes by placing objects near or against them. If the printer
overheats, a malfunction might occur.
Front and right view
1. Standard output tray
Printed pages are output here.
2. Upper right cover
Open this cover to remove jammed paper.
3. Bypass tray extension
When loading paper larger than A4 , pull out the bypass tray extension. For details about the sizes and
types of paper that can be used, see p.33 "Supported Paper for Each Input Tray".
4. Bypass tray
Up to 100 sheets of plain paper can be loaded.
5. Right cover (Duplex unit)
Open this cover to replace the fusing unit and transfer roller, or to remove jammed paper.
6. Handle
Pull out this handle when lifting the printer.
7. Tray 1, Tray 2
Up to 550 sheets of plain paper can be loaded in each tray.
10
1
10
9
2345
76
8
CQT001
Guide to Names and Functions of Components
8. Front lower cover
Open this cover when replacing the waste toner bottle.
If the " Waste Toner Bottle is full." message appears on the display, replace the waste toner bottle.
9. Power switch
Use this switch to turn the power on or off.
Perform the shutdown procedure before turning the power off. For details about how to shut down the printer,
see p.27 "Turning Off the Power".
10. Front cover
Open this when replacing the toner, black drum unit/color drum units or transfer unit.
11. Control panel
See p.13 "Guide to the Names and Functions of the Printer's Control Panel".
12. Paper support
Extend the paper support when printing on paper larger than A3 .
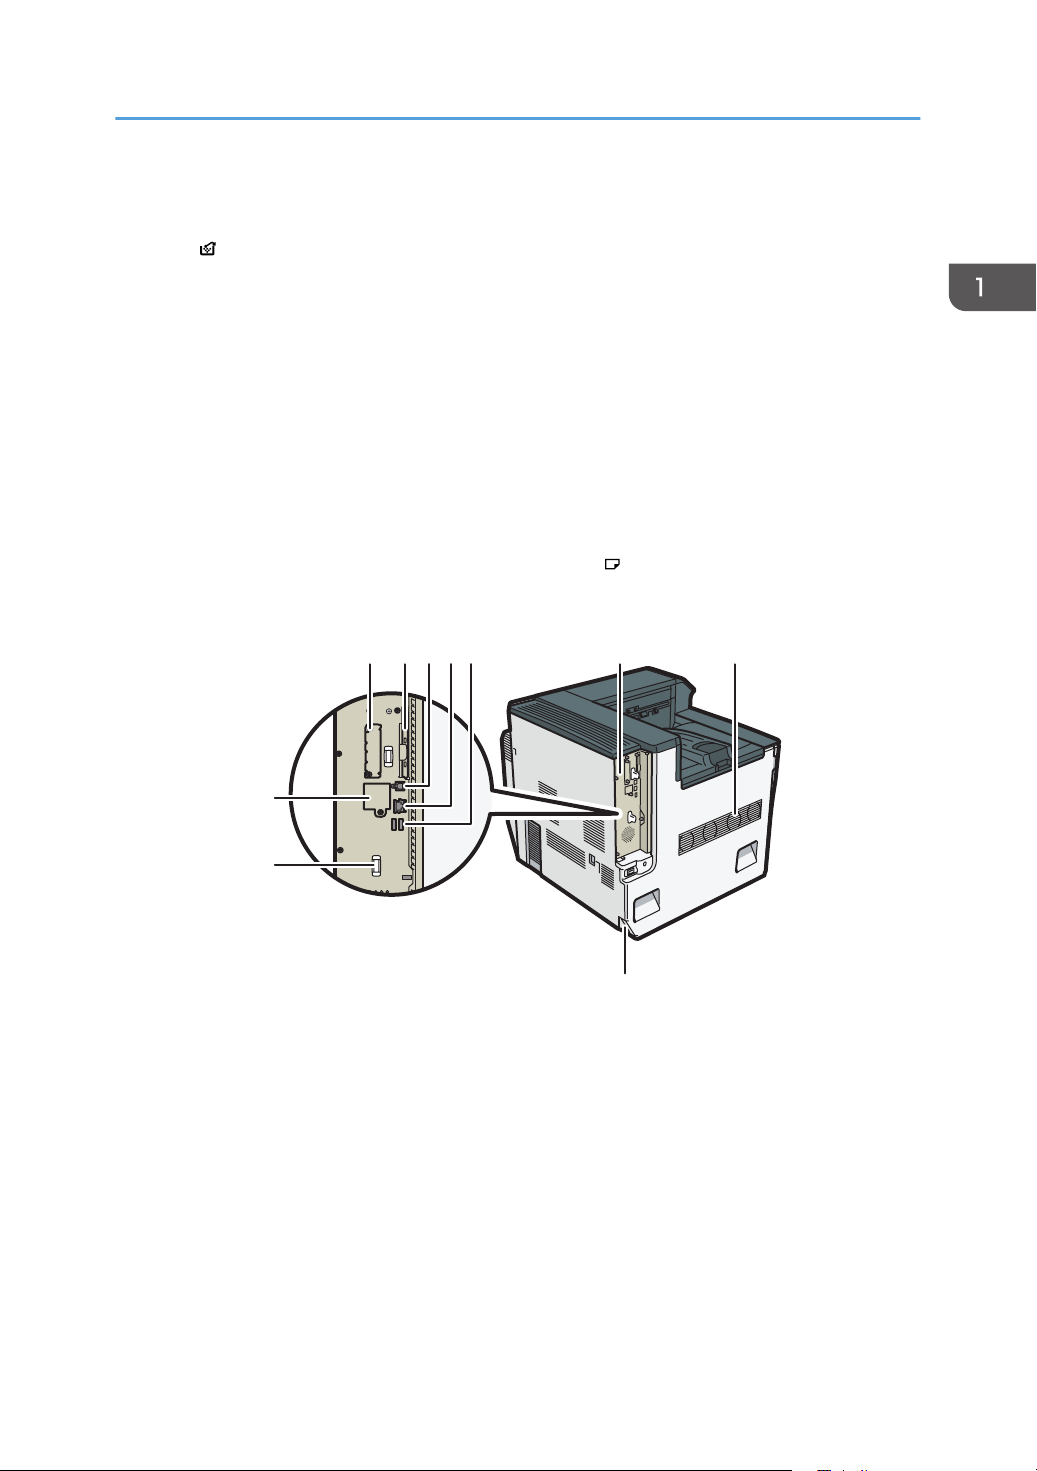
Rear and left view
1. Optional interface board slot
Optional interface boards can be inserted.
Insert an optional wireless LAN interface board or IEEE 1284 interface board.
2. Expansion card slots
Remove the cover to install SD cards.
3. USB port B
Use a USB cable to connect the printer to a host computer.
4. Ethernet port
Use a network interface cable to connect the printer to a network.
11
3 2
1
6
5
4
CQT004
1. Getting Started
5. USB port A
Connect external devices such as a digital camera, a card authentication device, etc.
6. Controller board
Slide this out to install options such as the SDRAM module, hard disk, or Gigabit Ethernet board.
7. Ventilator
Releases heat from internal components to prevent overheating. Do not place objects against or near these
holes. Doing so might result in printer malfunction.
8. Power connector
Connect the power cord to the printer. Insert the other end into an electrical outlet.
9. Handle
Hold this handle when pulling out the controller board.
10. Optional Gigabit Ethernet board port
By removing this cover and installing the optional Gigabit Ethernet board, you can connect an Ethernet cable
to the port on the Gigabit Ethernet board.
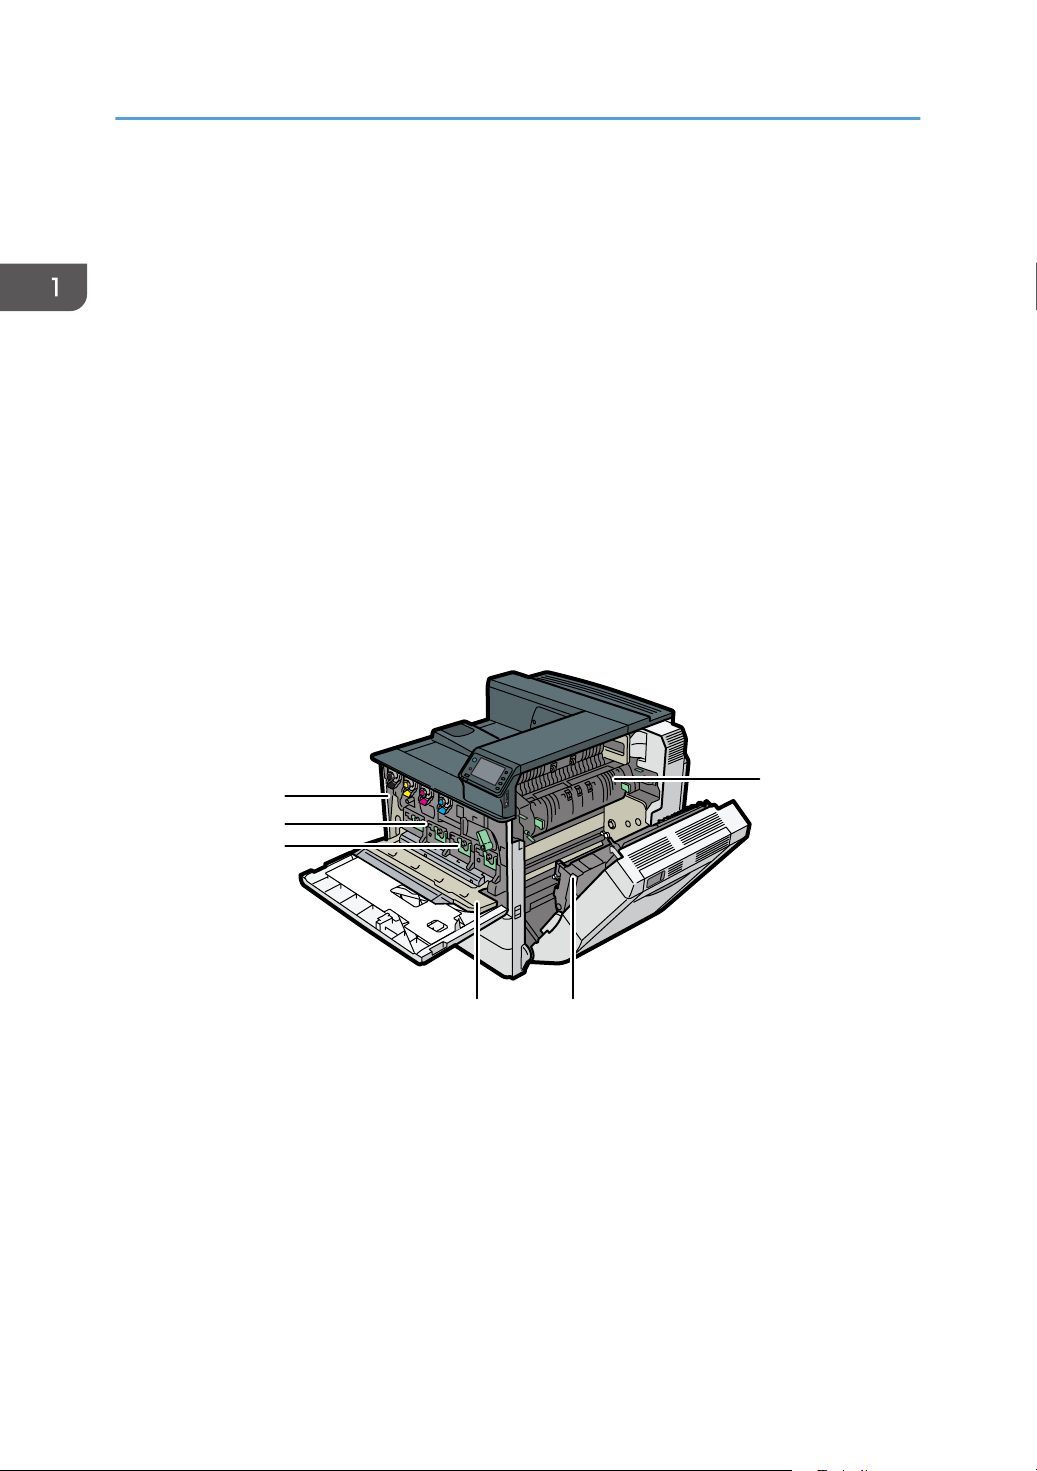
Interior
1. Fusing unit
Replace the fusing unit when the following message appears:
• "Replacement of Fusing Unit is now necessary. Replace Fusing Unit."
Replace the fusing unit and the transfer roller together.
2. Transfer roller
Replace the transfer roller when the following message appears:
• "Replacement of Fusing Unit is now necessary. Replace Fusing Unit."
Replace the transfer roller and the fusing unit together.
12

Guide to Names and Functions of Components
3. Inner cover
Open this cover when replacing the black drum unit/color drum units or transfer unit.
4. Black drum unit / Color drum units
From the left, the drum units are installed in the order of black (K), yellow (Y), magenta (M), and cyan (C).
Replace the relevant black drum unit/color drum units when the following message appears:
• "Replacement of Color Photoconductor Unit is now necessary. Replace Color Photoconductor Unit."
• "Replacement of Black Photoconductor Unit is now necessary. Replace Black Photoconductor Unit."
5. Transfer unit
Replace the transfer unit when the following message appears:
• "Replacement of Transfer Unit is now necessary. Replace Transfer Unit."
6. Toner
From the left, the toner is installed in the order of black (K), yellow (Y), magenta (M), and cyan (C).
Replace the relevant toner when the following message appears:
• " No toner. Replace Toner Cartridge."
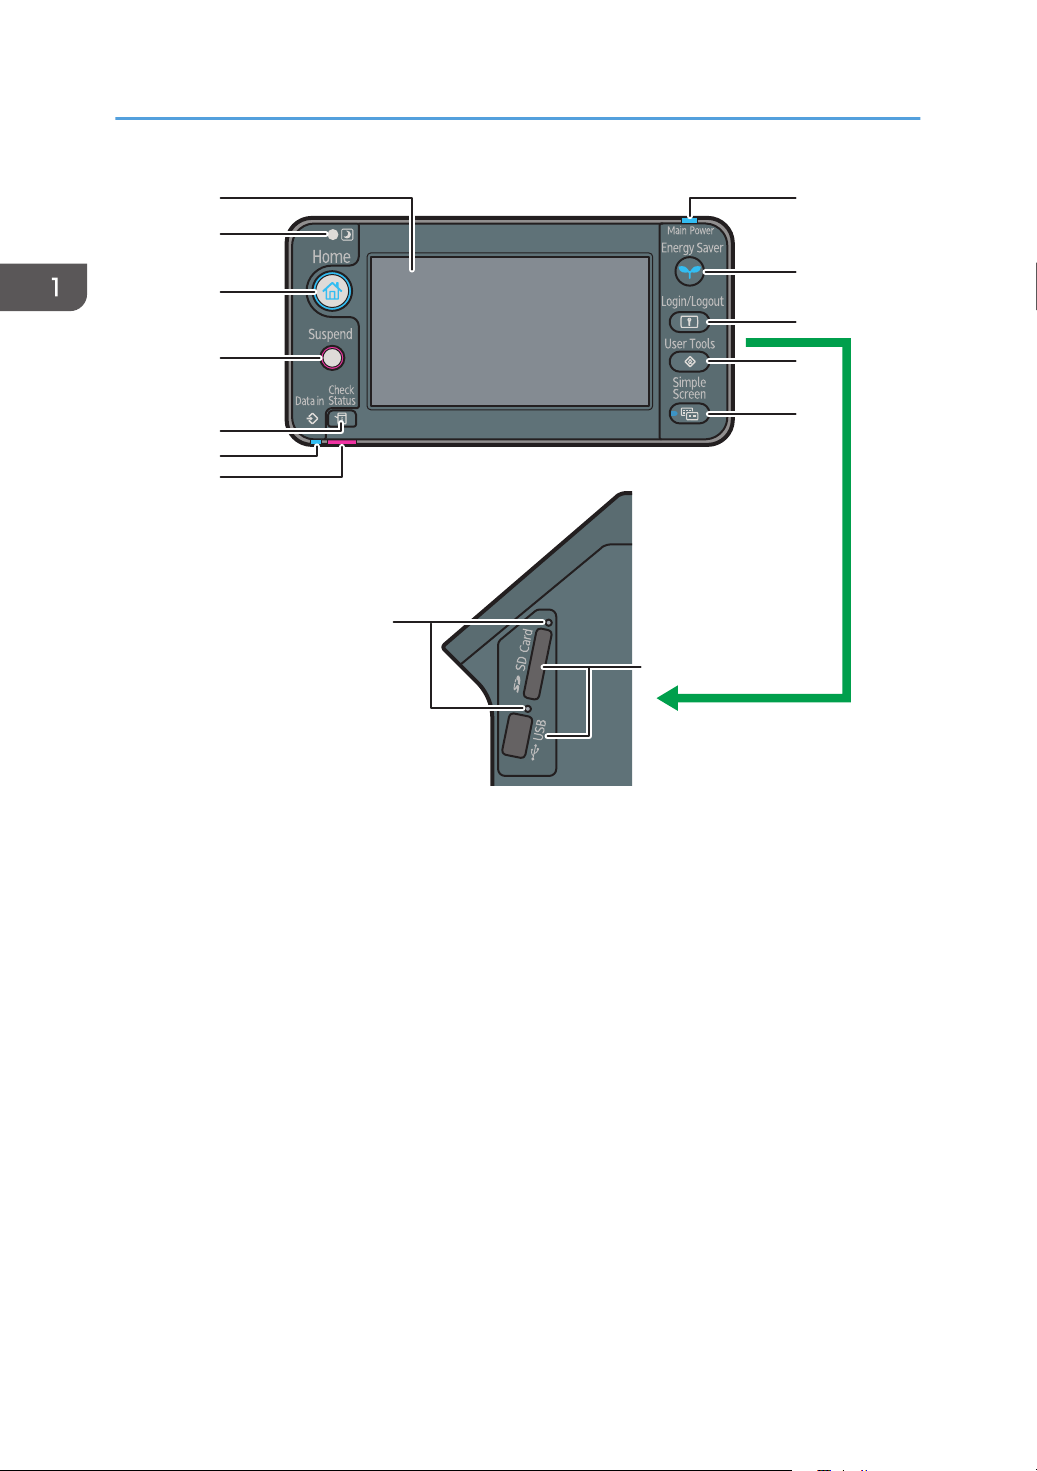
Guide to the Names and Functions of the Printer's Control Panel
This illustration shows the control panel of the printer with options fully installed.
13
1
2
3
4
5
6
7
8
9
13
10
11
12
14
CQT135
1. Getting Started
1. Display panel
Displays keys for each function, operation status, or messages. See p.18 "How to Use the Screens on the
Control Panel".
2. Light Sensor
The sensor that detects the ambient light level when the ECO Night Sensor function is enabled.
3. [Home] key
Press to display the [Home] screen. For details, see p.16 "How to Use the [Home] Screen".
4. [Suspend] key
Press this key to suspend a print job. The key lights up while the job is suspended.
5. [Check Status] key
Press to check the printer's system status, operational status of each function, and current jobs. You can also
display the job history and the printer's maintenance information.
6. Data In indicator
Flashes when the printer is receiving print jobs from a computer. The data in indicator is lit if there is data to be
printed.
7. Check Status indicator
Lights up or flashes when a printer error occurs.
14

Guide to Names and Functions of Components
Steady red: printing is not possible.
Flashing yellow: the printer will soon require maintenance or a replacement consumable such as a print
cartridge. Printing is possible, but print quality cannot be ensured.
Follow the instructions that appear on the display.
8. Power indicator
Remains lit while the power is on. It is unlit when the power is off or while the printer is in energy saver mode.
9. [Energy Saver] key
Press to switch to and from Sleep mode. See p.28 "Saving Energy". When the printer is in Sleep mode, the
[Energy Saver] key flashes slowly.
10. [Login/Logout] key
Press to log in or log out.
11. [User Tools] key
Press to change the default settings to meet your requirements. See "Displaying the Printer Configuration
Screens Using the Control Panel", Operating Instructions.
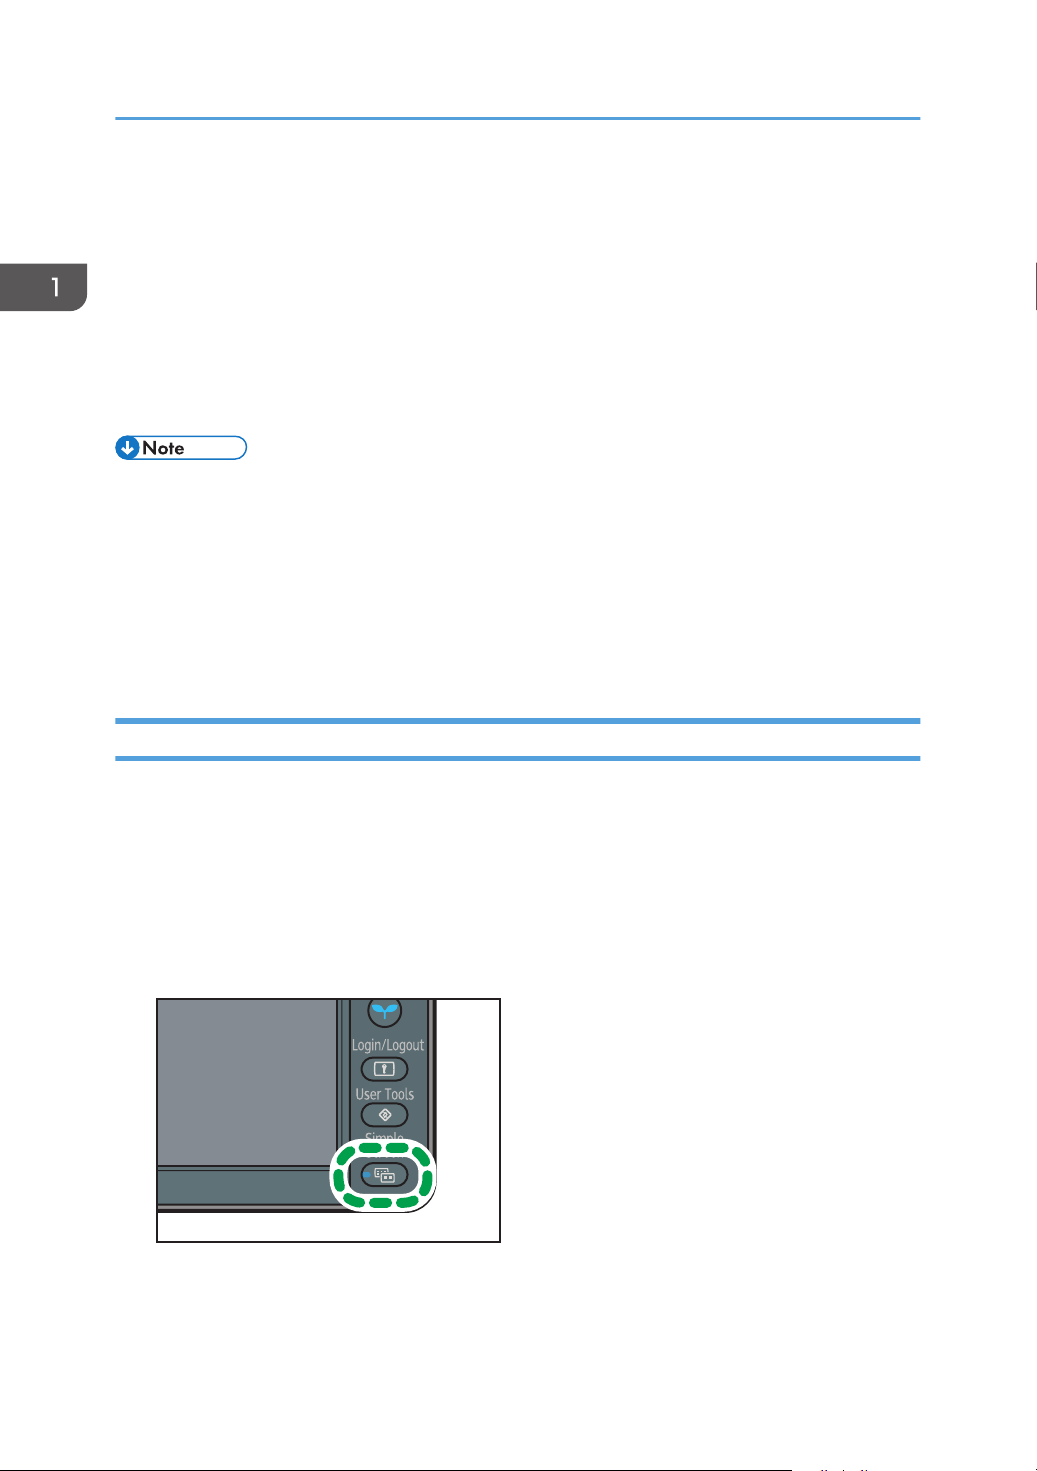
12. [Simple Screen] key
Press to switch to the simple screen. See p.20 "Switching Screen Patterns".
13. Media access lamp
Lights up when a memory storage device is inserted in the media slot or accessed.
14. Media slots
Use to insert an SD card or a USB flash memory device.
15
1
2
3
Touch the display panel
Press the [Home] key
CQT660
1. Getting Started
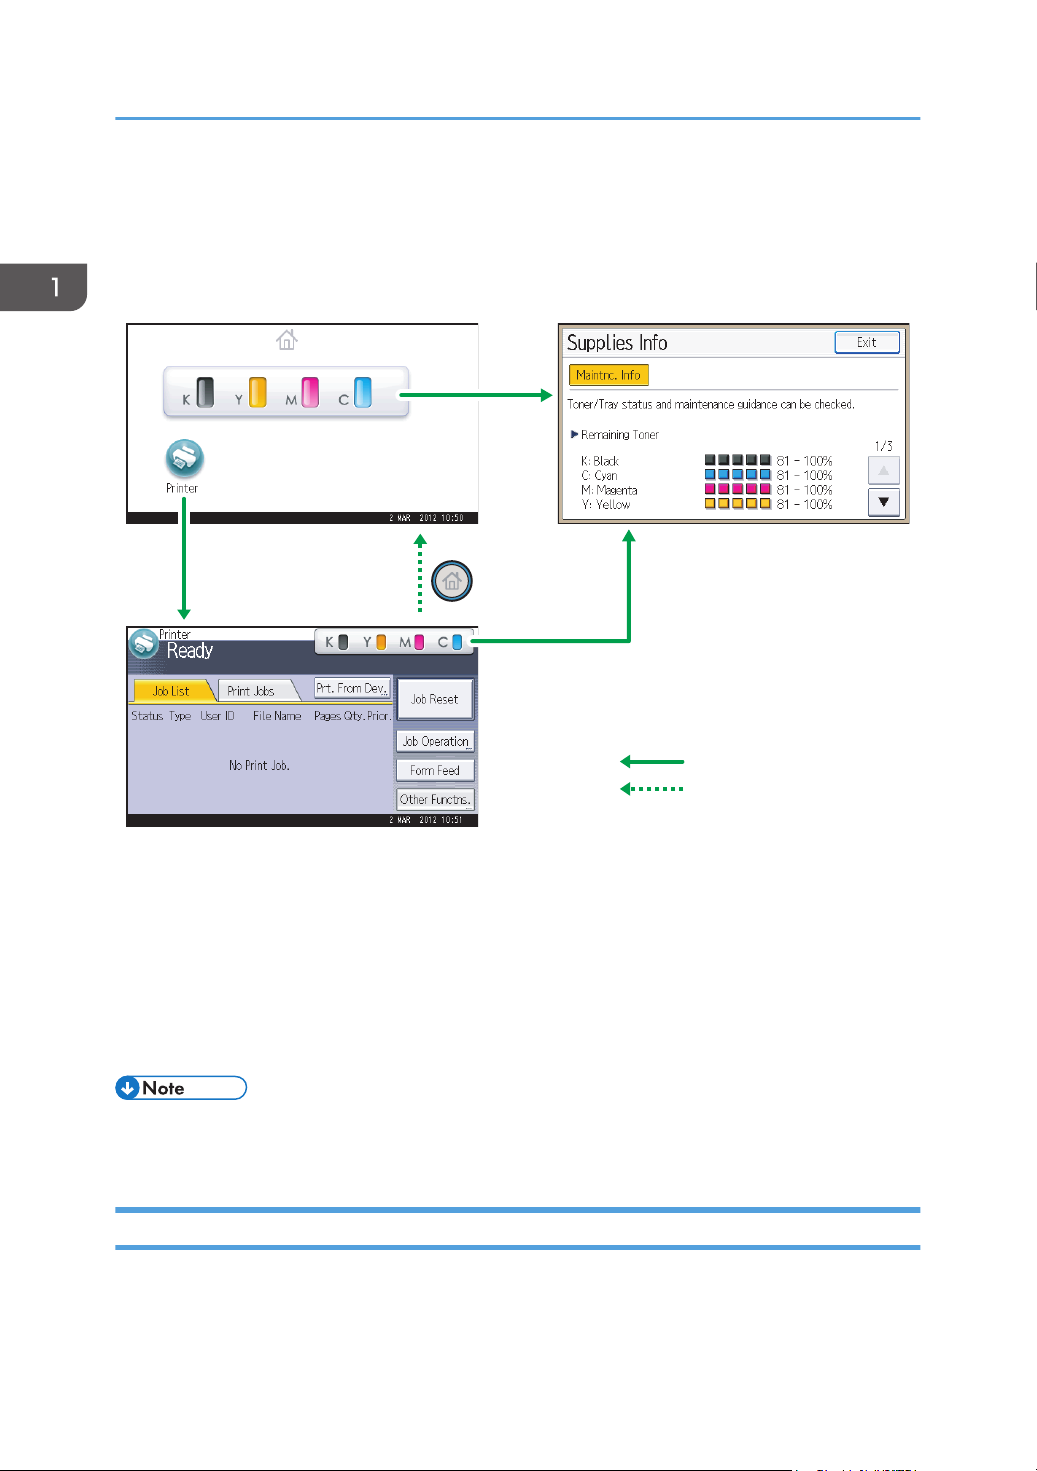
Using the Screen on the Control Panel
This section describes how to use the screen on the control panel.
1. [Home] screen
Displays function and shortcut icons. For details, see p.16 "How to Use the [Home] Screen".
2. [Printer] screen
Displays operation status, messages, and function menus. For details, see p.18 "How to Use the Screens on
the Control Panel".
3. [Supplies Info] screen
Allows you to check the printer status, such as toner, paper, and waste toner levels.
• The [Home] screen is set as the default screen when the printer is turned on. You can change this
default setting under Function Priority. See "System Settings", Operating Instructions.
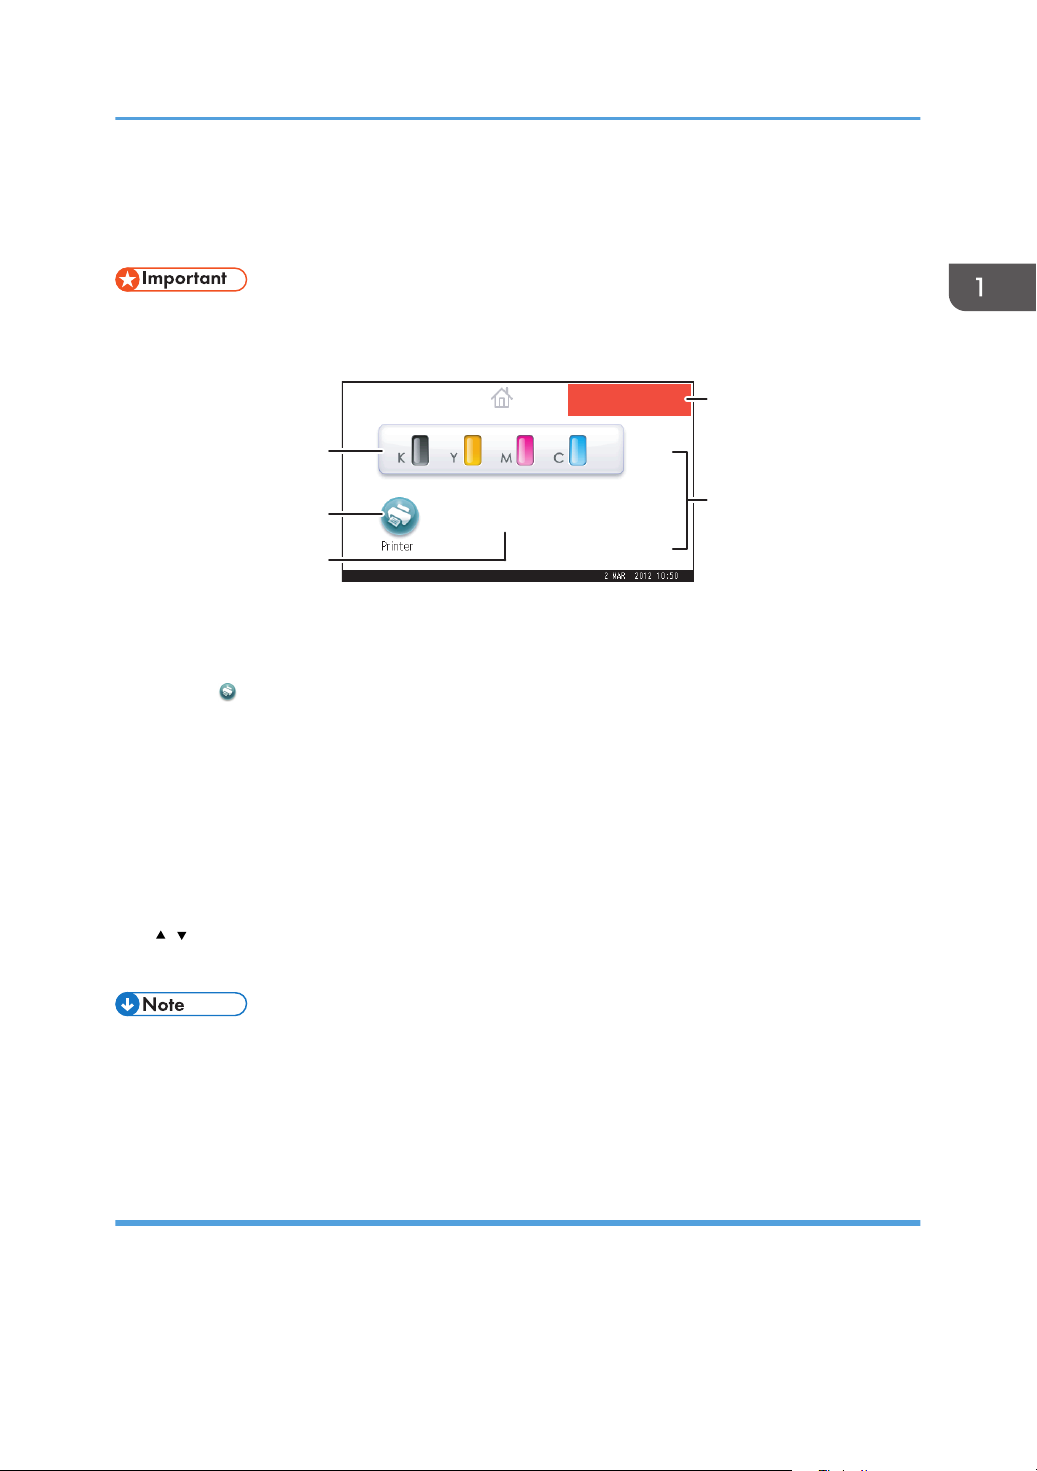
How to Use the [Home] Screen
To display the [Home] screen, press the [Home] key.
The icons of each function are displayed on the [Home] screen.
16
CQT658
5
1
2
3
4
Using the Screen on the Control Panel
You can add shortcuts to frequently used embedded software applications to the [Home] screen. The
icons of added shortcuts appear on the [Home] screen. The embedded software applications can be
recalled easily by pressing the shortcut icons.
• Do not apply strong impact or force to the screen. Otherwise, it may be damaged. Maximum force
allowable is approx. 30 N (approx. 3 kgf). (N = Newton, kgf = Kilogram force. 1 kgf = 9.8 N.)
1. Supply Information icon
Press to display the [Supplies Info] screen to check toner, paper, and waste toner levels.
2. [Printer]
Press to display the [Printer] screen.
3. Shortcut icon area
You can add shortcuts to embedded software applications to the [Home] screen. For details about how to
register shortcuts, see "Adding icons to the [Home] screen", Operating Instructions.
4. Home screen image
You can display an image such as a corporate logo on the [Home] screen. To change the image, see
"Displaying the image on the [Home] screen", Operating Instructions.
5. /
Press to switch pages when the icons are not displayed on one page.
• When an embedded software application is installed, a function icon for the application is
displayed on the [Home] screen.
• You can change the order of icons. For details, see "Changing the order of icons on the [Home]
screen", Operating Instructions.
System Reset
After finishing a job, the printer waits a specified length of time and then restores its settings to the default
values specified under Function Priority. This function is called "System Reset". For the procedure for
specifying default settings under Function Priority, see "System Settings", Operating Instructions.
17
1
4
2
8
5
3
6
7
QCT662
1. Getting Started
To change the length of time that the printer waits before restoring its settings to their default values, use
the System Auto Reset Timer setting. See "System Settings", Operating Instructions.
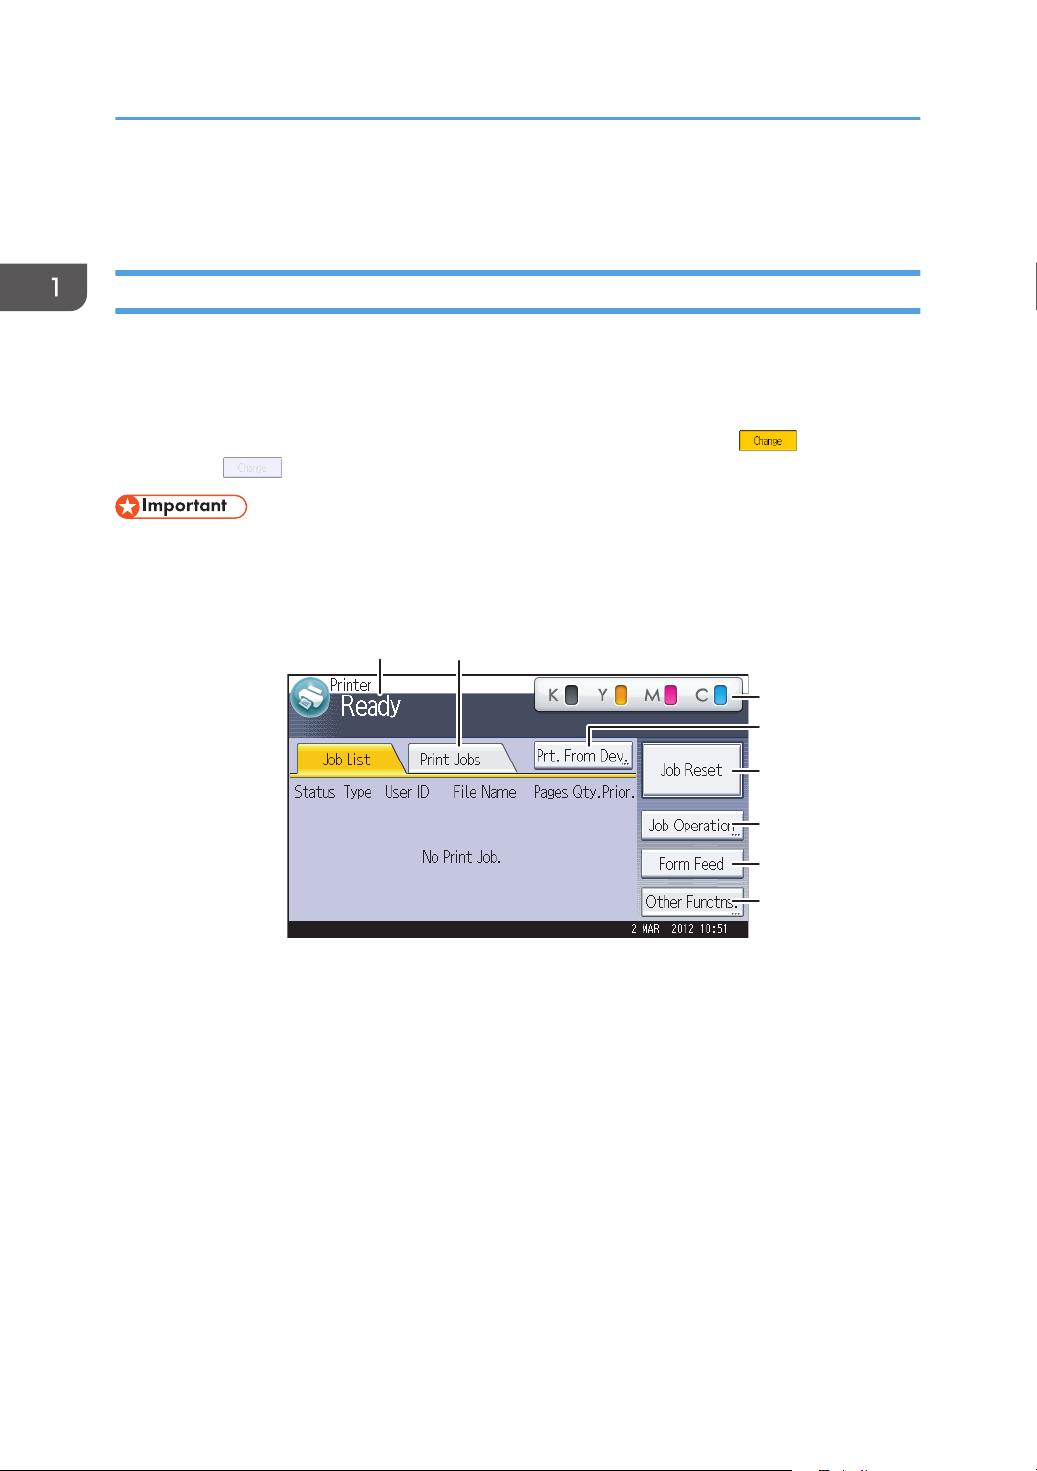
How to Use the Screens on the Control Panel
The display panel shows the operation status, messages, and function menus.
The function items displayed serve as selector keys. You can select or specify an item by lightly pressing
them.
When you select or specify an item on the display panel, it is highlighted such as . Keys
appearing as cannot be used.
• Do not apply strong impact or force to the screen. Otherwise, it may be damaged. Maximum force
allowable is approx. 30N (approx. 3 kgf). (N = Newton, kgf = Kilogram force. 1 kgf = 9.8N.)
The [Home] screen is set as the default screen when the printer is turned on.
18
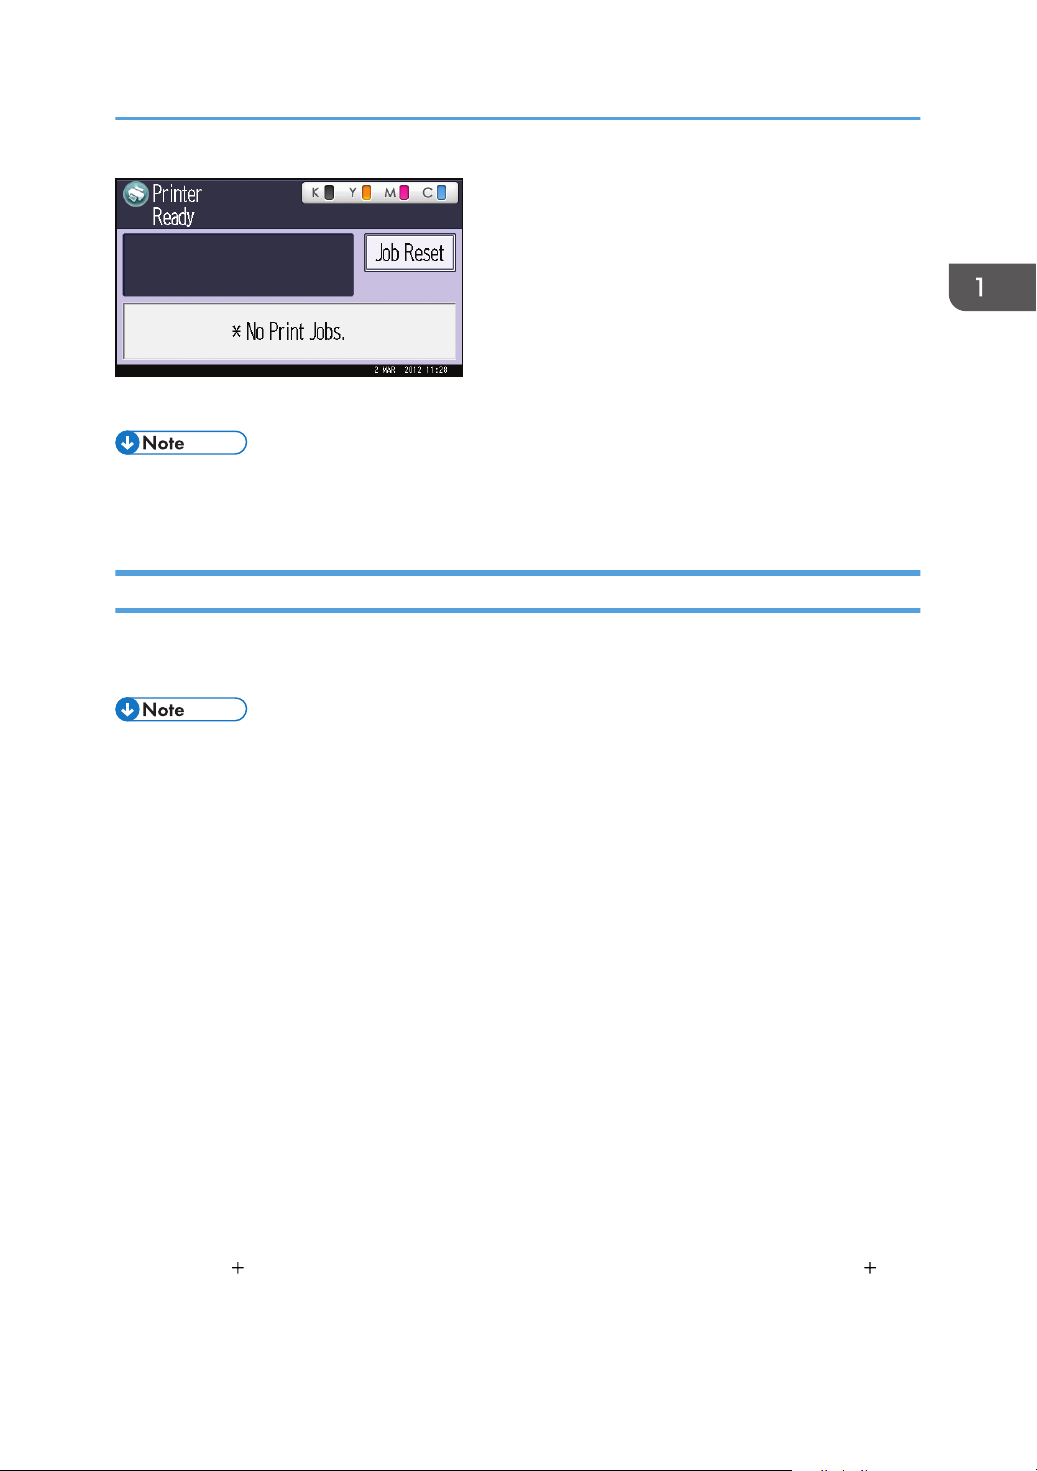
1. Operational status or messages
Displays current printer status, such as "Ready", "Offline", and "Printing...". Information about the print job
(user ID and document name) appears in this section.
2. [Print Jobs]
Press to display print jobs sent from a computer.
3. Supply Information
4. [Prt. From Dev.]
5. [Job Reset]
You can check the remaining toner. Press to display the [Supplies Info] screen.
Press to display the screen for printing files stored on memory storage devices directly.
Press to cancel the current print job.
If you press it when the Hex Dump is selected, Hex Dump is canceled.
CQT200
1
2
3
4
5
6
Using the Screen on the Control Panel
6. [Job Operation]
Press to suspend a job being processed.
7. [Form Feed]
Press to print all the data left in the printer's input buffer.
8. [Other Functns.]
Press to display the error logs and status of spooled jobs.
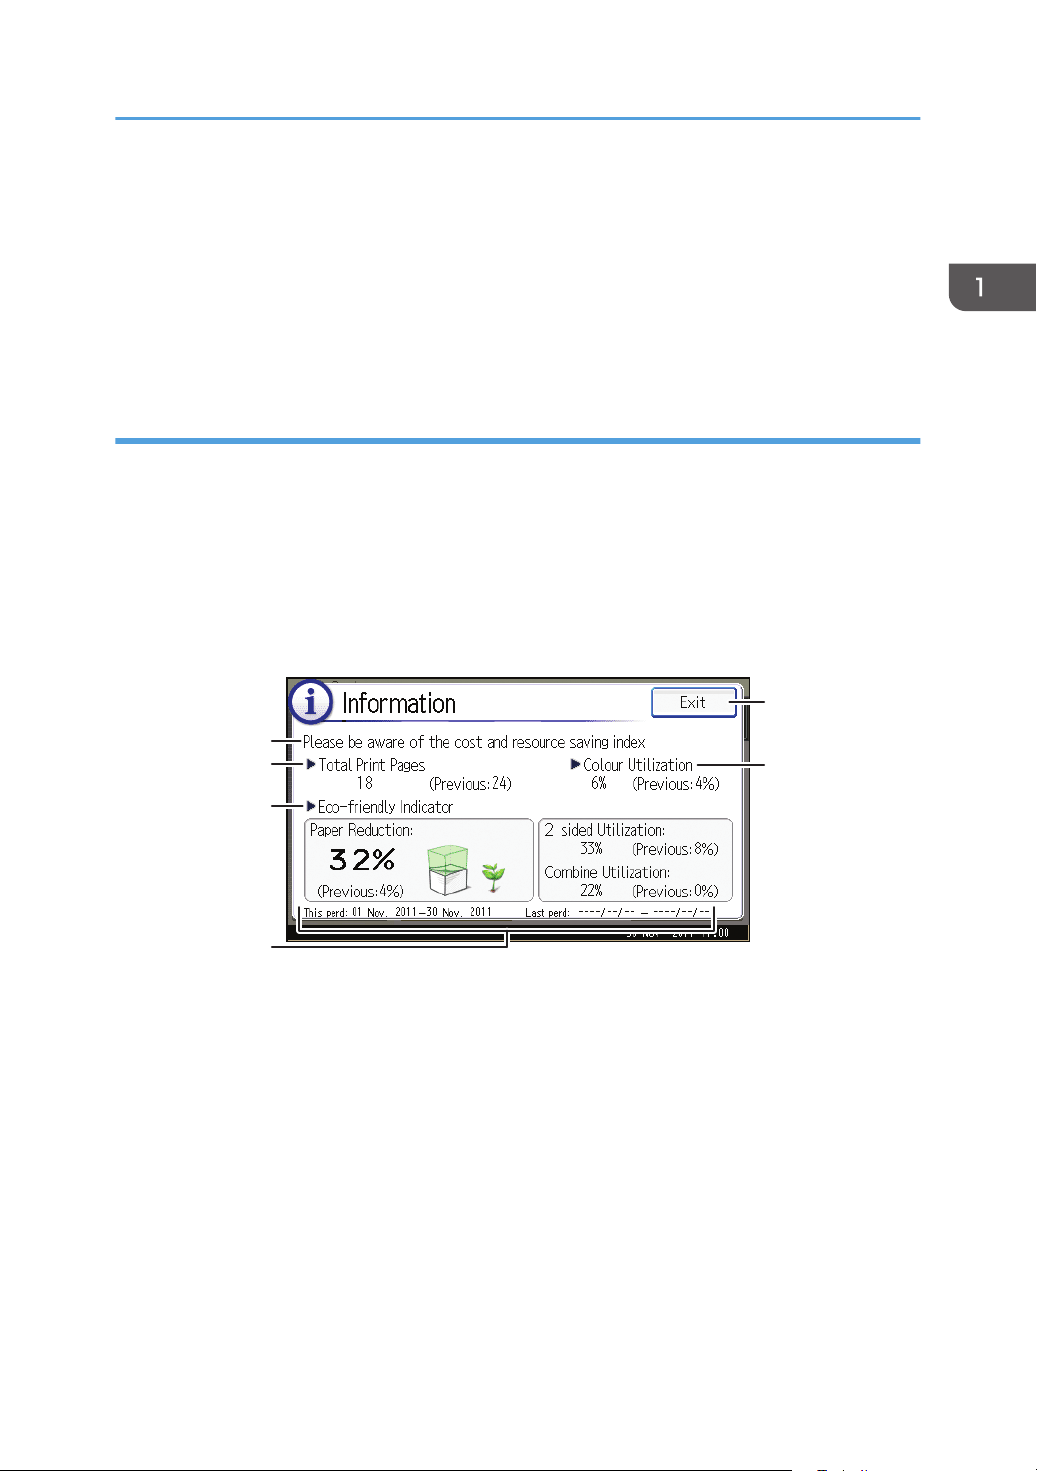
How to use the [Information] screen
To improve user’s environmental consciousness, you can configure the printer to notify users how much
they have conserved paper usage by utilizing various paper conserving function of the printer.
The color utilization ratio is also displayed on the [Information] screen.
When user authentication is enabled, the screen is displayed when you log in to the printer. When user
authentication is not enabled, the screen is displayed after returning from Sleep mode or after a system
reset. The [Information] screen appears when the power is turned on, regardless of the authentication
settings.
1. Message
A message from the administrator is displayed.
2. Total Print Pages
Total number of pages printed in the current count period and the previous count period are displayed.
3. Eco-friendly Indicator
• Paper Reduction:
Shows the amount of paper saved by using the duplex and combine printing functions. The value
indicates the percentage of paper saved from the total of all the paper used. As the percentage
increases, the stack of paper decreases and the flower grows. When the ratio is 76% or more, the
flower starts to bloom.
• 2 sided Utilization:
The ratio of 2-sided prints to the total number of prints is displayed.
19
CQT663
1. Getting Started
• Combine Utilization:
The ratio of combined prints to the total number of prints is displayed.
4. Count periods
The current and previous count periods are displayed.
5. [Exit]
Press this to close the [Information] screen and return to operation.
6. Color Utilization
The ratio of color prints to the total number of prints is displayed.
• Depending on the printer settings, the [Information] screen may not be displayed. For details, see
Security Guide.
• You can also use Web Image Monitor to check the usage status. For details about how to check
them, see Web Image Monitor Help.
• Under [Eco-friendly Counter Period/Administrator Message] in [System Settings], you can check
"Count Period", "Administrator Message", "Display Information Screen", and "Display Time". Only
the administrator can change the settings. For details, see Security Guide.
Switching Screen Patterns
This section explains how to switch to the simple screen and the keys that are displayed.
When you press the [Simple Screen] key, the screen changes from the initial display to the simple
screen.
Only the main functions are presented on the simple screen.
Letters and keys are displayed at a larger size, making operations easier.
1. Press the [Simple Screen] key.
This illustration shows the simple display of the [Printer] screen.
20
Using the Screen on the Control Panel
To increase the screen contrast, press the [Simple Screen] key again.
• To return to the initial display from the high contrast screen, press the [Simple Screen] key again.
• Certain keys do not appear on the simple screen.
Adding Icons to the [Home] Screen
You can also review icons of functions and embedded software applications that you deleted from the
[Home] screen.
• Shortcut names of up to 32 characters can be displayed in a standard screen. If the name of the
shortcut is longer than 32 characters, the 32nd character is replaced with "...". Only 30 characters
can be displayed in a simple screen. If the name of the shortcut is longer than 30 characters, the
30th character is replaced with "...".
• You can register up to 72 function and shortcut icons. Delete unused icons if the limit is reached. For
details see "Deleting an icon on the [Home] screen", Operating Instructions.
• You can change the position of icons. For details, see "Changing the order of icons on the [Home]
screen", Operating Instructions.
In the following procedure, a shortcut to an embedded software application is registered to the [Home]
screen.
For using Web Image Monitor
1. Log in to Web Image Monitor as an administrator.
For details, see "Displaying the Printer Configuration Screens Using a Web Browser", Operating
Instructions.
2. Point to [Device Management], and then click [Device Home Management].
3. Click [Edit Icons].
4. Point to [ Icon can be added.] of the position that you want to add, and then click [
Add].
5. Select the function or shortcut icon you want to add.
21
1. Getting Started
6. Click [OK] four times.
For using User Tools
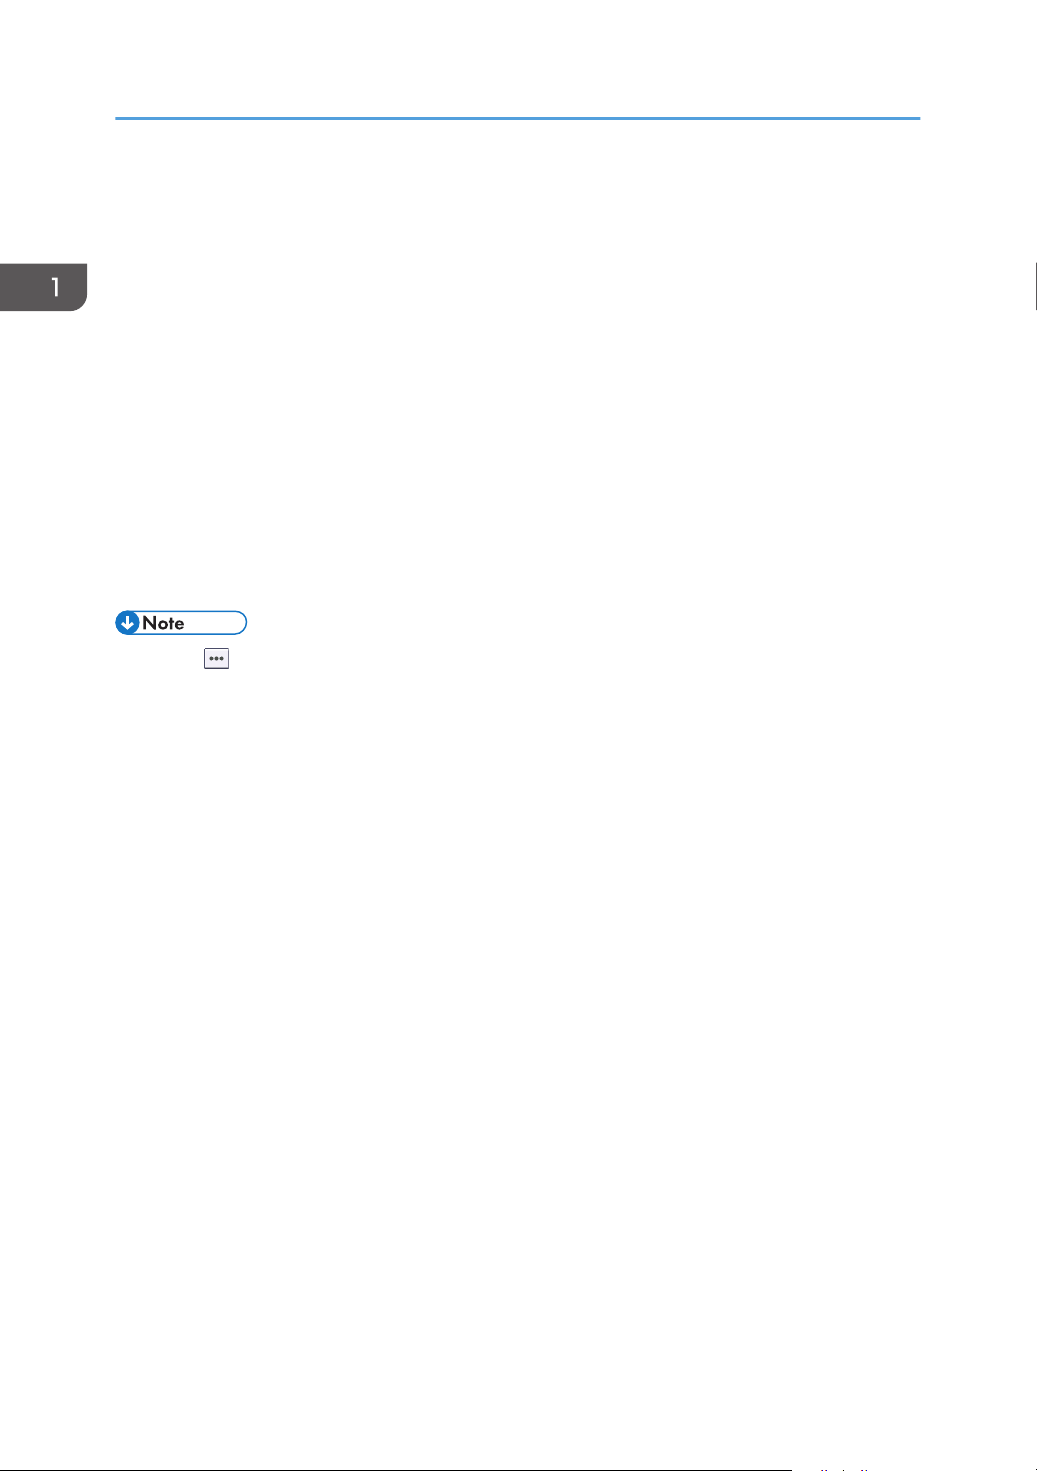
1. Press [Add Icon] in the [Edit Home] screen.
For details about how to access the [Edit Home] screen, see "Displaying the Printer Configuration
Screens Using the Control Panel", Operating Instructions.
2. Press [Select Icon to Add].
3. Press [Application].
4. Select the application you want to add.
5. Press [Select Destination].
6. Specify the position where [Blank] is displayed.
7. Press [Exit].
8. Press the [User Tools] key.
• Press [ ] on the upper-right corner of the [Select Destination] screen to check the position on the
simple screen.
22
Logging in the Printer
Logging in the Printer
This section describes how to log in to the printer.
If Basic Authentication, Windows Authentication, LDAP Authentication, or Integration Server
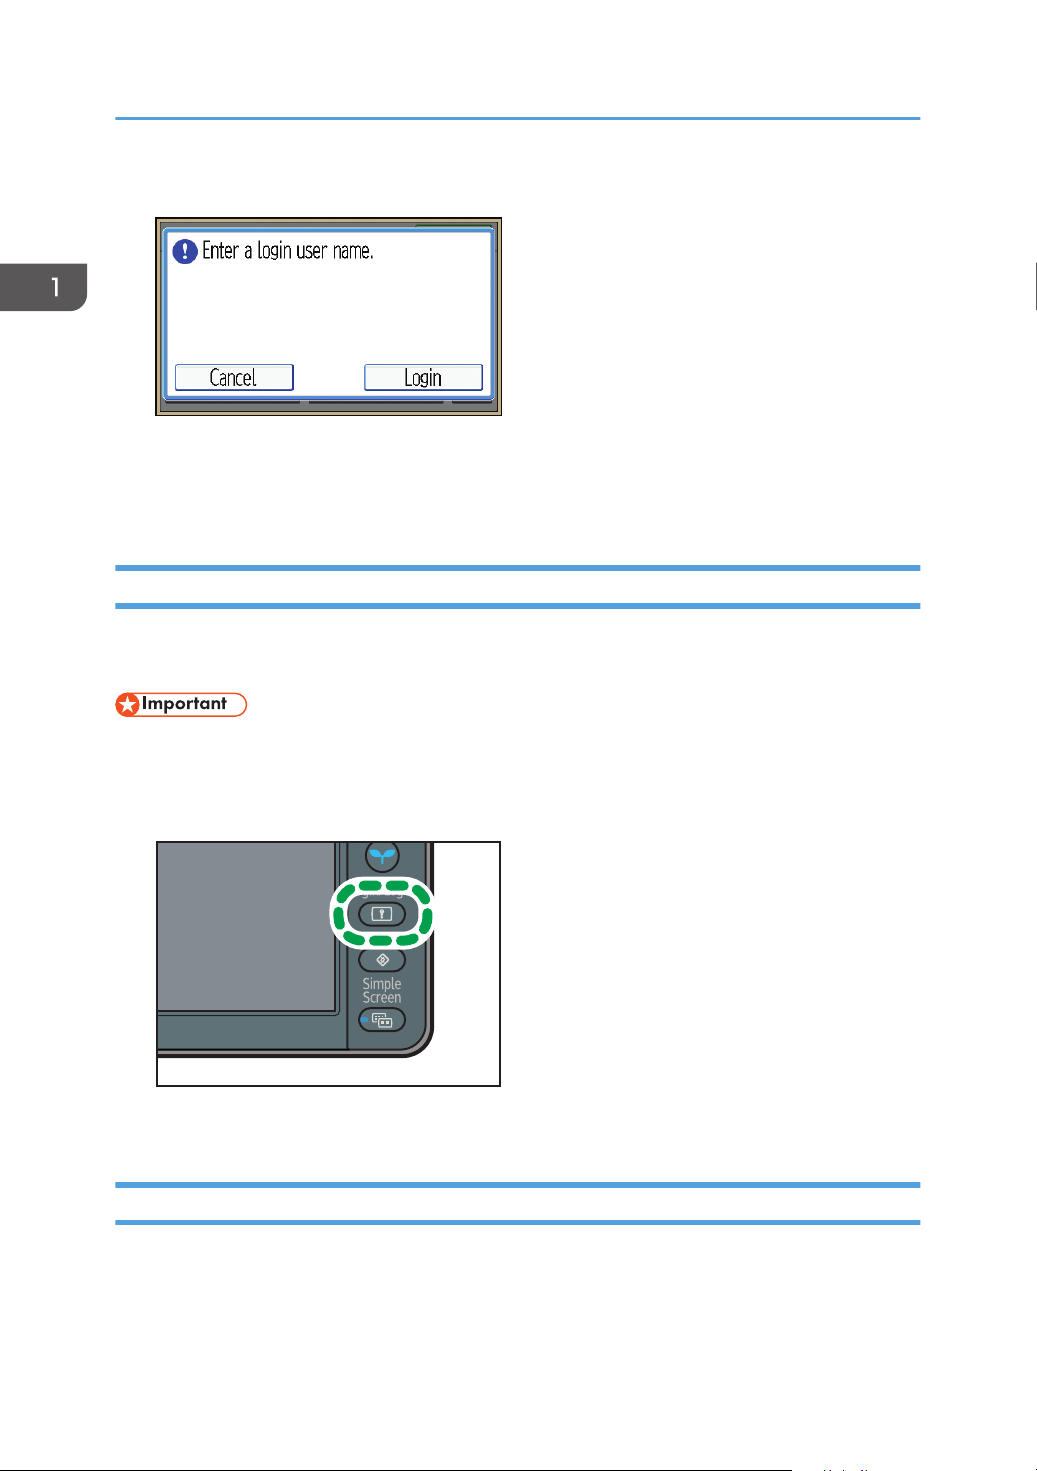
Authentication is enabled, the authentication screen appears on the display. The printer only becomes
operable after entering your own Login User Name and Login Password. If User Code Authentication is
enabled, you cannot use the printer until you enter the User Code.
If you can use the printer, you are logged in. When you exit the operable state, you are logged out. Be
sure to log out to prevent unauthorized usage.
• Ask the user administrator for the Login User Name, Login Password, and User Code. For details
about user authentication, see Security Guide.
User Code Authentication Using the Control Panel
This section explains the procedure for logging in to the printer using the control panel while User Code
Authentication is enabled.
If User Code Authentication is enabled, a screen prompting you to enter a User Code appears.
1. Enter a User Code (up to eight digits), and then press [OK].
• To log out, press the [Energy Saver] key after jobs are completed.
User Code Authentication Using a Printer Driver
This section explains the procedure for logging in to the printer using a printer driver while User Code
Authentication is enabled.
If User Code Authentication is enabled., specify the User Code in the printer properties of the printer
driver. For details, see the printer driver Help.
• The PCL printer driver supports User Code Authentication.
• When logged in using User Code Authentication, you do not have to log out.
Logging In Using the Control Panel
This section explains the procedure for logging in when Basic Authentication, Windows Authentication,
LDAP Authentication, or Integration Server Authentication is enabled.
23
CQT599
1. Getting Started
1. Press [Login].
2. Enter a Login User Name, and then press [OK].
3. Enter a Login Password, and then press [OK].
When the user is authenticated, the screen for the function you are using appears.
Logging Out Using the Control Panel
This section explains the procedure for logging out when Basic Authentication, Windows Authentication,
LDAP Authentication, or Integration Server Authentication is enabled.
• To prevent use of the printer by unauthorized persons, always log out when you have finished
using the printer.
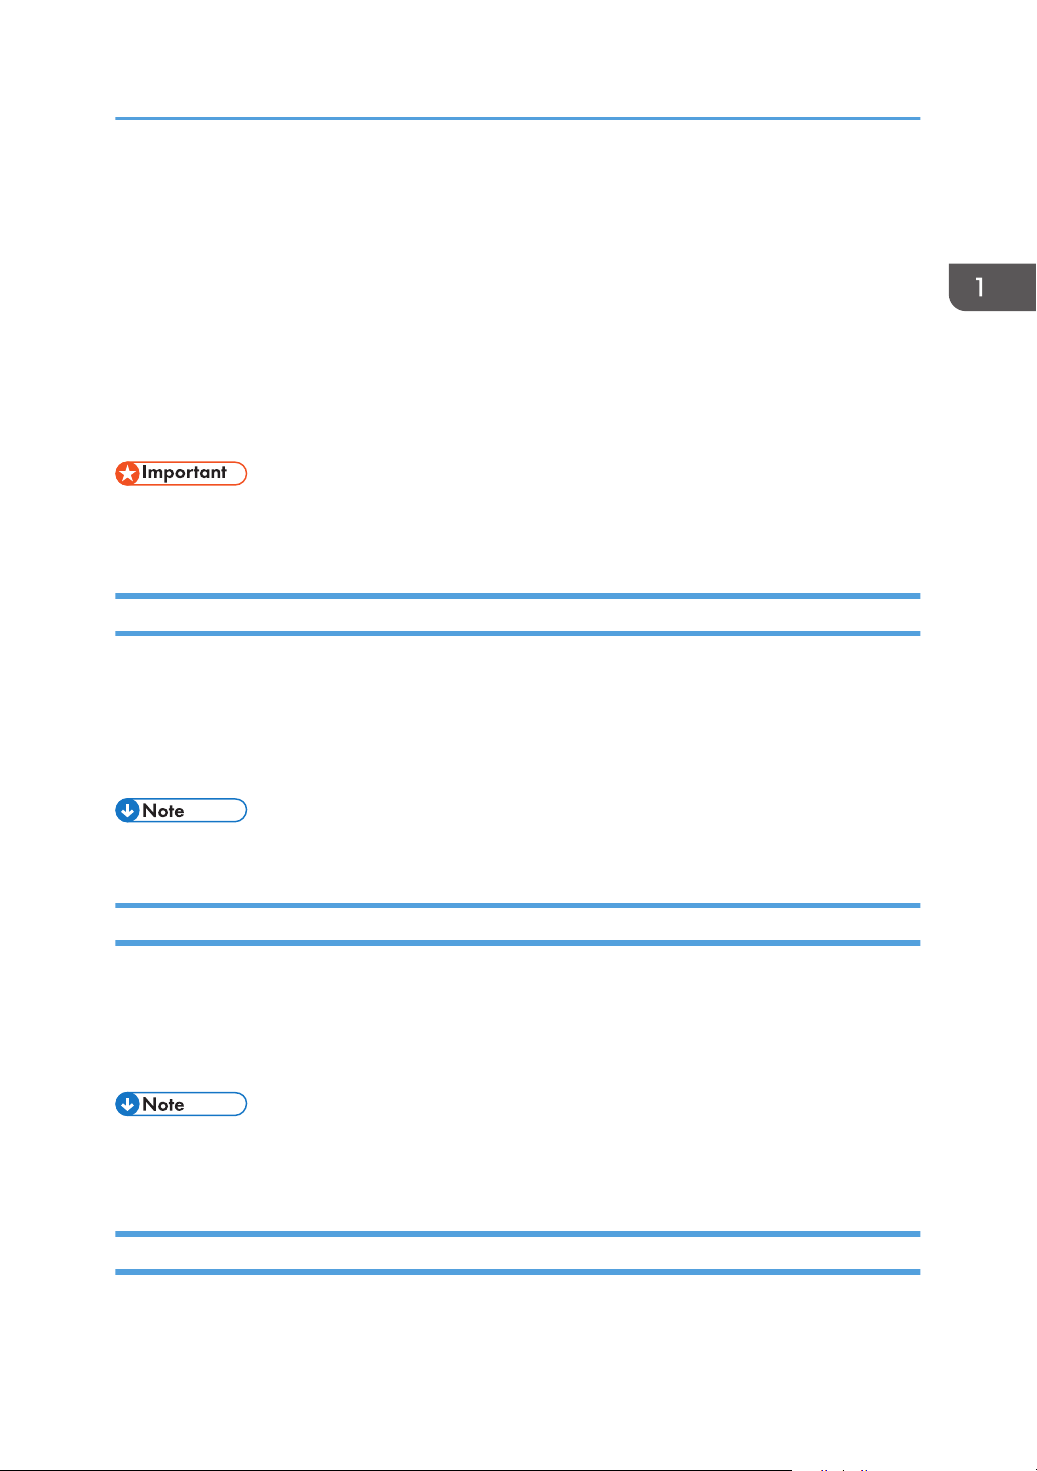
1. Press the [Login/Logout] key.
2. Press [Yes].
Logging In Using a Printer Driver
Enter your login user name and password as registered in the printer. You need only do this the first time
you access the printer.
The PCL printer driver supports User Code Authentication.
24
Logging in the Printer
The procedure is explained using Windows 7 as an example.
1. Open the printer properties dialog box, and then click the [Advanced Options] tab.
For details about displaying the printer properties dialog box, see p.30 "Displaying the Printer
Driver Properties with Windows".
2. Select the [User Authentication] check box.
3. If you want to encrypt the login password, click [Driver Encryption Key...].
If you do not want to encrypt the password, proceed to step 6.
4. Enter the driver encryption key already set on the printer.
5. Click [OK] to close the [Driver Encryption Key] dialog box.
6. Click [OK] to close the printer properties dialog box.
7. Open the printing preferences dialog box.
8. Specify the user authentication setting.
If you are using the PCL 5c printer driver, click the [Valid Access] tab, and then click
[Authentications...].
If you are using the PCL 6 printer driver, click the [Detailed Settings] tab, click [Job Setup], and then
click [Authentication...] in the [Job Setup] area.
9. Enter a login user name and login password already set on the printer or the server for
user authentication.
Be sure to enter the same login user name and login password that is registered on the printer or
server.
If you do not enter a valid login user name and login password, printing will not start.
10. Click [OK] to close the [Authentication] dialog box.
11. Click [OK] to close the printing preferences dialog box.
• Depending on the application in use, the properties specified in this procedure may not take effect.
• If you log in using the printer driver, you do not need to log out when you finish.
Logging In Using Web Image Monitor
For details about how to log in via Web Image Monitor, see "Displaying the Printer Configuration
Screens Using a Web Browser", Operating Instructions.
• For User Code Authentication, enter a User Code in the [Login User Name] box, and then click
[Login].
• The procedure may differ depending on the Web browser used.
25

1. Getting Started
Logging Out Using Web Image Monitor
This section explains the procedure for logging out via Web Image Monitor.
1. Click [Logout] to log out.
• Delete the cache memory of the Web browser after logging out.
26
CQT108
Turning On/Off the Power
Turning On/Off the Power
This section describes how to turn on/off the printer.
• This printer automatically enters Sleep mode if you do not use it for a while. To specify the time that
the printer waits before it enters Sleep mode, configure the Sleep Mode Timer setting. See "Timer
Settings", Operating Instructions.
Turning On the Power
• Do not turn off the power switch immediately after turning it on. Doing so may result in damage to
the hard disk or memory, leading to malfunctions.
1. Make sure the power cord is firmly plugged into the wall outlet.
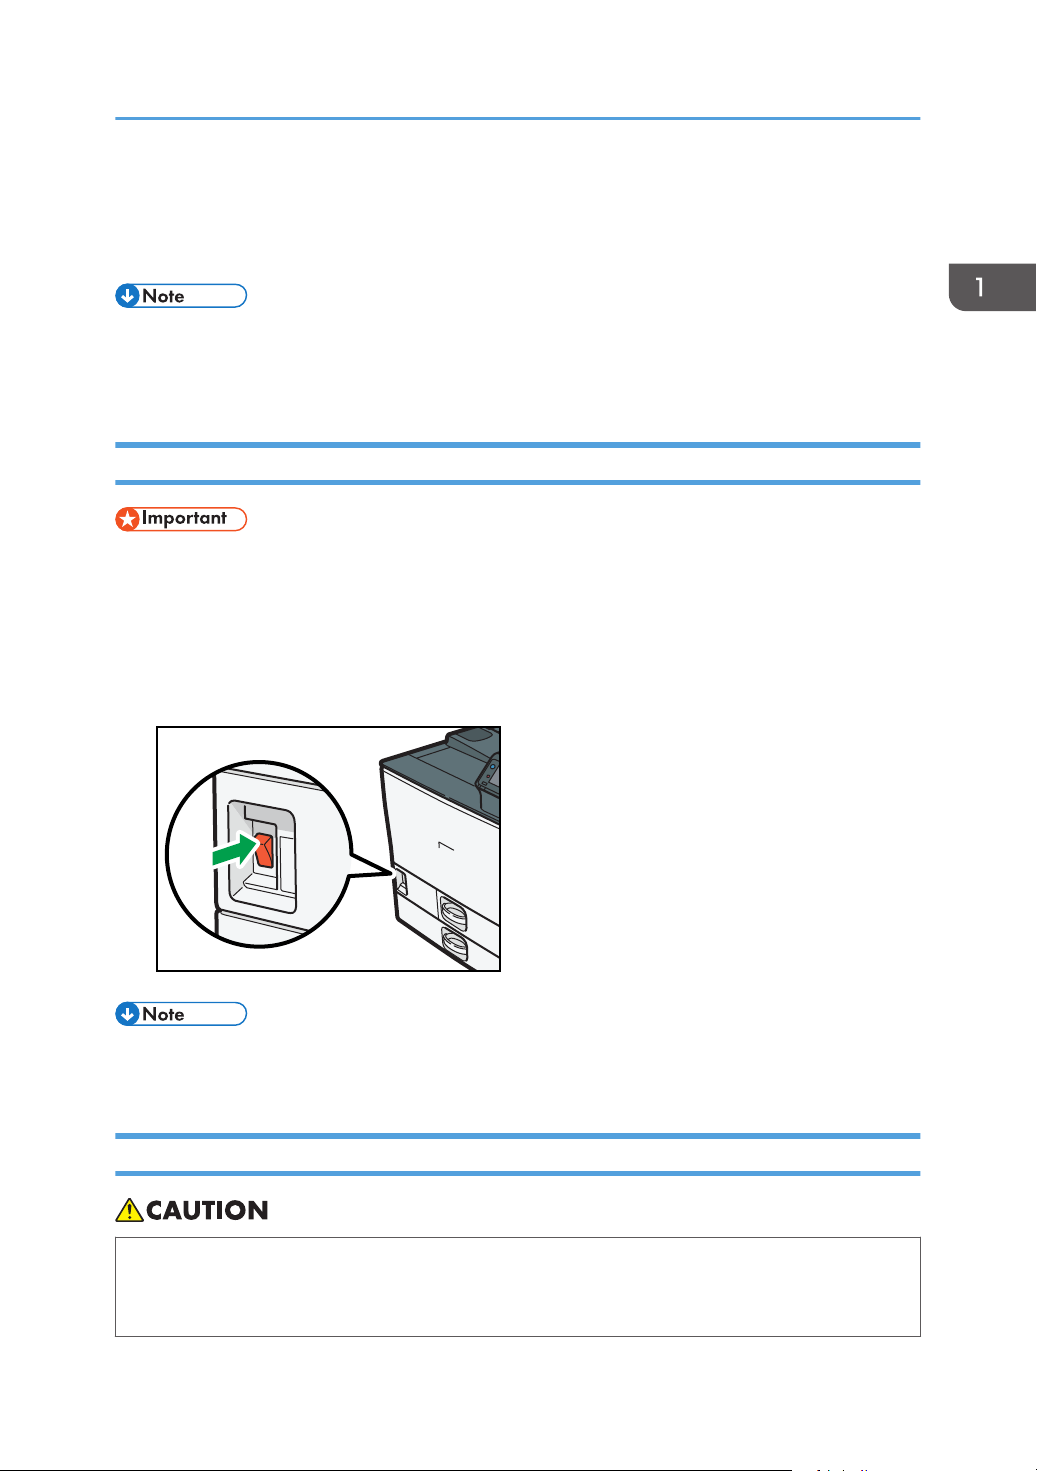
2. Turn on the power switch.
The power indicator turns on.
• After you switch the power on, a screen may appear to indicate that the printer is initializing. Do
not switch the power off during this process. Initialization takes about three minutes.
Turning Off the Power
• When disconnecting the power cord from the wall outlet, always pull the plug, not the cord.
Pulling the cord can damage the power cord. Use of damaged power cords could result in fire
or electric shock.
27

1. Getting Started
• After turning the printer's power off, wait at least a few seconds before turning it back on. If the
message "Turn main Power Switch off" appears, turn the printer's power off, wait 10 seconds or
more, and then turn it back on again. Never turn the power back on immediately after turning it off.
• Before unplugging the power cord plug, turn off the power switch and make sure the power switch
indicator turns off. Not doing so may result in damage to the hard disk or memory, leading to
malfunctions.
• Do not turn off the power while the printer is in operation.
1. Turn off the power switch.
The power indicator goes out.
Saving Energy
This printer has the following energy saving functions.
Low Power mode
If you do not use the printer for a certain period after an operation, the display will turn off and the
printer goes into Low Power mode. The printer uses less electricity in Low Power mode.
You can change the amount of time that the printer waits before switching to Low Power mode
under [Low Power Mode Timer]. For details, see "Timer Settings", Operating Instructions.
You can change the printer's settings to enter Low Power mode when you press the [Energy Saver]
key. For details, see "Administrator Tools", Operating Instructions.
To exit Low Power mode, do one of the following:
• Touch the display panel or press one of the keys on the control panel.
• Load paper in the bypass tray.
• Pull out the paper trays.
Sleep mode
If the printer remains inactive for a specified period after entering Low Power mode, it enters Sleep
mode to further reduce power consumption. The printer also enters Sleep mode under the following
conditions:
• When the [Energy Saver] key is pressed
• The time the printer waits before entering Sleep mode is set in [Sleep Mode Timer]
• When the ECO Night Sensor detects the ambient light level
For details about setting [Sleep Mode Timer] and [ECO Night Sensor], see "Timer Settings" and
"Administrator Tools", Operating Instructions.
28
To exit Sleep mode, do one of the following:
Loading...