

ResMed VPAP ST-A User Manual

VPAP™ ST-A with iVAPS
VPAP™ ST-A
NONINVASIVE VENTILATOR
Welcome Guide
English
Respiratory Care Solutions
Making quality of care easy
Respiratory Care Solutions
Making quality of care easy
Welcome
Thank you for choosing the VPAP ST-A or VPAP ST-A with iVAPS (hereafter ‘VPAP ST-A’). Before operating the device, please read the entire Welcome and Information Guides.
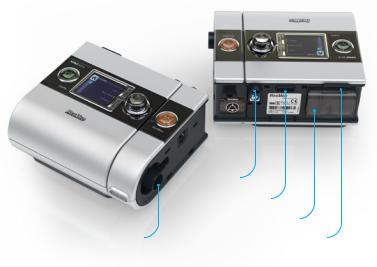
Note: The
|
DC power inlet |
|
Module/Adapter port |
|
Air filter |
Air outlet |
SD card slot |
VPAP ST
The VPAP ST-A system comprises the following elements:
•VPAP ST-A device • Air tubing • 90W power supply unit • S9Travel bag • SD card • S9 SD card protective folder.
Optional components include:
•H5i heated humidifier • Standard air tubing • SlimLine air tubing • 3 m air tubing • ClimateLine
heated air tubing • ClimateLineMAX heated air tubing • 30W power supply unit (does not support H5i)
• Power Station II battery pack • DC/DC Converter 24V/90W.
Travelling tips
When travelling with your VPAP ST-A only:
•• Ensure you pack the SlimLine or Standard air tubing as the ClimateLine or ClimateLineMAX heated air tubing is not designed to connect directly to the device.
•• Ensure you purchase and travel with the approved power cord for the region where you will be using the device.
1 English
 3
3
 2
2
 5
5
4 |
1 |
|
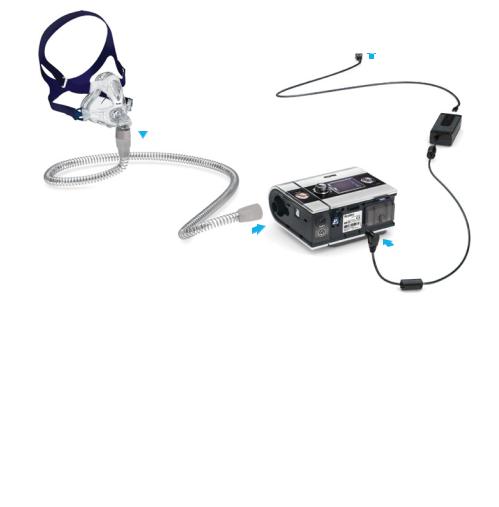
Setting up
1.Connect the DC plug of the power supply unit to the rear of the device.
2.Connect the power cord to the power supply unit.
3.Plug the other end of the power cord into the power outlet.
4.Connect one end of the air tubing firmly onto the air outlet.
5.Connect the assembled mask system to the free end of the air tubing.
Notes:
•• Always ensure that the VPAP ST-A is placed in an area where the alarm LED indicators are clearly visible.
•• For more information on assembling your mask see your mask user guide.
•• Recommended masks are available on www.resmed.com on the Products page under Service & Support.
2
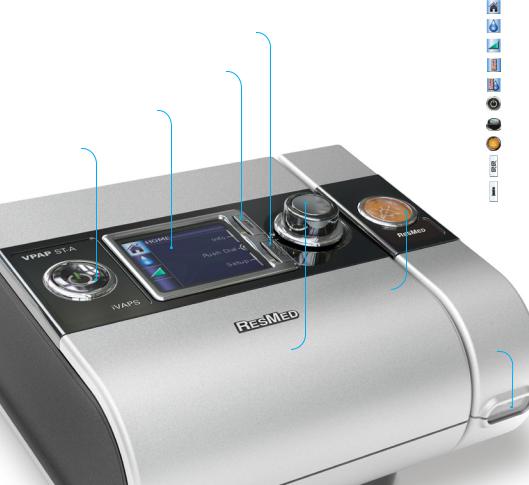
VPAP ST-A basics
Setup menu*
Allows you to make changes to settings or exit from the menu.
Info menu*
Allows you to view your sleep statistics or exit from the menu.
LCD screen
Displays the menus, treatment screens and reminders.
Start/Stop button
Starts or stops treatment.
Key:
Home
Humidity Level
Ramp
Heated Tube
Climate Control
Start/Stop
Push dial
Alarm mute
Setup menu
Info menu
Alarm mute
Press once to mute alarms. Press a second time to unmute.
Push dial
Turning the dial allows you to scroll through the menu and change settings.
Pushing the dial allows you to enter into a menu and confirm your choice.
*The Info and Setup menus are disabled if S9 Essentials has been enabled by your clinician.
Alarm and therapy LEDs
Yellow—flashes during an alarm. Blue—on during therapy (if enabled by clinician).
3 English
 Loading...