


All technical modifications reserved. 10/07. TSC 08.0189
Model No. PG400
Уважаемый покупатель! Приобретаемый вами продукт Remington прошел необходимую сертификацию в соответствии с требованиями российского законодательства. Подробную информацию о номере сертификата и сроке его действия вы сможете найти на сайте
http://www.remington-products.ru
МЛ03
08/INT/PG400 Version 03/08 Part No. T22 - 22621
REMINGTON® Registered Trade Mark of Spectrum Brands, Inc.,or one of its subsidiaries VARTA Consumer Batteries GmbH & Co. KGaA
Alfred-Krupp-Str.9
73479 Ellwangen Germany
www.remington-europe.com © 2008 SBI
WASHABLE GROOMING KIT
FOR PRECISE STYLING AND FINISHING
PG400
3.
1.
9.
8.
7.
2. 4. 5.
6.
080189_REM_IFU_PG400_18L.indd 1-3 |
|
|
10.04.2008 23:12:07 Uhr |
|
|
||
|
|
|
|

INTERNATIONAL SERVICE CENTRE
1. |
2. |
A |
B |
C |
3. 4.
D |
|
E |
5. 6.
7. 8.
 GERMANY
 BENELUX
 FRANCE
 ITALY
ITALY
 SCANDINAVIA
 AUSTRIA
 SWITZERLAND
 PORTUGAL
Central Europe
 00800 / 821 700 821
Mo.-Fr. 9 a.m. – 5 p.m. Central European Time (free call)
E-Mail: service@remington-europe.com
www.remington-europe.com
SPAIN
MALTA |
Tel. 00800 821 700 82 (free call) |
|
|
|
|
GREECE |
Tel. 00800 49 12 91 60 (free call) |
|
|
UNITED KINGDOM |
Tel. +44 0800 212 438 (free call) |
|
Rayovac Europe Ltd, Watermans House, Kingsbury Crescent, The Causeway, |
|
Staines, Middlesex, TW18 3BA, UNITED KINGDOM,www.remington.co.uk |
ČESKÁ REPUBLIKA |
Tel. +420 487 754 605 |
|
VARTA Baterie spol. s r. o., Jindřicha z Lipé 108, 470 01 Česká Lípa, |
|
ČESKÁ REPUBLIKA, www.cz.remington-europe.com |
IRELAND |
Tel. +353 (0) 1 460 4711 |
|
Remington Consumer Products, Unit 7C, Riverview Business Park, |
|
New Nangor Road, Dublin 22, IRELAND, www.remington.co.uk |
MAGYARORSZÁG |
Tel. +36 1 431 3600 |
|
Varta Hungária Kft., 1191 Budapest,Ady Endre út 42-44. |
|
www.hu.remington-europe.com |
POLSKA |
Tel. +48 22 328 11 50 |
|
Varta Baterie Sp. z o.o., ul. Fabryczna 5, 00-446 Warszawa, POLSKA, |
|
Fax +48 22 328 11 61, www.pl.remington-europe.com |
РОССИЯ |
Тел. +7 495 170 5401 |
|
ООО ПРОФСЕРВИС Россия, 109202, Москва, ул. 2я Карачаровская, 14а-3, |
|
www.remington-europe.com |
TÜRKIYE |
Tel. +90 212 659 01 24 |
|
Varta Pilleri Ticaret Ltd. Şti., İstoç 28.Ada No:1 34217, Mahmutbey/İstanbul, |
|
TÜRKİYE, Fax +90 212 659 48 40, www.tr.remington-europe.com |
|
|
|
|
|
|
|
|
|
|
|
|
|
|
|
|
|
|
|
|
|
|
|
|
|
|
|
|
|
|
|
|
|
|
|
|
|
|
|
|
|
|
|
|
|
|
|
|
|
|
|
|
|
|
|
080189_REM_IFU_PG400_18L.indd 4-6 |
|
|
|
10.04.2008 23:12:10 Uhr |
|
|
|
|
|
|||
|
|
|
|
|
|
|
|
|
|
|
|
|
|
|
|
|
|
|
|
|
|
|
|
|
|
|
|
|
|
|
|
|
|
ENGLISH
Thank you for choosing Remington®. Our products are designed to meet the highest standard of quality, functionality and design. We hope you enjoy using your new Remington® appliance. Please read the instructions for use carefully and keep in a safe place for future reference.


 CAUTION
 Use this appliance only for its intended use as described in this manual. Do not use attachments not recommended by Remington®.
 Do not use this product if it is not working correctly, if it has been dropped or damaged, or dropped into water.
|
|
DESCRIPTION |
1. |
On/Off Switch |
|
2. |
20mm trimmer attachment |
|
3. |
30mm trimmer attachment |
|
4. |
Fine trimmer attachment |
|
5. |
MiniScreen shaver attachment |
|
6. |
2 (reversible) guide combs |
|
7. |
Charging indicator light |
|
8. |
Charging adaptor |
|
9. |
Charging stand |
|
7
NL D GB
F
E
I
FIN S
AE GR RO TR RU PL HUN CZ SK P
1
080189_REM_IFU_PG400_18L.indd 7-GB_1 |
|
|
10.04.2008 23:12:14 Uhr |
|
|
||
|
|
|
|

ENGLISH


 GETTING STARTED
 CHARGING YOUR PERSONAL GROOMER
Before using your personal groomer for the first time, charge for 14-16 hours.
 Ensure the product is switched off.
 Place your personal groomer into the charging stand, connect the charging adaptor to the product and then to the mains. The charging indicator will light up.
Your personal groomer cannot be overcharged. However, if the product is not going to be used for an extended period time (2-3 months), unplug it from the mains and store. Fully recharge your personal groomer when you would like to use it again.
To preserve the life of your batteries, let them run out every six months then recharge for 14-16 hours.
 CORDED USE
 Connect the charging adaptor to the product and then to the mains.
 CAUTION: Extended mains only use will result in the reduction of the battery life.


 HOWTO USE
 BEFORE YOU BEGIN
Always comb your beard or moustache with a fine comb before you start trimming.
 REVERSIBLE GUIDE COMBS
These attachment reversible guide combs are for use with the 30mm trimmer blade only. To attach, gently slide the comb over the trimmer blade. An arrow on the side of the comb indicates the length which the hair will be cut.
Settings |
mm |
|
|
No guide combs |
0,5 mm |
|
|
Small comb |
3mm/6mm |
|
|
Large comb |
9mm/12mm |
|
|
Replacement combs available: SP256 |
|
2
080189_REM_IFU_PG400_18L.indd GB_2-GB_3
ENGLISH
ATTACHING AND REMOVING THE GUIDE COMBS |
GB |
|
|
||
With the trimmer blade facing away from you, slide the guide comb on top of the clipper |
D |
|
blade and click into position. |
||
With the trimmer blade facing away from you, carefully push the guide comb away from |
|
|
the trimmer blade. |
NL |
|
TO THIN AND TAPER THE BEARD/MOUSTACHE (Diagram 1) |
||
|
||
Attach a guide comb to the 30mm Trimmer Blade. If you are trimming for the first time |
F |
|
start with the maximum trimming length setting. |
||
|
||
Turn the unit on. |
|
|
Place the flat top of the trimmer comb against the skin. |
E |
|
Slowly slide the personal groomer through the hair. Repeat from different directions as |
|
|
necessary. |
|
|
If hair builds up in the trimmer comb during the trimming process, switch the unit off, pull |
I |
|
off the comb and brush/rinse off. |
|
|
TO DEFINE THE BEARD/MOUSTACHE LINE (Diagram 2) |
S |
|
|
||
Hold the personal groomer with 20mm Trimmer Blade facing you. |
|
|
Start with edge of beard/moustache line and gently lower the trimmer blade onto your |
FIN |
|
skin. Use motions towards edge of beard/moustache line to trim to desired locations in |
||
facial area and away from beard in neck area. |
|
|
TRIMMING EDGE OF SIDEBURNS (Diagram 3) |
P |
|
|
||
Hold the personal groomer with 20mm Trimmer Blade facing you. |
SK |
|
Start with edge of sideburn, and with the trimmer blades resting lightly against your skin, |
||
|
||
use motions towards edge of sideburn line to trim to desired locations in facial area. |
|
|
USING THE MINISCREEN SHAVER (Diagram 4) |
CZ |
|
Attach the MiniScreen shaver |
|
|
Hold the groomer so the MiniScreen gently touches your face in a 45 degree angle. |
HUN |
|
Use short, well-controlled movements to shave around your Beard/Moustache. Use your |
||
free hand to stretch your skin. This encourages the hair to stand upright, making it easier |
|
|
to shave. |
PL |
|
|
||
NOTE: The MiniScreen shaver was designed to shave the detail areas around your beard/ |
RU |
|
moustache/sideburns. It was not designed to shave your entire face. For a close comfortable |
||
|
||
shave, guaranteed, use one of Remington®’s electric shavers. |
TR |
|
TRIMMING THE NAPE OF YOUR NECK (Diagram 5) |
||
|
||
Note: You will need a hand mirror for this operation if performing it alone. |
|
|
Before you begin, attach the 30mm Trimmer Blade. |
RO |
|
Use your fingers to lift the hair at the base of your head up off the neck. Your index finger |
||
should be covering the roots of the hairs you are lifting to prevent accidental removal by |
|
|
the personal groomer. |
GR |
|
Using your other hand, hold the personal groomer to the base of your neck with the |
||
|
||
cutting unit facing up, and move the personal groomer up the length of the neck until it |
AE |
|
touches your finger covering the hair roots at the base of your head. |
||
|
3
10.04.2008 23:12:14 Uhr

ENGLISH
Be sure to move the unit slowly when performing this operation and to keep the hair roots at the base of your head out of the way of the trimmer.
 TO REMOVE HAIR FROM NOSE AND EAR (Diagram 6 & 7)
 Attach fine trimmer attachment.
Insert the personal groomer gently into nostril or ear.
 Gently move the groomer in and out of the nostril or ear and at the same time rotate. Avoid inserting the cutting unit more than 6mm into your nostril or ear.
 TO REMOVE HAIR FROM EYEBROWS (Diagram 8)
 Attach fine trimmer attachment.
Gently guide cutting unit to stray, unwanted hairs along the eyebrow line or protruding from the eyebrow itself.
 To remove the hairs completely lower onto the skin and move over desired area. Use slow and well-controlled movements.
 ATTACHING AND REMOVING THE TRIMMER COMB ATTACHMENT
NOTE: Always ensure the personal groomer is switched off before changing any attachments.
 To remove, hold the personal groomer with one hand and turn the trimmer head anticlockwise with the other.
 To attach, hold the personal groomer with one hand and turn the trimmer head clockwise with the other.
 Tips for best results
Beard, moustache and sideburn hairs should be dry.
 Avoid using lotions before using your personal groomer. Comb your hair in the direction that it grows.
 Remove trimmer comb attachment if you are: defining hairline edges such as sideburns, trimming the nape of your neck, trimming your beard line on front of neck.


 CARE FORYOUR PERSONAL GROOMER
CLEANING AND MAINTAINING YOUR PERSONAL GROOMER
 AFTER EACH USE
1.Turn the personal groomer off.
2.Gently brush the remaining hairs away/rinse under warm water from the guide comb and trimmer blade.
 CLEANING CAUTIONS
 Only the guide comb attachment and trimmer blade may be removed from the product for cleaning.
  Cleaning should only be done with a soft brush, such as the brush supplied with the product.
4
080189_REM_IFU_PG400_18L.indd GB_4-GB_5
ENGLISH
Only use the light-grade oil supplied or sewing machine oil on the blades. |
GB |
||
|
|||
Do not use harsh or corrosive cleaners on the units or their blades. |
D |
||
Do not submerge in water as damage will occur. |
|||
|
|||
STORAGE |
NL |
||
|
|||
Always store this appliance and cord in a moisture-free area. Do not store it in |
|
||
temperatures exceeding 140°F (60°C). |
F |
||
Do not wrap the cord of the charging adaptor around the appliance. |
|||
|
|||
|
Suitable for cleaning under water |
E |
|
|
|
||
|
|
I |
|
|
IMPORTANT SAFETY INSTRUCTIONS |
|
|
|
|
S |
|
|
|
||
WARNING – TO REDUCE THE RISK OF BURNS, ELECTROCUTION, FIRE, |
FIN |
||
OR INJURY TO PERSONS: |
|||
An appliance should never be left unattended when plugged into a power outlet. |
|||
|
|||
WARNING: Detach the hand-held part from the supply cord before cleaning it in water. |
P |
||
WARNING: The parts that have to be fixed must be installed so they cannot fall into water. |
|
||
Keep the power plug and cord away from heated surfaces. |
SK |
||
Make sure the power plug and cord do not get wet. |
|||
|
|||
Do not plug or unplug the product with wet hands. |
|
||
Do not use the product with a damaged cord. A replacement can be obtained via our |
CZ |
||
International Service Centres. |
|||
Charge, use and store the product at a temperature between 15°C and 35°C |
|
||
Always unplug from the mains when cleaning. |
HUN |
||
Only use the parts supplied with the appliance. |
|||
Keep this product out of reach of children. The use of this appliance by persons with |
|
||
reduced physical, sensory or mental capabilities or lack of experience and knowledge can |
PL |
||
give cause to hazards. Persons responsible for their safety should give explicit instructions |
|||
|
|||
or supervise the use of the appliance. |
RU |
||
|
|
||
|
|
TR |
|
|
PROTECTTHE ENVIRONMENT |
||
This appliance contains an environmentally friendly rechargeable Nickel Metal Hydride |
RO |
||
battery. Do not dispose the appliance or the battery in the household waste as restrictions |
|
||
exist in most countries. Adhere to national or local regulations for collection and disposal |
GR |
||
that apply to your specific location. In case you are required to remove the battery from |
|||
|
|||
the appliance for separate disposal see the instructions in the ‘Battery Removal’ section on |
AE |
||
how to open the housing. |
|||
|
|||
5
10.04.2008 23:12:15 Uhr

ENGLISH
 CAUTION: Do not put in fire or mutilate your battery packs as they may burst or release toxic materials.
For further information on recycling see www.remington-europe.com


 BATTERY REMOVAL
To remove the battery for safe disposal, please follow the instructions below:
 Turn the personal groomer on and discharge all remaining power.
Remove trimmer head (Diagram A)
 Hold the upper body of the personal groomer in one hand and the lower 1/6th of the personal groomer in the other and pull the battery cover off by force. (Diagram B)
 Remove the screw (Diagram C)
Remove the motor bracket by pressing the eccentric with force (Diagram D)  Disconnect the battery wire and remove the battery (Diagram E)
 SERVICE AND WARRANTY
This product has been checked and is free of defects. We warrant this product against any defects that are due to the faulty material or workmanship for a 2 year period from the original date of consumer purchase. If the product should become defective within the warranty period, we will repair any such defect or elect to replace the product or any part of it without charge provided there is proof of purchase. This does not mean an extension of the warranty period.
In the case of a warranty simply call the Remington® Service Centre in your region.
This warranty is offered over and above your normal statutory rights.
The warranty shall apply in all countries in which our product was sold via an authorised dealer.
This warranty does not include shaving heads / foils and the cutters which are consumable parts. Also, not covered is damage to the product by accident or misuse, abuse, alteration to the product or use inconsistent with the technical and/or safety instructions required. This warranty shall not apply if the product has been dismantled or repaired by a person not authorised by us.
6
080189_REM_IFU_PG400_18L.indd GB_6-D7
DEUTSCH
Unsere Produkte wurden entwickelt, um die höchsten Ansprüche an |
GB |
|
|
Qualität, Funktionalität und Design zu erfüllen. Wir wünschen Ihnen mit |
D |
Ihrem Remington® Haarschneide-/Rasier-Set viel Freude. Lesen Sie die |
|
Bedienungsanleitung vor der ersten Benutzung sorgfältig durch und bewahren Sie |
|
diese für ein späteres Nachschlagen gut auf. |
NL |
|
|
|
ACHTUNG |
|
|
F |
|
|
|
|
|
|||
|
|
|
|
|
|
E |
|
|
|
|
|
||
|
Bitte verwenden Sie dieses Gerät ausschließlich für den in dieser |
|
|
|
|
|
|
|
|||||
|
|
|
|
|
|
|
|
|
|
|
|||
|
Bedienungsanleitung beschriebenen Gebrauchszweck. Benutzen Sie keine |
|
|
|
|
|
|
|
|
|
|
||
|
Zusatzteile, die nicht von Remington® empfohlen werden. |
|
|
I |
|
|
|
|
|
||||
|
Verwenden Sie dieses Produkt nicht, wenn es nicht ordnungsgemäß |
|
|
|
|
|
|
|
|
|
|
||
|
funktioniert, wenn es heruntergefallen ist, beschädigt wurde oder komplett in |
|
|
|
|
|
|
|
|
|
|
||
|
Wasser gefallen ist. |
|
|
S |
|
|
|
|
|
||||
|
|
|
|
|
|
FIN |
|
|
|
|
|
||
|
|
BESCHREIBUNG |
|
|
|
|
|
|
|
||||
|
|
|
|
|
|
|
|
|
|
|
|
||
1. |
|
|
|
|
|
P |
|
|
|
|
|
||
|
|
|
|
|
|
|
|
|
|
||||
Ein-/Aus-Schalter |
|
|
SK |
|
|
|
|
|
|||||
|
|
|
|
|
|
|
|||||||
2. |
Trimmeraufsatz (20 mm) |
|
|
|
|
|
|
|
|||||
3. |
Trimmeraufsatz (30 mm) |
|
|
CZ |
|
|
|
|
|
||||
4. Schmaler Trimmeraufsatz für Nasen-/ Ohrenhärchen |
|
|
|
|
|
|
|
||||||
|
|
HUN |
|
|
|
|
|
||||||
5. |
MiniScreen-Rasieraufsatz |
|
|
|
|
|
|
|
|||||
|
|
|
|
|
|
|
|
|
|
||||
6. |
2 Kammaufsätze (von beiden Seiten benutzbar) |
|
|
|
|
|
|
|
|
|
|
||
7. |
Ladekontrollanzeige |
|
|
PL |
|
|
|
|
|
||||
8. |
Ladeadapter |
|
|
RU |
|
|
|
|
|
||||
9. |
Ladestation |
|
|
|
|
|
|
|
|||||
|
|
|
|
|
|
|
|
|
|
||||
|
|
|
|
|
|
TR |
|
|
|
|
|
||
|
|
|
|
|
|
RO |
|
|
|
|
|
||
|
|
|
|
|
|
GR |
|
|
|
|
|
||
|
|
|
|
|
|
AE |
|
|
|
|
|
||
|
|
|
|
|
|
|
|
|
|
|
|
|
|
|
|
|
|
|
|
|
|
|
|
|
|
|
|
|
|
|
|
|
7 |
|
|
|
|
|
|
|
|
|
|
|
|
|
|
|
|
|
|
|
|
|
|
|
|
|
|
|
|
|
|
|
|
|
|
|
|
|
10.04.2008 |
23:12:17 Uhr |
|
|
|
|
|
|
|
||||
|
|
|
|
|
|
|
|
|
|
|
|
|
|
|
|
|
|
|
|
|
|
|
|
|
|
|
|

DEUTSCH


 ERSTE SCHRITTE
 LADEN IHRES BART-/ HAARSCHNEIDE-SET
Laden Sie Ihr BART-/ HAARSCHNEIDE-SET bei erstmaliger Verwendung 14–16 Stunden lang auf.
 Stellen Sie sicher, dass der Trimmer ausgeschaltet ist.
 Stellen Sie Ihr BART-/ HAARSCHNEIDE-SET in die Ladestation, verbinden Sie den Ladeadapter mit dem Gerät und schließen Sie ihn dann an das Stromnetz an. Die Ladekontrollanzeige leuchtet.
Es besteht keine Gefahr, dass Sie das Gerät überladen. Wenn Sie den Trimmer über einen längeren Zeitraum nicht benutzen (2-3 Monate), trennen Sie ihn vom Stromnetz und verstauen Sie das Gerät. Laden Sie Ihren Trimmer vollständig auf, wenn Sie ihn wieder benutzen möchten.
Um die Laufzeit Ihrer Akkus zu erhalten, verwenden Sie den Trimmer alle 6 Monate solange, bis die Akkus vollständig entladen sind. Laden Sie den Trimmer dann für 14-16 Stunden.
 BETRIEB AM STROMNETZ
 Verbinden Sie den Ladeadapter mit dem Haarschneider und schließen Sie ihn dann an das Stromnetz an.
 ACHTUNG: Längerer Einsatz des Geräts im Netzbetrieb führt zu einer Verkürzung der Akkulaufzeit.


 BENUTZUNG
 VOR DER BENUTZUNG
Kämmen Sie Ihre Gesichtshaare vor der Benutzung des Trimmers immer mit einem feinen Kamm.
 VON BEIDEN SEITEN BENUTZBARE KAMMAUFSÄTZE
Die von beiden Seiten benutzbaren Kammaufsätze können nur mit dem 30-mm- Trimmaufsatz verwendet werden. Um einen Kamm aufzusetzen, schieben Sie diesen vorsichtig über die Trimmerklinge. Ein Pfeil an der Seite des Kamms zeigt die gewünschte Haarlänge an.
Einstellungen |
mm |
|
|
ohne Kammaufsatz |
0,5 mm |
|
|
Kleiner Kamm |
3mm/6mm |
|
|
Großer Kamm |
9mm/12mm |
|
|
Erhältliche Ersatzkämme: SP256
8
080189_REM_IFU_PG400_18L.indd D8-D9
DEUTSCH
|
AUFSETZEN UND ABNEHMEN DER KAMMAUFSÄTZE |
GB |
|
|
|
||
|
Schieben Sie den Kammaufsatz bei abgewandtem Trimmaufsatz von oben auf das Gerät und |
D |
|
|
lassen Sie den Aufsatz einrasten. |
||
|
Ziehen Sie den Kamm vorsichtig bei abgewandter Trimmerklinge von der Trimmerklinge ab. |
|
|
|
BART/SCHNURRBART AUSDÜNNEN UND SPITZ ZUSCHNEIDEN (Abbildung 1) |
NL |
|
|
|||
|
Setzen Sie einen Kammaufsatz auf den 30-mm-Trimmaufsatz auf. Wenn Sie Ihren Bart zum |
|
|
|
ersten Mal trimmen, beginnen Sie mit der maximalen Längeneinstellung. |
|
|
|
Schalten Sie das Gerät ein. |
F |
|
|
Drücken Sie das flache Ende des Trimmerkamms leicht gegen die Haut. |
||
|
|
||
|
Bewegen Sie den Bart-/ Haarschneider langsam durch das Haar. Wiederholen Sie die Schneid- |
|
|
|
bewegung, wenn nötig, und setzen Sie das Gerät dabei aus unterschiedlichen Richtungen an. |
E |
|
|
Falls beim Trimmen zu viele Haare am Kamm hängen bleiben, schalten Sie das Gerät aus, |
||
|
|
||
|
ziehen Sie den Kammaufsatz ab und bürsten Sie die Haare ab. |
|
|
|
BARTKANTE/SCHNURRBARTKANTE KONTURIEREN (Abbildung 2) |
I |
|
|
|
||
|
Nehmen Sie den Bart-/ Haarschneider mit dem 20-mm- Trimmeraufsatz dem Gesicht |
|
|
|
zugewandt in die Hand. |
S |
|
|
Beginnen Sie mit dem Rand der Bartkante/Schnurrbartkante und drücken Sie dabei |
||
|
|
||
|
die Trimmerklinge leicht gegen Ihre Haut. Bewegen Sie das Gerät auf die Bartkante/ |
|
|
|
Schnurrbartkante zu, um diese im Gesichtsbereich und in entgegengesetzter Richtung im |
FIN |
|
|
Halsbereich zu trimmen. |
||
|
|
||
|
KOTELETTEN TRIMMEN (Abbildung 3) |
|
|
|
|
||
|
|
||
|
Nehmen Sie den Bart-/ Haarschneider mit dem 20-mm-Trimmeraufsatz dem Gesicht |
P |
|
|
zugewandt in die Hand. |
|
|
|
Beginnen Sie mit dem Rand der Koteletten und drücken Sie dabei die Trimmerklingen |
SK |
|
|
leicht gegen Ihre Haut. Bewegen Sie das Gerät auf die Kotelettenkante zu, um diese im |
||
|
Gesichtsbereich zu trimmen. |
|
|
|
BENUTZUNG IHRES MINISCREEN-RASIERAUFSATZES (Abbildung 4) |
CZ |
|
|
|||
|
Setzen Sie den MiniScreen-Rasieraufsatz auf. |
||
|
Halten Sie den Bart-/ Haarschneider so, dass der MiniScreen-Rasieraufsatz das Gesicht in |
HUN |
|
|
einem Winkel von 45 Grad leicht berührt. |
||
|
Führen Sie kurze und kontrollierte Schneidbewegungen aus, um den Bereich um Ihren Bart/ |
||
|
Schnurrbart herum zu rasieren. Glätten Sie mit der freien Hand Ihre Haut, so dass die |
|
|
|
Barthaare aufrecht stehen und leichter geschnitten werden können. |
PL |
|
HINWEIS: Der MiniScreen-Rasieraufsatz wurde speziell für die Rasur von Detailbereichen |
|||
|
|||
an Bart, Schnurrbart und Koteletten konzipiert. Er ist nicht für eine Vollrasur ausgelegt. |
RU |
||
Benutzen Sie für eine gründliche und sanfte Rasur einen Elektrorasierer von Remington®. |
|||
|
NACKEN AUSRASIEREN (Abbildung 5) |
TR |
|
|
|||
|
|||
Hinweis: Wenn Sie Ihren Nacken ohne fremde Hilfe ausrasieren, benötigen Sie einen Handspiegel. |
|||
|
Befestigen Sie den 30-mm-Trimmaufsatz, bevor Sie beginnen. |
|
|
|
Heben Sie Ihr Haar im Nackenbereich mit den Fingern an. Decken Sie das Haar mit Ihrem |
RO |
|
|
Zeigefinger am Haaransatz ab, damit Sie es nicht ungewollt abschneiden. |
||
|
Nehmen Sie den Bart-/ Haarschneider in die freie Hand und setzen Sie ihn im unteren |
|
|
|
Nackenbereich mit dem Schneidmechanismus nach oben gerichtet an. Bewegen Sie den |
GR |
|
|
Personal Groomer über den ganzen Nacken nach oben, bis er Ihren Zeigefinger berührt, |
||
|
mit dem Sie den Haaransatz abdecken. Führen Sie diese Bewegungen langsam aus und |
|
|
|
achten Sie dabei darauf, dass der Haaransatz abgedeckt bleibt und nicht in Berührung mit |
AE |
|
|
dem Bart-/ Haarschneider kommt. |
||
|
|
||
9
10.04.2008 23:12:17 Uhr
DEUTSCH
 NASENUND OHRHAARE ENTFERNEN (Abbildung 6 & 7)
 Setzen Sie den schmalen Trimmeraufsatz auf.
Führen Sie die Schneideinheit des Gerätes vorsichtig in das Nasenloch oder den Gehörgang ein.
 Führen Sie den Trimmer vorsichtig in das Nasenloch bzw. den Gehörgang ein und wieder heraus und drehen Sie ihn gleichzeitig dabei.
 Achten Sie darauf, dass Sie die Schneideinheit nicht tiefer als 6 mm in das Nasenloch oder den Gehörgang einführen.
 AUGENBRAUEN TRIMMEN (Abbildung 8)
 Setzen Sie den schmalen Trimmeraufsatz auf.
Bewegen Sie die Schneideinheit vorsichtig über vereinzelte, unerwünschte Härchen entlang der Augenbrauen.
 Um die Haare vollständig zu entfernen, senken Sie den Trimmer tiefer und führen Sie ihn über den gewünschten Bereich.
 Führen Sie langsame und kontrollierte Schneidbewegungen aus.
 AUFSETZEN UND ABNEHMEN DES TRIMMERKAMMAUFSATZES
HINWEIS: Stellen Sie immer sicher, dass der Bart-/ Haarschneider ausgeschaltet ist, bevor Sie die Aufsätze austauschen.
 Zum Abnehmen halten Sie den Bart-/ Haarschneider in einer Hand und drehen Sie den Schneidkopf mit der anderen Hand gegen den Uhrzeigersinn.
 Zum Aufsetzen halten Sie den Bart-/ Haarschneider in einer Hand und drehen Sie den Schneidkopf mit der anderen Hand im Uhrzeigersinn.
 Tipps für optimale Trimmergebnisse
Bart, Schnurrbart und Koteletten müssen trocken sein.
 Benutzen Sie vor Gebrauch Ihres Bart-/ Haarschneider keine Hautpflegemittel. Kämmen Sie Ihre Haare in Wuchsrichtung.
 Nehmen Sie den Trimmerkammaufsatz ab, wenn Sie Ihren Haaransatz und Ihre Koteletten konturieren, Ihren Nacken ausrasieren oder Ihre Bartkante am Hals trimmen.


 DIE PFLEGE IHRES BART-/ HAARSCHNEIDER
REINIGUNG UND PFLEGE DES BART-/ HAARSCHNEIDER
 NACH DEM GEBRAUCH
1.Schalten Sie den Bart-/ Haarschneider aus.
2.Entfernen Sie die restlichen Haare vorsichtig mit einer Bürste von Kammaufsatz und Schneidkopf.
 HINWEISE ZUM REINIGEN
 Nur der Kammaufsatz und die Trimmaufsätze können für die Reinigung des Geräts abgenommen werden.
 Für die Reinigung darf nur eine weiche Bürste, wie z. B. die mit dem Gerät mitgelieferte Bürste, verwendet werden.
10
080189_REM_IFU_PG400_18L.indd D10-D11
DEUTSCH
|
Nutzen Sie nur das mitgelieferte Pflegeoder Nähmaschinenöl für die Klingen. |
GB |
|
|
|
|
Benutzen Sie keine starken oder ätzenden Mittel für die Reinigung des Gerätegehäuses |
D |
|
oder der Klingen. |
|
|
Tauchen Sie das Gerät niemals vollständig in Wasser ein, da es dadurch beschädigt werden kann. |
|
|
AUFBEWAHRUNG |
NL |
|
||
|
||
|
Bewahren Sie das Gerät und das Netzkabel stets an einem trockenen Ort auf. Bewahren |
|
|
Sie das Gerät bei einer Umgebungstemperatur von maximal 60 °C auf. |
F |
|
Wickeln Sie das Netzkabel des Ladeadapters nicht um das Gerät. |
|
|
|
|
|
Geeignet zur einfachen Reinigung unter fließendem Wasser |
E |
|
|
|
WICHTIGE SICHERHEITSHINWEISE |
|
|
I |
|
|
|
|
|
|||
|
|
|
|
|
S |
|
|
|
|
|
||
ZUR VERMEIDUNG DER GEFAHR VON VERBRENNUNGEN, |
|
|
|
|
|
|
|
|||||
|
|
|
|
|
|
|
|
|
|
|||
STROMSCHLÄGEN, FEUER ODER VERLETZUNGEN AN PERSONEN: |
|
|
FIN |
|
|
|
|
|
||||
Ein Elektrogerät sollte niemals unbeaufsichtigt sein, wenn es mit einer Strom führenden |
|
|
|
|
|
|
|
|||||
Steckdose verbunden ist. |
|
|
|
|
|
|
|
|
|
|
||
ACHTUNG: Stellen Sie sicher, dass das Gerät vom Netzkabel getrennt ist, bevor Sie es |
|
|
P |
|
|
|
|
|
||||
unter fließendem Wasser reinigen. |
|
|
|
|
|
|
|
|||||
ACHTUNG: Nehmen Sie sämtliche abnehmbaren Zubehörteile vor der Reinigung des |
|
|
|
|
|
|
|
|
|
|
||
|
|
|
|
|
|
|
|
|
|
|||
Gerätes ab. |
|
|
SK |
|
|
|
|
|
||||
Halten Sie den Netzstecker und das Netzkabel von warmen Oberflächen fern. |
|
|
|
|
|
|
|
|||||
Achten Sie darauf, dass der Netzstecker und das Netzkabel nicht nass werden. |
|
|
|
|
|
|
|
|
|
|
||
Berühren Sie den Netzstecker oder das Netzkabel des Gerätes nur mit trockenen Händen. |
|
|
|
|
|
|||||||
Verwenden Sie den Trimmer nicht, wenn das Netzkabel beschädigt ist. Ein Ersatzteil |
|
|
CZ |
|
|
|
|
|
||||
können Sie über unsere internationalen Servicecenter beziehen. |
|
|
|
|
|
|
|
|
|
|
||
Laden, benutzen und bewahren Sie das Gerät bei einer Umgebungstemperatur zwischen |
|
|
HUN |
|
|
|
|
|
||||
15°C und 35°C auf. |
|
|
|
|
|
|
|
|||||
Achten Sie darauf, das Gerät stets vom Stromnetz zu trennen, wenn Sie es reinigen. |
|
|
|
|
|
|
|
|
|
|
||
Verwenden Sie nur solche Teile, die zusammen mit dem Trimmer geliefert wurden. |
|
|
PL |
|
|
|
|
|
||||
Nicht in der Nähe von Kindern aufbewahren. Die Verwendung dieses Geräts durch |
|
|
|
|
|
|
|
|||||
Personen mit eingeschränkten physischen, sensorischen oder geistigen Fähigkeiten oder |
|
|
|
|
|
|
|
|
|
|
||
mangelnden Erfahrungen und Kenntnissen birgt gewisse Risiken. Für deren Sicherheit |
|
|
RU |
|
|
|
|
|
||||
verantwortliche Personen sollten ausdrückliche Anweisungen zur Nutzung des Geräts |
|
|
|
|
|
|
|
|||||
erteilen oder diese überwachen. |
|
|
|
|
|
|
|
|
|
|
||
|
|
|
|
|
TR |
|
|
|
|
|
||
|
SCHÜTZEN SIE UNSERE UMWELT |
|
|
|
|
|
|
|
||||
|
|
|
|
|
|
|
|
|
|
|
||
Dieses Gerät enthält einen umweltfreundlichen aufladbaren Nickel-Metall-Hybridakku. |
|
|
RO |
|
|
|
|
|
||||
|
|
|
|
|
|
|
|
|
|
|||
Werfen Sie das Gerät oder den Akku nicht in den Hausmüll. In den meisten Ländern ist dies |
|
|
GR |
|
|
|
|
|
||||
ohnehin untersagt. Beachten Sie die entsprechenden nationalen und lokalen Vorschriften bei |
|
|
|
|
|
|
|
|||||
|
|
|
|
|
|
|
|
|
|
|||
der Entsorgung. Falls es erforderlich ist, Akku und Gerät getrennt zu entsorgen, befolgen Sie |
|
|
|
|
|
|
|
|
|
|
||
bitte die Anweisungen zum Öffnen des Rasierergehäuses, die im Abschnitt „Akkuaustausch“ |
|
|
AE |
|
|
|
|
|
||||
beschrieben sind. |
|
|
|
|
|
|
|
|||||
|
|
|
|
|
|
|
|
|
|
|
|
|
|
|
|
|
|
|
|
|
|
|
|
|
|
|
|
|
|
11 |
|
|
|
|
|
|
|
|
|
|
|
|
|
|
|
|
|
|
|
|
|
|
|
|
|
|
|
|
|
|
|
|
|
|
10.04.2008 |
23:12:18 Uhr |
|
|
|
|
|
|
|
||||
|
|
|
|
|
|
|
|
|
|
|
|
|
|
|
|
|
|
|
|
|
|
|
|
|
|

DEUTSCH
 ACHTUNG: Akkus nicht ins Feuer werfen oder öffnen! Akkus können explodieren oder giftige Stoffe freisetzen.
Für weitere Informationen zum Thema Recycling siehe www.remington-europe.com


 ENTSORGUNG DES AKKUS
Für eine sichere Entsorgung des Akkus befolgen Sie bitte die nachstehend aufgeführten Anweisungen:
 Schalten Sie den Bart-/ Haarschneider ein und entladen Sie das Gerät vollständig.
Entfernen Sie den Schneidkopf. (Abbildung A)
 Halten Sie den oberen Teil des Bart-/ Haarschneider in einer Hand und legen Sie die andere Hand an den unteren Teil. Ziehen Sie kräftig am Deckel des Batteriefachs, bis sich dieser löst. (Abbildung B)
 Entfernen Sie die Schraube. (Abbildung C)
Entfernen Sie die Motorhalterung, indem Sie den Exzenter kräftig drücken. (Abbildung D)  Durchtrennen Sie die am Akku befindlichen Drähte und entfernen Sie den Akku. (Abbildung E)
 SERVICE UND GARANTIE
Dieses Produkt wurde sorgfältig geprüft und ist frei von Mängeln. Remington® gewährt für dieses Produkt eine Garantie gegen Defekte, die auf fehlerhafte Materialien oder Verarbeitung zurückzuführen sind, für die Dauer der Garantie ab dem Datum des Originalkaufbelegs. Tritt während der Garantiezeit ein Fehler am Gerät auf, wird es kostenfrei repariert oder ausgetauscht, wenn ein Kaufbeleg vorliegt. Dies führt nicht zu einer Verlängerung der Garantiezeit.
Rufen Sie in einem Garantiefall Ihr Remington®-Servicecenter vor Ort an.
Diese Garantie berührt nicht die gesetzlichen Gewährleistungsansprüche.
Die Garantie erstreckt sich auf alle Länder, in denen unser Produkt über einen Vertragshändler verkauft wurde.
Die Garantie schließt Verbrauchsteile wie Scherköpfe/ Scherfolien und Scherklingen aus. Diese Garantie erstreckt sich nicht auf Schäden am Produkt, die auf Unfälle oder fehlerhafte Verwendung, Missbrauch, Änderungen am Produkt oder unsachgemäßen Gebrauch entgegen den technischen oder Sicherheitshinweisen zurückzuführen sind.
Eine Garantieleistung ist ausgeschlossen, wenn das Gerät von einer Person demontiert oder repariert wurde, die nicht von Remington® autorisiert wurde.
12
080189_REM_IFU_PG400_18L.indd D12-NL13
NEDERLANDS
Dank u voor het kiezen van Remington®. Onze producten zijn ontwikkeld om aan |
GB |
|
|
de hoogste normen t.a.v. kwaliteit, functionaliteit en ontwerp te voldoen. Wij |
D |
hopen dat u uw nieuwe Remington® product met veel plezier zult gebruiken. Lees |
|
a.u.b. eerst de instructies goed door en bewaar deze op een veilige plaats, voor |
|
toekomstig gebruik. |
NL |
|
|
|
LET OP |
|
F |
|
|
|
|
|
|||
|
|
|
|
|
E |
|
|
|
|
|
||
|
Gebruik dit apparaat alleen waar het voor bedoeld is, zoals in dit handboek |
|
|
|
|
|
|
|||||
|
|
|
|
|
|
|
|
|
|
|||
|
beschreven. Gebruik geen hulpstukken die niet door Remington® worden |
|
|
|
|
|
|
|
|
|
||
|
geadviseerd. |
|
I |
|
|
|
|
|
||||
|
Gebruik dit product niet als het niet op de juiste wijze werkt, als het product |
|
|
|
|
|
|
|||||
|
|
|
|
|
|
|
|
|
|
|||
|
gevallen of beschadigd is, of in het water gevallen is. |
|
|
|
|
|
|
|
|
|
||
|
|
|
|
|
S |
|
|
|
|
|
||
|
|
|
|
|
FIN |
|
|
|
|
|
||
|
|
BESCHRIJVING |
|
|
|
|
|
|
||||
|
|
|
|
|
|
|
|
|
|
|
||
1. |
Aan/Uit-knop |
|
P |
|
|
|
|
|
||||
|
|
|
|
|
|
|||||||
|
|
|
|
|
|
|
|
|
||||
2. |
20 mm trimmerhulpstuk |
|
SK |
|
|
|
|
|
||||
|
|
|
|
|
|
|||||||
3. |
30 mm trimmerhulpstuk |
|
|
|
|
|
|
|||||
|
CZ |
|
|
|
|
|
||||||
4. |
Fijn trimmerhulpstuk |
|
|
|
|
|
|
|||||
|
|
|
|
|
|
|
|
|
||||
5. MiniScreen-scheerhulpstuk |
|
HUN |
|
|
|
|
|
|||||
6. |
2 (omkeerbare) geleidingskammen |
|
|
|
|
|
|
|||||
|
|
|
|
|
|
|
|
|
||||
7. |
Lampje laadadapter |
|
PL |
|
|
|
|
|
||||
8. |
Oplaadadapter |
|
|
|
|
|
|
|||||
|
|
|
|
|
|
|
|
|
||||
9. |
Laadstandaard |
|
RU |
|
|
|
|
|
||||
|
|
|
|
|
|
|
|
|
|
|||
|
|
|
|
|
TR |
|
|
|
|
|
||
|
|
|
|
|
RO |
|
|
|
|
|
||
|
|
|
|
|
GR |
|
|
|
|
|
||
|
|
|
|
|
AE |
|
|
|
|
|
||
|
|
|
|
|
|
|
|
|
|
|
|
|
|
|
|
|
|
|
|
|
|
|
|
|
|
|
|
|
|
13 |
|
|
|
|
|
|
|
|
|
|
|
|
|
|
|
|
|
|
|
|
|
|
|
|
|
|
|
|
|
|
|
|
|
|
|
|
|
10.04.2008 23:12:18 Uhr |
|
|
|
|
|
|
|
||
|
|
|
|
|
|
|
|
|
|
|
|
|
|
|
|
|
|
|
|
|
|
|
|
|
|
NEDERLANDS


 INLEIDING
 LADEN VAN UW PERSONAL GROOMER
Voordat u uw personal groomer voor de eerste keer gebruikt, dient hij 14-16 uur geladen te worden.
 Zorg ervoor dat het product is uitgeschakeld.
 Plaats uw personal groomer in de oplaadstandaard, sluit de oplaadadapter op het product aan en vervolgens op het stroomnet. De laadindicator zal gaan branden.
Uw personal groomer kan niet worden overladen. Als u het product echter gedurende langere tijd (2-3 maanden) niet gebruikt, trek het dan uit het stopcontact en berg het op. Als u het dan weer wilt gebruiken, moet u de groomer eerst weer geheel opladen.
Om de levensduur van uw batterijen te behouden, moet u deze elke zes maanden helemaal ‚leegmaken’ en vervolgens gedurende 14-16 uur weer helemaal opladen.
 GEBRUIK MET NETVOEDING
 Sluit de oplaadadapter aan op het product en steek deze vervolgens in het stopcontact.
 VOORZICHTIG: Langdurig gebruik met uitsluitend netvoeding zal de levensduur van de batterij verkorten.


 GEBRUIK
 VOORDAT U BEGINT
Kam gezichtshaar altijd met een fijne kam, voordat u met trimmen begint.
 OMKEERBARE GELEIDINGSKAMMEN
Deze omkeerbare geleidingskammen zijn bestemd voor gebruik met het 30 mm trimmerblad. Om hem te bevestigen dient de kam voorzichtig over het trimmerblad geschoven te worden. Een pijl aan de kant van de kam geeft de lengte waarop het haar geknipt zal worden aan.
Instellingen |
|
mm |
|
|
|
Geen geleidingskam |
|
0,5 mm |
|
|
|
Kleine kam |
|
3mm/6mm |
|
|
|
Grote kam |
|
9mm/12mm |
|
|
|
Vervangende kammen zijn leverbaar: SP256 |
|
|
14
080189_REM_IFU_PG400_18L.indd NL14-NL15
NEDERLANDS
|
GELEIDINGSKAMMEN BEVESTIGEN EN VERWIJDEREN |
|
GB |
|
|
|
|
|
|||
|
|
|
|
|
|
|
|
|
|
||
|
Met de trimmerkam van u af gericht, schuift u de geleidingskam op het snijblad en klikt u |
|
D |
|
|
|
|
|
|||
|
het in de juiste stand. |
|
|
|
|
|
|
||||
|
Met het trimmerblad van u af gericht, schuift u de geleidingskam voorzichtig van het |
|
|
|
|
|
|
|
|
|
|
|
trimmerblad af. |
|
NL |
|
|
|
|
|
|||
|
HET UITDUNNEN EN SMALLER MAKEN VAN BAARD/SNOR (Schema1) |
|
|
|
|
|
|
||||
|
Bevestig een geleidingskam op het 30 mm trimmerblad. Als u voor de eerste keer gaat |
|
|
|
|
|
|
|
|
|
|
|
trimmen, adviseren wij u de instelling voor de maximale lengte te gebruiken. |
|
F |
|
|
|
|
|
|||
|
Zet de eenheid aan. |
|
|
|
|
|
|
|
|
|
|
|
Plaats de vlakke bovenkant van de trimmerkam tegen de huid. |
|
|
|
|
|
|
|
|
|
|
|
Schuif de personal groomer voorzichtig door het haar. Indien nodig kunt u deze beweging |
|
E |
|
|
|
|
|
|||
|
in verschillende richtingen herhalen. |
|
|
|
|
|
|
||||
|
|
|
|
|
|
|
|
|
|
||
|
Als zich tijdens het trimmen haar in de trimmerkam ophoopt, schakel de unit dan uit, haal |
|
|
|
|
|
|
|
|
|
|
|
de kam eraf en borstel/spoel de kam af. |
|
I |
|
|
|
|
|
|||
|
DEFINIËREN VAN DE BAARD-/SNORLIJN (Schema 2) |
|
|
|
|
|
|
|
|
|
|
|
|
|
|
|
|
|
|
|
|
||
|
Houd de personal groomer met het 20 mm trimmerblad naar u toe gericht . |
|
S |
|
|
|
|
|
|||
|
Start met de buitenste lijn van de baard/snor en zet het trimmerblad voorzichtig op uw |
|
|
|
|
|
|
||||
|
|
|
|
|
|
|
|
|
|
||
|
huid. Beweeg naar de buitenste rand van de baard/snor om de gewenste delen van het |
|
|
|
|
|
|
|
|
|
|
|
gezicht te trimmen en beweeg van de baard in de nek af. |
|
FIN |
|
|
|
|
|
|||
|
BAKKEBAARDEN BIJWERKEN (Schema 3) |
|
|
|
|
|
|
||||
|
|
|
|
|
|
|
|
|
|
||
|
Houd de personal groomer met het 20 mm trimmerblad naar u toe gericht. |
|
P |
|
|
|
|
|
|||
|
Start met de buitenkant van een bakkebaard, waarbij de trimmerbladen licht tegen uw huid |
|
|
|
|
|
|||||
|
rusten. Beweeg naar de buitenste rand van de bakkebaard om de gewenste plaatsen in het |
|
|
|
|
|
|
|
|
|
|
|
|
|
|
|
|
|
|
|
|
||
|
gezicht te trimmen. |
|
SK |
|
|
|
|
|
|||
|
GEBRUIK VAN UW MINISCREEN-SCHEERAPPARAAT (Schema 4) |
|
|
|
|
|
|
||||
|
|
|
|
|
|
|
|
|
|
||
|
Bevestig het MiniScreen-scheerapparaat. |
|
CZ |
|
|
|
|
|
|||
|
Houd de groomer zodanig vast dat de MiniScreen uw gezicht onder een hoek van 45 |
|
|
|
|
|
|
||||
|
graden licht aanraakt. |
|
|
|
|
|
|
|
|
|
|
|
Maak korte en goed gecontroleerde bewegingen om rond uw baard/snor te scheren. |
|
HUN |
|
|
|
|
|
|||
|
Gebruik uw vrije hand om uw huid te strekken. Daardoor gaat het haar rechtop staan en is |
|
|
|
|
|
|||||
|
het gemakkelijker te scheren. |
|
PL |
|
|
|
|
|
|||
OPMERKING: Het MiniScreen-scheerapparaat is ontworpen om met grote precisie de plekken |
|
|
|
|
|
||||||
|
|
|
|
|
|
|
|
||||
rondom uw baard/snor/bakkebaarden te scheren. Het is niet ontworpen om uw hele gezicht |
|
|
|
|
|
|
|
|
|
||
te scheren. Gebruik voor een gegarandeerd glad en comfortabel scheerresultaat gebruik één |
|
RU |
|
|
|
|
|
||||
van de elektrische scheerapparaten van Remington®. |
|
|
|
|
|
|
|||||
|
|
|
|
|
|
|
|
|
|||
|
DE NEK UITSCHEREN (Schema 5) |
|
|
|
|
|
|
|
|
|
|
|
|
|
|
|
|
|
|
|
|
||
Opmerking: als u deze handeling alleen doet, hebt u een handspiegel nodig. |
|
TR |
|
|
|
|
|
||||
|
Bevestig het 30 mm trimblad voordat u begint. |
|
|
|
|
|
|
||||
|
|
RO |
|
|
|
|
|
||||
|
Gebruik uw vingers om het haar vanaf de hoofdhuid, uit de nek omhoog te houden. Uw |
|
|
|
|
|
|
||||
|
middelvinger dient de haarwortels van de door u opgepakte haren te beschermen, om het |
|
|
|
|
|
|
||||
|
per ongeluk afsnijden hiervan door de personal groomer te voorkomen. |
|
|
|
|
|
|
|
|
|
|
|
Met uw andere hand de personal groomer aan de onderkant van de nek plaatsen, met de |
|
GR |
|
|
|
|
|
|||
|
snij-unit omhoog gericht. Beweeg de personal groomer over de lengte van de nek tot het |
|
|
|
|
|
|
||||
|
uw vingers die de haarwortels beschermen aanraakt. Zorg dat de groomer tijdens deze |
|
|
|
|
|
|
|
|
|
|
|
handeling voorzichtig wordt bewogen en dat de haarwortels aan de onderkant van uw |
|
AE |
|
|
|
|
|
|||
|
hoofd uit de buurt van de trimmer blijven. |
|
|
|
|
|
|
||||
|
|
|
|
|
|
|
|
|
|
|
|
|
|
|
|
|
|
|
|
|
|
|
|
|
|
|
|
15 |
|
|
|
|
|
|
|
|
|
|
|
|
|
|
|
|
|
|
|
|
|
|
|
|
|
|
|
|
|
|
|
10.04.2008 |
23:12:18 Uhr |
|
|
|
|
|
|
|
|||
|
|
|
|
|
|
|
|
|
|
|
|
|
|
|
|
|
|
|
|
|
|
|
|
NEDERLANDS
 HAREN UIT NEUS EN OOR VERWIJDEREN (Schema 6 & 7)
 Bevestig het fijne trimmerhulpstuk.
Plaats de personal groomer voorzichtig in neusgat of oor.
 Beweeg de groomer zachtjes in en uit het neusgat of oor terwijl u het tegelijkertijd draait. Voorkom dat de snij-unit meer dan 6 mm in uw neusgat of oor wordt ingestoken.
 OM HAAR UIT DE WENKBRAUWEN TE VERWIJDEREN (Schema 8)
 Bevestig het fijne trimmerhulpstuk.
Beweeg de snijunit naar wild, ongewenst haar in de wenkbrauwen of haar dat uit de wenkbrauwen zelf naar buiten steekt.
 Om al het haar te verwijderen, moet u de snijunit op de huid laten zakken en de tondeuse over de gewenste plek bewegen.
 Maak langzame en goed gecontroleerde bewegingen.
 BEVESTIGEN EN VERWIJDEREN VAN DE TRIMMER-KAMHULPSTUKKEN
OPMERKING: zorg er altijd voor dat de personal groomer uit staat als u de hulpstukken gaat verwisselen.
 Om te verwijderen, de personal groomer in de ene hand vasthouden en vervolgens de trimmerkop met de andere hand linksom draaien.
 Om te bevestigen, de personal groomer in een hand vasthouden en vervolgens de trimmerkop draaien.
 Tips voor de beste resultaten
De haren van de baard, snor en bakkebaarden moeten droog zijn.
 Vermijd het gebruik van lotions voordat u uw personal groomer gaat gebruiken. Kam uw haar in de groeirichting.
 Verwijder het trimmer-kamhulpstuk als u: het uiteinde van de haarlijn wilt bepalen, de achterkant van de nek wilt trimmen, de baard aan de voorkant van de nek wilt trimmen.


 VOOR UW PERSONAL GROOMER ZORGEN
REINIGING EN ONDERHOUD VAN UW PERSONAL GROOMER
 NA ELK GEBRUIK
1.Schakel de personal groomer uit.
2.Borstel de achtergebleven haren voorzichtig uit de geleidingskam en het trimmerblad.
 VOORZORGSMAATERGELEN BIJ HET REINIGEN
 Alleen het hulpstuk van de kamgeleiding en het trimmerblad mogen voor het reinigen van het product verwijderd worden.
 Reiniging dient uitsluitend met een zachte borstel plaats te vinden, zoals met de bij het product meegeleverde borstel.
 Gebruik voor de bladen alleen lichte olie, zoals meegeleverd, of naaimachineolie.
16
080189_REM_IFU_PG400_18L.indd NL16-NL17
NEDERLANDS
Gebruik geen ruwe of corrosieve reinigingsmiddelen voor de houders of de snijbladen. |
GB |
||
|
|||
Niet in water onderdompelen, hierdoor wordt h et product beschadigen. |
D |
||
OPBERGEN |
|||
|
|||
Berg dit apparaat en het bijbehorende snoer altijd in een vochtvrije ruimte op. Niet bij |
NL |
||
temperaturen boven de 35°C bewaren. |
|||
Draai het snoer van de Oplaadadapter niet om de adapter heen. |
|
||
|
|
F |
|
|
Geschikt om in water te reinigen |
|
|
|
|
E |
|
|
|
|
|
|
BELANGRIJKEVEILIGHEIDSINSTRUCTIES |
I |
|
|
|
|
|
WAARSCHUWING - OM HET RISICO VAN BRANDWONDEN, ELEKTROCUTIE, |
S |
||
BRAND OF PERSOONLIJK LETSEL TE VOORKOMEN: |
|||
|
|||
Als een apparaat op de stroomvoorziening is aangesloten mag het nooit zonder toezicht |
FIN |
||
worden achtergelaten. |
|||
WAARSCHUWING: verwijder eerst het snoer van het product voordat u het product |
|
||
in water reinigt. |
P |
||
WAARSCHUWING: de onderdelen die u op het apparaat kunt bevestigen dient u voor |
|||
|
|||
reniging eerst goed te bevestigen zodat deze onderdelen niet in het water kunnen vallen |
|
||
tijdens het reinigen. |
SK |
||
Houd de stekker en het snoer uit de buurt van warmtebronnen. |
|||
Zorg ervoor dat de stekker en het snoer niet nat worden. |
|
||
Steek het snoer van het scheerapparaat nooit met natte handen in het stopcontact of trek het eruit. |
CZ |
||
Gebruik het product niet als het snoer is beschadigd. Een reservesnoer kan worden besteld |
|||
bij onze Internationale Service Centra. |
|
||
Laad, gebruik en berg het product op bij een temperatuur tussen 15°C en 35°C. |
HUN |
||
Neem vóór het reinigen altijd de stekker uit het stopcontact. |
|||
|
|||
Gebruik uitsluitend de onderdelen die bij het apparaat meegeleverd zijn. |
|
||
Dit product buiten het bereik van kinderen houden. Het gebruik van dit apparaat door |
PL |
||
personen met beperkte fysieke, sensorische of mentale mogelijkheden of personen die een |
|||
gebrek aan ervaring of kennis hebben, kan tot gevaarlijke situaties leiden. De personen die |
|
||
voor hun veiligheid verantwoordelijk zijn, dienen expliciete instructies te geven of toezicht |
RU |
||
op het gebruik van het apparaat te houden. |
|||
|
|||
|
|
TR |
|
|
BESCHERM HET MILIEU |
||
|
|
||
Dit apparaat bevat een milieuvriendelijke oplaadbare nikkel-metaalbatterij. Gooi dit |
RO |
||
|
|||
product of de batterij niet bij het huishoudelijke afval. Hiervoor bestaan in de meeste |
GR |
||
landen beperkingen. Volg de nationale of lokale regels voor het verzamelen en afvoer van |
|||
|
|||
afval op die in uw regio gelden. Als u de batterij uit het apparaat moet halen voor separate |
|
||
verwijdering, lees dan de instructies in het deel ‘Verwijderen / afvoeren van de batterij’ |
AE |
||
over het openen van de behuizing |
|||
|
|||
17
10.04.2008 23:12:19 Uhr
NEDERLANDS
. VOORZICHTIG: De batterijen niet verbranden of kapot maken, omdat deze dan kunnen barsten of giftige materialen kunnen vrijkomen.
Voor informatie over recycling kijk op www.remington-europe.com


 VERWIJDEREN / AFVOEREN VAN DE BATTERIJ
Volg de onderstaande instructies op om de batterij voor het veilig afvoeren te verwijderen:
 Zet de personal groomer aan en zorg voor het ontladen van de resterende stroom.
De trimmerkop verwijderen. (Schema A)
 Houd de bovenkant van de behuizing van de personal groomer in een hand en het lagere 1/6e deel van de personal groomer in de andere hand en trek de batterijenkap er met kracht af. (Schema B)
 De schroef verwijderen. (Schema C)
Verwijder de motorbeugel door met kracht op het excentriek te drukken. (Schema D)  Ontkoppel het batterijsnoer en verwijder de batterij. (Schema E)
 SERVICE EN GARANTIE
Dit product is gecontroleerd en is vrij van defecten. Wij verlenen garantie op dit product voor alle fouten die het gevolg zijn van slechte materialen of vakmanschap voor een periode van 2 jaar, beginnend vanaf de datum van eerste aankoop door de consument. Als het apparaat binnen de garantieperiode niet (meer) goed functioneert, zullen wij het zonder kosten repareren of u een nieuw apparaat toesturen, mits u een aankoopbewijs kunt overhandigen. Dit heeft geen verlenging van de garantieperiode tot gevolg. Als het apparaat binnen de garantieperiode niet (meer) goed functioneert, zullen wij het zonder kosten repareren of u een nieuw apparaat toesturen, mits u een aankoopbewijs kunt overhandigen. Dit heeft geen verlenging van de garantieperiode tot gevolg.
Om een beroep te doen op de garantie kunt u gewoon contact opnemen met het Remington® Servicecentrum in uw regio.
Deze garantie wordt verleend naast de aan u standaard toegekende wettelijke consumentenrechten.
Deze garantie is van toepassing in alle landen waar ons product via een geautoriseerde dealer werd verkocht.
Deze garantie geldt niet voor de messen. Evenmin is de garantie van toepassing op schade door ongevallen, onjuist gebruik, misbruik of aan het product aangebrachte veranderingen of een gebruik dat in strijd is met de technische vereisten of veiligheidsvoorschriften Deze garantie is niet van toepassing als het product uit elkaar is genomen of is gerepareerd door een persoon die daartoe door ons niet is gemachtigd.
18
080189_REM_IFU_PG400_18L.indd NL18-F19
FRANÇAIS
Merci d‘avoir choisi Remington®. Nos produits sont conçus pour répondre aux |
|
|
GB |
|
|
|
|
|
|||||
|
|
|
|
|
|
|
|
|
|
||||
exigences les plus élevées de qualité, de performance et de design. Nous espérons |
|
|
|
|
|
||||||||
que vous aurez plaisir à utiliser votre nouvel ensemble tondeuse Remington®. |
|
|
D |
|
|
|
|
|
|||||
Veuillez lire attentivement cette notice et la conserver en un lieu sûr pour |
|
|
|
|
|
|
|
|
|
|
|||
pouvoir vous y référer ultérieurement. |
|
|
NL |
|
|
|
|
|
|||||
|
|
|
|
|
|
|
|
|
|
|
|||
|
|
|
|
|
|
F |
|
|
|
|
|
||
|
|
ATTENTION |
|
|
|
|
|
|
|
|
|
|
|
|
|
|
|
|
|
E |
|
|
|
|
|
||
|
Cet appareil ne doit servir qu‘à l‘utilisation décrite dans ce manuel. N‘utilisez |
|
|
|
|
|
|
|
|
|
|
||
|
que les accessoires recommandés par Remington®. |
|
|
I |
|
|
|
|
|
||||
|
N‘utilisez pas ce produit s‘il ne fonctionne pas correctement, s‘il est tombé, s‘il |
|
|
|
|
|
|||||||
|
est endommagé, ou s‘il a été immergé dans l‘eau. |
|
|
|
|
|
|
|
|
|
|
||
|
|
|
|
|
|
S |
|
|
|
|
|
||
|
|
|
|
|
FIN |
|
|
|
|
|
|||
|
|
DESCRIPTION |
|
|
|
|
|
|
|
||||
1. |
Interrupteur marche/arrêt |
|
|
P |
|
|
|
|
|
||||
|
|
|
|
|
|
|
|||||||
|
|
|
|
|
|
|
|
|
|
||||
2. |
Accessoire pour tondeuse 20 mm |
|
|
SK |
|
|
|
|
|
||||
|
|
|
|
|
|
|
|||||||
3. |
Accessoire pour tondeuse 30 mm |
|
|
|
|
|
|
|
|||||
|
|
CZ |
|
|
|
|
|
||||||
4. Accessoire de coupe fine pour tondeuse |
|
|
|
|
|
|
|
||||||
|
|
|
|
|
|
|
|
|
|
||||
5. Accessoire de rasage MiniScreen |
|
|
HUN |
|
|
|
|
|
|||||
6. |
2 guides de coupe (réversibles) |
|
|
|
|
|
|
|
|||||
|
|
|
|
|
|
|
|
|
|
||||
7. |
Voyant de charge |
|
|
PL |
|
|
|
|
|
||||
8. |
Adaptateur de chargeur |
|
|
|
|
|
|
|
|||||
|
|
RU |
|
|
|
|
|
||||||
9. |
Support de charge |
|
|
|
|
|
|
|
|||||
|
|
|
|
|
|
|
|
|
|
||||
|
|
|
|
|
|
TR |
|
|
|
|
|
||
|
|
|
|
|
|
RO |
|
|
|
|
|
||
|
|
|
|
|
|
GR |
|
|
|
|
|
||
|
|
|
|
|
|
AE |
|
|
|
|
|
||
|
|
|
|
|
|
|
|
|
|
|
|
|
|
|
|
|
|
|
|
|
|
|
|
|
|
|
|
|
|
|
|
|
19 |
|
|
|
|
|
|
|
|
|
|
|
|
|
|
|
|
|
|
|
|
|
|
|
|
|
|
|
|
|
|
|
|
|
|
|
|
|
10.04.2008 |
23:12:19 Uhr |
|
|
|
|
|
|
|
||||
|
|
|
|
|
|
|
|
|
|
|
|
|
|
|
|
|
|
|
|
|
|
|
|
|
|
|
|

FRANÇAIS


 POUR DEMARRER
 COMMENT CHARGER VOTRE TONDEUSE
Avant d’utiliser votre tondeuse pour la première fois, chargez-la pendant 14 à 16 heures.
 Assurez-vous que le produit soit bien éteint.
 Placez votre tondeuse sur son support de charge, branchez l’adaptateur de charge sur l’appareil puis sur le secteur. L’indicateur de charge s’allume alors.
Votre tondeuse ne peut être surchargée. Cependant, s’il est prévu que le produit ne soit pas utilisé pendant une longue période (2-3 mois), veuillez le débrancher du secteur et le stocker de façon appropriée. Rechargez complètement votre tondeuse lorsque vous souhaitez la réutiliser
Pour prolonger la durée de vie de vos batteries, laissez-les se décharger entièrement tous les 6 mois puis rechargez-les pendant 14 à 16 heures.
 UTILISATION SUR SECTEUR
 Branchez le chargeur à l’appareil puis au secteur.
 ATTENTION: l‘utilisation prolongée sur secteur réduit la durée de vie de la batterie.


 GUIDE D’UTILISATION
 AVANT D’UTILISER LA TONDEUSE
Il est nécessaire de toujours peigner les poils de votre visage à l’aide d’un peigne fin avant de commencer à tondre.
 GUIDES DE COUPE REVERSIBLES
Ces guides de coupe réversibles peuvent uniquement être utilisés avec la lame de 30 mm. Pour fixer le guide, faites-le doucement glisser le long de la lame. Une flèche sur le côté du guide indique la longueur à laquelle les cheveux seront coupés.
Réglages |
|
mm |
|
|
|
Pas de guide de coupe |
|
0,5 mm |
|
|
|
Petit peigne |
|
3mm/6mm |
|
|
|
Peigne large |
|
9mm/12mm |
|
|
|
Peignes de rechange disponibles: SP256 |
|
|
20
080189_REM_IFU_PG400_18L.indd F20-F21
FRANÇAIS
|
FIXER ET ÔTER LES GUIDES DE COUPE |
GB |
|
|
|
|
Tout en maintenant les lames de la tondeuse dans la direction opposée à la vôtre, faites |
D |
|
glisser le guide de coupe sur le bout des lames et enfoncez-le jusqu’à ce que vous entendiez |
|
|
un clic. |
|
|
Tout en maintenant les lames de la tondeuse dans la direction opposée à la vôtre, appuyez |
NL |
|
sur le guide de coupe pour le retirer de la lame. |
|
|
|
|
|
POUR AFFINER LA BARBE/MOUSTACHE (Diagramme 1) |
|
|
|
|
|
Fixez le guide de coupe sur la lame de 30 mm. Si vous utilisez la tondeuse pour la première |
F |
|
fois, commencez par utiliser les réglages de coupe les plus longs. |
|
|
|
|
|
Allumez l’appareil. |
|
|
Placez l’extrémité plate du guide de coupe contre votre peau. |
E |
|
Faites glisser lentement la tondeuse dans vos cheveux. Répétez l’opération dans autant de |
|
|
|
|
|
directions que nécessaire. |
|
|
Si des cheveux s’amassent sur le guide pendant la coupe, éteignez l’appareil, ôtez le guide |
I |
|
et brossez-le. |
|
|
|
|
|
POUR DESSINER LES CONTOURS DE LA BARBE/MOUSTACHE (Diagramme 2) |
S |
|
||
|
Tenez la tondeuse avec les lames de 20 mm face à vous. |
|
|
|
|
|
Commencez au bord des contours de la barbe/moustache et rabattez lentement la lame |
|
|
sur votre peau. Appliquez des mouvements à la tondeuse vers les contours de la barbe/ |
FIN |
|
moustache pour raser les endroits désirés du visage et de la barbe au niveau du cou. |
|
|
|
|
|
RASER LES CONTOURS DES PATTES (Diagramme 3) |
|
|
|
|
|
Tenez la tondeuse avec les lames de 20 mm face à vous. |
P |
|
Commencez au bord des pattes, puis, tout en rabattant légèrement les lames de la |
|
|
tondeuse contre votre peau, appliquez des mouvements à l’appareil contre les contours |
SK |
|
des pattes pour raser les endroits désirés du visage. |
|
|
|
|
|
UTILISER LE RASOIR MINISCREEN (Diagramme 4) |
CZ |
|
||
|
Fixez le rasoir MiniScreen. |
|
|
Tenez la tondeuse de manière à ce que le MiniScreen touche légèrement votre peau à un |
|
|
angle de 45 degrés. |
HUN |
|
Pour raser les zones autour de votre barbe/moustache, procédez par petits mouvements |
|
|
bien contrôlés. Utilisez votre main libre pour tendre la peau. Cela permet de redresser les |
|
|
poils et de faciliter ainsi le rasage. |
|
REMARQUE: Le rasoir MiniScreen a été conçu pour raser avec précision les zones situées |
PL |
|
autour de votre barbe/moustache ou de vos pattes. Il n’a pas été conçu pour raser l’ensemble |
|
|
du visage Pour un rasage de près garanti et confortable, utilisez l’un des rasoirs électriques |
RU |
|
Remington®. |
||
|
RASER LA NUQUE (Diagramme 5) |
TR |
|
||
Remarque: Si vous vous rasez vous-même la nuque, vous aurez besoin d’un miroir portable. |
||
|
Avant de commencez, fixez la lame de 30 mm. |
|
|
Avec vos doigts, soulevez les cheveux à la base de votre tête pour dégager votre nuque. |
RO |
|
Votre index devrait couvrir les racines des cheveux que vous soulevez afin d’éviter de les |
|
|
raser accidentellement avec la tondeuse. |
|
|
Avec votre autre main, tenez la tondeuse à la base de votre cou, la partie coupante face |
GR |
|
à vous, et faites remonter la tondeuse le long de votre cou jusqu’à ce qu’elle touche |
|
|
votre doigt qui recouvre les racines des cheveux à la base de votre tête. Assurez-vous |
|
|
d’appliquer des mouvements lents à l’appareil lorsque vous réalisez cette opération et de |
AE |
|
maintenir les racines de vos cheveux à la base de votre tête hors du champ de la tondeuse. |
|
|
|
|
21
10.04.2008 23:12:19 Uhr

FRANÇAIS
 POUR RASER LES POILS DU NEZ ET DES OREILLES (Diagrammes 6 & 7)
 Fixez l’accessoire de tondeuse pour coupe fine.
Introduisez lentement la tondeuse dans votre narine ou votre oreille.
 Appliquez un lent mouvement de va-et-vient à la tondeuse dans votre.
Evitez d’insérer le bloc de coupe de plus de 6 mm dans vos narines ou vos oreilles.
 POUR ENLEVER LES POILS DES SOURCILS (Diagramme 8)
 Fixez l’accessoire de tondeuse pour coupe fine.
Guidez avec précaution la tête de coupe pour supprimer les poils indésirables le long de la ligne des sourcils ou pour couper les poils dépassant des sourcils.
 Pour enlever totalement les poils, placez la tondeuse en contact avec la peau et déplacez-la sur la zone concernée.
 Procédez par mouvements lents et bien contrôlés.
 FIXER ET ÔTER LES GUIDES DE COUPE
REMARQUE: Assurez-vous toujours que la tondeuse soit éteinte avant de changer d’ accessoire.
 Pour ôter les guides de coupe, tenez la tondeuse dans une main et tournez la tête de la tondeuse dans le sens contraire des aiguilles d’une montre avec l’autre main.
 Pour les fixez, tenez la tondeuse dans une main et tournez la tête de la tondeuse dans le sens des aiguilles d’une montre avec l’autre main.
 Conseils pour obtenir de meilleurs résultats
Il est conseillé de procéder au rasage sur une barbe, une moustache ou des pattes sèche(s).
 Eviter de vous imbiber de lotion avant d’utiliser votre tondeuse. Peignez-vous les cheveux dans le sens de la pousse.
 Ôtez le guide de coupe si vous dessinez les contours tels que les pattes, si vous vous rasez la nuque ou si vous rasez les contours de votre barbe au niveau du cou.


 ENTRETIEN DEVOTRETONDEUSE
NETTOYAGE ET ENTRETIEN DE VOTRE TONDEUSE
 APRÈS CHAQUE UTILISATION
1.Eteignez la tondeuse.
2.Ôtez soigneusement les poils restants sur le guide de coupe et les lames avec une brosse ou sous à l’eau chaude.
 PRECAUTIONS DE NETTOYAGE
 Seuls le guide de coupe et la lame de la tondeuse peuvent être ôtés de l’appareil pour le nettoyage.
 Il est vivement conseillé de nettoyer l’appareil exclusivement avec une brosse à poils tendres, comme celle fournie avec l’appareil .
22
080189_REM_IFU_PG400_18L.indd F22-F23
FRANÇAIS
Utilisez uniquement l’huile légère fournie ou de l’huile pour machine à coudre sur les lames. |
GB |
|
|
|
|
|
||||
|
|
|
|
|
|
|
||||
N’utilisez pas de nettoyants forts ou corrosifs sur l’appareil ou sur les lames. |
D |
|
|
|
|
|
||||
Ne plongez pas l’appareil dans l’eau. Cela l’endommagerait. |
|
|
|
|
|
|||||
STOCKAGE |
NL |
|
|
|
|
|
||||
Conservez toujours cet appareil et le cordon d’alimentation dans un endroit sec. Ne |
|
|
|
|
|
|||||
rangez pas l’appareil dans un endroit où la température est supérieure à 60°C. |
|
|
|
|
|
|
|
|||
Ne pas enrouler le cordon de l’adaptateur de chargeur autour de l’appareil. |
F |
|
|
|
|
|
||||
|
|
|
|
|
|
|
|
|
||
|
Conseils pour le nettoyage sous l’eau |
E |
|
|
|
|
|
|||
|
|
|
|
|
|
|
|
|
||
|
|
|
|
I |
|
|
|
|
|
|
|
CONSIGNES IMPORTANTES DE SECURITE |
|
|
|
|
|
||||
|
|
|
|
|
|
|
|
|||
|
|
|
|
S |
|
|
|
|
|
|
AVERTISSEMENT – POUR REDUIRE LE RISQUE DE BRULURES, |
|
|
|
|
|
|||||
|
|
|
|
|
|
|
||||
D’ELECTROCUTION, D’INCENDIE OU DE BLESSURE DE PERSONNES |
FIN |
|
|
|
|
|
||||
Ne laissez jamais d’appareil électrique sans surveillance lorsqu’il est branché. |
|
|
|
|
|
|||||
|
|
|
|
|
|
|
||||
IMPORTANT : Enlevez le cordon d‘alimentation de votre tondeuse avant de la nettoyer sous l’eau. |
|
|
|
|
|
|
|
|||
IMPORTANT : Assurez vous que les accessoires qui doivent être fixés sur votre tondeuse |
P |
|
|
|
|
|
||||
|
|
|
|
|
||||||
soient correctement positionnés afin qu‘ils ne risquent pas de tomber dans l‘eau. |
|
|
|
|
|
|
|
|||
Tenez la fiche et le cordon d’alimentation à l’écart des surfaces chaudes. |
|
|
|
|
|
|
|
|||
Ne jamais mouiller la fiche et le cordon d’alimentation. |
SK |
|
|
|
|
|
||||
Ne pas brancher ou débrancher l’appareil avec les mains mouillées. |
|
|
|
|
|
|||||
|
|
|
|
|
|
|
||||
Ne pas utiliser le produit si le cordon est endommagé. Vous pouvez obtenir un cordon de |
CZ |
|
|
|
|
|
||||
remplacement auprès de l’un de nos Centres de service après-vente internationaux. |
|
|
|
|
|
|||||
Chargez, utilisez et stockez le produit à une température comprise entre 15°C et 35°C. |
|
|
|
|
|
|||||
Débranchez toujours l’appareil du secteur avant de le nettoyer. |
HUN |
|
|
|
|
|
||||
Utilisez exclusivement les accessoires fournis avec l’appareil. |
|
|
|
|
|
|||||
Conservez ce produit hors de portée des enfants. L’utilisation de cet appareil par des |
|
|
|
|
|
|||||
personnes aux aptitudes physiques, sensorielles ou mentales réduites ou un manque |
|
|
|
|
|
|
|
|||
d’expérience ou de savoir-faire peut se révéler dangereuse. Il est recommandé aux |
PL |
|
|
|
|
|
||||
personnes responsables de leur sécurité de leur donner des instructions claires ou de les |
|
|
|
|
|
|||||
surveiller lors de l’utilisation de l’appareil. |
|
|
|
|
|
|
|
|||
|
|
|
|
RU |
|
|
|
|
|
|
|
PROTÉGER L’ENVIRONNEMENT |
TR |
|
|
|
|
|
|||
Cet appareil contient une batterie nickel-métal hydrure rechargeable à faible impact sur |
|
|
|
|
|
|||||
RO |
|
|
|
|
|
|||||
l’environnement. Ne jetez pas l’appareil ou sa batterie dans les déchets ménagers. La |
|
|
|
|
|
|||||
|
|
|
|
|
|
|
||||
réglementation de nombreux pays l’interdit. Respectez les dispositions nationales ou locales |
|
|
|
|
|
|
|
|||
relatives à la collecte et à l’élimination en vigueur dans votre lieu de résidence. Si vous êtes |
GR |
|
|
|
|
|
||||
amené à ôter la batterie de l’appareil pour l’éliminer séparément, veuillez vous reporter |
|
|
|
|
|
|||||
aux instructions du chapitre ‘Ôter la batterie’, qui vous expliquera comment ouvrir le |
|
|
|
|
|
|
|
|||
compartiment à batterie. |
AE |
|
|
|
|
|
||||
|
|
|
|
|
|
|
|
|
||
|
|
|
|
|
|
|
|
|
|
|
|
|
|
|
|
|
|
|
|
|
|
|
|
|
|
23 |
|
|
|
|
|
|
|
|
|
|
|
|
|
|
|
|
|
|
|
|
|
|
|
|
|
|
|
|
10.04.2008 23:12:20 Uhr

FRANÇAIS
 ATTENTION: Ne jetez pas les batteries au feu et ne les abîmez pas pour éviter tout risque d‘explosion ou de dégagement de produits toxiques.
Pour davantage d‘informations sur le reclyclage de nos produits, consultez
www.remington-europe.com


 ÔTER LA BATTERIE
Pour ôter la batterie et l’éliminer en toute sécurité, veuillez suivre les indications ci-dessous:
 Éteignez la tondeuse et déchargez complètement la batterie.
Retirez la tête de la tondeuse. (Diagramme A)
 Tenez la partie supérieure de la tondeuse dans une main et le dernier 1/6e de l’appareil dans l’autre main et tirez vigoureusement sur le couvercle du compartiment à batterie. (Diagramme B)
 Ôtez la vis. (Diagramme C)
Ôtez le support du moteur en pressant vigoureusement sur la came. (Diagramme D)  Débranchez le fil de la batterie et ôtez celle-ci. (Diagramme E)
 SERVICE ET GARANTIE
Ce produit a fait l’objet d’un contrôle et ne comporte aucun défaut. Nous garantissons ce produit contre tout défaut matériel ou de fabrication pour une période de 2 ans à compter de la date d’achat. Si le produit venait à ne plus fonctionner correctement au cours de la période de garantie, nous procéderions à la correction de chaque problème ou au remplacement de tout ou partie du produit sans aucun frais sur présentation de la preuve d’achat. Une telle procédure ne saurait donner lieu à une extension de la période de garantie.
Si vous êtes amené à faire valoir votre garantie, veuillez contacter le service après-vente Remington® de votre région.
Cette garantie n’a aucun impact sur vos droits statutaires normaux.
Cette garantie est valable dans tous les pays où ce produit est commercialisé par un revendeur autorisé.
La garantie ne couvre les couteaux, ces derniers sont des accessoires consommables. Les dommages causés par un accident, une utilisation impropre ou abusive, une détérioration du produit ou une utilisation non conforme aux instructions techniques et/ou de sécurité ne sont également pas couverts par la garantie. Cette garantie ne s’applique pas si le produit a été démonté ou réparé par une personne non autorisée par Remington®.
24
080189_REM_IFU_PG400_18L.indd F24-E25
ESPAÑOL
Gracias por elegir Remington®. Nuestros productos están diseñados para |
|
|
GB |
|
|
|
|
|
|||||
|
|
|
|
|
|
|
|
|
|
||||
satisfacer las necesidades más exigentes en cuanto a calidad, funcionalidad y |
|
|
D |
|
|
|
|
|
|||||
diseño. Deseamos que disfrute utilizando este producto Remington® appliance. |
|
|
|
|
|
|
|
||||||
Por favor lea atentamente las instrucciones de uso y guárdelas en un lugar seguro |
|
|
|
|
|
||||||||
para futura consulta. |
|
|
NL |
|
|
|
|
|
|||||
|
|
|
|
|
|
|
|
|
|
|
|||
|
|
|
|
|
|
F |
|
|
|
|
|
||
|
|
ADVERTENCIA |
|
|
|
|
|
|
|
|
|
|
|
|
|
|
|
|
|
E |
|
|
|
|
|
||
|
Utilice este producto sólo para el uso previsto según lo descrito en este |
|
|
|
|
|
|
|
|
|
|
||
|
manual. No utilice accesorios no recomendados por Remington®. |
|
|
I |
|
|
|
|
|
||||
|
No utilice este producto si no está funcionando correctamente, si se ha caído |
|
|
|
|
|
|
|
|
|
|
||
|
al suelo o al agua o si ha sido dañado. |
|
|
|
|
|
|
|
|
|
|
||
|
|
|
|
|
|
S |
|
|
|
|
|
||
|
|
|
|
|
FIN |
|
|
|
|
|
|||
|
|
DESCRIPCIÓN |
|
|
|
|
|
|
|
||||
1. |
Interruptor de encendido/apagado |
|
|
P |
|
|
|
|
|
||||
|
|
|
|
|
|
|
|||||||
|
|
|
|
|
|
|
|
|
|
||||
2. |
Accesorio para recortar de 20 mm |
|
|
SK |
|
|
|
|
|
||||
|
|
|
|
|
|
|
|||||||
3. |
Accesorio para recortar de 30 mm |
|
|
|
|
|
|
|
|||||
|
|
CZ |
|
|
|
|
|
||||||
4. Accesorio para recortado fino |
|
|
|
|
|
|
|
||||||
|
|
|
|
|
|
|
|
|
|
||||
5. Accesorio de afeitado MiniScreen |
|
|
HUN |
|
|
|
|
|
|||||
6. |
2 peines guías (reversibles) |
|
|
|
|
|
|
|
|||||
|
|
|
|
|
|
|
|
|
|
||||
7. |
Luz indicadora de carga |
|
|
PL |
|
|
|
|
|
||||
8. |
Ladaptador de carga |
|
|
|
|
|
|
|
|||||
|
|
RU |
|
|
|
|
|
||||||
9. |
Soporte para carga |
|
|
|
|
|
|
|
|||||
|
|
|
|
|
|
|
|
|
|
||||
|
|
|
|
|
|
TR |
|
|
|
|
|
||
|
|
|
|
|
|
RO |
|
|
|
|
|
||
|
|
|
|
|
|
GR |
|
|
|
|
|
||
|
|
|
|
|
|
AE |
|
|
|
|
|
||
|
|
|
|
|
|
|
|
|
|
|
|
|
|
|
|
|
|
|
|
|
|
|
|
|
|
|
|
|
|
|
|
|
25 |
|
|
|
|
|
|
|
|
|
|
|
|
|
|
|
|
|
|
|
|
|
|
|
|
|
|
|
|
|
|
|
|
|
|
|
|
|
10.04.2008 |
23:12:20 Uhr |
|
|
|
|
|
|
|
||||
|
|
|
|
|
|
|
|
|
|
|
|
|
|
|
|
|
|
|
|
|
|
|
|
|
|
|
|
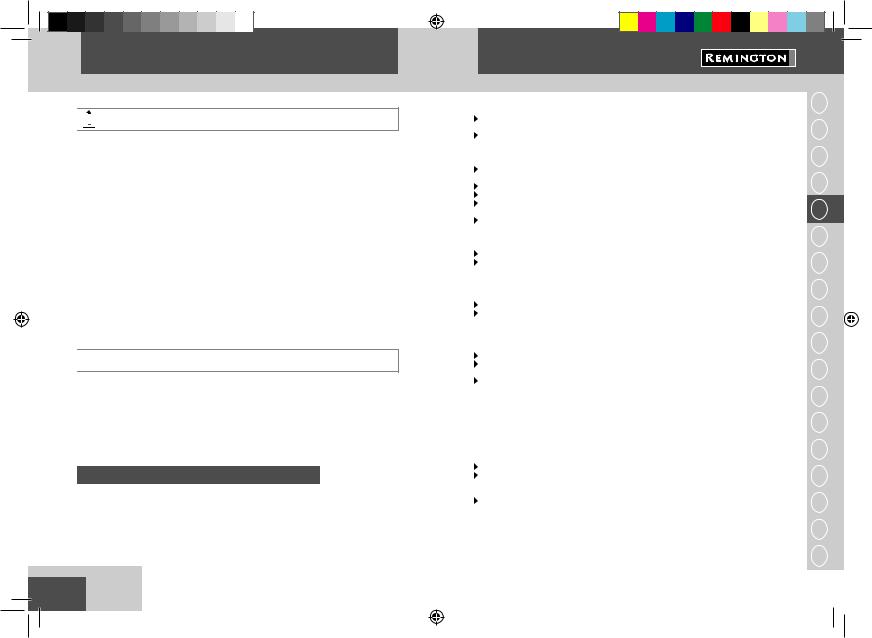
ESPAÑOL


 CÓMO EMPEZAR
 CARGA DEL KIT DE CORTE PERSONAL
Antes de utilizareste este kit de corte personal por primera vez, cárguela durante 14 a 16 horas.
 Asegúrese de que el aparato esté apagado.
 Coloque el kit de corte personal en el cargador, conecte el cable del adaptador al aparato y, a continuación, enchúfelo a la red eléctrica. El indicador de carga se iluminará.
El kit de corte personal no puede sobrecargarse. Sin embargo, si no piensa utilizarla durante un período de tiempo prolongado (2-3 meses), desenchúfelo de la red eléctrica y guárdelo. Recárguelo completamente antes de volver a utilizarlo.
Para conservar la vida útil de las baterías, deje que éstas se agoten completamente cada seis meses y luego recárguelas durante 14-16 horas.
 UTILIZACIÓN CON CABLE
 Conecte el adaptador de carga al aparato y luego a la red eléctrica.
 ADVERTENCIA: La conexión prolongada de la maquina a la red eléctrica reduce la vida útil de la batería.


 INSTRUCCIONES DE USO
 ANTES DE EMPEZAR
Antes de empezar con el corte, utilice un peine fino para peinar el pelo de la cara.
 PEINES GUÍA REVERSIBLES
Estos peines guía reversibles son sólo para usar con una cuchilla de 30 mm. Para fijarlos, deslice suavemente el peine sobre la cuchilla de la maquinilla. Una flecha situada en el lateral del peine guía indica la longitud a la que se cortará el pelo.
Ajuste |
|
mm |
|
|
|
Sin peine guía |
|
0,5 mm |
|
|
|
Peine pequeño |
|
3mm/6mm |
|
|
|
Peine grande |
|
9mm/12mm |
|
|
|
Peines de repuesto disponibles:SP256 |
|
|
26
080189_REM_IFU_PG400_18L.indd E26-E27
ESPAÑOL
|
COLOCACIÓN Y RETIRADA DE LOS PEINES GUÍA |
GB |
|
|
|
|
|
||
|
|
|
|
|
|
|
|
||
|
Con la hoja de la maquinilla orientada en dirección opuesta a usted, deslice el peine guía sobre la |
D |
|
|
|
|
|
||
|
parte superior de la cuchilla de la maquinilla hasta oír un clic cuando encaje en la posición correcta. |
|
|
|
|
|
|||
|
Con la hoja de la maquinilla orientada en dirección opuesta a usted, empuje el peine guía |
|
|
|
|
|
|
|
|
|
con cuidado hasta extraerlo de la cuchilla de la maquinilla. |
NL |
|
|
|
|
|
||
|
PARA DEJAR LA BARBA O EL BIGOTE MÁS FINOS O AFILADOS (DIAGRAMA 1) |
|
|
|
|
|
|||
|
|
|
|
|
|
||||
|
|
|
|
|
|
|
|
||
|
Coloque un peine guía sobre la cuchilla de 30 mm. Si se va a recortar el pelo por primera |
|
|
|
|
|
|
|
|
|
vez, empiece ajustando la longitud máxima a recortar. |
F |
|
|
|
|
|
||
|
Encienda la unidad. |
|
|
|
|
|
|||
|
|
|
|
|
|
|
|
||
|
Coloque el extremo plano del peine de la maquinilla contra la piel. |
|
|
|
|
|
|
|
|
|
Deslice lentamente la maquinilla personal por el pelo. Repita desde distintas direcciones si |
E |
|
|
|
|
|
||
|
es necesario. |
|
|
|
|
|
|||
|
|
|
|
|
|
|
|
||
|
Si se acumula pelo en el peine de la maquinilla durante el corte, apague la unidad, retire el |
|
|
|
|
|
|
|
|
|
peine y cepíllelo. |
I |
|
|
|
|
|
||
|
|
|
|
|
|
|
|
||
|
PARA DEFINIR EL CONTORNO DE LA BARBA O EL BIGOTE (DIAGRAMA 2) |
|
|
|
|
|
|
|
|
|
|
|
|
|
|
|
|
||
|
Sostenga el kit de corte personal con la cuchilla de corte de 20 mm orientada hacia usted. |
S |
|
|
|
|
|
||
|
Comience en el contorno de la barba o el bigote y vaya bajando suavemente la cuchilla |
|
|
|
|
|
|||
|
|
|
|
|
|
|
|
||
|
sobre la piel. Efectúe movimientos en dirección al borde de la barba o el bigote para |
|
|
|
|
|
|
|
|
|
recortar en las zonas que desee de la cara y alejándose de la barba en la zona del cuello. |
FIN |
|
|
|
|
|
||
|
RECORTE DEL CONTORNO DE LAS PATILLAS (DIAGRAMA 3) |
|
|
|
|
|
|||
|
|
|
|
|
|
|
|
||
|
Sostenga el kit de corte personal con la cuchilla de corte de 20 mm orientada hacia usted. |
|
|
|
|
|
|
|
|
|
Comience en el borde de la patilla y, con las hojas de la maquinilla apoyadas ligeramente |
P |
|
|
|
|
|
||
|
sobre la piel, efectúe movimientos hacia el borde de la patilla para recortar hasta la zona |
|
|
|
|
|
|
|
|
|
deseada de la cara. |
SK |
|
|
|
|
|
||
|
USO DE LA AFEITADORA MINISCREEN (DIAGRAMA 4) |
|
|
|
|
|
|||
|
Coloque el accesorio de afeitar MiniScreen. |
CZ |
|
|
|
|
|
||
|
Sostenga la maquinilla de forma que el MiniScreen toque suavemente la cara formando un |
|
|
|
|
|
|||
|
ángulo de 45 grados. |
|
|
|
|
|
|||
|
Utilice movimientos cortos y controlados para afeitar la zona de la barba y bigote. Utilice |
HUN |
|
|
|
|
|
||
|
fácil. |
|
|
|
|
|
|||
|
la mano libre para estirar la piel. De este modo, el pelo se levanta y el afeitado resulta más |
|
|
|
|
|
|
|
|
NOTA: la afeitadora MiniScreen está diseñada para afeitar las zonas delicadas que rodean |
PL |
|
|
|
|
|
|||
la barba, el bigote y las patillas. No está diseñada para afeitar toda la cara. Para obtener un |
|
|
|
|
|
||||
afeitado al ras, cómodo y seguro, utilice una de las afeitadoras eléctricas de Remington®. |
|
|
|
|
|
|
|
||
|
PARA RECORTAR EL PELO DE LA NUCA (DIAGRAMA 5) |
RU |
|
|
|
|
|
||
|
|
|
|
|
|
||||
|
|
|
|
|
|
||||
Nota: Necesitará un espejo de mano para efectuar esta operación si la lleva a cabo solo. |
|
|
|
|
|
|
|
||
|
Antes de empezar, coloque la cuchilla de 30 mm. |
TR |
|
|
|
|
|
||
|
Levante con los dedos el pelo de la base de la cabeza en dirección al cuello. El |
|
|
|
|
|
|||
|
índice deberá cubrir las raíces del cabello que está levantando para evitar cortarlas |
|
|
|
|
|
|
|
|
|
accidentalmente con el kit de corte personal. |
RO |
|
|
|
|
|
||
|
Con la otra mano, sostenga la maquinilla personal en la base del cuello con la unidad |
|
|
|
|
|
|||
|
cortadora orientada hacia arriba, y desplácela a todo lo largo del cuello hasta tocar los |
|
|
|
|
|
|
|
|
|
dedos que cubren las raíces del cabello de la base de la cabeza. Asegúrese de desplazar la |
GR |
|
|
|
|
|
||
|
unidad lentamente cuando efectúe esta operación y de mantener la raíz del pelo de la base |
|
|
|
|
|
|||
|
de la cabeza lejos del alcance de la maquinilla. |
|
|
|
|
|
|
|
|
|
|
|
AE |
|
|
|
|
|
|
|
|
|
|
|
|
|
|
|
|
|
|
|
|
|
|
|
|
|
|
|
|
|
27 |
|
|
|
|
|
|
|
|
|
|
|
|
|
|
|
|
|
|
|
|
|
|
|
|
|
|
10.04.2008 23:12:20 Uhr
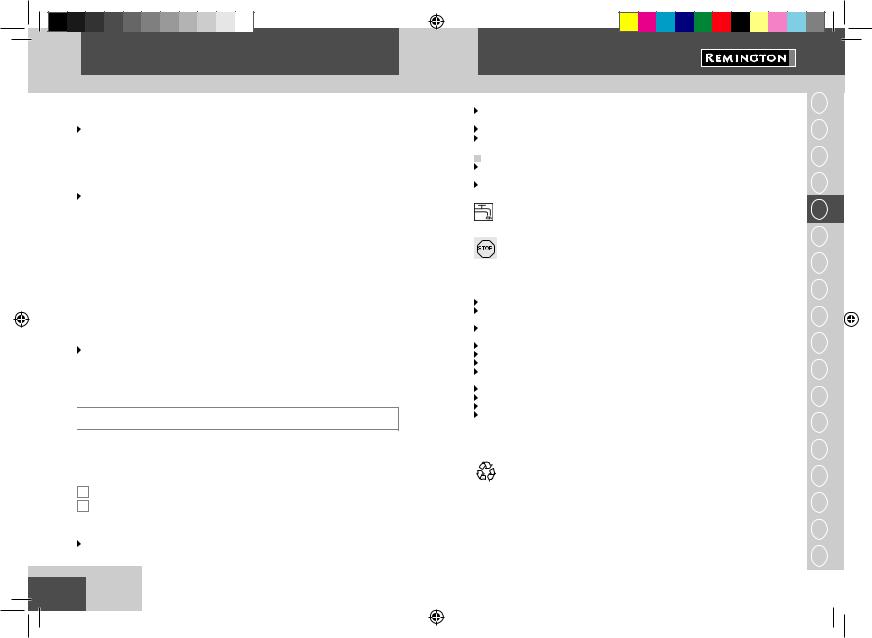
ESPAÑOL
 PARA ELIMINAR EL PELO DE LA NARIZ Y LAS OREJAS (DIAGRAMA 6 & 7)
 Coloque el accesorio para recortes finos.
Introduzca suavemente el kit de corte personal en las fosas nasales y en los oídos.
 Desplace suavemente la maquinilla hacia dentro y hacia fuera de las fosas nasales mientras la hace girar.
 No introduzca nunca la unidad cortadora más de 6 mm en las fosas nasales ni en los oídos.
 PARA RETIRAR EL PELO DE LAS CEJAS (DIAGRAMA 8)
 Coloque el accesorio para recortes finos.
Guíe el accesorio de corte con cuidado por el contorno de las cejas pasando sobre los pelos que desee eliminar o que sobresalgan de éstas.
 Para eliminar los pelos totalmente, apoye el aparato sobre la piel y páselo sobre la zona deseada.
 Realice movimientos lentos y controlados.
 COLOCACIÓN Y RETIRADA DEL PEINE DEL KIT DE CORTE
NOTA: Compruebe siempre que el kit de corte personal está apagado antes de cambiar cualquiera de las piezas.
 Para retirarla, sostenga la maquinilla personal con una mano y gire la cabeza de la misma en sentido contrario a las agujas del reloj con la otra.
 Para fijarla, sostenga la maquinilla personal con una mano y gire la cabeza de la misma en el sentido de las agujas del reloj con la otra.
 Consejos para obtener mejores resultados
El pelo de la barba, bigote y patillas debe estar seco.
 Evite utilizar lociones antes de usar la maquinilla personal. Peine el pelo en la misma dirección en la que crece.
 Extraiga el peine de la maquinilla si está definiendo el contorno del cabello de las patillas, del pelo de la nuca, o recortando el contorno de la barba en la parte delantera del cuello.


 CUIDADO DEL KIT DE CORTE PERSONAL
LIMPIEZA Y MANTENIMIENTO DE LA MAQUINILLA CORTADORA PERSONAL
 DESPUÉS DE CADA USO
1.Apague la maquinilla personal.
2.Cepille suavemente los pelos residuales del peine guía y de la cuchilla.
 PRECAUCIONES DURANTE LA LIMPIEZA
 Para su limpieza sólo pueden extraerse del aparato el peine guía y la cuchilla.
La limpieza deberá llevarse a cabo con un cepillo suave, como el que se incluye con el producto.
28
080189_REM_IFU_PG400_18L.indd E28-E29
ESPAÑOL
En las cuchillas sólo deberá usarse el aceite ligero que se suministra o aceite de máquinas |
|
GB |
|
|
|
|
|
|||
|
|
|
|
|
|
|
|
|||
de coser. |
|
D |
|
|
|
|
|
|||
No utilice productos fuertes o corrosivos para limpiar las unidades o las cuchillas. |
|
|
|
|
|
|
||||
No sumergir en agua, ya que podría dañar el aparato. |
|
|
|
|
|
|
|
|
||
ALMACENAMIENTO |
|
NL |
|
|
|
|
|
|||
Siempre debe guardar este aparato y el cable en un lugar libre de humedad. No almacenar |
|
|
|
|
|
|
|
|
||
a temperaturas superiores a los 140° F (60° C). |
|
F |
|
|
|
|
|
|||
No enrolle el cable del adaptador de carga alrededor del aparato. |
|
|
|
|
|
|
||||
|
|
|
|
|
|
|
|
|||
|
Lavable bajo el grifo del agua |
|
E |
|
|
|
|
|
||
|
|
|
|
|
|
|
|
|
||
|
|
|
|
I |
|
|
|
|
|
|
|
INSTRUCCIONES IMPORTANTES PARA LA SEGURIDAD |
|
|
|
|
|
|
|
|
|
|
|
|
|
S |
|
|
|
|
|
|
|
|
|
|
|
|
|
|
|
||
ADVERTENCIA – PARA REDUCIR EL RIESGO DE QUEMADURAS, DESCARGAS |
|
FIN |
|
|
|
|
|
|||
ELÉCTRICAS, INCENDIO O LESIONES: |
|
|
|
|
|
|
||||
|
|
|
|
|
|
|
|
|||
Nunca deberá dejarse sin vigilancia un aparto enchufado a una toma de corriente. |
|
|
|
|
|
|
|
|
||
ATENCIÓN: Desenchufar de la corriente y sacar el cable de corriente del producto antes |
|
P |
|
|
|
|
|
|||
|
|
|
|
|
|
|||||
de lavar con agua. |
|
|
|
|
|
|
||||
|
|
|
|
|
|
|
|
|||
ATENCIÓN: Las piezas que pudieran ser suceptibles de caerse en el agua deben de |
|
|
|
|
|
|
|
|
||
aseguarse previamente. |
|
SK |
|
|
|
|
|
|||
Mantenga el enchufe y el cable alejados de superficies calientes. |
|
|
|
|
|
|
||||
|
|
|
|
|
|
|
|
|||
Asegúrese de que el enchufe y el cable no se mojen. |
|
|
|
|
|
|
|
|
||
No enchufe ni desenchufe la afeitadora con las manos húmedas. |
|
CZ |
|
|
|
|
|
|||
No utilice este producto si el cable está dañado. Puede adquirir un cable nuevo a través de |
|
|
|
|
|
|
||||
cualquiera de nuestros centros de servicio en todo el mundo. |
|
|
|
|
|
|
|
|
||
Cargue, utilice y guarde el aparato a una temperatura de entre 15°C y 35°C. |
|
HUN |
|
|
|
|
|
|||
Al limpiar el aparato, desenchúfelo siempre de la toma de corriente. |
|
|
|
|
|
|
||||
Utilice exclusivamente los accesorios suministrados con el aparato. |
|
|
|
|
|
|
|
|
||
Mantenga este producto fuera del alcance de los niños. Este aparato puede ser peligroso |
|
PL |
|
|
|
|
|
|||
si lo utiliza una persona con limitaciones físicas, sensoriales o mentales, o bien, sin la |
|
|
|
|
|
|
||||
experiencia o los conocimientos necesarios. Las personas responsables de su seguridad y |
|
|
|
|
|
|
|
|
||
bienestar deberán dar instrucciones claras y detalladas o supervisar el uso de este aparato. |
|
RU |
|
|
|
|
|
|||
|
|
|
|
|
|
|
|
|
||
|
|
|
|
|
|
|
|
|
|
|
|
PROTECCIÓN DEL MEDIO AMBIENTE |
|
TR |
|
|
|
|
|
||
Este aparato contiene una batería ecológica recargable de níquel e hidruro metálico. No |
|
RO |
|
|
|
|
|
|||
|
|
|
|
|
|
|
|
|||
deseche el aparato ni la batería junto con la basura doméstica, ya que en casi todos los |
|
|
|
|
|
|
|
|
||
países existen restricciones al respecto. Observe las normativas nacionales o locales para |
|
GR |
|
|
|
|
|
|||
la recogida y desecho vigentes en su lugar de residencia. En caso de que necesite extraer la |
|
|
|
|
|
|
||||
|
|
|
|
|
|
|
|
|||
batería del aparato para desecharla, consulte las instrucciones sobre como abrir la carcasa |
|
|
|
|
|
|
|
|
||
en la sección „retirada de la batería“. |
|
AE |
|
|
|
|
|
|||
|
|
|
|
|
|
|
|
|
||
|
|
|
|
|
|
|
|
|
|
|
|
|
|
|
|
|
|
|
|
|
|
|
|
|
29 |
|
|
|
|
|
|
|
|
|
|
|
|
|
|
|
|
|
|
|
|
|
|
|
|
|
|
|
|
|
10.04.2008 23:12:21 Uhr
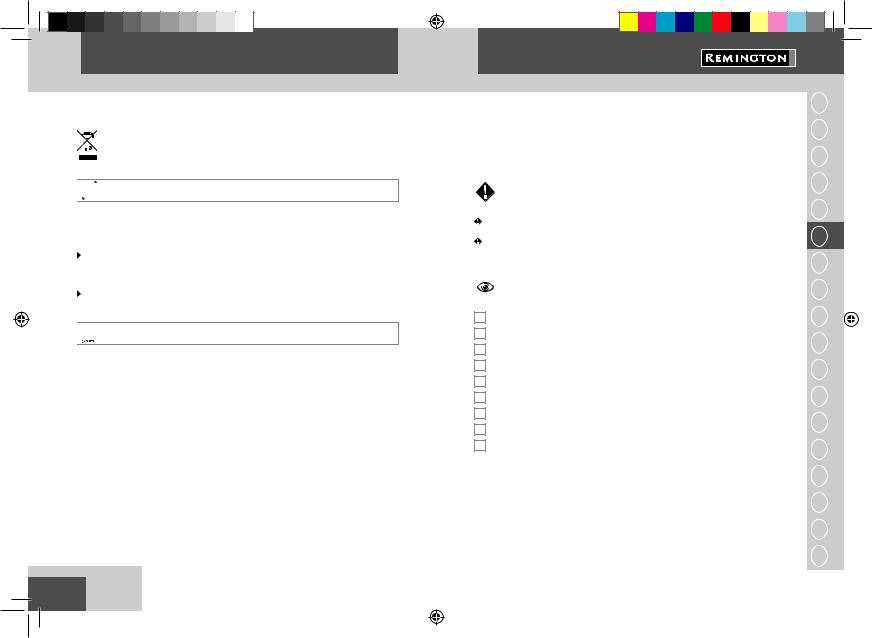
ESPAÑOL
 ADVERTENCIA: No queme ni destruya las pilas porque pueden explotar o liberar sustancias tóxicas.
Para más información sobre reciclaje visite nuestra página web www.remington-europe.com


 EXTRACCIÓN DE LA BATERÍA
Para extraer la batería y desecharla de forma segura, le rogamos siga las instrucciones que se exponen a continuación:
 Encienda el kit de corte personal y consuma toda la carga restante.
Extraiga el cabezal de la maquinilla. (DIAGRAMA A)
 Sostenga la parte superior de la maquinilla personal con una mano y el extremo inferior con la otra y haga fuerza hasta soltar la tapa de la batería. (DIAGRAMA B)
 Quite el tornillo. (DIAGRAMA C)
Quite el soporte del motor presionando con fuerza sobre la excéntrica. (DIAGRAMA D)  Desconecte el cable de la batería y extraiga esta última. (DIAGRAMA E)
 SERVICIOY GARANTÍA
Este producto ha sido comprobado y no presenta defectos. Concedemos una garantía de 2 años a partir de la fecha original de compra para cualquier defecto de material
o fabricación. Si el producto se hallara defectuoso dentro del plazo de garantía, nos comprometemos a reparar cualquier defecto de este tipo o a sustituir el producto o cualquier parte del mismo sin coste adicional siempre y cuando se presente el
comprobante de compra. Esto no implica una extensión del período de garantía. En caso de garantía, llame al Centro de Servicio Remington® de su región.
Esta garantía excede sus derechos legales estándar como consumidor.
La garantía será válida en todos los países en los que nuestro producto haya sido vendido a través de un distribuidor autorizado.
La garantía de este producto no incluye las cuchillas ya que éstas se consideran un consumible. La garantía tampoco cubre ningún tipo de daño del producto debido a un accidente o uso incorrecto, modificación o utilización distinta a lo descrito en las instrucciones técnicas y/o de seguridad.
Esta garantía no será válida si el producto ha sido desmontado o reparado por una persona no autorizada por nosotros.
30
080189_REM_IFU_PG400_18L.indd E30-I31
ITALIANO
Complimenti per aver scelto Remington®. I prodotti Remington® sono progettati |
|
|
GB |
|
|
|
|
|
|||||
|
|
|
|
|
|
|
|
|
|
||||
per soddisfare i più elevati standard di qualità, funzionalità e design. Grazie |
|
|
D |
|
|
|
|
|
|||||
a questo nuovo apparecchio Remington® sarà possibile raggiungere i risultati |
|
|
|
|
|
|
|
||||||
desiderati. Leggere attentamente le istruzioni e conservarle in un luogo sicuro |
|
|
|
|
|
|
|
|
|
|
|||
per future consultazioni. |
|
|
NL |
|
|
|
|
|
|||||
|
|
|
|
|
|
|
|
|
|
|
|||
|
|
|
|
|
|
F |
|
|
|
|
|
||
|
|
ATTENZIONE |
|
|
|
|
|
|
|
|
|
|
|
|
|
|
|
|
|
E |
|
|
|
|
|
||
|
L’uso di questo apparecchio è consentito ai soli fini descritti nel presente |
|
|
|
|
|
|
|
|
|
|
||
|
manuale. Non utilizzare accessori non consigliati da Remington®. |
|
|
I |
|
|
|
|
|
||||
|
Non utilizzare il prodotto se non correttamente funzionante, se danneggiato, |
|
|
|
|
|
|
|
|
|
|
||
|
se caduto a terra o in acqua. |
|
|
|
|
|
|
|
|
|
|
||
|
|
|
|
|
|
S |
|
|
|
|
|
||
|
|
|
|
|
FIN |
|
|
|
|
|
|||
|
|
DESCRIZIONE |
|
|
|
|
|
|
|
||||
1. |
Interruttore On/Off |
|
|
P |
|
|
|
|
|
||||
|
|
|
|
|
|
|
|||||||
|
|
|
|
|
|
|
|
|
|
||||
2. |
Accessorio trimmer da 20 mm |
|
|
SK |
|
|
|
|
|
||||
|
|
|
|
|
|
|
|||||||
3. |
Accessorio trimmer da 30 mm |
|
|
|
|
|
|
|
|||||
|
|
CZ |
|
|
|
|
|
||||||
4. Accessorio trimmer sottile |
|
|
|
|
|
|
|
||||||
|
|
|
|
|
|
|
|
|
|
||||
5. Accessorio rasoio a minischermo |
|
|
HUN |
|
|
|
|
|
|||||
6. |
2 pettini guida intercambiabili |
|
|
|
|
|
|
|
|||||
|
|
|
|
|
|
|
|
|
|
||||
7. |
Indicatore luminoso di carica |
|
|
PL |
|
|
|
|
|
||||
8. |
Adattatore di corrente |
|
|
|
|
|
|
|
|||||
|
|
RU |
|
|
|
|
|
||||||
9. |
Sostegno per la ricarica |
|
|
|
|
|
|
|
|||||
|
|
|
|
|
|
|
|
|
|
||||
|
|
|
|
|
|
TR |
|
|
|
|
|
||
|
|
|
|
|
|
RO |
|
|
|
|
|
||
|
|
|
|
|
|
GR |
|
|
|
|
|
||
|
|
|
|
|
|
AE |
|
|
|
|
|
||
|
|
|
|
|
|
|
|
|
|
|
|
|
|
|
|
|
|
|
|
|
|
|
|
|
|
|
|
|
|
|
|
|
31 |
|
|
|
|
|
|
|
|
|
|
|
|
|
|
|
|
|
|
|
|
|
|
|
|
|
|
|
|
|
|
|
|
|
|
|
|
|
10.04.2008 |
23:12:21 Uhr |
|
|
|
|
|
|
|
||||
|
|
|
|
|
|
|
|
|
|
|
|
|
|
|
|
|
|
|
|
|
|
|
|
|
|
|
|
 Loading...