

Page 1
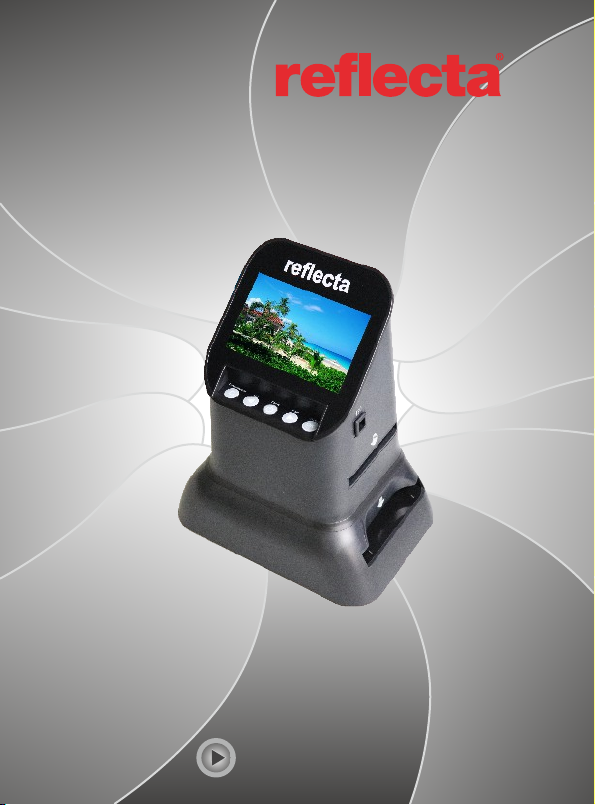
x66-Scan
Multi-Format Scanner
User‘s Manual
Page 2

User‘s Manual
For correct usage please read these instructions carefully and keep it
a safe place for future reference!
Contents
1. Preface........................................................................................1
2. Safety Precautions......................................................................1
3. Package contents....................................................................... 2
4. Description of parts..................................................................... 3
5. ..................................................................... 4 Product Indicator
6. 120 holder loading method......................................................... 5
7.
127 holder loading method
8.
Positive Slide Holder
Negative Film Holder
9. ........................................... 8
10. Operation Guide ...................................................................... 9
11. Product Specification................................................................17
12. Declaration...............................................................................18
..................................................... 6
...........................
.....................
................................................ 7
Page 3

1. Preface
Thank you for buying this product! Please read this instruction carefully
before using this product.
2. Safety Precautions
•
Do not attempt to disassemble or modify any part of the machine.
Do not touch the inside of the scanner after the product falls or suffers
•
other damage to avoid injury .
If the product smells or is abnormal, stop using it immediately.
•
•
Do not clean the scanner with alcohol, gasoline, diluent and other
organic solvent.
•
Please do not work in wet or humid and dusty area.
Do not overload the USB connections on your computer to avoid poor
•
working of the scanner for overloading.
•
Please use films of standard size.
Cleaning: Please make sure the scanner‘s luminous area is clean
•
before using for producing a clean image.
•
Non use period: The USB cord or adapter should be unplugged from
the computer or plug seat when the unit is left unused for a long period
of time.
•
The device can support 128GB SD, but we recommend to use 16GB
or less SD cards, as the device needs to pre-read and calculate
capacity of the inserted SD card to get the number of how many images
can be stored, large capacity SD might slow the response speed of the
device or even freeze the system, when this occurs, please disconnect
the power cable to restart the device.
In order to p rotect th e ma chine and s ave energ y, the pro duct will
automat ically sh ut d own if ther e is no opera tion for 30 m in utes.
Press the p ower butt on a gain to sta rt to work.
1
Page 4

3: Package contents
•
Film scanner
• 120 Film Holder (for 120 film, positive \ negative \ B&W)
• 127 Film Holder (for 127 slides, 4x4 cm)
Negative Film Holder (for 135 film strips, 24x36 mm frames)
•
Positive Slide Holder (for mounted slides, 5x5 cm)
•
• AC/DC adapter 5V
• USB cable
• Cleaning brush
• User‘s Manual
2
Page 5

4. Description of parts
Film Scanner
120 Film Holder
127 Film Holder
Positive Slide Holder
USB cable
Adapter
When Using the cleaning brush to clean the backlight, please insert
•
the cleaning brush from the side of the product.
X66-Scan
Multi-For mat Sca nner
User Manual
User Manual
Negative Film Holder
Cleaning brush
3
Page 6

5. P roduct In di ca tor
Display scr een
Mode key
Left key
Power key
Right key
4
Enter key
Focus butto n
Page 7

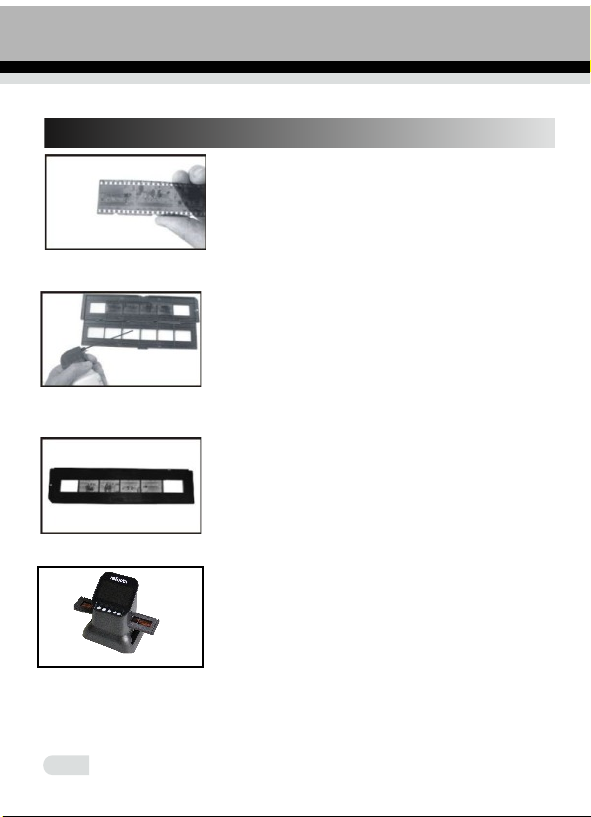
6. 120 Holder loading method
a. Hold up the film toward the light.
Face the glossy side of the film to yourself.
b. Take 120 holder out.
c. Take the 120 holder with the label facing up
and insert the film strip from the right side.
Center the image you want in the window.
c. Insert the 120 film holder horizontally into the
lower hole from the right side of the scanner
• Handle films with care to avoid scrathes or finger prints (for the best
use cotton gloves when handling films)
5
Page 8

7. h l127 older oading method
a. Take the 127 film holder with the
markings facing up.
b.Take 120 film holder and open it, put 127 film
holder into 120 film holder and close 120 film
holder
c.Take the nega tive and inse rt it from th e
right sid e in to the clos ed 1 20 film holde r
d. Insert the installed 120 film holder horizontally
into the lower hole from the right side of the
scanner.
6
Page 9

8. Positive Slide Holder
Take mounted slides with the glossy side up.
Open the slide holder at the marked spot on
the top.
With the slide holder laid open place the slide
into recessed area in the holder - the slide
should fit perfectly.
Note: Handle slides with care. Any dust,
scratches or fingerprints will show up on your
saved images.
It is recommended to use compressed air
to remove any dust from the slides.
the slides.
Close the slide holder and press the edges
so that it locks in place.
The loaded sl ide holder is i nserted
horizonta lly into the up per hole of the s canner
from the ri gh t side.
7
Page 10
9.
Negative Film Holder
Take the film strip with the glossy side
showing up.
Open the negative holder at the marked spot on
the top.
With the negative holder laid open place the
negative into holder so the notches line up with
the notches on the holder.
Note: Handle negatives with care. Any dust,
scratches or fingerprints will show up on your
saved images. If possible use cotton gloves
when handling negatives.
Close the negative holder and press the edges
so that it locks in place.
The negativ e holder is ins erted horiz ontally
into the uppe r hole of the sca nner from the
right side.
8
Page 11

10. Operation Guide
1. Introduction of Menu
Capture
Film Type
1 2 3 4 5
1 Language mode
2 USB mode
3 Capture mode
6 7
4 Playback mode
5 Film Type
6 Format
7 Resolution
2. Capture Picture
2.1 Before scanning please make sure the inner backlight panel is
clean.
Note: You can use the provided brush to clean the screen.
Insert the brush with the velvet side facing down.
9
Page 12

2.2 In main menu mode press OK/ENTER enter Film Type mode, then
press OK/ENTER to chose negative, slide or B&W.Then press "OK/Enter"
to enter negative, slide or B&W submenus.
Film Type
ENTER
Negative Film
1. When the f oc us button i s pr essed 120 , pr ess OK/En te r to enter
127/120 n eg ative, to select the r equired siz e of press ◄ or ►
the frame .
When the lens button is pressed 120, press OK/Enter to Enter
127/120 negative
127 VPK
120
60x 70
120
60x 45
120
60x 80
120
60x 60
120
60x 90
127 VPK
120
60x 70
127 VPK
120
60x 70
120
60x 45
120
60x 80
120
60x 45
120
60x 80
120
60x 60
120
60x 90
120
60x 60
120
60x 90
10
Page 13

2. When the focus button is pressed 135, press OK/Enter to enter
126/135 negative,
press ◄ or ►t o se lect the re qu ired
size
of the fram e.
126 KPK
135
126 KPK126 KP
126 KPK
135135
135
11
Page 14

Or in main menu, press ◄ or ►, until Capture mode, then press OK/ENTER,
enter the Film format selected in Film Type
Capture
OK/Enter
Convert/Mode
OK/Enter
2.3 Before pressing to capture picture, you can press OK button to
set Exposure.
EV
R
ENTER
G
B
SHP
Press ENTER to set exposure compensation or sharpness (SHP).
12
Page 15

3.How to playback captured pictures
In main menu, press ◄ or ► until playback mode, press OK/ENTER to the
picture auto-playback mode, press again to stop auto playback and you can
view captured pictures manually, you can press ◄ or ► to view.
Playback
ENTER
press OK/ENTER again enter picture editing mode, you can rotate, delete,
exit, save, and "home" back to main menu.
ENTER
ENTER
1
2
3
4
5
6
13
Page 16

1 Current picture rotate 90 digrees clockwise
2 Current picture rotate 90 digrees counter clockwise
3 Deleting the current picture from memory card
4 Exit the submenu edit mode, back
5 Saving the current edited picture
6 Exit the submenu edit mode, back to scan
4. Setting Language
Under main menu mode, press ◄ or ► until language mode, press OK/
ENTER to chose language, then press ◄ or ► and OK/ENTER, one of
following 8 languages can be set: English, French, German, Italian, Spanish,
T-Chinese, S-Chinese, Japanese.
English
Français
Deutsch
Italiano
Language
Español
繁體中 文
简体中文
Japanese
Language
ENTER
5. Formatting
In the main menu, press ◄ or ► to Format mode, press OK/ENTER button
to enter.
Format
Format the media?
YES
NO
14
Page 17

Format the media?
Format is successful!
YES
NO
Note: After using this function, all the information on the SD card will be
deleted !
6. Connect to computer
Under main menu mode, press ◄ or ► until USB MSDC, press OK/ENTER
after successfull connecting to computer, you can transfer the captured
pictures.
USB MSDC
USB MSDC
15
Page 18

7. R es olu ti on
Under main me nu mode, pres s ◄ or ► until Re so lu ti on, p re ss
OK/Ente r to e nter into R es ol ut ion c ho osing mod e, y ou can choo se
14M or 22M (M =M egapixels )
Resolution
16
14M
22M
Page 19

11: Product Specification
Function : Film scanner
Interface: USB 2.0
Display: Colour 4.3" TFT LCD
Exposure Control : Automatic / Manual (-2.0 EV~ +2.0EV)
White Balance : Automatic
Resolution : Maximum 22 Megapixels
Film types : 135 / 126 / 127 / 120
File format : JPEG
HDMI out:
Built-in memory : 128 MB
External memory card: SD card up to 128GB (not included)
Power Supply: DC 5V Adapter / USB Port
Language: English, French, German, Italian, Spanish,
Traditional Chinese, Simplified Chinese, Japanese
Supported OS: Windows / Mac / Linux
Product Size: L177 x W118 x H192mm
Weight: 580g
HDMI Type A
17
Page 20

12: Declaration
Please Note:
In the course of continuous product improvement,
specifications and appearance of the device can
change without prior notice.
reflecta GmbH
Merkurstraße 8
72184 Eutingen / Germany
E-Mail: service@reflecta.de
www.reflecta.de
18
 Loading...