


with 


Digital Postage Meter
Install Guide
US English Version

Contents
Communication Device |
Network Cable |
USB Cable |
Communication Device
For Pitney Bowes Digital Mailing System
|
mailstation |
|
mailstation 2 |
|
OR |
Ink Cartridge |
|
|
Ink Cartridge |
||
Scale |
Reorder #797-0 |
|
Reorder #797-M |
|
|
FRONT DEVANT
FRONT DEVANT
Meter |
Power Cord |
Sample Pack of |
||
|
|
|
|
Tape Sheets |
|
|
|
|
Reorder #612-9 |
|
|
DEF |
Review |
|
|
ABC |
|
|
|
|
_ |
MNO |
|
|
|
*# |
|
|
|
Lock |
JKL |
no |
|
|
|
GHI |
WXYZ |
|
|
Class |
TUV |
Enter yes |
|
|
|
PQRS |
Shift |
|
|
|
Funds |
Space . |
|
|
|
Back |
|
|
|
|
Menu |
|
|
|
Install Guide |
Scale Extension |
Phone Cord |
|
Cable #978-6 |
|
|
(Optional) |
|
Meter
PostageGuide
DigitalOperating
Read This First
To take advantage of the web-based capabilities of your meter with pbWebConnect™, your meter must be connected to your network.
 If network access is available for your meter, you can:
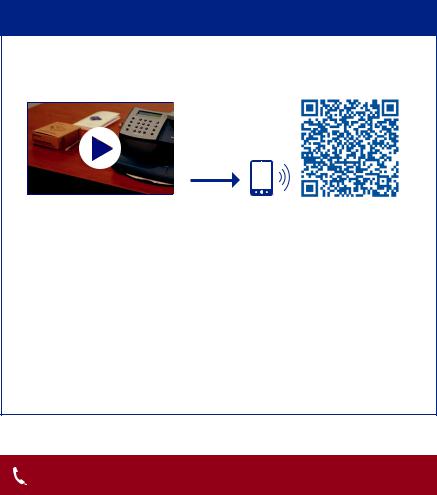
•Watch a step-by-step installation video by scanning the QR Code below with your smartphone
or
•By entering the following URL at your computer:
www.pb.com/support/new/K7
or
•Follow this printed installation guide, starting on page 1
If you do not have network access for your meter, go to page 17 “Alternative Method: Using an Analog Phone Line”
Installation Part 1 - Set Up Communication Device
1 Preparing for Installation
To install your meter using the Internet, you will need the following:
•Two power outlets
•An Internet source, such as a router, hub or network wall jack.
Note: DO NOT use a port in a computer to connect to your network.
Access to a computer during installation is recommended.
Wireless: Step 2 through Step 8 must be completed for wireless installation.
Technical Requirements:
IP Address
-Automatic assignment with DHCP and DNS server capability, or
-Manually specified static IP (not shared with other devices on your network).
If your network requires special settings, such as static IPs or proxy settings, your IT specialist should use the Special Network Settings instructions in this booklet, as part of the installation.
Proxy Server (if needed)
If your network uses Static IPs or Proxies, the setup software requires: Operating System:
•Windows 2000, Windows XP, Windows Vista, Windows 7
•Mac OS X (PowerPC: Ver10.3.x ~ Ver10.5.5)
Compatible Browsers:
Internet Explorer 7.x, 8.x, 9.x, Chrome 16.x, 17.x, 18.x, Firefox 10.x, 11.x, 12.x Safari 5.1
1
Installation Part 1 - Set Up Communication Device
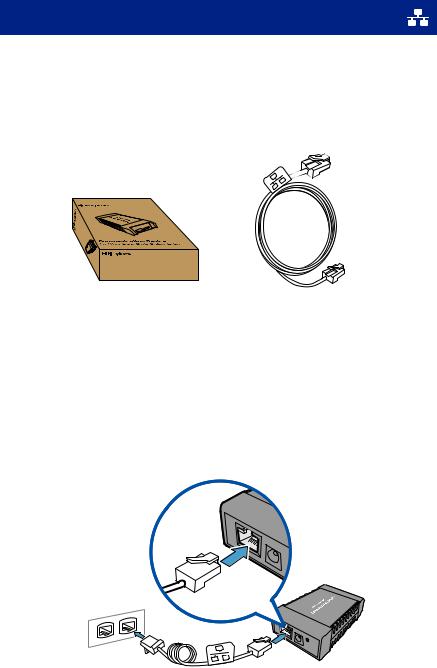
2Locate the Communication Device and Network Cable ( )
)
The Communication Device enables your meter to connect to Pitney Bowes via the Internet to access postage downloads. It’s packaged in its own cardboard box.
Communication Device
For Pitney Bowes Digital Mailing System
Communication Device Network Cable
3Connect the Communication Device to your Internet source
Be sure to connect to an active network port.
Note: If you are not certain where to connect, or whether your network requires special settings, consult your IT specialist.
Internet Source
Router, Hub, Wall Jack
|
|
Communication |
DO NOT use a port in a |
Network Cable |
Device |
computer to connect to |
|
|
your network. |
|
|
|
|
|
2
Installation Part 1 - Set Up Communication Device
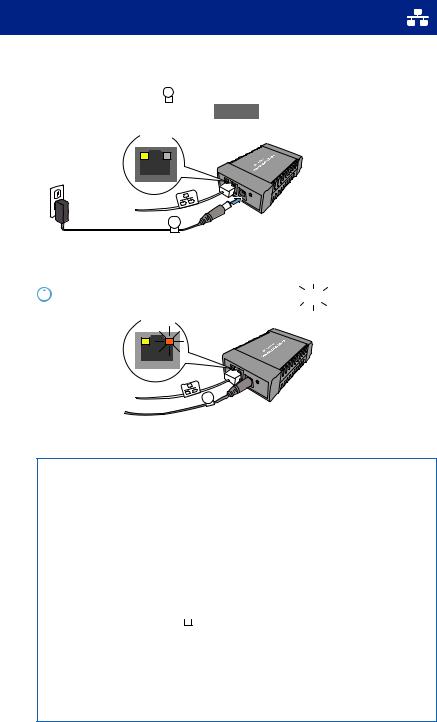
4Apply power to Communication Device
Plug the AC adapter ( ) into the Communication Device and a power outlet. The left LED is lit yellow when it is on.
LEDs
Communication
Device
AC Adapter
5Check LED
 After 45 seconds, the right LED will blink orange, go to Step 6
LEDs
If the right LED is solid orange (not blinking), follow Troubleshooting 1, below.
Troubleshooting 1
Communication Device may not be communicating to an active network port. Try the following:
•Be sure the Network Cable ( ) is properly connected at both ends.
•Try other ports (for 10 seconds each) until you find one that is active
(LED changes from solid orange to green). Do not use a network port in a computer.
•Pull the power connector ( ) out, then reconnect power to restart the Communication Device.
•If after 45 seconds, the right LED is still not blinking orange only, consult your IT specialist. Your IT specialist may need to follow the Special Network Settings procedure on page 6.
For more detailed technical assistance, go to: www.pb.com/support/LAN
3
Installation Part 1 - Set Up Communication Device
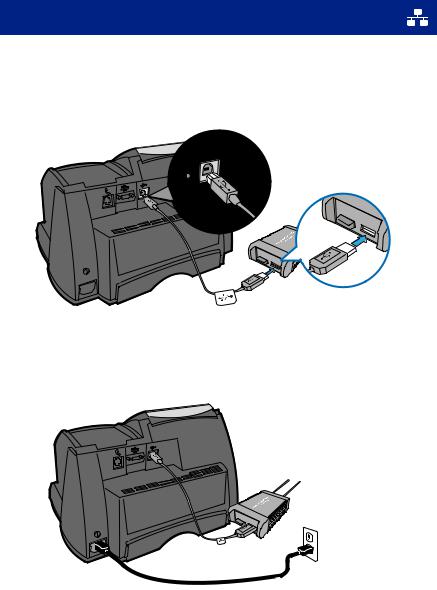
6 Connect the meter to the Communication Device with the USB Cable ( )
)
USB Cable
7 Connect the meter to a power outlet
Power Cord
When power is applied, the meter will display its startup screens and you will hear the meter’s printer initialize.
4

Installation Part 1 - Set Up Communication Device
8
•Check that the USB Cable ( ) is connected properly.
•If the right LED is solid orange (not blinking), then the network cable is connected to an inactive port. Try other ports (for 10 seconds each) until you find one that is active (LED changes from solid orange to green).
•Restart the Communication Device by pulling the power connector ( ) out, then reconnecting the power.
•If, after 60 seconds the message, “Meter connected to internet” is not displayed, consult your IT specialist.
Your IT specialist can refer to online troubleshooting assistance at: www.pb.com/support/LAN
5
Special Network Settings
This section is needed only if your network requires special settings to operate properly, such as static IPs and proxy server IDs, the settings will need to be added to the Communication Device.
Consult your IT specialist to determine if this is necessary.
To enter special settings
a.Disconnect power ( ) from the meter.
b.Be sure the Communication Device is:
-connected to an active Internet port
Communication
Device
-plugged into a power outlet
-the right LEDs are blinking in an orange and/or green pattern.
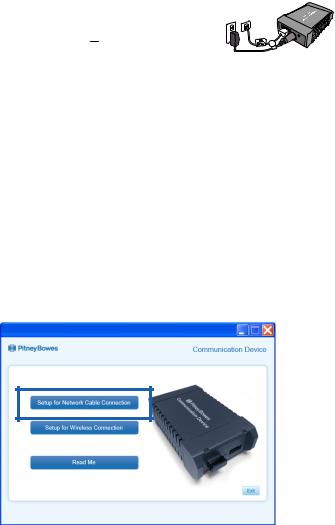
c. Download the setup software to your computer by going to: www.pb.com/support/netsetup.
Click the button for your type of computer.
Note: If a firewall message appears, click the button that allows the download to proceed.
d.Save the software “pbSmartLAN” to your computer, then open and run it.
e.Click the Setup for Network Cable Connection button.
Follow the setup wizard and enter the appropriate special settings.
6
 Loading...