


Black plate (1,1)
Operation Manual
Multi-CD control DSP High power CD/MP3/WMA/
AAC player with Bluetooth Wireless Technology and
FM/AM tuner
DEH-P9850BT
<CRB2179-A/N>1
English

Black plate (2,1)


 Contents
Thank you for buying this Pioneer product.
Please read through these operating instructions so you will know how to operate your model properly. After you have finished reading the instructions, keep this manual in a safe place for future reference.
Before You Start |
|
|
|||
About this unit |
6 |
|
|
||
– |
Operating environment |
6 |
|||
About this manual |
6 |
|
|||
Features 6 |
|
|
|
|
|
About WMA |
7 |
|
|
|
|
About AAC |
7 |
|
|
|
|
About Bluetooth |
7 |
|
|
||
Resetting the microprocessor |
8 |
||||
Clearing all memory |
8 |
|
|||
Protecting your unit from theft |
8 |
||||
– Removing the front panel |
9 |
||||
– Attaching the front panel |
9 |
||||
About the demo mode 9 |
|
||||
– |
Reverse mode |
9 |
|
||
– |
Feature demo mode 10 |
|
|||
Use and care of the remote control 10
– |
Installing the battery 10 |
– |
Using the remote control 10 |
–FUNCTION button and AUDIO button 10
 What’s What
Head unit 12
Remote control 12
Basic Operations |
|
|
Turning the unit on |
14 |
|
Selecting a source |
14 |
|
Loading a disc 14 |
|
|
Adjusting the volume |
15 |
|
Turning the unit off |
15 |
|
Tuner |
|
|
Listening to the radio |
16 |
|
Introduction of advanced tuner operation 17
Storing and recalling broadcast frequencies 17
Storing the strongest broadcast frequencies 17
2 |
En |
Selecting stations from the preset channel
list 18 |
|
Tuning in strong signals |
18 |
Built-in CD Player |
|
Playing a CD 19 |
|
Selecting a track directly |
19 |
Introduction of advanced built-in CD player
operation |
20 |
|
|
|
Repeating play 20 |
|
|
||
Playing tracks in random order |
20 |
|||
Scanning tracks of a CD |
21 |
|
||
Pausing CD playback 21 |
|
|
||
Selecting the search method |
21 |
|||
Searching every 10 tracks in the current |
||||
disc 21 |
|
|
|
|
Using disc title functions |
22 |
|
||
– |
Entering disc titles |
22 |
|
|
– |
Displaying disc titles |
23 |
||
Using CD TEXT functions |
23 |
|
||
– |
Displaying text information on CD TEXT |
|||
|
discs |
23 |
|
|
– |
Scrolling text information in the |
|||
|
display |
23 |
|
|
–Selecting tracks from the track title list 23
 MP3/WMA/AAC/WAV Player
Playing MP3/WMA/AAC/WAV files 24 Selecting a track directly in the current
folder 25
Introduction of advanced built-in CD player (MP3/WMA/AAC/WAV) operation 26
Repeating play 26
Playing tracks in random order 26 Scanning folders and tracks 27
Pausing MP3/WMA/AAC/WAV playback 27 Selecting the search method 27 Searching every 10 tracks in the current
folder 27
<CRB2179-A/N>2

Black plate (3,1)
 Contents
English
Displaying text information on MP3/WMA/
AAC/WAV disc 28 |
|
– |
When playing back an MP3/WMA/AAC |
|
disc 28 |
– |
When playing back a WAV disc 28 |
Scrolling text information in the display |
28 |
|
Selecting tracks from the file name list |
29 |
|
Displaying jacket arts on CD-ROM discs |
29 |
|
– |
Reading jacket arts 29 |
|
– |
Selecting folders with jacket arts |
30 |
 Bluetooth Telephone
Hands-free phoning with cellular phones featuring Bluetooth wireless technology 31
About the telephone source 32
– Standby mode 32
Setting up for hands-free phoning 32 Basic operation of hands-free phoning 33
– |
Making a phone call |
33 |
– |
Taking a phone call |
34 |
Introduction of advanced hands-free phoning operation 35
Connecting a cellular phone 35
–Searching for available cellular phones 36
–Using a cellular phone to initiate a connection 36
Disconnecting a cellular phone 37 Registering connected cellular phone 37 Deleting a registered phone 37 Connecting to a registered cellular
phone 38
–Connecting to a registered phone manually 38
–Connecting to a registered phone
automatically 38 Using the Phone Book 39
–Transferring entries to the Phone Book 39
– Changing the Phone Book display order 40
–Calling a number in the Phone Book 40
– |
Assign genres to phone numbers |
40 |
|
|||||||
– |
Editing the name of a Phone Book |
|
|
|||||||
|
entry |
41 |
|
|
|
|
|
|
|
|
– |
Editing phone numbers |
42 |
|
|
|
|
||||
– |
Selecting the icon of a Phone Book |
|
|
|||||||
|
entry |
42 |
|
|
|
|
|
|
|
|
– |
Clearing a Phone Book entry |
43 |
|
|
||||||
– |
Using preset numbers |
43 |
|
|
|
|
||||
Clearing memory |
|
43 |
|
|
|
|
|
|
||
Using the Call History |
44 |
|
|
|
|
|
||||
– |
Displaying the Call History |
44 |
|
|
|
|||||
– |
Calling a number from the Call |
|
|
|
||||||
|
History |
45 |
|
|
|
|
|
|
|
|
– |
Assigning preset numbers |
45 |
|
|
|
|||||
Making a call by entering phone number |
45 |
|
||||||||
Echo canceling and noise reduction |
46 |
|
|
|||||||
Changing the ring tone |
46 |
|
|
|
|
|
||||
Setting the automatic rejecting 47 |
|
|
|
|||||||
Setting the automatic answering |
47 |
|
|
|
||||||
Selecting the icon for user phone |
47 |
|
|
|
||||||
Displaying BD (Bluetooth Device) |
|
|
|
|
||||||
address 47 |
|
|
|
|
|
|
|
|
||
– |
Displaying BD address of your cellular |
|
||||||||
|
phone |
48 |
|
|
|
|
|
|
|
|
– |
Displaying BD address of this unit |
48 |
|
|||||||
Displaying system version for repair |
48 |
|
|
|||||||
Bluetooth Audio |
|
|
|
|
|
|
|
|||
Listening to songs on BT Audio (Bluetooth |
|
|||||||||
audio player) |
49 |
|
|
|
|
|
|
|||
Setting up for Bluetooth audio player |
49 |
|
||||||||
Connecting a Bluetooth audio player |
50 |
|
|
|||||||
Function operation |
51 |
|
|
|
|
|
|
|||
Playing songs on Bluetooth audio player |
51 |
|
||||||||
Pausing a song |
51 |
|
|
|
|
|
|
|||
Stopping playback |
51 |
|
|
|
|
|
|
|||
Disconnecting a Bluetooth audio player |
52 |
|
||||||||
|
|
|
|
|
|
|
|
|
|
|
|
|
|
|
|
|
|
|
En |
3 |
|
<CRB2179-A/N>3


 Contents
Displaying BD address of this unit |
52 |
||||||
Displaying system version for repair |
52 |
||||||
Multi-CD Player |
|
|
|
|
|||
Playing a CD |
53 |
|
|
|
|
||
Selecting a track directly |
53 |
|
|
||||
50-disc multi-CD player 54 |
|
|
|||||
Introduction of advanced multi-CD player |
|||||||
operation |
54 |
|
|
|
|
||
Repeating play 55 |
|
|
|
|
|||
Playing tracks in random order |
55 |
|
|||||
Scanning CDs and tracks |
55 |
|
|
||||
Pausing CD playback |
56 |
|
|
|
|||
Using ITS playlists 56 |
|
|
|
||||
– |
Creating a playlist with ITS |
|
|
||||
|
programming |
56 |
|
|
|
||
– |
Playback from your ITS playlist |
56 |
|||||
– |
Erasing a track from your ITS |
|
|||||
|
playlist |
57 |
|
|
|
|
|
– |
Erasing a CD from your ITS playlist 57 |
||||||
Using disc title functions |
57 |
|
|
||||
– |
Entering disc titles |
57 |
|
|
|||
– |
Displaying disc titles |
58 |
|
|
|||
– |
Selecting discs from the disc title |
||||||
|
list |
58 |
|
|
|
|
|
Using CD TEXT functions |
58 |
|
|
||||
– |
Displaying text information on CD TEXT |
||||||
|
discs |
|
59 |
|
|
|
|
– |
Scrolling text information in the |
||||||
|
display |
59 |
|
|
|
|
|
– |
Selecting tracks from the track title |
||||||
|
list |
59 |
|
|
|
|
|
Playing songs on iPod |
|
|
|
||||
Listening to songs on your iPod |
60 |
|
|||||
Browsing for a song |
60 |
|
|
|
|||
– |
Searching for a song |
61 |
|
|
|||
– |
Selecting a playlist |
61 |
|
|
|||
Displaying text information on iPod 61 Introduction of advanced iPod adapter
operation 62
4 |
En |
Black plate (4,1)
|
|
|
|
|
|
|
|
|
Repeating play |
62 |
|
|
|
|
|
||
Playing songs in a random order |
|
|
|
|||||
(shuffle) |
62 |
|
|
|
|
|
|
|
Pausing a song |
63 |
|
|
|
|
|
||
TV tuner |
|
|
|
|
|
|
|
|
Watching the television |
64 |
|
|
|
||||
Introduction of advanced TV tuner |
|
|
|
|||||
operation |
65 |
|
|
|
|
|
||
Storing and recalling broadcast stations |
65 |
|||||||
Storing the strongest broadcast stations |
|
|
||||||
sequentially |
65 |
|
|
|
|
|
||
Selecting stations from the preset channel |
||||||||
list |
66 |
|
|
|
|
|
|
|
DVD Player |
|
|
|
|
|
|
|
|
Playing a disc |
67 |
|
|
|
|
|
||
Selecting a disc |
67 |
|
|
|
|
|
||
Selecting a folder 67 |
|
|
|
|
|
|||
Introduction of advanced DVD player |
|
|
||||||
operation |
68 |
|
|
|
|
|
||
Repeating play |
68 |
|
|
|
|
|
||
Pausing disc playback |
69 |
|
|
|
||||
Playing tracks in random order 69 |
|
|
|
|||||
Scanning tracks of a CD/MP3/WMA |
69 |
|
|
|||||
Using ITS playlist and disc title functions |
69 |
|||||||
Using disc title functions |
69 |
|
|
|
||||
– |
Entering disc titles |
|
70 |
|
|
|
||
Audio Adjustments |
|
|
|
|
|
|||
Adjusting the audio easily |
71 |
|
|
|
||||
Adjusting the audio finely |
71 |
|
|
|
||||
Extra functions |
71 |
|
|
|
|
|
||
Introduction of audio adjustments |
71 |
|
|
|||||
Using the position selector 72 |
|
|
|
|||||
Using balance adjustment |
72 |
|
|
|
||||
Using the time alignment |
73 |
|
|
|
||||
– Adjusting the time alignment |
73 |
|
|
|||||
Using subwoofer output |
|
74 |
|
|
|
|||
– |
Adjusting subwoofer settings |
74 |
|
|
||||
<CRB2179-A/N>4
Black plate (5,1)
 Contents
English
– Adjusting low pass filter attenuation
|
slope 74 |
Using the high pass filter 75 |
|
– |
Muting the speaker units (filters) 75 |
– |
Setting the high pass filter for front |
|
speakers 75 |
–Setting the high pass filter for rear speakers 76
Using the auto-equalizer 76 |
|
|
Using the equalizer 76 |
|
|
– |
Recalling equalizer curves |
76 |
– |
Adjusting equalizer curves |
77 |
– |
Adjusting 16-band graphic |
|
|
equalizer 77 |
|
Using BBE sound |
78 |
|
|
Using compression and BMX |
78 |
||
Adjusting loudness |
79 |
|
|
Adjusting source levels 79 |
|
||
Using auditory user interface |
79 |
||
Auto TA and EQ (auto-time alignment and |
|||
auto-equalizing) |
80 |
|
|
– |
Before operating the auto TA and EQ |
||
|
function 80 |
|
|
– |
Carrying out auto TA and EQ 81 |
||
Initial Settings |
|
|
|
|
Adjusting initial settings |
83 |
|
||
Selecting the display language |
83 |
|||
Setting the date |
83 |
|
|
|
Setting the clock |
84 |
|
|
|
Setting the FM tuning step |
|
84 |
|
|
Setting the AM tuning step |
84 |
|||
Switching the warning tone |
85 |
|||
Switching the face auto open |
85 |
|||
Switching the auxiliary setting |
85 |
|||
Switching the dimmer setting |
85 |
|||
Adjusting the brightness |
85 |
|
||
Correcting distorted sound |
86 |
|
||
Switching the sound muting/attenuation 86
Switching the feature demo |
86 |
Switching the reverse mode |
87 |
Switching the Ever Scroll |
87 |
|
|
|
|
|
||||||
Calibrating the RPMs |
87 |
|
|
|
|
|
|
|||||
Activating the BT Audio source |
|
87 |
|
|
||||||||
Entering PIN code for Bluetooth wireless |
|
|||||||||||
connection |
88 |
|
|
|
|
|
|
|
|
|||
Resetting the Bluetooth wireless technology |
|
|||||||||||
module |
88 |
|
|
|
|
|
|
|
|
|
||
Other Functions |
|
|
|
|
|
|
|
|
||||
Turning the clock display on or off |
89 |
|
|
|||||||||
Using the AUX source |
89 |
|
|
|
|
|
|
|||||
– |
About AUX1 and AUX2 |
89 |
|
|
|
|||||||
– |
Selecting AUX as the source |
89 |
|
|
||||||||
– |
Setting the AUX title |
89 |
|
|
|
|
|
|||||
Using different entertainment displays |
90 |
|
||||||||||
– |
Setting the entertainment display |
90 |
|
|||||||||
– |
Setting the background display |
91 |
|
|||||||||
Rewriting the entertainment displays and the |
|
|||||||||||
icons for telephone functions |
92 |
|
|
|||||||||
Additional Information |
|
|
|
|
|
|
||||||
Understanding built-in CD player error |
|
|
||||||||||
messages |
93 |
|
|
|
|
|
|
|
|
|||
Understanding auto TA and EQ error |
|
|
||||||||||
messages |
93 |
|
|
|
|
|
|
|
|
|||
Understanding error message on rewriting |
|
|||||||||||
the entertainment displays |
94 |
|
|
|
||||||||
CD player and care |
94 |
|
|
|
|
|
|
|
||||
CD-R/CD-RW discs |
94 |
|
|
|
|
|
|
|||||
Dual Discs |
95 |
|
|
|
|
|
|
|
|
|||
MP3, WMA, AAC and WAV files |
95 |
|
|
|||||||||
– |
MP3 additional information |
96 |
|
|
||||||||
– |
WMA additional information |
96 |
|
|
||||||||
– |
AAC additional information |
|
96 |
|
|
|||||||
– |
WAV additional information |
97 |
|
|
||||||||
About folders and MP3/WMA/AAC/WAV |
|
|||||||||||
files |
97 |
|
|
|
|
|
|
|
|
|
|
|
Terms |
99 |
|
|
|
|
|
|
|
|
|
|
|
Specifications |
101 |
|
|
|
|
|
|
|
|
|||
|
|
|
|
|
|
|
|
|
|
|
|
|
|
|
|
|
|
|
|
|
|
|
|
En |
5 |
<CRB2179-A/N>5

Black plate (6,1)
Section
01  Before You Start
About this unit
 CAUTION
!Do not allow this unit to come into contact with liquids. Electrical shock could result. Also, this unit damage, smoke, and overheat could result from contact with liquids.
!Keep this manual handy as a reference for operating procedures and precautions.
!Always keep the volume low enough so that you can hear sounds from outside the vehicle.
!Protect this unit from moisture.
!If the battery is disconnected or discharged, the preset memory will be erased and must be reprogrammed.
!If this unit does not operate properly, contact your dealer or nearest authorized Pioneer Service Station.
Operating environment
This unit should be used within the temperature ranges shown below.
Operating temperature range: –10 °C to +60 °C (14 °F to 140 °F)
EN300328 ETC test temperature: –20 °C and +55 °C (–4 °F and 131 °F)
About this manual
This unit features a number of sophisticated functions ensuring superior reception and operation. All the functions have been designed for the easiest possible use, but many are not self-explanatory. This operation manual will help you benefit fully from this unit’s potential and to maximize your listening enjoyment. We recommend that you familiarize yourself with the functions and their operation by reading through the manual before you begin using this unit. It is especially important that
you read and observe WARNINGs and CAUTIONs in this manual.
Features
CD playback
Music CD/CD-R/CD-RW playback is possible.
MP3 file playback
You can play back MP3 files recorded on CD- ROM/CD-R/CD-RW (ISO9660 Level 1/Level 2 standard recordings).
!Supply of this product only conveys a license for private, non-commercial use and does not convey a license nor imply any right to use this product in any commercial (i.e. revenue-generating) real time broadcasting (terrestrial, satellite, cable and/or any other media), broadcasting/streaming via internet, intranets and/or other networks or in other electronic content distribution systems, such as pay-audio or audio-on-demand applications. An independent license for such use is required. For details, please visit http://www.mp3licensing.com.
WMA file playback
You can play back WMA files recorded on CD- ROM/CD-R/CD-RW (ISO9660 Level 1/Level 2 standard recordings).
AAC file playback
You can play back AAC files recorded on CD- ROM/CD-R/CD-RW (ISO9660 Level 1/Level 2 standard recordings).
WAV file playback
You can play back WAV files recorded on CD- ROM/CD-R/CD-RW (Linear PCM (LPCM)/MS ADPCM recordings).
6 |
En |
<CRB2179-A/N>6

 Before You Start
Hands-free phoning
This unit realizes effortless hands-free phoning with Bluetooth wireless technology.
Bluetooth audio player compatibility
When you use this unit with a Bluetooth audio player featuring Bluetooth wireless technology, you can control the Bluetooth audio player.
iPod® compatibility
When you use this unit with a Pioneer iPod adapter (CD-IB100), you can control an iPod with Dock Connector.
!iPod is a trademark of Apple Computer,
Inc., registered in the U.S. and other countries.
About WMA
The Windows Media™ logo printed on the box indicates that this unit can play back WMA data.
WMA is short for Windows Media Audio and refers to an audio compression technology that is developed by Microsoft Corporation. WMA data can be encoded by using Windows Media Player version 7 or later.
Windows Media and the Windows logo are trademarks or registered trademarks of Microsoft Corporation in the United States and/or other countries.
 Notes
Notes
!This unit may not operate correctly depending on the application used to encode WMA files.
|
Black plate (7,1) |
|
|
|
||
|
|
|
|
|
|
|
|
|
|
Section |
|||
|
|
|
01 |
|
|
|
|
|
|
|
|
||
! |
|
|
English |
|||
Depending on the version of Windows Media |
||||||
|
|
|
||||
|
Player used to encode WMA files, album |
|
|
|
||
|
names and other text information may not be |
|
|
|
||
|
correctly displayed. |
|
|
|
||
! There may be a slight delay when starting playback of WMA files encoded with image data.
About AAC
AAC is short for Advanced Audio Coding and refers to an audio compression technology standard used with MPEG 2 and MPEG 4. Several applications can be used to encode AAC files, but file formats and extensions differ depending on the application which is used to encode.
This unit plays back AAC files encoded by iTunes® version 4.8 and earlier.
iTunes is a trademark of Apple Computer, Inc., registered in the U.S. and other countries.
About Bluetooth
Bluetooth is a short-range wireless radio connectivity technology that is developed as a cable replacement for mobile phones, handheld PCs and other devices. Bluetooth operates in 2.4 GHz frequency range and transmits voice and data at speeds up to 1 megabit per second. Bluetooth was launched by a special interest group (SIG) that comprises of Ericsson Inc., Intel Corp., Nokia Corp., Toshiba and IBM in 1998, and it is currently developed by nearly 2 000 companies worldwide.
En |
7 |
<CRB2179-A/N>7
Black plate (8,1)
Section
01  Before You Start
!The Bluetooth word mark and logos are owned by the Bluetooth SIG, Inc. and any use of such marks by Pioneer Corporation is under license. Other trademarks and
trade names are those of their respective owners.
Resetting the microprocessor
The microprocessor must be reset under the following conditions:
!Prior to using this unit for the first time after installation
!If the unit fails to operate properly
!When strange or incorrect messages appear on the display
% Press RESET with a pen tip or other pointed instrument.
RESET button
Clearing all memory
To protect personal and private information, data about the phone stored in this unit can be deleted.
1Press SOURCE and hold until the unit turns off.
2Press MULTI-CONTROL and hold until Language select appears in the display.
8 |
En |
3Turn MULTI-CONTROL to select Phone reset.
Phone reset appears in the display.
4Push MULTI-CONTROL right to show a confirmation display.
Clear memory YES is displayed. Clearing
memory is now on standby.
# If you do not want to reset phone memory, press BAND.
5Press MULTI-CONTROL to clear the memory.
All data in the telephone source, including
Phone Book entries, number presets and the Call History is cleared.
Protecting your unit from theft
The front panel can be detached from the head unit and stored in the provided protective case to prevent theft.
!If the front panel is not detached from the head unit within five seconds of turning off the ignition, a warning tone will sound and the front panel will open.
!You can turn off the warning tone. See
Switching the warning tone on page 85.
!You can turn off the face auto open. See
Switching the face auto open on page 85.
 Important
!Never use force or grip the display and the buttons too tightly when removing or attaching.
!Avoid subjecting the front panel to excessive shocks.
!Keep the front panel out of direct sunlight and high temperatures.
<CRB2179-A/N>8

Black plate (9,1)
 Before You Start
!A few seconds after turning the ignition switch to on or off, the front panel automatically moves. When this happens, your fingers may become jammed in the panel, so keep your hands away from it.
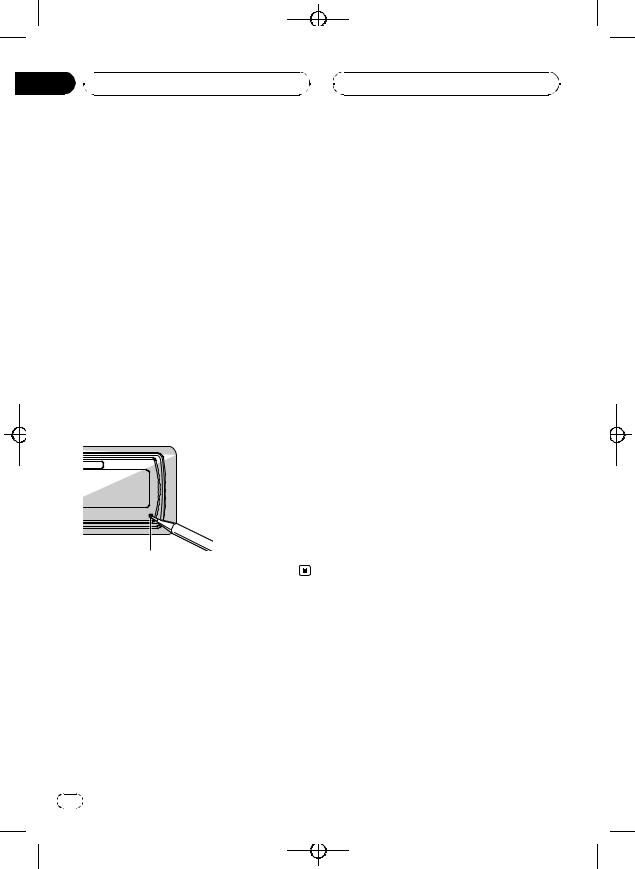
Removing the front panel
1 Press and hold EJECT to open the front panel.
2 Replace the front panel by clipping it into place.
Section
01
English
2 Slide and remove the front panel toward you.
Take care not to grip it too tightly or to drop the front panel and protect it from contact with water or other fluids to prevent permanent damage.
About the demo mode
This unit features two demonstration modes. One is the reverse mode, the other is the feature demo mode.
 Important
The red lead (ACC) of this unit should be connected to a terminal coupled with ignition switch on/off operations. If this is not done, the vehicle battery may be drained.
3 Put the front panel into provided protective case for safe keeping.
Attaching the front panel
1 Make sure the inner cover is closed.
Reverse mode
If you do not perform an operation within about 30 seconds, screen indications start to reverse, and then continue reversing every 10 seconds. Pressing BAND when power to this unit is turned off while the ignition switch is set to ACC or ON cancels the reverse mode. Press BAND again to start the reverse mode.
En |
9 |
<CRB2179-A/N>9

Section
01  Before You Start
Feature demo mode
The feature demo automatically starts when power to this unit is turned off while the ignition switch is set to ACC or ON. Pressing DISPLAY during feature demo operation cancels the feature demo mode. Press DISPLAY again to start the feature demo mode. Remember that if the feature demo continues operating when the car engine is turned off, it may drain battery power.
Use and care of the remote control
Installing the battery
Slide the tray out on the back of the remote control and insert the battery with the plus (+) and minus (–) poles pointing in the proper direction.
!When using for the first time, pull out the film protruding from the tray.
Black plate (10,1)
!Do not store the battery with metallic materials.
!In the event of battery leakage, wipe the remote control completely clean and install a new battery.
!When disposing of used batteries, please comply with governmental regulations or environmental public institutions’ rules that apply in your country/area.
Using the remote control
Point the remote control in the direction of the front panel to operate.
!The remote control may not function properly in direct sunlight.
 Important
!Do not store the remote control in high temperatures or direct sunlight.
!Do not let the remote control fall onto the floor, where it may become jammed under the brake or accelerator pedal.
 WARNING
Keep the battery out of the reach of children. Should the battery be swallowed, immediately consult a doctor.
 CAUTION
!Use only one CR2025 (3 V) lithium battery.
!Remove the battery if the remote control is not used for a month or longer.
!Do not recharge, disassemble, heat or dispose of the battery in fire.
!Do not handle the battery with metallic tools.
FUNCTION button and AUDIO button
You can also select the desired mode by FUNCTION button and AUDIO button on the remote control. But operation of FUNCTION button and AUDIO button on the remote control differs from the operation of MULTI-CONTROL on the head unit. When operating the remote control, switch through the modes as described below to select the mode.
FUNCTION button operation
% Press FUNCTION to select the desired mode (e.g., built-in CD player).
Press FUNCTION repeatedly to switch between the following modes:
 10
10 En
En
<CRB2179-A/N>10
 Before You Start
Play mode (repeat play)—Random mode
(random play)—Scan mode (scan play)— Pause (pause)—Search mode (search meth- od)—Title Input (disc title input)—Jacket art (jacket art read)
 Note
Note
Refer to Introduction of advanced built-in CD player operation on page 20.
AUDIO button operation
% Press AUDIO to select the desired mode.
Press AUDIO repeatedly to switch between the following modes:
Fader (balance adjustment)—Position (position selector)—TA Mode (time alignment set- ting)—Time Alignment (time alignment adjusting)—Loudness (loudness)—Powerful (graphic equalizer adjustment)—FREQ. (16band graphic equalizer adjustment)— Subwoofer1 (subwoofer on/off)— Subwoofer2 (subwoofer cut-off frequency)—
Subwoofer3 (subwoofer slope)—Front HPF
(front high pass filter slope)—
Front HPF FREQ. (front high pass filter cut-off frequency)—Rear HPF (rear high pass filter slope)—Rear HPF FREQ. (rear high pass filter cut-off frequency)—BBE (BBE)—COMP/BMX (Compression and BMX)—Auto EQ (autoequalizer on/off)—SLA (source level adjust- ment)—AUI sound level (auditory user interface)
 Note
Note
Refer to Introduction of audio adjustments on page 71.
Black plate (11,1)
Section
01
English
En  11
11
<CRB2179-A/N>11

Black plate (12,1)
Section
02  What’s What
1 234 5 6 7
b a 9
Head unit
1 EQ button
Press to select various equalizer curves.
2 Connection status indicator
Lights up when your cellular phone is connected via Bluetooth wireless technology.
3 DISPLAY button
Press to select different displays.
4 CLOCK button
Press to change to the clock display.
5 PHONE button
Press to select the phone as the source. While operating a phone source, press to end a call, reject an incoming call or cancel making a call.
6 MULTI-CONTROL
Move to perform manual seek tuning, fast forward, reverse and track search controls. Also used for controlling functions.
Turn to increase or decrease the volume.
7 LIST button
Press to display the disc title list, track title list, folder list, file list or preset channel list depending on the source.
8
8 RESET button
Press to reset the microprocessor.
9 BAND button
Press to select among three FM bands and one AM band and to cancel the control mode of functions.
a SOURCE button
This unit is turned on by selecting a source. Press to cycle through all the available sources.
b EJECT button
Press to eject a CD from your built-in CD player.
Press and hold to open or close the front panel.
Remote control
Operation is the same as when using the buttons on the head unit.
c VOLUME buttons
Press to increase or decrease the volume.
d FUNCTION button
Press to select functions.
 12
12 En
En
<CRB2179-A/N>12

 What’s What
c 9 d
m
l ak


 e j i
e j i


 f h
f h


 g
g
e Joystick
Move to perform manual seek tuning, fast forward, reverse and track search controls. Also used for controlling functions.
Functions are the same as MULTI-CONTROL except for volume control.
f DIRECT button
Press to directly select the desired track.
g CLEAR button
Press to cancel the input number when 0–9 are used.
h 0–9 buttons
Press to directly select the desired track, preset tuning or disc. Buttons 1–6 can operate the preset tuning for the tuner or disc number search for the multi-CD player.
i OFF HOOK button
Press to start talking on the phone while operating a phone source.
|
Black plate (13,1) |
|
|
|
||
|
|
|
|
|
|
|
|
|
|
Section |
|||
|
|
|
02 |
|
|
|
|
|
|
|
|
||
|
|
|
English |
|||
j |
ON HOOK button |
|||||
|
|
|
||||
|
While operating the phone source, press to |
|
|
|
||
|
end a call or reject an incoming call. |
|
|
|
||
k ATT button
Press to quickly lower the volume level, by about 90%. Press once more to return to the original volume level.
l ENTERTAINMENT button
Press to change to the entertainment display.
m AUDIO button
Press to select various sound quality controls.
En  13
13
<CRB2179-A/N>13

Section
03  Basic Operations
Turning the unit on
% Press SOURCE to turn the unit on.
When you select a source, the unit is turned on.
Selecting a source
You can select a source you want to listen to. To switch to the built-in CD player, load a disc in the unit (refer to page 19).
% Press SOURCE to select a source.
Press SOURCE repeatedly to switch between the following sources:
Tuner—Television—DVD player/MultiDVD player—Built-in CD player—Multi- CD player—iPod—External unit 1—Exter- nal unit 2—AUX1—AUX2—Telephone— BT Audio
 Notes
Notes
!In the following cases, the sound source will not change:
—When there is no unit corresponding to the selected source connected to this unit.
—When there is no disc in the unit.
—When there is no disc in the DVD player.
—When there is no magazine in the multiCD player.
—When there is no magazine in the multiDVD player.
—When the AUX (auxiliary input) is set to off (refer to page 85).
—When the BT Audio source is set to off (refer to Activating the BT Audio source on page 87).
!External unit refers to a Pioneer product (such as one available in the future) that, although incompatible as a source, enables control of basic functions by this unit. Two external units can be controlled by this unit. When two external units are connected, the allocation of
 14
14 En
En
Black plate (14,1)
them to external unit 1 or external unit 2 is automatically set by this unit.
!When this unit’s blue/white lead is connected to the vehicle’s auto-antenna relay control terminal, the vehicle’s antenna extends when
this unit’s source is turned on. To retract the antenna, turn the source off.
Loading a disc
1Press EJECT to open the front panel.
CD loading slot appears.
# After a CD has been inserted, press SOURCE to select the built-in CD player.
2Insert a CD into the CD loading slot.
Front panel is closed automatically, and playback will start.
!With jacket art function on, jacket arts on CD-ROM disc are automatically read in this unit when the disc is inserted. To cancel reading jacket arts, press BAND. For details, refer to Reading jacket arts on page 29.
CD loading slot
# You can eject a CD by pressing EJECT.
 Notes
Notes
!The built-in CD player plays one standard, 12cm or 8-cm CD at a time. Do not use an adapter when playing 8-cm CDs.
!Do not insert anything other than a CD into the CD loading slot.
<CRB2179-A/N>14

 Basic Operations
!There is sometimes a delay between starting up CD playback and the sound being issued. When being read, Format read is displayed.
!If you cannot insert a disc completely or if after you insert a disc the disc does not play, check that the label side of the disc is up. Press EJECT to eject the disc, and check the disc for damage before inserting it again.
!When the CD loading or ejecting function does not operate properly, you can eject the CD by pressing and holding EJECT while opening the front panel.
!If an error message such as ERROR-11 is dis-
played, refer to Understanding built-in CD player error messages on page 93.
Adjusting the volume
% Use MULTI-CONTROL to adjust the sound level.
With the head unit, turn MULTI-CONTROL to increase or decrease the volume.
With the remote control, press VOLUME to increase or decrease the volume.
Turning the unit off
% Press SOURCE and hold until the unit turns off.
Black plate (15,1)
Section
03
English
En  15
15
<CRB2179-A/N>15
Black plate (16,1)
Section
04  Tuner
Tuner
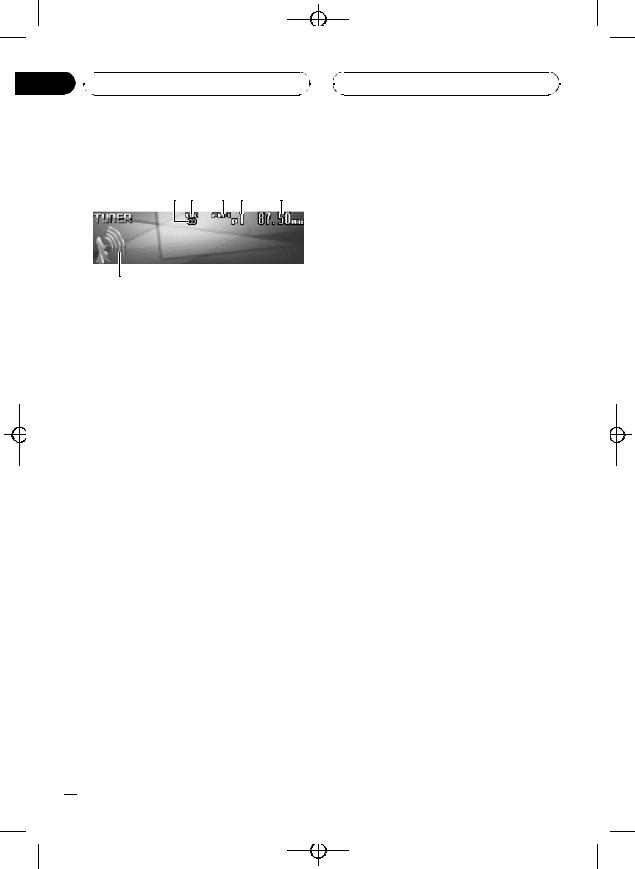
Listening to the radio
1 2 |
3 4 |
5 |
6
These are the basic steps necessary to operate the radio. More advanced tuner operation is explained starting on the next page.
 Important
If you are using this unit in North, Central or South America, reset the AM tuning step (see
Setting the AM tuning step on page 84).
1 Stereo (5) indicator
Shows when the selected frequency is being broadcast in stereo.
2 LOC indicator
Shows when local seek tuning is on.
3 Band indicator
Shows which band the radio is tuned to, AM or FM.
4 Preset number indicator
Shows which preset has been selected.
5 Frequency indicator
Shows the frequency to which the tuner is tuned.
6 Signal level indicator
Shows the radio wave strength.
1 Press SOURCE to select the tuner.
Press SOURCE until you see Tuner displayed.
2 Press BAND to select a band.
Press BAND until the desired band (FM-1, FM-2, FM-3 for FM or AM) is displayed.
3To perform manual tuning, push MULTI-CONTROL left or right.
The frequencies move up or down step by step.
4To perform seek tuning, push and hold MULTI-CONTROL left or right for about one second and release.
The tuner will scan the frequencies until a broadcast strong enough for good reception is
found.
# You can cancel seek tuning by pushing
MULTI-CONTROL left or right.
# If you push and hold MULTI-CONTROL left or
right you can skip stations. Seek tuning starts as soon as you release MULTI-CONTROL.
 16
16 En
En
<CRB2179-A/N>16

 Tuner
Tuner
Introduction of advanced tuner operation
1
1 Function display
Shows the function status.
1Press MULTI-CONTROL to display the main menu.
FUNCTION, AUDIO and ENTERTAINMENT appear on the display.
2Use MULTI-CONTROL to select FUNCTION.
Turn to change the menu option; press to select.
The function name appears on the display.
3Turn MULTI-CONTROL to select the function.
Turn MULTI-CONTROL clockwise or counterclockwise to switch between the functions in the following order:
BSM (best stations memory)—Local (local
seek tuning)
# To return to the frequency display, press
BAND.
 Note
Note
If you do not operate the function within about 30 seconds, the display is automatically returned to the frequency display.
Black plate (17,1)
|
|
Section |
|
|
04 |
|
|
English |
Storing and recalling |
||
broadcast frequencies |
|
|
You can easily store up to six broadcast frequencies for later recall.
1When you find a frequency that you want to store in memory press LIST to switch to the preset channel list mode.
2Use MULTI-CONTROL to store the selected frequency in memory.
Turn to change the preset number; press and hold to store.
The preset number you have selected will flash and then remain lit. The selected radio
station frequency has been stored in memory.
# If you do not operate the list within about 30 seconds, the preset channel list mode is canceled automatically.
 Notes
Notes
!Up to 18 FM stations, six for each of the three FM bands, and six AM stations can be stored in memory.
!You can also store radio station frequencies assigned to preset tuning numbers by press-
ing and holding one of the preset tuning buttons 1–6 on the remote control.
Storing the strongest broadcast frequencies
BSM (best stations memory) lets you automatically store the six strongest broadcast frequencies under preset tuning buttons 1–6. Once stored you can tune in to those frequencies with the touch of button.
1 Use MULTI-CONTROL to select BSM in the function menu.
BSM appears in the display.
En  17
17
<CRB2179-A/N>17
Section
04  Tuner
Tuner
2Press MULTI-CONTROL to turn BSM on. Searching is displayed. While Searching is displayed, the six strongest broadcast frequencies will be stored under preset tuning numbers 1–6 in the order of their signal strength. When finished, the preset channel list ap-
pears.
# To cancel the storage process, press
MULTI-CONTROL.
3Use MULTI-CONTROL to select the desired station.
Turn to change the station; press to select.
# You can also change the station by pushing
MULTI-CONTROL up or down.
 Note
Note
Storing broadcast frequencies with BSM may replace broadcast frequencies you have saved using buttons 1–6.
Selecting stations from the preset channel list
The preset channel list lets you see the list of preset stations and select one of them to receive.
1Press LIST to switch to the preset channel list mode during the frequency display.
2Use MULTI-CONTROL to select the desired station.
Turn to change the station; press to select.
# You can also change the station by pushing
MULTI-CONTROL up or down.
# If you do not operate the list within about 30 seconds, the preset channel list mode is canceled automatically.
Black plate (18,1)
 Notes
Notes
!You can also recall radio station frequencies assigned to preset tuning numbers by pushing MULTI-CONTROL up or down during the frequency display.
!You can also recall radio station frequencies assigned to preset tuning numbers by press-
ing one of the preset tuning buttons 1–6 on the remote control.
Tuning in strong signals
Local seek tuning lets you tune in only those radio stations with sufficiently strong signals for good reception.
1Use MULTI-CONTROL to select Local in the function menu.
Local appears in the display.
2Press MULTI-CONTROL to turn local seek tuning on.
Local seek sensitivity (e.g., Level 2) appears in
the display.
# To turn local seek tuning off, press
MULTI-CONTROL again.
3Push MULTI-CONTROL left or right to set the sensitivity.
There are four levels of sensitivity for FM and two levels for AM:
FM: Level 1—Level 2—Level 3—Level 4 AM: Level 1—Level 2
The Level 4 setting allows reception of only
the strongest stations, while lower settings let you receive progressively weaker stations.
 18
18 En
En
<CRB2179-A/N>18

 Built-in CD Player
Playing a CD
1 2
3
These are the basic steps necessary to play a CD with your built-in CD player. More advanced CD operation is explained starting on the next page.
1 Track number indicator
Shows the track number currently playing.
2 Play time indicator
Shows the elapsed playing time of the current track.
3 Disc title indicator
Shows the title of the currently playing disc.
!If no title has been entered for the currently playing disc, nothing is displayed.
1Press SOURCE to select the built-in CD player.
Press SOURCE until you see Compact Disc
displayed.
# If no disc is loaded in the unit, you cannot select Compact Disc (built-in CD player). Insert a disc in the unit. (Refer to page 14.)
2To perform fast forward or reverse, push and hold MULTI-CONTROL left or right.
# If you select Rough search, pushing and holding MULTI-CONTROL left or right enables you to search every 10 tracks in the current disc. (Refer to Selecting the search method on page 21.)
Black plate (19,1)
Section
05
3 To skip back or forward to another |
English |
|
|
track, push MULTI-CONTROL left or right. |
|
Pushing MULTI-CONTROL right skips to the |
|
start of the next track. Pushing |
|
MULTI-CONTROL left once skips to the start |
|
of the current track. Pushing again will skip to |
|
the previous track. |
|
 Note
Note
When a CD TEXT disc is inserted, the disc title automatically begins to scroll in the display. When Ever Scroll is set to ON at the initial setting, the disc title scrolls continuously. Refer to Switching the Ever Scroll on page 87.
Selecting a track directly
When using the remote control, you can select a track directly by entering the desired track number.
1 Press DIRECT.
Track number input display appears.
2 Press 0–9 buttons to enter the desired track number.
# You can cancel the input number by pressing
CLEAR.
3 Press DIRECT.
The track of entered number will play.
 Note
Note
After entering the number input mode, if you do not perform an operation within about eight seconds, the mode is automatically canceled.
En  19
19
<CRB2179-A/N>19

Black plate (20,1)
Section
05  Built-in CD Player
Introduction of advanced built-in CD player operation
1
1 Function display
Shows the function status.
1Press MULTI-CONTROL to display the main menu.
FUNCTION, AUDIO and ENTERTAINMENT appear on the display.
2Use MULTI-CONTROL to select FUNCTION.
Turn to change the menu option; press to select.
The function name appears on the display.
3Turn MULTI-CONTROL to select the function.
Turn MULTI-CONTROL clockwise or counterclockwise to switch between the functions in the following order:
Play mode (repeat play)—Random mode
(random play)—Scan mode (scan play)— Pause (pause)—Search mode (search meth- od)—Title Input (disc title input)—Jacket art
(jacket art read)
# To return to the playback display, press BAND.
 Notes
Notes
!When playing a CD TEXT disc, you cannot switch to Title Input. The disc title will have already been recorded on a CD TEXT disc.
!When playing audio data (CD-DA), it is not effective even if you turn Jacket art on. (Refer to page 29.)
 20
20 En
En
!If you do not operate the function within about
30 seconds, the display is automatically returned to the playback display.
Repeating play
There are two repeat play ranges for the builtin CD player: Disc repeat (disc repeat) and Track repeat (one-track repeat).
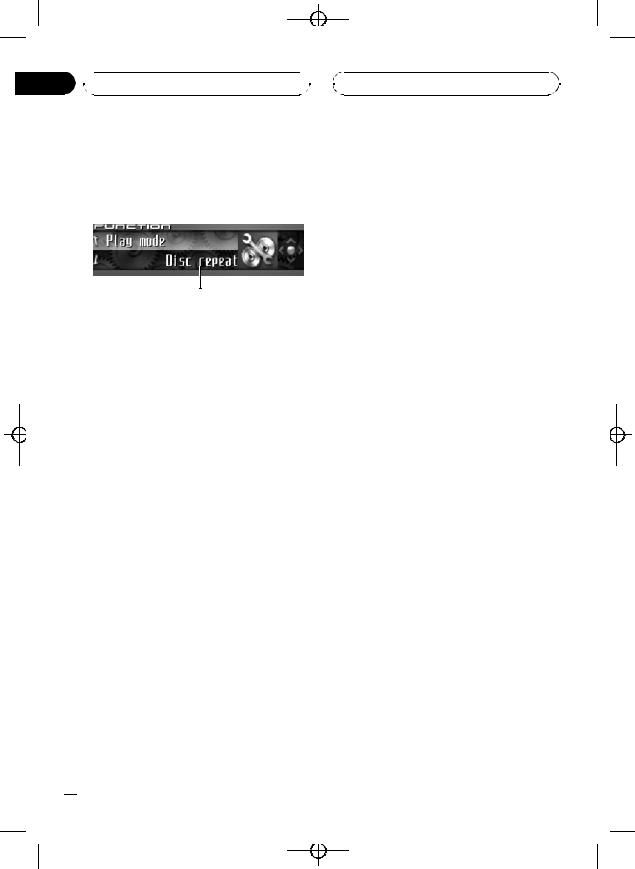
1Use MULTI-CONTROL to select Play mode in the function menu. Play mode appears in the display.
2Press MULTI-CONTROL to select the repeat range.
Press MULTI-CONTROL repeatedly until the desired repeat range appears in the display.
!Disc repeat – Repeat the current disc
!Track repeat – Repeat just the current track
 Note
Note
If you perform track search or fast forward/reverse during Track repeat, the repeat play range changes to Disc repeat.
Playing tracks in random order
Random play lets you play back tracks on the CD in a random order.
1Use MULTI-CONTROL to select Random mode in the function menu. Random mode appears in the display.
2Press MULTI-CONTROL to turn random play on.
Tracks will play in a random order.
# To turn random play off, press
MULTI-CONTROL again.
<CRB2179-A/N>20
 Built-in CD Player
Scanning tracks of a CD
Scan play lets you hear the first 10 seconds of each track on the CD.
1Use MULTI-CONTROL to select Scan mode in the function menu. Scan mode appears in the display.
2Press MULTI-CONTROL to turn scan play
on.
The first 10 seconds of each track is played.
3When you find the desired track press MULTI-CONTROL to turn scan play off.
The track will continue to play.
# If the display has automatically returned to the playback display, select Scan mode again by using MULTI-CONTROL.
 Note
Note
After scanning of a CD is finished, normal playback of the tracks will begin again.
Pausing CD playback
Pause lets you temporarily stop playback of the CD.
1Use MULTI-CONTROL to select Pause in the function menu.
Pause appears in the display.
2Press MULTI-CONTROL to turn pause
on.
Playback of the current track pauses.
# To turn pause off, press MULTI-CONTROL again.
Black plate (21,1)
|
|
|
Section |
|
|
|
05 |
|
|
|
English |
Selecting the search method |
|||
You can switch the search method between fast forward/reverse and searching every 10 tracks.
1Use MULTI-CONTROL to select Search mode in the function menu. Search mode appears in the display.
2Press MULTI-CONTROL to select the search method.
Press MULTI-CONTROL until the desired search method appears in the display.
!FF/REV – Fast forward and reverse
!Rough search – Searching every 10 tracks
Searching every 10 tracks in the current disc
If a disc contains over 10 tracks, you can search every 10 tracks. When a disc contains many tracks, you can roughly search for the track you want to play.
1Select the search method Rough search.
Refer to Selecting the search method on this page.
2Push and hold MULTI-CONTROL left or right to search every 10 tracks on a disc.
# If a disc contains less than 10 tracks, pushing and holding MULTI-CONTROL right recalls the last track of the disc. Also, if the remaining number of tracks after searching every 10 tracks is less than 10, pushing and holding MULTI-CONTROL right recalls the last track of the disc.
En  21
21
<CRB2179-A/N>21
Black plate (22,1)
Section
05  Built-in CD Player
# If a disc contains less than 10 tracks, pushing and holding MULTI-CONTROL left recalls the first track of the disc. Also, if the remaining number of tracks after searching every 10 tracks is less than 10, pushing and holding MULTI-CONTROL left recalls the first track of the disc.
4 Push MULTI-CONTROL up or down to select a letter of the alphabet.
Each time MULTI-CONTROL is pushed up, alphabet, numbers or symbols are displayed in ascending order (A B C ...). Each time MULTI-CONTROL is pushed down, letters are displayed in descending order.
Using disc title functions
You can input CD titles and display the title. The next time you insert a CD for which you have entered a title, the title of that CD will be displayed.
Use the disc title input feature to store up to 48 CD titles in the unit. Each title can be up to 10 characters long.
!When playing a CD TEXT disc, you cannot switch to disc title input display. The disc title will have already been recorded on a CD TEXT disc.
Entering disc titles
You can display the text information of any disc that has had a disc title entered.
1Play the CD that you want to enter a title for.
2Use MULTI-CONTROL to select
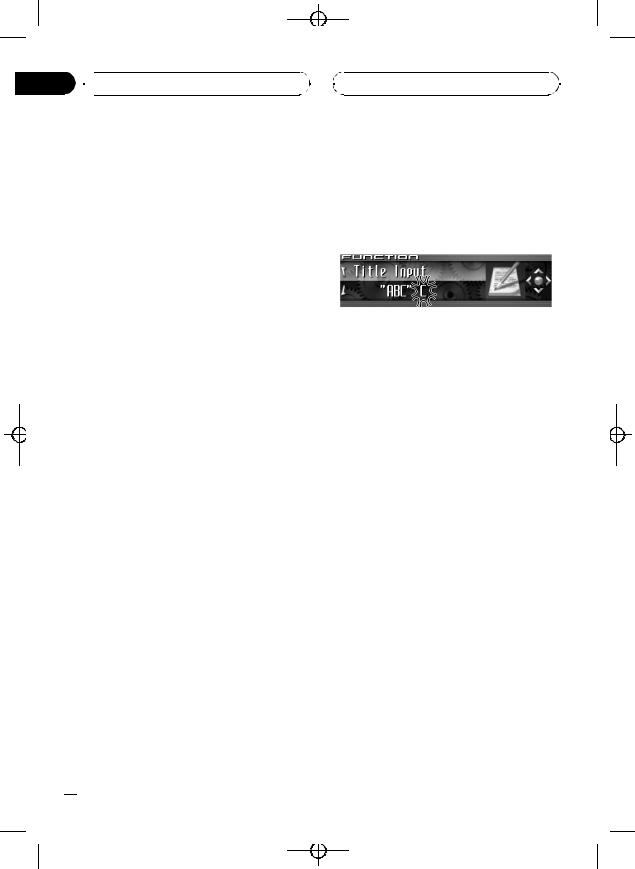
Title Input in the function menu. Title Input appears in the display.
3 Press DISPLAY to select the desired character type.
Press DISPLAY repeatedly to switch between the following character types:
Alphabet (upper case), numbers and symbols
—Alphabet (lower case)—European letters, such as those with accents (e.g. á, à, ä, ç)— Numbers and symbols
5Push MULTI-CONTROL right to move the cursor to the next character position.
When the letter you want is displayed, push MULTI-CONTROL right to move the cursor to the next position and then select the next letter. Push MULTI-CONTROL left to move backwards in the display.
6Move the cursor to the last position by pushing MULTI-CONTROL right after entering the title.
When you push MULTI-CONTROL right one more time, the entered title is stored in memory.
7Press BAND to return to the playback display.
 Notes
Notes
!Titles remain in memory, even after the disc has been removed from the unit, and are recalled when the disc is reinserted.
!After data for 48 discs has been stored in memory, data for a new disc will overwrite the oldest one.
!If you connect a multi-CD player, you can input disc titles for up to 100 discs.
!When a multi-CD player that does not support disc title functions is connected, you cannot enter disc titles in this unit.
 22
22 En
En
<CRB2179-A/N>22

 Built-in CD Player
Displaying disc titles
You can display the text information of any disc that has had a disc title entered.
% Press DISPLAY.
Press DISPLAY repeatedly to switch between the following settings:
 : disc title—Simple display
Using CD TEXT functions
Some discs have certain information encoded on the disc during manufacture. These discs may contain such information as the CD title, track title, artist’s name and playback time and are called CD TEXT discs. Only these specially encoded CD TEXT discs support the functions listed below.
Displaying text information on CD TEXT discs
You can display the text information of any disc that has had a disc title entered.
% Press DISPLAY.
Press DISPLAY repeatedly to switch between the following settings:
 : disc title—
 : disc artist name—
 : track title—
 : track artist name—
 : disc title and
  : disc artist name—
 : track title and
  : track artist name—Simple display
# If specific information has not been recorded on a CD TEXT disc, title or name is not displayed.
Black plate (23,1)
Section
05
than 24 letters, you can scroll the text informa- |
English |
|
|
tion as follows. |
|
!When the source icon is turned off, this unit can display the first 30 letters of text information.
% Press DISPLAY and hold until the text information begins to scroll through the display.
The titles scroll.
 Note
Note
When Ever Scroll is set to ON at the initial setting, text information scrolls continuously in the display. Refer to Switching the Ever Scroll on page 87.
Selecting tracks from the track title list
Track title list lets you see the list of track titles on a CD TEXT disc and select one of them to play back.
1Press LIST to switch to the track title list mode.
2Use MULTI-CONTROL to select the desired track title.
Turn to change the track title; press to play.
# You can also change the track title by pushing
MULTI-CONTROL up or down.
# If you do not operate the list within about 30
seconds, the track title list mode is canceled automatically.
Scrolling text information in the display
This unit can display the first 24 letters of disc title, disc artist name, track title and track artist name. When the text information is longer
En  23
23
<CRB2179-A/N>23

Section
06 MP3/WMA/AAC/WAV Player
Playing MP3/WMA/AAC/ WAV files
1 2 3 4
6 5
These are the basic steps necessary to play an MP3/WMA/AAC/WAV with your built-in CD player. More advanced MP3/WMA/AAC/WAV operation is explained starting on page 26.
1MP3/WMA/AAC/WAV indicator
Shows the type of file currently playing.
2Folder number indicator
Shows the folder number currently playing.
3 Track number indicator
Shows the track (file) number currently playing.
4 Play time indicator
Shows the elapsed playing time of the current track (file).
5Bit rate/sampling frequency indicator
Shows the bit rate or sampling frequency of the current track (file).
6Folder name indicator
Shows the name of the currently playing folder.
1 Press SOURCE to select the built-in CD player.
Press SOURCE until you see Compact Disc displayed.
Black plate (24,1)
# If no disc is loaded in the unit, you cannot select Compact Disc (built-in CD player). Insert a disc in the unit. (Refer to page 14.)
2 Push MULTI-CONTROL up or down to select a folder.
#You cannot select a folder that does not have an MP3/WMA/AAC/WAV file recorded in it.
#To return to folder 01 (ROOT), press and hold BAND. However, if folder 01 (ROOT) contains no files, playback commences with folder 02.
3 To perform fast forward or reverse, push and hold MULTI-CONTROL left or right.
# If you select Rough search, pushing and holding MULTI-CONTROL left or right enables you to search every 10 tracks in the current folder. (Refer to Selecting the search method on page 27.)
4 To skip back or forward to another track, push MULTI-CONTROL left or right.
Pushing MULTI-CONTROL right skips to the start of the next track. Pushing MULTI-CONTROL left once skips to the start of the current track. Pushing again will skip to the previous track.
 Notes
Notes
!When playing discs with MP3/WMA/AAC/ WAV files and audio data (CD-DA) such as CD-EXTRA and MIXED-MODE CDs, both types can be played only by switching mode between MP3/WMA/AAC/WAV and CD-DA with
BAND.
!If you have switched between playback of MP3/WMA/AAC/WAV files and audio data (CD-DA), playback starts at the first track on the disc.
!The built-in CD player can play back an MP3/ WMA/AAC/WAV file recorded on CD-ROM. (Refer to page 95 for files that can be played back.)
 24
24 En
En
<CRB2179-A/N>24

 MP3/WMA/AAC/WAV Player
!Playback is carried out in order of file number. Folders are skipped if they contain no files. (If folder 01 (ROOT) contains no files, playback commences with folder 02.)
!When playing back files recorded as VBR (variable bit rate) files, the play time will not be correctly displayed if fast forward or reverse operations are used.
!When playing back MP3 files recorded as VBR (variable bit rate) files, the bit rate value is not displayed even after switching to bit rate.
(VBR will be displayed.)
!When playing back WMA files recorded as VBR (variable bit rate) files, the average bit rate value is displayed.
!There is no sound on fast forward or reverse.
!When an MP3/WMA/AAC/WAV disc is inserted, folder name automatically begins to scroll in the display. When Ever Scroll is set to ON at the initial setting, folder name scrolls
continuously. About Ever Scroll, refer to
Switching the Ever Scroll on page 87.
|
Black plate (25,1) |
|
Section |
|
06 |
Note |
English |
After entering the number input mode, if you do not perform an operation within about eight seconds, the mode is automatically canceled.
Selecting a track directly in the current folder
When using the remote control, you can select a track directly by entering the desired track number.
1 Press DIRECT.
Track number input display appears.
2 Press 0–9 buttons to enter the desired track number.
# You can cancel the input number by pressing
CLEAR.
3 Press DIRECT.
The track of entered number will play.
En  25
25
<CRB2179-A/N>25
Black plate (26,1)
Section
06  MP3/WMA/AAC/WAV Player
Introduction of advanced built-in CD player (MP3/ WMA/AAC/WAV) operation
1
1 Function display
Shows the function status.
1Press MULTI-CONTROL to display the main menu.
FUNCTION, AUDIO and ENTERTAINMENT appear on the display.
2Use MULTI-CONTROL to select FUNCTION.
Turn to change the menu option; press to select.
The function name appears on the display.
3Turn MULTI-CONTROL to select the function.
Turn MULTI-CONTROL clockwise or counterclockwise to switch between the functions in the following order:
Play mode (repeat play)—Random mode
(random play)—Scan mode (scan play)— Pause (pause)—Search mode (search meth- od)—Jacket art (jacket art read)
# To return to the playback display, press BAND.
 Note
Note
If you do not operate the function within about 30 seconds, the display is automatically returned to the playback display.
Repeating play
For MP3/WMA/AAC/WAV playback, there are three repeat play ranges: Folder repeat (folder repeat), Track repeat (one-track repeat) and Disc repeat (repeat all tracks).
1Use MULTI-CONTROL to select Play mode in the function menu. Play mode appears in the display.
2Press MULTI-CONTROL to select the repeat range.
Press MULTI-CONTROL repeatedly until the desired repeat range appears in the display.
!Folder repeat – Repeat the current folder
!Track repeat – Repeat just the current track
!Disc repeat – Repeat all tracks
 Notes
Notes
!If you select another folder during repeat play, the repeat play range changes to Disc repeat.
!If you perform track search or fast forward/reverse during Track repeat, the repeat play range changes to Folder repeat.
!When Folder repeat is selected, it is not possible to play back a subfolder of that folder.
Playing tracks in random order
Random play lets you play back tracks in a random order within the repeat range,
Folder repeat and Disc repeat.
1 Select the repeat range.
Refer to Repeating play on this page.
2 Use MULTI-CONTROL to select Random mode in the function menu. Random mode appears in the display.
 26
26 En
En
<CRB2179-A/N>26
 MP3/WMA/AAC/WAV Player
3 Press MULTI-CONTROL to turn random play on.
Tracks will play in a random order within the previously selected Folder repeat or
Disc repeat ranges.
# To turn random play off, press
MULTI-CONTROL again.
Scanning folders and tracks
While you are using Folder repeat, the beginning of each track in the selected folder plays for about 10 seconds. When you are using Disc repeat, the beginning of the first track of each folder is played for about 10 seconds.
1 Select the repeat range.
Refer to Repeating play on the previous page.
2Use MULTI-CONTROL to select Scan mode in the function menu. Scan mode appears in the display.
3Press MULTI-CONTROL to turn scan play
on.
The first 10 seconds of each track of the current folder (or the first track of each folder) is played.
4When you find the desired track (or folder) press MULTI-CONTROL to turn scan play off.
The track (or folder) will continue to play.
# If the display has automatically returned to the playback display, select Scan mode again by using MULTI-CONTROL.
 Note
Note
After track or folder scanning is finished, normal playback of the tracks will begin again.
Black plate (27,1)
|
|
Section |
|
|
06 |
|
|
English |
Pausing MP3/WMA/AAC/ |
||
WAV playback |
|
|
Pause lets you temporarily stop playback of the MP3/WMA/AAC/WAV.
1Use MULTI-CONTROL to select Pause in the function menu.
Pause appears in the display.
2Press MULTI-CONTROL to turn pause
on.
Playback of the current track pauses.
# To turn pause off, press MULTI-CONTROL again.
Selecting the search method
You can switch the search method between fast forward/reverse and searching every 10 tracks.
1Use MULTI-CONTROL to select Search mode in the function menu. Search mode appears in the display.
2Press MULTI-CONTROL to select the search method.
Press MULTI-CONTROL until the desired search method appears in the display.
!FF/REV – Fast forward and reverse
!Rough search – Searching every 10 tracks
Searching every 10 tracks in the current folder
If the current folder contains over 10 tracks, you can search every 10 tracks. When one folder contains a lot of tracks, you can roughly search for the track you want to play.
En  27
27
<CRB2179-A/N>27

Black plate (28,1)
Section
06  MP3/WMA/AAC/WAV Player
1Select the search method Rough search.
Refer to Selecting the search method on the previous page.
2Push and hold MULTI-CONTROL left or right to search every 10 tracks in the current folder.
#If the current folder contains less than 10 tracks, pushing and holding MULTI-CONTROL right recalls the last track of the folder. Also, if the remaining number of tracks after searching every 10 tracks is less than 10, pushing and holding MULTI-CONTROL right recalls the last track of the folder.
#If the current folder contains less than 10 tracks, pushing and holding MULTI-CONTROL left recalls the first track of the folder. Also, if the remaining number of tracks after searching every 10 tracks is less than 10, pushing and holding
MULTI-CONTROL left recalls the first track of the folder.
#Depending on the version of iTunes® used to write MP3 files onto a disc, comment information may not be correctly displayed.
#Depending on the version of Windows Media Player used to encode WMA files, album names and other text information may not be correctly displayed.
When playing back a WAV disc
% Press DISPLAY.
Press DISPLAY repeatedly to switch between the following settings:
 : folder name—
 : file name—
 : folder name and
  : file name—Simple display
#If specific information has not been recorded on a WAV disc, name is not displayed.
#You can only play back WAV files in the frequencies 16, 22.05, 24, 32, 44.1 and 48 kHz (LPCM), or 22.05 and 44.1 kHz (MS ADPCM). The
sampling frequency shown in the display may be rounded.
Displaying text information on MP3/WMA/AAC/WAV disc
Text information recorded on an MP3/WMA/ AAC/WAV disc can be displayed.
When playing back an MP3/ WMA/AAC disc
% Press DISPLAY.
Press DISPLAY repeatedly to switch between the following settings:
 : folder name—
 : file name—
 : folder name and
  : file name—
 : artist name and
  : album title—
 : artist name and
  : track title—
 : comment and
  : file name—Sim- ple display
# If specific information has not been recorded on an MP3/WMA/AAC disc, title or name is not displayed.
 28
28 En
En
Scrolling text information in the display
This unit can display the first 24 letters only of folder name, file name, track title, artist name, album title and comment. When the recorded information is longer than 24 letters, you can scroll the text to the left so that the rest of the text information can be seen.
!When the jacket art is turned off, this unit can display the first 30 letters of text information.
% Press DISPLAY and hold until the text information begins to scroll through the display.
The text information scrolls.
<CRB2179-A/N>28

 MP3/WMA/AAC/WAV Player
 Notes
Notes
!Unlike MP3, WMA and AAC file format, WAV files display only the folder name and the file name.
!When Ever Scroll is set to ON at the initial setting, text information scrolls continuously in
the display. Refer to Switching the Ever Scroll on page 87.
Selecting tracks from the file name list
File name list lets you see the list of file names (or folder names) and select one of them to playback.
1Press LIST to select the file name list mode.
Press LIST repeatedly to switch between the following lists:
Folder/file name list—jacket art list—playback display
2Use MULTI-CONTROL to select the desired file name (or folder name).
Turn to change the name of file or folder; press to play; push right to see a list of the
files (or folders) in the selected folder.
# You can also change the name of file or folder
by pushing MULTI-CONTROL up or down.
# To return to the previous list (the folder one
level higher), push MULTI-CONTROL left.
# If the folder/file number is more than 100, last
2-digit of the folder/file number is displayed.
# Number of the folders/files in the currently selected folder will be indicated on the right side of
the display.
# If you do not operate the list within about 30
seconds, the file name list mode is canceled automatically.
Black plate (29,1)
|
|
Section |
|
|
06 |
|
|
English |
Displaying jacket arts on |
||
CD-ROM discs |
|
|
If jacket arts are recorded on CD-ROM disc, you can display them on this unit so you can easily find a specific folder looking at the jacket art.
!Record jacket arts for folders on CD-ROM in advance using your computer. For details, please visit the following site: http://www.pioneer.co.jp/car/pclink4/index- e.html
!Jacket arts (max. 15 images) directly beneath the ROOT folder can be read. If images have been recorded on the lower tier than the ROOT folder, these images are not displayed. In this case, preset images are displayed. Refer to About folders and MP3/WMA/AAC/WAV files on page 97.
Reading jacket arts
With this function on, jacket arts on CD-ROM disc are automatically read in this unit when the disc is inserted.
!Up to 15 jacket arts can be read in this unit.
!Reading jacket arts can take approx. 40 seconds. If the disc is reloaded, this unit read jacket arts again from the beginning.
!Jacket arts are not displayed if MIXEDMODE CD or partial CD is inserted into this unit.
!For other folders with no jacket arts recorded, this unit automatically assigns preset images to them.
1Use MULTI-CONTROL to select Jacket art in the function menu. Jacket art appears in the display.
2Press MULTI-CONTROL to turn jacket art read on.
# To turn jacket art function off, press
MULTI-CONTROL again.
En  29
29
<CRB2179-A/N>29

Black plate (30,1)
Section
06  MP3/WMA/AAC/WAV Player
Selecting folders with jacket arts
You can display the list of folders that are already assigned jacket arts and select one to start playback.
!In the jacket art list, this unit displays up to 15 folders with jacket arts.
!For other folders with no jacket arts recorded, this unit automatically assigns preset images to them.
1Press LIST to select the jacket art list mode.
Press LIST repeatedly to switch between the following lists:
Folder/file name list—jacket art list—playback display
2Push MULTI-CONTROL up or down to change the group of jacket art.
3Use MULTI-CONTROL to select jacket art of the desired folder.
Turn to change the jacket art of folder; press to
play.
# You can also change the jacket art of folder by
pushing MULTI-CONTROL left or right.
# If you do not operate the list within about 30
seconds, the jacket art list mode is canceled automatically.
 30
30 En
En
<CRB2179-A/N>30
 Loading...