


Universal Digital Preamp / Equalizer
Owner’s Manual
DEQ-P90
English

Contents |
|
Key Finder .................................................... |
3 |
Head Unit (DEX-P90RS) .................................. |
3 |
Remote Control (DEX-P90RS) ........................ |
3 |
Opening and Closing |
|
the Remote Control Cover ........................ |
4 |
- When the Cover is Closed |
|
- When the Cover is Open |
|
Before Using This Product ...................... |
6 |
About This Product .......................................... |
6 |
About This Manual ............................................ |
6 |
About the Digital Network ................................ |
6 |
MODE Switch Setting ...................................... |
7 |
Resetting the Microprocessor ............................ |
7 |
Precaution .......................................................... |
8 |
Audio Adjustment ...................................... |
9 |
Audio Menu ...................................................... |
9 |
- Switching to the Audio Menu |
|
Audio Adjustment <Main> .................... |
11 |
Main Menu ...................................................... |
11 |
- Switching to the Main Menu |
|
Fader/Balance Adjustment .............................. |
11 |
Bass/Treble Adjustment .................................. |
12 |
Adjusting the Listening Position .................... |
13 |
-Using the Position Selector
-Fine Tuning the Position
-Effective distance Adjustment
Using the Position Fine Tuning function
Source Level Adjustment ................................ |
17 |
Audio Adjustment <Equalizer> .............. |
18 |
About the Equalizer Menu .............................. |
18 |
Equalizer menu ................................................ |
18 |
- Switching to the Equalizer Menu |
|
Relation Between Frequency Characteristics |
|
and Sound Quality .................................... |
19 |
Adjusting the 31 Band Graphic Equalizer ...... |
21 |
The Flat function ............................................ |
22 |
1

Audio Adjustment <Network> .............. |
23 |
What is the Multi-Amp System? .................... |
23 |
Network Menu ................................................ |
24 |
- Switching to the Network Menu |
|
Time Alignment Adjustment .......................... |
25 |
-Switching to the
Time Alignment Adjustment Mode
-Measuring the Distance to be Corrected
-Inputting the Distance to be Corrected
Filter Adjustment ............................................ |
29 |
-Switching to the Filter Adjustment Mode
-Using the Mute function
-Adjusting the Filter
Audio Adjustment |
|
<Memory Functions> ........................ |
34 |
Memory Functions of |
|
Adjusted Audio Menu .............................. |
34 |
Switching to Memory Mode .......................... |
35 |
- Equalizer Menu |
|
- Network Menu |
|
Storing the Adjustment Data in Memory ........ |
36 |
Recalling Data Stored in Memory .................. |
37 |
-Recalling Memory Using Forward/Reverse Order
— Functions of Equalizer Menu —
-Specifying the Memory Number Directly
Memory Protect function ................................ |
39 |
Memory Clearing Operations .......................... |
40 |
Display for the Person who Set Up |
|
the Audio Adjustments .................... |
41 |
Inputting the Name .......................................... |
41 |
Inputting Characters ........................................ |
41 |
Memory Data Memo ................................ |
44 |
Connecting the Units .............................. |
47 |
WARNING ...................................................... |
47 |
CAUTION ...................................................... |
47 |
Routing the Optical Cable .............................. |
48 |
Setting Example .............................................. |
48 |
Connection Diagram ...................................... |
49 |
Connecting the RCA Input Amplifier ............ |
50 |
Connecting the Power Terminal ...................... |
51 |
Connecting the IP-BUS and Optical Cable |
.... 52 |
- Connecting the Cables |
|
- Attaching the Noise Filter |
|
Installation ................................................ |
54 |
Installing the Unit ............................................ |
54 |
Troubleshooting ...................................... |
55 |
Checklist .......................................................... |
55 |
Specifications .......................................... |
56 |
Contents
2
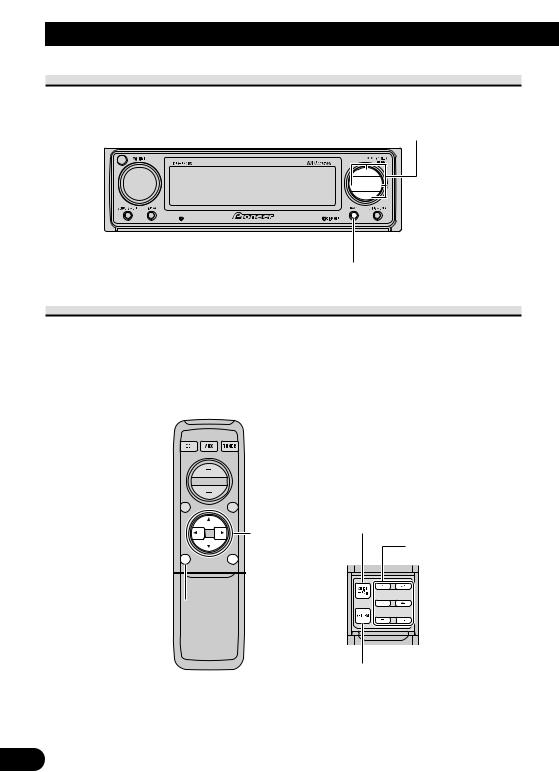
Key Finder
Head Unit (DEX-P90RS)
This unit can be operated with the combined Head Unit DEX-P90RS (sold separately).
5/∞/2/3 buttons
BAND button 
Remote Control (DEX-P90RS)
Most of all functions can be operated by the remote control.
Opening the cover enables the SHIFT, RETURN and FUNCTION buttons 1–6 inside the remote control. For more details, refer to the page 4.
SHIFT button
5/∞/2/3 buttons
FUNCTION buttons 1–6
 BAND button
MENU button 
RETURN button
Closed state |
Open state |
3
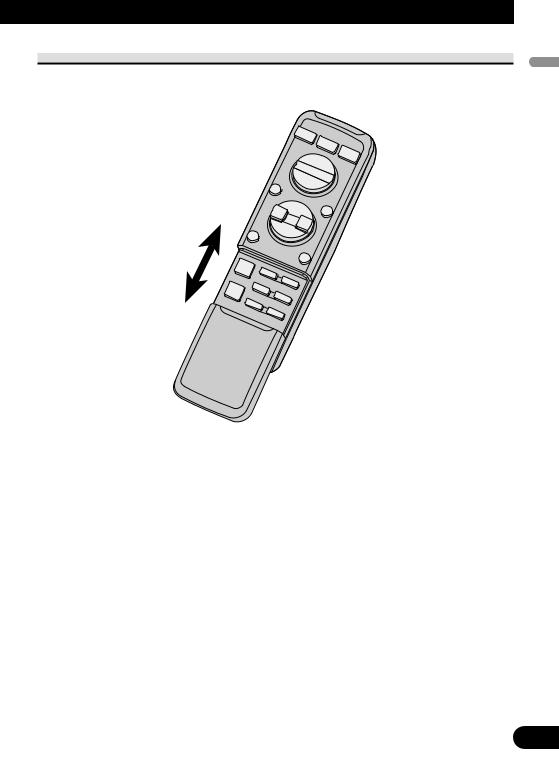
Opening and Closing the Remote Control Cover
When the remote control is opening the cover enables the SHIFT, RETURN and FUNCTION buttons 1–6 inside the unit.
Menu displays with cover open and closed in this system, the available functions and the menu display vary depending on the condition of the remote control in use.
Remote Control |
Menu display |
Cover closed |
Closed state |
|
|
Cover open |
Open state |
|
|
Finder Key
4
Key Finder
When the Cover is Closed
Closing the cover of the remote control makes the menu display to the closed state.
Menu display in closed state
Example: Main Menu Screen
Note:
• Menu display in closed state: Current mode and functions which are ON are displayed.
When the Cover is Open
Opening the cover of the remote control makes the menu display to the open state.
Menu display in open state
Example: Main Menu Setting Screen
Note:
•Positions of menu items on the display correspond to the positions of FUNCTION buttons 1–6.
•Menu display in open state: Using FUNCTION buttons 1–6, operable functions are displayed.
When the cover is closed in the middle of operation
•Closing the cover during operation releases the previous operation and returns the menu display to the closed mode.
5
Before Using This Product
About This Product
This product is universal digital preamp/equalizer which can be operated with the combined head unit DEX-P90RS (sold separately). You can operate a number of Audio Adjustment functions with separately sold head unit.
About This Manual
This product features a number of sophisticated functions ensuring superior reception and operation. All are designed for the easiest possible use, but many are not self-explanatory. This operation manual is intended to help you benefit fully from their potential and to maximize your listening enjoyment.
We recommend that you familiarize yourself with the functions and their operation by reading through the manual before you begin using this product. It is especially important that you read and observe the “Precaution” on page 8 and in other sections.
This manual mainly explains the remote control operation. In some functions, you can perform the same operations with the head unit, however, the remote control offers a number of buttons such as SHIFT, MENU, RETURN and FUNCTION buttons 1–6 which are not provided on the head unit. And all of audio adjustment operations can only be conducted with the remote control.
About the Digital Network
A vehicle, unlike the home audio, imposes several constraints upon the quality of reproduced sound, and have the following effects:
•Reflected sounds have strong effects on direct sounds because of the confined space and complex shape within a vehicle. This disturbs frequency characteristics and significantly reduces sound quality.
•The orientation of the sound image becomes unnatural, because speakers may not be installed symmetrically to left and right of the listener, or because speakers are installed in both the front and rear.
This system is equipped with a wide variety of functions that use DSP to create the ideal sound quality and sound image in a vehicle and overcome these constraints on reverberation.
Product This Using Before / Finder Key
6
Before Using This Product
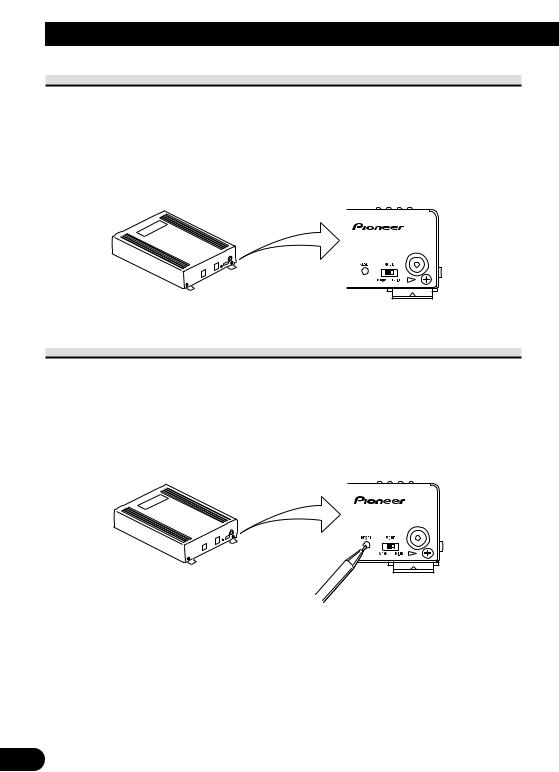
MODE Switch Setting
This product equipped two setting modes. The one is LR/IND mode and the other is LR/COM mode. LR/IND mode can be adjusted the equalizer and network adjustment independently between Left and Right channel. LR/COM mode can be adjusted these adjustment simultaneously between Left and Right channel. Since usable functions are different between LR/IND and LR/COM, be sure to set the mode correctly.
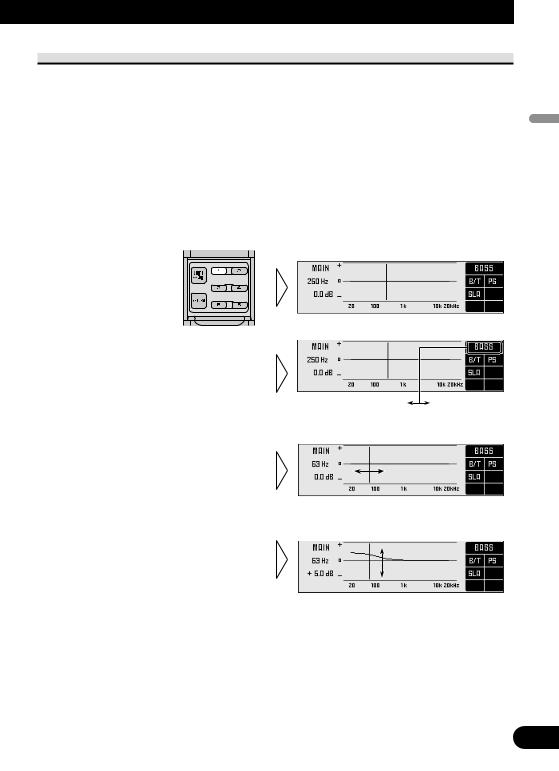
•Set MODE switch of this product to appropriate position with a pen tip or other pointed instrument.
Resetting the Microprocessor
The microprocessor must be reset under the following conditions:
When using this product for the first time after installation.
When the machine fails to operate properly.
When strange (incorrect) messages appear on the display.
When setting the position of the MODE switch of this product.
•To reset the microprocessor, press the RESET button on this unit with a pen tip or other pointed instrument.
7

Precaution
• Keep this manual handy as a reference for operating procedures and precautions. |
|
|
• Always keep the volume low enough for outside sounds to be audible. |
|
|
• Protect the product from moisture. |
Before |
|
• If the battery is disconnected, the preset memory will be erased and must be repro- |
||
|
||
grammed. |
|
|
• Should this product fail to operate properly, contact your dealer or nearest authorized |
ProductThisUsing |
|
Pioneer Service Station. |
||
|
8

Audio Adjustment
Audio Menu
This system has the following three Audio Menus:
Main <Main> (page 11)
This carries out Fader/Balance Adjustments as well as Bass/Treble Adjustment, the basis for sound quality adjustments. It also sets up and adjusts the Position Selector, which corrects the orientation of the sound image for the listener’s position in the vehicle.
Equalizer <Equalizer> (page 18)
This corrects complex frequency disturbance in a vehicle.
The Equalizer function for the component can make fine adjustments of sound quality for each frequency.
Network <Network> (page 23)
This adjusts the reproduced frequency band (cross-over frequency) and the level of each sound range (band) when a multi-amp system is set up. It also corrects unnatural orientation of the sound image caused by the locations of the speakers (using the Time Alignment function), by setting up a delay (time difference) between speakers set up for different sound ranges.
Note:
•The 5/∞/2/3 buttons on the head unit (DEX-P90RS) can not be used for Audio Adjustment operations.
9
Switching to the Audio Menu
When the system is ON, you can adjust the sound quality.
1.Each press of MENU button selects the desired Audio Menu in the following order:
Main (Main Menu) = Equalizer (Equalizer Menu) = Network (Network Menu)
2.Operate the mode.
3.Press the BAND button and cancel the Audio Menu.
Cancel the Audio Menu to return to the operations screen of the source currently in use.
Adjustment Audio
10

Audio Adjustment <Main>
Main Menu
With this menu, you can make the following adjustments.
•Fader/Balance Adjustment <FAD/BAL CONTROL> (Closed state)
•Bass/Treble Adjustment <B/T> (Open state)
•Listening Position Adjustment <PS> (Open state)
•Source Level Adjustment <SLA> (Open state)
Switching to the Main Menu
• Press the MENU button and select the Main Menu (refer to page 10).
After the title screen, the display switches to the operation screen of the Main Menu. Opening and closing the cover of the remote control (refer to page 4) switches between the open and closed states of the menu display and setting screen.
• To cancel the Main Menu, press the BAND button.
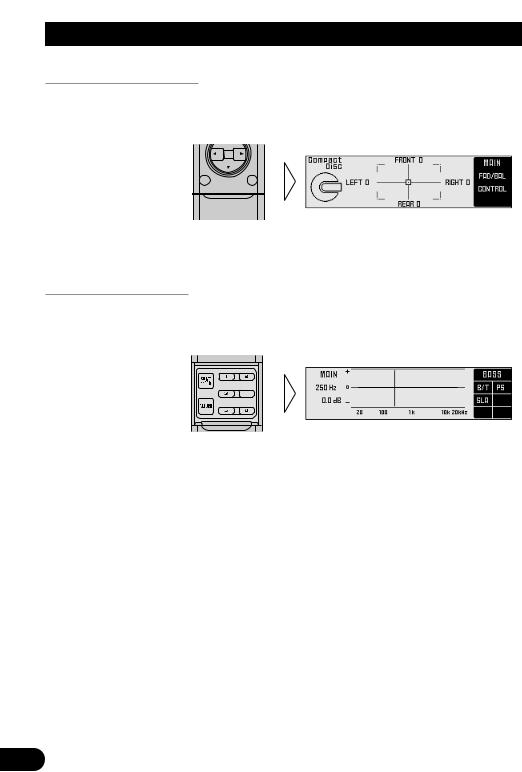
Fader/Balance Adjustment <FAD/BAL CONTROL> (Closed state)
This function allows you to select a fader/balance setting that provides ideal listening conditions in all occupied seats. This function can be operated with the remote control cover closed.
1.Close the cover of the remote control (refer to page 4).
2.Adjust front/rear speaker balance with the 5/∞ buttons.
Note:
• In the front-speaker-oriented system, if the fader is set to rear, whole sound level is attenuated.
3.Adjust left/right speaker balance with the 2/3 buttons.
11
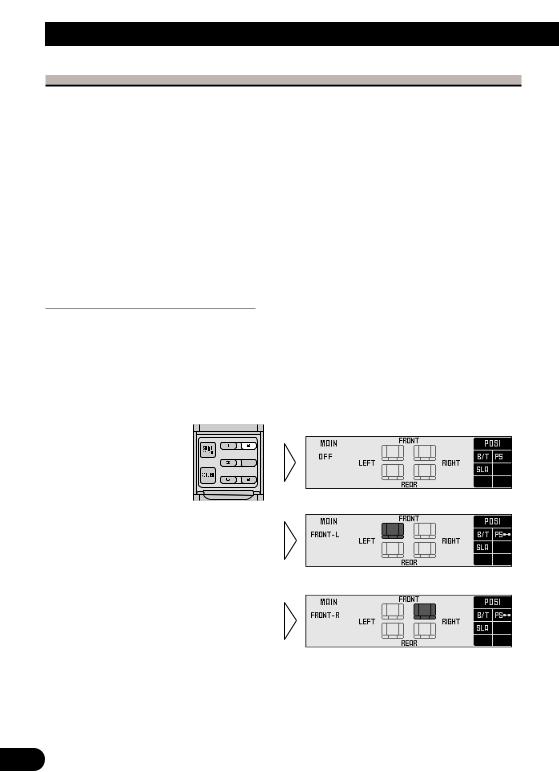
Bass/Treble Adjustment <B/T> (Open state)
It is possible to select one from a choice of four frequencies to becomes the reference when adjusting the bass/treble tone. The frequencies and level adjustment ranges from which selections may be made are as follows:
Bass : 63 Hz, 100 Hz, 160 Hz, 250 Hz
Treble: 4 kHz, 6.3 kHz, 10 kHz, 16 kHz
Level adjustment range: –12 dB – +12 dB (1 dB/1 step)
1.Open the cover of the remote control (refer to page 4).
This switches to Main Menu Setting Screen.
2.Press the FUNCTION button 1.
The display switches to Bass/Treble Adjustment Screen.
3.Press the FUNCTION button 1 again to choose bass (BASS) or treble (TREB).
Pressing the button switches |
BASS |
TREB |
bass/treble. |
4.Press the 2/3 buttons and select a frequency point.
Tune to the desired frequency point.
5. Press the 5/∞ buttons and adjust the level.
Holding down these buttons continues their operations (with one stop at the central position).
Note:
•Raising the Bass/Treble level too high may result in distortion. Perform Bass/Treble Adjustment to adjust overall sound quality.
<Main> Adjustment Audio
12
Audio Adjustment <Main>
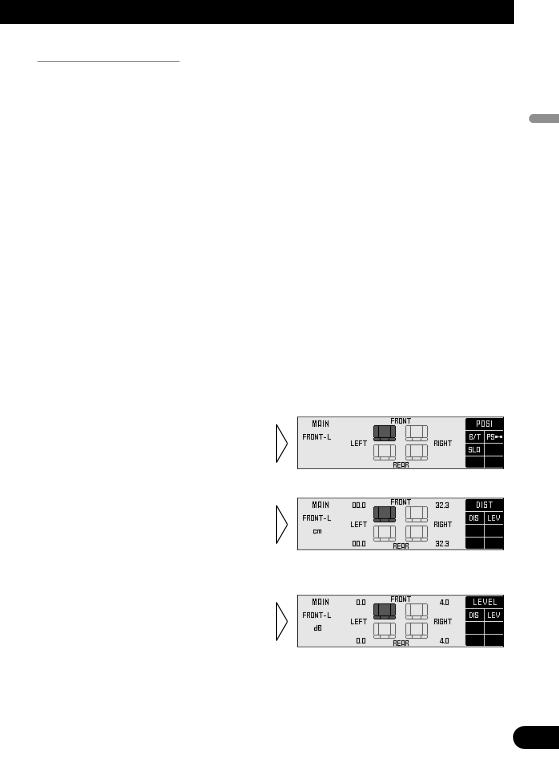
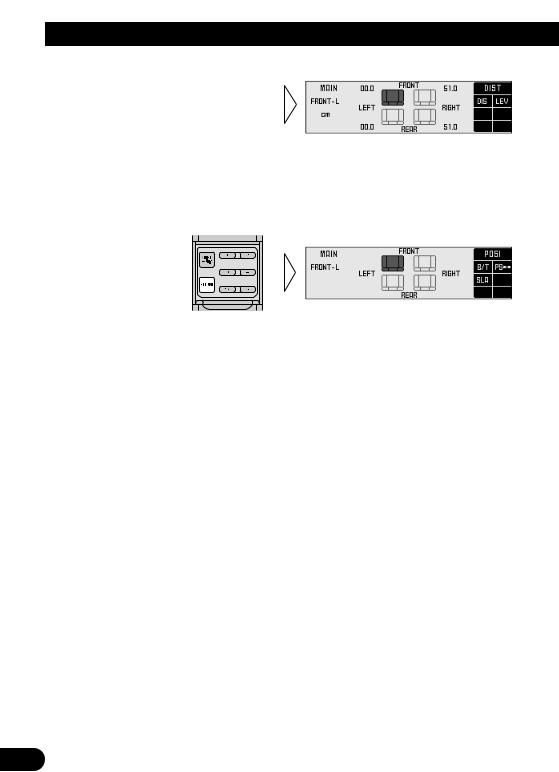
Adjusting the Listening Position <PS> (Open state)
One way to assure a more natural sound is to clearly position the stereo sound image (putting you in the center of the sound field).
The Position Selector function adjusts distance and volume level of sound from each speaker to match seat positions and the number of people in the car, and lets you recall settings at the touch of a button. The result is a natural sound regardless of the seat you are sitting in.
Button |
Position |
5 |
FRONT (Front Seat Left & Right) |
|
|
2 |
FRONT-L (Front Seat Left) |
|
|
3 |
FRONT-R (Front Seat Right) |
|
|
Using the Position Selector <POSI>
1.Open the cover of the remote control in the Main Menu (refer to page 4).
This switches to Main Menu Setting Screen.
2.Press the FUNCTION button 2.
The display switches to Position Selector Screen.
3.Press the FUNCTION button 2 again to turn the Position Selector function ON.
4.Press one of buttons 2/3/5 and select the desired position.
Set up the position to match the position of the listener in the car.
Experimenting with other positions
•The position is normally designed to match the listener’s position in the car. However, other positions may prove to be more effective, depending on the model of the car and the location of the speakers. Compare the sound and choose the position in which the sounds are most natural.
13
Fine Tuning the Position
After choosing the position using the Position Selector function, it is possible to fine tune the distance and the difference in sound levels. Conduct the fine tuning to match the location of the left and right speakers and the shape of the car and correct the position of the sound image so that the sounds are most natural.
Distance (DIS): 0 — 340 cm (1.7 cm/1 step)
The longer the distance, the longer the sounds coming from the speaker take to reach the ears of the listener, giving the listener the feeling that the speaker is moving
further away. The sound image thus moves in the direction in which the value for the distance is closer to 0.
Adjustment range in the difference in sound levels (LEV): 0 — –30 dB (1dB/1step)
The smaller the level, the lower the sound volume output from the speaker, giving the listener the feeling that the speaker is moving further away. The sound image thus moves in the direction in which the value for the difference in sound levels is closer to 0.
Relationship between the distance and the delay time
It is necessary to adjust the delay time, irrespective of the distance between the listening position and each speaker unit, for better sound quality.
With this system, when you adjust the distance, the corresponding delay time is conducted automatically. It means that you can adjust the time alignment without calculating.
Note:
•Fine tuning can be conducted separately for each position.
•The values set after fine tuning are stored into memory as the values for the position. When the position is next called up, the fine tuning values are recalled.
1.Use the Position Selector function and select the position (refer to page 13).
Example: When selecting FRONT–L
2.Press the FUNCTION button 2 for two seconds and switch to Position Fine Tuning Screen.
3.Press FUNCTION buttons 1 or 2 and select the distance (DIS) adjustment or difference in sound levels (LEV) adjustment.
Continued overleaf.
<Main> Adjustment Audio
14
Audio Adjustment <Main>
4.Press the 2/3 buttons to correct the position of the sound image.
Holding down these buttons continues their operations (during distance tuning, holding down the button moves the distance 3.4 cm/1 step).
5.After tuning has been completed, press the RETURN button to cancel the Position Fine Tuning Screen.
The values are stored in memory and the display returns to Position Selector Screen.
Points concerning fine tuning
•While listening to vocals, adjust the distance to position the vocal sound image naturally to the front.
15

Effective distance Adjustment Using the Position Fine Tuning function
— Relation to Time Alignment Adjustment function —
When the system comprises a multi-amp system, the distance between the listening position and each speaker can be tuned using either of two methods.
Time Alignment Adjustment function of the Network Menu (page 25)
The distance between the listening position and each speaker of each band (high, mid, low and subwoofer) can be adjusted for the left and right speakers.
Distance tuning of the Position Fine Tuning function
The distance between the listening position and the left and right speakers can be tuned, regardless of the band. The same tuning is conducted for high, mid and low range bands. With a multi-amp system, combine the two methods to ensure the position of the sound images are set up more effectively.
1.Adjust the distance from each speaker using the Time Alignment Adjustment function of the Network Menu (refer to page 25).
2.Adjust the overall distance from the left and right speakers using the Position Fine Tuning Function.
Use the set values for the Time Alignment Adjustment function to fine tune the overall balance of the sound image positions.
3.Use the Position Fine Tuning Function to adjust the overall level balance between the left and right speakers.
Adjust the difference in sound levels between the left and right speakers so that the sound image is in the front.
Adjusting distance using the Position Fine Tuning function
•When the display has switched to Time Alignment Adjustment Screen after adjusting the distance between the listening position and each speaker using the Position Fine Tuning function, the values set using the Position Fine Tuning function will be added to the values created using the Time Alignment Adjustment function and the sum of the values displayed.
•To store the displayed values in memory as new values for the Time Alignment Adjustment function (standard values for the Position Fine Tuning function), adjust any one value again, using the 5/∞ buttons. The displayed values will be stored in memory and the distance between the listening position and each speaker set using the Position Fine Tuning function will be reset and returned to 0.
When the distance has been using the Time Alignment Adjustment function
•The distance adjustment of the Position Fine Tuning function uses the distance adjustment of the Time Alignment Adjustment function as its basis. If the distance is reset using the Time Alignment Adjustment function, this standard value is changed. When this happens, any distance adjustment previously set using the Position Fine Tuning function is reset to 0.
<Main> Adjustment Audio
16
Audio Adjustment <Main>
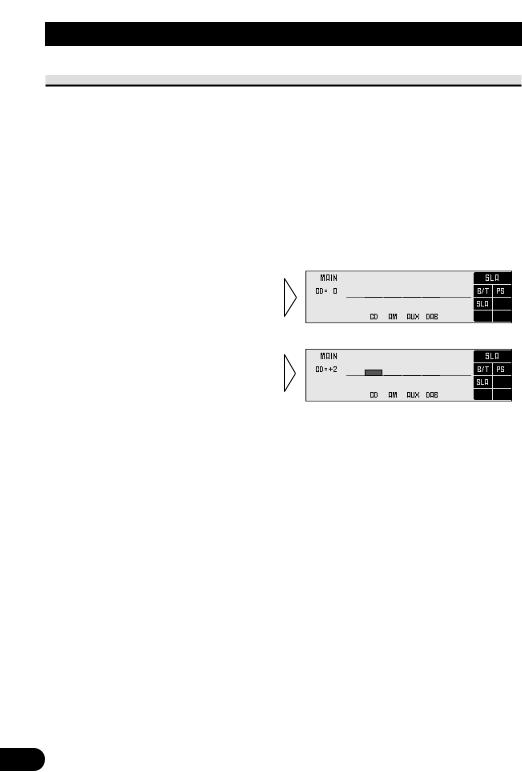
Source Level Adjustment <SLA> (Open state)
The SLA (Source Level Adjustment) function prevents radical leaps in volume level when switching between sources. Settings are based on the FM volume level, which remains unchanged.
1.Compare the FM volume with the volume of the other source (refer to DEX-P90RS (sold separately) Owner’s Manual).
2.Press the MENU button to switch to the Main Menu.
3.Open the cover of the remote control switches to Main Menu Setting Screen.
4.Press Function button 3 on MAIN Menu Setting Screen.
The display switches to SLA Adjustment Screen.
5.Increase or decrease the level with the 5/∞ buttons.
The display shows “+4” – “–4”.
Note:
•Since the FM volume is the control, SLA is not possible in the FM modes.
•The MW/LW volume level, which is different from the FM base setting volume level, can also be adjusted similar to sources other than tuner.
•The head unit’s CD player, Multi-CD player and DVD player are set to the same volume adjustment setting automatically.
•AUX, External 1 and External 2 are set to the same volume adjustment setting automatically.
17
 Loading...