


PABK 60 A1
AIRBRUSH SET PABK 60 A1
AIRBRUSH SET
Operation and Safety Notes
SÚPRAVA STRIEKACEJ PIŠTOLE
Pokyny pre obsluhu a bezpečnostné pokyny
SADA STŘÍKACÍ PISTOLE
Pokyny pro obsluhu a bezpečnostní pokyny
AIRBRUSH-SET
Bedienungs- und Sicherheitshinweise
IAN 73868
73868_par_Airbrush_Set_Cover_LB4 (CZ-SK).indd 3 05.07.12 16:58

Before reading, unfold both pages containing illustrations and familiarise yourself with all functions of the
device.
Před čtením si odklopte obě dvě strany s obrázky a potom se seznamte se všemi funkcemi přístroje.
Pred čítaním si odklopte obidve strany s obrázkami a potom sa oboznámte so všetkými funkciami prístroja.
Klappen Sie vor dem Lesen die beiden Seiten mit den Abbildungen aus und machen Sie sich anschließend
mit allen Funktionen des Gerätes vertraut.
GB Operation and Safety Notes Page 5
CZ Pokyny pro obsluhu a bezpečnostní pokyny Strana 15
SK Pokyny pre obsluhu a bezpečnostné pokyny Strana 25
DE / AT / CH Bedienungs- und Sicherheitshinweise Seite 35
73868_par_Airbrush_Set_Cover_LB4 (CZ-SK).indd 4 05.07.12 16:58

1 2
8
9
4 5 6 7
2 a
9 a
10 11 12
3
13
A
B
2
2 a
1
13
3
5
73868_par_Airbrush_Set_Cover_LB4 (CZ-SK).indd 5 05.07.12 16:58
C
1
14
D
9 9a
7 12
6
10 8
73868_par_Airbrush_Set_Cover_LB4 (CZ-SK).indd 8 05.07.12 16:58
Table of contents
Introduction
Intended use ........................................................................................................................................ Page 6
Features and fittings ............................................................................................................................ Page 6
Technical data ..................................................................................................................................... Page 7
General safety instructions for compressed air tools................................Page 7
General safety information for electrical devices .............................................................................Page 9
Product-specific safety instructions .....................................................................................................Page 9
Before initial use ....................................................................................................................... Page 9
Preparations for use
Connecting the airbrush set ................................................................................................................ Page 9
Mixing paints for use .......................................................................................................................... Page 10
Turning airbrush compressor on / off .................................................................................................Page 10
Regulating the air pressure ................................................................................................................. Page 10
Regulating the spraying results...........................................................................................................Page 10
Using the accessories (see Ill. D) .......................................................................................................Page 11
Cleaning and care .................................................................................................................... Page 11
Information about warranty and service processing
Warranty terms ...................................................................................................................................Page 12
Scope of warranty ..............................................................................................................................Page 12
Procedure in the case of warranty ..................................................................................................... Page 12
Environmental instructions and disposal information .............................. Page 13
Paint disposal instructions ................................................................................................ Page 13
CE Declaration of Conformity ......................................................................................... Page 13
5 GB
73868_par_Airbrush_Set_Content_LB4 (CZ-SK).indd 5 06.07.12 12:26
Introduction
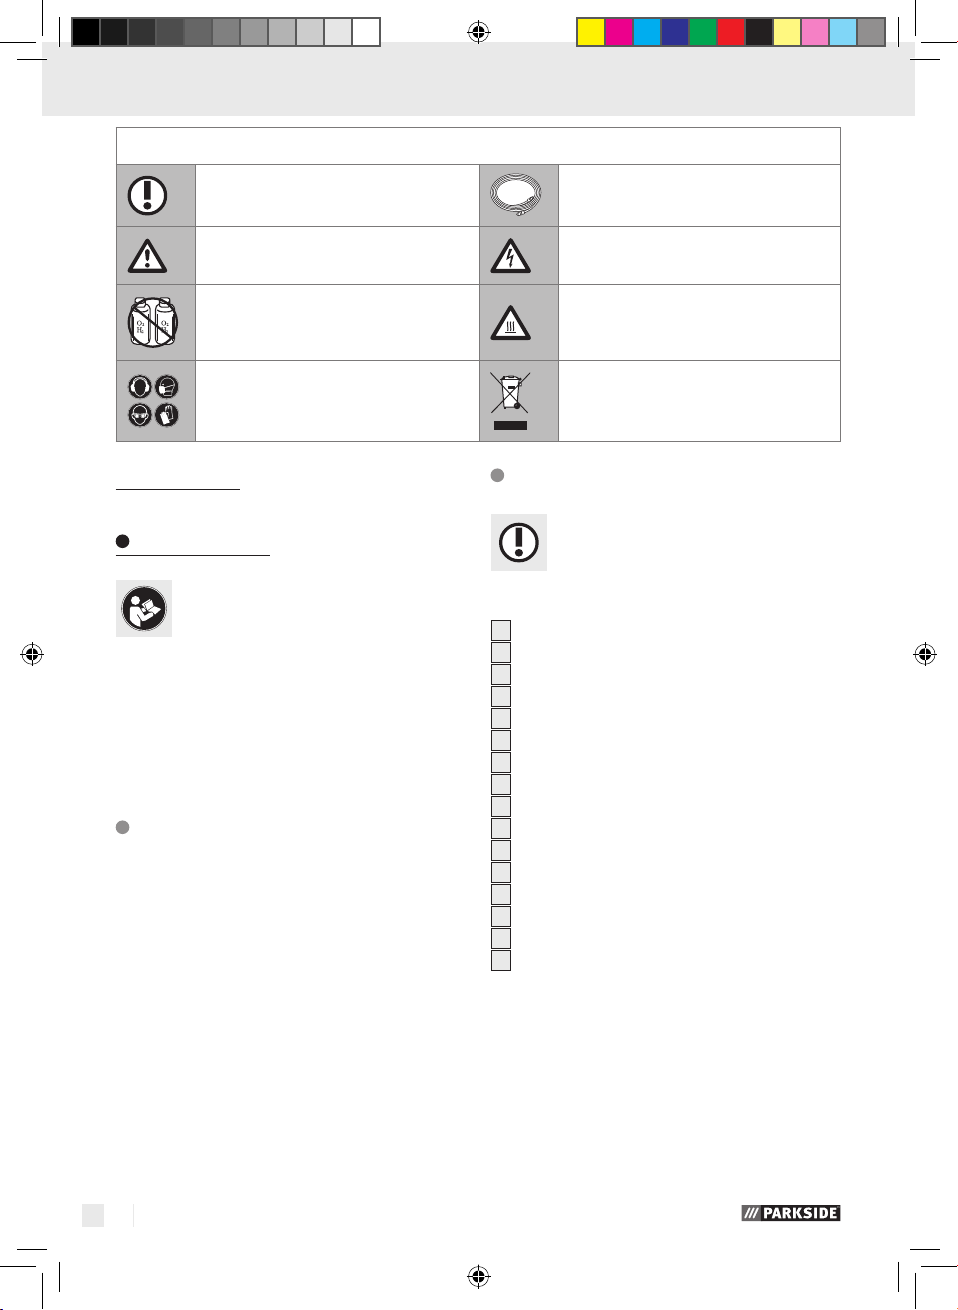
The following pictograms are used in these operating instructions / on the device:
Note Supply hose
Observe caution and safety notes! Danger of electric shock
Never use hydrogen, oxygen, carbon
dioxide or other bottled gases as an
energy source.
Risk of burns!
Wear hearing protection, dust protection mask, protective glasses and
protective gloves.
Airbrush set
Introduction
Congratulations! You have chosen a
high-quality device from our company.
Familiarise yourself with the product
before using it for the first time. In addition, please
carefully refer to the operating instructions and the
safety advice below. Initial operation of this tool
must be performed by trained personnel.
KEEP OUT OF THE REACH OF CHILDREN!
Intended use
This device is a portable air compressor optimised for
use with airbrushes. With the accessories included,
it is suitable for use in numerous applications. It is
maintenance-free and equipped with noise suppression so it is also suitable for use in closed rooms.
Keep these instructions in a safe place. When passing this product on to others please also include all
documents. Any use other than the intended is prohibited and potentially dangerous. Damages resulting from noncompliance or misuse are not covered
by the warranty and are not included in the manufacturer‘s liability. This device has been designed
for household use and may not be used for commercial or industrial purposes.
Dispose of packaging and device in
an environmentally friendly way!
Features and fittings
Check that all the items are present and
that the product is in perfect condition
immediately after unpacking. Never use
the product if it is defective.
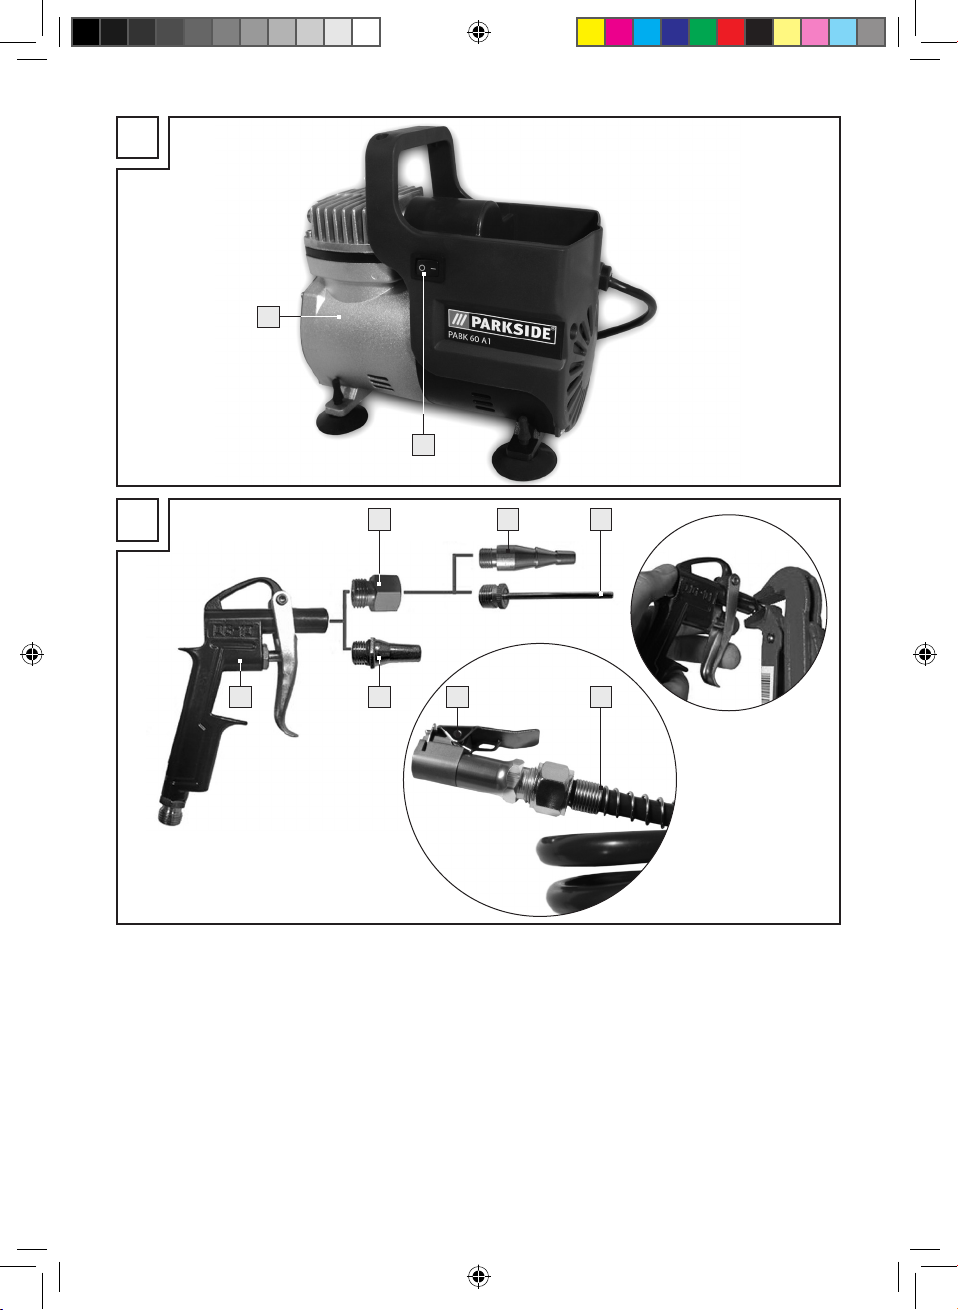
1
Airbrush compressor
2
Coiled hose
2 a
Coiled hose adapter
3
Spray stylus
4
Paint mixing beaker with closure lid
5
Paint mixing beaker with connection lid
6
Air mattress adapter
7
Thread adapter
8
Compressed air hose
9
Air blow gun
9a
Air blow gun nozzle
10
Universal valve connection
11
Mixing pipette
12
Ball needle
13
Open-end wrench
14
On / Off Switch
Note: This package also includes six different colours of highly concentrated, water-soluble paints in
plastic containers as well as a beaker of thinner
(transparent). These are referred to as „consumables“ in the following.
6 GB
73868_par_Airbrush_Set_Content_LB4 (CZ-SK).indd 6 06.07.12 12:26
Introduction / General safety instructions for compressed air tool
Technical data
Output power: approx. 15 l / min
Theoretical suction capacity: max. 40 l / min
Operating pressure: approx. 0.16 Mpa
Max. operating pressure: approx. 0.35 Mpa
(approx. 3 bar)
Weight without accessories: approx. 4140 g
Motor output
without load: 100 W
Operating voltage: 230 V∼, 50 Hz
Output of
compressor speed: 1440 min
Protection class: IPX 0
Protection class: I /
-1
General safety instructions
for compressed air tools
Note: When used in the following text, the terms
„compressed air device“ or „device“ refer to the
compressed air device specified in these instructions
for use.
Basic safety measures must be
followed when using compressed air devices to
eliminate the risk of fire, electric shock and personal
injury. Be sure to read and follow the notices within
these operating instructions prior to using the device
and store them in a safe location. The manufacturer
assumes no liability for damages or personal injury
resulting from failure to follow these operating instructions.
Children or persons who lack the knowledge
or experience to use the device or whose physical, sensory or intellectual capacities are limited must never be allowed to use the device
without supervision or instruction by a person
responsible for their safety.
Prevent children from playing with the device.
RISK OF INJURY! Before
performing maintenance tasks, disconnect the
compressed air supply.
Only use the device in applications for which it
was designed!
Do not overload the device.
Never use hydrogen, oxygen, car-
bon dioxide or other bottled gasses
to power this tool as doing so may
result in explosion, causing severe injuries.
Maintain and clean the device regularly as
prescribed (see Chapter „Cleaning and care“).
DANGER OF EXPLOSION!
Never use petrol or other flammable liquids to
clean the compressed air tool! Sparks could ignite residual vapours inside the compressed air
device resulting in the compressed air device
exploding. Do not use the device in explosive
environments with flammable liquids, gasses or
dust. Never work on materials which are or could
potentially be highly flammable or explosive.
Check the device for damage before bringing
it into use. Always make sure that the device is
in perfect condition each time before use.
Remain alert at all times and always watch
what you are doing! Unexpected movement of
the device may cause hazards.
Avoid placing your body in an unnatural position.
Keep proper footing and balance at all times.
By doing this you will be in a better position to
control the compressed air device in unforeseen
circumstances.
Do not use any device if its switch is defective.
A device that can no longer be switched on
and off is dangerous and must be repaired.
Store the device out of the reach of children
when it is not in use. Do not let anyone use the
device if he or she is not familiar with it or has
not read the instructions and advice. Compressed
air devices are dangerous when they are used
by inexperienced people.
Maintain the device carefully. Check that mov-
ing device parts are working properly and move
freely. Check for any parts that are broken or
damaged enough to detrimentally affect the
functioning of the device. Have damaged parts
repaired before you use the device. Many accidents have their origins in poorly maintained
devices.
Switch off the device off when it is not in use.
Always wear personal protective
device and safety glasses. Wearing
personal protective devices such as
7 GB
73868_par_Airbrush_Set_Content_LB4 (CZ-SK).indd 7 06.07.12 12:26
General safety instructions for compressed air tools
dust mask, non-slip safety shoes, safety helmet
or ear protectors, depending on the type of
compressed air tool and its application, reduces
the risk of injuries.
Check the connections and supply lines. All
maintenance units, couplings and hoses must be
equipped to meet the pressure and air amounts
specified in the device specific values. Pressure
that is too low influences the functioning of the
device; pressure that is too high can cause
damage to property and personal injury.
Protect hoses from kinks, constrictions, solvents
and sharp edges. Keep hoses away from heat,
oil and rotating parts.
Make sure that the hose clamps are always
tightly fastened. If the hose clamps are not
tightly fastened or are damaged, the air could
escape uncontrollably.
Replace damaged hoses immediately. A dam-
aged supply line may result in the air hose
whipping about and may result in injuries.
If the power cable of the device is damaged, it
has to be replaced by the manufacturer or its
service department or a similarly qualified person in order to avoid hazards.
Do not use the device when tired or under the
influence of drugs, alcohol or medications. One
moment of carelessness when using the device
may result in serious injuries.
Do not directly inhale the exhaust air. Keep eyes
away from exhaust air. Exhaust air from the
compressed air device may contain water, oil,
metal particles or contamination from inside the
compressor. This may result in injury to health.
BE CAREFUL WHEN
SETTING DOWN THE DEVICE! Always put
down the device so it does not come into contact
with the trigger. This could potentially result in
accidental activation of the device, which again
could result in hazards.
Only use suitable accessories. These may be
purchased from the manufacturer. Using nonOEM accessories may result in hazards.
Only use filtered and regulated compressed
air. Dust, caustic vapours and / or moisture may
damage the motor of a compressed air tool.
8 GB
The hose must be designed for pres-
sures of at least 8.6bar or 125PSI,
but at least 150 % of the maximum
pressure generated in the system.
The tool and supply line must be
equipped with a hose coupling to
completely remove pressure when
disconnecting the coupling hose.
Do not modify this device in any way without
the manufacturer‘s approval.
Only use the compressed air device with the
specified pressure (max. 0.35 Mpa / approx.
3 bar).
Disconnect the compressed air device from the
air supply after each use and when not in use.
Do not use the compressed air device if it leaks
or is in need of repair.
Never connect the compressed air device to an
air hose with pressure exceeding 7bar.
Keep your working area clean and well lit. Un-
tidy or poorly lit working areas can lead to ac-
cidents. Working under proper conditions will
allow you better control of the device, particu-
larly under unforeseen circumstances.
Only have the device repaired
by qualified specialist personnel using OEM
spare parts. This will ensure that your device
remains safe to use.
Keep children and other individuals away from
the device during use. Distractions can cause
you to lose control of the device.
Wear suitable clothing. Do not wear loose cloth-
ing or jewellery. Keep your hair, clothing and
gloves clear of moving parts. Loose clothing,
jewellery or long hair can become trapped in
moving parts.
Put down the trigger and device in the event of
unexpected compressor failure.
Whenever possible, use a condensate trap or
regularly empty the compressed air device
hoses and tubing before and during use to re-
move condensate (water).
ATTENTION! An undersized com-
pressed air system may minimise the
efficiency of your device.
Never point the compressed air device at your-
self, other persons or animals. Otherwise there
is a risk of injury.
73868_par_Airbrush_Set_Content_LB4 (CZ-SK).indd 8 06.07.12 12:26
General safety instructions … / Before initial use / Preparations for use
Always observe all the safety advice attached
to the compressor.
Make sure that the compressor intake opening
is never blocked and the airflow is never hindered.
Clean the suction filter with a cloth when it is
dirty. Switch off the device and pull the plug
from the socket to prevent it from being accidentally switched on.
Do not allow yourself to become distracted while
working with the device.
General safety information
for electrical devices
Never connect the device to a residual current
(FI) protective switch.
Protect yourself against electric shock. As you
are working, avoid touching grounded parts
(e.g. refrigerator, water supply pipes etc.).
DANGER! Avoid contact with live lines. This
device is not insulated against electric shock.
Check extension and power supply cables reg-
ularly. Replace any faulty cables with new ones
immediately.
If the mains power cable of this device is dam-
aged, it has to be replaced by the manufacturer
or its service department or a similarly qualified
person in order to avoid hazards.
Store the device in a dry environment when it is
not being used over a longer period.
Make sure that the connection cable does not
hang over a corner or be stretched; otherwise
there is a risk of injury.
Do not use the mains lead for any purpose for
which it was not intended, e.g. to carry the
product, to hang it up or to pull the mains plug
out of the mains socket.
Never pull on the mains cable to remove the
mains plug from the socket.
Never use electrical tool in damp or wet envi-
ronments and never expose it to rain or high
humidity.
Never switch on the device in the vicinity of in-
flammable liquids or gases.
If the device is used outdoors, only use exten-
sion cables that are expressly designed for out-
door use.
Product-specific safety
instructions
CAUTION! RISK OF BURNS!
The compressor heats up after ex-
tended operation. Therefore always
use the handle on the device to move it. Never
touch the device itself!
ATTENTION! The casing of the airbrush com-
pressor may become hot during use. Do not
touch hot surfaces in order to prevent burns.
Never leave the device in operation unattended.
Built-up heat generated by the device can be a
source of danger.
Before initial use
Check that all parts of the device are in perfect
condition.
Make sure that the available mains voltage is
compatible with the voltage intended for operating the compressor.
Note: You will find the intended mains voltage
on the type plate of the device.
Preparations for use
Connecting the airbrush set
Be absolutely certain to disconnect the mains
plug before connecting the airbrush set to the
compressor and release the pressure in the lines
by actuating the vent of the air blow gun
Use the respective screw connection to connect
the spray stylus
the coiled hose to the airbrush connection
Use the included open-end wrench. 13 (see Ill. A).
Fasten the paint mixing beaker with connection
5
lid
to the spray stylus 3 (see Ill. B).
Insert the mains plug into the mains socket.
3
with the coiled hose 2 and
9
.
1
.
9 GB
73868_par_Airbrush_Set_Content_LB4 (CZ-SK).indd 9 06.07.12 12:26

Preparations for use
Note: For optimal results, professionals connect
an intermediate pressure reducer (not included
with delivery). The pressure reducer can be used
to adjust the compressed air at the spray gun
and optimise it to your needs.
Note: During use of the blow gun
corresponding hose
compressor
2 a
ning on the adapter
2
incl. adapter for the
, there is a small discharge ope-
2 a
, which releases air. This
9
with the
serves to create a more uniform airflow for easier and better handling of the blow gun
9
. This
is not a defect, rather, it serves for better handling and an improvement of the spray results by
means of a uniform airflow.
Mixing paints for use
The paints included are water-soluble. In order to
properly apply the paints, add water and stir. As
delivered, the paints are too viscous.
First fill the beaker with your selected paint
colour with water.
Now screw the cover back on the beaker and
shake it.
Now use the pipette 11 to remove two drops
of the slightly diluted paint paste and add them
to a paint mixing beaker completely filled with
4, 5
water (
Shake the beaker. Now your paint has reached
the correct consistency.
Attach the paint mixing glass (4, 5) accord-
ing to Ill. B.
Note: If desired, you can adjust the amount of
water added to influence the colour intensity
yourself as with a watercolour box. The more
water you add, the „thinner“ the colour.
You can also mix individualised colour tones
from the available colour pastes. Please take
note, there must be no paint clumps remaining
in the paint containers. The consistency should
correspond to that of water.
Note: If the paint used does not cover well, increase the amount of paint in the mixture ratio.
).
Turning airbrush compressor
on / off
Turn the airbrush compressor 1 on by setting the
on / off switch
14
to the position “I“ (see Ill. C).
Turn the airbrush compressor 1 off by setting
the on / off switch
14
in the position “0“ (see
Ill. C).
Note: Full pressure is built up after two seconds.
Regulating the air pressure
Regulate the air pressure by actuating the vent
of the air blow gun
9
to more or less of an
extent.
ATTENTION! The device has a pressure switch,
which periodically and automatically turns the device off if there is excess pressure or if it is not in use.
Shortly before reaching the switch-off point, the
compressor runs more roughly and vibrates. This
may also be the case when re-started under load.
The performance and functionality are not impaired
by this. This is not a defect, rather, serves to protect
the compressor from overloading.
Note: The blow pistol
9
blows air through the
discharge openings even without actuating the trigger. This is NOT A DEFECT.
Through actuating the trigger, the air discharge is
increased so that more air volume flows.
Note: During use of the blow gun
responding hose
2 a
sor
, there is a small discharge opening on the
2 a
adapter
2
incl. adapter for the compres-
, which releases air. This serves to create
9
with the cor-
a more uniform airflow for easier and better handling
of the blow gun
9
. This is not a defect, rather, it
serves for better handling and an improvement of
the spray results by means of a uniform airflow.
Regulating the spraying results
Regulate the amount of the paint supplied by
turning the paint nozzle of the spray stylus to
the right or left (see Ill. B).
10 GB
73868_par_Airbrush_Set_Content_LB4 (CZ-SK).indd 10 06.07.12 12:26

Preparations for use / Cleaning and care
Using the accessories (see Ill. D)
Air mattress adapter 6, ball needle
Use a pipe wrench to unscrew the nozzle
the air blow gun
9
.
Then – depending on what is needed – screw
on the air mattress adapter
12
dle
, as well as the thread adapter 7 into
the barrel of the air blow gun
Universal valve connection
6
or the ball nee-
9
10
Screw the universal valve connection 10 directly
onto the compressed air hose
8
12
9 a
.
.
Cleaning and care
Thoroughly clean the spray stylus 3 immedi-
ately after use. Otherwise the paint can dry and
cause problems during the next use.
Thoroughly rinse out the spray stylus 3 with
water.
Use the thinner included to clean any stubborn
dried paint.
Note: The thinner is not suitable for water-soluble paints. Rather, it corresponds to a varnish
for thinning paints containing solvents.
Note: If you remove the paint nozzle of the
air blow gun
threads before reattaching it so its freedom of
movement is not affected.
Never lay the entire air blow gun 9 in a sol-
vent bath.
Note: If the air intake of the compressor should
become dirty, use a dry cloth to remove the accumulated dirt.
Fault Interrupted paint jet
Cause Solution
1. Paint almost
empty
2. Paint too viscous 2. Lower viscosity
3. Dry / defective
nozzle
9
during cleaning, lubricate the
or intermittent paint
delivery
1. Fill paint
3. Screw in nozzle tightly
or replace
Fault Interrupted paint jet
or intermittent paint
delivery
of
Cause Solution
4. Paint supply
4. Cleaning
restricted
5. Incorrect posi-
5. Correct position angle
tion of spray
3
stylus
.
Fault Spray pattern
incomplete
Cause Solution
1. Air head
dirty / defective
2. Nozzle dirty /
defective
1. Clean / replace air head
1. Rinse with clear water
2. Clean / replace air
nozzle
Fault Spray pattern irregu-
lar with drips
Cause Solution
1. Defective nozzle 1. Replace nozzle. Contact
a respective service centre.
2. Paint too viscous 2. Lower viscosity
3. Insufficient
working pressure
3. Increase working pressure (if necessary, not included accessories, e.g.
pressure reducer)
3. Hose defective; replace
hose
Fault Non-uniform paint
amount delivered
Cause Solution
Nozzle dirty /
Clean / replace air nozzle
defective
11 GB
73868_par_Airbrush_Set_Content_LB4 (CZ-SK).indd 11 06.07.12 12:26
… / Environmental … / Paint disposal instructions / CE Declaration of Conformity
Information about warranty and service processing
Information about warranty
and service processing
Creative Marketing Consulting GmbH
warranty
Dear customer, the warranty for this device is 3 years
from the date of purchase. In the event the product
is defective, you have legal rights vis-à-vis the retailer
of this product. Your statutory rights are not limited
in any way by our warranty detailed below.
Warranty terms
The warranty period begins on the date of purchase.
Please retain the original receipt safely. This receipt
is required as proof of purchase.
Should this device show any fault in materials or
manufacture within three years from date of purchase,
it will be repaired or replaced - at our choice - by us
free of charge. In order for the warranty to be valid,
the defective device and the proof of purchase (receipt) must be presented within the three-year warranty
period, accompanied by a brief written description
of the nature of the defect and of the date it arose.
If the defect is covered by our warranty, you will receive the repaired device or replacement in return.
A repair or exchange of the device does not extend
a new warranty period.
Scope of warranty
This device has been manufactured to strict quality
guidelines and meticulously examined before delivery.
instructions provided in the operating instructions must
be followed strictly to constitute proper use of the
product. Purposes and practices which the operating instructions warn of or advise against must be
avoided without fail.
This product is intended for private, non-commercial
use only. The warranty is void in the case of inappropriate and improper handling, use of force and
of any intervention which was not carried out by our
authorized service branch.
Procedure in the case of warranty
Please follow the instructions below to ensure quick
processing of your matter:
When inquiring about your product please have
your receipt and product number (e.g. IAN) ready
as your proof of purchase.
The item number can be found on the type plate,
an engraving, the cover page of your instructions
(bottom left) or the decal at the back or bottom. In
the event of malfunctions or other defects please
first contact the service department below by
phone or e-mail.
A product recorded as defective, along with the
proof of purchase (receipt) and a description of the
defect and when it occurred, can then be returned
free of charge to you at the service address provided.
Note:
Visit www.lidl-service.com to download
this and many other manuals, product
videos and software.
How to contact us:
The warranty applies to faults in material or manufacture. This warranty does not apply to product parts
subject to normal wear and tear and which can therefore be considered as wear items, or to damage to
fragile parts, e.g. switches, storage batteries or
glass parts.
This warranty becomes void if the device has been
damaged or improperly used or maintained. All
12 GB
73868_par_Airbrush_Set_Content_LB4 (CZ-SK).indd 12 06.07.12 12:26
Name: C. M. C. GmbH
Internet address: www.cmc-creative.de
E-mail: service.gb@cmc-creative.de
Telephone: +49 (0) 06894 9989752
(standard German landline
rates apply)
Registered office: Germany
IAN 73868
… / Environmental … / Paint disposal instructions / CE Declaration of Conformity
Please note that the following address is not a
service address.
Please first contact the service centre listed above.
Address:
C. M. C. GmbH
Katharina-Loth-Str. 15
66386 St. Ingbert
Germany
Environmental instructions and
disposal information
Don‘t waste, recycle!
The device, accessories and packaging
should be recycled in an environmentally friendly manner.
Do not dispose of the compressed air tool through
your household waste, or throw into fire or water. If
possible, non-operational devices should be recycled. Contact your local retailer for information.
Paint disposal instructions
Do not allow to enter sewage system, open
bodies of water or soil.
Product: Dispose of at collection facility for old
paints / varnishes.
European list of waste materials
08 01 12 waste paint and varnish other than those
mentioned in 08 01 11.
Uncleaned packaging:
Only completely emptied containers may be dis
of through recycling. Dispose of residual material
that has not hardened in the same manner as the
product.
posed
CE Declaration of Conformity
We,
C. M. C. GmbH
Documentation officer: Marc Uhle
Katharina-Loth-Str. 15
66386 St. Ingbert
declare on our sole responsibility the product
Compressed air airbrush set
Serial number: 1454
Year of manufacture: 2012 / 36
IAN: 73868
Model: PARKSIDE AIRBRUSH SET PABK 60 A1
to meet the basic safety requirements of European
Directives
EC Low Voltage Directive
2006 / 95 / EC,
EC Directive for Electromagnetic
Compatibility
2004 / 108 / EC
and its amendments.
The conformity assessment is based on the following
harmonised standards:
EN 55014–1:2000+A2:2003
EN 55014–2:1997+A1:2001
EN 61000–3–2:2000
EN 61000–3–3:1995+A1:2001
EN 60335–1:2002+A1+A11+A12+A2+A13
+A14+A15
EN 62233:2008
St. Ingbert, 30. June 2012
Karl Peter Uhle
– Managing Director –
13 GB
73868_par_Airbrush_Set_Content_LB4 (CZ-SK).indd 13 06.07.12 12:26
14
73868_par_Airbrush_Set_Content_LB4 (CZ-SK).indd 14 06.07.12 12:26
 Loading...