


TG2431_2432_QG(e).fm Page 1 Thursday, November 25, 2004 10:08 AM
Model No.
Model No.
KX-TG2431 KX-TG2432
Quick Guide
Please read the operating instructions for further details.
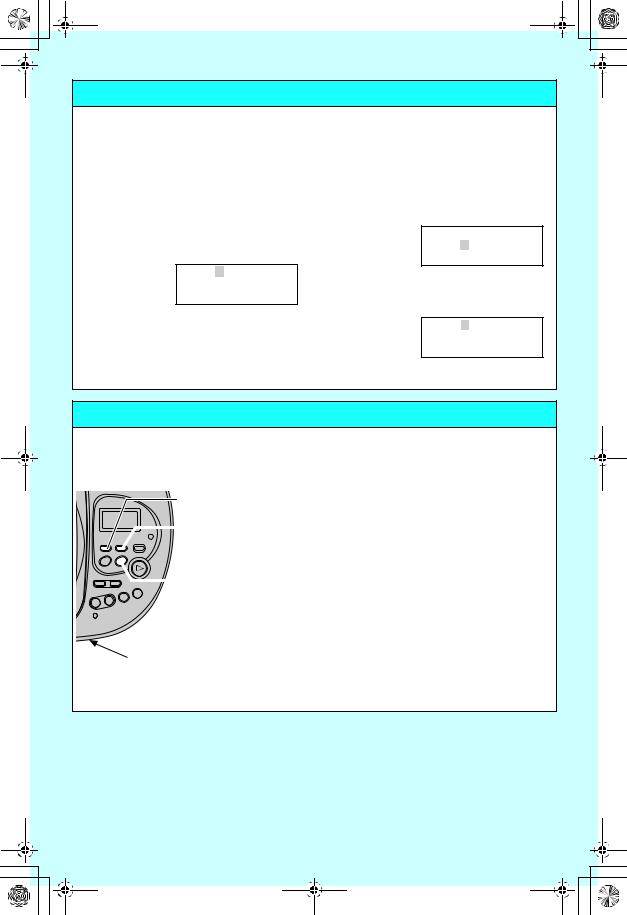
Connections
Base unit
Raise the antenna.
To single-line telephone jack (RJ11C)
Telephone line cord
Fasten the AC adaptor cord.
To power outlet (120 V AC, 60 Hz)
AC adaptor
Hooks
Charger unit (KX-TG2432 only)
To power outlet (120 V AC, 60 Hz)
AC adaptor
Hooks |
Bottom of |
|
|
|
the charger |
Fasten the AC adaptor cord to prevent it from being disconnected.
Note:
LUse only the included Panasonic AC adaptor PQLV19.
LMake sure that the AC adaptor and telephone line cords are plugged into the unit properly.
LThe AC adaptor must remain connected at all times. (It is normal for the adaptor to feel warm during use.)
|
Printed in U.S.A. |
|
|
PQQW13542ZA DA1104SY0 |
|||
|
|
|
|
|
|
|
|
|
|
|
|
|
|
|
|
|
|
|
|
|
|
|
|

TG2431_2432_QG(e).fm Page 2 Thursday, November 25, 2004 10:08 AM
Battery installation
1 Insert the battery (1), and press it down 2 Close the handset cover. until it snaps into the compartment (2).
2
1
Battery charge
Place the handset on the base unit or charger for 6 hours before initial use.
Base unit |
Charger unit (KX-TG2432 only) |
CHARGE indicator
CHARGE indicator
Navigator key
The handset navigator key can be used to navigate through menus and to select items shown on the display, by pressing
{^}, {V}, {<}, or {>}.
Soft keys
The handset features 2 soft keys. By pressing a soft key, you can select the function displayed directly above it.
Rcvd |
Phone |
Kcalls |
book L |
– 2 –
TG2431_2432_QG(e).fm Page 3 Thursday, November 25, 2004 10:08 AM
Setting the date and time
Set the date and time so that the unit will announce the day and time each message was recorded by the answering system when you play back messages.
1 Press {MENU}.
2 Press {4}.
3 Enter the current month, day, and year by selecting 2 digits for each. Example: June 15, 2005
Press {0}{6} {1}{5} {0}{5}.
Date:12.31.2005
Time:12:00 AM
KAM/PM SaveL
4 Enter the current hour and minute (12hour clock format) by selecting 2 digits for each.
Example: 9:30 PM
Press {0}{9} {3}{0}.
Date:06.15.2005
Time:12:00 AM
KAM/PM SaveL
5 Select “AM” or “PM” by pressing {AM/ PM}.
Date:06.15.2005
Time:09:30 AM
KAM/PM SaveL
6 Press {Save}, then press {OFF}.
Recording your greeting message
You can record your own greeting message (max. 2 minutes) that will be played when the answering system answers a call. If you do not record a greeting message, a pre-recorded greeting message will be used.
{GREETING REC}
 {GREETING CHECK}
 {STOP}
MIC
1 Press {GREETING REC}.
LThe unit announces “To record greeting, press record again.”
2 Within 10 seconds, press {GREETING REC} again.
3 After the unit beeps, speak clearly about 20 cm (8 inches) away from the MIC.
4 To stop recording, press {GREETING REC} or {STOP}.
To play back the greeting message Press {GREETING CHECK}.
– 3 –
 Loading...