


CQ-4300U
Table of contents
 Loading...
R
Heavy Duty Cassette/ Weather Band Receiver with Changer Control
CQ-4500U/CQ-4300U
Operating Instructions
Please read these instructions carefully before using this product and save this manual for future use.
2
Panasonic welcomes you to our ever growing family of electronic product owners. We know that this
product will bring you many hours of enjoyment. Our reputation is built on precise electronic and
mechanical engineering, manufactured with carefully selected components and assembled by people
who take pride in their work. Once you discover the quality, reliability, and value we have built into this
product, you too will be proud to be a member of our family.
❏
Use This Equipment Safely
When Driving
Keep the volume level low enough to be aware of road and traffic conditions.
When Washing Vehicle
Do not expose the equipment, including the speakers and tapes, to water or excessive moisture. This
could cause electrical shorts, fire, or other damage.
When Parked
Parking in direct sunlight can produce very high temperatures inside your vehicle. Give the interior a
chance to cool down before switching the unit on.
Use the Proper Power Supply
This equipment is designed to operate off a 12 volt, negative ground battery system (the normal system
in a North American vehicle.)
Protect the Tape Mechanism
Keep magnets, screwdrivers, or other metallic objects away from the tape mechanism and tape head to
prevent poor performance or malfunctions.
Use Authorized Service Centers
Do not attempt to disassemble or adjust this precision equipment. Please refer to the Servicenter list
included with this product for service assistance.
Notes:
• The two units can be connected to an optional CD changer (CX-DP801EUC, etc.), CQ-4500U can
be connected to an optional wired remote control unit (CA-RC300U).
• For connection and operation of CD changer (CX-DP801EUC, etc.) and wired remote control unit
(CA-RC300U), refer to the operating instructions of that unit.
• A wireless remote control unit (CA-RC500U) is optional for CQ-4500U.
• Optional wired remote control unit CA-RC300U can be connected to CQ-4500U.
Find the model number and serial number on either the back or bottom of the unit. Please record them
in the space below and retain this booklet as a permanent record of your purchase to aid in
identification in case of theft.
MODEL NUMBER SERIAL NUMBER
DATE PURCHASED FROM
CQ-4500U/CQ-4300U
Note: This operating instruction manual is for two models CQ-4500U and CQ-4300U.
The differences between these models are mentioned below. All illustrations throughout this manual
represent model CQ-4500U unless otherwise specified.
Model
Features
Wired remote control
Wireless remote control
AUX-IN
Temperture readout
S.HDB/LOUD
preamp-out
CQ-4500U
Yes
Yes
Yes
Yes
S
•
HDB
Yes
CQ-4300U
None
None
None
None
LOUD
None
3
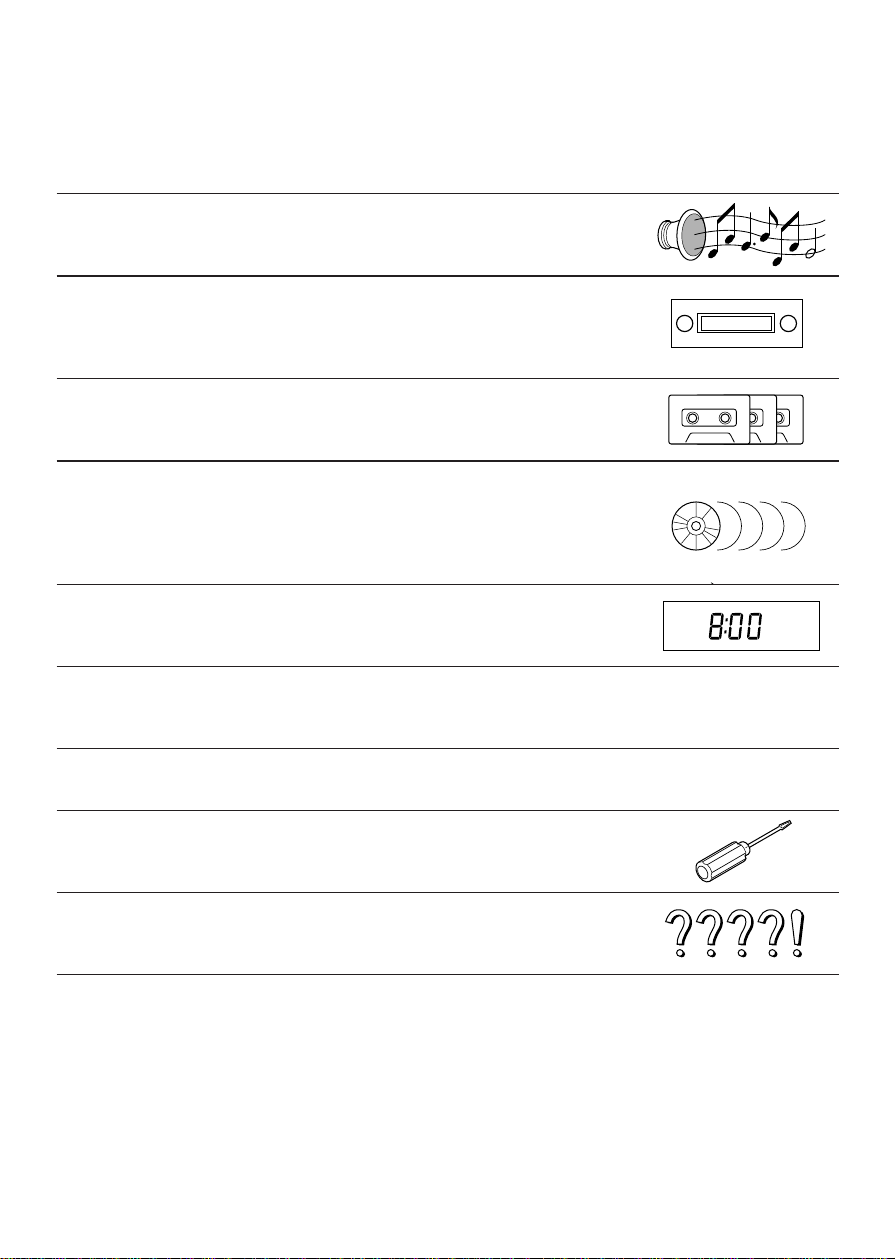
Contents
Use This Equipment Safely...................................................................Page 2
❏
Power and Sound Controls......................................................................4
How to adjust the volume, mute, balance, and tone for best listening
❏
Radio Basics..............................................................................................6
Mode selection, manual and automatic tuning, band selection,
preset stations
❏
Cassette Tape Player Basice....................................................................9
How to load, wind, play, and eject a cassette tape
❏
CD Changer Basics.................................................................................13
Play, repeat, random and scan, error messages.
Note: CD changer controls are applicable to units with optional CD changer
unit (sold separeately).
❏
Clock Basics............................................................................................15
Setting the time, selecting the clock display, alarm operation
❏
Temperature Reading.............................................................................17
❏
Casette Head Cleaning Warning............................................................17
❏
In Case of Malfunction............................................................................18
❏
Installation Guide....................................................................................19
Step-by-step procedures, electrical connections
❏
Troubleshooting......................................................................................28
Troubleshooting tips, where to get service help
Specifications .............................................................................................30
Part 15 of the FCC Rules............................................................................30
4
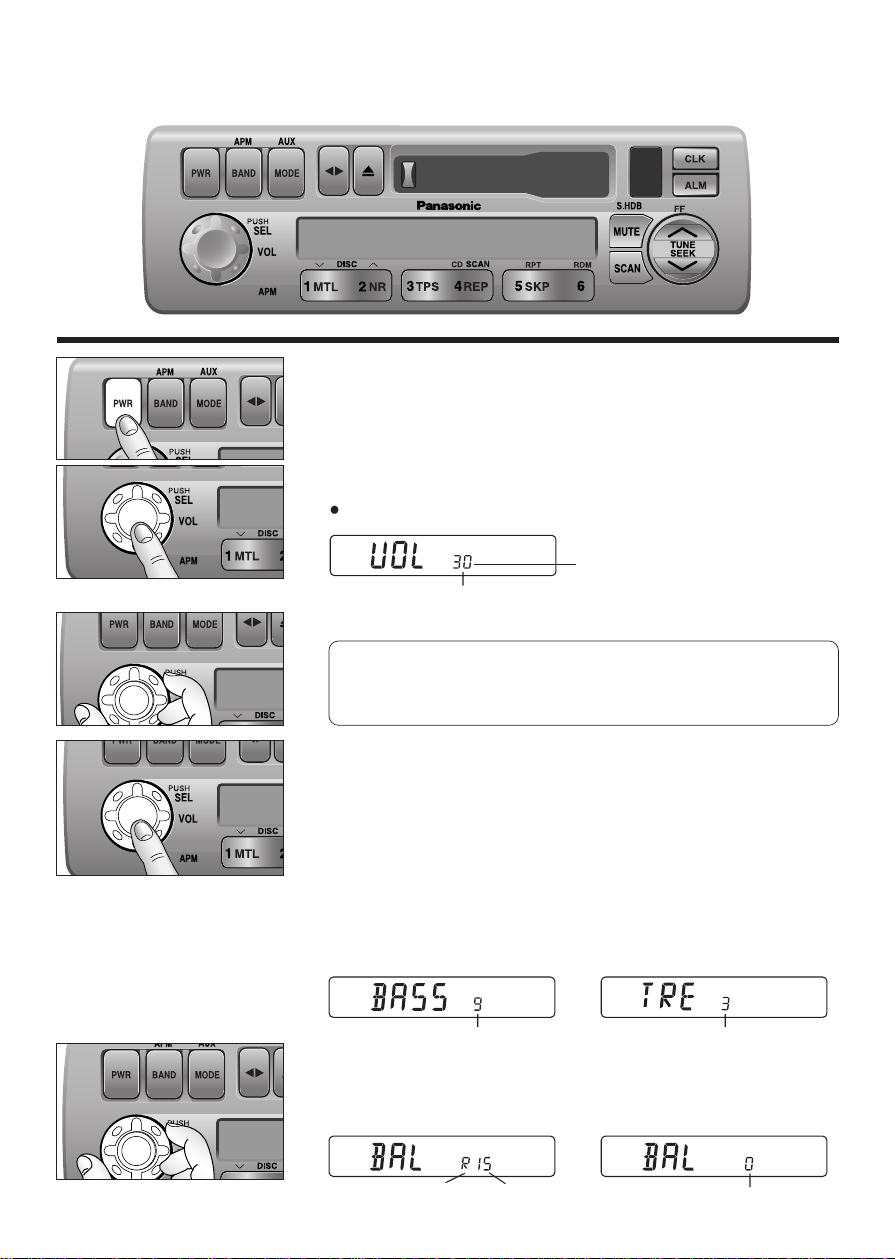
Power and Sound Controls
Power
If the vehicle is not running yet, turn the key in the ignition until the
accessory indicator lights.
Press
[PWR] to switch on the power.
Changing Audio Modes
Press this knob [SEL] to change the audio mode as follows.
VOL
a
BASS
a
TRE
(Volume) (Treble)
cd
FADE
b
BAL
(Fader) (Balance)
Volume
Press the knob to select the volume mode and then turn it
clockwise or counterclockwise to adjust the volume lev el.
Bass and Treble
Press the knob to select the BASS or TREBLE mode and then turn
it clockwise or counterclockwise to increase or decrease the
bass/treble level.
d
d
0 to 40
-12 to 12 -12 to 12
Volume Level
4500U
BASS/FAD
BAL/FADER
FEW
l
k
Anti-Volume-Blast Circuit
At power on, the volume returns to the previous level slowly if
the level was at 20 or higher.
Balance
Press the knob to select the BALANCE mode and then turn it
clockwise or counterclockwise to shift the sound volume to the right
or left speakers.
or L 1 to 15
Balance Center
(R: Right, L: Left)
BASS/FAD
BAL/FADER
BASS/FAD
BAL/FADER
5
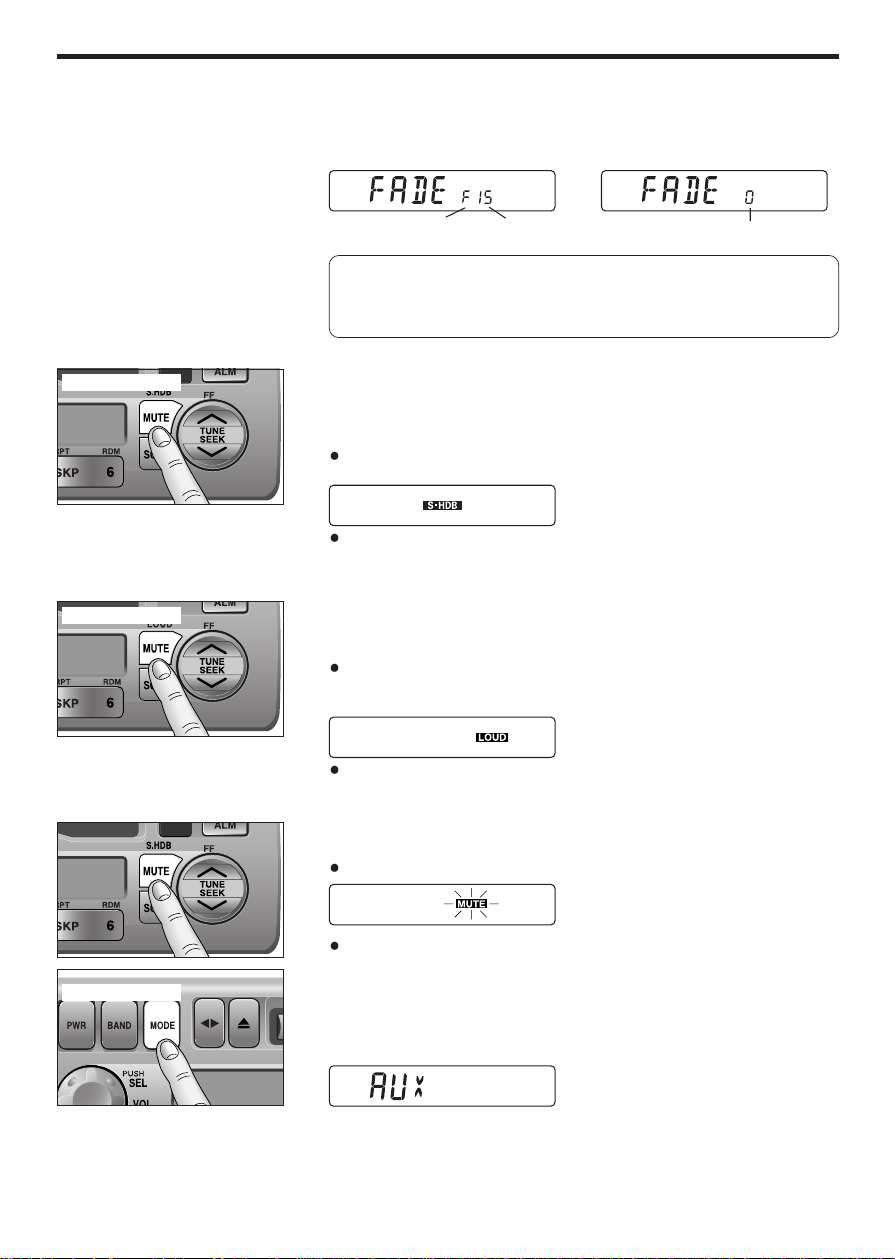
Fader
Press the knob to select the FADER mode and then turn it
clockwise or counterclockwise to shift the sound volume to the front
or rear speakers.
S•HDB (Super High Definition Bass)
(Only for CQ-4500U)
This featare enhances bass definition.
Press and hold [MUTE] (S•HDB) for more than 2 seconds to
activate high-defintion bass.
Press and hold [MUTE] (S•HDB) for more than 2 seconds to
cancel.
Tone Enhancement (Loudness)
(Only for CQ-4300U)
Press and hold [MUTE] (LOUD) for more than 2 seconds to
enhance bass and treble tones when listening at low or medium
volume.
Press and hold [MUTE] (LOUD) for more than 2 seconds again to
deactivate when listening at higher volumes.
Mute
Press [MUTE] to mute the sound completely.
Press [MUTE] again to cancel.
Selecting Auxiliary Source
(Only for CQ-4500U)
Press and hold [MODE] (AUX) for more than 2 seconds to select
AUX Input mode.
Connect the auxiliary equipment (any other appropriate
equipment) to the AUX IN Connector.
Canceling AUX Input mode
Press [MODE] (AUX) to resume the previous mode.
4500U
FEW
l
k
or R
(F: Front, R: Rear)
1 to 15
Fader Center
Press and hold
Press and hold
4300U
FEW
l
k
Note: In the audio mode (BASS/TRE/BAL/FADE), the display
will returm to regular operation mode when there is no input for
more than 5 seconds (2 seconds in the VOL mode).
Press and hold
FEW
l
k
4500U
6
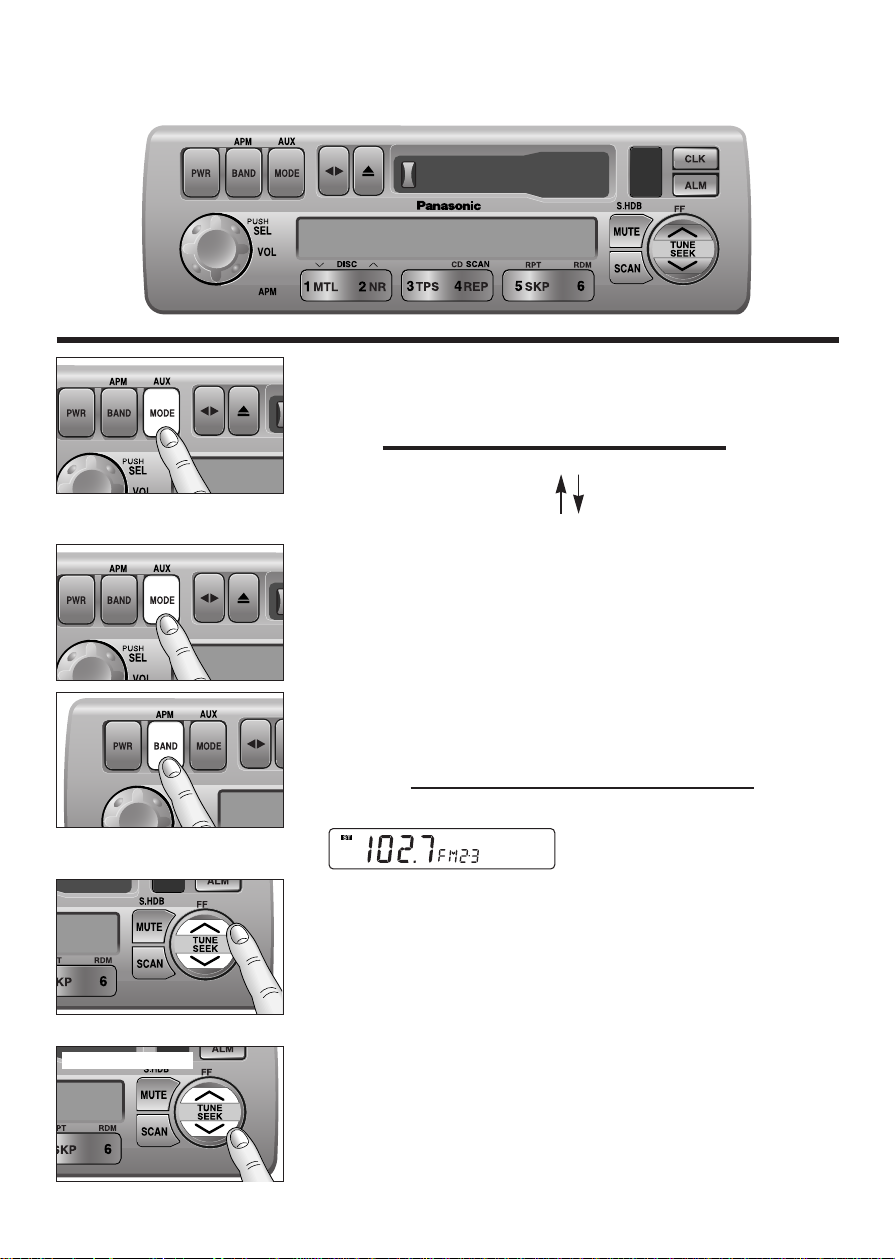
Radio Basics
Mode Selection
Press [MODE] to change the operation mode as follows.
Radio
a
Cassette
a
CD Changer (when connected)
cd
Press and hold [MODE] for more
than 2 seconds.
(AUX is only for CQ-4500U)
AUX
To change to the tuner mode
In case of CD changer mode or Tape mode, press [MODE].
Selecting a Band
Press [BAND] to change the band setting as follows.
FM1
a
FM2
a
W/B
a
AM
(Weather Band)
cd
"ST" indicator lights when FM stereo broadcast is available.
4500U
FEW
l
k
Manual Tuning
Press [TUNE jj] or [TUNE ii] to tune in a higher or lower
frequency.
Seek Tuning
Press and hold [SEEK jj] or [SEEK ii] for more than 0.5
seconds, then release it.
Seek tuning will automatically stop when a signal of the next
broadcast station is received.
Hold and release
BASS/FAD
BAL/FADER
l
k
FEW
4500U
FEW
l
k
4500U
7
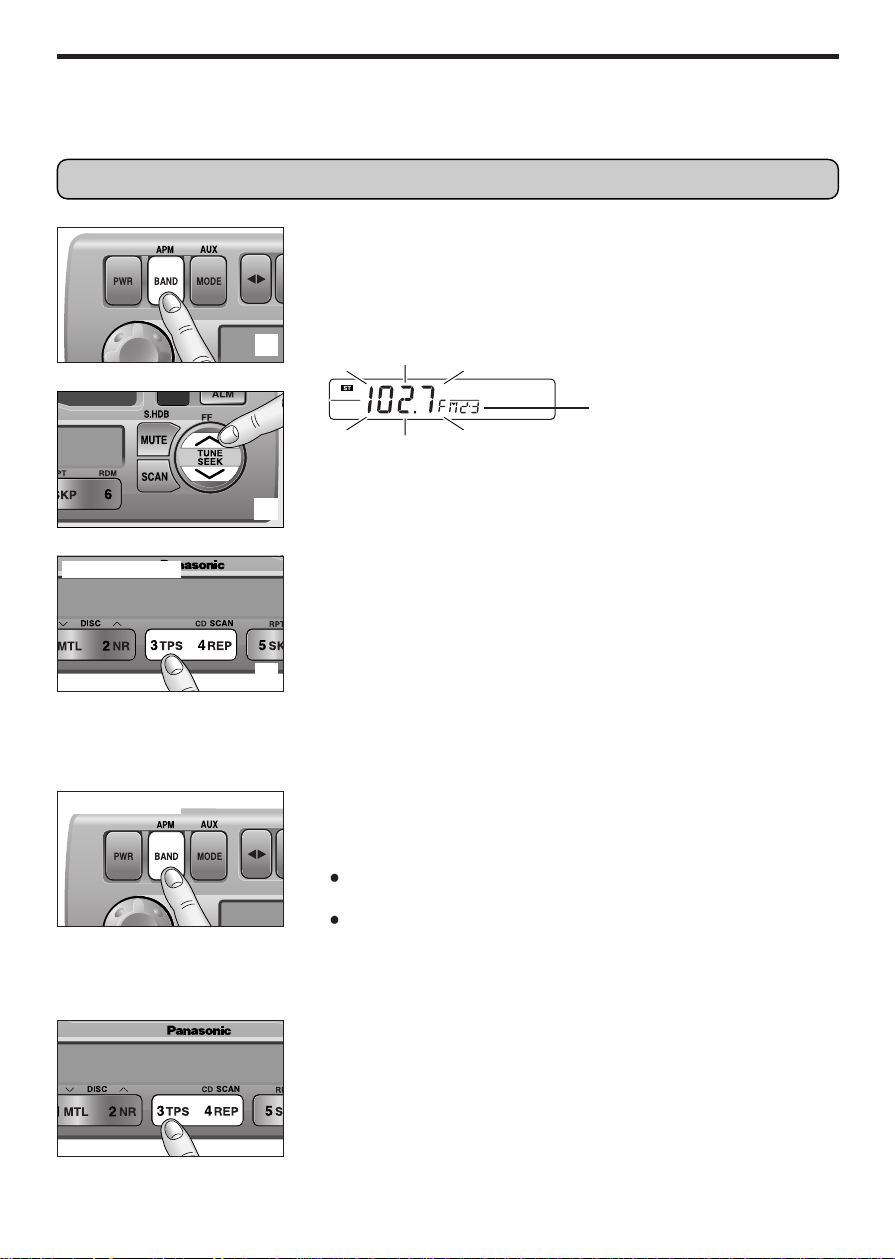
Station Preset
FM1, FM2, and AM can save maximum 6 stations each in their preset station memories.
Manual Station Preset
Press [BAND] to select a desired band.
Use manual or seek tuning to find a station to be stored in the
preset memory.
Press and hold one of the preset buttons [1] to [6] until the
display blinks once.
Note: You can change the memor y setting by repeating the above
procedure.
Tuning in a Preset Station
Press any of the buttons [1] to [6] to tune in the station preset by
the above.
Auto Station Preset
Select a band and press and hold [BAND] (APM: Auto Preset
Memory) for more than 2 seconds.
The 6 strongest available stations will be automatically saved in
the memory on preset buttons
[1] to [6].
Once set, the preset stations are sequentially scanned for 5
seconds each.
Note: Any stations preset previously on the selected band will be
erased.
d
d
Press and hold
Press and hold
Preset Number
Caution: To ensure safety, never attempt to preset stations while you are driving.
FEW
l
k
4500U

8
Radio Basics
(continued)
Tuning in a Weather Band
Station
Press any of the buttons [1] to [6] to monitor the preset station.
Weather Band Stations
National Weather Radio Broadcasts from over 380 locations
throughout the U.S. on seven VHF/FM frequencies.
Tune to weather band to receive continuous weather information 24
hours a day on one of the following frequencies.
1. 162.550 MHz
2. 162.400 MHz
3. 162.475 MHz
4. 162.425 MHz
5. 162.450 MHz
6. 162.500 MHz
7. 162.525 MHz
Occasionally the frequency of an existing or planned station must
be changed because of unexpected radio frequency interference
with adjacent NOAA Weather Radio Stations and/or with other
Government or Commercial Operations within the area. If you have
a question concerning NOAA Weather Radio, please contact your
nearest National Weather Service Office.
Note: The weather band (CH1-6) has been preset. CH7 is
selected by pressing
[jj] or [ii].
WB
Weather Band Frequency (channel) Number
The frequency (162) remains unchanged.

9
Cassette Tape Player Basics
Playing a Cassette
Insert the cassette with the exposed tape side facing to the right.
Play will start automatically.
Rewind and Fast Forward
Press [ii] (REW) or [jj] (FF) to rewind or fast forward the tape.
Press
[] to stop.
The tape will resume playing from that position.
Changing Sides
Press [] to reverse.
4500U
BASS/FAD
BAL/FADER
FEW
l
k
Exposed Tape side
Playing Side Indicator
Top Side Playing Bottom Side Playing
4500U
FEW
l
k
Rewind
Fast Forward
l
k
FEW
10
Cassette Tape Player Basics
(continued)
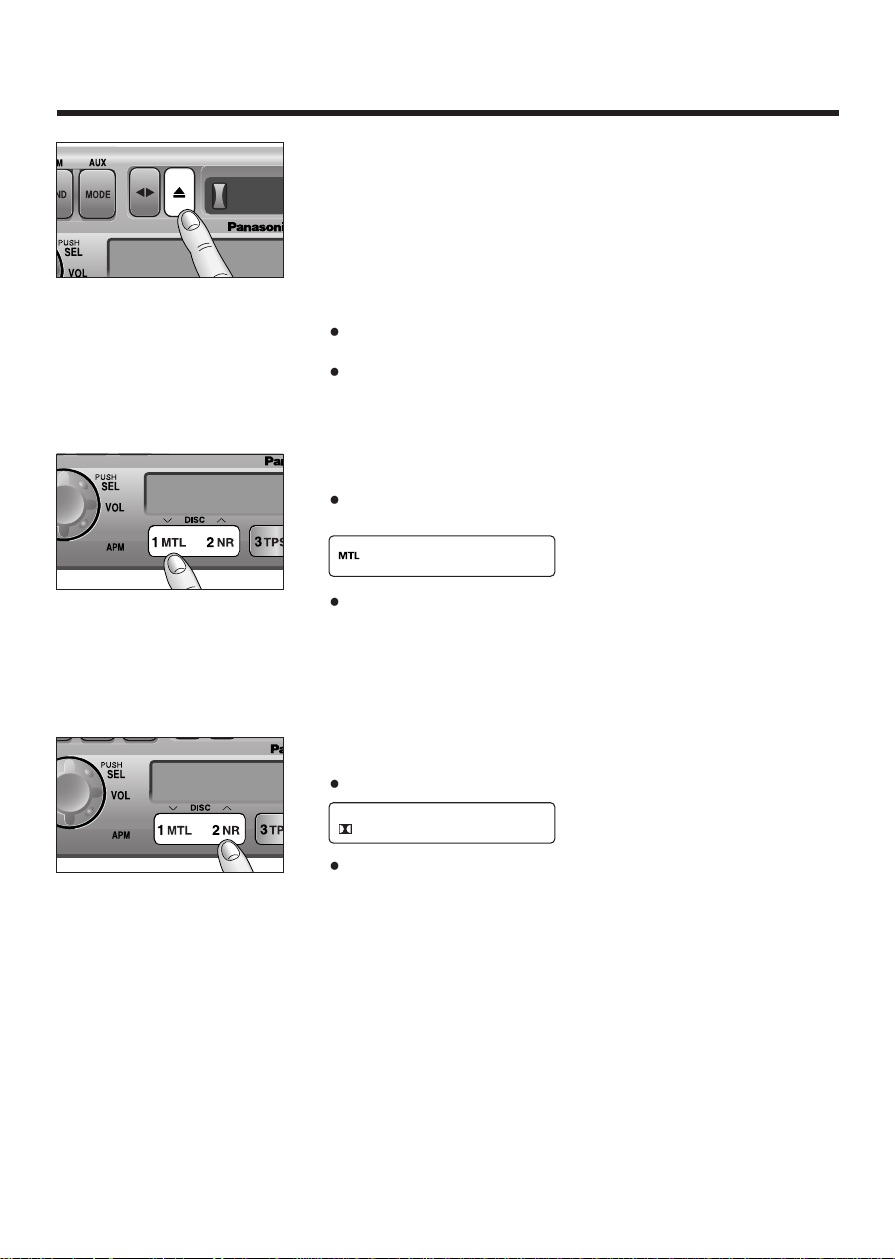
Tape Eject
Press [u] to eject the tape, and the previous mode of operation will
be resumed.
Notes:
Always remove the cassette tape from the unit when the cassette
tape player is not being used.
If power is switched off before [u] is pressed, the cassette will not
be ejected. Switch on the power again and press
[u] to eject the
cassette.
Metal Tape Mode
Press [1 MTL] when playing metal or chromium dioxide (CrO2)
position tapes.
Press [1 MTL] again to cancel.
Note: Playing non-metal position tapes in MTL mode causes high
frequency imbalance, which affects tone quality.
Dolby Noise Reduction
Press [2 NR] to set the Dolby B NR mode.
Press [2 NR] again to cancel.
Note: Set the Dolby B NR mode when playing back a tape recorded
with Dolby B Noise Reduction.
BASS/FAD
BAL/FADER
BASS/FAD
BAL/FADER
Loading...