


DLP® Projector
User manual

TABLE OF CONTENTS
SAFETY............................................................................................... |
4 |
Important Safety Instruction....................................................................................................... |
4 |
Laser Radiation Safety Information............................................................................................ |
5 |
3D Safety Information................................................................................................................ |
6 |
Copyright.................................................................................................................................... |
6 |
Disclaimer.................................................................................................................................. |
6 |
Trademark Recognition.............................................................................................................. |
7 |
FCC............................................................................................................................................ |
7 |
Declaration of Conformity for EU countries................................................................................ |
8 |
WEEE......................................................................................................................................... |
8 |
INTRODUCTION................................................................................. |
9 |
Package Overview..................................................................................................................... |
9 |
Standard accessories................................................................................................................. |
9 |
Optional accessories.................................................................................................................. |
9 |
Product Overview...................................................................................................................... |
10 |
Connections.............................................................................................................................. |
11 |
Keypad...................................................................................................................................... |
12 |
Remote control.......................................................................................................................... |
13 |
SETUP AND INSTALLATION........................................................... |
15 |
Installing the projector............................................................................................................... |
15 |
Connecting sources to the projector......................................................................................... |
17 |
Adjusting the projector image.................................................................................................... |
18 |
Remote setup............................................................................................................................ |
20 |
USING THE PROJECTOR................................................................ |
22 |
Powering on / off the projector.................................................................................................. |
22 |
Selecting an input source.......................................................................................................... |
23 |
Menu navigation and features................................................................................................... |
24 |
OSD Menu tree......................................................................................................................... |
25 |
Display image settings menu.................................................................................................... |
33 |
Display 3D menu....................................................................................................................... |
37 |
Display aspect ratio menu......................................................................................................... |
37 |
Display edge mask menu.......................................................................................................... |
39 |
Display digital zoom menu........................................................................................................ |
39 |
Display image shift menu.......................................................................................................... |
39 |
Audio internal speaker menu.................................................................................................... |
40 |
Audio mute menu...................................................................................................................... |
40 |
Audio volume menu.................................................................................................................. |
40 |
Audio audio input menu............................................................................................................ |
40 |
Audio audio out menu............................................................................................................... |
40 |
Setup projection menu.............................................................................................................. |
41 |
2 English

Setup filter settings menu.......................................................................................................... |
41 |
Setup power settings menu....................................................................................................... |
41 |
Setup security menu................................................................................................................. |
42 |
Setup test pattern menu............................................................................................................ |
42 |
Setup remote settings menu..................................................................................................... |
42 |
Setup projector ID menu........................................................................................................... |
42 |
Setup 12V trigger menu............................................................................................................ |
43 |
Setup options menu.................................................................................................................. |
43 |
Setup reset OSD menu............................................................................................................. |
44 |
Network LAN menu................................................................................................................... |
44 |
Network control menu............................................................................................................... |
45 |
Setup network control settings menu........................................................................................ |
46 |
Info menu.................................................................................................................................. |
51 |
MAINTENANCE................................................................................. |
52 |
Installing and cleaning the dust filter......................................................................................... |
52 |
ADDITIONAL INFORMATION.......................................................... |
53 |
Compatible resolutions.............................................................................................................. |
53 |
Image size and projection distance........................................................................................... |
56 |
Projector dimensions and ceiling mount installation................................................................. |
57 |
IR remote codes........................................................................................................................ |
58 |
Troubleshooting......................................................................................................................... |
62 |
Warning indicators.................................................................................................................... |
64 |
Specifications............................................................................................................................ |
66 |
Optoma global offices............................................................................................................... |
67 |
English 3

SAFETY
The lightning flash with arrow head within an equilateral triangle is intended to alert the user to the presence of uninsulated "dangerous voltage" within the product's enclosure that may be of sufficient magnitude to constitute a risk of electric shock to persons.
The exclamation point within an equilateral triangle is intended to alert the user to the presence of important operating and maintenance
(servicing) instructions in the literature accompanying the appliance.
Please follow all warnings, precautions and maintenance as recommended in this user’s guide.
Important Safety Instruction
Do not block any ventilation openings. To ensure reliable operation of the projector and to protect from over heating, it is recommended to install the projector in a location that does not block ventilation. As an example, do not place the projector on a crowded coffee table, sofa, bed, etc. Do not put the projector in an enclosure such as a book case or a cabinet that restricts air flow.
To reduce the risk of fire and/or electric shock, do not expose the projector to rain or moisture. Do not install near heat sources such as radiators, heaters, stoves or any other apparatus such as amplifiers that emits heat.
Do not let objects or liquids enter the projector. They may touch dangerous voltage points and short out parts that could result in fire or electric shock.
Do not use under the following conditions:
±±In extremely hot, cold or humid environments.
(i)Ensure that the ambient room temperature is within 5°C ~ 40°C
(ii)Relative humidity is 10% ~ 85%
±±In areas susceptible to excessive dust and dirt.
±±Near any appliance generating a strong magnetic field.
±±In direct sunlight.
Do not use the unit if it has been physically damaged or abused. Physical damage/abuse would be (but not limited to):
±±Unit has been dropped.
±±Power supply cord or plug has been damaged.
±±Liquid has been spilled on to the projector.
±±Projector has been exposed to rain or moisture.
±±Something has fallen in the projector or something is loose inside.
Do not place the projector on an unstable surface. The projector may fall over resulting in injury or the projector may become damaged.
Do not block the light coming out of the projector lens when in operation. The light will heat the object and may melt, cause burns or start a fire.
Please do not open or disassemble the projector as this may cause electric shock.
Do not attempt to service the unit yourself. Opening or removing covers may expose you to dangerous voltages or other hazards. Please call Optoma before you send the unit for repair.
See projector enclosure for safety related markings.
The unit should only be repaired by authorized service personnel.Only use attachments/accessories specified by the manufacturer.
Do not look into straight into the projector lens during operation. The bright light may harm your eyes.This projector will detect the life of the light source itself.
4 English
When switching the projector off, please ensure the cooling cycle has been completed before disconnecting power. Allow 90 seconds for the projector to cool down.
Turn off and unplug the power plug from the AC outlet before cleaning the product.
Use a soft dry cloth with mild detergent to clean the display housing. Do not use abrasive cleaners, waxes or solvents to clean the unit.
Disconnect the power plug from AC outlet if the product is not being used for a long period of time.Do not setup the projector in places where it might be subjected to vibration or shock.
Do not touch the lens with bare hands.
Remove battery/batteries from remote control before storage. If the battery/batteries are left in the remote for long periods, they may leak.
Do not use or store the projector in places where smoke from oil or cigarettes may be present, as it can adversely affect the quality of the projector performance.
Please follow the correct projector orientation installation as non standard installation may affect the projector performance.
Use a power strip and or surge protector. As power outages and brown-outs can KILL devices.
Laser Radiation Safety Information
Complies with 21 CFR 1040.10 and 1040.11 except for conformance as a Risk Group 2 LIP as defined in IEC 62471-5:Ed. 1.0. For more information see Laser Notice No. 57, dated May 8, 2019
IEC 60825-1:2014 CLASS 1 LASER PRODUCT RISK GROUP 2
Complies with 21 CFR 1040.10 and 1040.11 except for conformance as a Risk Group 2 LIP as defined in IEC 62471-5:Ed. 1.0. For more information see Laser Notice No. 57, dated May 8, 2019.
IEC 60825-1:2014 PRODUIT LASER DE CLASSE 1 GROUPE DE RISQUE 2 Conforme aux normes 21 CFR 1040.10 et 1040.11, à l'exception de la conformité en tant que PIL du groupe de risque 2 définie dans la CEI 62471-5: Ed. 1,0. Pour plus d'informations, voir l'avis au laser n ° 57 du 8 mai 2019.
IEC 60825-1:2014 1 |
RG2 |
|
|
|
|
IEC 62471-5:Ed.1.0 |
RG2 LIP |
|
, |
21 CFR 1040.10 |
|
1040.11 |
2019 |
5 |
8 |
57 |
. |
IEC 60825-1:2014 1 |
RG2 |
|
|
|
|
IEC 62471-5:Ed.1.0 |
RG2 LIP |
|
, |
21 CFR 1040.10 |
|
1040.11 |
2019 |
5 |
8 |
57 |
. |
Failure to comply with the following could result in death or serious injury.
This projector has built-in Class 4 laser module. Disassembly or modification is very dangerous and should never be attempted.
Any operation or adjustment not specifically instructed by the user’s guide creates the risk of hazardous laser radiation exposure.
Do not open or disassemble the projector as htis may cause damage by the exposure of laser radiation.
Do not stare into beam when the projector is on. The bright light may result in permanent eye damage.When turning on the projector, make sure no one within projection range is looking at the lens.
Without following the control, adjustment or operation procedure may cause damage by the exposure of laser radiation.
Adequate instructions for assembly, operation, and maintenance, including clear warnings concerning precautions to avoid possible exposure to laser.
English 5
IEC 60825-1: 2014 Class 1 RG2 IEC 62471-5:2015 RG2
Additional instructions to supervise children, no staring, and not use optical aids.Additional instructions to install above the reach of children.
Notice is given to supervise children and to never allow them to stare into the projector beam at any distance from the projector.
Notice is given to use caution when using the remote control for starting the projector while in front of the projection lens.
Notice is given to the user to avoid the use of optical aids such as binoculars or telescopes inside the beam.
As with any bright light source, do not stare into the beam, RG2 IEC 62471-5:2015.
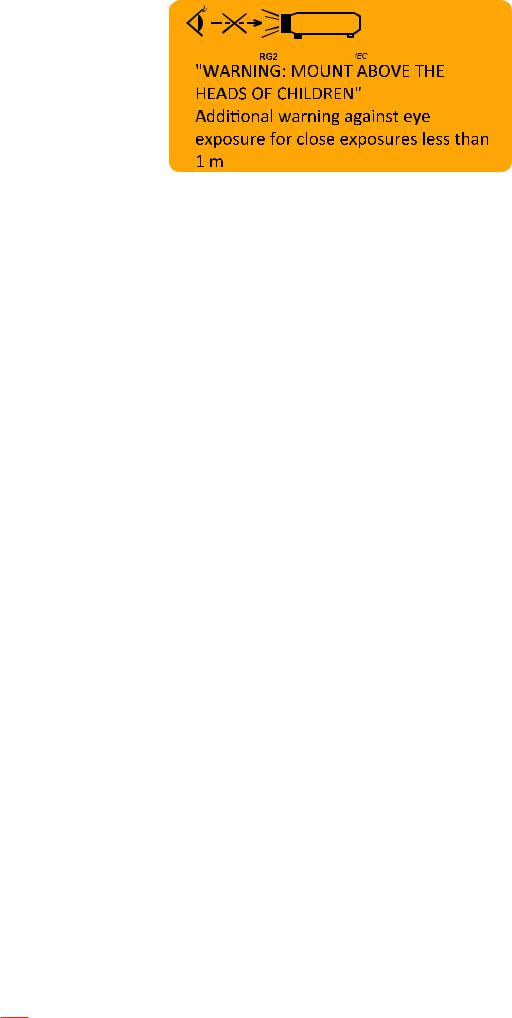
WARNING: MOUNTABOVE THE HEADS OF CHILDREN. The use of a ceiling mount is recommended with this product to place it above the eyes of children.
3D Safety Information
Please follow all warnings and precautions as recommended before you or your child use the 3D function.
Warning
Children and teenagers may be more susceptible to health issues associated with viewing in 3D and should be closely supervised when viewing these images.
Photosensitive Seizure Warning and Other Health Risks
Some viewers may experience an epileptic seizure or stroke when exposed to certain flashing images or lights contained in certain Projector pictures or video games. If you suffer from, or have a family history of epilepsy or strokes, please consult with a medical specialist before using the 3D function.
Even those without a personal or family history of epilepsy or stroke may have an undiagnosed condition that can cause photosensitive epileptic seizures.
Pregnant women, the elderly, sufferers of serious medical conditions, those who are sleep deprived or under the influence of alcohol should avoid utilizing the unit’s 3D functionality.
If you experience any of the following symptoms, stop viewing 3D pictures immediately and consult a medical specialist: (1) altered vision; (2) light-headedness; (3) dizziness; (4) involuntary movements such as eye or muscle twitching; (5) confusion; (6) nausea; (7) loss of awareness; (8) convulsions;
(9) cramps; and/ or (10) disorientation. Children and teenagers may be more likely than adults to experience these symptoms. Parents should monitor their children and ask whether they are experiencing these symptoms.
Watching 3D projection may also cause motion sickness, perceptual after effects, disorientation, eye strain and decreased postural stability. It is recommended that users take frequent breaks to lessen the potential of these effects. If your eyes show signs of fatigue or dryness or if you have any of the above symptoms, immediately discontinue use of this device and do not resume using it for at least thirty minutes after the symptoms have subsided.
Watching 3D projection while sitting too close to the screen for an extended period of time may damage your eyesight. The ideal viewing distance should be at least three times the screen height. It is recommended that the viewer’s eyes are level with the screen.
Watching 3D projection while wearing 3D glasses for an extended period of time may cause a headache or fatigue. If you experience a headache, fatigue or dizziness, stop viewing the 3D
6 English

projection and rest.
Do not use the 3D glasses for any other purpose than for watching 3D projection.
Wearing the 3D glasses for any other purpose (as general spectacles, sunglasses, protective goggles, etc.) may be physically harmful to you and may weaken your eyesight.
Viewing in 3D projection may cause disorientation for some viewers. Accordingly, DO NOT place your 3D PROJECTOR near open stairwells, cables, balconies, or other objects that can be tripped over, run into, knocked down, broken or fallen over.
Copyright
This publication, including all photographs, illustrations and software, is protected under international copyright laws, with all rights reserved. Neither this manual, nor any of the material contained herein, may be reproduced without written consent of the author.
© Copyright 2019
Disclaimer
The information in this document is subject to change without notice. The manufacturer makes no representations or warranties with respect to the contents hereof and specifically disclaims any implied warranties of merchantability or fitness for any particular purpose. The manufacturer reserves the right to revise this publication and to make changes from time to time in the content hereof without obligation of the manufacturer to notify any person of such revision or changes.
Trademark Recognition
Kensington is a U.S. registered trademark of ACCO Brand Corporation with issued registrations and pending applications in other countries throughout the world.
HDMI, the HDMI Logo, and High-Definition Multimedia Interface are trademarks or registered trademarks of HDMI Licensing LLC in the United States and other countries.
DLP®, DLP Link and the DLP logo are registered trademarks of Texas Instruments and BrilliantColorTM is a trademark of Texas Instruments.
MHL, Mobile High-Definition Link and the MHL Logo are trademarks or registered trademarks of MHL Licensing, LLC.
All other product names used in this manual are the properties of their respective owners and are Acknowledged.
FCC
This device has been tested and found to comply with the limits for a Class B digital device pursuant to Part 15 of the FCC rules. These limits are designed to provide reasonable protection against harmful interference in a
residential installation. This device generates, uses and can radiate radio frequency energy and, if not installed and used in accordance with the instructions, may cause harmful interference to radio communications.
However, there is no guarantee that interference will not occur in a particular installation. If this device does cause harmful interference to radio or television reception, which can be determined by turning the device off and on is encouraged to try to correct the interference by one or more of the following measures:
Reorient or relocate the receiving antenna.
Increase the separation between the device and receiver.
Connect the device into an outlet on a circuit different from that to which the receiver is connected.Consult the dealer or an experienced radio/television technician for help.
Notice: Shielded cables
All connections to other computing devices must be made using shielded cables to maintain compliance with FCC regulations.
English 7

Caution
Changes or modifications not expressly approved by the manufacturer could void the user's authority, which is granted by the Federal Communications Commission, to operate this projector.
Operation Conditions
This device complies with Part 15 of the FCC Rules. Operation is subject to the following two conditions:
1.This device may not cause harmful interference and
2.This device must accept any interference received, including interference that may cause undesired operation.
Notice: Canadian users
This Class B digital apparatus complies with Canadian ICES-003. Remarque à l'intention des utilisateurs canadiens
Cet appareil numerique de la classe B est conforme a la norme NMB-003 du Canada.
Declaration of Conformity for EU countries
EMC Directive 2014/30/EU (including amendments)Low Voltage Directive 2014/35/EU
RED 2014/53/EU (if product has RF function)
WEEE
Disposal instructions
Do not throw this electronic device into the trash when discarding. To minimize pollution and ensure utmost protection of the global environment, please recycle it.
8 English

INTRODUCTION
Package Overview
Carefully unpack and verify that you have the items listed below under standard accessories. Some of the items under optional accessories may not be available depending on the model, specification and your region of purchase. Please check with your place of purchase. Some accessories may vary from region to region.
The warranty card is only supplied in some specific regions. Please consult your dealer for detailed information.
Standard accessories
|
Geometric |
|
|
|
|
|
|
|
Correction |
PIP/PBP |
|
|
|
||
|
|
F1 |
F2 |
|
|
Warranty Card* |
|
|
Mode |
ENTER |
|
|
|||
|
|
AV Mute |
|
|
|
||
|
Volume F3 |
D Zoom |
|
Basic User Manual |
|||
|
Info. |
|
|
|
|
|
|
|
Source |
Re-Sync |
|
|
|
||
|
Format Freeze |
IDRemoteAll |
|
|
Paper UM |
||
|
|
Menu |
|
|
|
||
|
VGA |
S-Video HDMI1 |
HDMI2 |
|
|
||
|
1 |
2 |
3 |
|
|
|
|
|
HDBaseT Video |
DVI |
HDMI3 |
|
|
|
|
|
4 |
5 |
6 |
|
|
|
|
|
BNC |
YPbPr DisplayPort 3D |
|
|
|
||
|
7 |
8 |
9 |
0 |
|
|
|
Projector |
Remote control |
Power lead |
|
Documentation |
|||
Note |
|
|
|
|
|
|
|
The remote control is shipped with the battery.
*For European warranty Information, please visit www.optoma.com.
Optional accessories
|
|
|
|
|
|
|
|
|
|
|
|
|
|
|
|
|
|
|
|
|
|
|
|
|
|
|
Lens cap |
|
CD user manual |
|
Carry bag |
|
VGA cable |
||
Note
Optional accessories vary depending on model, specification and region.
English 9
INTRODUCTION |
|
|
|
|
|||
Product Overview |
|
|
|
|
|
||
1 |
2 |
3 |
4 |
5 |
8 |
9 |
5 |
7 |
|
|
|||||
|
|
|
|
|
6 |
|
|
|
|
|
|
|
4 |
|
10 |
|
|
|
|
|
|
|
|
11 |
|
|
|
|
|
|
|
|
|
|
|
|
11 |
|
|
Note
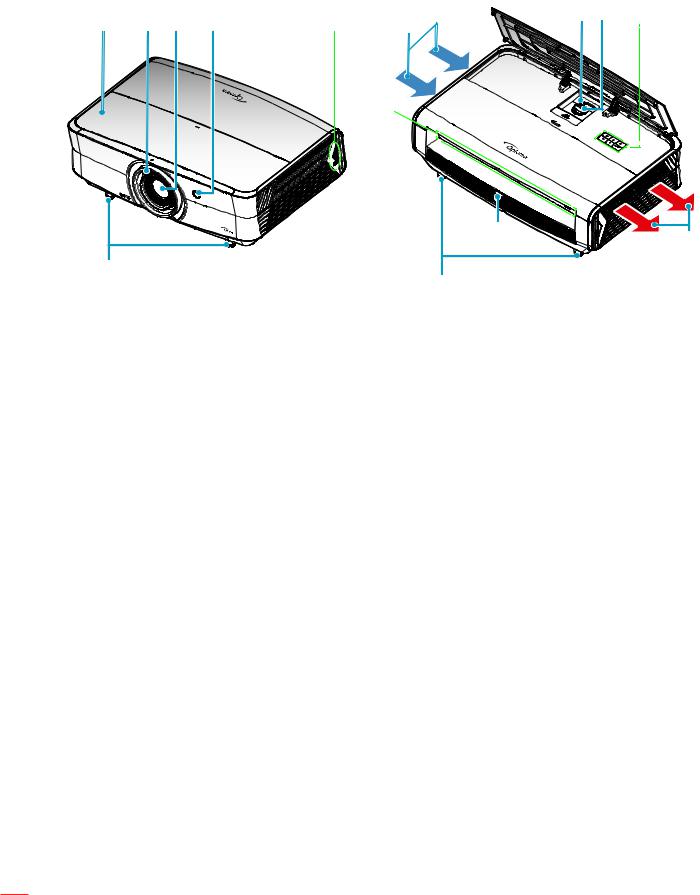
Do not block projector intake and exhaust vents.
When operating the projector in an enclosed space, allow at least 30 cm clearance around the intake and exhaust vents.
No |
Item |
1.Top Cover
2.Focus Ring
3.Lens
4.IR Receiver
5.Keypad
6.Input / Output
No |
Item |
7.Ventilation (inlet)
8.Zoom Lever
9.Lens Shift Dial 10. Ventilation (outlet)
11. Tilt-Adjustment Foot
10 English
INTRODUCTION
Connections
1 |
2 |
3 |
4 |
5 |
6 |
7 |
8 |
9 |
10 |
11 |
|
|
|
HDMI v1.4 |
HDMI v2.0 4K/MHL |
|
|
|
SERVICE |
AC-IN |
RJ-45 |
RS232 |
HDMI 1 |
HDMI 2 |
VGA |
AUDIO |
|
|
|
|
|
|
|
|
IN |
12V |
|
|
|
|
|
|
|
|
|
|
|
|
|
|
|
|
|
OUT |
|
|
|
|
|
|
|
AUDIO |
|
|
|
|
|
|
|
|
OUT |
|
|
|
|
|
|
|
|
|
USB |
S / PDIF |
|
|
|
|
|
|
POWER OUT |
|
|
|
|
|
|
|
|
(5V |
1.5A) |
|
|
|
|
|
|
|
13 |
12 |
|
No |
Item |
1.KensingtonTM Lock Port
2.Power Socket
3.RJ-45 Connector
4.RS232 Connector
5.HDMI 1 (v1.4) Connector
6.HDMI 2 (v2.0) 4K / MHL Connector (*1;*3)
7.VGA Connector
No |
Item |
8.AUDIO IN Connector
9.12V OUT Connector
10. Service Connector (*2)
11. S/PDIF Connector
12. USB Power Out (5V 1.5A) (*3)
13. AUDIO OUT Connector
Note
(*1)HDMI 2 connector supports HDCP2.2 and MHL V2.2.
(*2)For firmware upgrade.
(*3)MHL and USB DC5V are alternately powered on. For example, USB DC 5V is off when MHL is on or DC 5V is on when MHL is off.
English 11

INTRODUCTION
Keypad
1 |
2 |
3 |
4 |
8
7
No |
Item |
1.Power and On/Standby LED
2.Source
3.Menu
4.Enter
65
No |
Item |
5.Re-Sync
6.Four Directional Select Keys
7.Laser LED
8.Temp LED
12 English

INTRODUCTION
Remote control
For Data Model
|
On |
|
|
Off |
|
|
||
1 |
|
|
|
|
|
|
34 |
|
2 |
Geometric |
|
|
|
33 |
|||
Correction |
PIP/PBP |
|
||||||
3 |
|
F1 |
|
F2 |
|
|
32 |
|
|
Mode |
|
AV Mute |
|
|
|||
4 |
|
|
|
|
|
|
31 |
|
5 |
|
|
ENTER |
|
|
30 |
||
|
|
|
|
|
|
|
||
6 |
|
|
|
|
|
|
29 |
|
7 |
Info. |
|
|
|
|
|
||
Source |
|
Re-Sync |
|
|
||||
|
|
|
|
|||||
8 |
|
|
|
|
|
|
28 |
|
|
|
|
|
|
|
|
||
9 |
Volume |
|
D Zoom |
|
|
|||
|
|
|
|
|
|
|
||
10 |
|
|
Menu |
|
|
27 |
||
11 |
|
|
|
|
|
|
26 |
|
12 |
Format Freeze |
Remote |
|
|||||
|
|
|
ID |
All |
|
25 |
||
13 |
VGA |
S-Video HDMI1 |
HDMI2 |
|||||
|
||||||||
|
|
2 |
|
|
|
24 |
||
|
|
|
|
|
|
|||
14 |
HDBaseT |
|
DVI |
HDMI3 |
||||
|
|
|||||||
4 |
|
5 |
6 |
|
|
23 |
||
|
|
|
|
|||||
15 |
BNC |
|
DisplayPort 3D |
|
||||
|
|
|
||||||
16 |
|
|
|
9 |
|
|
22 |
|
|
|
|
|
|
|
|
||
|
17 |
18 |
19 |
20 |
21 |
|
||
No |
Item |
1.Power on
2.Geometric Correction
3.Function button (F1) (Assignable)
4.Mode
5.Four directional select keys
6.Information
7.Function button (F3) (Assignable)
8.Source
9.Menu
10.Volume - / +
11.Freeze
12.Format (Aspect Ratio)
13.VGA
14.S-Video
15.HDBase-T
16.Video
17.BNC (not supported)
No |
Item |
18.YPbPr (not supported)
19.Numeric keypad (0-9)
20.Display port (not supported)
21.3D
22.DVI (not supported)
23.HDMI3 (not supported)
24.HDMI1
25.HDMI2
26.Remote ID / Remote all
27.Digital Zoom - / +
28.Re-sync
29.Laser (not supported)
30.Enter
31.AV Mute
32.Function button (F2) (Assignable)
33.PIP/PBP (not supported)
34.Power off
English 13
INTRODUCTION
Note Some keys may have no function for models that do not support these features.
For Home Model
1 |
ON |
|
OFF |
14 |
|
|
|
||
2 |
|
|
|
15 |
3 |
|
User2 |
|
|
User1 |
User3 |
16 |
||
4 |
Brightness Contrast |
Mode |
||
|
|
|
17 |
|
|
|
Aspect ratio |
|
|
|
Keystone |
|
|
|
5 |
|
|
18 |
|
|
DB |
3D |
||
|
|
|
||
|
|
|
19 |
|
6 |
Mute |
|
Sleep Timer |
|
7Volume
 20
20
8 |
Source |
Re-sync |
21 |
|
|
22 |
|
|
|
|
|
9 |
Menu |
|
23 |
|
|
|
|
10 |
|
Volume |
24 |
11 |
HDMI1 |
HDMI2 |
25 |
|
|
||
12 |
VGA1 |
VGA2 Video YPbPr |
26 |
|
|
||
13 |
|
|
27 |
No |
Item |
1.Power On
2.User 2
3.User 1
4.Brightness
5.Keystone (not supported)
6.Mute
7.DB (Dynamic Black)
8.Source
9.Enter
10.Menu
11.HDMI1
12.VGA1
13.VGA2 (not supported)
14.Power Off
No |
Item |
15.User 3
16.Contrast
17.Display Mode
18.Aspect Ratio
19.3D Menu On / Off
20.Sleep Timer
21.Volume +
22.Re-Sync
23.Four Directional Select Keys
24.Volume -
25.HDMI2
26.YPbPr (not supported)
27.Video (not supported)
Note Some keys may have no function for models that do not support these features.
14 English

SETUP AND INSTALLATION
Installing the projector
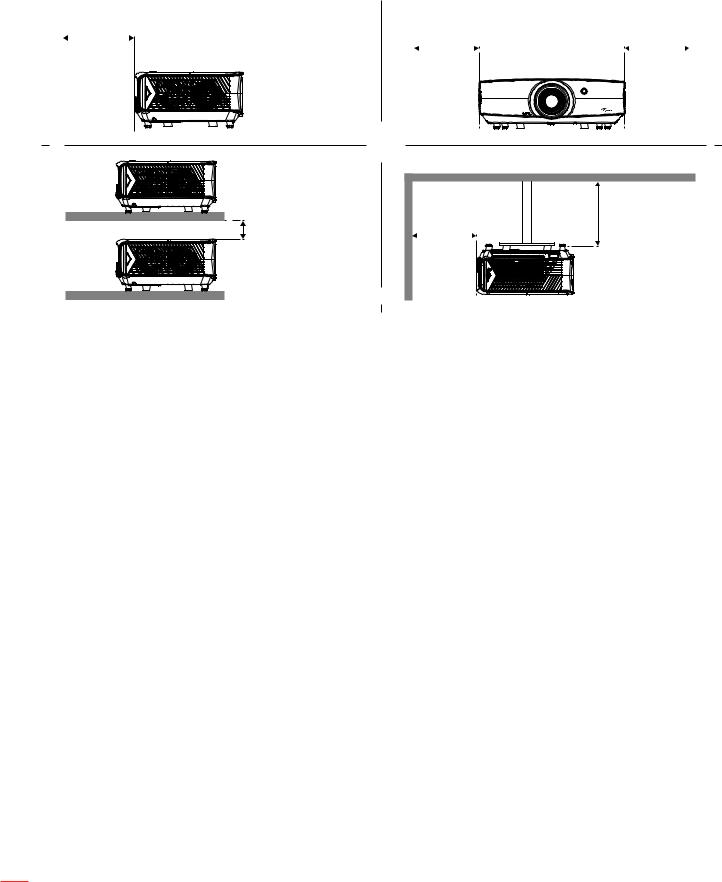
Your projector is designed to be installed in one of four possible positions.
Your room layout or personal preference will dictate which installation location you select. Take into consideration the size and position of your screen, the location of a suitable power outlet, as well as the location and distance between the projector and the rest of your equipment.
Table mount front |
Table mount rear |
Ceiling mount front |
Ceiling mount rear |
Projector should be placed flat on a surface and 90 degrees / perpendicular to the screen.
How to determine projector location for a given screen size, please refer to distance table on page
56.
How to determine screen size for a given distance, please refer to distance table on page 56.
Note The further away the projector is placed from the screen the projected image size increases and vertical offset also increases proportionally.
IMPORTANT!
Do not operate the projector in any orientation other than table top or ceiling mount. The projector should be horizontal and not tilted either forwards/backwards or left/right. Any other orientation will invalidate the warranty and may shorten the lifetime of the projector light source or the projector itself. For none standard installation advise please contact Optoma.
English 15
SETUP AND INSTALLATION
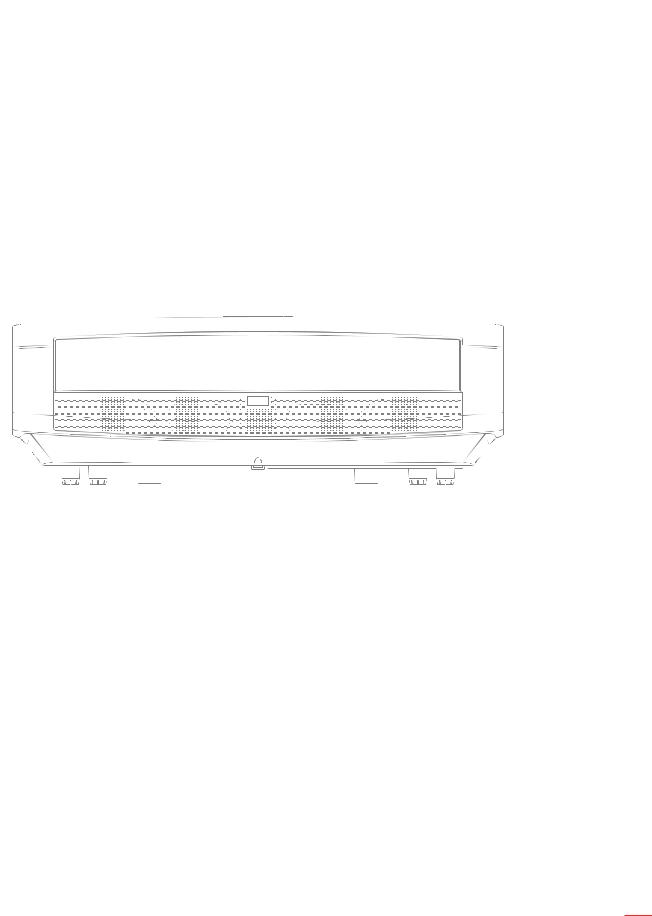
Projector installation notice
|
Allow at least 30 cm clearance around the exhaust vent. |
|
|
|
|
|||||||||||
|
|
Minimum |
|
|
|
|
Minimum |
Minimum |
|
|||||||
|
|
|
|
|
|
|
||||||||||
|
|
|
|
|
||||||||||||
|
|
|
|
|
|
|
||||||||||
|
|
100mm |
|
|
|
|
|
|||||||||
|
|
|
|
|
|
|||||||||||
|
(3.94 inches) |
|
|
|
|
300mm |
|
300mm |
|
|||||||
|
|
|
|
|
|
|
|
|
|
(11.81 inches) |
(11.81 inches) |
|
||||
|
|
|
|
|
|
|
||||||||||
|
|
|
|
|
|
|
|
|
|
|
|
|
|
|
|
|
|
|
|
|
|
|
|
|
|
|
|
|
|
|
|
|
|
|
|
|
|
|
|
|
|
|
|
|
|
|
|
|
|
|
|
|
|
|
|
|
|
|
|
|
|
|
|
|
|
|
|
|
Minimum |
Minimum |
|
Minimum |
100mm |
100mm |
|
(3.94 inches) |
(3.94 inches) |
||
100mm |
|||
|
|
||
(3.94 inches) |
|
|
Ensure that the intake vents do not recycle hot air from the exhaust vent.
When operating the projector in an enclosed space, ensure that the surrounding air temperature within the enclosure does not exceed operation temperature while the projector is running, and the air intake and exhaust vents are unobstructed.
All enclosures should pass a certified thermal evaluation to ensure that the projector does not recycle exhaust air, as this may cause the device to shutdown even if the enclosure temperature is with the acceptable operation temperature range.
16 English
SETUP AND INSTALLATION
Connecting sources to the projector
|
|
3 |
|
|
4 |
|
|
5 |
1 |
2 |
6 |
|
|
|
SERVICE |
|
AC-IN |
RJ-45 RS232 |
|
|
|
11 |
|
|
|
10 |
|
|
14 |
12 |
7 |
|
9 |
|||
|
|
||
|
13 |
|
|
|
|
8 |
No |
Item |
1.HDMI Cable
2.HDMI / MHL Cable
3.RCA Component Cable
4.VGA In Cable
5.Audio In Cable
6.12V DC Jack
7.USB Cable
No |
Item |
8.S/PDIF Out Cable
9.USB Power Cable
10.Audio Out Cable
11.HDMI Dongle
12.RS232 Cable
13.RJ-45 Cable
14.Power Cord
English 17

SETUP AND INSTALLATION
Adjusting the projector image
Image height
The projector is equipped with elevator feet for adjusting the image height.
1.Locate the adjustable foot you wish to adjust on the underside of the projector.
2.Rotate the adjustable foot clockwise or counterclockwise to raise or lower the projector.
Tilt-Adjustment Feet
 Tilt-Adjustment Ring
Zoom, lens shift, and focus
To adjust the image size and position, do the following:
a. Push down firmly on the middle of the top cover to unlock the latch. Then open the top cover.
Zoom Lever
Lens Shift
b.To adjust the image size, turn the zoom lever clockwise or counterclockwise to increase or decrease the projected image size.
c.To adjust the image position, turn the lens shift dial clockwise or counterclockwise to adjust the position of the projected image vertically.
18 English

SETUP AND INSTALLATION
To adjust the focus, turn the focus ring clockwise or counterclockwise until the image is sharp and legible. 


 Focus Ring
Focus adjustment
Note The projector will focus at a distance of 1.3m to 9.3m.
English 19
SETUP AND INSTALLATION
Remote setup
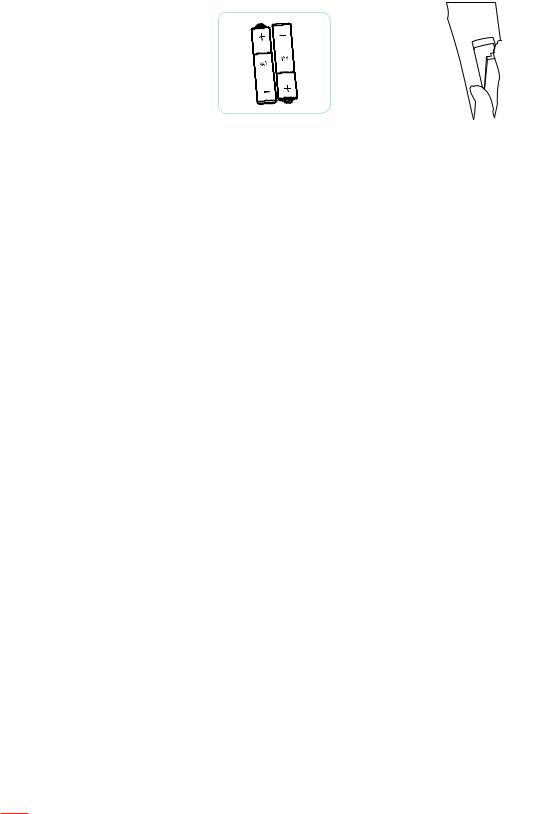
Installing / replacing the batteries
Two AAA size batteries are supplied for the remote control.
1.Remove the battery cover on the back of the remote control.
2.Insert AAA batteries in the battery compartment as illustrated.
3.Replace back cover on remote control.
Note Replace only with the same or equivalent type batteries.
CAUTION
Improper use of batteries can result in chemical leakage or explosion. Be sure to follow the instructions below.Do not mix batteries of different types. Different types of batteries have different characteristics.
Do not mix old and new batteries. Mixing old and new batteries can shorten the life of new batteries or cause chemical leakage in old batteries.
Remove batteries as soon as the are depleted. Chemicals that leak from batteries that come in contact with skin can cause a rash. If you find any chemical leakage, wipe thoroughly with a cloth.
The batteries supplied with this product may have a shorter life expectancy due to storage conditions.If you will not be using the remote control for an extended period of time, remove the batteries.
When you dispose of the batteries, you must obey the law in the relative area or country.
Effective range
Infra-Red (IR) remote control sensor is located on the front side and rear side of the projector. Ensure to hold the remote control at an angle within 30 degrees perpendicular to the projector’s IR remote control sensor to function correctly. The distance between the remote control and the sensor should not be longer than 7 meters (~ 23 feet).
Make sure that there are no obstacles between the remote control and the IR sensor on the projector that might obstruct the infra-red beam.
Make sure the IR transmitter of the remote control is not being shined by sunlight or fluorescent lamps directly.
Please keep the remote controller away from fluorescent lamps for over 2 m or the remote controller might become malfunction.
If the remote control is close to Inverter-Type fluorescent lamps, it might become ineffective from time to time.
If the remote control and the projector are within a very short distance, the remote control might become ineffective.
When you aim at the screen, the effective distance is less than 5 m from the remote control to the screen and reflecting the IR beams back to the projector. However, the effective range might change according to screens.
20 English
SETUP AND INSTALLATION
Approx. ±15°
|
|
|
|
|
|
|
On |
|
|
|
|
|
|
|
Geometric |
|
|
|
|
|
|
|
Correction |
|
|
|
|
|
|
Mode |
F1 |
|
|
|
|
|
|
PIP/PBP |
|
|
|
|
|
|
|
|
|
|
|
|
|
|
|
|
F2 |
|
|
|
|
|
|
|
AV |
|
|
|
|
|
|
ENTER |
Mute |
|
|
|
|
|
|
|
|
|
|
|
|
|
|
Info. |
|
|
|
|
|
|
Source |
|
|
|
|
|
|
|
Volume |
F3 |
|
|
|
|
|
|
|
Re- |
|
|
|
Format |
|
Menu |
Sync |
|
|
|
|
|
Zoom |
|
|||
|
|
|
|
|
|
D |
|
|
VGA |
Freeze |
|
|
|
||
|
1 |
S- |
|
|
|
|
|
4HDBaseT |
2Video |
ID |
|
|
|||
BNC |
Video |
HDMI1 |
Remote |
|
|
||
7 |
5 |
6 |
3 |
|
All |
|
|
8 |
|
HDMI2 |
|
|
|||
|
YPbPr |
DVI |
|
|
|
|
|
|
9DisplayPort |
HDMI3 |
|
|
|
||
|
|
3D |
|
|
|
|
|
|
|
0 |
|
|
|
|
|
Off
Approx. ±15°
|
|
|
|
|
|
|
On |
|
|
|
|
|
|
|
Geometric |
|
|
|
|
|
|
|
Correction |
|
|
|
|
|
|
Mode |
F1 |
|
|
|
|
|
|
PIP/PBP |
|
|
|
|
|
|
|
|
|
|
|
|
|
|
|
|
F2 |
|
|
|
|
|
|
|
AV |
|
|
|
|
|
|
ENTER |
Mute |
|
|
|
|
|
|
|
|
|
|
|
|
|
|
Info. |
|
|
|
|
|
|
Source |
|
|
|
|
|
|
|
Volume |
F3 |
|
|
|
|
|
|
|
Re- |
|
|
|
Format |
|
Menu |
Sync |
|
|
|
|
|
Zoom |
|
|||
|
|
|
|
|
|
D |
|
|
VGA |
Freeze |
|
|
|
||
|
1 |
S- |
|
|
|
|
|
4HDBaseT |
2Video |
ID |
|
|
|||
BNC |
Video |
HDMI1 |
Remote |
|
|
||
All |
|
|
|||||
7 |
5 |
6 |
3 |
|
|
|
|
8 |
|
HDMI2 |
|
|
|||
|
YPbPr |
DVI |
|
|
|
|
|
|
9DisplayPort |
HDMI3 |
|
|
|
||
|
|
3D |
|
|
|
|
|
|
|
0 |
|
|
|
|
|
Off
English 21
 Loading...