


MD-1150
Cat. No. 42-4039
OWNER’S MANUAL
Please read before using this equipment.
Electronic Keyboard
MD-1150
A
42-4039.fm Page 1 Friday, March 3, 2000 8:55 AM
2
We recommend you record your key-
board’s serial number here. The number
is in the battery compartment of the key-
board.
Serial Number ____________________
THE FCC WANTS YOU TO
KNOW
This keyboard complies with the limits
for a Class B dig ital device as spec ified
in Part 15 of
FCC Rules
. These limits
provide reasonable protection against
radio and TV interference in a residential
area. However, your keyboard might
cause TV or radio interference even
when it is operating properly. To elimi-
nate interference, you can try one or
more of the following corrective mea-
sures:
• Reorient or relocate the receiving
antenna.
• Increase the distance between the
keyboard and the radio or TV.
• Use outlets on different electrical cir-
cuits for the keybo ard and the radi o
or TV.
Consult your local RadioShack store if
the problem still exists.
You must use shielded interface cables
with this equipment.
WARNING:
To reduce the risk of fire or
shock hazard, do not expose this product to rain
or moisture.
CAUTION
RISK OF ELEC-
TRIC SHOCK. DO
NOT OPEN.
CAUTION:
TO REDUCE THE RISK OF
ELECTRIC SHOCK, DO NOT REMOVE
COVER OR BACK. NO USER-SERVICEABLE
PARTS INSIDE. REFER SERVICING TO QUAL-
IFIED PERSONNEL.
This symbol is intended to alert
you to the presence of uninsu-
lated dangerous voltage within
the product’s enclosure that might
be of sufficient magnitude to con-
stitute a risk of electric shock. Do
not open the product’s case.
This symbol is intended to inform
you that important operating and
maintenance instructions are
included in the literature accom-
panying this product.
!
!
©
1999 Tandy Corporation.
All Rights Reserved.
Optimus, RadioShack, and Adaptaplug are registered trademarks used by Tandy Corporation.
42-4039.fm Page 2 Friday, March 3, 2000 8:55 AM
3
FEATURES
Your Optimus MD-115 0 Electronic Key-
board is a state-of-the -art ke yboard with
many exciting features. You can set the
keyboard to sound like 100 differen t mu-
sical instruments or sound effects. To
accompany your music, the keyboard
has 100 rhythms, as well as auto ac-
companiments and percussion sounds.
Your keyboard also includes a MIDI
(Musical Instrument Digital Interface)
feature, which lets you connect it to oth-
er MIDI-equipped musical instruments
or devices, even your per sonal comput-
er.
This versatile keyboard can provide
hours of fun and is i dea l for anyone who
wants to make music, from the begi nner
to the experienced musician.
Note: The MD-1150 conforms to most,
but not all, General MIDI spe cifications.
Because of this, you might experience
some incompatibility when using the
MD-1150 with another Ge ner al MID I de -
vice. For more information, see “Using
MIDI” on Page 25.
Your keyboard’s features include:
61 Full-Size Keys with Touch Re-
sponse — the keyboard’s volume var-
ies in response to the force of your
touch, just like an acoustic piano or or-
gan, so you can add emotion to your
music.
Backlit Liquid Crystal Display —
shows the notes and cho rd s as y ou pl ay
them, along with the current tone,
rhythm, and tempo. The built-in back-
light makes it easy to read the display
even in darkness.
16-Note Polyphonic Sound — lets you
play and hear up to 16 notes at the
same time so you can play o r create al-
most any type of music.
100 Tones — you can set your key-
board to sound like anything from a
harpsichord to a honky-tonk piano.
100 Prerecorded Tunes — let you hear
a sample of what you and the k eyboard
can do. You can play the tunes either
one at a time or c onsecutively, and you
can turn off the melody or accompani-
ment portion so you can play along with
the tunes.
100 Auto-Rhythms — give you a
steady beat for many styles of music,
from rhumba to slow rock.
Transpose Function — lets you in-
stantly change the key of the music,
even while you are playing.
Headphones/Output Jack — lets you
connect headphones so you can play
without disturbing oth ers, or an external
amplifier so you can play for a crowd.
Sustain Jack — lets you connect a sus-
tain pedal (not supplied) to the MD-1150
so you can sustain your keyboard’s
sound.
42-4039.fm Page 3 Friday, March 3, 2000 8:55 AM
4
Tempo Control — lets you speed u p or
slow down the tempo of any selected
music pattern.
Tune Control — lets you adjust the
pitch of your keyboard so you can play
in tune with other instruments.
Fill-In Rhythm — le ts you i nsert a short
variation into any auto-rhythm.
Auto Accompaniment — lets you auto-
matically play a pres et harmonic pattern
to match the selected auto-rhythm.
Chord Book — lets you easily see
which keys to press and which fingers to
use to form a chord, as well as easily
learn the chord’s name.
Two Built-In Speakers — provide ex-
cellent sound to help make your music
come alive.
Power Options — let you power the
keyboard from internal batteries (not
supplied) or standard AC power (with an
optional adapter) so you can make mu-
sic almost anywhere.
Notes:
• If the keyboard is left in one place
for a very long time, its feet could
mar your furniture’s finish. We rec-
ommend you place the feet on felt
cloth pads to protect your furniture
or use an optional keyboard stand,
available at your local RadioShack
store.
• This Owner’s Manual explains how
to use this electronic keyboard. It
does not teach music.
42-4039.fm Page 4 Friday, March 3, 2000 8:55 AM

5
CONTENTS
Preparation .......................... ............................................. ....................................... 7
Connecting Power .............................................................................................. 7
Using Batteries ............................................................................................ 7
Using AC Power .......................................................................................... 8
Connecting Headphones .................................................................................... 8
Listening Safely ........................................................................................... 8
Connecting an External Amplifier ....................................................................... 9
Using the Music Stand ....................................................................................... 9
Operation ............................. ............................................. ..................................... 10
Basic Operation ........................... ...... ....... ...... ............................................. ..... 10
Cancelling Auto Power Off ......................................................................... 11
Playing the Prerecorded Tunes ........................................................................ 11
Playing Back a Prerecorded Tune ............................................................. 11
Playing Along with a Prerecorded Tune ..................................................... 13
Turning Applause Off/On ........................................................................... 13
Consecutively Playing Back the Tunes ...................................................... 13
Using the Preset Tones .................................................................................... 13
Selecting/Playing a Preset Tone ................................................................ 14
Keyboard Split Tones ................................................................................. 14
Percussion Sounds .................................................................................... 15
Layered Tones ........................................................................................... 15
Using the Preset Auto-Rhythms ....................................................................... 15
Selecting/Playing an Auto-Rhythm ............................................................ 16
Using SYNCHRO ....................................................................................... 17
Using FILL-IN ............................................................................................. 17
Using Auto Accompaniment ............................................................................. 17
Adjusting the Accompaniment Volume ...................................................... 18
Concert Chord ............... ....... ...... ....... ...... ............................................. ..... 18
Standard Fingering .................................................................................... 20
Using the Chord Book ...................................................................................... 21
Special Features ........... ...... ...... ....... ............................................. ....... ...... ........... 23
Changing Keys ................................................................................................. 23
Tuning the Keyboard ........................................................................................ 23
Using Touch Response .................................................................................... 24
Using a Sustain Pedal ...................................................................................... 24
42-4039.fm Page 5 Friday, March 3, 2000 8:55 AM

6
Using MIDI ............................................................................................................. 25
About MIDI ......................... ...... ....... ...... ....... ...... ............................................. .. 25
Making the MIDI Connections .......................................................................... 25
MIDI Data ......................................................................................................... 26
Changing MIDI Settings .................................................................................... 27
Notes About the MIDI Implementation Chart .................................................... 28
Troubleshooting .................................................................. .................................. 29
Standard Fingering Chord Charts ....................................................................... 31
Note Table .............................................................................................................. 34
MIDI Implementation Chart .................................................................................. 35
Care and Maintenance .......................................................................................... 37
Specifications ......................... .......................... .......................... ......................... .. 38
42-4039.fm Page 6 Friday, March 3, 2000 8:55 AM
7
PREPARATION
Note: To connect a MIDI device, see
“Making the MIDI Connections” on
Page 25. To connect a sustain pedal,
see “Using a Sustain Pedal” on
Page 24.
CONNECTING POWER
You can power your MD-1150 from ei-
ther:
• internal batteries (see “Using Batter-
ies”)
• standard AC power using an
optional AC adapter (see “Using AC
Power” on Page 8)
Notes:
• Connecting an AC adapt er automat-
ically disconnects internal batteries.
• Always disconnect the adapter
when you finish using the MD-1150.
Using Batteries
Your MD-1150 can use six D batteries
(not supplied) for power. For the best
performance and longest life, we rec om -
mend RadioShack alkaline batteries.
Cautions:
• Use only fresh batteries of the
required size and recommended
type.
• If you do not plan to use the MD-
1150 with batteries for a week or
more, or if you will be usin g only A C
power, remove the batteries.
• Do not mix old and new batteries,
different types of batteries (stan-
dard, alkaline, or rechargeable), or
rechargeable batteries of different
capacities.
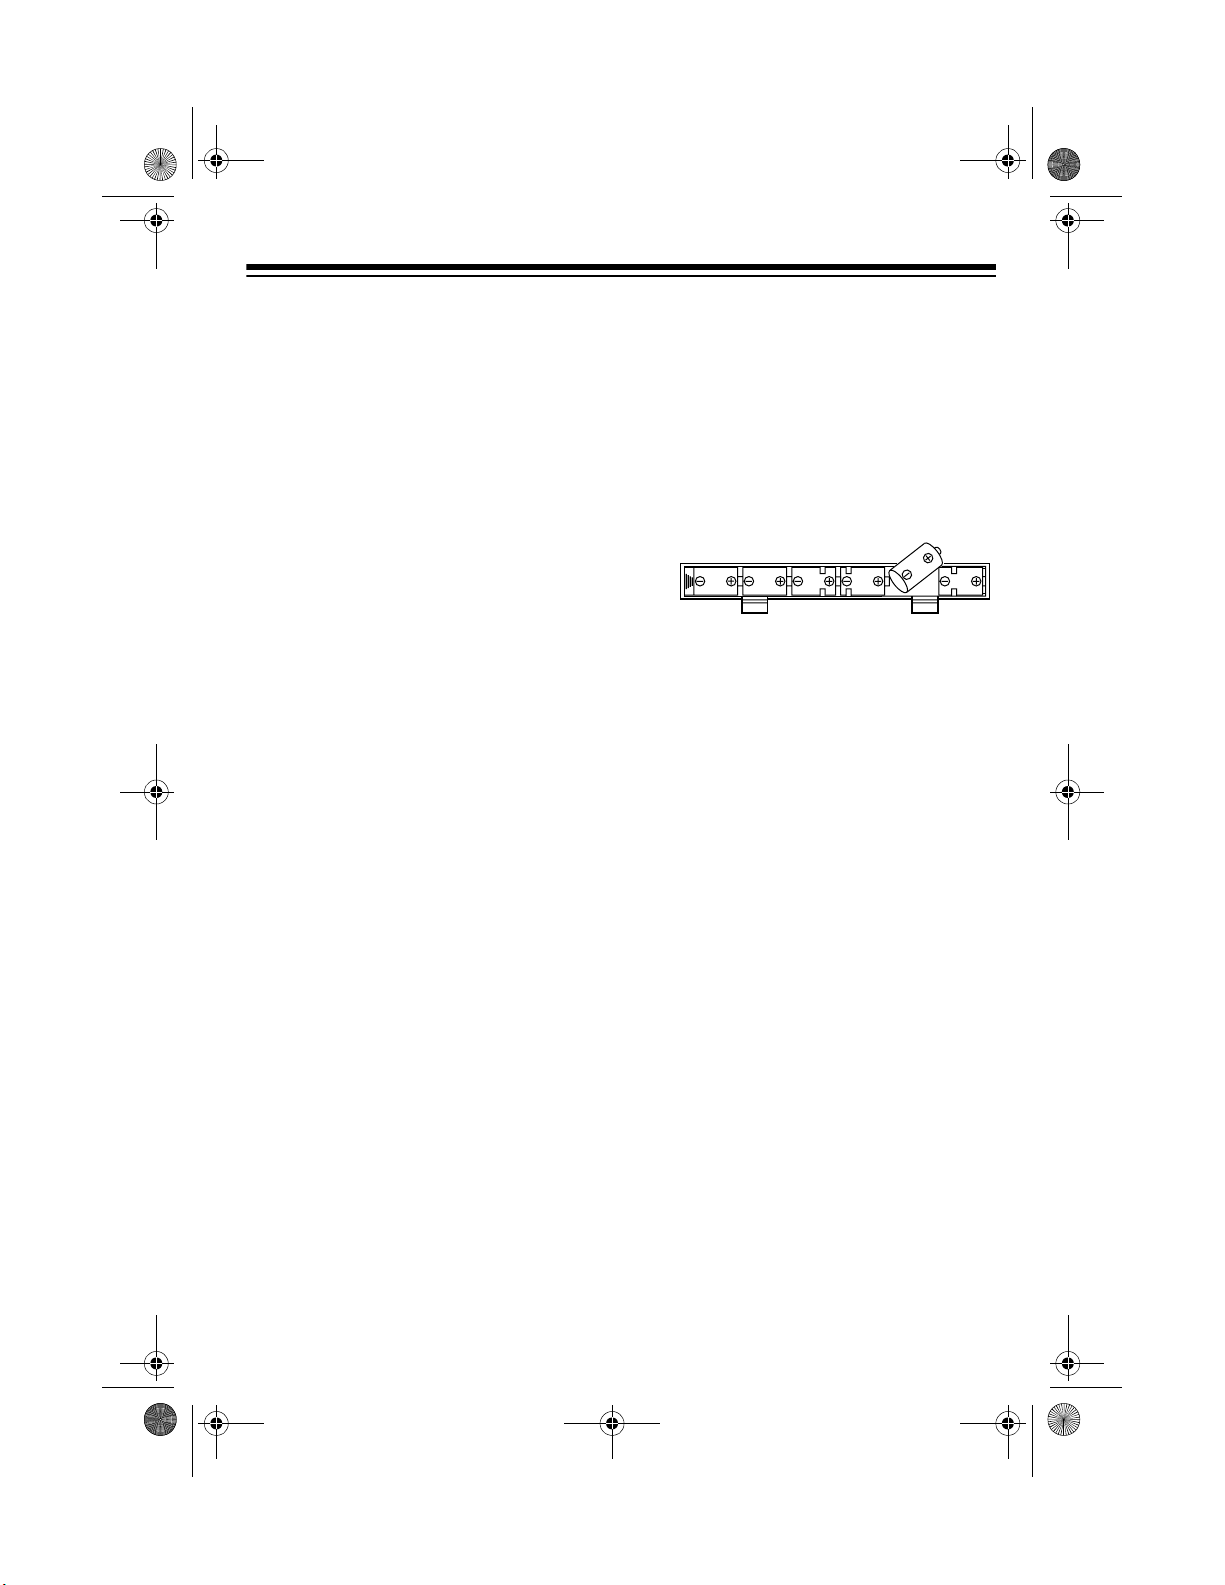
1. Press the tabs on the batte ry com-
partment cover, then pull up to
remove the cover.
2. Put the batteries in the compartment
as indicated by the polar ity symbols
(+ and –) marked beside the com-
partment.
3. Replace the cover.
If the MD-1150 sounds weak or does not
work properly, replace all six batteries.
Warning: Dispose of old batteries
promptly and properly. Do not burn or
bury them.
Caution: Always remove old or weak
batteries; batteries can leak chemicals
that can destroy electronic parts.
42-4039.fm Page 7 Friday, March 3, 2000 8:55 AM

8
Using AC Power
You can power your MD-1150 from
standard AC power using a 9-volt AC
adapter (not supplied) and a Size M
Adaptaplug
®
.
Cautions:
You must use an AC
adapter that supplies 9
volts and delivers at least
800 milliamps. Its c en ter ti p must be
set to negative, and its plug must
correctly fit the MD-1150’s
DC 9V
jack. Using an adapter that does not
meet these specifications could
damage the MD-1150 or the
adapter.
• Always press
POWER
to turn off the
keyboard before you c onnect or dis-
connect the adapter.
• Always plug the AC a dapter i nto the
MD-1150 before you plug it into the
AC outlet. Always unplug the AC
adapter from the AC outlet before
you unplug it from the MD-1 150.
Follow these steps to power your MD-
1150 from AC power.
1. Insert the adapter’s barrel plug into
the
DC 9V
jack on the back of the
MD-1150.
2. Plug the adapter into a s tandard AC
outlet.
CONNECTING
HEADPHON ES
To listen to your MD-1150 without dis-
turbing others, you can connect a pair of
1
/
4
-inch (6.35-mm) plug stereo head-
phones (not supplied). Your local Ra-
dioShack store sells a wide s election of
headphones.
To connect a p air of head phones, i nsert
the headphones’ plug i nto the
PHONES/
OUTPUT
jack on the back of the key-
board.
Note: Connecting headphones discon-
nects the MD-1150’s built-in speakers.
Listening Safely
To protect your hearing, follow these
guidelines when you use headphones.
• Set the volume to the low est setting
before you begin liste ning. A fter yo u
begin listening, adjus t the volume to
a comfortable level.
• Do not listen at e xtremely high vol-
ume levels. Extended high-volume
listening can lead to permanent
hearing loss.
!
42-4039.fm Page 8 Friday, March 3, 2000 8:55 AM
9
• Once you set the volume, do not
increase it. Over time, your ears
adapt to the volume level, so a vol-
ume level that does not cause dis-
comfort might still damage your
hearing.
CONNECTING AN
EXTERNAL AMPLIFIER
To amplify your MD-1150’s sound, you
can connect it to an external amplifier
(not supplied) using an a udio cable (not
supplied) with a
1
/
4
-inch (6.35-mm) plug.
To connect an external amplifier to you r
keyboard, insert the cable’s
1
/
4
-inch
(6.35-mm) plug into the
PHONES/OUT-
PUT
jack on the back of the keyboard,
and connect the cable’s other end to the
amplifier’s input jack(s) (such as AUX IN
or TAPE IN).
Your local RadioSha ck store sells a full
line of amplifiers, speakers, and connec-
tion cables.
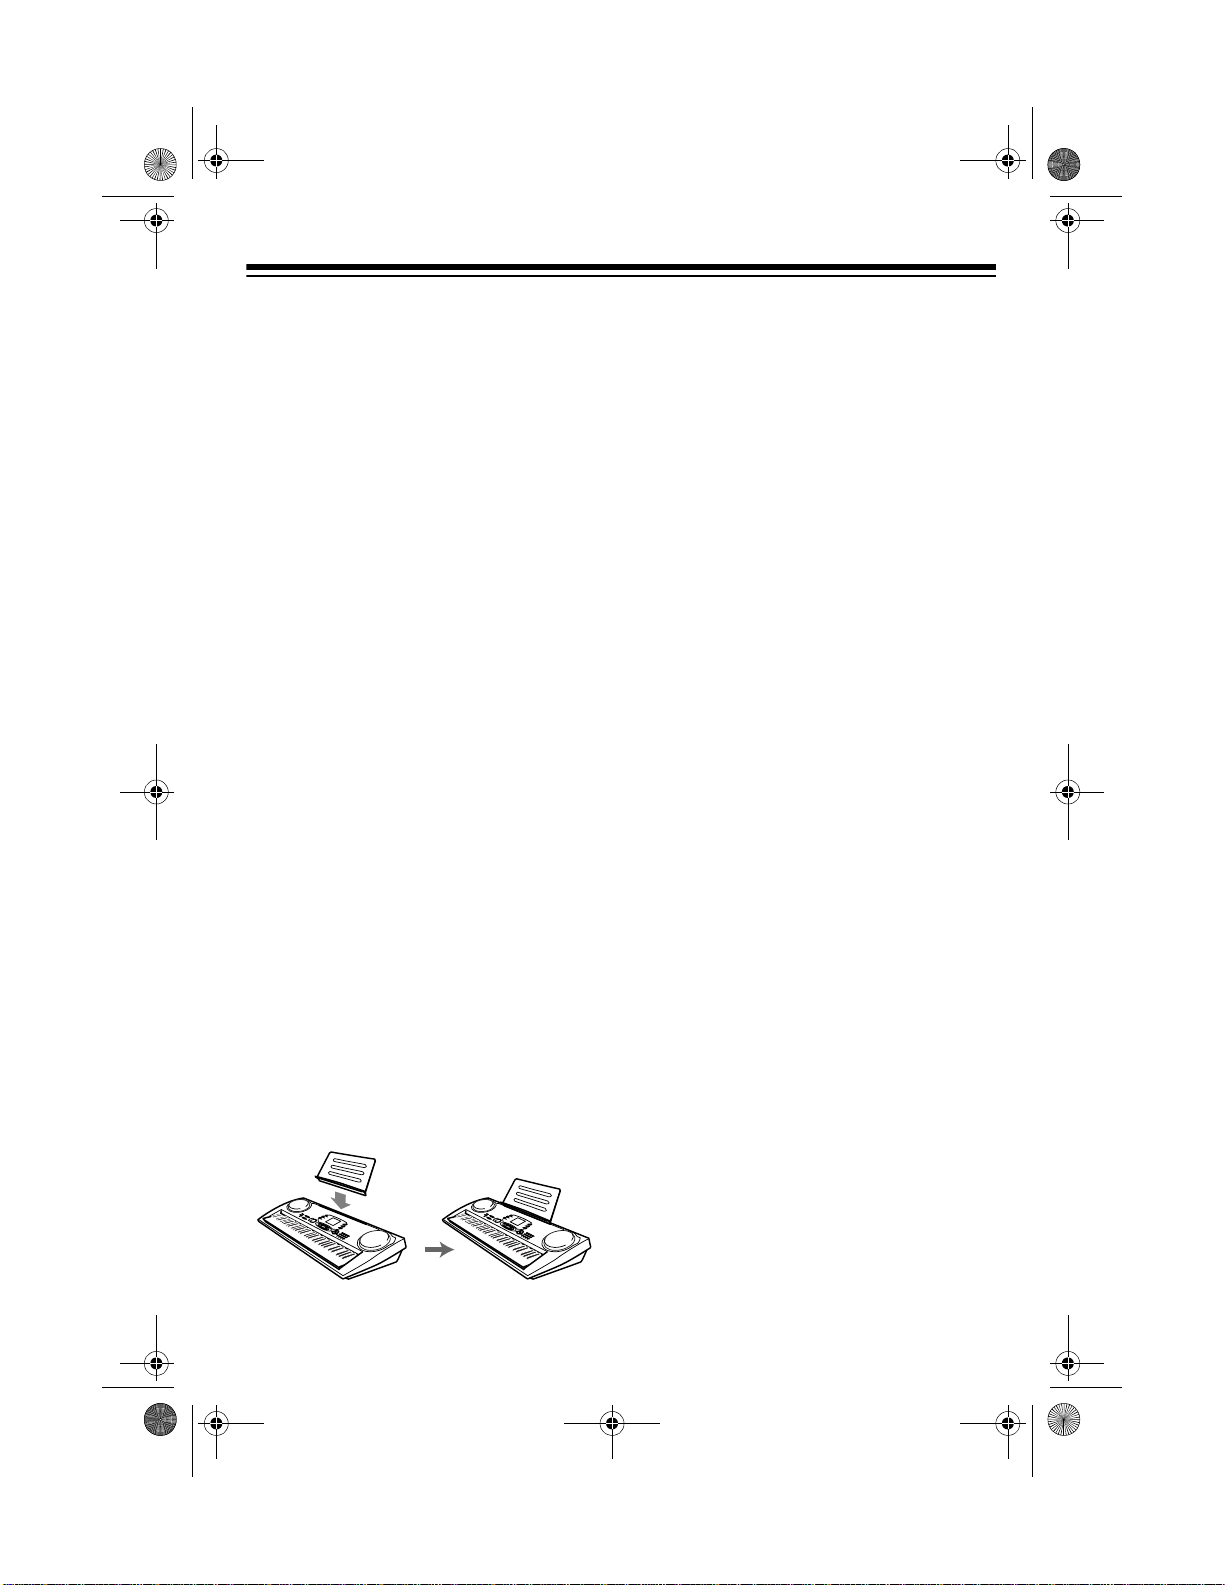
USING THE MUSIC STAND
To easily view sheet music while playing
your keyboard, insert the supplied music
stand into the slot on the top back panel.
42-4039.fm Page 9 Friday, March 3, 2000 8:55 AM
10
OPERATION
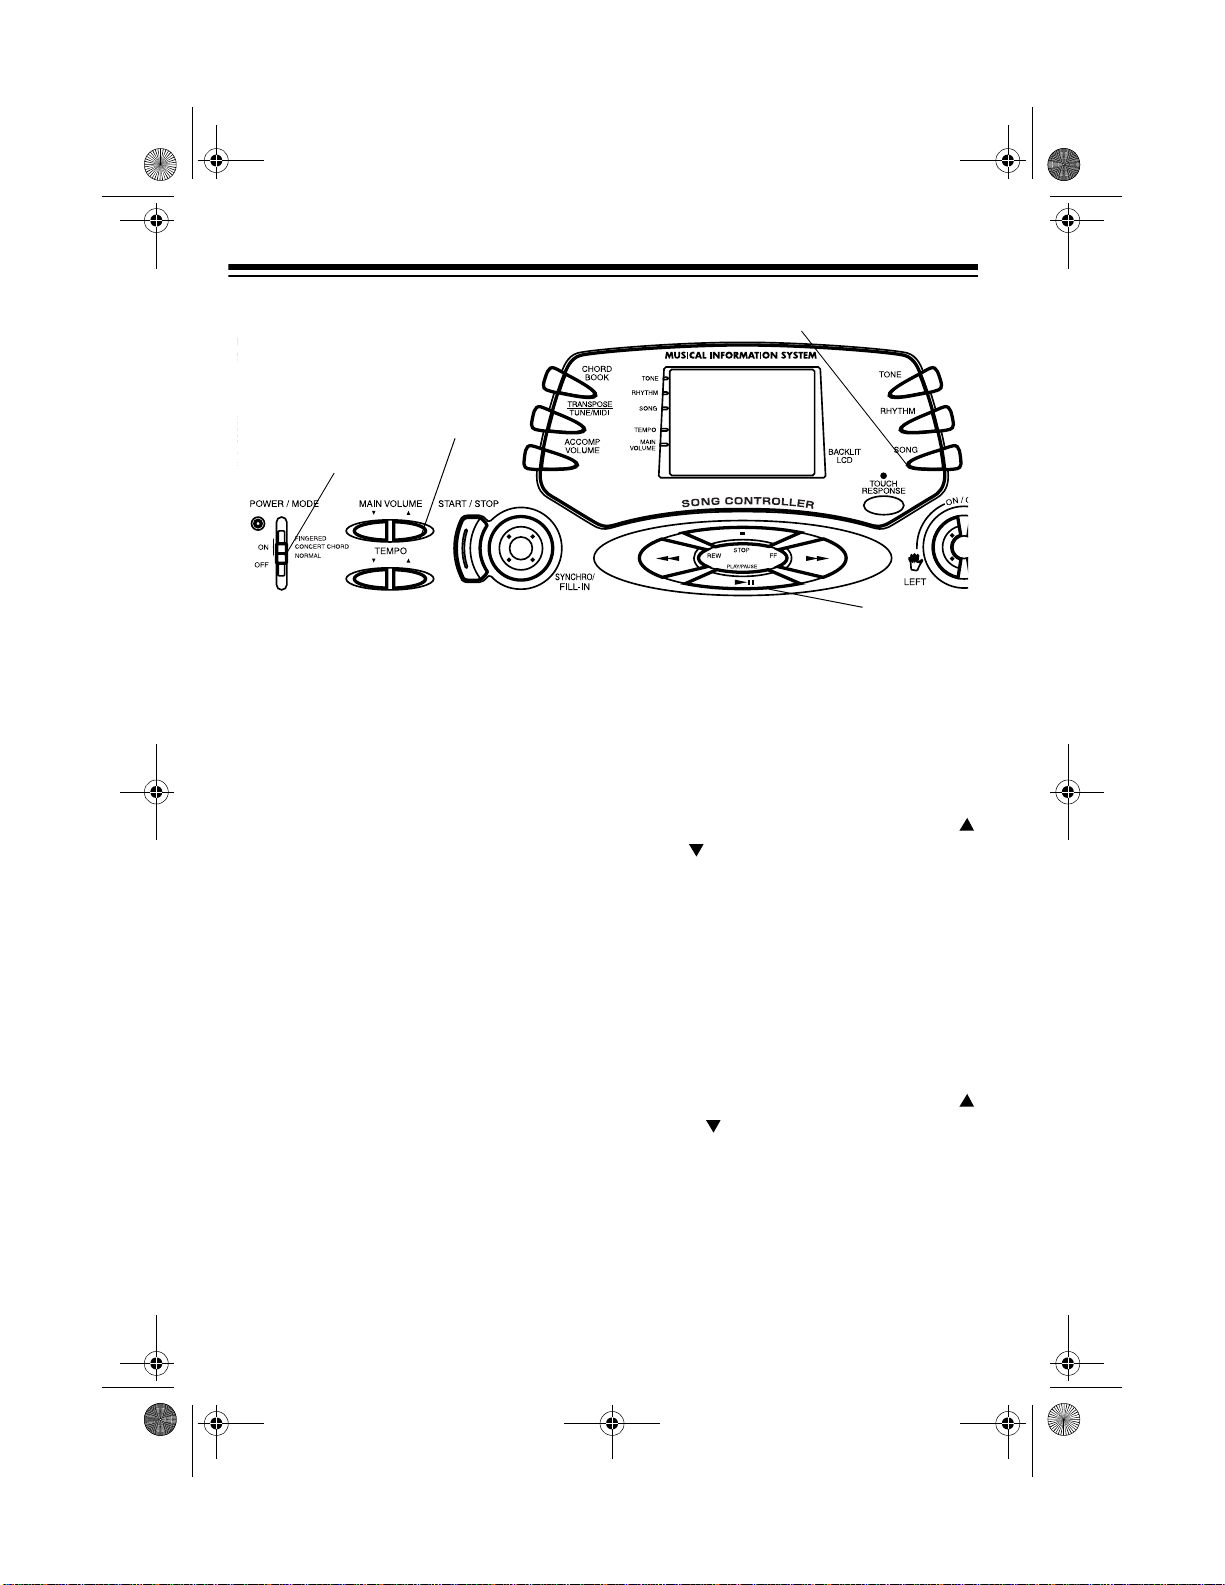
BASIC OPERATION
1. To turn on the keyboard, set
POWER/MODE
to
NORMAL
. The
POWER/MODE indicator and the
display light.
Note: To save powe r when operat-
ing on batteries, th e keyboard auto-
matically turns off after about 6
minutes if you do not press a key. To
turn on the keyboard again, set
POWER/MODE
to
OFF
then back to
NORMAL
.
2. To hear a sample of the MD-1150’s
many sounds, play a prerecorded
tune (see “Playing the Prerecorded
Tunes” on Page 11). To make your
own music, simply begi n playing the
keyboard.
Notes:
• The keyboard automatically
selects th e to ne PIA NO 1 ( No. 00)
when you turn the power on. To
select a different tone, see
“Selecting/Playi ng a Preset Tone”
on Page 14 .
• To select an auto-rhythm, see
“Using the Preset Auto- Rhythms”
on Page 15.
• To play auto ac comp animent, se e
“Using Auto Accompaniment” on
Page 17.
3. Repeatedly press
MAIN VOLUME
or to increase or decrease the
volume. The current setting
appears.
Notes:
• The keyboard’s volume ranges
from 0 (no sound) to 9 (maxi-
mum). Each time you turn on th e
keyboard, the volume is set to 7.
• To quickly change the volume set-
ting, hold down
MAIN VOLUME
or .
• To quickly return to the default
volume setting of 7, press both
MAIN VOLUME
buttons at the
same time.
• The volume level differs depend-
ing on the tone, accompa niment,
or song you s elected.
P
POWER/MODE
MAIN VOLUME
(Partial Control View)
SONG
PLAY/PAUSE
42-4039.fm Page 10 Friday, March 3, 2000 8:55 AM

11
4. To turn off the keyboard, set
POWER/MODE
to
OFF
. The POWER/
MODE indicator and the display turn
off.
Cancelling Auto Power Off
To have the keyboard not automatically
turn off during a session, turn on the
keyboard while holding down
TONE
.
The next time you turn the keyb oard off
then back on again, it wil l automatically
turn off after about 6 minutes.
PLAYING THE
PRERECORDED TUNES
You can listen to any of the 100 tunes
that come prerecorded in th e keyboard,
or you can turn off a tune’s melody or
accompaniment and play along on the
keyboard.
Playing Back a Prerecorded
Tune
1. Press
SONG
. An indicator appears
next to
SONG
on the display and the
number of the current tune appears.
Note: The keyboard alw ays selects
the tune “(Everything I Do) I Do It for
You” (No. 00) the first time you
press
SONG
after turning the power
on.
2. Choose a tune from the 100
SONGS list and enter its two-digit
number on the keypad.
Or, you can press
+
or
–
to move to
the next higher or lower numbered
tune.
Notes:
• Precede a single-digit number
with a 0. For example, to select
08 (“Killing Me Softly with His
Song”) press
0 8
.
• If you enter an incorrect first di git,
press
SONG
to clear your entry,
then enter the correct digit.
3. Press
PLAY/PAUSE
to start playing
the tune.
You c an change the tune by repe at-
ing Step 2 even while a tune is play-
ing. The new tune immediately
begins to play.
As a tune plays, the display shows:
• a “score” to show you the notes
that are playing (right side of th e
display)
• a “keyboard” to sho w you the fin-
gering and which keys are
pressed (bottom of the display)
• a “metronome” to show you the
selected tempo — the metro-
nome’s bar swings alo ng with the
tempo you selected, and the
black dots above the met ronome
show the beat co unt in the mea-
sure
• the chord name ( except for tunes
70 to 99) to the center ri ght of th e
display
• “play” indicator ( ) to the upper
left of the display
42-4039.fm Page 11 Friday, March 3, 2000 8:55 AM
12
Note: Each tune plays a different
preset tone for the melody, but you
can change to another tone even
while the tune is playing. Foll ow the
steps under “Selecting/Playing a
Preset Tone” o n Page 14 to sel ect a
different tone.
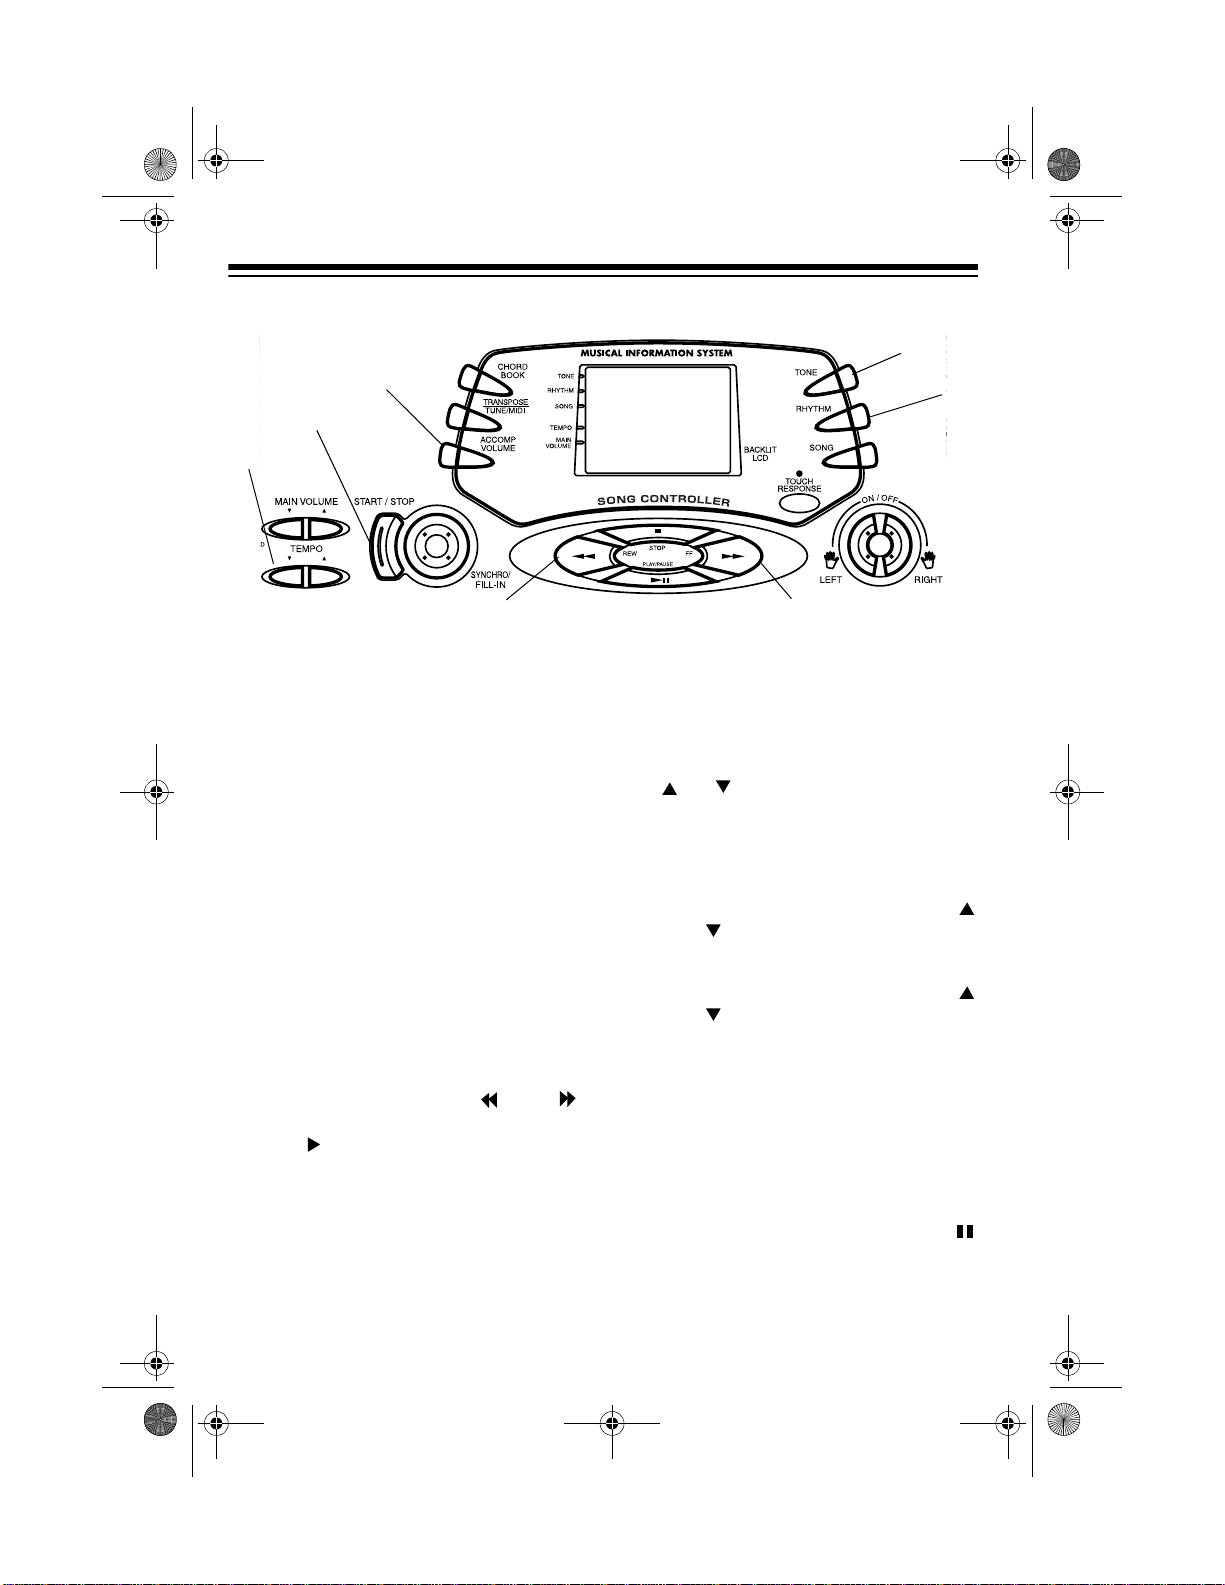
4. Use
MAIN VOLUME
to adjust the
overall volume as desired.
To adjust only the accompaniment
volume (except tunes 70 to 99),
press
ACCOMP VOLUME
then enter
the desired volume level using the
number keys (be tween 0 and 9) or
press
+
or
–
within 5 seconds.
5. To move to a particular sec tion of a
tune, hold down
REW
or
FF
during
play. The indicator ( or )
appears along with the p lay indica-
tor ( ). The keyboard sounds a
beep for each measure. When you
reach the section you want, releas e
REW
or
FF
to resume play.
Hint: You can find the scores for
most of the prerecorded tunes in the
Sheet Music and Play Gu ide for the
Prerecorded Tunes
, supplied with
your MD-1150. Refer to this sheet to
count the number of measures to
skip.
To change the te mpo, press
TEMPO
or . The current tempo setting
appears.
Notes:
• To quick ly s lo w dow n or spee d up
the tempo, hold down
TEMPO
or .
• To reset the tempo to its default
(original) speed, press
TEMPO
or at the same time.
• Tunes 70 to 99 are arranged so
the tempo changes during play.
However, if you select a tempo
other than the one you previo usly
selected, those t unes play in the
newest tempo.
6. To temporarily stop playing the tune,
press
PLAY/PAUSE
again.
appears. To stop the tune com-
pletely, press
STOP
.
START/STOP
ACCOMP
VOLUME
TONE
TEMPO
REW FF
ON/OFF
RHYTHM
42-4039.fm Page 12 Friday, March 3, 2000 8:55 AM
 Loading...