


User Manual
|
|
|
|
h |
|
|
|
s |
|
|
|
li |
|
|
|
g |
|
|
|
n |
|
|
|
|
E |
|
|
|
|

|
h |
|
|
|
|
lis |
|
|
Eng |
|
|
|
|
|
Getting to Know Xsight . . . . . . . . . . . . . . . . . . . . . . . . . . . . . . . . . . . . . . . . 3
Unpacking and Setting Up Xsight . . . . . . . . . . . . . . . . . . . . . . . . . . . . . . . . . . . . . . . . . . . . . . . . . . . . . . . . . . . . . 3 Using Xsight Keys and Touch screen . . . . . . . . . . . . . . . . . . . . . . . . . . . . . . . . . . . . . . . . . . . . . . . . . . . . . . . . . . 3 Keys Xsight COLOUR . . . . . . . . . . . . . . . . . . . . . . . . . . . . . . . . . . . . . . . . . . . . . . . . . . . . . . . . . . . . . . . . . . . . . . . . . 4 Keys Xsight TOUCH . . . . . . . . . . . . . . . . . . . . . . . . . . . . . . . . . . . . . . . . . . . . . . . . . . . . . . . . . . . . . . . . . . . . . . . . . . . 6 Initial Setup . . . . . . . . . . . . . . . . . . . . . . . . . . . . . . . . . . . . . . . . . . . . . . . . . . . . . . . . . . . . . . . . . . . . . . . . . . . . . . . . . 8
Home Screen and Everyday Use . . . . . . . . . . . . . . . . . . . . . . . . . . . 9
Favorites . . . . . . . . . . . . . . . . . . . . . . . . . . . . . . . . . . . . . . . . . . . . . . . . . . . . . . . . . . . . . . . . . . . . . . . . . . . . . . . . . . . . .9
Activities . . . . . . . . . . . . . . . . . . . . . . . . . . . . . . . . . . . . . . . . . . . . . . . . . . . . . . . . . . . . . . . . . . . . . . . . . . . . . . . . . . . . .9
Devices . . . . . . . . . . . . . . . . . . . . . . . . . . . . . . . . . . . . . . . . . . . . . . . . . . . . . . . . . . . . . . . . . . . . . . . . . . . . . . . . . . . . . .9
Profiles . . . . . . . . . . . . . . . . . . . . . . . . . . . . . . . . . . . . . . . . . . . . . . . . . . . . . . . . . . . . . . . . . . . . . . . . . . . . . . . . . . . . .10
Settings . . . . . . . . . . . . . . . . . . . . . . . . . . . . . . . . . . . . . . . . . . . . . . . . . . . . . . . . . . . . . . . . . . . . . . . . . . . . . . . . . . . .10
Settings . . . . . . . . . . . . . . . . . . . . . . . . . . . . . . . . . . . . . . . . . . . . . . . . . . . . . . . . . . . . . 11
Device Setup . . . . . . . . . . . . . . . . . . . . . . . . . . . . . . . . . . . . . . . . . . . . . . . . . . . . . . . . . . . . . . . . . . . . . . . . . . . . . . . 11
Add Device . . . . . . . . . . . . . . . . . . . . . . . . . . . . . . . . . . . . . . . . . . . . . . . . . . . . . . . . . . . . . . . . . . . . . . . . . . . . 11
Delete Device . . . . . . . . . . . . . . . . . . . . . . . . . . . . . . . . . . . . . . . . . . . . . . . . . . . . . . . . . . . . . . . . . . . . . . . . . . 12
View Code . . . . . . . . . . . . . . . . . . . . . . . . . . . . . . . . . . . . . . . . . . . . . . . . . . . . . . . . . . . . . . . . . . . . . . . . . . . . . 12
Learning . . . . . . . . . . . . . . . . . . . . . . . . . . . . . . . . . . . . . . . . . . . . . . . . . . . . . . . . . . . . . . . . . . . . . . . . . . . . . . . . . . . 13
Volume Control . . . . . . . . . . . . . . . . . . . . . . . . . . . . . . . . . . . . . . . . . . . . . . . . . . . . . . . . . . . . . . . . . . . . . . . . . . . . . 14
Clock . . . . . . . . . . . . . . . . . . . . . . . . . . . . . . . . . . . . . . . . . . . . . . . . . . . . . . . . . . . . . . . . . . . . . . . . . . . . . . . . . . . . . . . 15
Audio . . . . . . . . . . . . . . . . . . . . . . . . . . . . . . . . . . . . . . . . . . . . . . . . . . . . . . . . . . . . . . . . . . . . . . . . . . . . . . . . . . . . . . 15
Brightness . . . . . . . . . . . . . . . . . . . . . . . . . . . . . . . . . . . . . . . . . . . . . . . . . . . . . . . . . . . . . . . . . . . . . . . . . . . . . . . . . . 15
Timeout . . . . . . . . . . . . . . . . . . . . . . . . . . . . . . . . . . . . . . . . . . . . . . . . . . . . . . . . . . . . . . . . . . . . . . . . . . . . . . . . . . . . 16
Language . . . . . . . . . . . . . . . . . . . . . . . . . . . . . . . . . . . . . . . . . . . . . . . . . . . . . . . . . . . . . . . . . . . . . . . . . . . . . . . . . . 16
RF On/Off . . . . . . . . . . . . . . . . . . . . . . . . . . . . . . . . . . . . . . . . . . . . . . . . . . . . . . . . . . . . . . . . . . . . . . . . . . . . . . . . . . 16
Reset . . . . . . . . . . . . . . . . . . . . . . . . . . . . . . . . . . . . . . . . . . . . . . . . . . . . . . . . . . . . . . . . . . . . . . . . . . . . . . . . . . . . . . . 16
PC Setup . . . . . . . . . . . . . . . . . . . . . . . . . . . . . . . . . . . . . . . . . . . . . . . . . . . . . . . . . . . . 17
2 |
www.onefo rall.com |
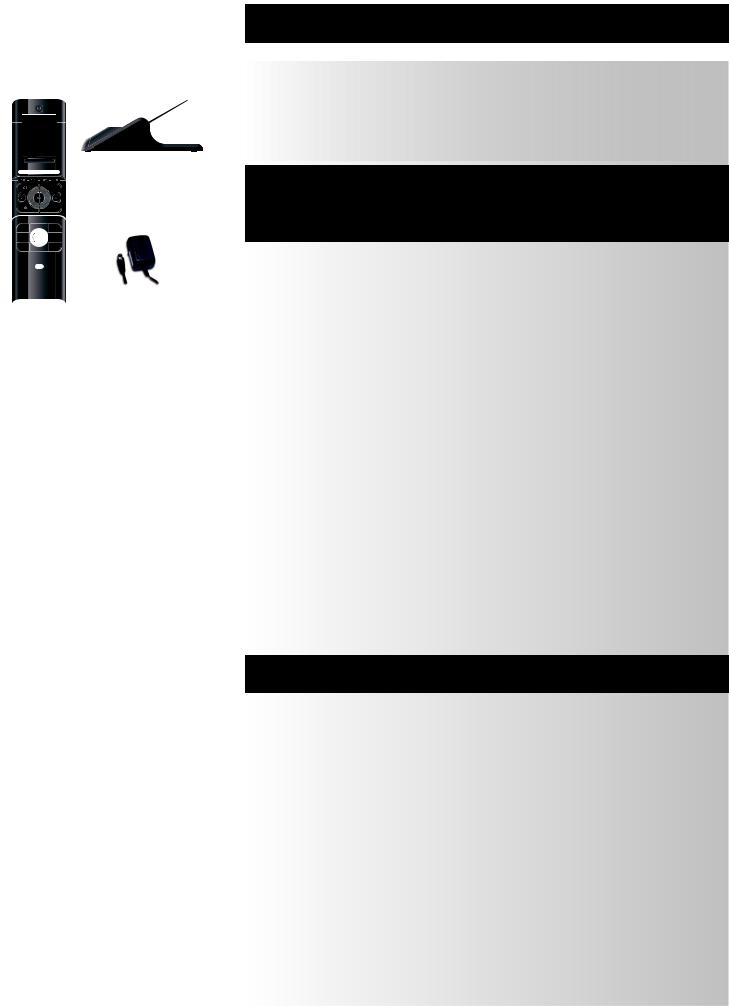
Charging Cradle
Lithium Ion battery
AC/DC Adaptor for Charging Cradle
USB Cable
CD Rom
Quick Start Guide
3x AA
Batteries
USB Cable
CD Rom
Quick Start Guide
Getting to Know Xsight
The Xsight ToUcH / Xsight coloUr is the latest fully-featured universal remote control from ONE FOR ALL. It offers full control of all your infra-red controlled Audio Video devices, as well as high-end features such as Learning, Profiles and Activity Control. You can set up your remote to control your devices by following the simple on-screen instructions on the remote, or connect to a PC for adding advanced features such as Activities and Favorites.
Unpacking and Setting Up “Xsight ToUcH”or“Xsight coloUr”
(See also the Xsight Quick Guide)
Inside the packaging you will find the following:
•Your“Xsight coloUr”or“Xsight ToUcH”Universal remote control
•charging cradle (Xsight ToUcH)
•ac/Dc adaptor for charging cradle (Xsight ToUcH)
•lithium Ion battery (Xsight ToUcH) or 3 x aa Batteries (Xsight coloUr)
•USB cable
•cD-rom with remote software and User manual
•Quick Start Guide
Firstly, install the battery supplied in the packaging by matching the contacts + and – to the illustrations in the battery compartment.
Only Xsight TOUCH: The supplied battery comes partially charged, but we recommend charging the battery for approximately an hour before use.
To do this, connect the charging cradle to a power outlet using the supplied AC/DC Adaptor and place the remote on the cradle. The display will show the “battery charging icon”.In order to fully charge the remote, leave it in the cradle for approximately 4 hours.
Tobegin setting up your Xsight you have two options:
1)Follow the on-screen instructions on the remote while in front of the devices you wish to control. This is the quickest method to set up the remote for basic control of your devices. For more advanced setup, you can connect the remote to your PC once it is operating all your devices correctly.
2)To use PC setup, including Activities (translation), Favorites (translation) etc, insert the CD-ROM into your PC and follow the install wizard. Connect the remote when prompted by the software using the included USB Cable.
Using Xsight Keys and Touchscreen
To start using your remote at any time, simply touch it or press a key and it will respond and the backlight will illuminate. You can adjust the amount of time the light is on for in the Settings Menu (see page 16).
Xsight features the following types of controls:
•hard keys on the remote’sfront that let you control common device features.
•fully-interactive screen (Xsight TOUCH features a Touch Screen) that provides functions for your devices appropriate to your pattern of use.
www.oneforall.com |
3 |

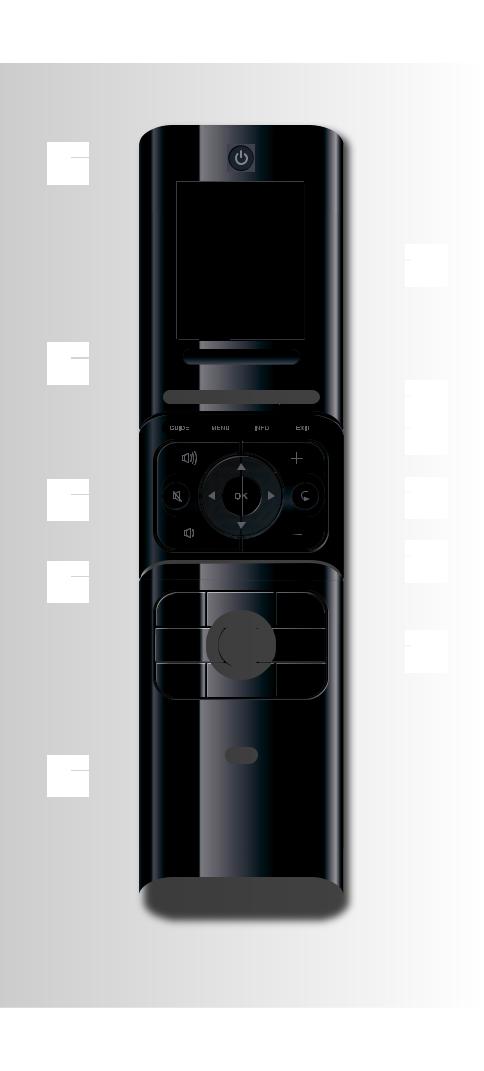
Keys Xsight coloUr
1
2
3
4
5
|
|
|
|
|
|
|
|
|
|
|
|
|
|
|
|
|
|
|
|
|
|
|
|
|
|
|
|
|
|
|
|
|
|
|
|
|
|
|
|
|
|
|
|
|
|
|
|
|
6 |
7 |
|
|
|
|
|
|
|
|
|
|
|
|
|
|
|
|
|
||
|
|
|
|
|
|
|
|
|
|
|
|
|
|
|
|
|
|
|
|
|
|
|
|
|
|
|
|
|
|
|
|
|
|
|
|
|
|
|
|
 8 9
8 9 


10
11
4 |
|
www.onefo rall.com |

Keys Xsight coloUr
1
2
3
4
5
Power key
Turns device ON/OFF.
Screen keys
3 keys on either side of the screen give you direct access to the functions displayed on the screen.
Scroll bar
Scrolls pages.
Home key
Shortcut key – One short press goes one back to the previous level in the Menu structure. Holding down for two seconds takes the remote to the Home screen.
favorites
Shortcut key – In user mode accesses the Favorites screen directly. Disabled in Setup mode. activities
Shortcut key – In user mode accesses the Activities screen directly. Disabled in Setup mode.
Devices
Shortcut key – In user mode accesses the Devices screen directly. Disabled in Setup mode.
Guide key
Brings up device guide if your original remote has guide. menu key
Brings up device menu if your original remote has menu. In DVD, it brings up disc menu.
Info
Displays information about your video or audio feed. exit
Exit guide and menu.
6
7
8
9
channel keys
Operates channel up/down functions in video devices and preset up/down in audio devices.
Volume keys
Controls volume and mute.
navigation keys
Operates the navigation functions of your device if available.
Teletextkeys
Accesses teletext functions if your device has text features.
Transport keys
10Operates DVR functions and performs traditional Play/Pause/Fast Forward/Rewind/Record on all other video and audio devices.
Digit 0-9
11Direct digit entry or text entry for customizing labels. aV key
Selects input function of your device. E.g. TV/SAT,TV/DVD. enter/ -/—
Operates channel enter and 10+ digit entry.
lcD screen
Your remote’scustomizable screens can be set up via the remote or by connecting to your PC. To use the functions displayed on the screen, press the buttons adjacent to the function displayed on the screen. To move between the pages, click the scroll bar to the left or right. Multiple pages will wrap around, so for example if you scroll right to the last page, scrolling right again will take you back to the first page.
www.oneforall.com |
5 |
Keys Xsight ToUcH
1
2
3
4
5
|
|
|
|
|
|
|
|
|
|
|
|
|
|
|
|
|
|
|
|
|
|
|
|
|
|
|
|
|
|
|
|
|
|
|
|
|
|
|
|
|
|
|
|
|
|
|
|
|
|
|
|
|
6 |
7 |
|
|
|
|
|
|
|
|
|
|
|
|
|
|
|
||
|
|
|
|
|
|
|
|
|
|
|
|
|
|
|
|
|
|
 8 9
8 9 


10
11
6 |
|
www.onefo rall.com |
 Loading...