


M3
Manufacturer
Digital Automatic Blood Pressure Monitor
Model M3
Instruction Manual
English
Français
Deutsch
Italiano
Español
Nederlands
IM-HEM-7200-E(V)-03-10/2010
5329530-9B
Русский
EU-representative
OMRON HEALTHCARE Co., Ltd.
53, Kunotsubo, Terado-cho, Muko, Kyoto,
617-0002
JAPAN
OMRON HEALTHCARE EUROPE B.V.
Scorpius 33, 2132 LR Hoofddorp, THE NETHERLANDS
www.omron-healthcare.com
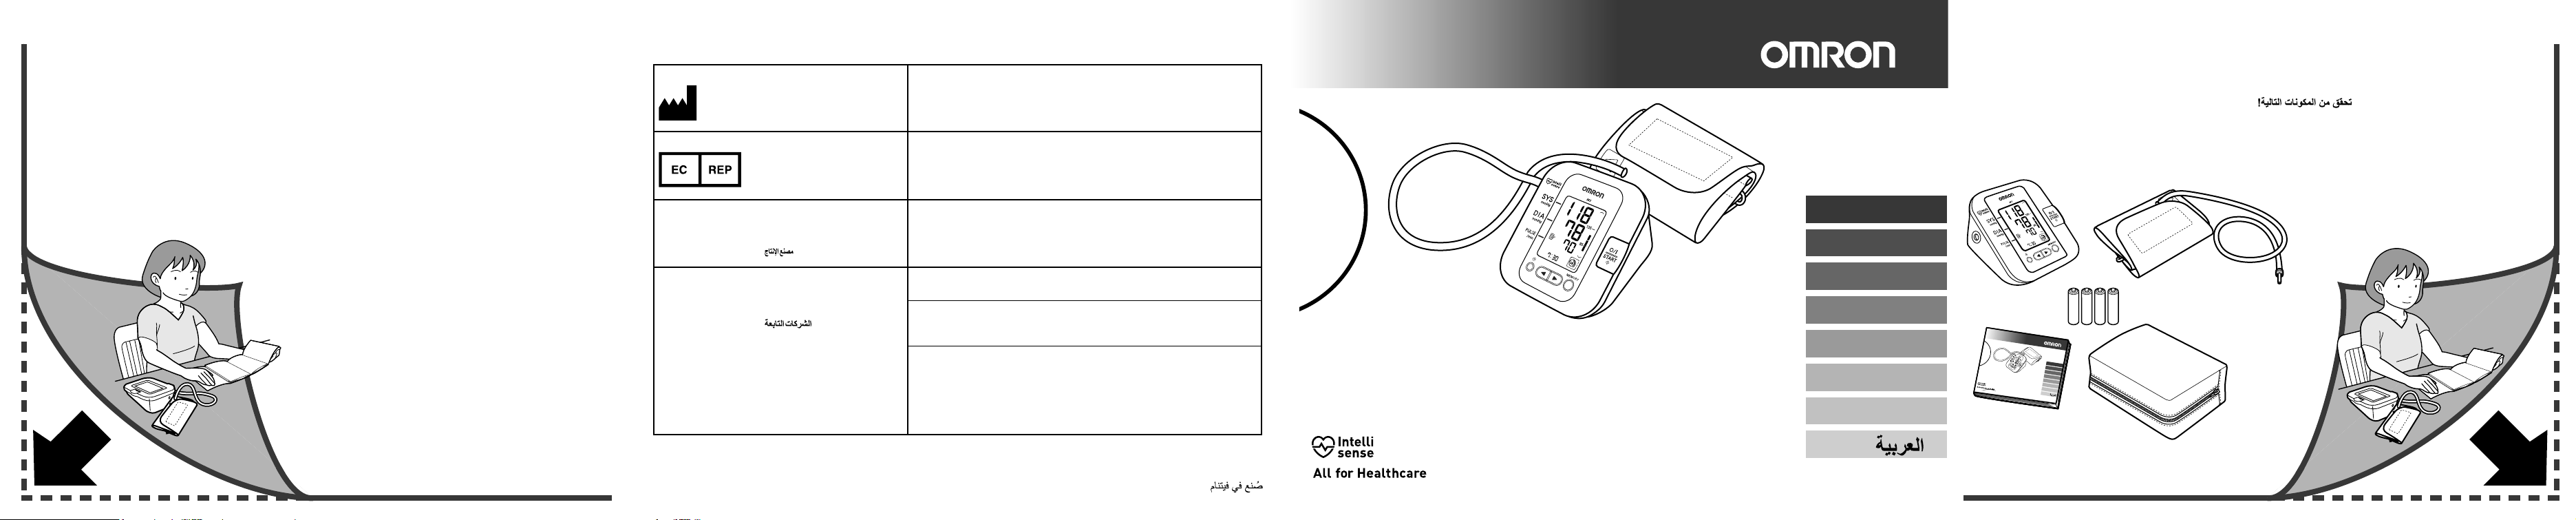
Check following components!
Vérifier les composants suivants !
Prüfen Sie folgende Teile des Lieferumfangs!
Controllare i componenti indicati di seguito!
¡Compruebe los siguientes componentes!
Controleer de volgende onderdelen!
Проверьте следующие компоненты!
Production facility
Site de production
Produktionsstätte
Stabilimento di produzione
Subsidiary
Succursale
Niederlassung
Consociata
Oficina de producción
Productiefaciliteit
Производственное подразделение
Empresa filial
Dochteronderneming
Дочерняя компания
OMRON HEALTHCARE MANUFACTURING VIETNAM CO., LTD.
Binh Duong Province, VIETNAM
OMRON HEALTHCARE UK LTD.
Opal Drive, Fox Milne, Milton Keynes, MK15 0DG U.K.
OMRON MEDIZINTECHNIK HANDELSGESELLSCHAFT mbH
John-Deere-Str. 81a, 68163 Mannheim, GERMANY
www.omron-medizintechnik.de
OMRON
14, rue de Lisbonne, 93561 Rosny-sous-Bois Cedex, FRANCE
Uniquement pour le marché français: OMRON Service Après Vente
Nº Vert 0 800 91 43 14
consommateurs@omron-sante.fr
www.omron-sante.fr/contact
SANTÉ FRANCE SAS
Made in Vietnam
English
Français
Deutsch
Italiano
Español
Digital Automatic Blood Pressure Monitor
Nederlands
Model M3
Русский
Instruction Manual
Fabricado en Vietnam
Geproduceerd in VietnamFabriqué en Vietnam
Prodotto in Vietnam
Сделано во ВьетнамеHergestellt in Vietnam
IM-HEM-7200-E(V)-05-11/2011
5329530-9D
Contents
21
b
F
J
L
c
Thank you for purchasing the OMRON M3 Digital Automatic Blood Pressure Monitor.
The OMRON M3 is a compact, fully automatic blood pressure monitor, operating on the
oscillometric principle. It measures your blood pressure and pulse rate simply and quickly. For
comfortable controlled inflation without the need of pressure pre-setting or re-inflation the
devices uses its advanced “IntelliSense” technology.
Intended Use
This product is designed to measure the blood pressure and pulse rate of people within the
range of the designated arm cuff, following the instructions in this instruction manual.
It is mainly designed for general household use. Please read the Important Safety Information
in this instruction manual before using the unit.
F
E
A
B
C
G
H
D
Important Safety Information ........................1
d
a
1. Overview ...................................................3
2. Preparation ...............................................4
2.1 Installing/Replacing the Batteries...........4
2.2 Setting the Buzzer/ Date and Time ........5
3. Using the Unit ...........................................6
3.1 Applying the Arm Cuff ............................6
3.2 How to Sit Correctly ...............................7
3.3 Taking a Reading ...................................8
3.4 Using the Memory Function .................10
Please read this instruction manual thoroughly before using the unit.
Please keep for future reference.
For specific information about your own blood pressure, CONSULT YOUR
DOCTOR.
4. Troubleshooting and Maintenance .......12
4.1 The Icons and Error Messages ........... 12
4.2 Troubleshooting................................... 14
4.3 Maintenance........................................ 16
4.4 Storage................................................ 17
5. Optional Parts.........................................18
6. Technical Data ........................................19
7. Some Useful Information about Blood Pressure .... 22
I J K
M
N
U
V
O
W
P
X
L
Q
R
S
Y
Z
T

Important Safety Information
Consult your doctor prior to using in pregnancy or if diagnosed with arrhythmia or arteriosclerosis.
Please read this section carefully before using the unit.
Warning:
• Indicates a potentially hazardous situation which, if not avoided, could result in death or serious injury.
(General Usage)
• Always consult your doctor. Self-diagnosis of measurement results and self-treatment are dangerous.
• People with severe blood flow problems, or blood disorders, should consult a doctor before using the unit, as cuff
inflation can cause internal bleeding.
(AC Adapter Usage)
• Never plug in or unplug the power cord from the electric outlet with wet hands.
(Battery Usage)
• If battery fluid should get in your eyes, immediately rinse with plenty of clean water. Consult a doctor immediately.
Caution:
• Indicates a potentially hazardous situation which, if not avoided, may result in minor or moderate injury to the user
or patient or damage to the equipment or other property.
(General Usage)
• Do not leave the unit unattended with infants or persons who cannot express their consent.
• Do not use the unit for any purpose other than measuring blood pressure.
• Do not disassemble the unit or arm cuff.
• Use only the approved arm cuff for this unit. Use of other arm cuffs may result in incorrect measurement results.
• Make sure that the air tube is not wrapped around other parts of your body when taking measurements at night.
This could result in injury when the air pressure in the air tube is increased.
• Do not leave the cuff wrapped on the arm if taking measurements during the night. This could result in injury.
• Do not inflate the arm cuff over 299 mmHg.
• Do not use a mobile phone or other devices that emit electromagnetic fields, near the unit. This may result in
incorrect operation of the unit.
• Do not operate the unit in a moving vehicle (car, airplane).
• To inflate the cuff manually, refer to Section 3.3. If the cuff is over inflated, it can cause internal bleeding.
EN
1

Important Safety Information
(AC Adapter Usage)
• Use only the original AC adapter (optional) designed for this unit. Use of unsupported adapters may damage and/or
may be hazardous to the unit.
• Plug the AC adapter into the appropriate voltage outlet. Do not use a multiple-tap.
• Do not use the AC adapter if the unit or the power cord is damaged. Turn off the power and unplug the power cord
immediately.
(Battery Usage)
• If battery fluid should get on your skin or clothing, immediately rinse with plenty of clean water.
• Use only four “AA” alkaline or manganese batteries with this unit. Do not use other types of batteries.
• Do not insert the batteries with their polarities incorrectly aligned.
• Replace old batteries with new ones immediately. Replace all four batteries at the same time.
• Remove the batteries if the unit will not be used for three months or more.
• Do not use new and used batteries together.
General Precautions
• Do not apply strong shocks and vibrations to or drop the unit and arm cuff.
• Do not take measurements after bathing, drinking alcohol, smoking, exercising or eating.
• Do not forcibly bend the arm cuff or bend the air tube excessively.
• When removing the air tube, pull on the air plug at the connection with the main unit not the tube itself.
• Do not inflate the arm cuff when it is not wrapped around your arm.
• Do not wash the arm cuff or immerse it in water.
• Read and follow the “Important information regarding Electro Magnetic Compatibility (EMC)” in the Technical Data
Section.
• Read and follow the “Correct Disposal of This Product” in the Technical Data Section when disposing of the device
and any used accessories or optional parts.
2
1. Overview
Open the rear cover page to read following:
The alphabet in the rear cover page correspond to those in the body page.
A
B
CDEFGHIJK
LMNOPQR
STU
V
W
X
Y
Z
Main unit
Display
O/I START ( ) button
Memory button
Up/Down ( ) buttons
Buzzer and Date/Time setting
( ) button
Air Jack
Battery compartment
AC adapter jack (for optional AC
adapter)
Arm cuff
Display
Systolic blood pressure
Diastolic blood pressure
Heartbeat symbol
(Flashes during measurement)
Memory symbol
Deflation symbol
Average value symbol
Movement error symbol
Date/Time display
Blood pressure level indicator
Pulse display
Buzzer symbol
Arm cuff (Medium cuff: arm
circumference 22-32cm)
Coloured Marker
Cuff wrapping guide
Battery low symbol
Irregular heartbeat symbol
Air tube
Air plug
EN
3
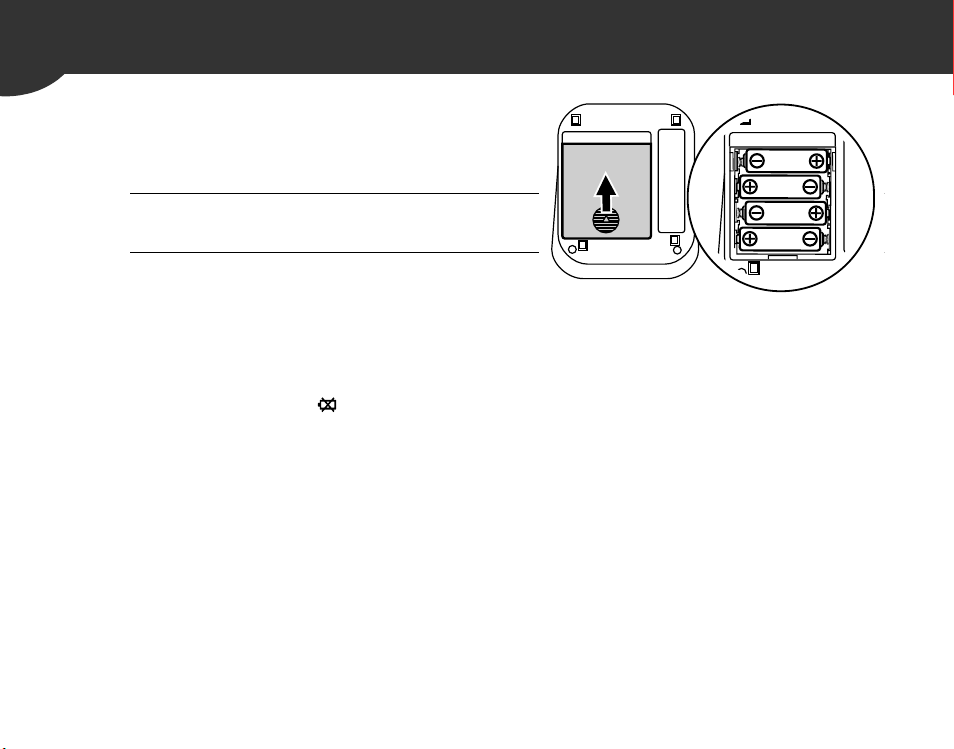
2. Preparation
2.1
Installing/Replacing the
Batteries
1. Remove the battery cover.
2. Insert four “AA” batteries as
indicated in the battery
compartment and then replace the battery cover.
Notes:
• If the battery low symbol ( ) appears on the display, turn the unit off then replace all batteries at the same
time.
• The measurement values continue to be stored in memory even after the batteries are replaced.
Disposal of used batteries should be carried out in accordance with the national
regulations for the disposal of batteries.
4
2. Preparation
1)
2)
Push or buttons to
select On or Off.
Push the button to confirm.
On
Off
1)
2)
Ye ar
Month
Day
Hour
Minute
Push or buttons to
change.
Push the button to confirm.
Next setting appears.
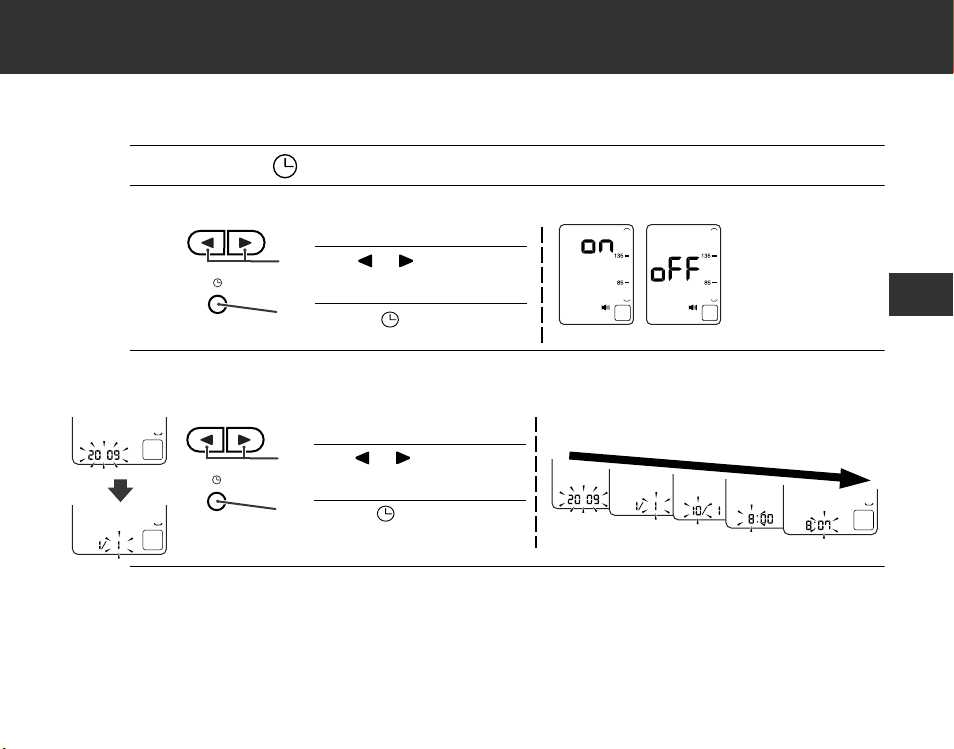
2.2
Setting the Buzzer/ Date and Time
1. Press the button.
2. Set the Buzzer.
3. Set the monitor to the correct date and time before
taking a measurement for the first time.
4. Press the O/I START button to store the setting.
Notes:
• If the batteries have been removed for 30 seconds or more, the date and time setting will need to be reset.
• If the date and time are not set, “-:--” appears during or after measurement.
EN
5
3. Using the Unit
Open both the front and rear covers to read following:
The alphabet and number in the cover page correspond to those in the body page.
L
FaJ
b
3.1
Applying the Arm Cuff
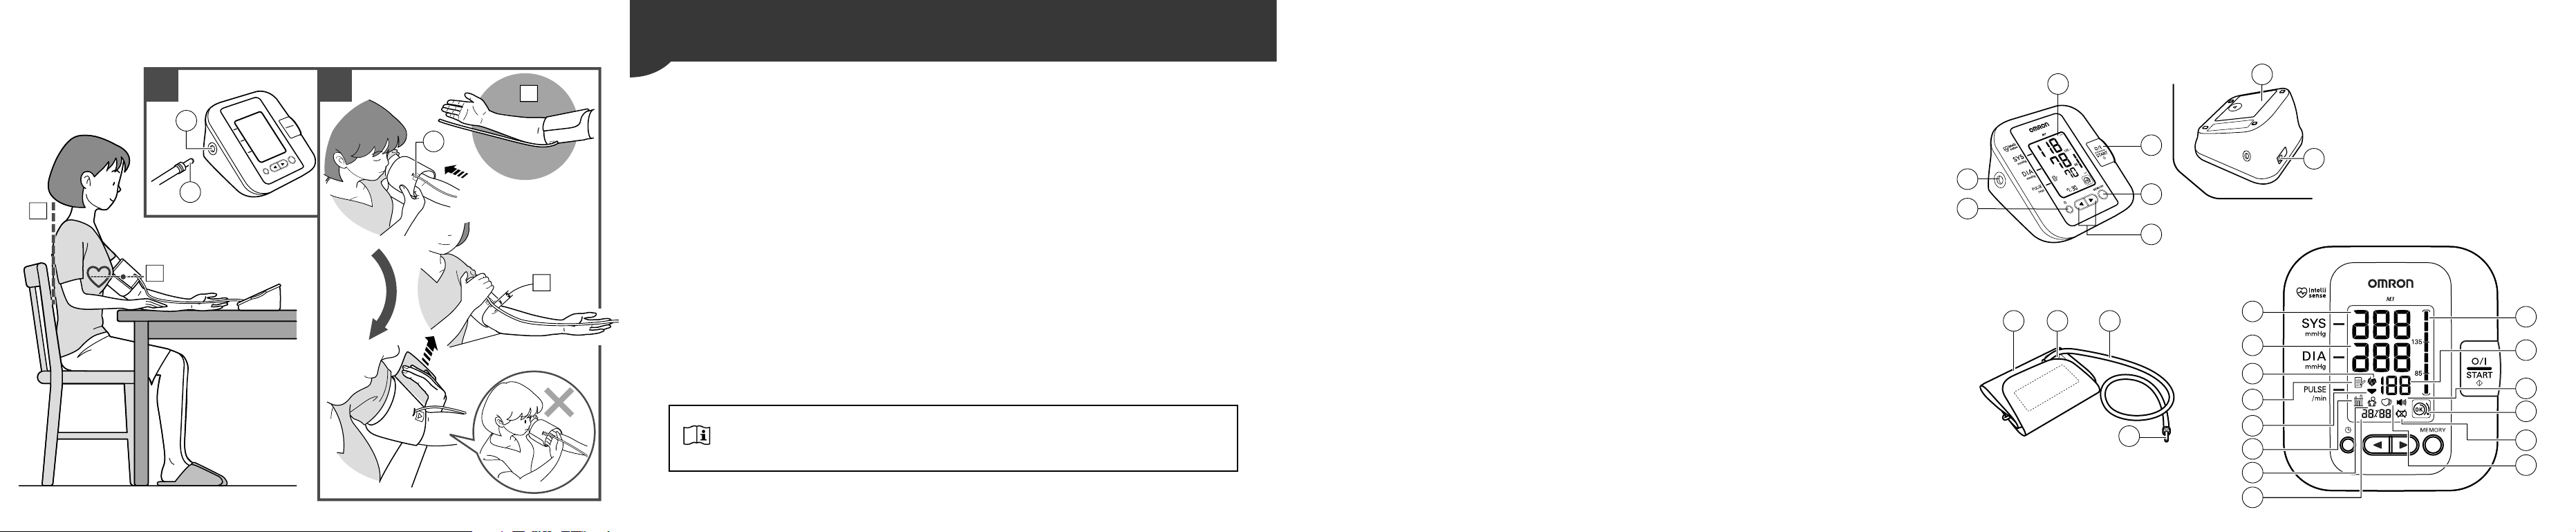
Remove tight-fitting clothing or tight rolled up sleeve from your upper arm.
Do not place the cuff over thick clothes.
1. Insert the air plug into the air jack.
2. Put your arm through the cuff loop.
3. Position the arm correctly.
The bottom edge of the cuff should be 1 to 2 cm above the elbow. Marker (arrow
under tube) is centred on the middle of your inner arm. Close the fabric fastener FIRMLY.
Notes:
• When you take a measurement on the right arm, air tube will be at the side of your elbow. Be careful not
to rest your arm on the air tube. ---
• The blood pressure can differ between the right arm and the left arm, and therefore also the measured
blood pressure values can be different. Omron recommends to always use the same arm for
measurement. If the values between the two arms differ substantially, please check with your physician
which arm to use for your measurement.
6
 Loading...