


User's Guide
http://www.omega.com e-mail: info @omega.com
LDP-124, LDP-126, LDP-144 AND LDP-146
OPERATOR´S MANUAL FOR CLOCK MODELS

|
OMEGAnet |
On-Line Service |
Internet e-mail |
|
http://www.omega.com |
info@omega.com |
|
|
|
|
|
|
|
Servicing North America: |
|
USA : |
One Omega drive, Box 4047 |
|
|
ISO 9001 Certified |
Stamford, CT 06907-0047 |
|
|
|
|
Tel : (203) 359-1660 |
Fax : (203) 359 7700 |
|
|
e-mail : info@omega.com |
|
Canada : |
976 Bergar |
|
|
|
|
Laval (Quebec) H7L 5A1 |
|
|
|
Tel : (514) 856-6928 |
Fax : (514) 856-6886 |
|
|
e-mail : info@omega.com |
|
USA and Canada : |
For immediate technical or application assistance: |
||
Sales Service : 1-800-826-6342 / 1-800-TC-OMEGASM |
|||
|
|
Customer Service : 1-800-622-2378 / 1-800-622-BESTSM |
|
|
|
Engineering Service : 1-800-872-9436 / 1-800-USA-WHENSM |
|
|
|
Telex : 996404 EASYLINK : 62968934 |
CABLE : OMEGA |
Mexico and |
|
|
|
Latin America : |
Tel : (95) 800-826-6342 |
Fax : (95) 203-359-7807 |
|
|
|
En Español : (203) 359-7803 |
e-mail : espanol@omega.com |
Benelux: |
Servicing Europe: |
||
Postbus 8034, 1180 LA Amstelveen, The Netherlands |
|||
|
|
Tel : (31) 20 6418405 |
Fax : (31) 20 6434643 |
|
|
Toll Free in Benelux : 0800 0993344 |
|
|
|
e-mail : nl@omega.com |
|
Czech Republic : |
ul. Rude armady 1868, 733 01 Karvina-Hranice |
||
|
|
Tel : 420 (69) 6311899 |
Fax : 420 (69) 6311114 |
|
|
Toll Free : 0800-1-66342 |
e-mail : czech@omega.com |
France : |
9, rue Denis Pappin, 78190 Trappes |
|
|
|
|
Tel : (33) 130-621-400 |
Fax : (33) 130-699-120 |
|
|
Toll Free in France : 0800-4-06342 |
|
|
|
e-mail : france@omega.com |
|
Germany/Austria : |
Daimlerstrasse 26, D-75392 Deckenpfronn, Germany |
||
|
|
tel : 49 (07056) 3017 |
Fax : 49 (07056) 8540 |
|
|
Toll Free in Germany : 0130 11 21 66 |
|
|
|
e-mail : info@omega.de |
|
United Kingdom : |
One Omega Drive, River Bend Thecnology Centre |
||
ISO 9002 Certified |
Northbank, Irlam, Manchester |
|
|
|
|
M44 5EX, England |
|
|
|
Tel : 44 (161) 777-6611 |
Fax : 44 (161) 777-6622 |
Toll Free in the United Kingdom : 0800-488-488 e-mail : info@omega.co.uk
It is the policy of OMEGA to comply with all worldwide safety and EMC/EMI regulations that apply. OMEGA is constantly pursuing certification of its products to the European New Approach Directives. OMEGA will add the CE mark to every appropriate device upon certification.
The information contained in this document is believed to be correct, but OMEGA Engineering, Inc. accepts no liability for any errors it contains, and reserves the right to alter specifications without notice.
WARNING : These products are not designed for use in, and should not be user for, patient connected applications.
Page :1
CONTENTS
DESCRIPTION SECTION PAGE
===========================================================================
IMPORTANT SAFETY CONSIDERATIONS |
1 |
3 |
UNPACKING AND INSPECTION |
2 |
4 |
MAIN FEATURES |
3 |
4 |
MODELS |
4 |
5 |
MODEL LDP-1XX-C0, DISPLAY TIME USING THE FORMAT MM : SS |
4.1 |
5 |
MODEL LDP-1XX-C1, DISPLAY TIME USING THE FORMAT HH : MM |
4.2 |
5 |
MODEL LDP-1XX-C2, DISPLAY TIME USING THE FORMAT HH : MM : SS |
4.3 |
5 |
GENERAL SPECIFICATIONS |
5 |
6 |
FRONT VIEW, DESCRIPTION |
6 |
7 |
REAR VIEW, DESCRIPTION |
7 |
7 |
WIRING |
8 |
8 |
POWER SUPPLY, RECOMMENDED WIRING |
8.1 |
8 |
FUSES |
8.2 |
8 |
CONTROL LINES, ALARM AND SERIAL OUTPUT |
8.3 |
8 |
NOTES |
8.4 |
8 |
EXCITATION VOLTAGE FOR SENSORS |
8.5 |
9 |
POWERUP AND OPERATION |
9 |
9 |
REAL TIME CLOCK |
9.1 |
9 |
RUN TIME CLOCK |
9.2 |
9 |
UP / DOWN TIMING |
9.2.1 |
9 |
CONNECTION EXAMPLES |
9.2.2 |
10 |
RUN TIME ALARM SETTING |
9.3 |
10 |
SERIAL DATA OUTPUT |
9.4 |
10 |
CONFIGURATION |
10 |
10 |
POWER SELECTION |
10.1 |
10 |
INSTRUMENT CONFIGURATION |
10.2 |
10 |
CONTROL BOARD POSITION |
10.2.1 |
11 |
DIP SWITCH AND JUMPERS LOCATION |
10.2.2 |
11 |
DIP SWITCH CONFIGURATION |
10.2.3 |
11 |
JUMPERS CONFIGURATION |
10.2.4 |
12 |
SERIAL DATA OUTPUT CONFIGURATION |
10.2.5 |
12 |
INSTALLATION |
11 |
13 |
MECHANICAL DIMENSIONS |
12 |
13 |
APPENDIX 1: LDP-1XX-CX AS SLAVE REPEATER |
|
14 |
APPENDIX 2: TIME-NET CONFIGURATION AND CONNECTIONS |
|
15 |
WARRANTY |
|
16 |
OTHER PRODUCTS |
|
17 |
Page : 2
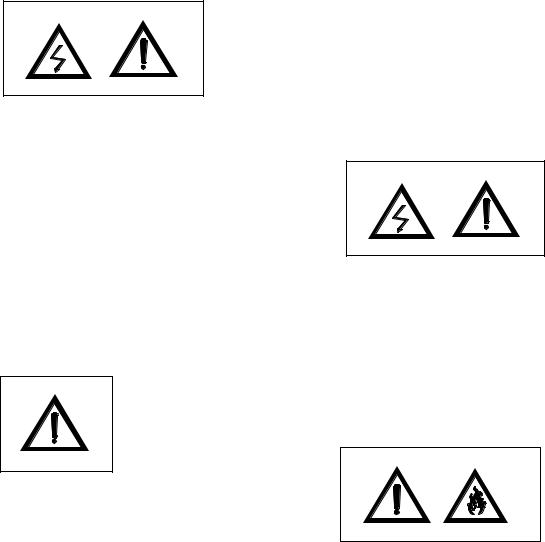
1.- IMPORTANT SAFETY CONSIDERATIONS
INSTALLATION
PRECAUTIONS.-
The installation and the future use of this unit must be done by suitable qualified personnel. The unit has not AC
(mains) switch, it will be in operation as soon as power is connected.
The installation must
incorporate an external main switch.
The unit has a protection fuse incorporated on the AC socket, if it is necessary to change or replace, use the time lag fuse according IEC
127/2 and the values indicated below.
200 mA when the unit is operating at 230 Vac 400 mA when the unit is operating at 115 Vac.
Install also the necessary devices to protect the operator and the process when using the unit to control a machine or process where injury to personnel or damage to equipment or process, may occur as a result of failure of the unit.
See paragraph 8, WIRING and paragraph 10, CONFIGURATION and check that all jumpers are on the correct position.
SAFETY PRESCRIPTIONS.-
The unit has been designed and tested under EN-61010-1 rules and is delivered in good condition. This operator's manual contains useful information for electrical connections. Do not make wiring signal changes or connections when power is
applied to the unit. Make signal connections before power is applied and, if reconnection is required, disconnect the AC (mains) power before such wiring is at-
tempted.
Install the unit in places with a good ventilation to avoid the excessive heating. And far from electrical noise source or magnetic field generators such as power relays, electrical motors, speed controls etc...
The unit cannot be installed in open places. Do not use until the installation is finished.
POWER SUPPLY.-
The power supply must be connected to the adequate terminals (see the connection instructions). The characteristics of the power supply are showed on the label on the rear part. Please make sure that the unit is correctly connected to a power supply of the correct voltage and frequency.
Do not use other power supply otherwise permanent damage may be caused to the unit.
Do not connect the unit to power sources heavily loaded or to circuits which power loads in cycle ON-OFF or to circuits which power inductive loads.
SIGNAL WIRING.-
Certain considerations must be given when install the signal input and control wires. If the wires are longs can act like an antenna and introduce the electrical noise to the unit, therefore :
Do not install the signal input or control wires in the same conduit with power lines, heaters, solenoids, SCR controls etc....and always far from these elements.
When shielded wires are used, connect the shield to the common terminal and leave unconnected the other end of the shield and do not connect to the machine ground.
SAFETY CONSIDERATIONS
PRESCRIPTIONS.-
Before starting any operation of adjustment, replacement, maintenance or repair, the unit must be disconnected from any kind of power supply.
Keep the unit clean , to assure good functioning and performance. Use for it a clean and humid rag. Do not use for the frontal lens abrasive products, solvents, alcohol, etc... because its transparence could be damaged and this may cause difficulty for a correct vision of the reading.
To prevent electrical or fire hazard, do not expose the unit to excessive moisture.
Do not operate the unit in the presence of flam-
mable gases or fumes, such as environment constitutes a definite safety hazard. The unit
is designed to be mounted in a metal panel.
If the unit shows signs of damage, or is not able to show the expected measures, or has been stored in a bad conditions or a protection failure can occur, then do not attempt to operate and keep the unit out of service.
IN CASE OF FIRE
1.- Disconnect the unit from the power supply. 2.- Give the alarm according to the local rules.
3.- Switch off all the air conditioning devices.
4.- Attack the fire with carbonic snow, do not use water in any case.
WARNING : In closed areas do not use systems with vaporized liquids.
CONNECTIONS
All wiring connections are made using push-in and Sub-D cable connectors.
There is a separate connector block for power supply and input&control signal. Please make sure that each connector block is connected on the adequate place.
The wire cross section recommended for power supply is 2.5 mm2.
PANEL MOUNTING
Verify that the panel cut-out is correctly according to the dimensions indicated on page 13 with a minimum depth of 150 mm. (5.9").
Install the fixation pieces in the lateral guides of the unit by its rear part and then turn the screw firmly against the panel, until the unit is totally hold on.
See paragraph 12 on page 13.
Page : 3

2.- UNPACKING AND INSPECTION
It is advisable to do a detailed reading of this Manual before mounting the instrument. This Operator's Manual contains all the technical specifications : electricals as well as mechanics, both necessary to do a correct installation and also a good use of the instrument.
At the same time the user will acquire the knowledge needed to obtain the best performances of the product.
Check that inside the present cardboard box, there are the following :
1 Instrument Model LDP-1XX-C0, C1 or C2.
1 Operator's Manual.
1 Connector for Power Supply.
1 Screw-clamp connectors, 4 pins female for alarm output.
1 Sub-D male connector of 9 pins and 1Sub-D female connector of 15 pins
2 Pieces for fixing the unit against the panel.
If there are some doubts or inquiries about the present instrument, please contact OMEGA
ENGINEERING´S customer service department.
When the shipment arrives remove the Packing List and verify that you have received all equipment. Then inspect the box and the instrument, and if there is evidence of damage caused by bad handling during the transport, it is advisable to make a careful inspection of all damages making a note of all of them and to pass on this information directly to the Transport Company.
If this occurs but with insured material, ask the Transport Company for instructions about submitting a claim
3.- MAIN FEATURES
The Large Displays for real time clock (12 or 24 hours) or run up or run down clock are made up of four different series.
The clock accepts inputs from contact closure and other sensor inputs to start, stop and reset the run time clock.
Transducer excitation of 15 Vdc nominal is available. The units feature a run time alarm with optically isolated transistor switch output, and RS422 level two wire transmission of the displayed time.
The main features of each serie are the following :
Serie LDP-124-XX : 4 digits type LED, seven segments, red or green colour with 57 mm (2.3") height.
Serie LDP-126-XX : 6 digits type LED, seven segments, red or green colour with 57 mm (2.3") height.
Serie LDP-144-XX : 4 digits type LED, seven segments, red or green colour with 100 mm (4") height.
Serie LDP-146-XX : 6 digits type LED, seven segments, red or green colour with 100 mm (4") height.
The complete reference for each instrument is obtained replacing the ""XX" by the corresponding references for every Model (C0, C1 & C2). See paragraph 4.
Page : 4
The common features for all series are the following:
MECHANICAL.- Housed in a rugged extruded aluminium profile housing for panel mounting or free standing. Finished in anodized black colour. The frontal lens is mounted with a special rubber profile which provides the front part of the unit with an IP-65 protection.
CONTROL SIGNALS .- Three inputs, sharing one common return. The operating mode depends on interlinking of the three control lines
CONNECTIONS.- |
For output alarm are made using one screw-clamp connector of 4 terminals located on |
|
the rear part of the unit. |
|
For control signals are made using one Sub-D connector of 15 terminals located on the |
|
rear part of the unit. |
|
For serial data output are made using one Sub-D connector of 9 terminals located on |
|
the rear part of the unit. |
|
The recommended wire cross section is 0.5 mm2. |
|
For Power Supply uses a push-in cable connector with 2 terminals for power and 1 |
|
terminal for earth ground. |
|
The recommended wire cross section is 2.5 mm2. |
|
The fuse is located in the Power Supply socket, as well as the spare fuse. |
MEMORY.- |
Non volatile static RAM type, to maintain the real time clock running in power down or |
|
in case of power failure during two years. It allows 100,000 cycles ON/OFF. |
|
On the run time clock the data and alarm value will be stored also for a maximum of |
|
2 years. |
RESET.- |
By remote push-button using the connector of 15 terminals on the rear part. |
|
Only for run time clock. |
4.- MODELS
4.1.- MODEL LDP-1XX-C0. Display time using the format MM: SS
Real time clock : 59 minutes, 59 seconds. Run time clock : 99 minutes 59 seconds.
Real time clock or run time clock is internally DIP switch selectable. Run up or run down controlled by internal dip switch.
4.2.- MODEL LDP-1XX-C1. Display time using the format HH : MM
Real time clock : 12 or 24 hours selectable. Run time clock : 99 hours 59 minutes.
Real time clock or run time clock is internally DIP switch selectable. Run up or run down controlled by internal dip switch.
4.3.- MODEL LDP-1XX-C2. Display time using the format HH : MM : SS
Real time clock : 12 or 24 hours.
Run time clock : 99 hours, 59 minutes, 59 seconds.
Real time clock or run time clock is internally DIP switch selectable. Run up or run down controlled by internal dip switch.
Page : 5
 Loading...