


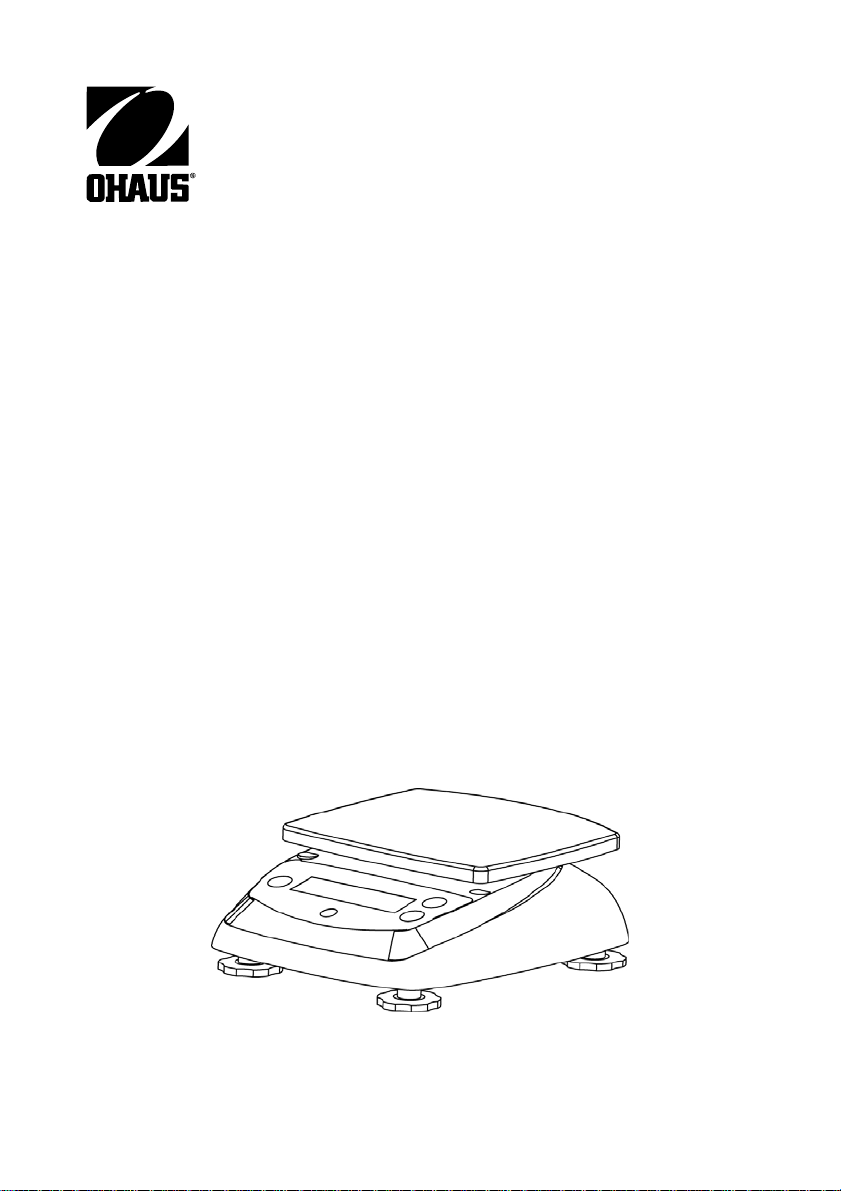
V31X501
Ohaus V31X501, V31X3, V31X6, V31XH202, V31XH2 Instruction Manual
...
Instruction Manual
Serie Valor
Manual de instrucciones
Valor
Manuel d’instructions
Valor
Bedienungsanleitung
Serie Valor
Manuale di istruzioni
TM
Valor 3000 Series
TM
TM
série 3000
TM
3000-Serie
TM
3000
3000


Valor 3000 Series Scales
EN-1
1. INTRODUCTION
This manual contains installation, operation and maintenance instructions for the
TM
Valor
3000 Series Scales. Please read the manual completely before using the
scale.
1.1 Safety Precautions
Please follow these safety precautions:
• Verify that the AC Adapter input voltage matches the local AC power supply.
• Use the scale only in dry locations.
• Do not operate the scale in hostile environments.
• Do not drop loads on the platform.
• Do not place the scale upside down on the pan.
• Service should be performed only by authorized personnel.
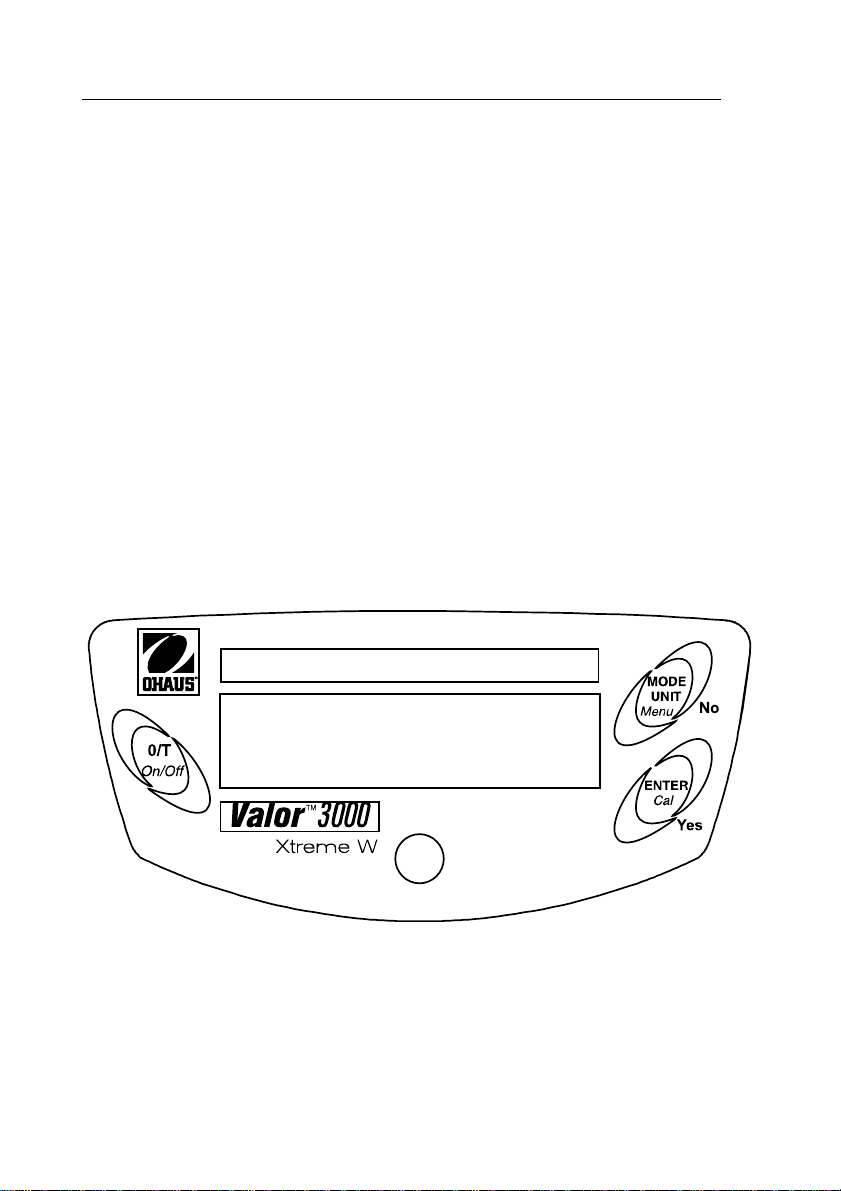
1.2. Controls
Figure 1-1. Controls.
EN-2 Valor 3000 Series Scales
TABLE 1-1. CONTROL FUNCTIONS.
Button Functions
O/T On/Off
MODE/UNIT
Menu
ENTER Cal
Short Press: (when off) Turns scale on
(when on) Sets display to zero
Tares weight of item on pan
Long Press: Turns the scale off
Short Press Steps through active units and modes
Long Press: Enters menu
Short Press (Menu) “No” (toggles through available settings)
Short Press: Stores 100% reference in % mode
Stores reference sample in SG mode
Long Press Initiates span calibration process
Short Press(Menu) “Yes” (selects/accepts displayed setting)
2. INSTALLATION
2.1 Package Contents
• Scale
• Pan
• Power Adapter
• Instruction Manual
• Warranty Card
2.2. Location
Use the scale on a firm, steady surface. Avoid locations with excessive air current,
vibrations, heat sources, or rapid temperature changes. For models V31XW301,
V31XW3, V31XW6 adjust the leveling feet so the bubble is centered in the circle.

Valor 3000 Series Scales
EN-3
Figure 2-1. Leveling the Scale.
2.3. Transport lock
Open the battery cover. Move the transport lock switch to “Unlock” position. Install
4 C (LR14) batteries, if desired. Reinstall the battery cover
Figure 2-2. Battery Installation.
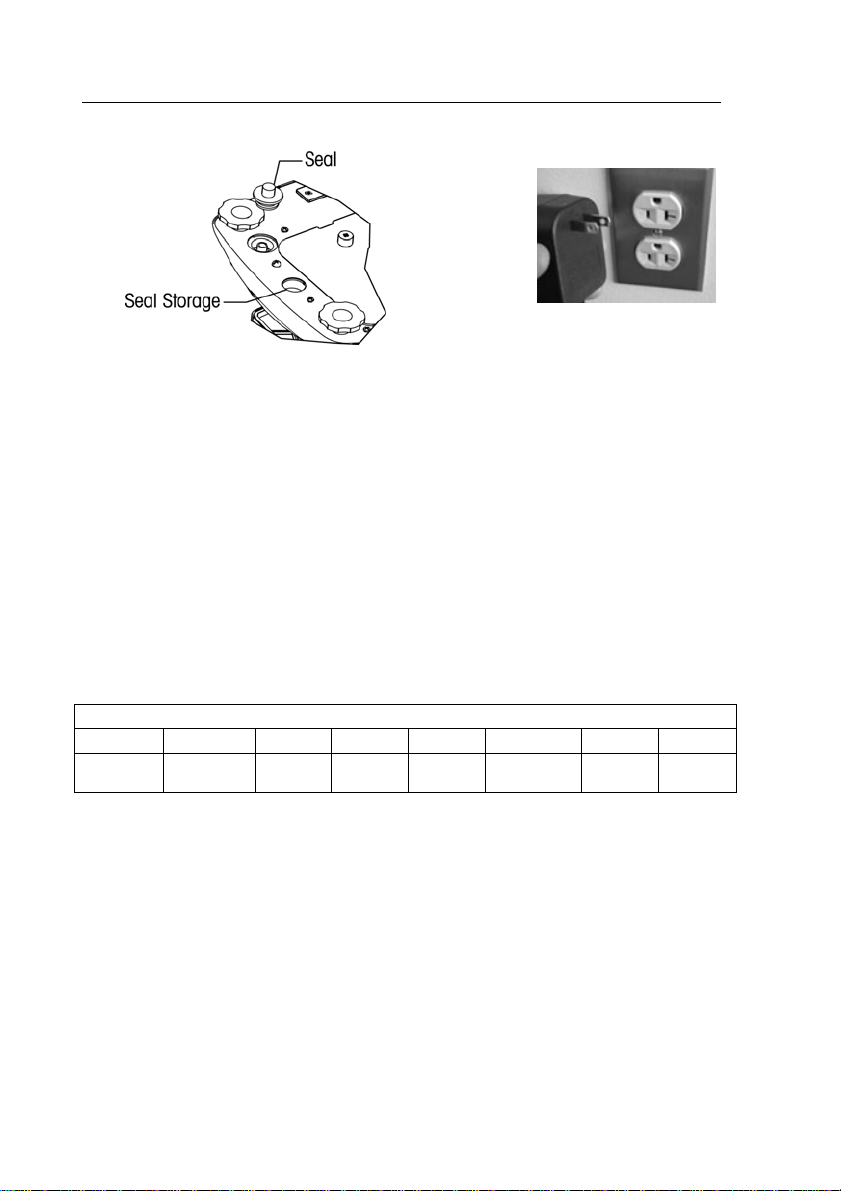
2.4 Power
The AC adapter(included) may be used to power the scale when battery power is not
available. Remove the rubber seal in the bottom. Store it in the location provided.
Connect the AC adaptor plug to the input jack.
NOTE: To prevent water ingress during cleaning, insert back rubber seal into the
input jack recess.
EN-4 Valor 3000 Series Scales
Figure 2-3. Power Connection and Sealing
.
2.5 Initial Calibration
When the scale is first installed, it should be calibrated to ensure accurate weighing
results.
Press and hold the ENTER/Cal button until CAL is displayed. When the button is
again pressed and released, the display shows –C- while zero reading is stored.
Next, the display shows the calibration weight value in grams. Place the specified
calibration weight (sold separately) on the pan. See Table 2-1 for appropriate
weights. The display shows –C- while the reading is stored. The display returns to
the previous application mode and scale is ready for use.
TABLE 2-1. CALIBRATION WEIGHTS.
MODELS
Calibration
Weights
V31XH202 V31XH2 V31X3 V31X6 V31XW301 V31XW3 V31XW6
200g 2 kg 3 kg 6 kg 300 g 3 kg 6 kg
3. OPERATION
3.1 Weighing Mode
Use this mode to measure the weight of a sample in the selected unit of measure.
1. Press MODE/UNIT/Menu until the desired unit icon is displayed.
2. Put an empty container on the pan, then press O/T/On/Off to tare the container
weight.
3. Add material to the container. The display shows the weight of the material.

Valor 3000 Series Scales
EN-5
3.2 Percent Mode
Use this mode to measure the weight of a sample as a percentage of a reference
weight.
1. Press MODE/UNIT/Menu until Set.rEF and the % icon are displayed.
2. Press No to use the reference weight in memory and proceed to step 6.
3. Press Yes to establish a new reference. Scale display will now blink until
reference is stored.
4. Put an empty container on the pan, then press O/T/On/Off to tare the container
weight.
5. Add the desired amount of material to the container, then press ENTER/Cal to
store the displayed weight. The display shows 100%.
6. Replace the reference material with new material. The display shows the
percentage of the sample compared to reference weight.
3.3 Specific Gravity Mode
Use this mode to measure the specific gravity of a sample.
1. Press MODE/UNIT/Menu until Set.rEF and the S icon are displayed.
2. Press No to use the reference weight in memory and proceed to step 6.
3. Press Yes to establish a new reference weight. Scale display will now blink until
reference is stored.
4. Put an empty container on the pan, then press O/T/On/Off to tare the
container weight.
5. Fill the container with water, then press ENTER/Cal to store the displayed
weight. The display shows the water weight with the S icon blinking.
6. Replace the water with the same volume of sample material, then press
ENTER/Cal. The display shows the specific gravity of the sample.
3.4 Fluid Ounce Mode
Use this mode to measure the fluid ounce volume of a sample.
1. Press MODE/UNIT/Menu until the FL icon is displayed.
2. Put an empty container on the pan, then press O/T/On/Off to tare the
container weight.
3. Fill the container with sample material. The display shows the volume of the
sample.
EN-6 Valor 3000 Series Scales
4. SETTINGS
The Menu allows the user to customize scale settings.
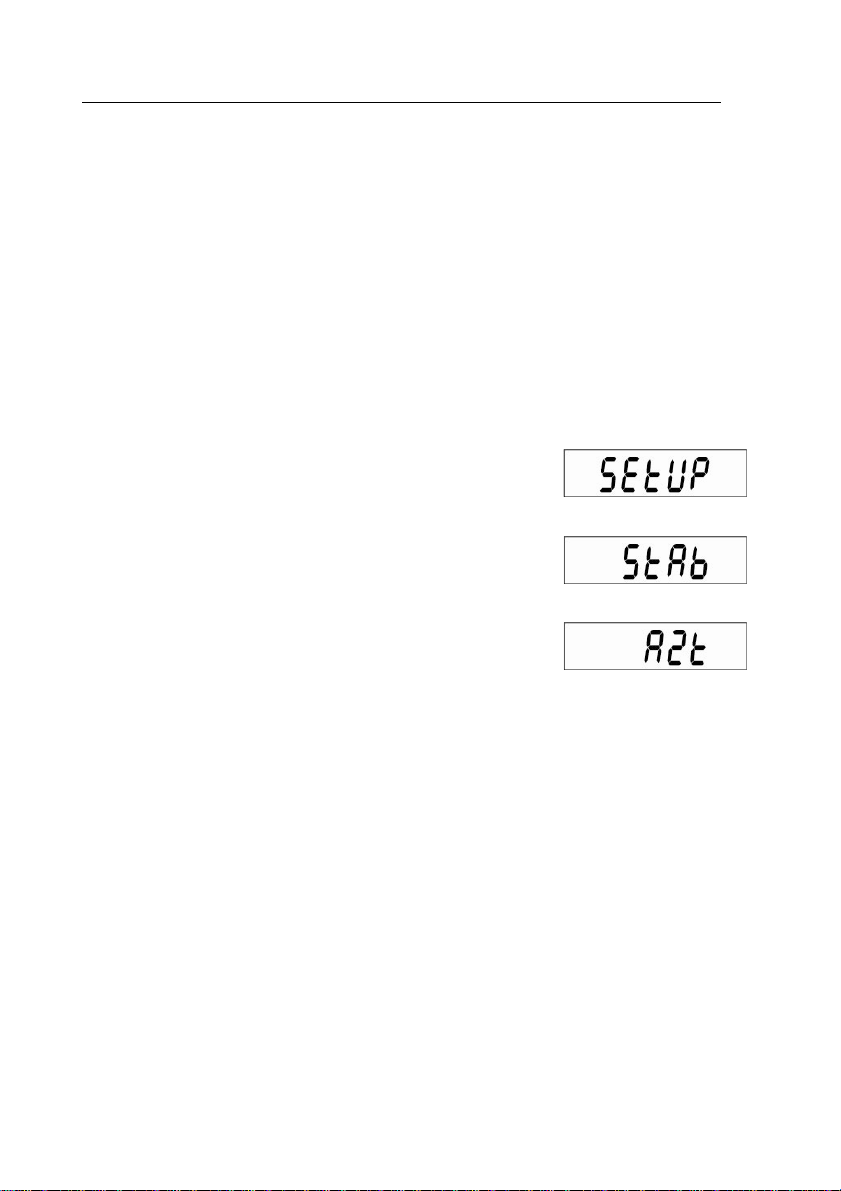
4.1 Menu Navigation
Press and hold MODE/UNIT/Menu button until SEtUP is displayed, then release it.
Press Yes to enter the displayed menu. or press No to advance to the next menu.
Once in the menu, press Yes to view the menu item setting or press No to move to
the next menu item. When viewing the setting, press Yes to accept the setting, or
press No to change the setting. When End is displayed, press Yes to advance to the
next menu or No to return to the top of the current menu.
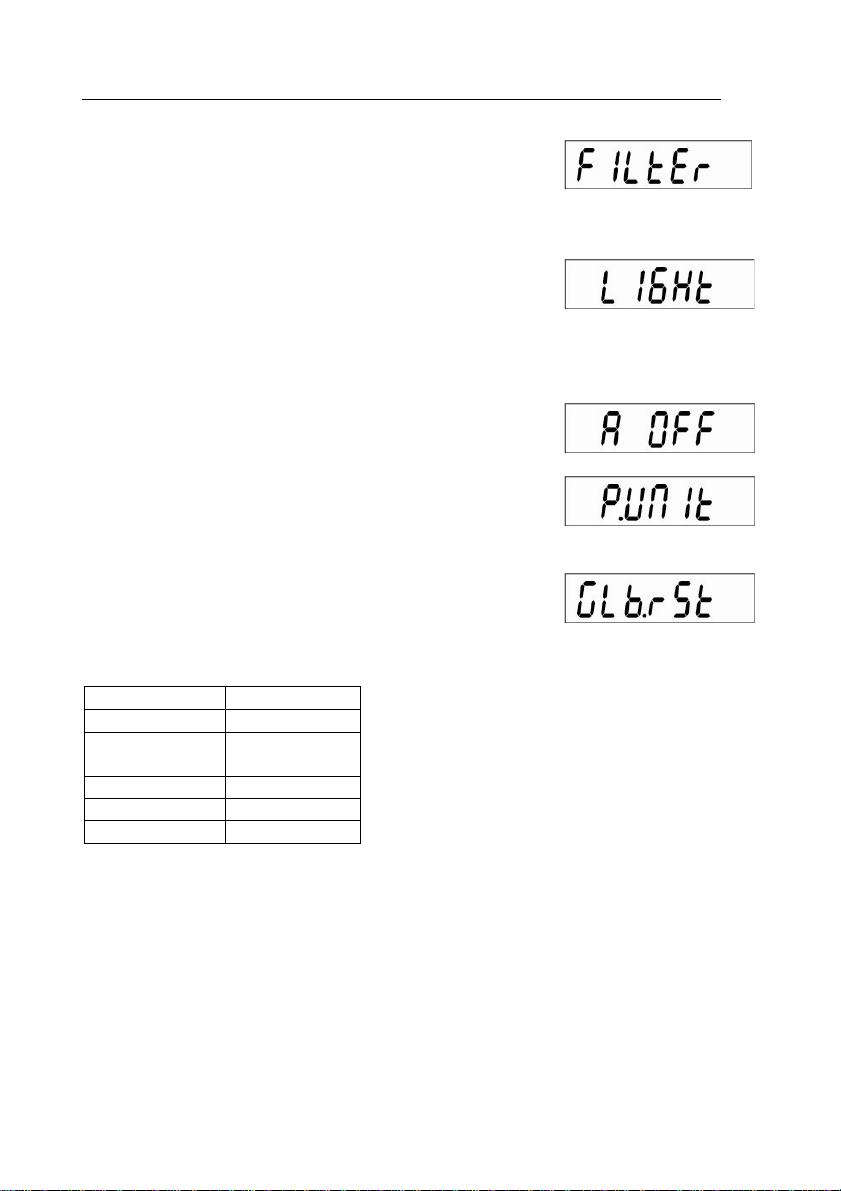
4.2 Setup Menu
STABILITY RANGE
Set the stability range to 0.5d, 1d, 2d or 5d (divisions).
AUTO ZERO TRACKING RANGE
Set the automatic zero tracking range to OFF, 0.5d, 1d,
3d (divisions).
Valor 3000 Series Scales
FILTER LEVEL
Set the filter level to LO (low), ME (medium), or HI
(high).
BACK LIGHT
Set the back light functionality to OFF (always
off), ON (always on) or Auto (turns on when a
key is pressed or the displayed weight
changes).
AUTO OFF
Set the automatic shut off functionality to ON (shut off
after 5 minutes) or OFF (stays on).
POWER ON UNIT
Set the unit of measure displayed at startup to g, kg, lb,
oz or lb:oz.
GLOBAL RESET
Select YES (reset menus to factory defaults) or NO (do not
reset).
Units will be set to factory defaults.
Menu Default
Stability Range 1d
Auto zero
Tracking
Filter Level ME
Back Light Auto
Auto off On
0.5d
END:
Advance to the Unit/Mode menu (Yes) or back to Setup (No).
EN-7
EN-8 Valor 3000 Series Scales
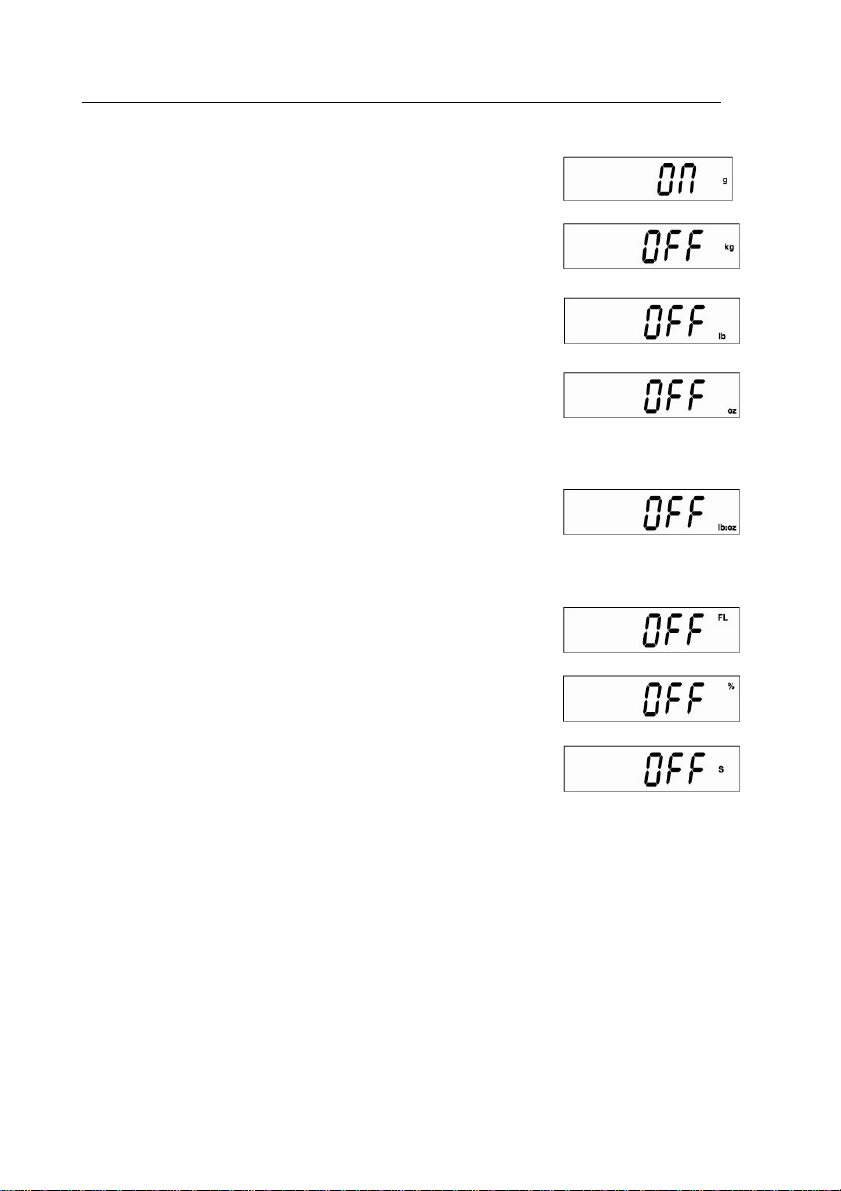
4.3 Unit/Mode Menu
GRAM UNIT
Set grams ON or OFF.
KILOGRAM UNIT
Set kilograms ON or OFF.
POUND UNIT
Set pounds ON or OFF.
OUNCE UNIT
Set ounces ON or OFF. If ON is selected, set DEC
(decimal ounces) or FrA (fractional ounces)
POUND OUNCE UNIT
Set pound ounces ON or OFF. If On is selected, set DEC
(decimal ounces) or FrA (fractional ounces)
Note: V31XH202 and V31XW301 models do not include
fractional ounces in lb:oz unit
FLUID OUNCE MODE
Set fluid ounces ON or OFF.
PERCENT MODE
Set percent ON or OFF.
SPECIFIC GRAVITY MODE
Set specific gravity ON or OFF.
END
Exit to the previous Unit/Mode (Yes) or g (No).
Valor 3000 Series Scales
EN-9
5. MAINTENANCE
5.1 Troubleshooting
The following table lists common problems and possible causes and remedies.
If the problem persists, contact Ohaus or your authorized dealer.
TABLE 5-1. TROUBLESHOOTING.
Symptom Possible Cause Remedy
Cannot turn on No power to scale Verify connections and voltage.
Poor accuracy
Cannot calibrate
Cannot access mode Mode not enabled Enter menu and enable mode
Cannot access unit Unit not enabled Enter menu and enable unit
Err 8.1 Pan has load during power on Remove weight from pan and re-zero.
Err 8.2 Pan was removed prior to power on Install pan and re-zero.
OVER Weight on pan exceeds capacity Remove weight from the pan
UNDER Pan was removed during weighing Re-install pan
Err 9 Factory calibration data corrupted
REF Err Reference Weight is too small Use larger sample
LOWrEF
Improper calibration • Unstable
environment
Unstable environment • Incorrect
calibration weight
Reference Weight is too low for
accurate percent weighing.
5.2 Service Information
If the troubleshooting section does not resolve or describe your problem, contact
your authorized Ohaus service agent. For service assistance or technical support in
the United States call toll-free 1-800-526-0659 between 8.00 AM and 5:00 PM
EST. An Ohaus product service specialist will be available to provide assistance.
Outside the USA, please visit our web site, www.ohaus.com to locate the Ohaus
office nearest you.
Perform calibration • Move scale to
suitable location
Move the scale to suitable location •
Use correct calibration weight
Contact Ohaus or an authorized service
agent • Perform service calibration
Continue to weigh with less accurate
results
EN-10 Valor 3000 Series Scales
6. TECHNICAL DATA
The technical data is valid under the following ambient conditions:
Ambient temperature: 0°C to 40°C
Relative humidity: 10% to 95% relative humidity, non-condensing
Height above sea level: Up to 4000 m
Operability is assured at ambient temperatures between 0°C and 40°C
Power
AC adapter – 9VDC 500mA output
Protection
Protected against dust and water
Pollution degree: 2
Installation category: Class III
EMC: See Declaration of Conformity
6.1 Specifications
TABLE 6-1.SPECIFICATIONS.
Model V31XH202 V31XH2 V31X3 V31X6 V31XW301 V31XW3 V31XW6
Capacity 200 2000 3000 6000 300 3000 6000
Repeatability
(g)
Linearity (g)
(+/-)
Weighing
Units
Application
Modes
Tare range To capacity by subtraction
Stabilization
Time
Power
Requirements
Calibration Digital with external weight
Display Type 6-digit 7-segment LCD with white LED backlight
Display Size 15 mm / 0.6” digits
Keypad 3-button overlay
OIML Class - - - - III III III
Ingress
Protection
Pan Size
(mm / in)
Net Weight
(kg / lb)
Shipping
Weight
(kg / lb)
0.01 0.1 1 0.2 1 2
0.01 0.1 1 0.2 1 2
g, kg, lb, oz, lb:oz
Weigh, Percent weighing, Specific Gravity, Fluid Ounces
≤3 seconds
9 VDC 500 mA AC adaptor (supplied) or 4 C (LR14) batteries (not supplied)
- - - - IP65 IP65 IP65
120 / 4.7
1.2/2.6 1.3/2.9 1.4/3.1
2.6/5.7 2.7/6 2.8/6.2
146 x 158 /
5.7 x 6.2
Valor 3000 Series Scales
6.2. Capacity and Readability
TABLE 6-2. CAPACITY AND READABILITY.
EN-11
MODELS
UNITS
g
kg
oz
lb
lb:oz
oz 7 x 1 / 8
lb : oz
fl
V31XH202 V31XH2 V31X3 V31X6 V31XW301 V31XW3 V31XW6
200.00 x
0.01
0.20000x
0.00001
7.0550 x
0.0005
0.44090x
0.00005
0lb : 7.05oz
X0.01oz
N A
6.7630 x
0.0005
2000.0 x
0.1
2.0000 x
0.0001
70.550 x
0.005
4.4090 x
0.0005
4lb: 6.55oz
x 0.01oz
70.5 x
1 / 8
4lb : 6.5oz
x 1/8oz
67.630 x
0.005
3000 x 1 6000 x 1 300.0 x 0.2 3000 x 1 6000 x 2
3.000 x
0.001
105.80 x
0.05
6.615 x
0.005
6 lb : 9.80
oz x 0.05oz
105.5 x
1 / 8
6lb : 9.5oz x
1/8oz
101.45 x
0.05
6.000 x
0.001
211.65 x
0.05
13.230 x
0.005
13lb:
3.65oz x
0.05oz
211.5 x
1 / 8
13 lb :
3.5oz x
1/8oz
202.90 x
0.05
0.3000 x
0.0002
10.585 x
0.01
0.6615 x
0.0005
0lb : 10.58
oz
X 0.01 oz
10.5 x
1 / 8
N A
10.145 x
0.01
3.000 x
0.001
105.80 x
0.05
6.615 x
0.005
6 lb :
9.80 oz x
0.05oz
105.5 x
1 / 8
6lb :
9.5oz x
1/8oz
101.45 x
0.05
6.000 x
0.002
211.6 x
0.1
13.225 x
0.005
13lb: 3.6
oz x 0.1oz
211.5 x
1 / 8
13 lb :
3.5oz x
1/8oz
202.9 x
0.1
EN-12 Valor 3000 Series Scales
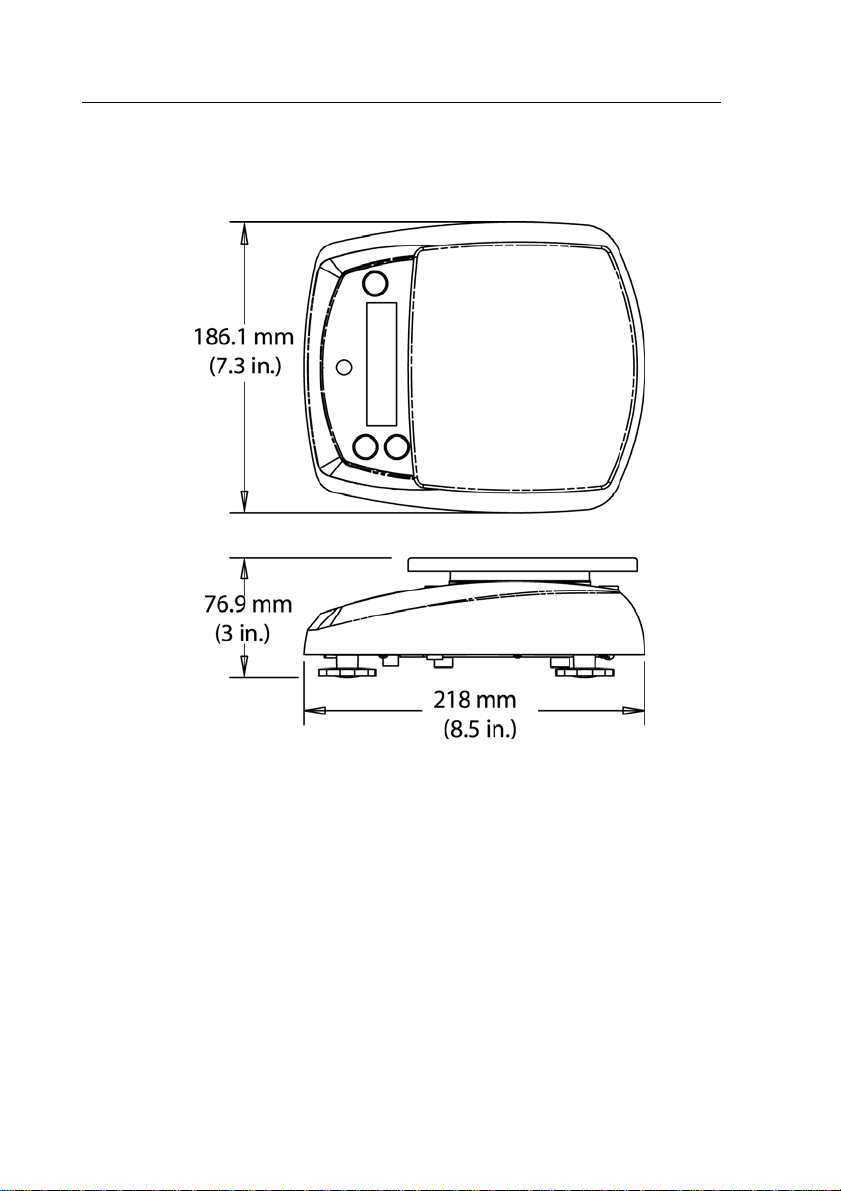
6.3 Drawings
Figure 6-1. Models V31XH2, V31X3, V31X6, V31XW301, V31XW3, V31XW6
Valor 3000 Series Scales
EN-13
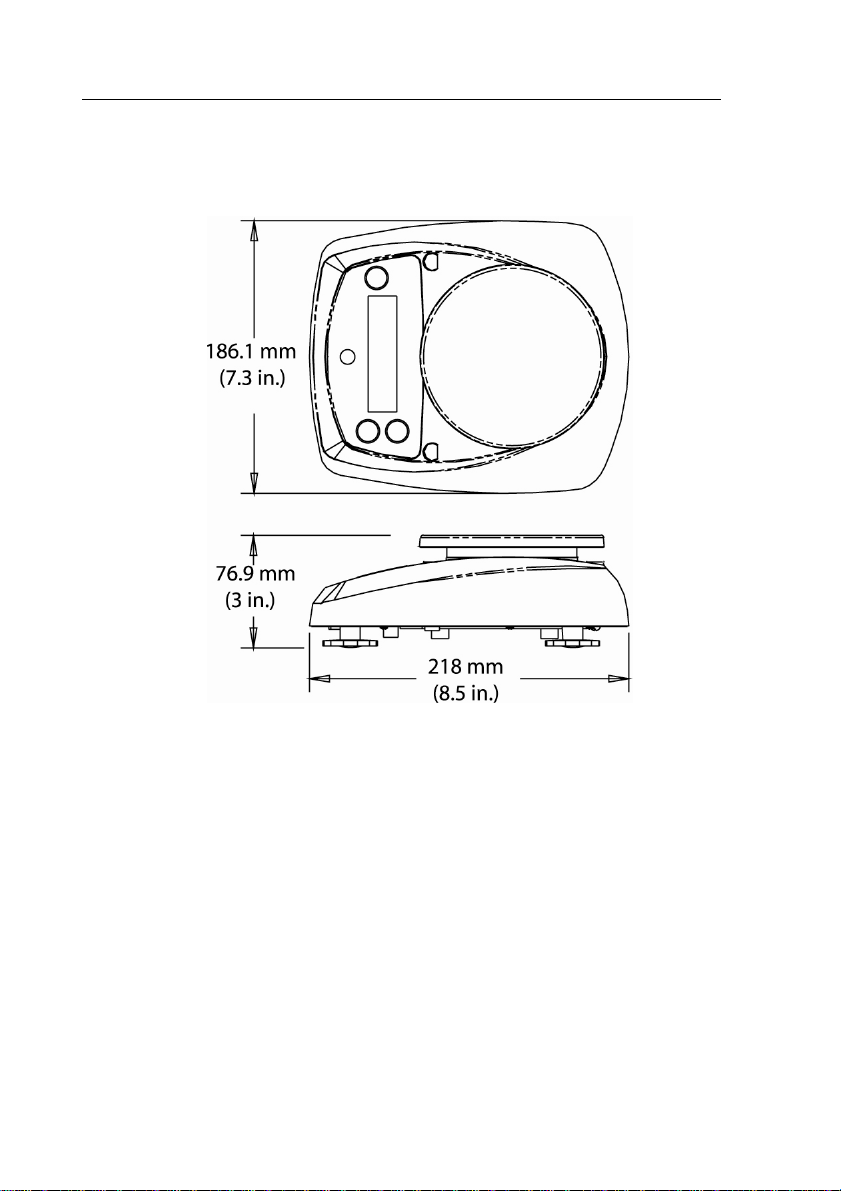
Figure 6-2. Model V31XH202
EN-14 Valor 3000 Series Scales
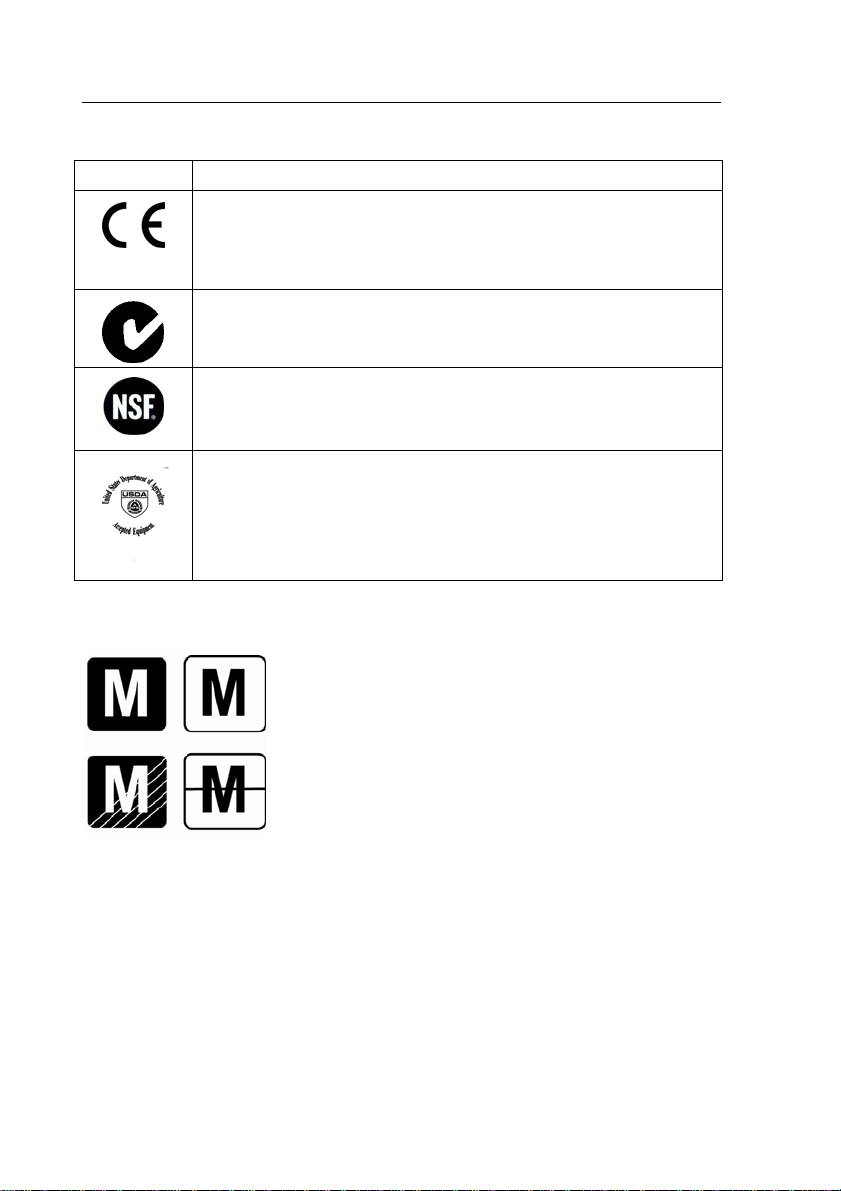
Compliance to the following standards is indicated by the corresponding mark on the
.
product
Mark Standard
This product conforms to the EMC directive 89/336/EEC and the
Low Voltage Directive 73/23/EEC. The complete declaration of
Conformity is available from Ohaus Corporation
AS/NZS4251.1 Emission; AS/NZS4252.1 Immunity
NSF/ANSI 169 - 2005
NSF/ANSI /3-A 14159-1 - 2002
Important notice for verified weighing instruments
The first stage of the initial verification has been carried out at the manufacturers work. It
comprises all tests according to the adopted European standard EN 45501:1992,
paragraph 8.2.2.
If national regulations limit the validity period of the verification, the user of the weighing
instrument must strictly observe the re-verification period and inform the respective W+M
authorities
.
Weighing Instruments verified at the place of manufacture
bear one of the preceding mark on the packing label and
the green ‘M’ (metrology) sticker on the descriptive plate.
They may be put into service immediately.
Weighing Instruments to be verified in two stages have no
green ‘M’ (metrology) on the descriptive plate and bear
one of the preceding identification mark on the packing
label. The second stage of the initial verification must be
carried out by the approved service organization of the
authorized representative within the EC or by the national
weight & measures (W+M) authorities.
Valor 3000 Series Scales
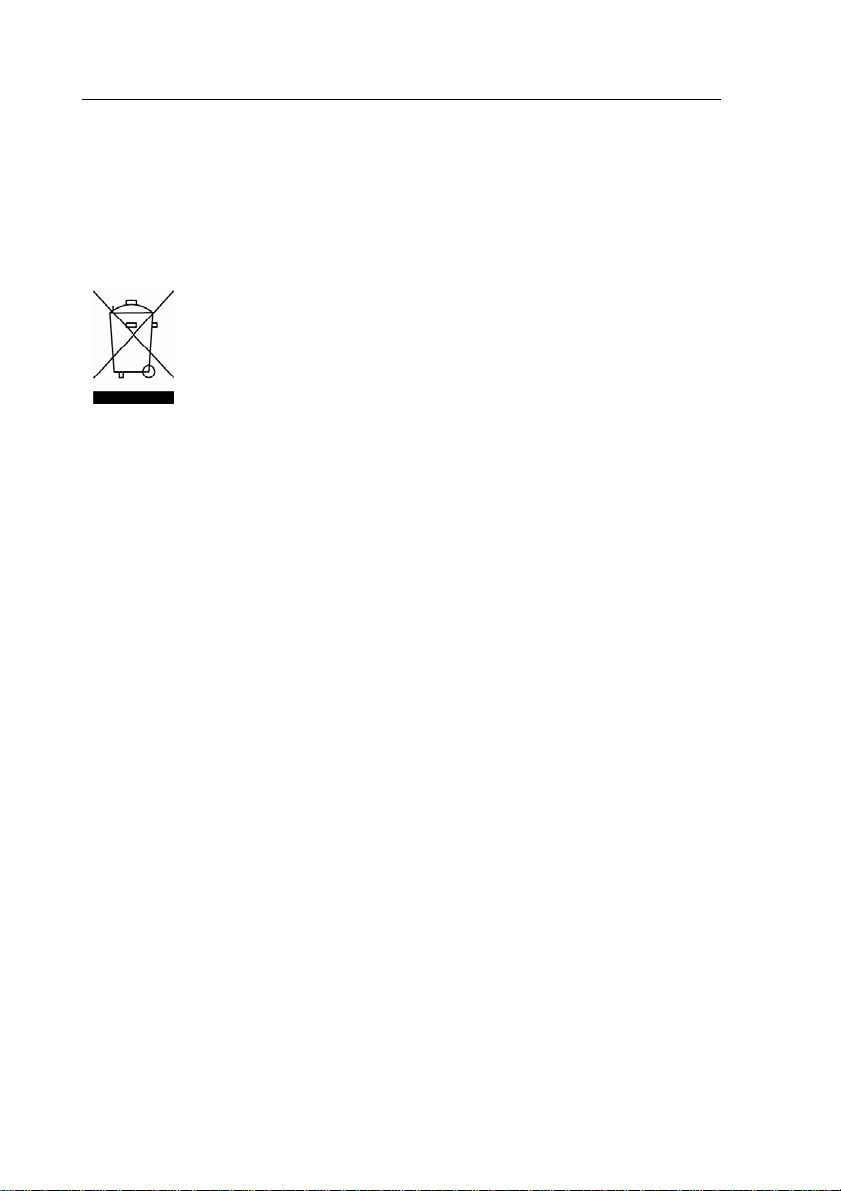
Disposal
In conformance with the European Directive 2002/96 EC on Waste Electrical
and Electronic Equipment (WEEE) this device may not be disposed of in
domestic waste. This also applies to countries outside the EU, per their
specific requirements.
Please dispose of this product in accordance with local regulations at the
collecting point specified for electrical and electronic equipment.
If you have any questions, please contact the responsible authority or the
distributor from which you purchased this device.
Should this device be passed on to other parties (for private or professional
use), the content of this regulation must also be related.
EN-15
Thank you for your contribution to environmental protection.
FCC Note
This equipment has been tested and found to comply with the limits for a Class A digital
device, pursuant to Part 15 of the FCC Rules. These limits are designed to provide reasonable
protection against harmful interference when the equipment is operated in a commercial
environment. This equipment generates, uses, and can radiate radio frequency energy and, if
not installed and used in accordance with the instruction manual, may cause harmful
interference to radio communications. Operation of this equipment in a residential area is
likely to cause harmful interference in which case the user will be required to correct the
interference at his own expense.
This Class A digital apparatus complies with Canadian ICES-003.
Cet appareil numérique de la classe A est conforme à la norme NMB-003 du Canada.
ISO 9001 Registration
In 1994, Ohaus Corporation, USA, was awarded a certificate of registration to ISO 9001 by
Bureau Veritus Quality International (BVQI), confirming that the Ohaus quality management
system is compliant with the ISO 9001 standard’s requirements. On May 15, 2003, Ohaus
Corporation, USA, was re-registered to the ISO 9001:2000 standard.

EN-16 Valor 3000 Series Scales
LIMITED WARRANTY
Ohaus products are warranted against defects in materials and workmanship from
the date of delivery through the duration of the warranty period. During the warranty
period Ohaus will repair, or, at its option, replace any component(s) that proves to
be defective at no charge, provided that the product is returned, freight prepaid, to
Ohaus. This warranty does not apply if the product has been damaged by accident
or misuse, exposed to radioactive or corrosive materials, has foreign material
penetrating to the inside of the product, or as a result of service or modification by
other than Ohaus. In lieu of a properly returned warranty registration card, the
warranty period shall begin on the date of shipment to the authorized dealer. No
other express or implied warranty is given by Ohaus Corporation. Ohaus Corporation
shall not be liable for any consequential damages.
As warranty legislation differs from state to state and country to country, please
contact Ohaus or your local Ohaus dealer for further details.
Básculas serie Valor 3000
ES-1
1. INTRODUCCIÓN
Este manual contiene instrucciones de instalación, operación y mantenimiento para
las básculas serie Valor
báscula.
TM
3000. Lea el manual completamente antes de usar la
1.1 Precauciones de seguridad
Siga estas precauciones de seguridad:
• Verifique que el voltaje del adaptador de corriente alterna coincida con la
alimentación eléctrica local.
• Use la báscula sólo en lugares secos
• No opere la báscula en ambientes adversos
• No deje caer cargas sobre la plataforma de pesaje
• No coloque la báscula al revés sobre la bandeja
• El servicio debe proporcionarse solamente por personal autorizado
1.2. Controles
Figura 1-1. Controles.
ES-2
Básculas serie Valor 3000
TABLA 1-1. FUNCIONES DE CONTROL.
Botón Funciones
O/T On/Off
MODE/UNIT
Menu
ENTER Cal
Presión corta: (en “off”) Enciende la báscula
(en “on”) Pone la pantalla en cero
Tara el peso del artículo en la bandeja
Presión larga: Apaga la báscula
Presión corta Recorre las unidades y modos activos
Presión larga: Ingresa al menú
Presión corta (Menu) “No” (alterna a través de
las configuraciones disponibles)
Presión corta: Guarda referencias al 100% en
modo de %
Guarda la muestra de referencia en
el modo SG
Presión larga Inicia el proceso de calibración
de extensión
Presión corta (Menu) “Yes” (selecciona/acepta
la configuración mostrada)
2. INSTALACIÓN
2.1 Contenido del paquete
• Báscula
• Bandeja
• Adaptador de corriente
• Manual de instrucciones
• Tarjeta de garantía
2.2. Ubicación
Coloque la báscula sobre una superficie firme y estable. Evite lugares con exceso
de corrientes de aire, vibraciones, fuentes de calor y cambios rápidos de
temperatura. En los modelos V31XW301, V31XW3, V31XW6, ajuste las patas de
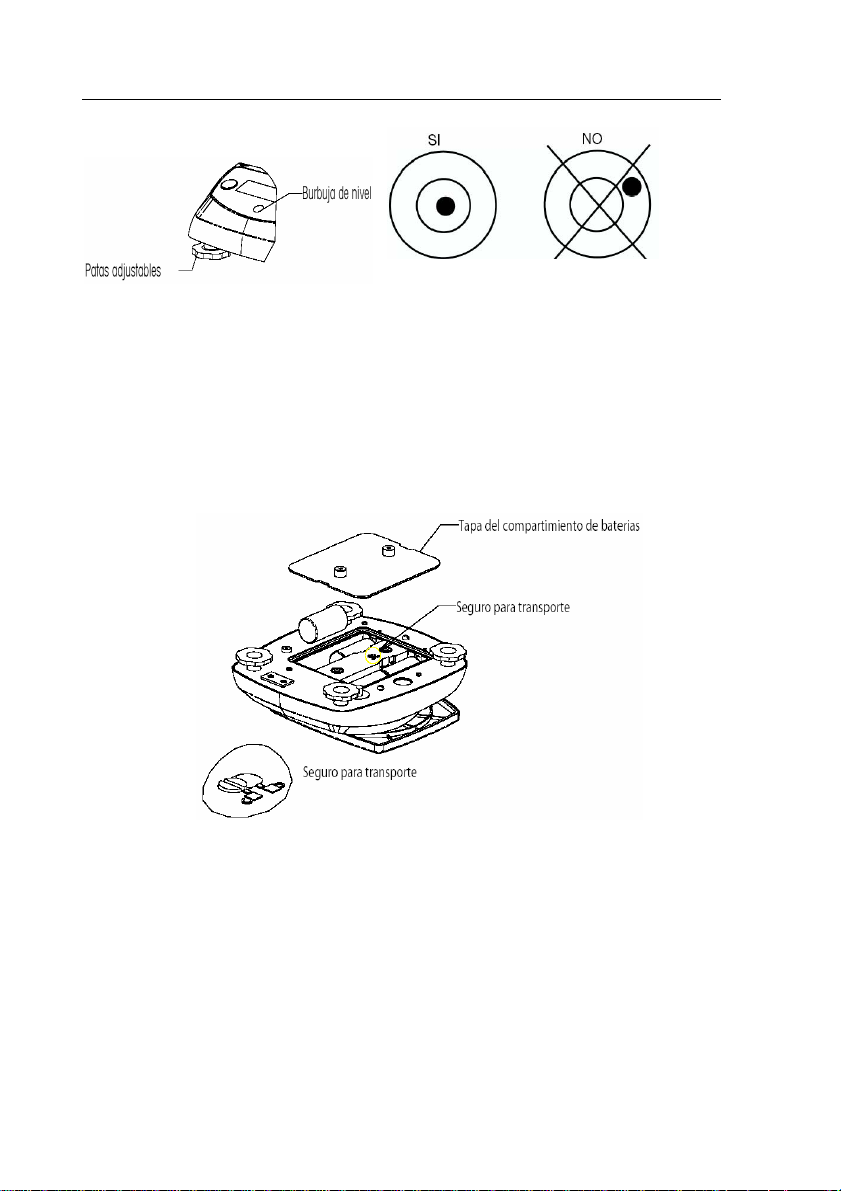
nivelación para que la burbuja quede centrada en el círculo.
Básculas serie Valor 3000
ES-3
Figura 2-1. Nivelación de la báscula.
2.3. Seguro para transporte
Abra la tapa del compartimiento de baterías. Mueva el botón del seguro para
transporte a la posición “Unlock” (destrabar). Instale 4 baterías C (LR14) si desea.
Reinstale la tapa del compartimiento de baterías.
Figura 2-2. Instalación de las baterías.
2.4 Energía
El adaptador de corriente alterna (incluido) puede usarse para alimentar la báscula
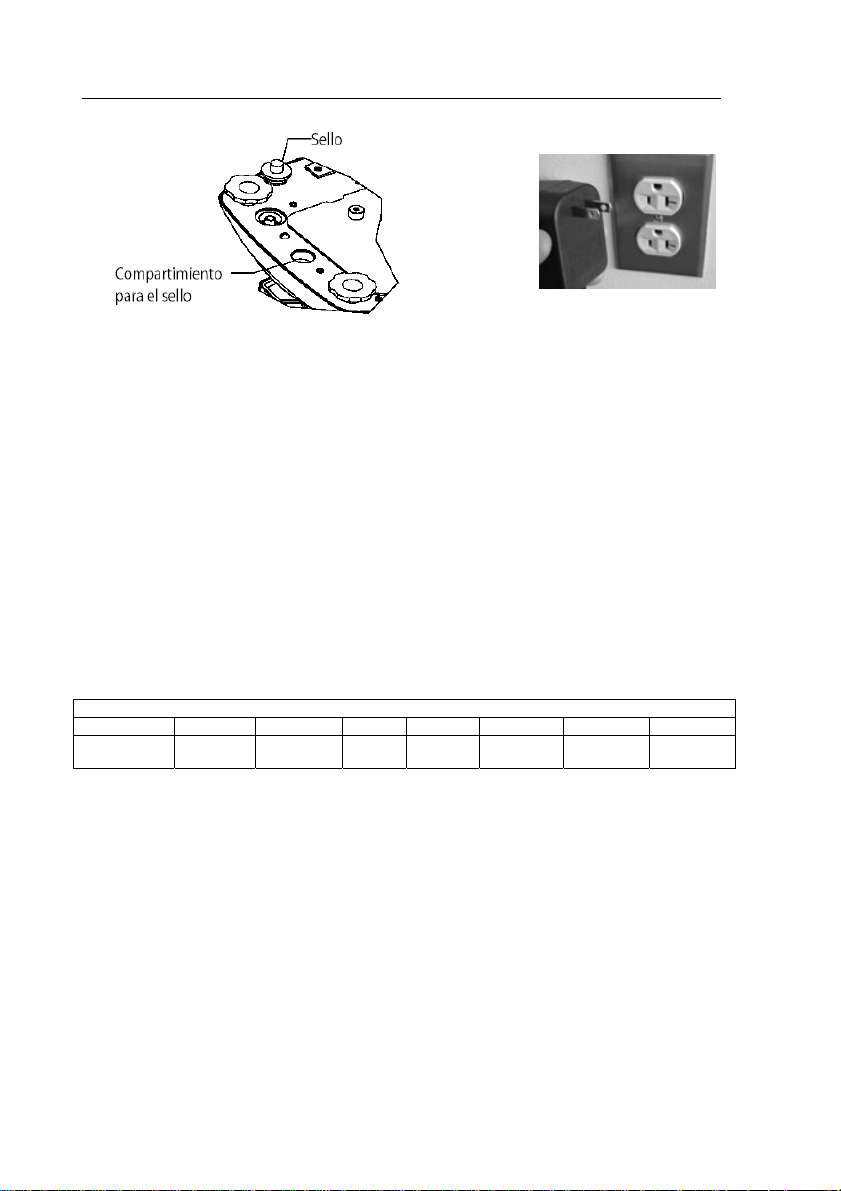
cuando no hay energía de baterías disponible. Retire el sello de goma de la parte
inferior. Guárdelo en el lugar indicado. Conecte el adaptador de corriente en el
enchufe.
NOTA: Para evitar la entrada de agua durante la limpieza, inserte nuevamente
el sello de goma en el enchufe.
ES-4
Básculas serie Valor 3000
Figura 2-3. Conexión de la energía y sellado.
2.5 Calibración inicial
Cuando se instala la báscula por primera vez, debe calibrarse para asegurar
resultados de pesaje exactos.
Presione y sostenga el botón ENTER/Cal hasta que aparezca CAL. Cuando se
vuelve a presionar el botón y se suelta, la pantalla muestra -C- mientras se guarda
la lectura de cero. A continuación, la pantalla muestra el valor del peso de
calibración en gramos. Coloque el peso de calibración especificado (vendido por
separado) sobre la bandeja. Consulte los pesos adecuados en la Tabla 2-1. La
pantalla muestra -C- mientras se guarda la lectura. La pantalla regresa al modo de
aplicación previo y la báscula está lista para usarse.
TABLA 2-1. PESOS DE CALIBRACIÓN.
V31XH202 V31XH2 V3X3 V31X6 V31XW301 V31XW3 V31XW6
Pesos de
calibración
200g 2 kg 3 kg 6 kg 300 g 3 kg 6 kg
MODELOS
3. OPERACIÓN
3.1 Modo de pesaje
Use este modo para medir el peso de una muestra en la unidad de medida
seleccionada.
1. Presione MODE/UNIT/Menu hasta que aparezca el símbolo de la
unidad deseada.
2. Coloque un recipiente vacío sobre la bandeja y presione O/T/On/Off para tarar
el peso de dicho recipiente.
3. Agregue material al recipiente. La pantalla muestra el peso del material.

Básculas serie Valor 3000
ES-5
3.2 Modo de porcentaje
Use este método para medir el peso de una muestra como porcentaje del peso de
referencia.
1. Presione MODE/UNIT/Menu hasta que aparezcan los símbolos Set.Ref y %.
2. Presione “No” para usar el peso de referencia en la memoria y proceda con
el paso 6.
3. Presione “Yes” para establecer una nueva referencia. La pantalla
destellará ahora hasta que se guarde la referencia.
4. Coloque un recipiente vacío sobre la bandeja y presione O/T/On/Off para tarar
el peso de dicho recipiente.
5. Agregue la cantidad deseada de material al recipiente y presione
ENTER/Cal para guardar el peso mostrado. La pantalla muestra 100%.
6. Reemplace el material de referencia con material nuevo. La pantalla muestra el
porcentaje de la muestra comparada con el peso de referencia.
3.3 Modo de gravedad específica
Use este modo para medir la gravedad específica de una muestra.
1. Presione MODE/UNIT/Menu hasta que aparezcan los símbolos Set.Ref y S.
2. Presione “No” para usar el peso de referencia en la memoria y proceda con
el paso 6.
3. Presione “Yes” para establecer un nuevo peso de referencia.
La pantalla destellará ahora hasta que se guarde la referencia.
4. Coloque un recipiente vacío sobre la bandeja y presione O/T/On/Off para tarar
el peso de dicho recipiente.
5. Llene el recipiente con agua y luego presione ENTER/Cal para guardar el peso
mostrado. La pantalla muestra el peso del agua con el símbolo S destellando.
6. Reemplace el agua con el mismo volumen de material de muestra y
luego presione ENTER/Cal. La pantalla muestra la gravedad específica de
la muestra.
3.4 Modo de onza líquida
Use este modo para medir el volumen en onzas líquidas de la muestra.
1. Presione MODE/UNIT/Menu hasta que aparezca el símbolo FL.
2. Coloque un recipiente vacío sobre la bandeja y presione O/T/On/Off para
tarar el peso de dicho recipiente.
3. Llene el recipiente con material de muestra. La pantalla muestra el volumen
de la muestra.
ES-6
Básculas serie Valor 3000
4. CONFIGURACIONES
El menú permite al usuario personalizar las configuraciones de la báscula.
4.1 Menú de navegación
Presione y sostenga el botón MODE/UNIT/Menu hasta que aparezca SEtUP y luego
suéltelo.
Presione “Yes” para ingresar al menú mostrado, o presione “No” para avanzar al
siguiente menú.
Una vez en el menú, presione “Yes” para ver la configuración del elemento del menú
o presione “No” para avanzar al siguiente elemento del menú. Cuando vea la
configuración, presione “Yes” para aceptar la configuración, o presione “No” para
cambiar dicha configuración. Cuando aparezca “End”, presione “Yes” para avanzar
al siguiente menú o “No” para regresar a la parte superior del menú actual.
4.2 Menú de configuración
RANGO DE ESTABILIDAD
Establezca el rango de estabilidad en 0.5d, 1d, 2d o 5d
(divisiones).
RANGO DE SEGUIMIENTO DE CERO AUTOMÁTICO
Establezca el rango de seguimiento de cero automático
en OFF, 0.5d, 1d, 3d (divisiones).
Básculas serie Valor 3000
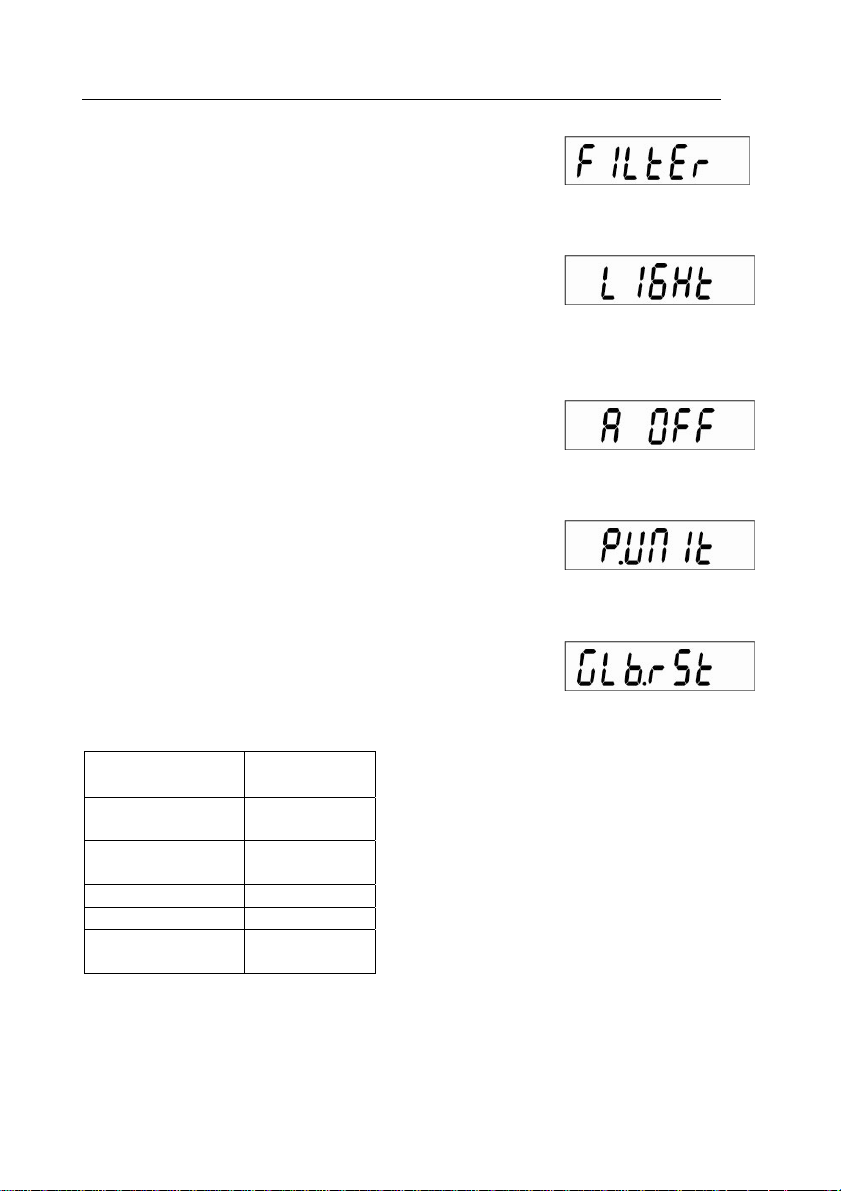
NIVEL DE FILTRO
Establezca el nivel de filtro en LO (bajo), ME (medio), o
HI (alto).
LUZ DE FONDO
Establezca la funcionalidad de la luz de fondo
en OFF (siempre apagada), ON (siempre
encendida) o en Auto (se enciende cuando se
presiona una tecla o cambia el peso
mostrado).
APAGADO AUTOMÁTICO
Establezca la funcionalidad de apagado automático en
ON (se apaga después de 5 minutos) o en OFF
(permanece encendida).
ENCENDIDO DE UNIDAD
Establezca la unidad de medida mostrada en el inicio en
g, kg, lb, oz o lb:oz.
REINICIO GLOBAL
Seleccione YES (restablece los menús a los valores de
fábrica) o NO (no los restablece).
Las unidades estarán establecidas en los valores de
fábrica.
Menú Valor de
fábrica
Rango de
estabilidad
Seguimiento de
cero automático
Nivel de filtro ME
Luz de fondo Auto
Apagado
automático
1d
0.5d
On
FINALIZAR (END):
Avanza al modo Unit/Mode (Yes) o regresa a configuración (Setup) (No).
ES-7
ES-8
Básculas serie Valor 3000
4.3 Menú Unit/Mode
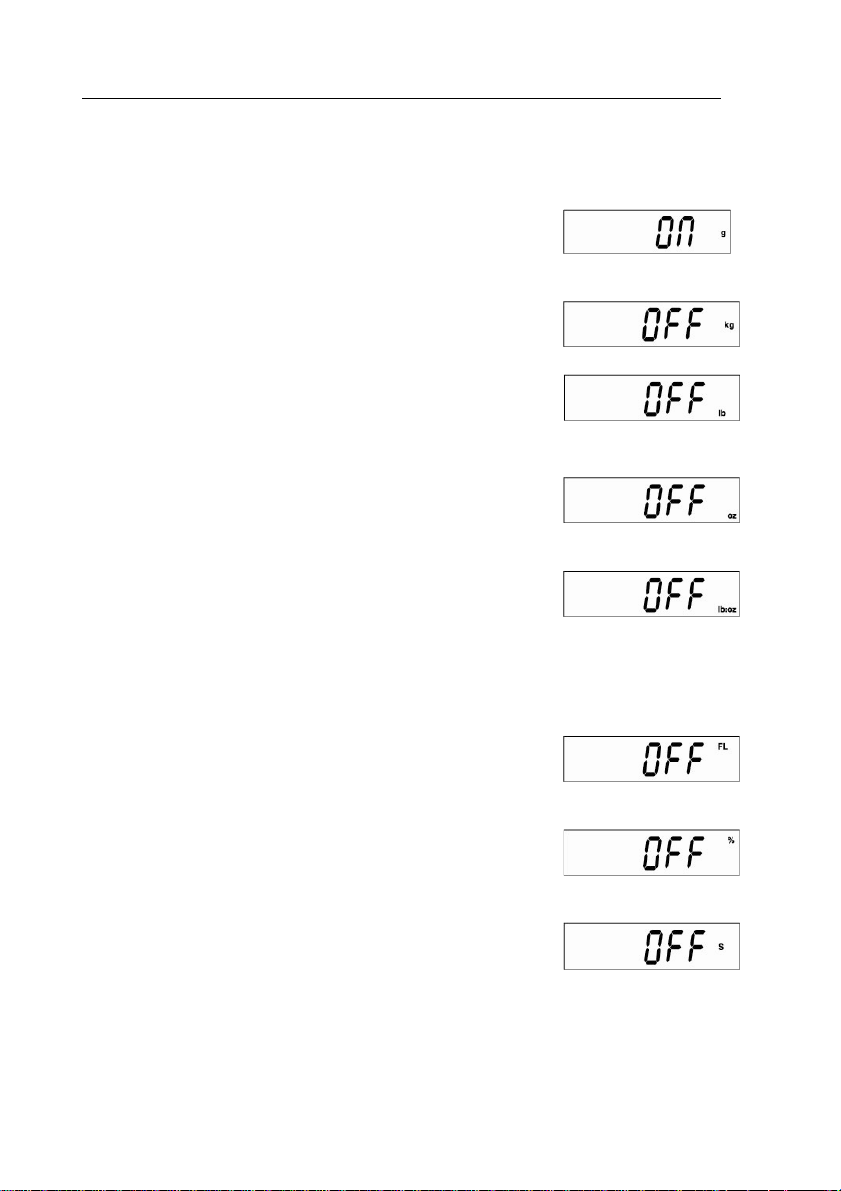
UNIDAD EN GRAMOS
Establece gramos en encendido (ON) o apagado (OFF).
UNIDAD EN KILOGRAMOS
Establece kilogramos en encendido (ON) o apagado
(OFF).
UNIDAD EN LIBRAS
Establece libras en encendido (ON) o apagado (OFF).
UNIDAD DE ONZAS
Establece onzas en encendido (ON) o apagado (OFF).
Si selecciona ON, establezca DEC (onzas decimales) o
FrA (onzas fraccionales)
UNIDAD DE LIBRAS ONZA
Establece libras onzas en encendido (ON) o apagado
(OFF). Si selecciona ON, establezca DEC (onzas
decimales) o FrA (onzas fraccionales)
Nota: Los modelos V31XH202 y V31XW301 no incluyen
onzas fraccionales en la unidad lb:oz
MODO DE ONZAS LÍQUIDAS
Establece onzas líquidas en encendido (ON) o apagado
(OFF).
MODO DE PORCENTAJE
Establece porcentaje en encendido (ON) o apagado
(OFF).
MODO DE GRAVEDAD ESPECÍFICA
Establece la gravedad específica en encendido (ON) o
apagado (OFF).
FINALIZAR (END):
Sale para ir al menú Unit/Mode anterior (Yes) o a g (No).
 Loading...